Introduction
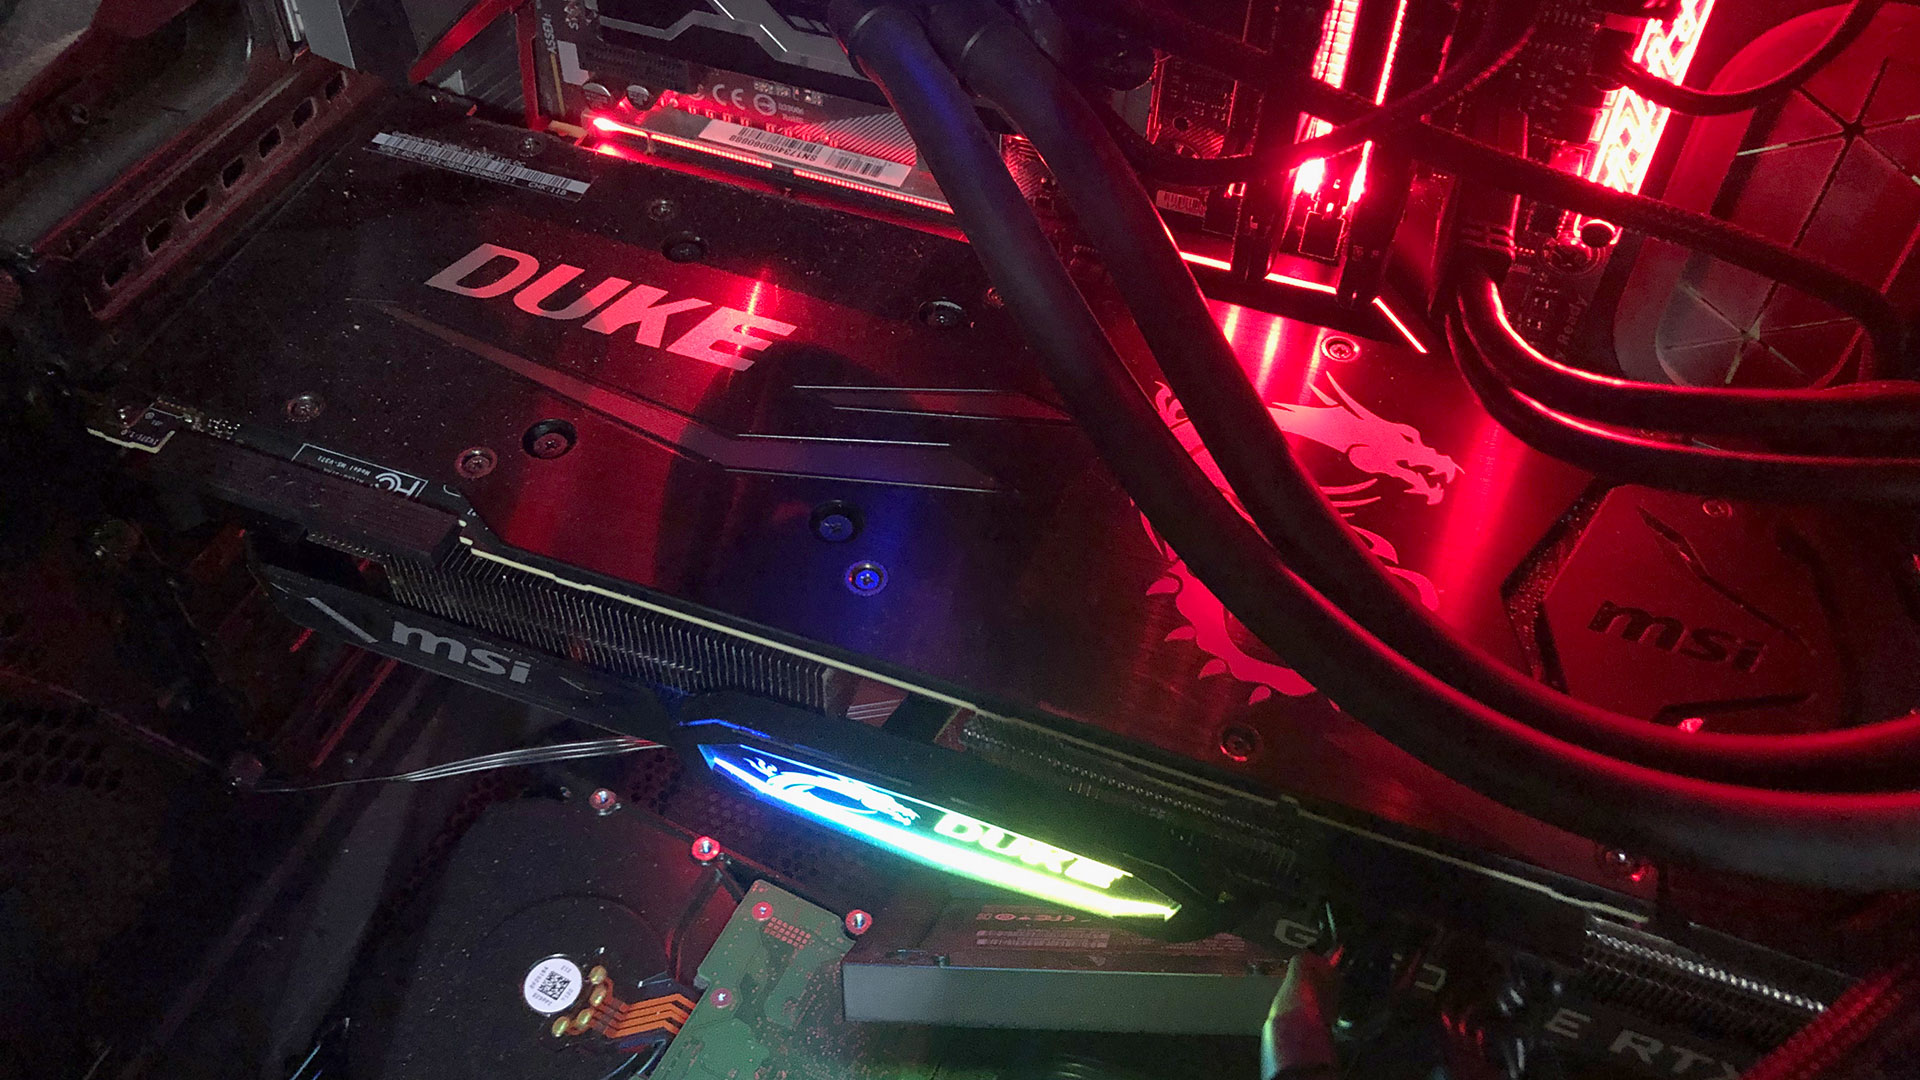
Welcome to the world of graphics card overclocking! If you’re a gamer or a creative professional looking to squeeze every last drop of performance out of your graphics card, you’re in the right place. In this article, we’ll explain what overclocking is, why it can benefit you, and provide step-by-step guidance on how to overclock your graphics card.
Overclocking is the process of increasing the clock speed of your graphics card’s GPU (Graphics Processing Unit) and memory beyond their factory-set defaults. By doing so, you can potentially unlock higher levels of performance, allowing your graphics card to handle more demanding tasks such as running games at higher resolutions or producing more detailed visual effects.
Why would you want to overclock your graphics card? The answer is simple: to get the most out of your hardware. Overclocking can significantly improve your gaming experience, allowing you to enjoy smoother framerates and better overall performance. It can also benefit content creators who rely on their graphics cards for rendering and other computationally intensive tasks.
However, before you dive into overclocking, there are a few things you need to consider. First and foremost, overclocking will increase power consumption and generate more heat. You need to make sure that your system has adequate cooling to prevent overheating, which could potentially damage your hardware. Additionally, overclocking may void your graphics card’s warranty, so it’s essential to understand the risks involved.
If you’re ready to take the plunge, we’ll guide you through the process step by step. We’ll explain how to prepare your system, adjust the necessary settings, and optimize for stability and performance. We’ll also introduce you to popular software tools that can help you overclock your graphics card with ease and efficiency.
Throughout this article, we’ll also discuss common issues you may encounter while overclocking and provide troubleshooting tips to help you overcome them. Lastly, we’ll weigh the benefits against the risks of overclocking and offer our final thoughts and recommendations on whether it’s a suitable option for you.
So, get ready to unlock the full potential of your graphics card and elevate your gaming or professional experience to new heights. Let’s dive into the world of overclocking and see what we can achieve!
Why Overclock Your Graphics Card?
If you’re wondering why you should invest time and effort into overclocking your graphics card, let’s explore some of the key benefits that await you. Overclocking can offer a range of advantages, enhancing your gaming experience, improving productivity, and giving you a competitive edge.
First and foremost, overclocking your graphics card can provide a significant boost to performance. By increasing the clock speeds of the GPU and memory, you can achieve higher frame rates in games, leading to smoother gameplay and a more immersive experience. Whether you’re conquering virtual battlefields or exploring intricate virtual worlds, a higher-performing graphics card can make the difference between a laggy, choppy experience and a seamless, fluid one.
Additionally, overclocking can give you an edge in competitive gaming. In multiplayer games, where split-second reactions and precise movements can determine victory or defeat, every bit of performance matters. By pushing your graphics card to its limits, you can potentially gain an advantage over other players, improving your chances of success in intense online battles.
Overclocking is not limited to gaming—it can also be beneficial for professionals in fields such as video editing, 3D modeling, and animation. These tasks demand substantial computing power and can push your system to its limits. By overclocking your graphics card, you can reduce rendering times, allowing you to complete projects faster and work more efficiently. This can be especially valuable for freelancers or those working on tight deadlines.
Another advantage of overclocking is the ability to future-proof your system. As technology advances and newer, more demanding games and applications are released, a graphics card that may have been top-of-the-line a few years ago can start to struggle. However, by overclocking your graphics card, you can squeeze out extra performance and extend its lifespan, delaying the need for an expensive upgrade.
It’s important to acknowledge that the benefits of overclocking come with risks. Pushing your graphics card beyond its factory settings can lead to increased power consumption and heat generation. Therefore, it’s crucial to ensure that your system has adequate cooling, such as efficient fans and proper airflow, to prevent overheating.
Additionally, it’s essential to consider the warranty implications. Overclocking can potentially void your graphics card’s warranty, which means that if any issues arise, you won’t be able to rely on the manufacturer’s support for repairs or replacements. It’s vital to weigh the benefits against the risks and make an informed decision.
In the following sections, we’ll provide you with a step-by-step guide to overclocking your graphics card. We’ll also explore popular software tools designed specifically for this purpose. So, if you’re ready to unlock the full potential of your graphics card, let’s dive in and start overclocking!
Things to Consider Before Overclocking
Before you embark on the journey of overclocking your graphics card, there are several important factors to consider. These considerations will help you ensure a successful and safe overclocking experience.
First and foremost, you need to assess your hardware’s capabilities and limitations. Not all graphics cards are created equal, and some may have better overclocking potential than others. Check the specifications of your graphics card model to determine its base clock speeds, maximum temperatures, and power limits. This information will serve as a baseline for your overclocking endeavors and help you set realistic expectations.
Next, it’s crucial to understand the cooling requirements for overclocking. Overclocking generates more heat, and without adequate cooling, your graphics card could overheat and become unstable or even suffer permanent damage. Ensure that your system has robust cooling solutions, such as high-quality fans, good airflow, and proper ventilation. You may also consider aftermarket cooling options, such as aftermarket GPU coolers or liquid cooling systems, for better heat dissipation.
Furthermore, you need to be familiar with your system’s power supply unit (PSU) capabilities. Overclocking increases the power consumption of your graphics card, and an insufficient power supply may result in system instability and crashes. Ensure that your PSU has enough wattage and the appropriate power connectors to support the overclocked graphics card’s requirements. Consider investing in a high-quality PSU with a good power rating to ensure stable power delivery.
It’s also important to update your graphics card drivers to the latest version provided by the manufacturer. Updated drivers often include bug fixes, performance optimizations, and improved compatibility, which can contribute to a smoother overclocking experience. Visit the manufacturer’s website or use their driver update software to ensure you have the most up-to-date drivers installed.
Additionally, you should create a backup or restore point before starting the overclocking process. Overclocking involves tweaking settings and pushing your hardware to its limits, which increases the risk of instability or crashes. Having a backup or restore point allows you to revert to a stable configuration in case anything goes wrong during the overclocking process.
Finally, it’s essential to educate yourself about the overclocking process and the specific tools or software you’ll be using. Familiarize yourself with the terminology, concepts, and settings related to GPU overclocking. Take the time to read user guides, watch tutorials, and join online communities or forums where experienced overclockers can provide guidance and support.
By considering these factors and preparing yourself and your system adequately, you’ll be ready to move on to the exciting process of overclocking your graphics card. In the next section, we’ll provide a step-by-step guide to help you through the overclocking process, ensuring that you have the knowledge and confidence to achieve the best possible results.
Step-by-Step Guide to Overclocking Your Graphics Card
Now that you’ve considered the necessary factors and prepared your system, it’s time to dive into the step-by-step process of overclocking your graphics card. Follow these instructions carefully to achieve the best results.
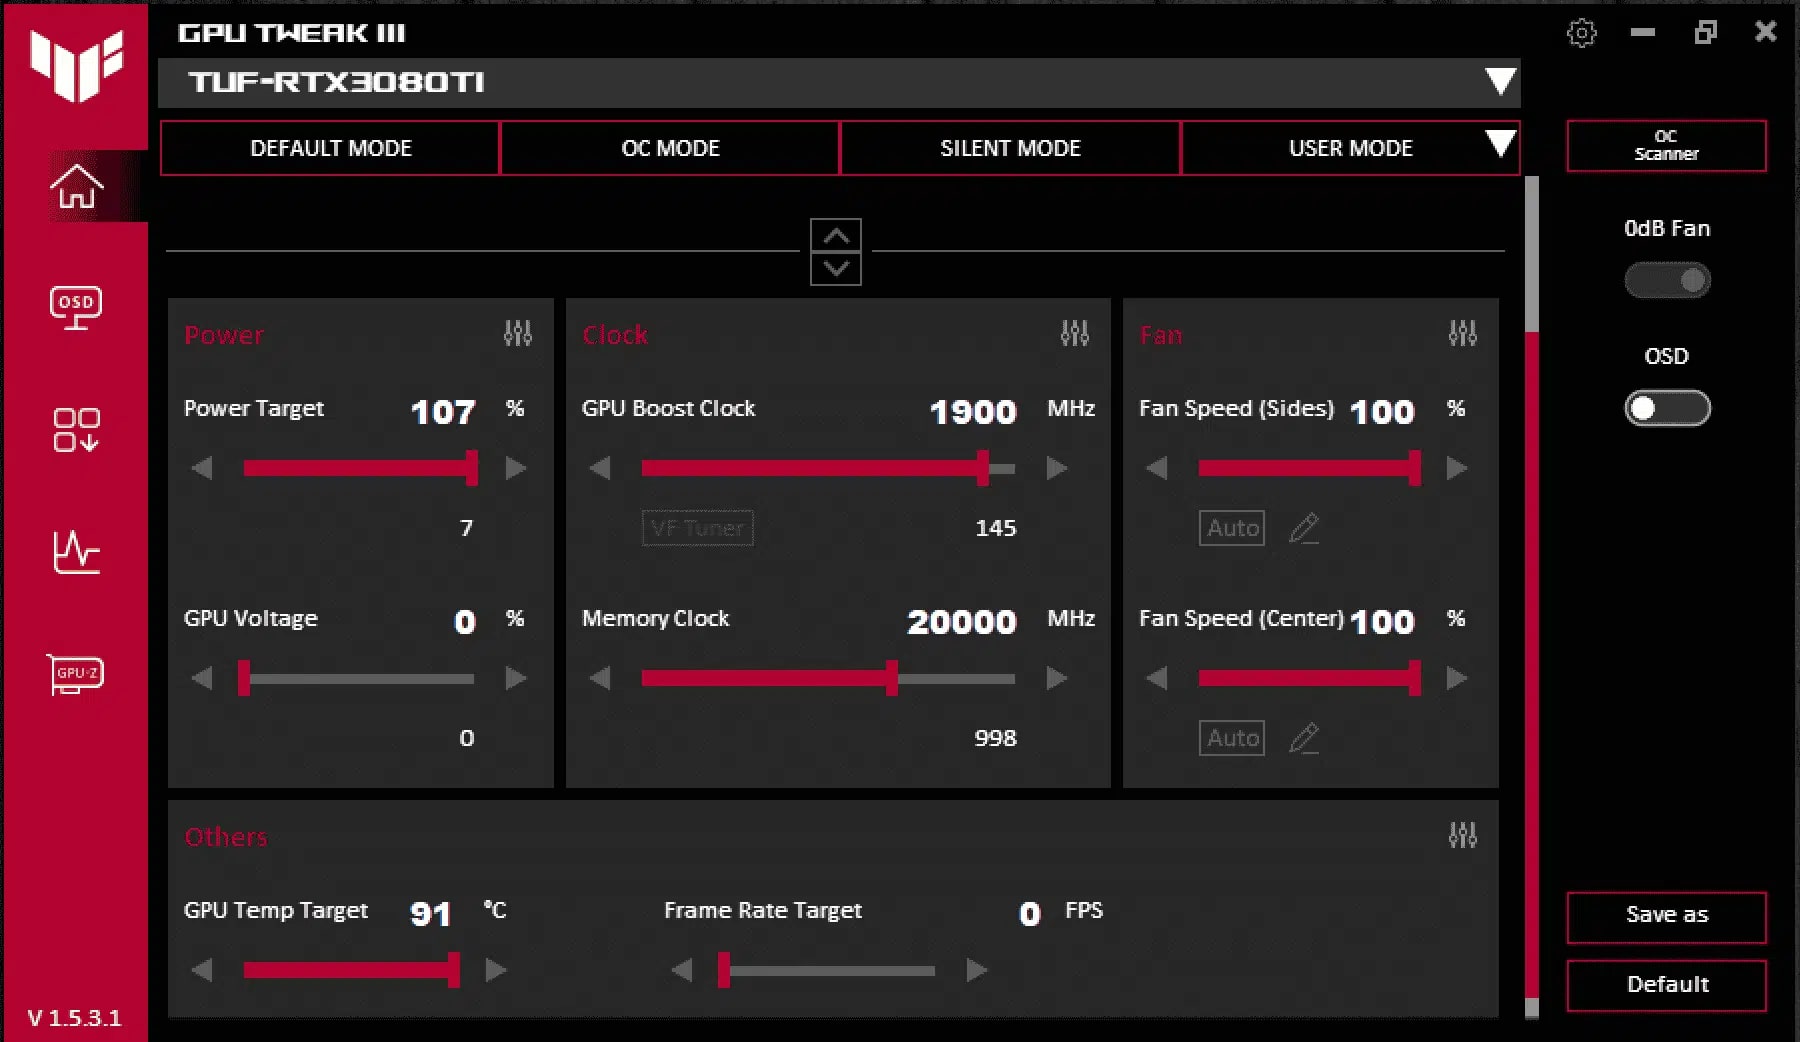
- Install Overclocking Software: Start by installing an overclocking utility specific to your graphics card. Popular options include MSI Afterburner, ASUS GPU Tweak, or EVGA Precision X. These software tools provide a user-friendly interface for adjusting clock speeds, voltages, and fan settings.
- Monitor and Benchmark: Before starting the overclocking process, closely monitor the temperatures, clock speeds, and fan speeds of your graphics card using the software you installed. Familiarize yourself with the baseline performance and stability of the card.
- Set a Target and Go Step-by-Step: Determine your target overclocking goal, whether it’s increasing core clock, memory clock, or both. It’s recommended to take small incremental steps rather than making significant changes all at once. Start by increasing core clock by a small amount, such as 25 MHz, and test for stability.
- Stress Test: Run stress tests to check stability and ensure that your overclocked settings are stable under heavy load. Popular stress-testing tools include FurMark and 3DMark. Monitor the temperatures and performance during the stress test to ensure they remain within acceptable limits.
- Adjust Voltage (If Necessary): If you encounter stability issues, you may need to increase the voltage slightly. However, be cautious as increasing voltage can generate more heat and potentially harm your graphics card. Incrementally increase the voltage and test for stability after each adjustment.
- Test for Artifacts: Artifacts are graphical glitches or inconsistencies that may appear when a graphics card is pushed beyond its stable limits. Use programs like Unigine Heaven or gaming benchmarks to look for any visual abnormalities. If artifacts occur, it may indicate an unstable overclock, and you may need to tweak your settings.
- Repeat and Fine-Tune: Continue tweaking and testing your overclock settings, making small adjustments at a time and running stability tests after each change. Take note of the highest stable clock speeds achieved while maintaining acceptable temperatures and performance.
- Document and Save Profiles: Once you find stable overclocked settings, document them for future reference. Save profiles within the overclocking software so that you can easily switch between stock and overclocked settings whenever needed.
Remember, overclocking is an iterative process that requires patience and careful monitoring. Take your time to find the right balance between increased performance and stability.
It’s recommended to keep an eye on your temperatures during the entire overclocking process. If temperatures reach unsafe levels or the system becomes unstable, dial back the overclocked settings or adjust your cooling solution accordingly.
With the step-by-step guide above, you should be well-equipped to embark on your overclocking journey. However, it’s important to understand that overclocking always carries risks, and pushing your hardware beyond its factory settings may result in damage or reduced lifespan. Proceed with caution and make informed decisions based on your specific hardware and comfort level.
In the next section, we’ll explore popular software tools that can simplify and streamline the overclocking process.
Testing for Stability and Performance
Once you’ve overclocked your graphics card, it’s essential to test its stability and performance to ensure that your settings are reliable and provide the desired improvements. Testing your overclocked graphics card allows you to identify any issues and make further adjustments if necessary. Here are some effective methods for testing stability and performance:
1. Stress Testing Software: Stress testing software puts your graphics card under intense load to assess its stability. Popular stress testing tools include FurMark, MSI Kombustor, and 3DMark. These programs push your graphics card to its limits, allowing you to monitor temperatures, clock speeds, and performance during the stress test. Run stress tests for an extended period (e.g., 30 minutes) to ensure stability and observe for any crashes, artifacts, or abnormal behavior.
2. Gaming Benchmarks: Running demanding games or gaming benchmarks is another effective way to evaluate the stability and performance of your overclocked graphics card. Choose graphics-intensive games, set them to high settings, and monitor the frame rates, temperatures, and overall smoothness of the gameplay. If you encounter crashes, artifacts, or any instability during gaming, it may indicate an unstable overclock.
3. Monitoring Software: Use monitoring software, such as MSI Afterburner or GPU-Z, to track temperatures, clock speeds, fan speeds, and other relevant metrics during stress tests and gaming sessions. Monitoring these parameters helps you identify potential issues, such as excessive heat or performance throttling, and allows you to make informed adjustments to maintain stability.
4. Observation for Artifacts: Artifacts are graphical glitches, flickering, or visual anomalies that may occur when a graphics card is pushed beyond its stable limits. Keep a keen eye on your monitor during stress tests and gaming sessions to detect any artifacts. If artifacts appear, it may indicate an unstable overclock. Adjusting the overclocked settings or reverting to default values can help resolve this issue.
5. Compare Performance: Benchmarking your overclocked graphics card against its stock settings or similar hardware configurations can help you assess the level of performance improvement. Use benchmarking tools like Unigine Heaven or 3DMark to compare frame rates and overall performance metrics between different settings. This comparison enables you to quantify the benefits of overclocking and fine-tune your settings accordingly.
Throughout the testing process, monitor your graphics card temperatures closely. If temperatures exceed safe levels or approach the maximum threshold, it’s crucial to address the cooling solution by adjusting fan speeds, improving ventilation, or considering aftermarket cooling options. Overheating can lead to instability, decreased performance, and potentially damage your hardware.
Keep in mind that overclocking is always a balance between performance gains and stability. If you encounter instability, crashes, or undesirable temperatures, consider dialing back your overclocked settings or adjusting voltage levels for better stability. It’s crucial to find a configuration that offers optimal performance without sacrificing reliability and longevity.
By thoroughly testing for stability and performance, you can ensure that your overclocked graphics card is operating reliably and delivering the desired improvements. In the next section, we’ll explore popular software tools that can assist you in overclocking your graphics card efficiently.
Popular Software for Overclocking Graphics Cards
When it comes to overclocking your graphics card, having the right software tools can make the process easier, more efficient, and user-friendly. There are several popular software options available that are specifically designed for overclocking graphics cards. Let’s take a look at some of the most widely used ones:
MSI Afterburner: MSI Afterburner is a widely recognized and versatile overclocking utility that works with graphics cards from various manufacturers. It offers a user-friendly interface with sliders and dials to adjust core clock, memory clock, voltage, and fan settings. Afterburner also provides real-time monitoring of vital statistics such as temperature, usage, and clock speeds. You can create custom fan profiles, save overclocking profiles, and even control RGB lighting on compatible graphics cards.
ASUS GPU Tweak: ASUS GPU Tweak is developed specifically for ASUS graphics cards and offers a straightforward interface for overclocking and monitoring. It allows you to adjust core clock, memory clock, GPU voltage, and fan speeds. GPU Tweak also provides real-time temperature monitoring and includes a gaming booster feature that optimizes your system for gaming performance.
EVGA Precision X1: EVGA Precision X1 is another well-regarded overclocking tool that supports EVGA graphics cards. It offers a clean and intuitive interface that allows you to tweak core clock, memory clock, voltage, and power limit. Precision X1 provides real-time monitoring of GPU temperatures, usage, clock speeds, and fan speeds. It also offers a customizable on-screen display for monitoring statistics while gaming.
Sapphire TriXX: Sapphire TriXX is geared towards Sapphire Graphics Cards and offers extensive overclocking features. It allows you to adjust core clock, memory clock, voltage, and fan speeds. The software provides temperature monitoring, fan control options, and the ability to create multiple performance profiles. TriXX also has a built-in stress test feature to assess the stability of your overclocked settings.
Gigabyte AORUS Engine: Gigabyte AORUS Engine is tailored for Gigabyte graphics cards and offers a sleek and intuitive interface. It enables you to adjust core clock, memory clock, voltage, and fan speeds with ease. AORUS Engine provides real-time monitoring and supports custom lighting effects on RGB-enabled graphics cards.
These are just a few examples of the most popular overclocking software tools available. It’s important to note that the compatibility of these tools may vary depending on your graphics card manufacturer. Always ensure that you download and install the correct software for your specific GPU model.
While these tools simplify the overclocking process, it’s crucial to exercise caution and make educated adjustments to avoid instability or damage to your graphics card. It’s recommended to refer to user guides, tutorials, and manufacturer forums for guidance and support while using these software tools.
In the next section, we’ll address common issues that may arise during the overclocking process and provide troubleshooting tips to help you overcome them.
Common Issues and Troubleshooting
While overclocking your graphics card can bring significant performance benefits, it’s not uncommon to encounter a few bumps along the way. Understanding the common issues that can arise during the overclocking process and knowing how to troubleshoot them can help you overcome these obstacles. Here are some common issues and troubleshooting tips:
1. System Instability: One of the most common issues when overclocking is system instability, which can manifest as crashes, freezes, or blue screens of death (BSOD). To troubleshoot system instability, dial back your overclocked settings to previous stable levels. If the issue persists, consider gradually decreasing the overclock or adjusting voltage levels. It’s also essential to ensure that your system is adequately cooled and that your power supply can handle the increased power demands.
2. Artifacts and Visual Glitches: Artifacts are graphical glitches or anomalies that may occur when a graphics card is pushed beyond its stable limits. If you encounter artifacts, it’s an indication that your overclocked settings may be too aggressive. Consider dialing back the core clock or memory clock in small increments until the artifacts disappear. You can also try increasing the voltage slightly to provide additional stability.
3. High Temperatures: Overclocking can increase the heat generated by your graphics card, and high temperatures can lead to system instability. If you’re experiencing excessive temperatures, ensure that your cooling solution is sufficient. Clean any dust from your fans or heatsinks, improve airflow within your case, and consider installing additional case fans or upgrading your CPU cooler. If necessary, reduce your overclocked settings or invest in aftermarket cooling options.
4. Driver Crashes or Display Issues: Sometimes overclocking can cause driver crashes or display issues like black screen or flickering. If this occurs, try updating your graphics card drivers to the latest version provided by the manufacturer. If the problem persists, consider reverting to the default settings or lowering your overclocked settings. It’s also worth ensuring that your system is free of any software conflicts or conflicting overclocking tools.
5. Power Supply Limitations: Insufficient power supply can result in instability or system crashes when overclocking. If you’re pushing your graphics card to its limits and experiencing power-related issues, consider upgrading to a higher wattage power supply with enough headroom to handle the increased power demands. Ensure that all power connectors are properly connected and that your power supply is functioning correctly.
6. Memory Errors: Overclocking the memory of your graphics card too aggressively can lead to memory errors. If you encounter memory errors during stress tests or gaming sessions, reduce the memory clock slightly until the errors disappear. It’s important to find a balance between performance gains and stability when overclocking the memory.
Remember that each graphics card is unique, and the overclocking experience may vary. Patience and trial and error are essential when troubleshooting issues. It’s advisable to make incremental adjustments to your overclocked settings, test for stability, and monitor temperatures along the way.
If you’re unsure about specific issues or need further assistance, consult manufacturer forums, online communities, or seek help from experienced overclockers. Their expertise and guidance can prove invaluable in troubleshooting specific issues and achieving stable and optimal overclocked settings.
In the next section, we’ll discuss the benefits and risks of overclocking, helping you weigh the pros and cons before making a decision.
Benefits and Risks of Overclocking
Before diving into overclocking your graphics card, it’s crucial to understand both the benefits it offers and the potential risks involved. This section will highlight the advantages and disadvantages of overclocking, allowing you to make an informed decision. Let’s explore the benefits and risks:
Benefits of Overclocking:
1. Increased Performance: The primary benefit of overclocking your graphics card is unlocking increased performance. By pushing your hardware beyond its factory-set clock speeds, you can achieve higher frame rates, smoother gameplay, and improved responsiveness. This can greatly enhance your gaming experience and allow for more demanding tasks such as video editing or 3D rendering to be completed more efficiently.
2. Cost-Effective Performance Boost: Overclocking provides a cost-effective way to boost your system’s performance without the need to purchase new, higher-end hardware. Instead of investing in a more powerful graphics card, overclocking enables you to make the most out of the hardware you already own, delaying the need for an expensive upgrade.
3. Competitive Advantage: Overclocking can give you a competitive edge in gaming, especially in multiplayer scenarios that demand quick reflexes and precise movements. By maximizing your graphics card’s performance, you can achieve higher frame rates, reducing input lag and gaining an advantage over your opponents.
Risks of Overclocking:
1. Increased Heat and Power Consumption: Overclocking generates more heat and consumes more power, potentially leading to higher temperatures. If your cooling solution is inadequate, the increased heat can reduce stability and even damage your graphics card. Additionally, increased power consumption may require a more robust power supply, adding additional cost if an upgrade is necessary.
2. Voided Warranties: Overclocking may void your graphics card’s warranty. If any issues arise during or after the overclocking process, you may not be eligible for support or warranty coverage from the manufacturer. It’s crucial to weigh the potential performance benefits against the loss of warranty protection.
3. Greater Risk of System Instability: Overclocking introduces the potential for system instability, such as crashes, freezes, or graphical artifacts. Pushing the hardware beyond its factory settings can introduce variables that may impact stability, and finding the right balance between performance and stability can be challenging. Proper testing, monitoring, and incremental adjustments are necessary to achieve a stable overclocked configuration.
4. Reduced Lifespan or Potential Damage: Overclocking puts additional stress on your graphics card, which may lead to a reduced lifespan or potential damage if the hardware is pushed too aggressively and not adequately cooled. It’s vital to monitor temperatures, ensure sufficient cooling, and practice responsible overclocking to minimize these risks.
When deciding whether to overclock your graphics card, it’s crucial to consider these benefits and risks carefully. Assess your cooling capabilities, power supply, and your comfort level with potentially voiding warranties or encountering system stability issues. It’s recommended to start with conservative overclocking settings and gradually increase performance while monitoring temperatures and stability.
In the next section, we’ll provide our final thoughts and recommendations to help you make an informed decision on whether overclocking is right for you.
Final Thoughts and Recommendations
As we wrap up our exploration of graphics card overclocking, it’s important to consider the information we’ve covered and provide some final thoughts and recommendations.
Overclocking your graphics card can undoubtedly yield performance benefits, improving your gaming experience or enhancing your productivity in creative tasks. By pushing your hardware beyond its factory limits, you can achieve higher frame rates, smoother gameplay, and faster render times.
However, it’s essential to approach overclocking with caution and awareness of the potential risks involved. Increased heat generation, higher power consumption, and the voiding of warranties are among the potential downsides. Achieving a stable overclock requires careful monitoring, proper cooling, and incremental adjustments to find the optimal balance between performance and stability.
Before deciding to overclock your graphics card, consider the following recommendations:
1. Understand Your Hardware: Familiarize yourself with the specifications and limitations of your graphics card model. Knowing your card’s base clock speeds, maximum temperatures, and power limits will help you set realistic expectations and avoid undue stress on your hardware.
2. Prioritize Cooling: Ensure that your system has adequate cooling in place to dissipate the extra heat generated during overclocking. Proper cooling can help maintain stability, prevent overheating, and extend the lifespan of your graphics card.
3. Take Incremental Steps: Begin your overclocking journey with conservative settings and make incremental adjustments. Test for stability and monitor temperatures at each step to find the optimal overclocked configuration without compromising reliability.
4. Consider Power Supply Upgrades: If you’re pushing your graphics card to its limits, ensure that your power supply can handle the increased power demands. Upgrading to a higher wattage power supply may be necessary to maintain stability and avoid potential system instability.
5. Document and Save Profiles: Once you find stable and satisfactory overclocked settings, document them for future reference. Saving profiles within your overclocking software allows for easy switching between stock and overclocked configurations.
6. Monitor and Test Regularly: Continuously monitor temperatures, clock speeds, and stability to ensure that your overclocked configuration remains reliable and effective. Regularly test your system using stress tests or demanding applications to catch any potential issues.
7. Stay Within Your Comfort Zone: Overclocking requires a certain level of knowledge and technical expertise. If you’re not comfortable delving into the world of overclocking or if the potential risks outweigh the benefits for you, it’s perfectly acceptable to stick with your graphics card’s stock settings.
Ultimately, the decision to overclock your graphics card is a personal one. It hinges on your specific needs, comfort level, and willingness to accept the potential downsides. If you’re an avid gamer or creative professional seeking an extra performance edge, overclocking can be a viable option when done responsibly.
Remember, overclocking should be approached as an experiment and a process of discovery. Take your time, proceed with caution, and always prioritize the stability and longevity of your hardware.
We hope this article has provided valuable insights and guidance on how to overclock your graphics card. Good luck with your overclocking endeavors!