Reasons to Upgrade to a Solid State Drive
Are you tired of waiting for your computer to boot up or open applications? It may be time to consider upgrading to a solid state drive (SSD). Unlike traditional hard drives (HDD), SSDs offer numerous advantages that can significantly improve your computing experience. Let’s explore the reasons why you should make the switch:
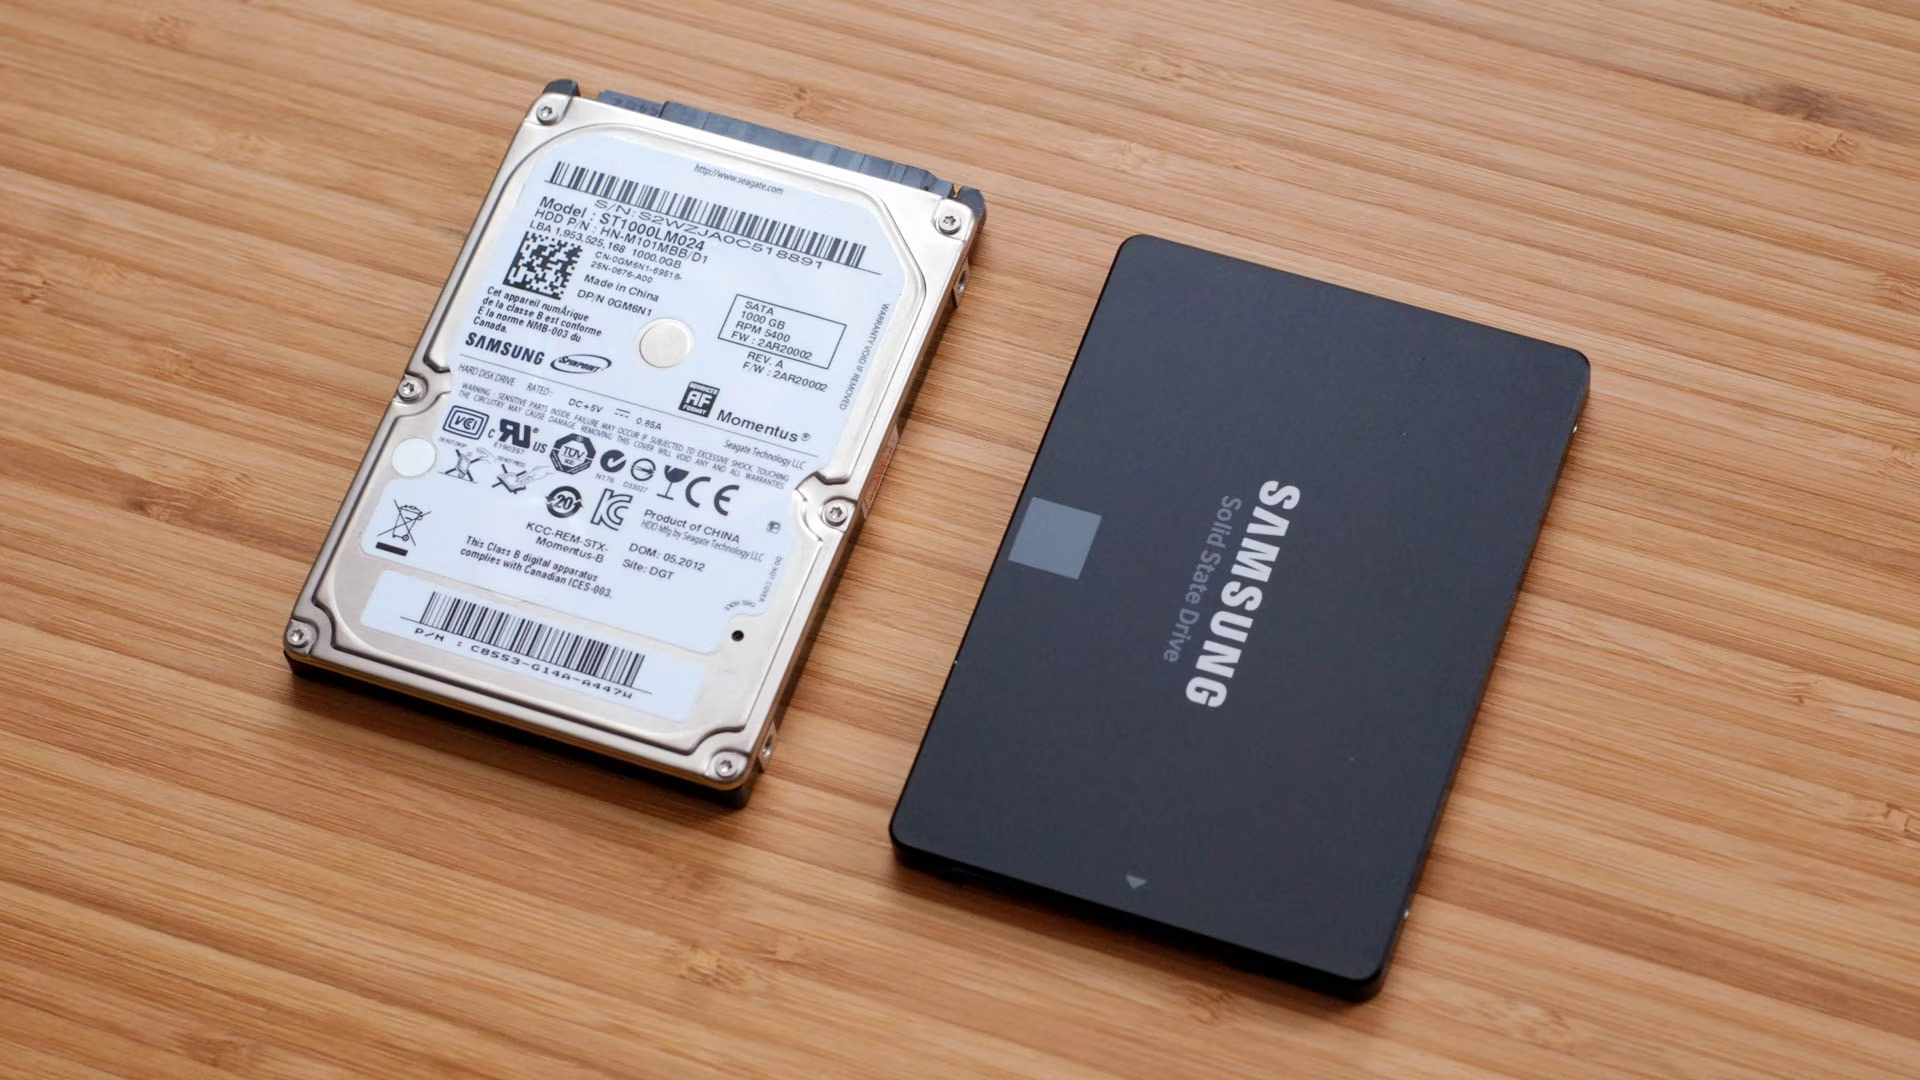
- Lightning-fast Speed: One of the most significant advantages of an SSD is its blazing-fast speed. Traditional hard drives rely on mechanical components to read and write data, while SSDs use flash memory. This difference means that SSDs can access data almost instantly, resulting in quicker boot times, faster application launches, and seamless multitasking.
- Improved Performance: With an SSD, you can experience a significant boost in overall system performance. Applications load faster, files transfer quickly, and overall system responsiveness is greatly enhanced. Whether you’re a gamer, a creative professional, or an everyday user, upgrading to an SSD will provide a noticeable improvement in your computer’s performance.
- Enhanced Durability: Unlike traditional hard drives that are prone to mechanical failures, SSDs don’t have any moving parts. This makes them more resistant to shocks, vibrations, and drops. Additionally, SSDs generate less heat, reducing the risk of overheating. Investing in an SSD ensures better durability and longevity for your data storage solution.
- Reduced Power Consumption: SSDs consume significantly less power compared to traditional hard drives. This energy efficiency not only helps extend battery life in laptops and portable devices but also reduces the overall power consumption of desktop systems. Upgrading to an SSD can lead to both cost savings and positive environmental impact.
- No Noise: If you’re tired of hearing the constant whirring and clicking sounds from your old hard drive, an SSD is the perfect solution. Since there are no moving parts, SSDs operate silently, providing a quieter computing experience. Say goodbye to the annoying noise and enjoy a peaceful work environment.
- Compact and Lightweight: SSDs are compact and lightweight, making them ideal for laptops and other portable devices. They take up less space inside your computer chassis and add negligible weight, allowing for easier portability without compromising on storage capacity or performance.
These compelling reasons demonstrate the value of upgrading to a solid state drive. By making the switch, you can enjoy significantly faster speeds, improved performance, enhanced durability, reduced power consumption, noise-free operation, and a compact form factor. Don’t let your outdated hard drive hold you back; embrace the future of storage technology with an SSD.
Preparing for the Migration Process
Before diving into the migration process, it’s essential to take a few preliminary steps to ensure a smooth transition from your old hard drive to the new solid state drive (SSD). Following these steps will help you avoid data loss and ensure a successful migration:
- Backup Your Data: Before making any changes to your hard drive, it’s crucial to back up all your important data. This ensures that even if something goes wrong during the migration process, your files will be safe and easily recoverable. You can use external storage devices, cloud backup services, or even take advantage of built-in backup tools provided by your operating system.
- Organize and Clean Up Your Files: Take this opportunity to declutter your hard drive and get rid of unnecessary files. Remove temporary files, delete duplicate files, and move any large files or programs that you don’t frequently use to an external storage device. This will not only free up space on your existing hard drive but also make the migration process faster and smoother.
- Make a List of Essential Programs and Licenses: Take note of all the software applications you currently use and make sure you have the necessary licenses or product keys to reinstall them on the new SSD. This will help you avoid any inconvenience or delays when setting up your system on the new drive.
- Ensure Compatibility: Check if your computer and operating system support SSD installation. Verify the interface compatibility (SATA, PCIe, or NVMe) between your motherboard and the SSD. If you are unsure, consult your computer’s manufacturer or refer to the documentation provided with the SSD.
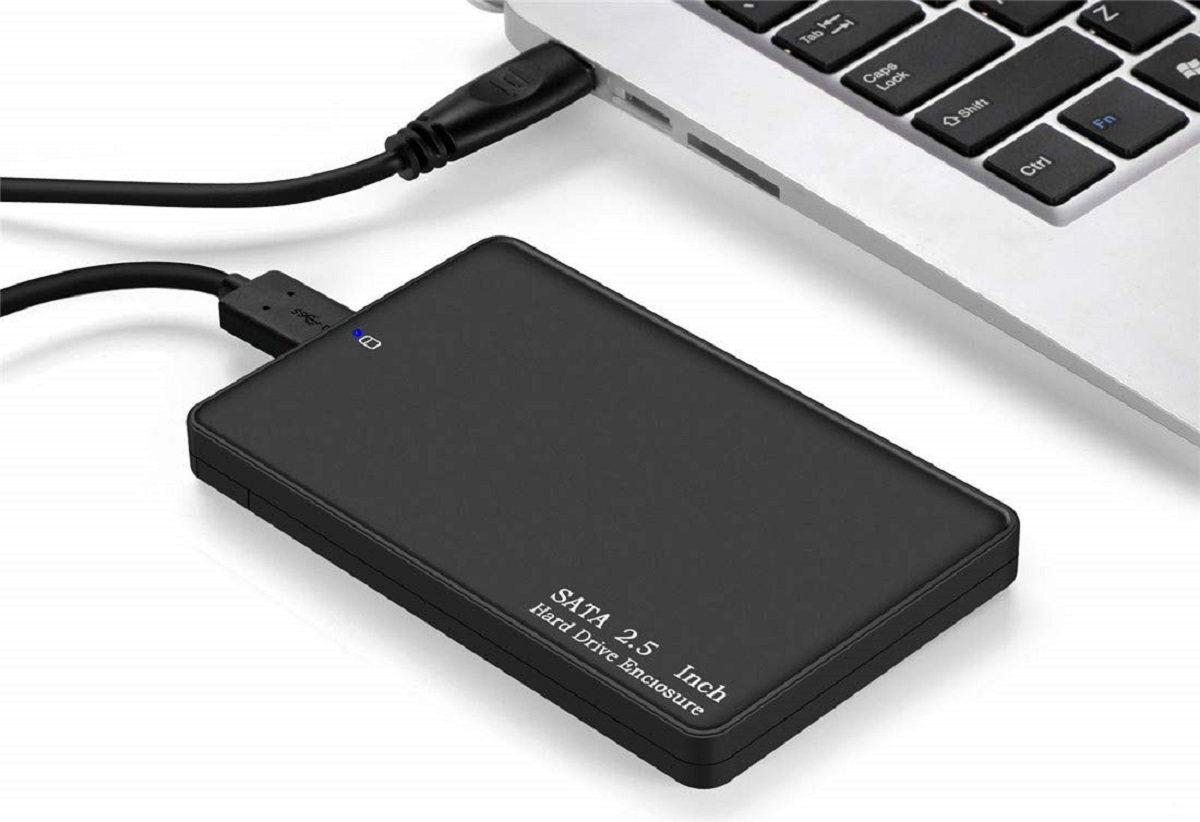
- Gather necessary tools: While most SSDs come with migration software, it’s always a good idea to have a USB-to-SATA adapter or external enclosure on hand. These tools will allow you to connect your new SSD to your computer easily and transfer data smoothly during the migration process.
By following these preparations, you can mitigate the risks associated with the migration process and ensure a seamless transition to your new solid state drive. Remember to back up your data, clean up your hard drive, make note of essential programs and licenses, confirm compatibility, and gather the necessary tools. Once you’ve completed these steps, you’ll be ready to move on to the actual data transfer and installation process.
Backing Up Important Data
When it comes to migrating data to a new solid state drive (SSD), the first and most crucial step is to back up all your important data. This ensures that even if something goes wrong during the migration process, your files will remain safe and accessible. Follow these guidelines to effectively back up your important data:
- Identify Critical Files and Folders: Take the time to identify the files and folders that contain important data, such as documents, photos, videos, and music. Prioritize backing up these files first to ensure their safety.
- Utilize External Storage Devices: One of the easiest and most reliable ways to back up your data is by using external storage devices like external hard drives or USB flash drives. Connect your chosen storage device to your computer and copy and paste the necessary files and folders onto the device. Make sure you have enough storage space to accommodate all your backed-up data.
- Utilize Cloud Storage Services: Cloud storage services such as Google Drive, Dropbox, or OneDrive offer convenient and secure options for backing up your data. Upload your files and folders to the cloud, and they will be accessible from anywhere with an internet connection. Ensure that you have sufficient storage space in your chosen cloud service or consider upgrading if needed.
- Use Backup Software: Consider using specialized backup software that offers features like automatic backups, incremental backups, and scheduling. These tools can simplify the backup process by automating the task and ensuring that your data is always up to date.
- Verify Backup Integrity: After backing up your data, it’s essential to verify the integrity of the backup. Double-check that all files and folders have been successfully copied and compare them to the original copies for any discrepancies or errors. This step ensures the completeness and accuracy of your backup.
- Create Multiple Copies: To provide an extra layer of protection, consider creating multiple copies of your important data. This can involve using different storage devices or employing a combination of both external storage devices and cloud storage services. Multiple backups safeguard against unforeseen events such as hardware failure or data corruption.
By following these steps and backing up your important data, you can have peace of mind knowing that your essential files and folders are safely preserved. Whether you choose external storage devices or utilize cloud storage services, the key is to ensure redundancy and verify the integrity of your backups. Taking the time to back up your data adequately is a crucial step in the migration process to protect against any potential data loss or unexpected issues.
Cleaning Up your Old Hard Drive
Before migrating your data to a new solid state drive (SSD), it’s a good idea to clean up your old hard drive. This not only helps free up space but also ensures that you only migrate essential files and minimize any potential issues during the transfer process. Follow these steps to effectively clean up your old hard drive:
- Remove Unnecessary Files and Programs: Start by deleting any unnecessary files or programs from your hard drive. This can include old documents, temporary files, unused applications, and downloads that are no longer needed. Sort through your files and folder structure to identify and delete anything that is taking up unnecessary space.
- Organize Your Files: Take the time to organize your files and folders in a logical manner. Create folders for different types of files and move them accordingly. This not only helps you find files more easily but also makes the migration process smoother by ensuring that files are located in the correct directory.
- Delete Duplicate Files: Duplicate files can take up a significant amount of space on your hard drive. Use duplicate file finder software or manually search for and delete duplicate files. This helps free up valuable storage space and streamlines the migration process by eliminating unnecessary files.
- Transfer Large Files: If you have large files that you don’t frequently use, consider moving them to an external storage device. This could include large videos, high-resolution images, or seldom-used software installers. By transferring these files, you can free up space on your old hard drive and reduce the amount of data you need to migrate.
- Uninstall Unused Programs: Go through your list of installed programs and uninstall any that you no longer use. This not only helps free up space but can also improve system performance by reducing the number of background processes and entries in the registry.
- Run Disk Cleanup Tools: Utilize the built-in disk cleanup tools provided by your operating system. These tools can help identify and delete unnecessary files, temporary files, and system caches that are taking up space on your hard drive. Disk cleanup can also help optimize your system performance.
By cleaning up your old hard drive, you ensure that only essential files and programs are migrated to your new solid state drive. Removing unnecessary files, organizing your data, deleting duplicates, transferring large files, uninstalling unused programs, and running disk cleanup tools all contribute to a streamlined and efficient migration process. Take the time to clean up your old hard drive for a fresh start on your new SSD.
Choosing the Right Solid State Drive
When it comes to upgrading to a solid state drive (SSD), choosing the right one for your needs is crucial. With various options available on the market, it’s essential to consider factors such as capacity, performance, reliability, and budget. Here are some key considerations to help you choose the right SSD:
- Storage Capacity: Determine the storage capacity you require for your SSD. Consider the size of your current hard drive and how much data you need to migrate. SSDs come in different capacities ranging from 128GB to several terabytes. Strike a balance between your budget and the amount of storage space you need.
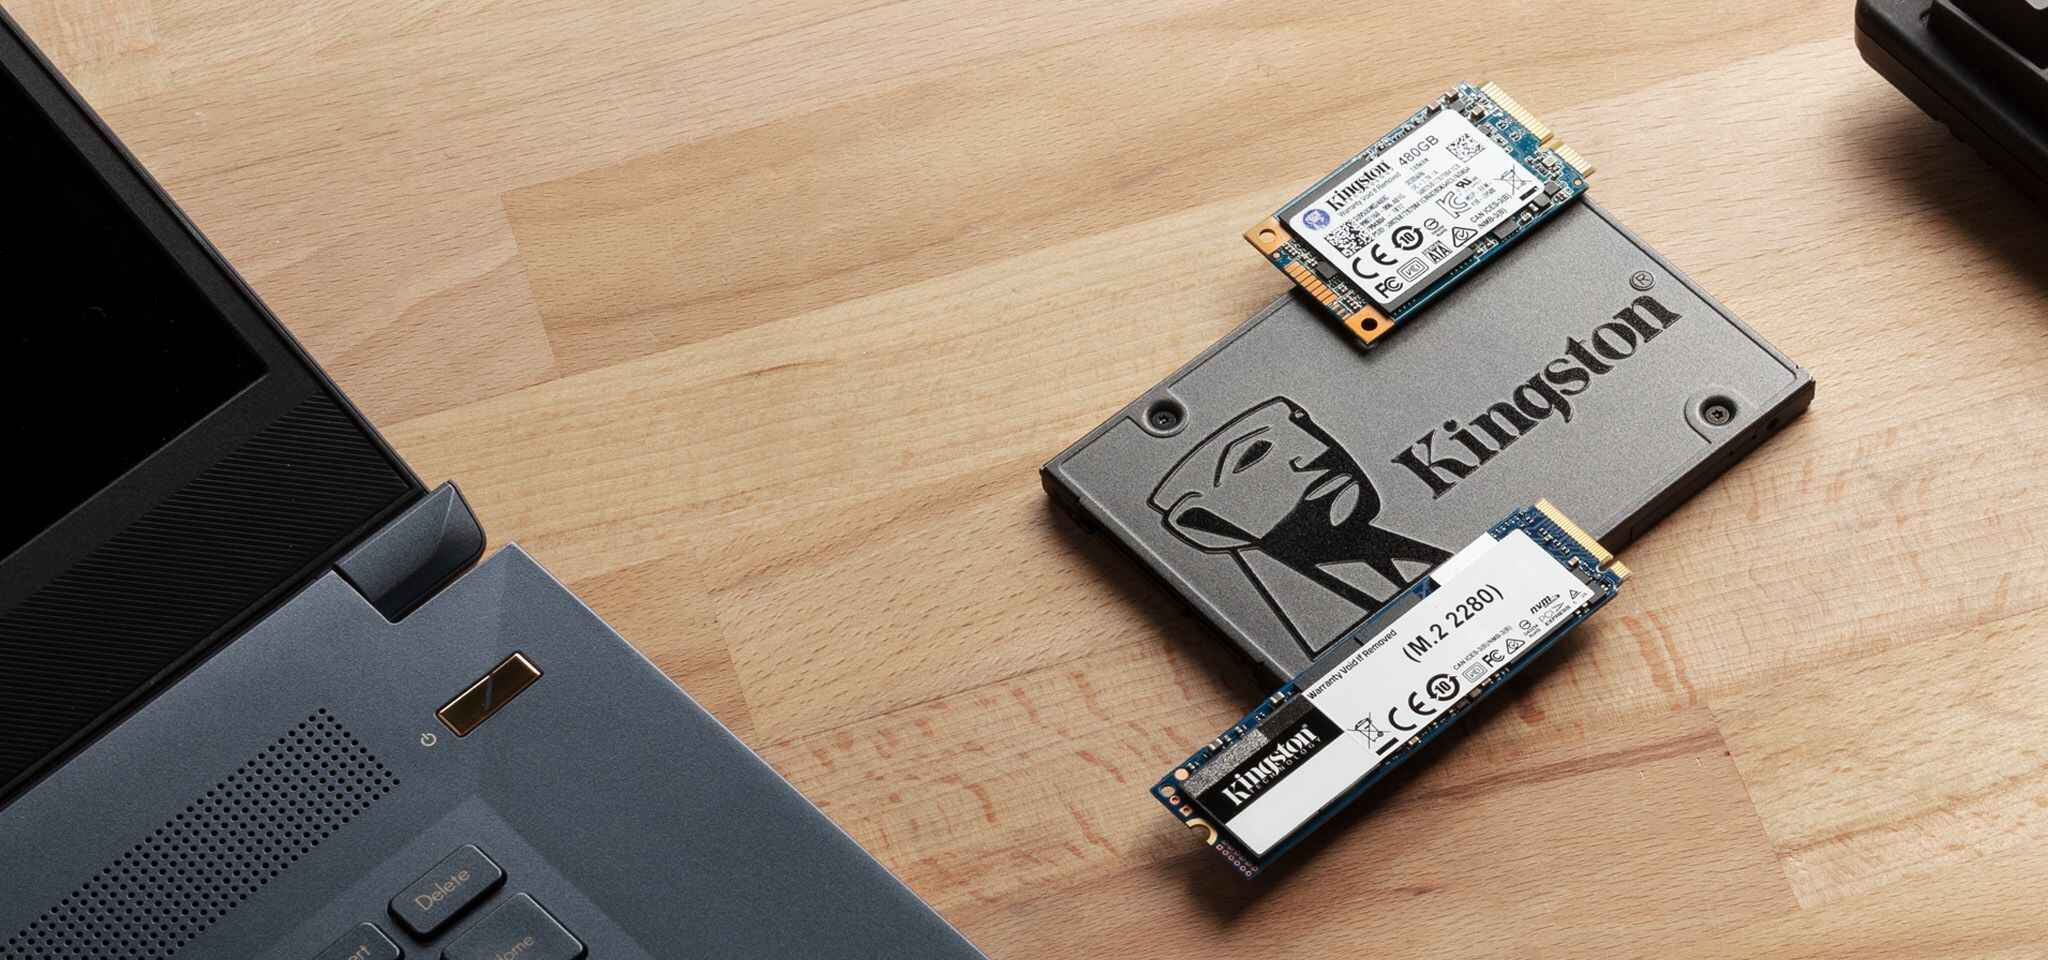
- Form Factor: Check the form factor compatibility of the SSD with your computer. Common form factors include 2.5-inch SATA, M.2, and PCIe. Ensure that the form factor is compatible with your computer’s hardware and available slots for easy installation.
- Speed and Performance: SSDs offer faster speeds compared to traditional hard drives, but there are variations among SSD models. Look for SSDs that offer high random read and write speeds to ensure swift application launches and data access. Consider SSDs with PCIe or NVMe interfaces for even faster performance.
- Reliability and Endurance: Assess the reliability and endurance of the SSD. Look for SSDs from reputable manufacturers known for their reliability and quality. Check for features such as error correction technology and wear-leveling algorithms, which contribute to the longevity and robustness of the drive.
- Price and Budget: Set a budget for your SSD upgrade and compare the options within that price range. SSD prices have become more affordable over time, but higher-capacity and faster models tend to be more expensive. Consider the balance between your budget and the desired features and performance.
- Customer Reviews: Read customer reviews and ratings of the SSD models you are considering. Real-world experiences can provide valuable insights into the performance, reliability, and compatibility of the SSD in different systems. Look for SSDs with positive reviews and high ratings.
- Warranty and Support: Check the warranty length and the support provided by the SSD manufacturer. A longer warranty period indicates the manufacturer’s confidence in the product’s quality. Additionally, reliable customer support can be helpful if any issues arise during installation or usage.
By considering factors such as storage capacity, form factor, speed and performance, reliability and endurance, price and budget, customer reviews, and warranty and support, you can make an informed decision when choosing the right solid state drive for your system. Ensure that the selected SSD meets your storage needs, offers the desired performance, and provides a balance between price and quality. Investing in the right SSD will yield long-term benefits and optimize your computing experience.
Transferring Data Using Cloning Software
When it comes to migrating data from your old hard drive to a new solid state drive (SSD), one of the most efficient methods is to use cloning software. Cloning software allows you to create an exact copy of your existing hard drive and transfer it to the new SSD. Follow these steps to transfer your data using cloning software:
- Choose a Reliable Cloning Software: Research and select a reliable cloning software that supports your specific operating system and hardware. Popular options include Acronis True Image, Macrium Reflect, and EaseUS Todo Backup.
- Install the Cloning Software: Download and install the chosen cloning software on your computer. Ensure that both the old hard drive and the new SSD are connected and recognized by your system.
- Launch the Cloning Software: Open the cloning software and choose the disk cloning option. Select the old hard drive as the source disk, and the new SSD as the destination disk.
- Configure the Cloning Settings: Depending on the cloning software you’re using, you may have various options to configure. These options can include resizing partitions, aligning sectors, and selecting the type of cloning (sector-by-sector or intelligent cloning). Review the settings and adjust them according to your preferences.
- Start the Cloning Process: Once you’ve reviewed and confirmed the cloning settings, start the cloning process. The software will begin creating a clone of the old hard drive and transferring it to the new SSD. The duration of the process will depend on the size of the data being transferred.
- Verify the Cloned Data: After the cloning process is complete, it’s crucial to verify the integrity of the cloned data. Carefully compare the files and folders on the new SSD with those on the old hard drive to ensure they are an exact match. This step helps avoid any potential data loss or corruption during the cloning process.
- Disconnect the Old Hard Drive and Connect the SSD: Once you have confirmed the successful transfer of data to the new SSD, shut down your computer, disconnect the old hard drive, and connect the SSD to the appropriate port. Verify that the computer recognizes the SSD during the startup process.
- Test and Ensure the Functionality: Boot up your computer with the new SSD and verify that everything is functioning correctly. Check if your system recognizes the new SSD and if all your files and applications are accessible. Run a few tests to ensure optimal performance and stability.
By following these steps and using reliable cloning software, you can seamlessly transfer your data from the old hard drive to the new solid state drive. Cloning software simplifies the migration process and ensures that all your files, applications, and settings are preserved on the new SSD. Remember to verify the cloned data, disconnect the old hard drive, and test the functionality of the new SSD for a smooth transition.
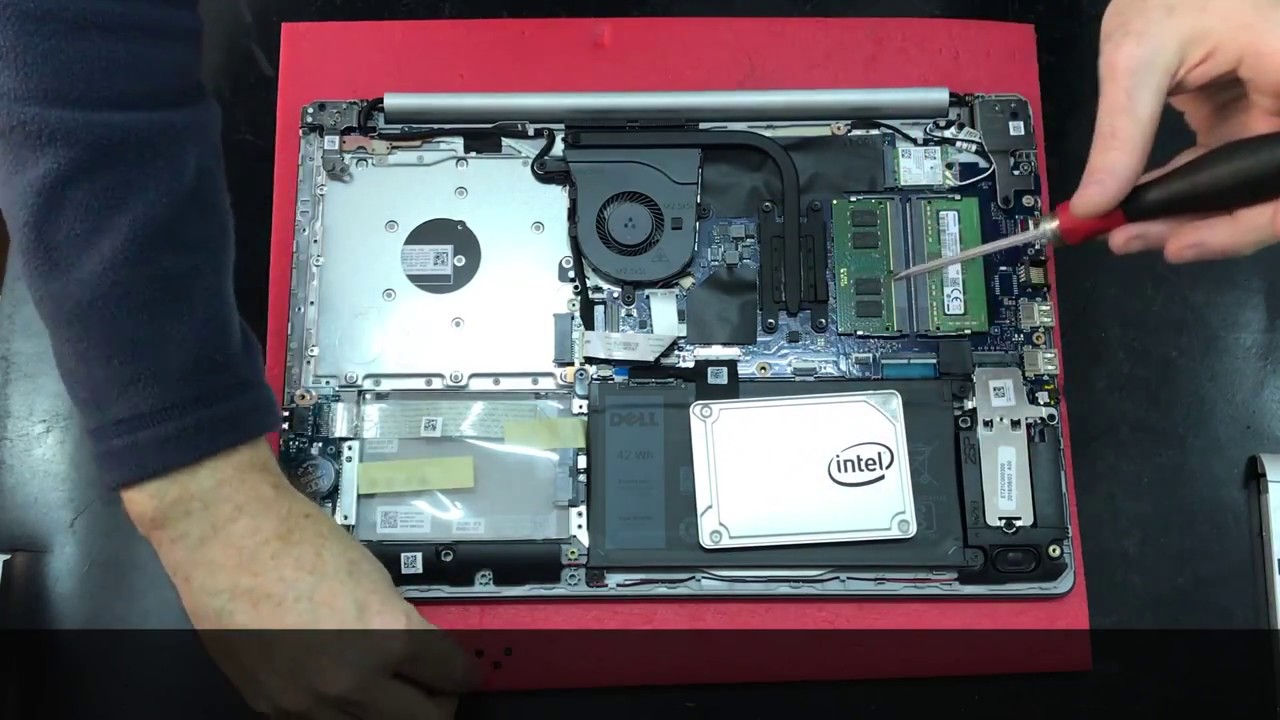
Installing the Solid State Drive
Once you have successfully transferred your data to the new solid state drive (SSD) using cloning software, the next step is to physically install the SSD into your system. Proper installation is crucial to ensure the SSD functions correctly and maximizes its performance. Follow these steps to install the SSD:
- Prepare the Necessary Tools: Gather the necessary tools for the installation, such as a screwdriver and any screws or brackets that may be required. Refer to the documentation provided with the SSD and your computer to determine the specific tools needed.
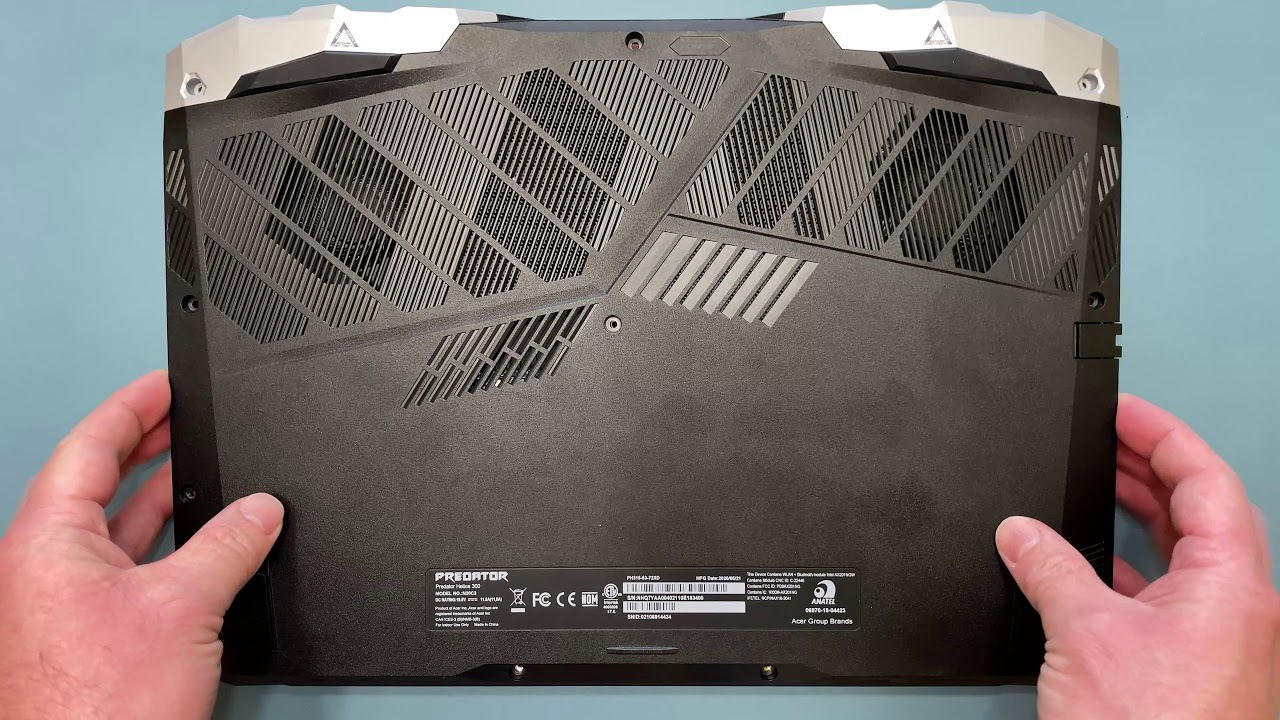
- Power Down and Disconnect: Shut down your computer and unplug it from the power source. Disconnect any cables or peripherals that may be connected to your computer.
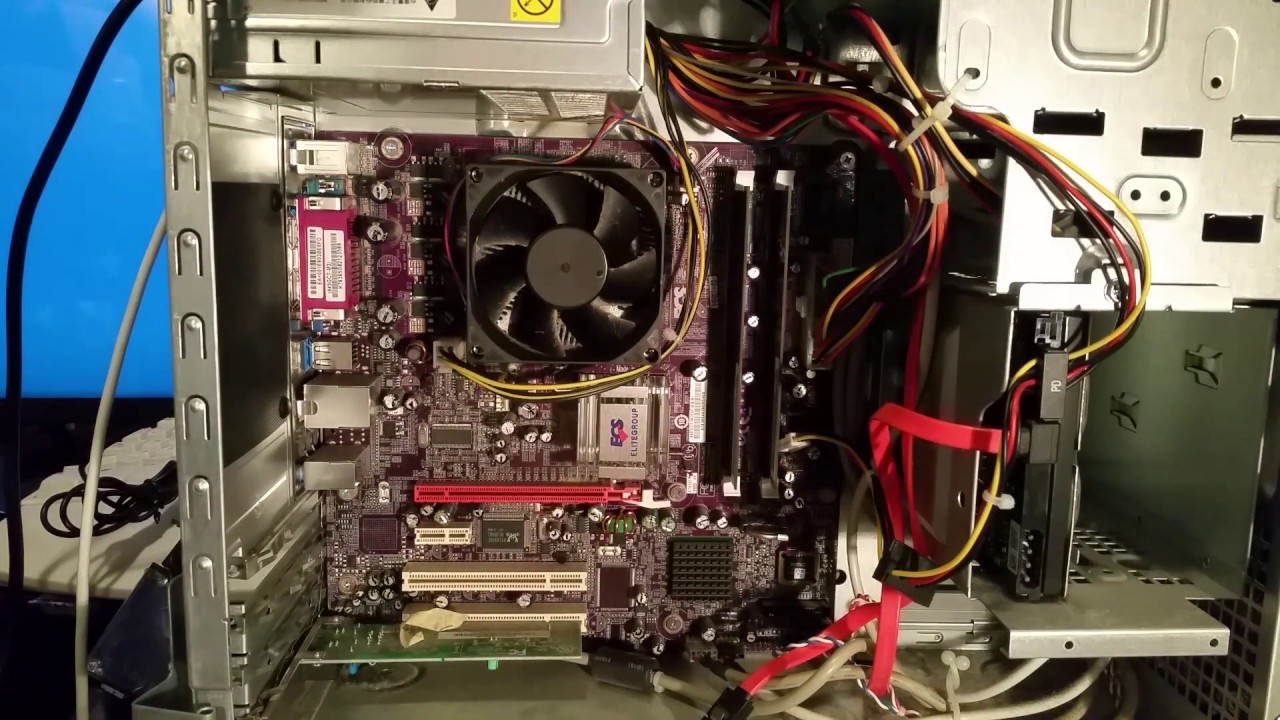
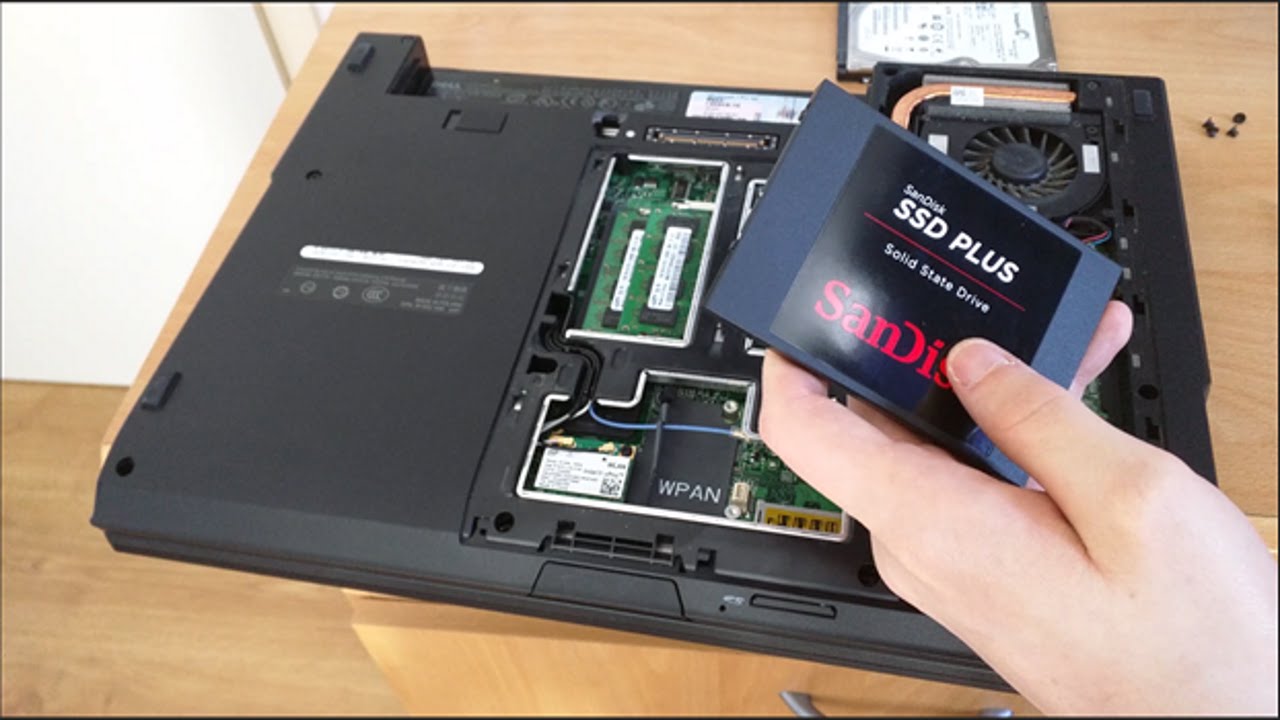
- Locate the Hard Drive Bay: Locate the hard drive bay in your computer chassis. The location can vary depending on the computer model. Refer to your computer’s manual or manufacturer’s website for guidance.
- Remove the Old Hard Drive (if applicable): If you are replacing your old hard drive with the SSD, remove the old hard drive from its bay. Carefully disconnect any cables or connectors attached to the hard drive and unscrew any screws that are holding it in place. Slide out the old hard drive and set it aside.
- Install the SSD: Place the SSD into the empty hard drive bay. Ensure that the connectors on the SSD align with the connectors in the bay. Gently push the SSD into the bay until it is firmly seated. Use screws or brackets to secure it in place, if necessary.
- Reconnect Cables and Peripherals: Reconnect any cables or peripherals that you disconnected previously. Ensure that all connections are secure.
- Power On your Computer: Plug in your computer and power it on. The computer should recognize the newly installed SSD during the startup process.
- Verify the Recognition: Once your computer boots up, verify that the SSD is recognized by your operating system. Open the device manager to confirm that the SSD is listed as a connected storage device. This step ensures that the SSD is properly recognized and ready for use.
- Format and Partition (if necessary): If the SSD is not formatted or partitioned, you may need to perform these steps. Consult the documentation provided with your operating system or use disk management tools to format and partition the SSD according to your needs.
- Restore Data and Applications: Once the SSD is installed and recognized, you can restore your data and applications from the backup you created earlier. Copy your files and folders from the backup source to the appropriate locations on the SSD. Reinstall any applications or programs as needed.
By following these steps, you can ensure a proper and successful installation of the solid state drive (SSD) into your system. Take necessary precautions to handle the SSD and ensure that all cables and connectors are securely attached. Verifying the recognition of the SSD and properly restoring your data and applications will complete the installation process, allowing you to enjoy the improved speed and performance offered by your new SSD.
Verifying the Data Transfer
After migrating your data from the old hard drive to the new solid state drive (SSD), it’s crucial to verify the data transfer to ensure that everything has been successfully copied. Verifying the data transfer helps identify any potential issues or discrepancies before relying on the new SSD for your files and applications. Follow these steps to verify the data transfer:
- Compare Files and Folders: Start by comparing the files and folders on the old hard drive with those on the new SSD. Check that all the files and directories are present and appear to be in the correct locations.
- Open and Test Files: Open a few files from different directories on the new SSD to ensure that they can be accessed and are functional. Pay attention to important documents, images, videos, and other file types that are critical to your workflow.
- Launch Applications: Launch several applications installed on the new SSD to ensure that they open and function as expected. This includes testing both system applications and third-party software that you regularly use.
- Check for Data Corruption or Errors: Examine the files and applications for any signs of data corruption or errors. If you notice any abnormalities, such as missing data, distorted images, or application crashes, it could indicate a problem with the data transfer.
- Perform System Updates: Check for and perform any system updates or patches that may be available for your operating system and applications. Updates can address any compatibility issues or bugs that may have occurred during the data transfer process.
- Run Diagnostics and Disk Checks: Utilize diagnostic tools provided by your operating system or third-party software to perform disk checks and identify any potential errors or issues with the new SSD. These tools can help ensure the integrity of the disk and identify any underlying problems.
- Compare Sizes and Free Space: Compare the overall size and free space of the old hard drive with the new SSD. Ensure that the reported sizes and available space match or are close to each other. Any significant discrepancies could indicate a problem with the data transfer.
- Test Data Accessibility and Speed: Test the accessibility and speed of the data stored on the new SSD. Copy a large file from and to the SSD to ensure that data transfers are smooth and efficient. Compare the transfer speeds with the expected performance of the SSD.
By following these steps and carefully verifying the data transfer, you can ensure the successful migration of your files and applications to the new solid state drive (SSD). Comparing files and folders, testing files and applications, checking for data corruption or errors, performing system updates, running diagnostics and disk checks, comparing sizes and free space, and testing data accessibility and speed are essential for confirming the integrity and functionality of the data on the new SSD. Take the time to verify the data transfer so that you can confidently rely on your new SSD for your computing needs.
Tips for Optimal Performance with SSD
Once you have successfully installed your new solid state drive (SSD), optimizing its performance can enhance your overall computing experience. SSDs already offer significant speed and reliability advantages over traditional hard drives, but following these tips will help you maximize their potential:
- Enable TRIM: Ensure that TRIM is enabled on your SSD. TRIM is a command that allows the operating system to inform the SSD which blocks of data are no longer in use, allowing for more efficient read and write operations.
- Update Firmware: Check if there are any firmware updates available for your SSD. Manufacturers often release updates that improve performance and address potential issues. Visit the manufacturer’s website or use their provided software to check for and apply firmware updates.
- Properly Align Partitions: Ensure that the partitions on your SSD are properly aligned. Misaligned partitions can result in reduced performance. Most modern operating systems automatically align partitions correctly, but it’s important to verify this alignment.
- Avoid Defragmentation: SSDs do not benefit from defragmentation like traditional hard drives. In fact, frequent defragmentation can reduce the lifespan of an SSD. Disable automatic defragmentation for your SSD in your operating system settings.
- Disable Hibernation and System Restore: Consider disabling hibernation and system restore features if you are trying to maximize SSD performance and storage space. These features can consume disk space and generate frequent write operations that may not be necessary for SSDs.
- Enable AHCI Mode: AHCI (Advanced Host Controller Interface) mode allows better communication between the operating system and the SSD. Verify that your computer’s SATA controller is set to AHCI mode in the BIOS settings.
- Disable Superfetch and Prefetch: Disable Superfetch and Prefetch features in the Windows operating system. While these features aim to improve performance on traditional hard drives, they are not necessary for SSDs and can potentially cause unnecessary wear.
- Monitor and Manage Storage Space: Regularly monitor your SSD’s storage space and manage it efficiently. Keep at least 10-20% of the SSD’s capacity free to maintain optimal performance. Delete unnecessary files and move large files to external storage devices when necessary.
- Enable Power Management: Enable power management settings in your operating system to optimize power consumption. Since SSDs are energy-efficient, setting power management options can help further extend your laptop’s battery life.
- Regularly Update Drivers and Operating System: Keep your drivers and operating system up to date. Driver and system updates often include performance optimizations specific to SSDs. Check for updates regularly and install them to ensure compatibility and performance improvements.
By implementing these tips, you can ensure optimal performance and longevity for your solid state drive (SSD). Enabling TRIM, updating firmware, aligning partitions, avoiding defragmentation, disabling hibernation and system restore, enabling AHCI mode, disabling Superfetch and Prefetch, monitoring storage space, enabling power management, and regularly updating drivers and the operating system are all crucial steps in maximizing the potential of your SSD. Embrace these tips and enjoy the full benefits of speed, reliability, and efficiency offered by your new SSD.
Conclusion
Upgrading to a solid state drive (SSD) offers numerous advantages in terms of speed, performance, reliability, and efficiency. By following the steps outlined in this guide, you can successfully migrate your data from your old hard drive to the new SSD and optimize its performance for an enhanced computing experience.
Starting with the reasons to upgrade to an SSD, we discussed the lightning-fast speed, improved performance, enhanced durability, reduced power consumption, quiet operation, and compact form factor that makes SSDs a worthwhile investment. Preparing for the migration process involves backing up important data, cleaning up your old hard drive, choosing the right SSD, and transferring data using cloning software.
Installing the SSD requires careful physical installation, verifying the data transfer ensures a successful migration, and following tips for optimal SSD performance will help you make the most out of your new storage solution.
Remember to choose reliable cloning software, backup your data before the migration, and verify the integrity of the transferred files and applications. Properly installing the SSD involves ensuring compatibility, securely connecting cables, and confirming the recognition of the new drive by the operating system.
With the installation complete, optimizing the performance of your SSD involves enabling TRIM, updating firmware, aligning partitions, disabling defragmentation, managing storage space, and keeping drivers and the operating system up to date.
By following these steps and implementing the tips provided, you can enjoy the speed, reliability, and efficiency that solid state drives have to offer. Upgrading to an SSD is an investment that will greatly improve your computing experience and productivity.
Take the time to prepare properly, choose the right SSD, diligently transfer your data, install and verify the new drive, and optimize its performance. By doing so, you can embrace the benefits of an SSD and unlock a faster, smoother, and more reliable computing experience.