Introduction
Customizing your PSU (Power Supply Unit) cables is a popular trend among PC enthusiasts and modders. By adding color and style to your cables, you can transform the look of your computer and create a unique aesthetic that reflects your personal taste. Whether you want to match your cables to your PC’s theme or simply add some flair to your setup, custom PSU cables are a great way to achieve that.
Not only do colored PSU cables enhance the visual appeal of your PC, but they can also make cable management easier. Differentiating the cables by color can help you identify them quickly when building or upgrading your system, making the installation process more efficient. Additionally, customized cables can contribute to better airflow and organization inside your PC case, improving overall cooling performance and reducing clutter.
While buying pre-made colored cables is an option, it can limit your choices in terms of colors and lengths. DIY customizing allows you to have complete control over the colors, lengths, and even cable extensions, providing a more personalized solution tailored to your specific needs.
In this guide, we will explore the various methods to make your PSU cables colored, from preparing the cables to choosing the appropriate heat shrink sleeves and using cable combs. We will also cover the installation and safety tips to ensure a successful customization process.
So, whether you’re an avid gamer, a professional designer, or simply someone who likes to build and personalize their own PC, let’s dive into the world of PSU cable customization and discover how you can make your computer setup truly unique with colored PSU cables.
Why Customize PSU Cables?
Customizing PSU cables offers several benefits and advantages for PC enthusiasts. Let’s explore some of the reasons why you might want to consider customizing your PSU cables:
1. Aesthetics: One of the main reasons people customize their PSU cables is to enhance the overall look and aesthetics of their PC. With a wide range of colors and styles available, you can match your cables to your PC’s theme or create a visually stunning contrast that stands out.
2. Personalization: Customizing your cables allows you to personalize your PC setup and make it reflect your individual style and preferences. You can choose colors that resonate with you, making your PC feel unique and tailored to your taste.
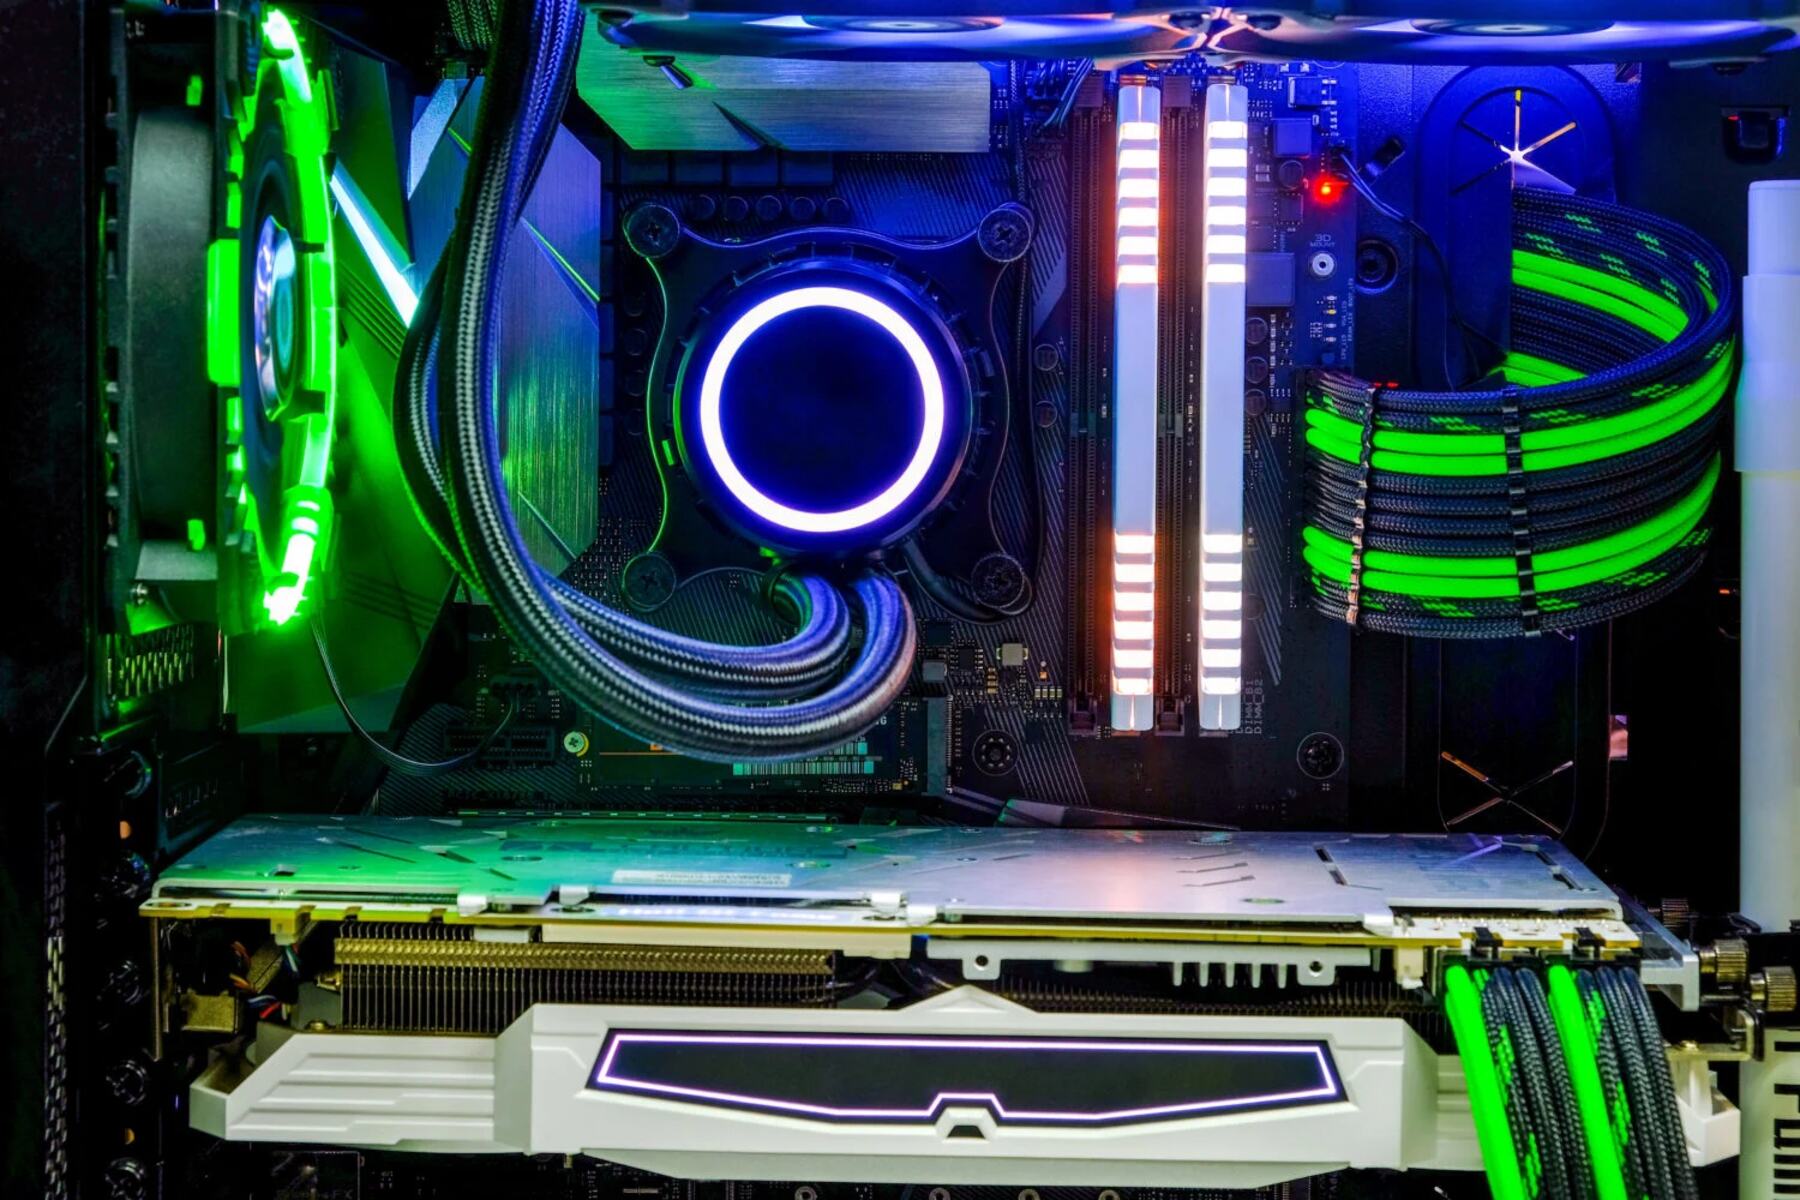
3. Cable Management: Colored PSU cables make cable management easier and more efficient. By using different colors for different components (such as motherboard, GPU, and peripherals), you can easily identify and route the cables, reducing clutter and improving airflow in your PC case.
4. Flexibility: DIY customization gives you the freedom to choose the exact length of your cables, ensuring a clean and tidy cable routing. Additionally, you can opt for cable extensions, which provide more flexibility in terms of cable placement and management.
5. Upgradability: Customized PSU cables are not only compatible with your current PC build but also allow for future upgrades. You can reuse the cables for different components or even when building a new system, saving both time and money in the long run.
6. Professional Look: Well-crafted and neatly organized colored cables can give your PC a professional and high-end look. It adds a touch of precision and attention to detail, elevating your setup to the next level.
7. Pride of Ownership: Lastly, customizing your PSU cables gives you a sense of pride and satisfaction. Building and perfecting a PC setup that reflects your personality and style brings a unique sense of fulfillment.
By customizing your PSU cables, you can achieve not only a visually stunning PC but also enjoy the practical benefits of better cable management and flexibility. So, let your creativity run wild and transform your computer setup into a work of art by customizing your PSU cables.
Tools and Materials Needed
Before you can start customizing your PSU cables, you will need a few tools and materials. Here is a list of what you’ll need to get started:
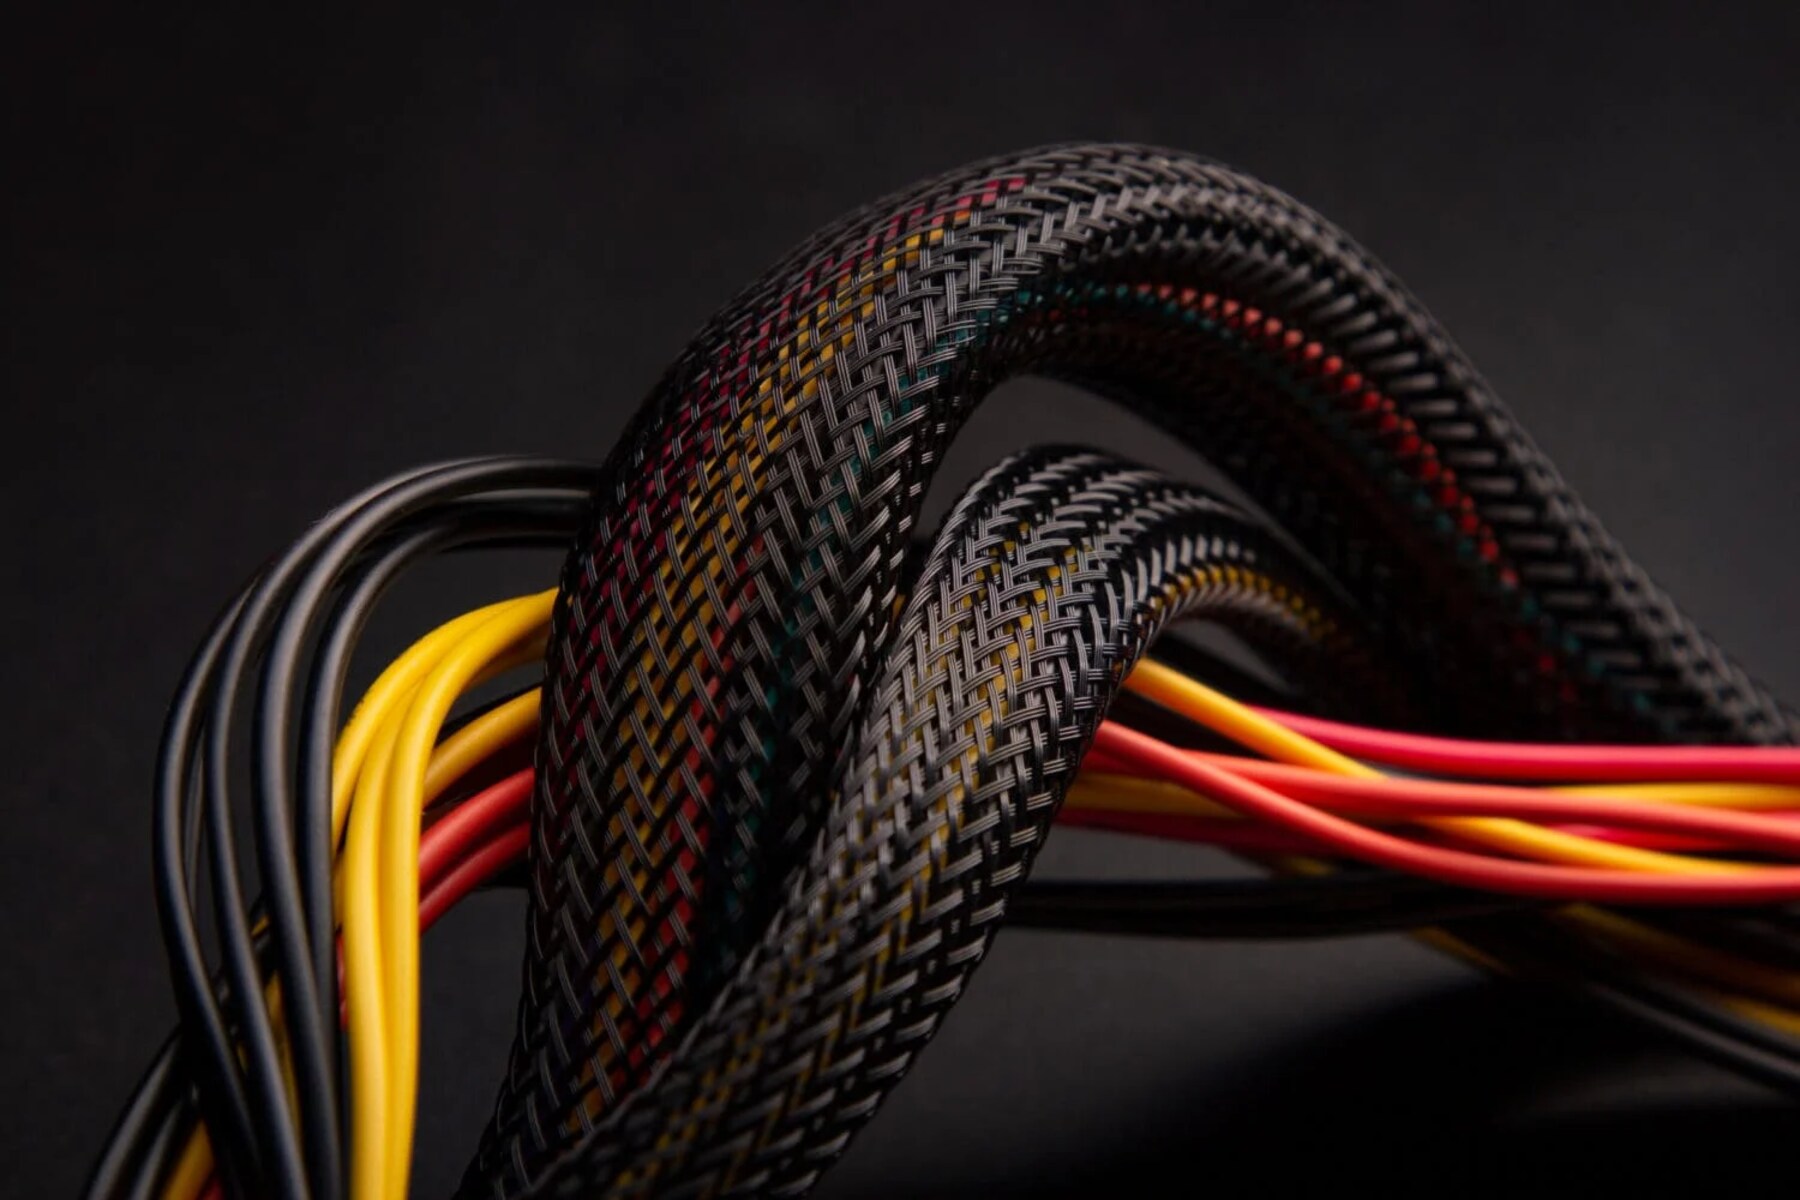
1. Heat Shrink Sleeves: Heat shrink sleeves are essential for adding color to your PSU cables. They are available in various sizes and colors to suit your preferences. Make sure to choose high-quality heat shrink sleeves that are durable and can withstand heat during the shrinking process.
2. Heat Gun or Hair Dryer: A heat gun or hair dryer is used to heat the shrink sleeves and secure them in place. A heat gun is more precise and efficient, but a hair dryer can also work if you don’t have a heat gun available.
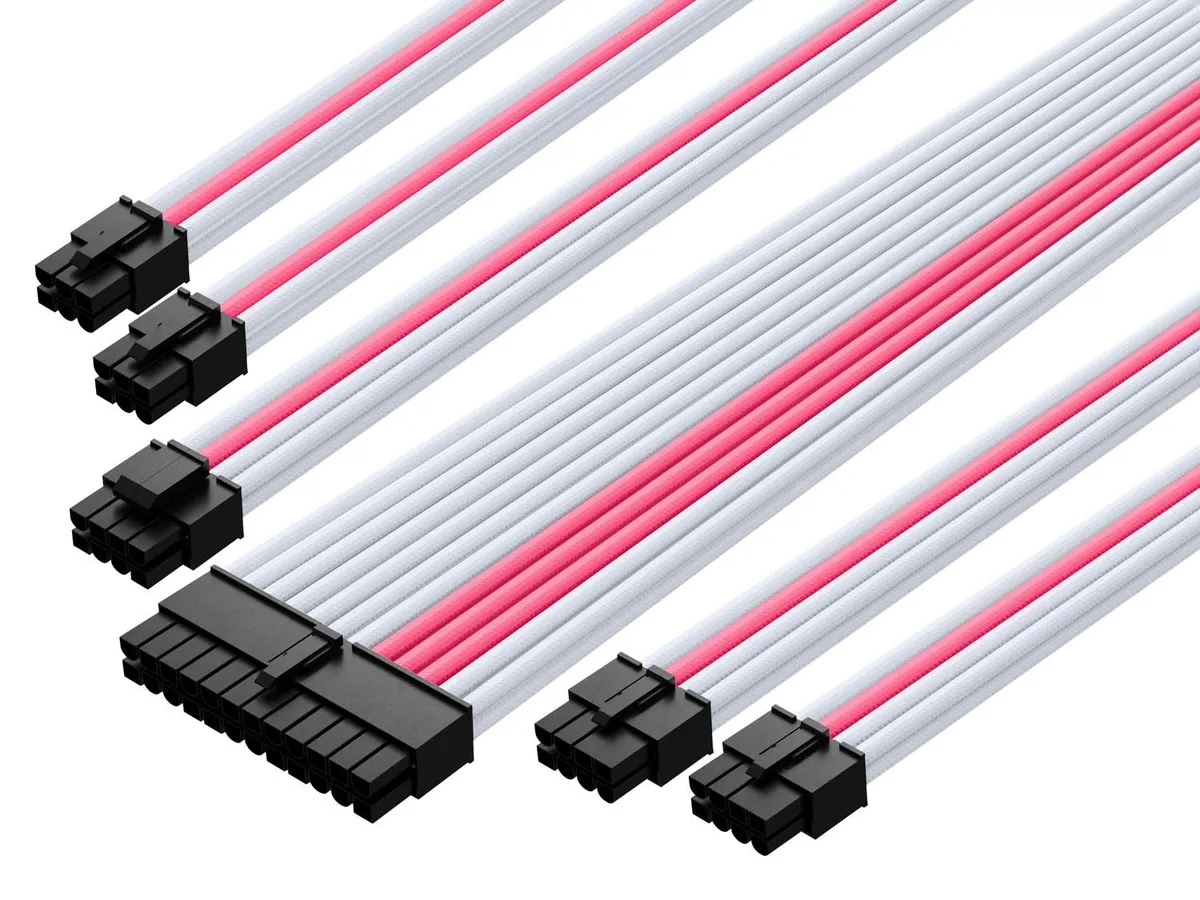
3. Cable Combs: Cable combs are used to organize and straighten the cables, giving them a clean and professional look. They come in different sizes to accommodate various cable thicknesses.
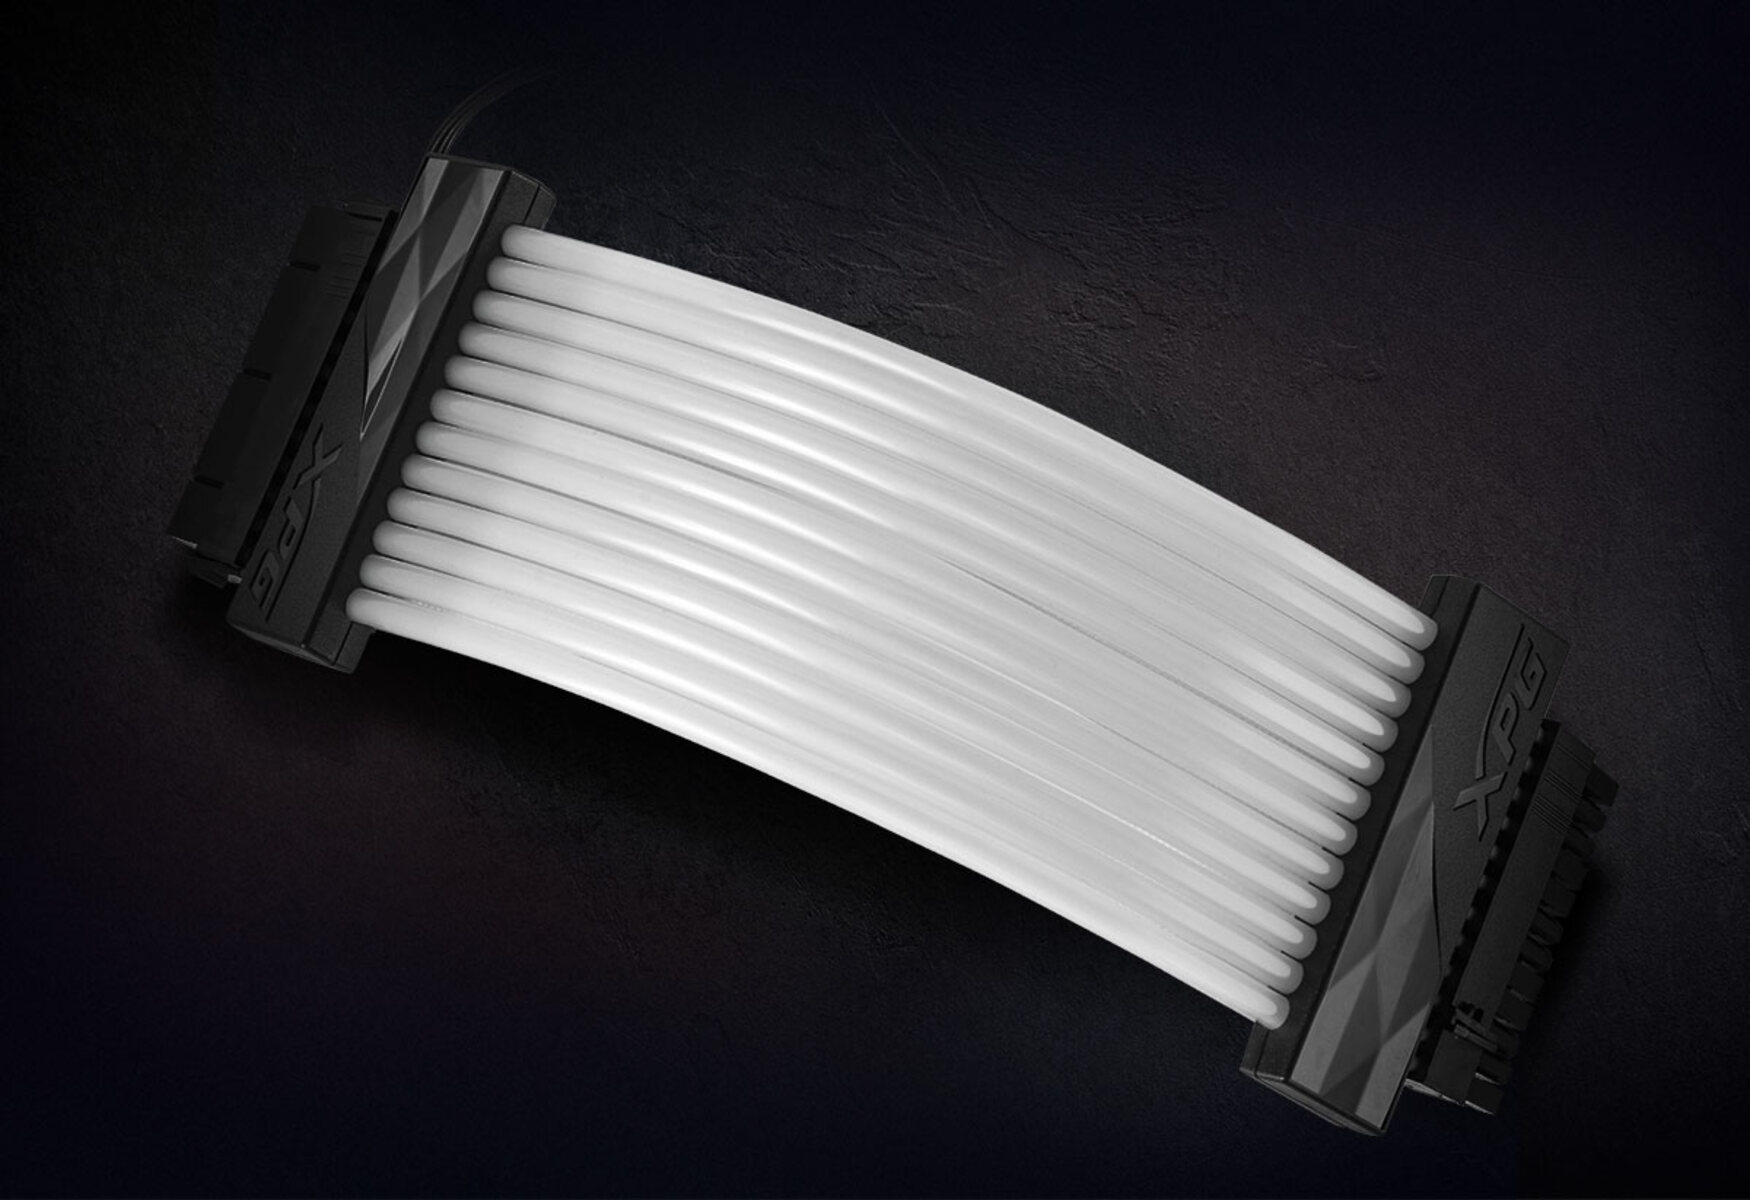
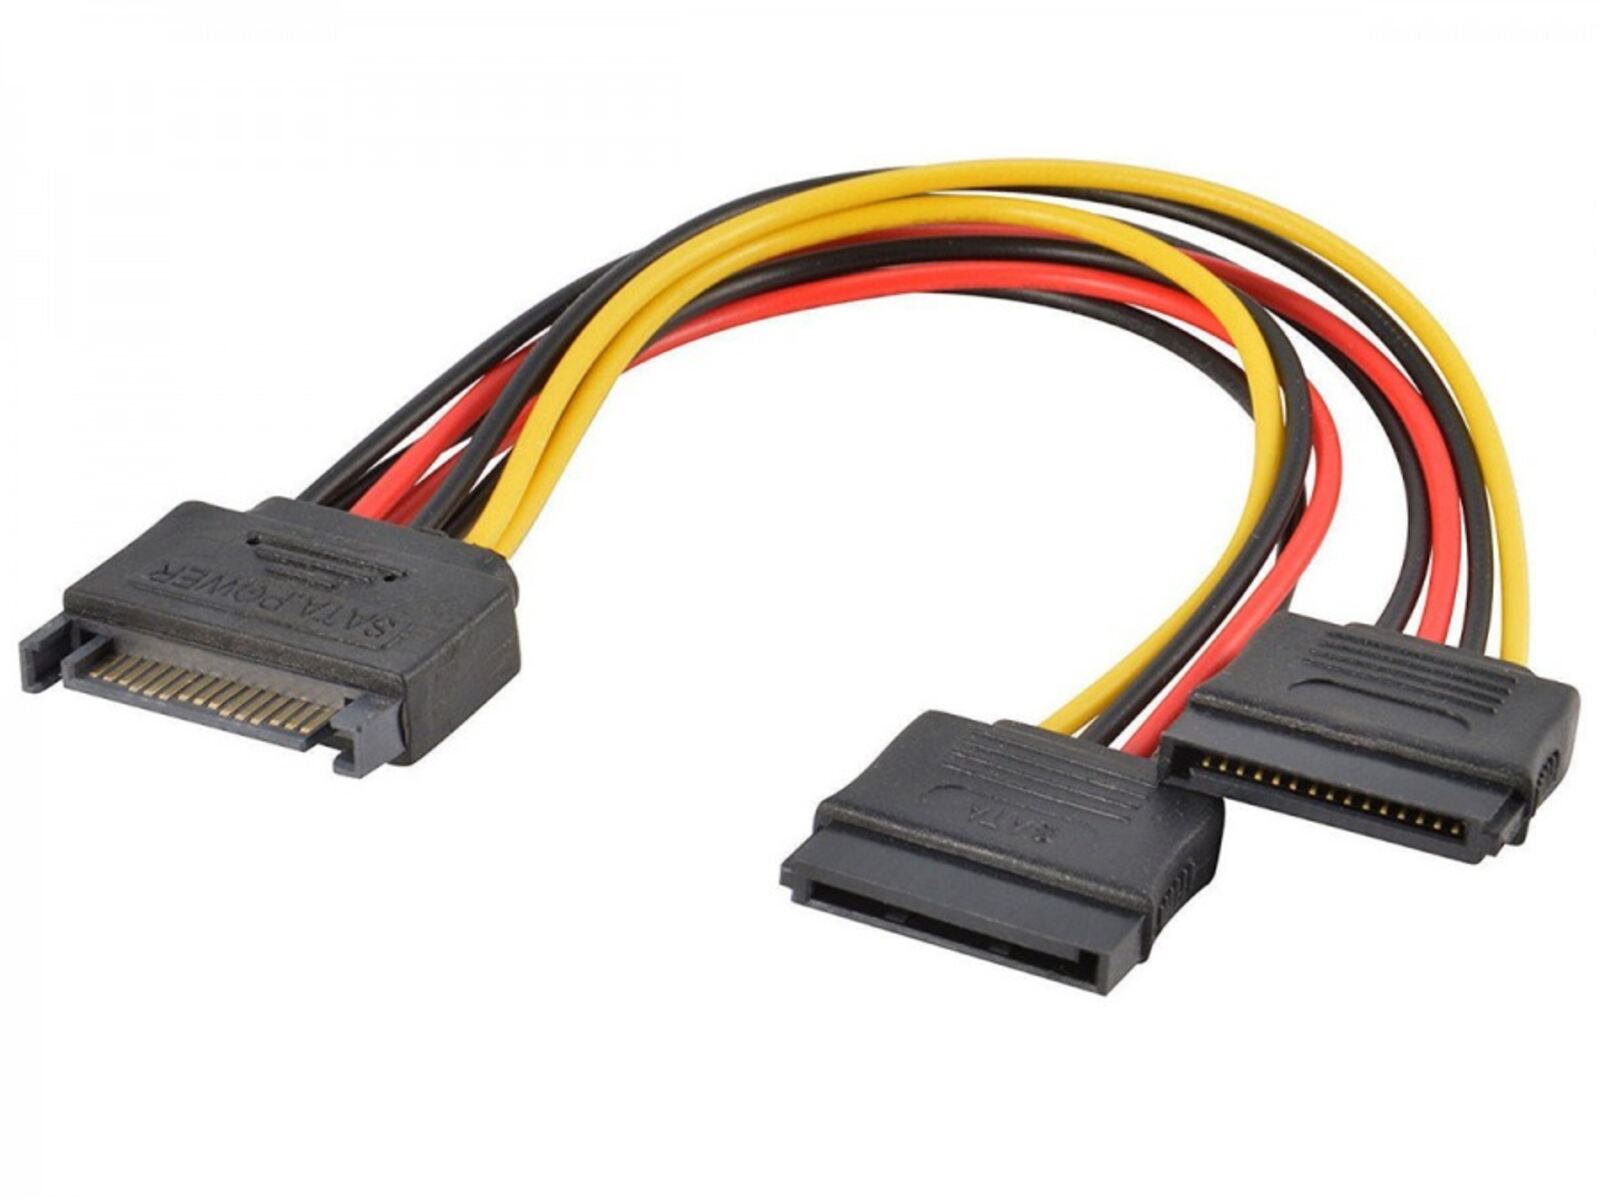
4. Cable Extensions (optional): Cable extensions are helpful if you need to extend the length of your cables or want to add additional colors. They are available in different lengths and colors, allowing you to customize your cables further.
5. Wire Cutter and Stripper: To prepare your cables for customization, you will need a wire cutter and stripper. These tools will help you remove the insulation from the cables, allowing you to apply the heat shrink sleeves easily.
6. Electrical Tape (optional): Electrical tape can be used to secure the heat shrink sleeves temporarily before applying heat. It helps ensure that the sleeves stay in place during the shrinking process.
7. Safety Equipment: It’s essential to prioritize your safety when working with cables and heat sources. Wear heat-resistant gloves to protect your hands and safety goggles to shield your eyes from any potential sparks or debris.
8. Thorough Instructions or Tutorials: It’s recommended to have thorough instructions or tutorials on hand to guide you through the customization process. This will ensure that you follow the correct steps and achieve the desired results.
9. Patience and Attention to Detail: Customizing PSU cables requires patience and attention to detail. Take your time to ensure that the sleeves are applied correctly, and the cables are neatly organized. Small details can make a big difference in the final aesthetics of your PC.
Having these tools and materials ready will set you up for success in customizing your PSU cables. Now that you have everything you need, let’s move on to preparing the cables for customization.
Preparing the Cables
Before applying the heat shrink sleeves and customizing your PSU cables, it’s important to prepare the cables properly. Here are the steps to follow:
1. Disconnect the Power: Ensure that your PC is completely powered off and unplugged from the electrical outlet. This will prevent any accidental damage or shocks during the customization process.
2. Identify and Arrange the Cables: Take a moment to identify the cables you’ll be customizing. This will depend on your specific setup and the cables you want to add color to. Arrange the cables in a way that makes them easily accessible for customization.
3. Measure and Cut Heat Shrink Sleeves: Carefully measure the length of each cable section you wish to customize. Cut the heat shrink sleeves into appropriate lengths, ensuring that they will cover the desired section fully. It’s always better to cut the sleeves slightly longer than needed to allow for any adjustments or mistakes.
4. Strip the Cable Ends: Take your wire cutter and stripper to remove the insulation from both ends of the cable section you’re working on. Ensure that you strip the appropriate length of insulation to give enough surface area for the heat shrink sleeve to adhere to.
5. Slide the Heat Shrink Sleeves: Slip the cut heat shrink sleeves onto the cable sections. Make sure the sleeves are positioned evenly and cover the intended area completely. If you are using different colors or multiple sleeves on one cable, arrange them accordingly.
6. Secure with Electrical Tape (optional): If you want to ensure that the heat shrink sleeves are held in place during the shrinking process, you can use electrical tape to temporarily secure them. Wrap the tape tightly around the ends of the sleeves, making sure it doesn’t obstruct the area to be heated.
7. Double Check and Adjust: Before proceeding to the next step, double-check that the sleeves are positioned correctly and tightly on the cable sections. Make any necessary adjustments to ensure a proper fit and alignment.
Once you have prepared your cables by measuring, cutting, and sliding on the heat shrink sleeves, you are ready to move on to the next step of customizing your PSU cables. Taking the time to properly prepare the cables will contribute to a cleaner and more professional-looking end result.
Choosing and Applying Heat Shrink Sleeves
The choice of heat shrink sleeves can greatly impact the overall aesthetics and durability of your customized PSU cables. Here are the key factors to consider when selecting and applying heat shrink sleeves:
1. Size and Color: Ensure that the diameter of the heat shrink sleeve matches the thickness of your cables. Using sleeves that are too large or too small can result in an uneven and sloppy appearance. Choose colors that complement your PC’s theme or create a striking contrast.
2. Material Quality: Opt for heat shrink sleeves made from high-quality materials that are heat-resistant and have good insulation properties. This will ensure that the sleeves provide long-lasting protection for your cables.
3. Shrinking Method: Determine if the heat shrink sleeves require a heat gun or can be shrunk using a hairdryer. Be mindful of the shrinking temperature and duration to avoid overheating and damaging the cables.
4. Shrink Ratio: The shrink ratio indicates how much the sleeve will shrink when heated. Choose a shrink ratio that will effectively wrap around the cable and provide a snug fit without being too tight or too loose.
5. Heat Application: To ensure a smooth and wrinkle-free appearance, evenly heat the shrink sleeves using a heat gun or hairdryer. Start from the center of the sleeve and move towards the ends, gradually shrinking the sleeve. Be cautious not to overheat the sleeves, as it can cause them to melt or deform.
6. Cooling and Inspection: Allow the cables to cool down completely before handling them. Once cooled, inspect the heat shrink sleeves for any gaps or imperfections. If needed, reapply heat or make adjustments as necessary.
7. Testing and Functionality: After applying the heat shrink sleeves, ensure that the cables are still functional and properly connected. Test the functionality of your PC to ensure that the customization process has not affected the performance or stability of your system.
Remember, patience and precision are key when applying heat shrink sleeves. Take your time to ensure a clean and professional finish. With the right choice of sleeves and careful application, you can achieve vibrant and neatly organized PSU cables that enhance the overall look of your PC.
Using Cable Combs
Cable combs are an essential tool for achieving a clean and organized look when customizing your PSU cables. They help to align and separate the individual cables, keeping them neatly organized and preventing them from tangling. Here’s how you can effectively use cable combs:
1. Choose the Right Size: Cable combs come in various sizes to accommodate different cable thicknesses. Select combs that match the diameter of your cables to ensure a snug fit and proper alignment.
2. Open and Insert the Cables: Start by opening the cable comb and gently inserting the cables into the teeth of the comb one at a time. Slide the cables through until they are positioned securely within the comb.
3. Align the Cables: Once the cables are inserted into the comb, align them in a straight and orderly manner. Use your fingers to ensure the cables are evenly spaced and positioned within the teeth of the comb.
4. Secure the Comb: Once the cables are aligned, gently close the cable comb, ensuring that it grasps the cables firmly. The teeth of the comb should hold the cables securely in place, preventing them from shifting or becoming tangled.
5. Repeat the Process: Depending on the number of cables you’re working with, repeat the above steps with additional cable combs as needed. Be mindful of maintaining a neat and uniform appearance with consistent spacing between the combs and cables.
6. Check for Tension: After securing the cable combs, check for any excessive tension or strain on the cables. Ensure that the cables are not being pulled too tightly or at awkward angles that could lead to damage or performance issues.
7. Make Adjustments: If you notice any cables that are not properly aligned or positioned within the combs, make the necessary adjustments. This could involve reinserting the cables into the comb or rearranging the combs themselves to achieve the desired alignment.
8. Final Inspection: Once all the cables are organized using cable combs, take a step back and inspect the overall appearance. Ensure that the cables are neatly aligned, spaced evenly, and that the combs are securely holding them in place.
By using cable combs, you can achieve a professional and streamlined look for your customized PSU cables. Not only do they enhance the aesthetics of your PC, but they also contribute to better cable management and improved airflow within your system.
Attaching Cable Extensions
Attaching cable extensions is a great way to add flexibility and customization to your PSU cables. Whether you need to extend the length of your cables or want to incorporate additional colors, cable extensions offer a convenient solution. Follow these steps to attach cable extensions effectively:
1. Identify the Cables: Determine which cables you want to extend or customize further. This could include cables such as the 24-pin ATX motherboard cable, GPU cables, or peripheral cables.
2. Choose the Right Extensions: Select cable extensions that match the type of cables you’re extending. Ensure that the connectors on the extensions are compatible with your existing PSU cables and components (e.g., 8-pin PCI-e connectors for GPU cables).
3. Disconnect and Remove the Cables: Before attaching the extensions, make sure to power off your PC and unplug it from the electrical outlet. Disconnect the cables you want to extend from the PSU and the components they are connected to.
4. Connect the Extensions: Attach the cable extensions to the corresponding cables. Align the connectors and gently push them together until they click into place. Ensure a secure and tight connection to avoid any looseness or interruptions in power delivery.
5. Secure the Extensions: Use cable combs, cable ties, or other cable management tools to secure the extensions along with the original cables. This will help maintain a clean and organized appearance while minimizing cable clutter.
6. Cable Routing: Carefully route the extended cables to their respective destinations, ensuring they are neatly arranged and not obstructing any airflow or components. Use cable clips or cable management channels within your PC case to guide and secure the cables in place.
7. Test and Verify: Once you have attached the cable extensions and properly routed them, verify that all the connections are secure. Power on your PC and test the functionality of your components to ensure that the extended cables are working properly.
8. Final Adjustments: Take a final look at the cable extensions and make any necessary adjustments to enhance their appearance and ensure they are properly aligned. Pay attention to the overall cable management within your PC case to maintain an organized and clutter-free environment.
Adding cable extensions allows you to achieve the desired length and color customization for your PSU cables. It provides additional flexibility in cable management and allows for future upgrades or changes without replacing the entire cable set.
Installation and Safety Tips
When customizing your PSU cables, it’s essential to prioritize safety and ensure proper installation. Follow these tips to ensure a successful customization process:
1. Power Off and Disconnect: Before starting any work on your PSU or cables, power off your PC and disconnect it from the electrical outlet. This reduces the risk of electric shock and protects you from accidental contact with live wires.
2. Use Proper Tools: Utilize the appropriate tools for the customization process, such as wire cutters, heat guns, or hair dryers. Using the correct tools helps you work safely and effectively.
3. Wear Protective Gear: Protect yourself by wearing heat-resistant gloves and safety goggles. This safeguards your hands and eyes from potential burns, sparks, or debris that may occur during the customization process.
4. Follow Manufacturer’s Instructions: Read and follow the instructions provided with the heat shrink sleeves, cable combs, and any other accessories you are using. This ensures that you are utilizing them correctly and in a way that optimizes safety.
5. Deal with Heat Shrink Sleeves Cautiously: When using a heat gun or hair dryer to shrink the sleeves, exercise caution. Avoid heating the sleeves for too long or getting too close to the cables to prevent overheating or damaging them.
6. Double-Check Connections: Before powering on your PC, double-check all cable connections to ensure they are secure and properly seated. This prevents any loose connections, which can lead to malfunctions or electrical hazards.
7. Ensure Proper Cable Management: Take time to route and manage your cables properly within your PC case. This includes using cable combs, clips, or ties to organize and secure the cables, preventing them from interfering with other components or blocking airflow.
8. Maintain Good Airflow: Proper cable management helps maintain good airflow within your PC case, which is crucial for keeping components cool. Ensure that the cables do not obstruct any fans, vents, or heatsinks, as this can lead to overheating issues.
9. Regularly Inspect and Maintain: After customizing your PSU cables, periodically inspect them to ensure they remain in good condition. Check for any signs of wear, damage, or loose connections. Proper maintenance helps ensure the longevity and performance of your cables.
10. Consult Professionals if Needed: If you are unsure about any aspect of the customization process or encounter any difficulties, seek guidance from professionals or experienced individuals. It’s better to get assistance to ensure safety and optimal results.
By following these installation and safety tips, you can confidently customize your PSU cables while prioritizing your well-being and the functionality of your PC setup. Take your time, be cautious, and enjoy the process of creating a personalized and visually appealing computer setup.
Conclusion
Customizing your PSU cables is a fantastic way to elevate the aesthetics of your PC and create a personalized setup that reflects your style and preferences. By adding color, organizing cables with cable combs, and incorporating cable extensions, you can achieve a clean and visually appealing look that enhances both the appearance and functionality of your computer.
Throughout this guide, we have explored the various steps involved in customizing PSU cables, from preparing the cables and choosing heat shrink sleeves to using cable combs and attaching cable extensions. We have emphasized the importance of safety precautions and the use of proper tools to ensure a successful customization process.
Incorporating colored PSU cables not only enhances the overall look of your PC but also offers the additional benefits of improved cable management and flexibility. By using cable combs, you can organize cables neatly, allowing for better airflow and a cleaner interior. Cable extensions provide the flexibility to customize cable lengths and incorporate additional colors to match your desired theme.
Remember to prioritize safety throughout the customization process. Power off your PC, disconnect it from the electrical outlet, and use appropriate protective gear like heat-resistant gloves and safety goggles. Following manufacturer instructions and regularly inspecting and maintaining your cables are crucial for their longevity and performance.
Now that you have gained insights into the art of customizing PSU cables, get ready to unleash your creativity and embark on a journey of transforming your computer setup into a masterpiece. Enjoy the process, experiment with different colors and techniques, and let your unique style shine through in every aspect of your customized PSU cables.