Introduction
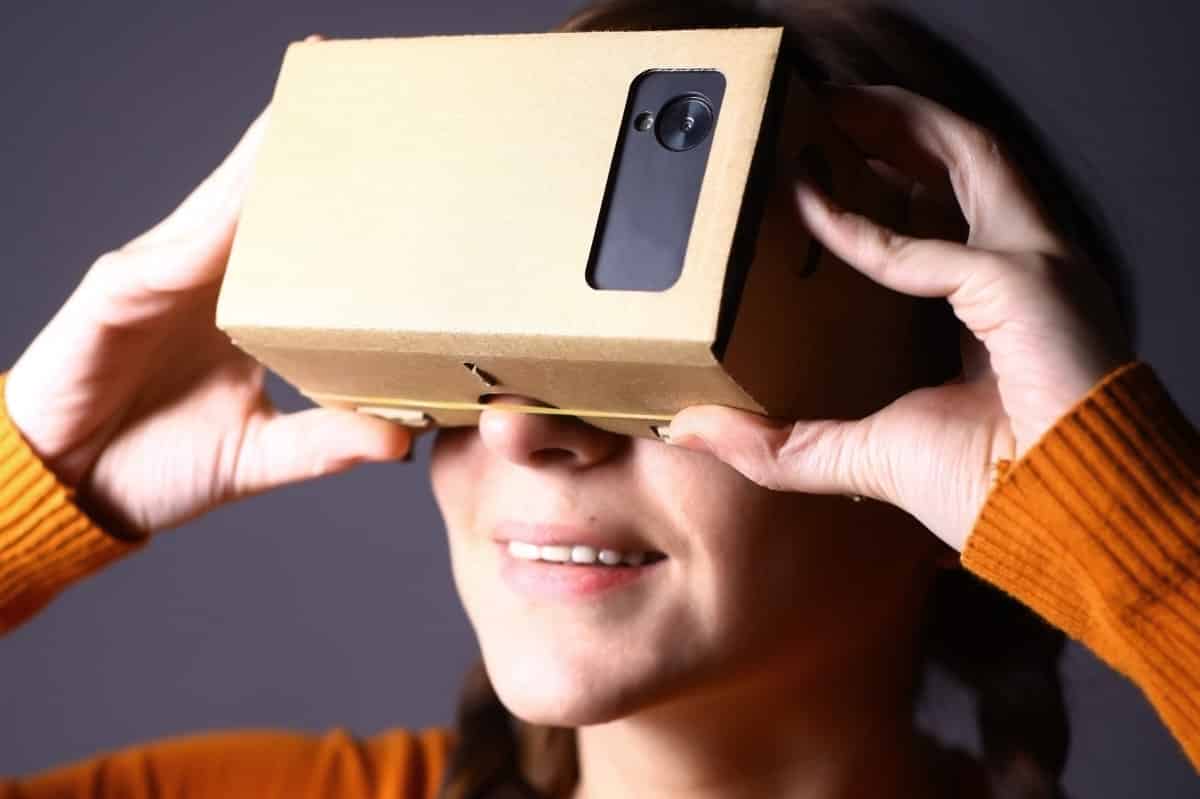
Welcome to the world of virtual reality! Imagine being able to step into a three-dimensional world where you can explore distant lands, interact with objects, and even play games – all from the comfort of your own home. Virtual reality (VR) technology has gained immense popularity in recent years, providing an immersive and captivating experience like never before. While there are commercially available VR headsets on the market, they can often come with a hefty price tag.
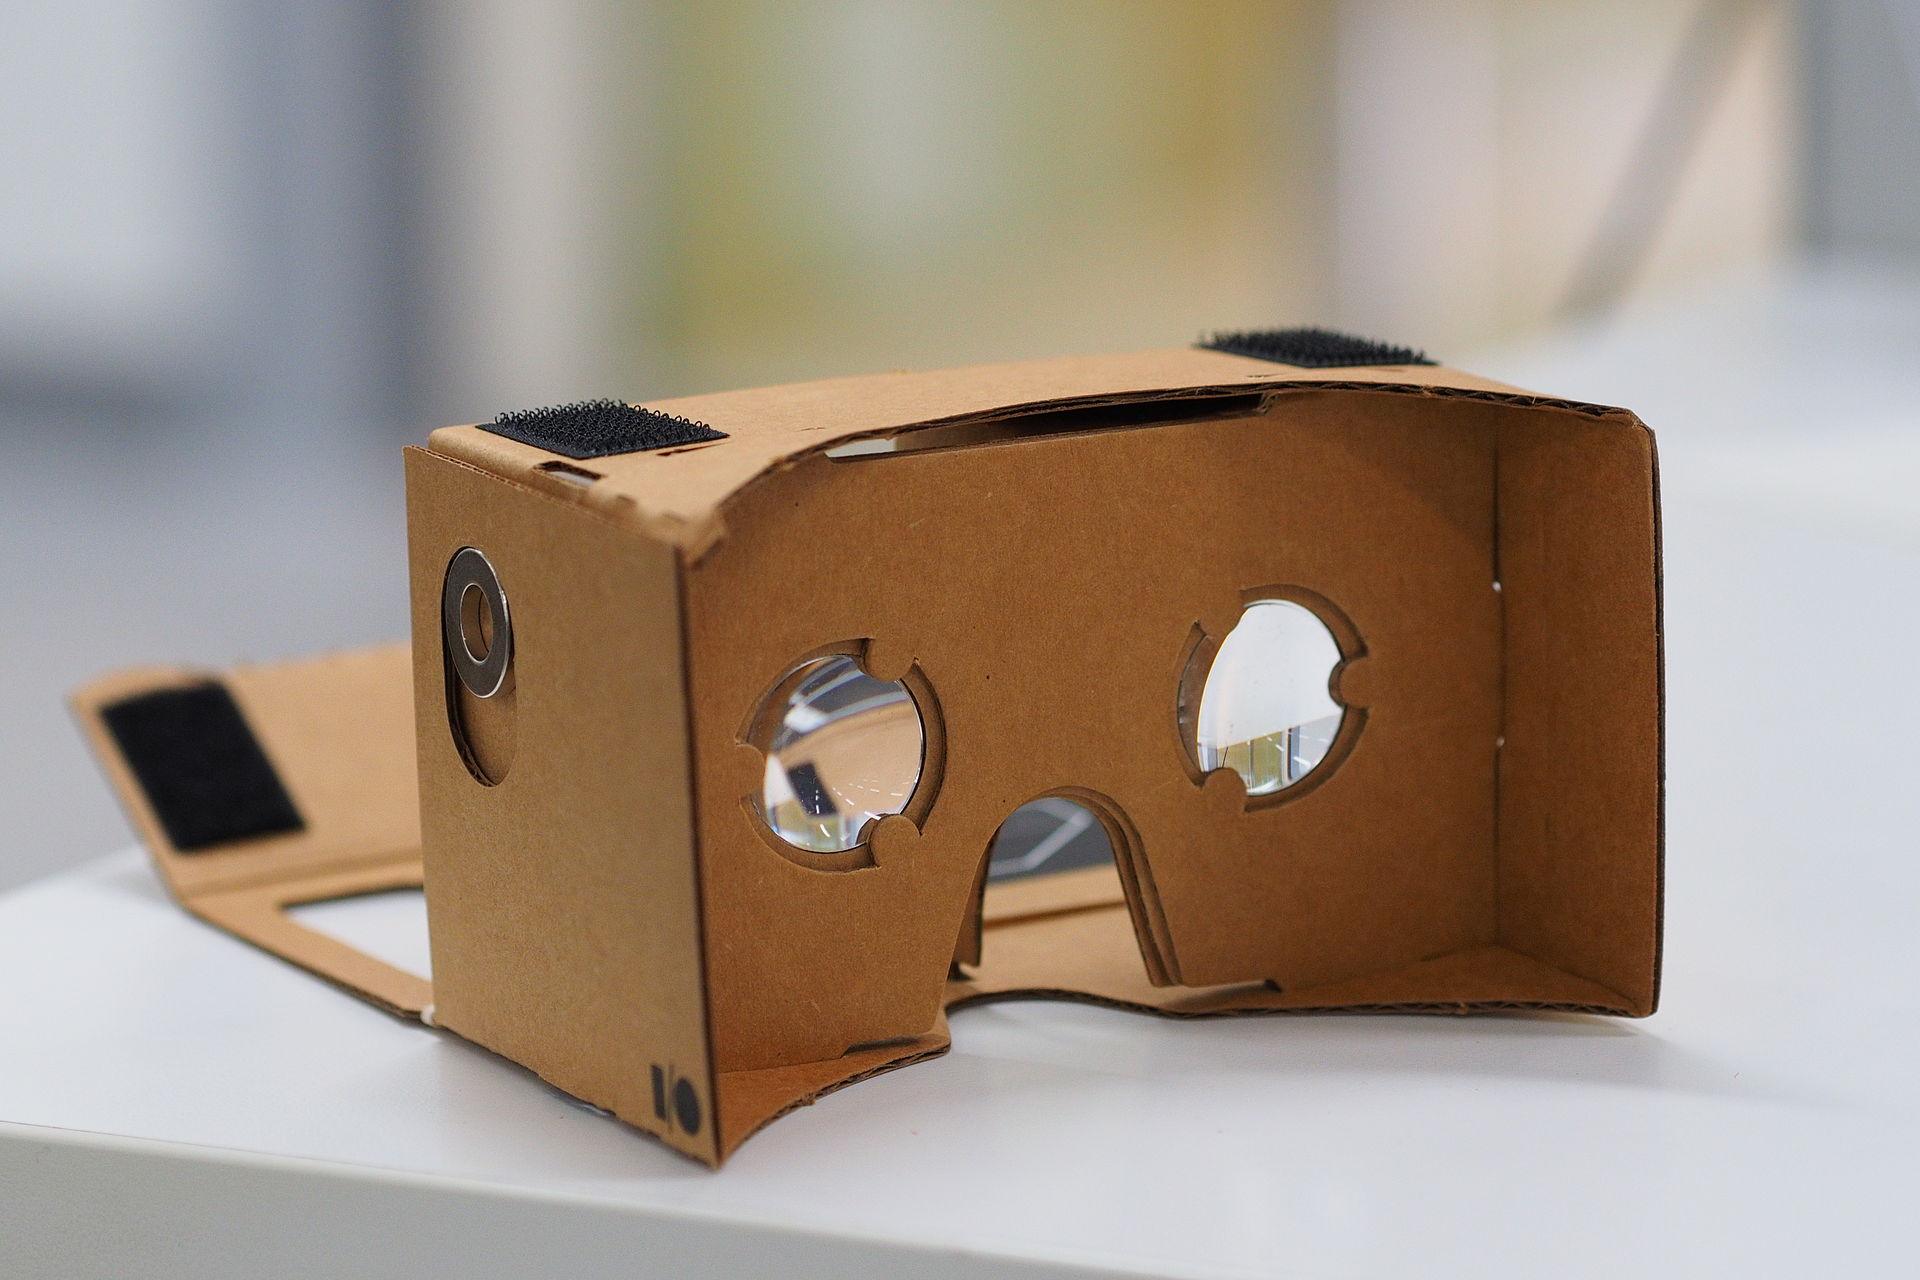
But fear not, because there’s a cost-effective solution that you can easily make at home – virtual reality cardboard. This do-it-yourself (DIY) project allows you to create your own VR headset using simple materials and a smartphone. With virtual reality cardboard, you can enjoy the wonders of VR without breaking the bank.
In this guide, we will take you through the step-by-step process of creating your very own virtual reality cardboard. Whether you’re a tech enthusiast or a casual gamer, making your own VR headset can be a fun and rewarding project. Not only will you have a blast building it, but you’ll also have a fully functional VR headset that you can enjoy for hours on end.
So, grab your tools and let’s dive into the exciting world of virtual reality as we show you how to make your own virtual reality cardboard!
Why Make Your Own Virtual Reality Cardboard?
As mentioned earlier, virtual reality headsets can be quite expensive. By making your own virtual reality cardboard, you can save a significant amount of money while still experiencing all the benefits of virtual reality.
Here are a few reasons why you should consider making your own VR cardboard:
- Affordability: Commercial VR headsets can cost hundreds of dollars, making them unaffordable for many people. Making your own virtual reality cardboard is a cost-effective alternative that allows you to enjoy the immersive VR experience without breaking the bank.
- Customization: When you make your own VR cardboard, you have the freedom to customize it according to your preferences. You can choose the color, design, and even add your own personal touch to make it truly unique.
- Education and Learning: Virtual reality provides an excellent tool for education and learning. By making your own VR cardboard, you can explore educational content, visit historical landmarks, or even take virtual field trips – all from the comfort of your own home.
- Engaging Experiences: Virtual reality offers incredible opportunities for entertainment and gaming. Making your own VR cardboard allows you to immerse yourself in thrilling games, exciting simulations, and captivating virtual experiences.
- Expand Your Creativity: Building your own virtual reality cardboard is an exciting DIY project that can unleash your creativity. It provides a hands-on experience for constructing something useful and innovative.
With these compelling reasons in mind, making your own virtual reality cardboard opens up a world of possibilities. It allows you to enjoy virtual reality experiences without the high cost, while also offering the freedom to personalize and explore various educational and entertainment opportunities. So, why spend a fortune on a commercial VR headset when you can create your own and embark on an immersive journey into virtual reality?
What You’ll Need
Before you embark on creating your virtual reality cardboard, it’s important to gather all the necessary materials. Don’t worry, you won’t need any fancy or hard-to-find items – most of them can be easily sourced from your local craft store or even found at home. Here’s a list of the essential materials you’ll need:
- Cardboard: Look for a sturdy piece of cardboard that is at least 2mm thick. It should be large enough to create the main structure of your VR cardboard.
- Lenses: The lenses are a crucial component of the VR headset. You can purchase lenses specifically designed for virtual reality or repurpose lenses from old binoculars or magnifying glasses.
- Velcro or Elastic Straps: These will be used to secure your VR cardboard to your head. Velcro works well for adjustable straps, while elastic bands provide a snug fit.
- Scissors: You’ll need a pair of sharp scissors to cut the cardboard and trim any excess material.
- Marker or Pencil: Use a marker or pencil to mark the areas where you need to cut or fold the cardboard.
- Duct Tape: Duct tape is great for reinforcing the structure and holding the cardboard pieces together.
- Sponge or Foam: This will be used as padding to provide comfort while wearing the VR headset.
- A Smartphone: Virtual reality experiences are powered by a smartphone. Make sure you have a compatible smartphone with a gyroscope, as it will be responsible for tracking your head movements.
Once you have gathered these materials, you’re ready to begin creating your virtual reality cardboard. It’s always helpful to have a clean and well-lit workspace, a ruler for precise measurements, and some patience as you go through the process. With these essentials in hand, you’ll be well-prepared to bring your DIY VR headset to life!
Step 1: Gathering the Materials
The first step in creating your virtual reality cardboard is to gather all the necessary materials. Here’s a breakdown of what you’ll need and how to gather them:
- Cardboard: Look for a piece of durable cardboard that is at least 2mm thick. You can find cardboard at your local craft store or repurpose sturdy boxes. Ensure that it is large enough to create the necessary pieces for your VR headset.
- Lenses: The lenses are a crucial component of your virtual reality experience. You can purchase VR lenses from specialty stores or online retailers. Alternatively, you can repurpose lenses from old binoculars or magnifying glasses. Opt for lenses with a focal length between 40-50mm for optimal viewing.
- Velcro or Elastic Straps: You’ll need straps to secure the VR cardboard to your head. Velcro strips offer adjustability, while elastic bands provide a snug fit. You can find these at craft stores or repurpose old straps from backpacks or belts.
- Scissors: Prepare a pair of sharp scissors to cut the cardboard to the desired size and shape. Ensure that they are clean and ready for precise cuts.
- Marker or Pencil: Use a marker or pencil to mark the areas where you need to cut or fold the cardboard. This will help you achieve accurate measurements and alignments.
- Duct Tape: Duct tape will be used to reinforce the structure and hold the cardboard pieces together. Choose a strong and durable tape to ensure longevity.
- Sponge or Foam: To enhance comfort, you can add padding to the VR headset. Cut a small piece of sponge or foam and make sure it fits snugly inside the headset to provide cushioning.
- A Smartphone: Your smartphone will power the virtual reality experience. Make sure you have a compatible smartphone with a gyroscope, as it will be responsible for tracking your head movements.
By gathering these materials, you’re taking the first step towards creating your own virtual reality cardboard. Ensure that you have all the necessary items before proceeding to the next step. With everything ready, you’re one step closer to immersing yourself in virtual reality!
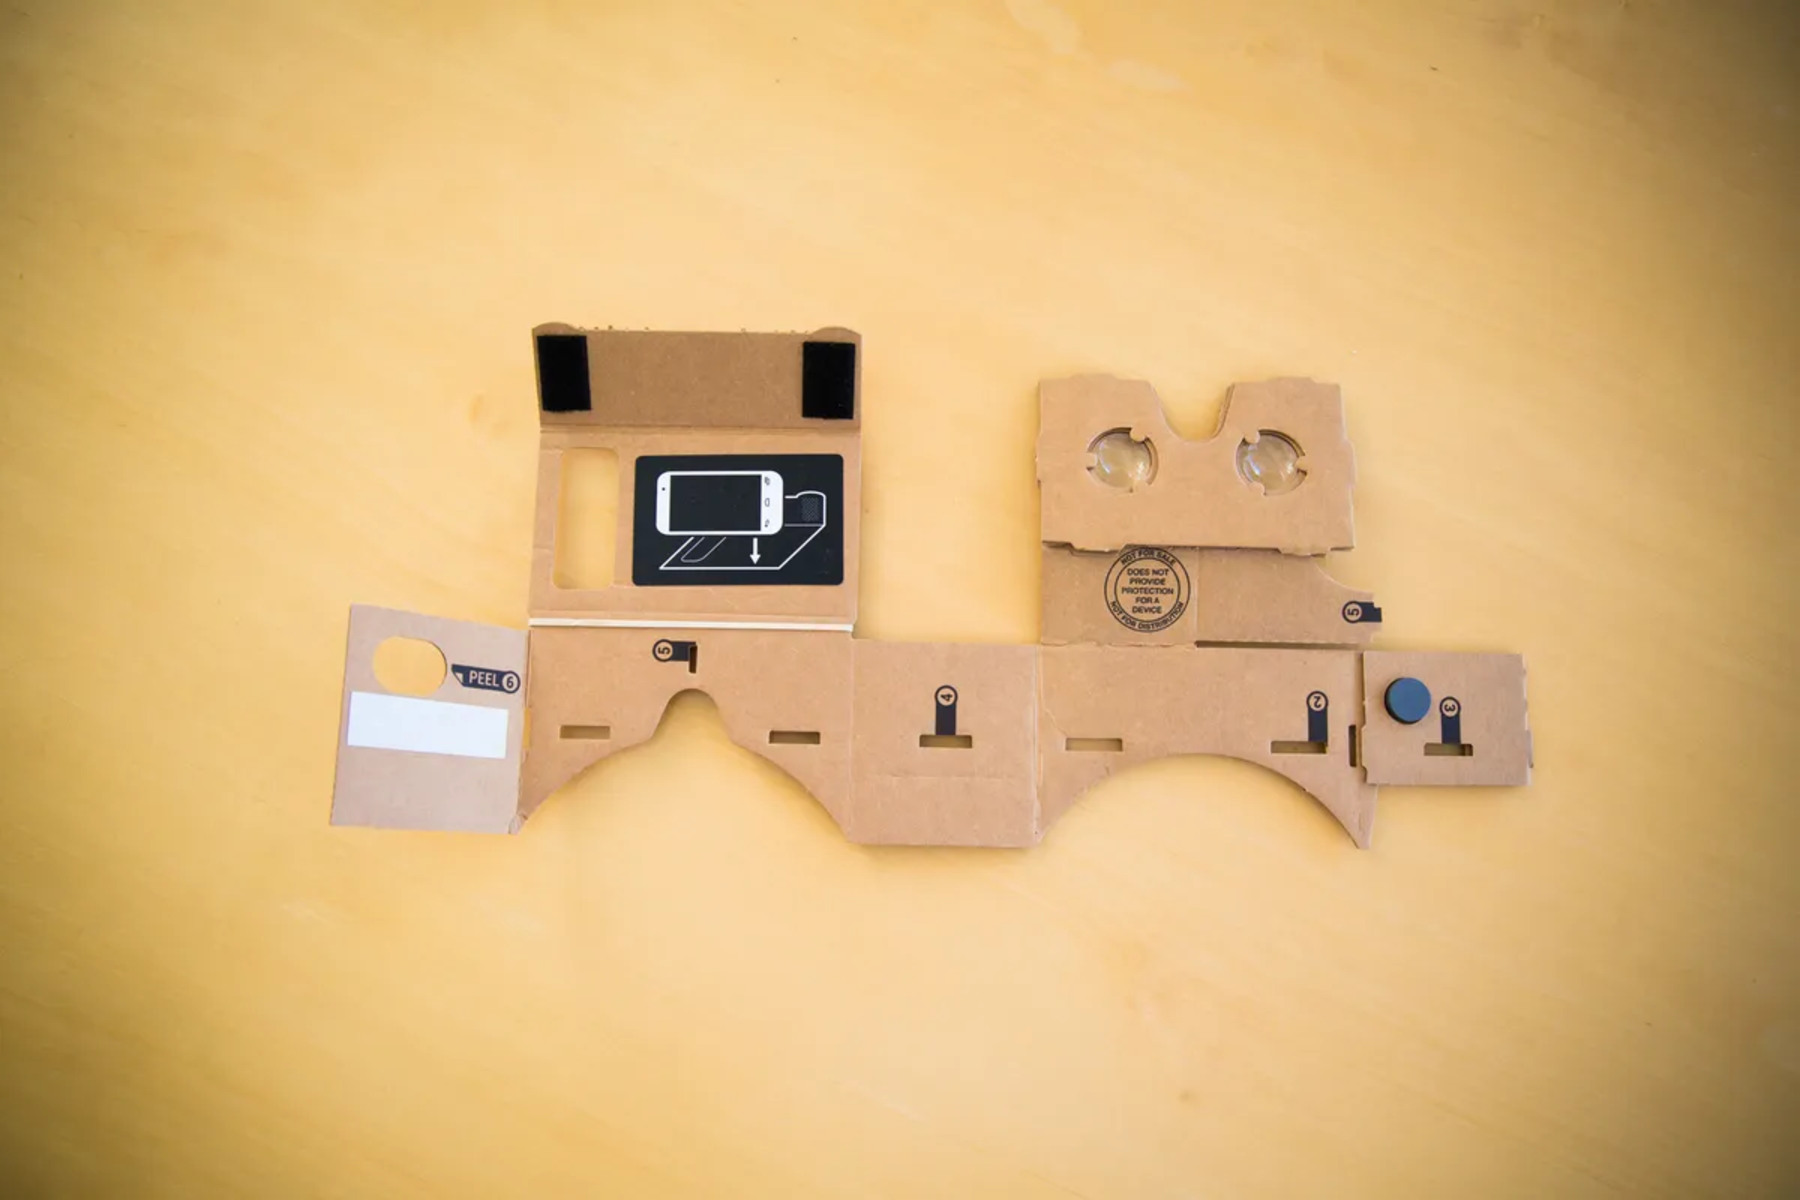
Step 2: Designing the Template
Now that you have gathered all the materials, it’s time to design the template for your virtual reality cardboard. The template will serve as the blueprint for cutting and assembling the cardboard pieces. Follow these steps to create your template:
- Measurements: Start by measuring the dimensions of your smartphone. You’ll need to create a slot in the cardboard to hold the phone securely. Measure the width, height, and thickness of your phone and use these measurements as a reference for designing the template.
- Main Structure: Draw the main structure of your VR cardboard on a piece of cardboard. This will typically include the front piece, side pieces, and top piece. The front piece should be slightly larger than the dimensions of your smartphone to allow for a comfortable fit.
- Eye Holes: Mark the positions for the eye holes on the front piece. These holes will align with your eyes when wearing the VR headset. Ensure that they are evenly spaced and at a comfortable distance from each other.
- Button Cutout: If your smartphone has a side or top button that you’ll need to access while using the VR headset, mark a cutout on the side or top piece of the template. This will allow easy access to the button without removing the phone from the headset.
- Strap Attachments: Determine the positions for attaching the straps to the cardboard. Mark these areas on the side or top pieces of the template. Ensure that they are secure and aligned with the position of your head when wearing the VR headset.
- Cutouts: Consider any additional cutouts you may need, such as ports for headphones or charging cables. Mark these on the template to ensure easy accessibility while using the VR headset.
It’s important to take accurate measurements and ensure that all the markings are clear on the template. This will help in cutting and assembling the cardboard pieces correctly in the subsequent steps. Take your time during this stage to ensure a well-designed template for your VR cardboard.
Step 3: Cutting and Folding the Cardboard
With the template designed, it’s time to move on to cutting and folding the cardboard pieces for your virtual reality cardboard. Follow these steps to transform the template into a functional VR headset:
- Transfer the Template: Place the template on the cardboard and use a marker or pencil to trace around the outlines of each piece. Ensure that you transfer all the necessary markings, including the eye holes, strap attachments, and any additional cutouts.
- Cut Out the Pieces: Carefully cut along the traced lines using a pair of sharp scissors. Take your time and make precise cuts to ensure neat and accurate pieces. Remember to cut out the eye holes and any required cutouts for buttons or ports.
- Fold the Pieces: Use the markings on the template as a guide to fold the cardboard pieces into their designated shapes. Gently score along the fold lines with a blunt edge, such as the back of a knife, to create clean and crisp folds. Fold the front piece, side pieces, and top piece according to the design.
- Secure with Duct Tape: To reinforce the structure and hold the cardboard pieces together, use duct tape along the edges and seams. Apply strips of tape on both the outer and inner sides of the cardboard, ensuring a strong bond between the pieces.
- Add Padding: If desired, cut a small piece of sponge or foam to fit inside the front piece of the cardboard. This will provide extra comfort while wearing the VR headset. Attach the padding using adhesive or double-sided tape.
Take your time during the cutting and folding process to ensure accuracy and precision. The final product should resemble a functional VR headset, with the front piece housing the smartphone and the side and top pieces forming the structure for holding the cardboard to your head.
Once you’ve completed this step, you’re ready to move on to the exciting task of assembling your virtual reality cardboard!
Step 4: Assembling the Pieces
Now that you have cut and folded the cardboard pieces, it’s time to assemble them to create your virtual reality cardboard. Follow these steps to put the pieces together:
- Align the Pieces: Start by aligning the side pieces with the front piece of the cardboard. Ensure that they fit snugly and are aligned correctly with the eye holes.
- Secure with Duct Tape: Use duct tape to securely attach the side pieces to the front piece. Apply tape along the seams and edges, both on the outside and inside of the cardboard. This will provide stability and ensure that the pieces stay in place during use.
- Attach the Top Piece: Position the top piece of the cardboard on the assembled front and side pieces. Make sure it fits securely and aligns with the strap attachments. Use duct tape to fasten the top piece to the rest of the structure.
- Reinforce with Duct Tape: Apply additional strips of duct tape along the seams and edges of the assembled pieces. This will further strengthen the structure and prevent any potential weak points.
During the assembly process, make sure that the pieces are aligned properly and securely attached. The final product should resemble a basic VR headset, with the side and top pieces providing support and the front piece serving as the frame for holding the smartphone.
Once you’ve completed this step, your virtual reality cardboard is almost ready for use. The next step involves adding lenses to enhance your VR experience. Get ready to take the excitement up a notch!
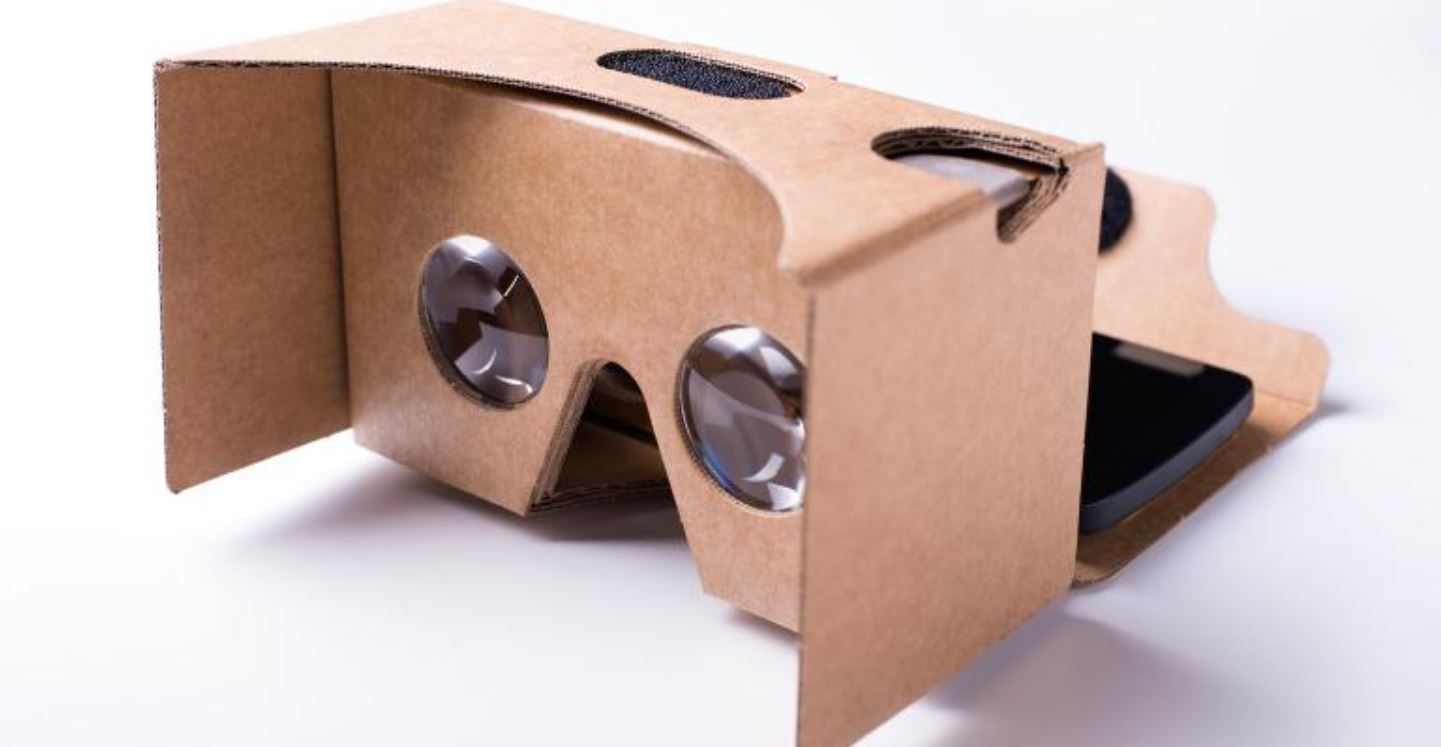
Step 5: Adding Lenses
Now that you’ve assembled the main structure of your virtual reality cardboard, it’s time to add lenses to enhance your VR viewing experience. The lenses will allow you to focus and magnify the virtual content displayed on your smartphone. Follow these steps to add the lenses to your VR cardboard:
- Prepare the Lens Cutouts: Using the measurements and guidelines from your template, mark the positions where the lenses will be placed on the front piece of the cardboard. Ensure that the cutouts align with your eyes when wearing the VR headset.
- Cut the Lens Holes: Carefully cut out the marked lens holes using a pair of sharp scissors or a craft knife. Take your time to make clean and precise cuts, as the size and shape of the cutouts should match the dimensions of your lenses.
- Insert the Lenses: Place the lenses into the cutout holes, ensuring that they fit securely and are positioned correctly. The lenses should be centered and sit at a distance that provides a comfortable viewing experience when wearing the VR headset.
- Secure the Lenses: Use adhesive or craft glue to secure the lenses in place. Apply the adhesive around the edges of the lenses, ensuring that they are firmly attached to the cardboard. Be careful not to get any adhesive on the lens surface, as it could affect the clarity of your VR experience.
Adding lenses to your virtual reality cardboard is a crucial step in creating a fully functional VR headset. The lenses will allow you to focus and immerse yourself in the virtual content displayed on your smartphone. Take care to align and secure the lenses properly, ensuring optimal visual quality.
With the lenses securely in place, your virtual reality cardboard is now almost complete. The final step involves fine-tuning and customizing your VR headset to make it comfortable and suited to your unique preferences.
Step 6: Fine-tuning and Customization
With your virtual reality cardboard almost complete, it’s time to fine-tune and customize it to ensure optimal comfort and a personalized experience. Follow these steps to make the necessary adjustments:
- Trim Excess Cardboard: Take a moment to check if there are any excess cardboard pieces or rough edges that need trimming. Use a pair of scissors or a craft knife to remove any unnecessary or protruding parts, making the VR headset smooth and streamlined.
- Adjust Strap Length: If you’re using elastic straps, adjust their length to ensure a snug but comfortable fit on your head. Trim any excess length and secure the straps to the designated strap attachments on the cardboard using adhesive or strong tape.
- Customize the Exterior: Get creative and customize the exterior of your VR cardboard. You can paint the cardboard, add decorations, or even use colored duct tape to give it a unique and personalized look.
- Add Comfort Enhancements: Consider adding additional padding or cushioning to increase comfort during prolonged use. You can use foam, fabric, or even soft adhesive pads to provide extra cushioning around the areas that come in contact with your face.
- Test and Adjust: Before using your virtual reality cardboard extensively, test it out by inserting your smartphone and wearing the headset. Make any necessary adjustments to the lens position, strap fit, or padding to ensure maximum comfort and optimal viewing experience.
By fine-tuning and customizing your virtual reality cardboard, you can tailor it to suit your preferences and enhance your overall VR experience. Take the time to make these adjustments so that you can fully enjoy the immersive world of virtual reality.
Once you’re satisfied with the final adjustments, it’s time to put on your DIY virtual reality cardboard and delve into a world of captivating virtual experiences!
Conclusion
Congratulations! You have successfully created your very own virtual reality cardboard. Through the step-by-step process outlined in this guide, you have learned how to gather the necessary materials, design a template, cut and fold the cardboard, assemble the pieces, add lenses, and fine-tune and customize your VR headset.
By making your own virtual reality cardboard, you have unlocked a world of immersive experiences without breaking the bank. This cost-effective solution allows you to enjoy the wonders of virtual reality, from exploring new worlds to engaging in exciting games, all from the comfort of your own home.
Remember, the key to a successful VR experience lies not only in the construction of the cardboard but also in choosing the right VR apps and content for your smartphone. Explore the vast array of virtual reality applications available for your smartphone, whether it’s educational content, thrilling games, or captivating simulations. Let your imagination guide you as you dive into the endless possibilities of virtual reality.
Lastly, be sure to share your creation with others. Inspire your friends, family, and fellow DIY enthusiasts to embark on their own virtual reality adventure. By spreading the knowledge and joy of DIY VR cardboard, you can help others discover the incredible potential of this accessible and exciting technology.
So, put on your virtual reality cardboard, grab your smartphone, and get ready for an unforgettable journey into a world of immersive experiences. The possibilities are endless, and the adventure awaits!