Introduction
Welcome to the fascinating world of stamp making with a laser engraver! Whether you’re a DIY enthusiast, a craft lover, or a business owner looking to add a personal touch, creating custom stamps can be an exciting and fulfilling endeavor.
A laser engraver is a powerful tool that harnesses the precision of laser technology to etch intricate designs onto various materials. With its versatility and accuracy, a laser engraver is an ideal choice for stamp making. This modern technique allows you to unleash your creativity and produce professional-quality stamps with ease.
In this guide, we will walk you through the step-by-step process of making stamps using a laser engraver. We will cover everything you need to know, from understanding the basics of stamp making to setting up your laser engraver and testing your finished stamp.
Whether you’re a beginner or have some experience with laser engraving, this guide will provide you with the knowledge and tips to create stunning custom stamps that will leave a lasting impression. So let’s dive in and explore the art of stamp making with a laser engraver!
What is a Laser Engraver?
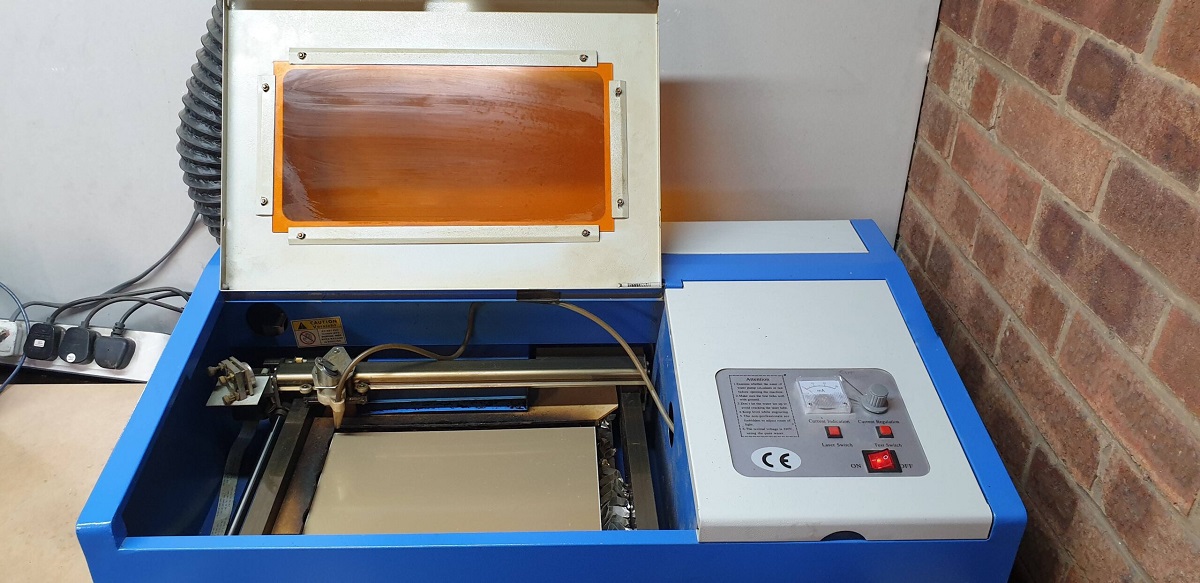
A laser engraver is a device that uses precise laser technology to etch or engrave designs onto various materials. It uses the focused heat of a laser beam to remove or vaporize the surface layer of the material, creating a permanent mark. Laser engravers are commonly used in industries such as manufacturing, jewelry making, signage, and now, even in the realm of stamp making.
One of the key advantages of using a laser engraver for stamp making is its ability to create intricate and detailed designs with remarkable precision. The laser beam can be controlled with a high level of accuracy, allowing for the reproduction of even the most delicate patterns and fonts.
Laser engravers offer a wide range of possibilities when it comes to stamp making. They can be used on various materials like rubber, polymer, wood, acrylic, and even metal. This versatility allows for the creation of stamps suitable for different purposes, whether it’s for crafting, business branding, or personal use.
Another benefit of using a laser engraver for stamp making is its efficiency and speed. The automated process eliminates the need for manual carving or cutting, saving you time and effort. Laser engraving also offers consistent and repeatable results, ensuring that each stamp you create is of the highest quality.
It’s worth noting that laser engraving technology has advanced significantly in recent years, making it more accessible to a wider range of users. No longer reserved for large-scale industrial operations, smaller and more affordable laser engravers are now available for home hobbyists and small businesses.
In the next sections, we will delve deeper into the process of stamp making using a laser engraver, exploring the materials you’ll need, the design process, and the steps involved in creating your own unique stamps. So let’s continue our journey and discover the exciting possibilities that a laser engraver brings to the world of stamp making!
Understanding the Basics of Stamp Making
Before diving into the process of making stamps with a laser engraver, it’s important to have a basic understanding of how stamps are constructed and how they function. A stamp is essentially a tool used to create impressions or marks on various surfaces. It consists of two main components: the stamp design and the stamp material.
The stamp design is the image or pattern that you want to imprint. It can be a logo, a monogram, a decorative motif, or even a custom artwork. The design can be created digitally using graphic design software or hand-drawn and scanned for digital processing.
The stamp material refers to the medium on which the design is engraved or etched. Traditionally, stamps were made from materials such as rubber, wood, or even metal. However, with the advent of laser engravers, newer materials like polymer and acrylic have gained popularity due to their ease of engraving and durability.
When creating a stamp, the stamp material is engraved with the desired design, leaving behind raised areas that will hold the ink. When the stamp is pressed onto a surface, the ink adheres to the raised areas and transfers to the surface, creating the desired impression.
Stamp making with a laser engraver allows for precise and intricate designs that may be difficult to achieve with traditional carving methods. The laser beam removes the material in a controlled manner, leaving behind a clean and detailed engraving.
Understanding the basics of stamp making will help you approach the process with greater clarity and confidence. In the following sections, we will explore the materials you’ll need, the step-by-step process of creating stamps using a laser engraver, and some tips and tricks to enhance your stamp-making skills. So let’s continue our stamp making journey and bring your design ideas to life!
Materials You’ll Need
Creating stamps with a laser engraver requires a few essential materials to get started. While the specific materials may vary depending on your design and preferences, here are the key elements you’ll need:
- Laser Engraver: Of course, the most critical item is a laser engraver. There are various models available, ranging from small desktop units to larger industrial-grade machines. Choose a model that fits your budget, workspace, and specific requirements.
- Stamp Material: Select the material on which you want to create your stamp. Common options include rubber, polymer, acrylic, or even wood. Ensure that the material is compatible with laser engraving to achieve the best results.
- Stamp Handle or Mount: Depending on the size and purpose of your stamp, you may need a handle or mount to affix the stamp material. Handles provide a comfortable grip and make it easier to apply pressure when stamping. Consider materials like wood or acrylic for creating sturdy handles.
- Graphic Design Software: If you’re designing your stamp digitally, you’ll need graphic design software. Popular options include Adobe Illustrator, CorelDRAW, or even free alternatives like Inkscape. These tools allow you to create and customize your stamp designs with precision.
- Design Templates or Artwork: Depending on your stamp design, you may want to use pre-made templates or have custom artwork ready in digital format. Templates can save time and provide a starting point for your design, while custom artwork allows for a unique and personalized stamp.
- Protective Eyewear and Ventilation: As laser engraving involves the use of high-intensity laser beams, it’s essential to prioritize safety. Wear protective eyewear to shield your eyes from potential laser radiation. Additionally, ensure proper ventilation in your workspace to minimize the release of fumes or smoke.
These are the essential materials you’ll need to embark on your stamp-making journey with a laser engraver. Gathering these supplies beforehand will ensure a smooth and enjoyable stamp making experience. In the next sections, we’ll guide you through the step-by-step process of designing and engraving your stamps, along with some helpful tips and tricks. So let’s continue our creative exploration and bring your stamp-making dreams to life!
Step 1: Designing Your Stamp
The first step in creating a custom stamp with a laser engraver is designing your stamp. This is where your creativity comes into play, as you envision and bring to life the image or pattern you want to imprint.
If you have graphic design skills, you can use software like Adobe Illustrator or CorelDRAW to create your stamp design from scratch. Start with a blank canvas and experiment with different shapes, fonts, and elements to create a design that suits your needs. Consider factors such as the size and level of detail you want to achieve.
If you’re not comfortable with graphic design software, don’t worry. There are plenty of online resources and marketplaces that offer pre-made stamp templates. Browse through these platforms and choose a template that aligns with your vision. Then, customize the template by adding your personalized text or tweaking the design to make it uniquely yours.
Alternatively, if you have a hand-drawn design, scan it and digitize it using a scanner or camera. If needed, you can fine-tune the design using image editing software or use it as a reference to create a digital version from scratch.
When designing your stamp, keep in mind its purpose and the surfaces you’ll be stamping on. Consider whether it will be used on paper, fabric, or other materials, as this can impact the level of detail and the type of design elements you choose. Additionally, consider the size of the stamp and ensure that your design scales well without losing its clarity.
Once you have finalized your stamp design, save it in a compatible format for the laser engraver software. Popular file formats include JPEG, PNG, or vector-based formats like SVG or AI. Consult your specific engraver’s manual or software to ensure compatibility.
Designing your stamp is the creative starting point of the stamp-making process. Take your time to explore different ideas, experiment with shapes and fonts, and create a design that reflects your style and purpose. In the next section, we’ll discuss how to prepare the stamp material for engraving. So let’s move forward and bring your stamp design to life!
Step 2: Preparing the Stamp Material
After finalizing your stamp design, the next step in making a stamp with a laser engraver is preparing the stamp material. The material you choose will depend on the type of stamp you want to create, the level of detail in the design, and the desired durability of the stamp.
If you opt for rubber stamp material, ensure that it is specifically made for laser engraving. This type of material is usually a sheet of rubber backed with adhesive for easy mounting. It’s important to choose a thickness that is suitable for your design and the intended use of the stamp.
If you prefer polymer stamp material, again, ensure it is compatible with laser engraving. Polymer stamps are known for their durability and ability to hold fine details. They often come in pre-cut shapes or sheets that can be easily engraved and mounted for use.
Acrylic is another option that works well for laser-engraved stamps. It is durable, easy to clean, and allows for clear and precise engravings. However, acrylic stamps may not hold as much detail as rubber or polymer stamps, so keep that in mind when designing your stamp.
Regardless of the material you choose, prepare it by cutting, trimming, or shaping it to the desired size and shape for your stamp design. Use a cutting tool or scissors to achieve clean and precise edges. Make sure the stamp material fits within the working area of your laser engraver.
Before engraving, it’s crucial to remove any protective film or covering from the stamp material to avoid any interference with the laser engraving process. Clean the surface of the material to ensure it is free from dust or debris that could affect the engraving quality.
Once the stamp material is prepared and cleaned, it’s ready to be mounted or placed inside the laser engraver. Follow the instructions provided by your specific engraver model to secure the material in place.
Preparing the stamp material is an important step to ensure optimal engraving results. Take the time to choose and prepare the material that best suits your design and desired outcomes. In the next section, we’ll discuss the setup process for your laser engraver, so let’s continue our stamp-making journey!
Step 3: Setting Up Your Laser Engraver
Once you have your stamp design finalized and the stamp material prepared, the next step in making a stamp with a laser engraver is setting up the engraver itself. Proper setup is crucial to ensure accurate and precise engraving.
Begin by positioning your laser engraver in a well-ventilated area with a stable surface. Ensure that there is enough space around the machine for easy accessibility and proper airflow. Refer to the manufacturer’s instructions for any specific requirements or recommendations for setting up your particular model.
Next, double-check that your engraving software is properly installed on your computer and connected to the laser engraver. Install any necessary drivers or plugins to ensure a smooth communication between the software and the engraver.
Before starting the engraving process, calibrate the laser focus. This step is critical to ensure the engraving depth and quality. Follow the manufacturer’s instructions on how to calibrate the focus point, as it may vary depending on your engraver model.
Now, it’s time to load your stamp design into the engraving software. Import the digital file of your stamp design, making sure it is properly scaled, centered, and aligned within the working area.
Configure the laser engraver settings according to the stamp material you are using. This includes adjusting the laser power, engraving speed, and resolution. Refer to the material specifications and consult the engraver manual for recommended settings. It’s a good practice to do a test run on a small area of the stamp material to ensure the engraving parameters are suitable for your design.
Once you have verified the settings, secure the prepared stamp material in the engraver bed or holder. Ensure that it is properly aligned and firmly in place to prevent any movement during the engraving process.
With all the setup steps completed, you are now ready to start the laser engraving process. Double-check all the settings, safety measures, and proper alignment one last time before initiating the engraving.
Setting up your laser engraver correctly is essential to ensure accurate and precise stamp engraving. By following the manufacturer’s instructions and accurately configuring the engraver settings, you can achieve optimal results. In the next section, we will walk you through the process of engraving your stamp design, so let’s continue our stamp-making journey!
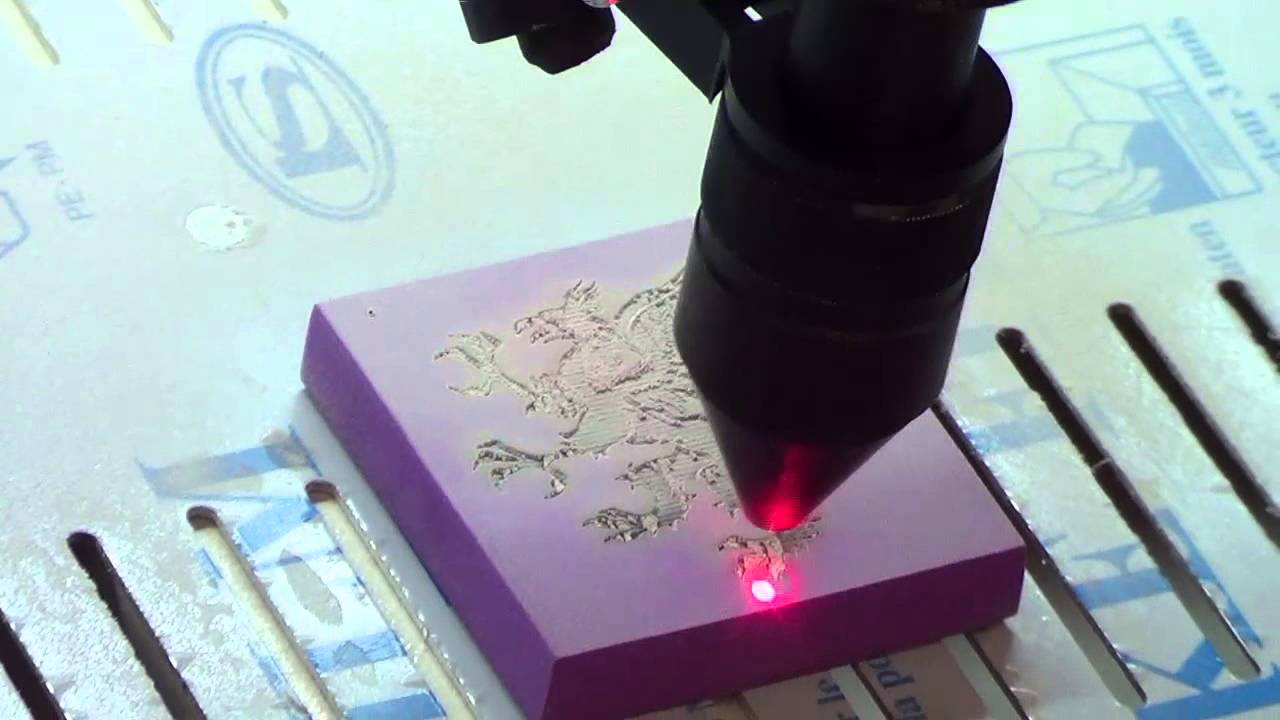
Step 4: Engraving the Stamp Design
With your laser engraver set up and the stamp material securely in place, it’s time to move on to the exciting step of engraving your stamp design. This is where you will see your design come to life as it is etched onto the stamp material.
Initiate the engraving process by starting the laser engraver and selecting the appropriate engraving settings in the software. These settings may include the laser power, engraving speed, and resolution. It’s crucial to use the recommended settings that align with the type of stamp material you’re using.
As the engraving begins, the laser beam precisely follows the paths defined by your stamp design. It removes or vaporizes the surface layer of the stamp material, creating the desired engraved design. The laser engraver controls the depth and accuracy of the engraving, ensuring consistent results.
During the engraving process, it’s important to monitor the progress to ensure that the engraving is proceeding according to your expectations. Keep a close eye on the stamp material to ensure that there are no issues such as excessive burning, improper engraving depth, or any other anomalies. Make any necessary adjustments to the settings as needed.
Depending on the complexity and size of your stamp design, the engraving process can take anywhere from a few minutes to several hours. Be patient and allow the laser engraver to complete the process without interruption.
Once the engraving is complete, carefully remove the stamp material from the engraver. Be cautious as the material may still be warm. Inspect the engraved design to ensure that it matches your intended design and that all details are clearly visible.
After finishing the engraving, it’s a good idea to clean the stamp material to remove any residue or debris. A gentle wipe with a soft cloth or a quick rinse will help ensure a clean and well-defined stamp impression.
Congratulations! You have successfully engraved your stamp design using a laser engraver. In the next step, we will discuss how to clean up the stamp and make it ready for use. So let’s move forward in our stamp-making journey!
Step 5: Cleaning Up the Stamp
After engraving your stamp design, it’s essential to clean up the stamp to ensure optimal performance and longevity. Cleaning the stamp removes any residual debris, enhances the clarity of the engraved design, and prepares it for inking and stamping.
Begin by gently wiping the surface of the stamp material with a clean, dry cloth. This helps remove any loose debris or dust particles that may have accumulated during the engraving process.
If there are any stubborn residues or particles on the stamp, you can use a mild soap solution or rubber stamp cleaner to give it a more thorough cleaning. Apply the solution to a soft brush or cloth and gently scrub the engraved surface. Avoid using harsh chemicals or abrasive materials that could damage the stamp.
Rinse the stamp with clean water to remove any cleaning solution residue. Be cautious not to expose the stamp to excessive water, especially if it’s made of wood or has a wooden handle, as it can cause warping or damage.
Once the stamp is clean, pat it dry with a soft cloth or leave it to air dry naturally. Make sure the stamp is completely dry before moving on to the next step.
Inspect the engraved design after cleaning to ensure that it is clear and free of any remaining debris. If needed, repeat the cleaning process until you’re satisfied with the cleanliness and visibility of the design.
If your stamp material has a sticky adhesive backing, ensure that it is free from dust or lint before attaching it to the stamp handle or mount. This will ensure a secure and stable grip during stamping.
Cleaning up the stamp is an important step in maintaining its performance and ensuring crisp and clear impressions. Proper cleaning removes any residue, dust, or debris that could affect the stamping quality. In the next step, we will discuss how to attach the stamp handle, so let’s keep moving forward in our stamp-making journey!
Step 6: Attaching the Stamp Handle
After cleaning the stamp, the next step in making a stamp with a laser engraver is attaching the stamp handle. The handle provides a comfortable grip and makes it easier to apply pressure when stamping.
If your stamp material already has an adhesive backing or is designed to be self-mounting, you can skip this step and proceed to testing your stamp with the existing backing.
If your stamp material does not have an adhesive backing, you will need to attach it to a stamp handle or mount manually. Stamp handles are commonly made of wood or acrylic, providing a sturdy and comfortable grip.
Begin by selecting a stamp handle that is suitable for the size and thickness of your stamp material. Ensure that the handle has a flat surface or a designated area where you can securely attach the stamp.
If the stamp material is flexible like rubber or polymer, you can use a strong adhesive, such as craft glue or double-sided adhesive tape, to attach it to the stamp handle. Apply the adhesive to the back of the stamp material, align it with the handle, and press firmly to ensure a secure bond. Allow the adhesive to dry according to the manufacturer’s instructions.
If you’re working with a more rigid material like acrylic, you may need to use screws or other fasteners to attach the stamp material to the handle. Drill small holes in the stamp material and corresponding holes in the handle. Align the holes and insert the screws, tightening them to secure the stamp material in place.
Ensure that the stamp is properly aligned on the handle, with the engraved design facing outward. The handle should provide a comfortable grip and allow you to apply pressure evenly when stamping.
Once the stamp material is securely attached to the handle, give it a gentle test by applying light pressure to check for any movement or looseness. If everything is secure, your stamp is now ready for use!
Attaching the stamp handle is the final step in completing your stamp-making process. A well-attached handle ensures stability and ease of use when stamping. In the next step, we will discuss how to test your stamp to ensure accurate impressions. So let’s keep moving forward and ready our stamp for action!
Step 7: Testing Your Stamp
After attaching the stamp handle, it’s important to test your stamp to ensure it will produce accurate and clear impressions. Testing the stamp allows you to make any necessary adjustments before using it for your desired applications.
Start by preparing a testing surface. This can be scrap paper, a fabric swatch, or any other material that you plan to use your stamp on. Ensure that the surface is clean and free from any dust or debris.
Ink your stamp by applying a thin and even layer of stamping ink to the engraved surface. Make sure that the ink covers the entire design, but avoid excess ink that could cause smudging or smearing.
Press the stamp firmly and evenly onto the testing surface. Apply consistent pressure for a few seconds to allow the ink to transfer from the stamp to the surface. Lift the stamp slowly and carefully to reveal the impression.
Inspect the impression for clarity, definition, and completeness. Check for any areas where ink may have smudged or not transferred properly. If necessary, adjust the pressure, angle, or ink application for optimal results.
Continue testing the stamp on various surfaces and materials to evaluate its performance. Pay attention to the level of detail that the stamp can reproduce and ensure that the impressions are consistent and accurate.
If you encounter any issues or imperfections during the testing process, it may be necessary to make adjustments. For example, you may need to refine the design, clean the stamp more thoroughly, or make modifications to the pressure or ink application technique.
Once you are satisfied with the results of your stamp testing, congratulations! Your stamp is now ready for use in your desired applications. Whether it’s for personal crafts, business branding, or any other creative endeavor, your custom-made stamp will leave a lasting impression.
Remember to clean your stamp after each use to maintain its performance and longevity. Use a stamp cleaner or a gentle wipe with a damp cloth to remove any excess ink. Proper care and maintenance will ensure that your stamp stays in excellent condition for future stamping needs.
By testing your stamp and making any necessary adjustments, you can confidently utilize it in various projects and applications. With your stamp ready, it’s time to embark on your stamping adventures and showcase your creativity and personal touch!
Tips and Tricks for Stamp Making with a Laser Engraver
Stamp making with a laser engraver is a creative and rewarding process. To help you achieve the best results and enhance your stamp-making skills, here are some valuable tips and tricks:
- Experiment with different materials: Don’t limit yourself to one type of stamp material. Explore various options like rubber, polymer, and acrylic to see which ones work best for your designs and desired outcomes.
- Optimize your design for engraving: To ensure accurate and clear engravings, simplify complex designs by removing unnecessary details and increasing the size of elements that may be too fine to reproduce effectively.
- Test different engraving settings: Spend time experimenting with laser power, engraving speed, and resolution settings to achieve the desired depth and clarity for your stamp. Keep notes of successful combinations for future reference.
- Consider multi-color stamp designs: Explore the possibility of creating stamps with multiple colors by engraving separate layers for each color. This can add depth and vibrancy to your stamped creations.
- Ensure proper ventilation: Laser engraving can produce fumes and smoke, especially when working with certain materials. Make sure your workspace is well-ventilated to maintain a safe and comfortable environment.
- Protect your eyes and skin: Wear appropriate protective eyewear to shield your eyes from laser radiation. In addition, consider applying a barrier cream to your hands to protect your skin from potential contact with hazardous materials.
- Maintain cleanliness: Keep your work area clean and free from debris to prevent interference with the engraving process. Regularly clean your laser engraver, focusing on the lens, mirrors, and engraving bed to maintain optimal performance.
- Always perform test runs: Before engraving your final stamp design, perform test runs on scrap materials. This allows you to verify settings, design clarity, and overall engraving quality before committing to the final stamp material.
- Experiment with different stamp sizes: Explore creating stamps in various sizes to suit different applications and projects. This versatility allows you to cater to a wide range of stamping needs.
- Continuously learn and improve: Stamp making with a laser engraver is a skill that can be honed over time. Keep exploring new techniques, learning from experienced users, and seeking inspiration to refine your stamp-making abilities.
By incorporating these tips and tricks into your stamp-making process, you can elevate the quality of your stamps and expand your creative possibilities. Remember that practice makes perfect, so keep experimenting, refining, and enjoying the art of stamp making with your laser engraver!
Conclusion
Congratulations on completing this journey into the world of stamp making with a laser engraver! Through this guide, we’ve explored the step-by-step process of creating custom stamps, from designing and engraving to testing and using them for various applications.
By harnessing the power of laser technology, you have unlocked the ability to create intricate and personalized stamps that leave a lasting impression. The precision and versatility of a laser engraver have empowered you to bring your creative vision to life, whether for personal crafts, business branding, or any other stamping needs.
Remember to take advantage of the materials, tools, and software available to you in order to refine your stamp-making skills. Experiment with different stamp materials and engraving settings to achieve optimal results. Clean and maintain your stamps to ensure their longevity and performance.
Continuously explore new techniques, learn from experienced stamp makers, and seek inspiration to enhance your craft. The possibilities are endless when it comes to stamp making, and your laser engraver is the key to unlocking a world of creativity and personal expression.
Now that you have a solid understanding of the stamp making process, it’s time to let your imagination soar. Whether you’re creating decorative stamps, adding a professional touch to your branding, or indulging in the joy of crafting, your custom-made stamps will serve as a unique reflection of your creativity and style.
So go ahead, continue your stamp-making adventure with confidence, and enjoy the satisfaction that comes with creating beautifully designed and personalized stamps with your laser engraver. Happy stamp making!