Ingredients for Gelato Without an Ice Cream Maker
Gelato is a delicious frozen dessert that originated in Italy and has gained popularity all over the world. Making gelato at home without an ice cream maker may sound daunting, but with the right ingredients and a few simple steps, you can create a creamy and flavorful gelato that will rival any store-bought version. Here are the key ingredients you’ll need:
1. Milk: Whole milk is traditionally used in gelato recipes as it adds richness and smoothness to the texture. You can also use reduced-fat milk if you prefer a lighter option.
2. Heavy cream: Adding heavy cream brings a luxurious creaminess to the gelato. It helps to create a smooth and silky texture that melts in your mouth.
3. Sugar: Granulated sugar is used to sweeten the gelato. The amount of sugar can be adjusted to your taste preference, but keep in mind that it also affects the texture of the gelato.
4. Egg yolks: Egg yolks act as a thickening agent and contribute to the richness of the gelato. They give the gelato a creamy and velvety consistency.
5. Flavorings: The beauty of gelato lies in its endless flavor possibilities. You can add a variety of ingredients like cocoa powder, vanilla extract, fruit puree, nuts, or even coffee to infuse delicious flavors into your gelato.
6. Salt: A pinch of salt helps to balance the sweetness and enhance the overall flavor of the gelato.
7. Optional mix-ins: If you want to take your gelato to the next level, you can add mix-ins like chocolate chips, crushed cookies, or chopped fruits to create exciting textures and bursts of flavor.
Ensure to have these ingredients on hand before you start making your gelato at home. Once you have gathered everything you need, you’re ready to move on to the next step: preparing the custard base.
Step 1: Prepare Your Ingredients
Before you begin the process of making gelato without an ice cream maker, it’s important to ensure that all your ingredients are ready and prepared. This step is crucial for a smooth and efficient gelato-making experience. Here’s what you need to do:
1. Gather your ingredients: Review the recipe and make sure you have all the necessary ingredients. Take them out of the refrigerator or pantry and have them measured and ready to use. This will save you time and prevent any interruptions during the preparation process.
2. Set up your workspace: Clear a clean and spacious area in your kitchen where you can comfortably work. Make sure you have all the required utensils and equipment within reach. This may include a medium-sized saucepan, a whisk, a mixing bowl, a sieve, and a freezable dish to store your gelato once it’s made.
3. Prepare your flavorings: If you plan to incorporate any additional flavorings into your gelato, prepare them beforehand. For example, if you’re using fresh fruit, wash, peel, and chop it into small pieces. If you’re using cocoa powder, measure it out and set it aside. Having your flavorings ready will streamline the process and ensure that they are incorporated smoothly into the gelato.
4. Separate the egg yolks: If your gelato recipe calls for egg yolks, separate them from the egg whites. Crack the eggs carefully and gently transfer the yolks from one half of the shell to the other, allowing the egg whites to fall into a separate bowl. Remember to discard or save the egg whites for another use.
By taking the time to prepare your ingredients and setting up your workspace, you’ll be able to create a seamless gelato-making process. This will allow you to focus on each step without any interruptions, resulting in a delicious homemade gelato that you can proudly enjoy.
Step 2: Make a Custard Base
The custard base is the foundation of any gelato recipe. It creates the creamy and smooth texture that makes gelato so irresistible. To make the custard base for your gelato without an ice cream maker, follow these simple steps:
1. Heat the milk and cream: In a medium-sized saucepan, pour the milk and heavy cream. Place the saucepan over medium heat and warm the mixture until it starts to steam. Avoid bringing it to a boil.
2. Whisk the egg yolks: In a separate mixing bowl, whisk the egg yolks until they are well-combined and slightly pale in color. This helps to incorporate air and create a light and fluffy gelato texture.
3. Add sugar and salt: Gradually add the granulated sugar and a pinch of salt to the whisked egg yolks. Continue whisking until the sugar has dissolved and the mixture becomes smooth and glossy.
4. Temper the eggs: Slowly pour a small amount of the warm milk and cream mixture into the egg yolk mixture while continuously whisking. This process, known as tempering, prevents the eggs from curdling when they come into contact with the hot liquid. Gradually add more of the milk and cream mixture, whisking constantly.
5. Combine the mixtures: Once the egg yolk mixture has been tempered, pour it back into the saucepan with the remaining milk and cream mixture. Whisk everything together until well-combined.
6. Cook the custard base: Return the saucepan to the stove and cook the custard base over low heat, stirring continuously. Use a wooden spoon or a heat-resistant spatula to scrape the bottom of the saucepan to prevent the mixture from sticking or burning. Cook until the custard base thickens and coats the back of the spoon. This usually takes about 8-10 minutes.
Now that you’ve successfully made the custard base, you’re ready to move on to the next step: cooling the custard base before adding your desired flavorings.
Step 3: Cool the Custard Base
After making the custard base for your gelato, it’s important to cool it down before adding any flavorings. This step allows the gelato mixture to thicken and develop a richer texture. Follow these steps to properly cool the custard base:
1. Remove from heat: Once the custard base has reached the desired thickness and coats the back of a spoon, remove the saucepan from the heat source. This stops the cooking process and prevents the custard from becoming overcooked.
2. Sieve the mixture: Pour the custard base through a fine-mesh sieve or strainer into a clean mixing bowl. This step helps to remove any lumps or cooked egg bits, resulting in a smoother gelato texture.
3. Cool to room temperature: Allow the custard base to cool down to room temperature. You can speed up the cooling process by placing the mixing bowl in an ice bath. Stir the custard base occasionally to prevent a skin from forming on the surface.
4. Cover and refrigerate: Once the custard base has cooled, cover the mixing bowl with plastic wrap or a lid and place it in the refrigerator. Let it chill for at least 2-4 hours or overnight. This allows the flavors to develop and the custard base to firm up.
By properly cooling the custard base, you are ensuring that the gelato has a smooth and creamy texture once it’s frozen. The chilling process also allows the flavors to meld together, resulting in a more flavorful end product. Once the custard base is properly chilled, you can move on to the next step of adding your desired flavorings to create a unique and delicious gelato.
Step 4: Mix in Your Flavorings
One of the joys of making gelato at home is the ability to customize the flavors to your liking. In this step, you’ll get to infuse your custard base with delicious flavorings. Follow these steps to mix in your desired flavorings:
1. Choose your flavorings: Select the flavor or flavors you want to incorporate into your gelato. Whether it’s classic options like vanilla or chocolate, or more adventurous choices like fruit purees or nut extracts, the possibilities are endless. Be creative and experiment with different combinations to develop your signature gelato flavor.
2. Measure the flavorings: Depending on the type of flavoring you choose, measure out the appropriate amount. For example, if you’re using vanilla extract, follow the recipe guidelines for the recommended quantity. If you’re using cocoa powder, measure it out and set it aside.
3. Add the flavorings: Take the chilled custard base out of the refrigerator and give it a gentle stir. Slowly pour the flavorings into the custard base while whisking continuously. Make sure the flavorings are evenly distributed throughout the mixture.
4. Whisk until well-combined: Continue whisking the custard base and flavorings together to ensure thorough incorporation. This step helps to evenly distribute the flavorings, giving your gelato a consistent taste throughout.
5. Taste and adjust: Once the flavorings are mixed in, taste a small spoonful of the gelato base to determine if you’re satisfied with the flavor. If you feel it needs more intensity, you can add a little extra flavoring, but be cautious not to overwhelm the base. Remember, the flavors will develop further during the freezing process.
By mixing in your desired flavorings, you can create a gelato that reflects your personal taste preferences. Whether you prefer a classic flavor or want to experiment with unique combinations, this step allows you to add that special touch to your homemade gelato. Now that the flavorings are incorporated, it’s time to move on to the next step: transferring the gelato mixture to a freezable dish.
Step 5: Transfer the Mixture to a Freezable Dish
Now that you have mixed in your desired flavorings, it’s time to transfer the gelato mixture to a freezable dish. This step is crucial for setting the gelato and allowing it to freeze into a smooth and creamy dessert. Follow these simple steps to ensure a successful transfer:
1. Choose a freezable dish: Select a shallow and wide dish that is suitable for freezing. It’s best to use a metal or glass dish, as they conduct cold more efficiently. Avoid using plastic containers, as they may not cool the mixture evenly.
2. Pour the gelato mixture: Carefully pour the gelato mixture into the freezable dish. Use a spatula or a spoon to scrape down the sides of the mixing bowl, ensuring that you transfer all of the mixture into the dish.
3. Level the surface: Smooth out the surface of the gelato mixture with the back of a spoon or a spatula. This helps to create an even thickness throughout the dish and ensures a consistent freezing process.
4. Cover the dish: Place a lid or tightly cover the dish with plastic wrap. This prevents the gelato from developing ice crystals and protects it from absorbing any odors or flavors from the freezer.
5. Label and date: To keep track of your gelato flavors and freezing time, label the dish with the flavor and the date it was made. This way, you can easily identify your creations and ensure you enjoy them at their peak freshness.
By transferring the gelato mixture into a freezable dish, you create the ideal environment for the mixture to freeze. This step is essential for achieving the desired texture and consistency of gelato. Once the dish is prepared, it’s time to move on to the next step: freezing the gelato.
Step 6: Freeze the Gelato
After transferring the gelato mixture to a freezable dish, it’s time to let it freeze and transform into a delightful frozen treat. Follow these steps to properly freeze your gelato:
1. Place the dish in the freezer: Carefully place the covered dish in the coldest part of your freezer. Ensure that it sits on a flat surface to maintain an even freeze. Avoid overcrowding the freezer to allow for proper airflow and efficient freezing.
2. Set the freezer temperature: It’s important to set your freezer to the appropriate temperature for freezing gelato. The ideal temperature range is between -18°C to -20°C (-0.4°F to -4°F). Maintaining a consistent freezing temperature is crucial for achieving a smooth and creamy texture.
3. Freeze for several hours: Typically, gelato takes approximately 4-6 hours to freeze properly. However, the exact freezing time can vary depending on your freezer’s temperature and the size of the dish. Allow enough time for the gelato to solidify but avoid over-freezing, as it can affect its texture.
4. Check the gelato: After a few hours, check the gelato by gently pressing a finger into the surface. The gelato should be firm but still slightly soft. If it’s too hard, slightly soften at room temperature for a few minutes before serving.
5. Keep the lid or cover on: As tempting as it may be, try to resist the urge to open the lid or cover frequently. Keeping it closed ensures that the gelato stays at the proper temperature and prevents ice crystals from forming.
Freezing the gelato allows the mixture to solidify and develop the desired texture. It’s important to remember that gelato is not completely frozen like traditional ice cream, but rather has a softer and silkier consistency. Once the gelato is properly frozen, it’s time to move on to the next step: stirring the gelato every 30 minutes.
Step 7: Stir the Gelato Every 30 Minutes
Stirring the gelato every 30 minutes during the freezing process is a crucial step to achieve a smooth and creamy texture. This step helps prevent ice crystals from forming and ensures that the gelato freezes evenly. Here’s how to do it:
1. Set a timer: Once you’ve placed the gelato in the freezer, set a timer for every 30 minutes. This will help you keep track of the time and make sure you don’t forget to stir the gelato.
2. Take the gelato out of the freezer: Carefully remove the gelato from the freezer and uncover the dish. Place it on a flat surface, like your kitchen counter.
3. Stir the gelato: Use a spoon or a spatula to vigorously mix the gelato. Start from the outer edges and work your way towards the center, incorporating any frozen bits into the softer mixture. Make sure to scrape the sides of the dish to prevent any crystallization.
4. Smooth the surface: After stirring, smooth out the surface of the gelato with the back of a spoon or a spatula. This helps create an even texture and prevents any air pockets from forming.
5. Return to the freezer: Once you’ve stirred and smoothed the gelato, cover the dish and place it back in the freezer. Set the timer for another 30 minutes and repeat the stirring process each time.
By stirring the gelato every 30 minutes, you’re effectively breaking up any ice crystals that might form during the freezing process. This consistent stirring ensures a smoother and creamier gelato texture. Continue this process for several hours until the gelato reaches the desired consistency. Once the gelato is ready, it’s time for the final step: enjoying your homemade gelato!
Step 8: Enjoy Your Homemade Gelato
After patiently following all the previous steps, it’s time to savor the fruits of your labor and enjoy your homemade gelato! Here’s how to fully relish the flavors and textures of your creation:
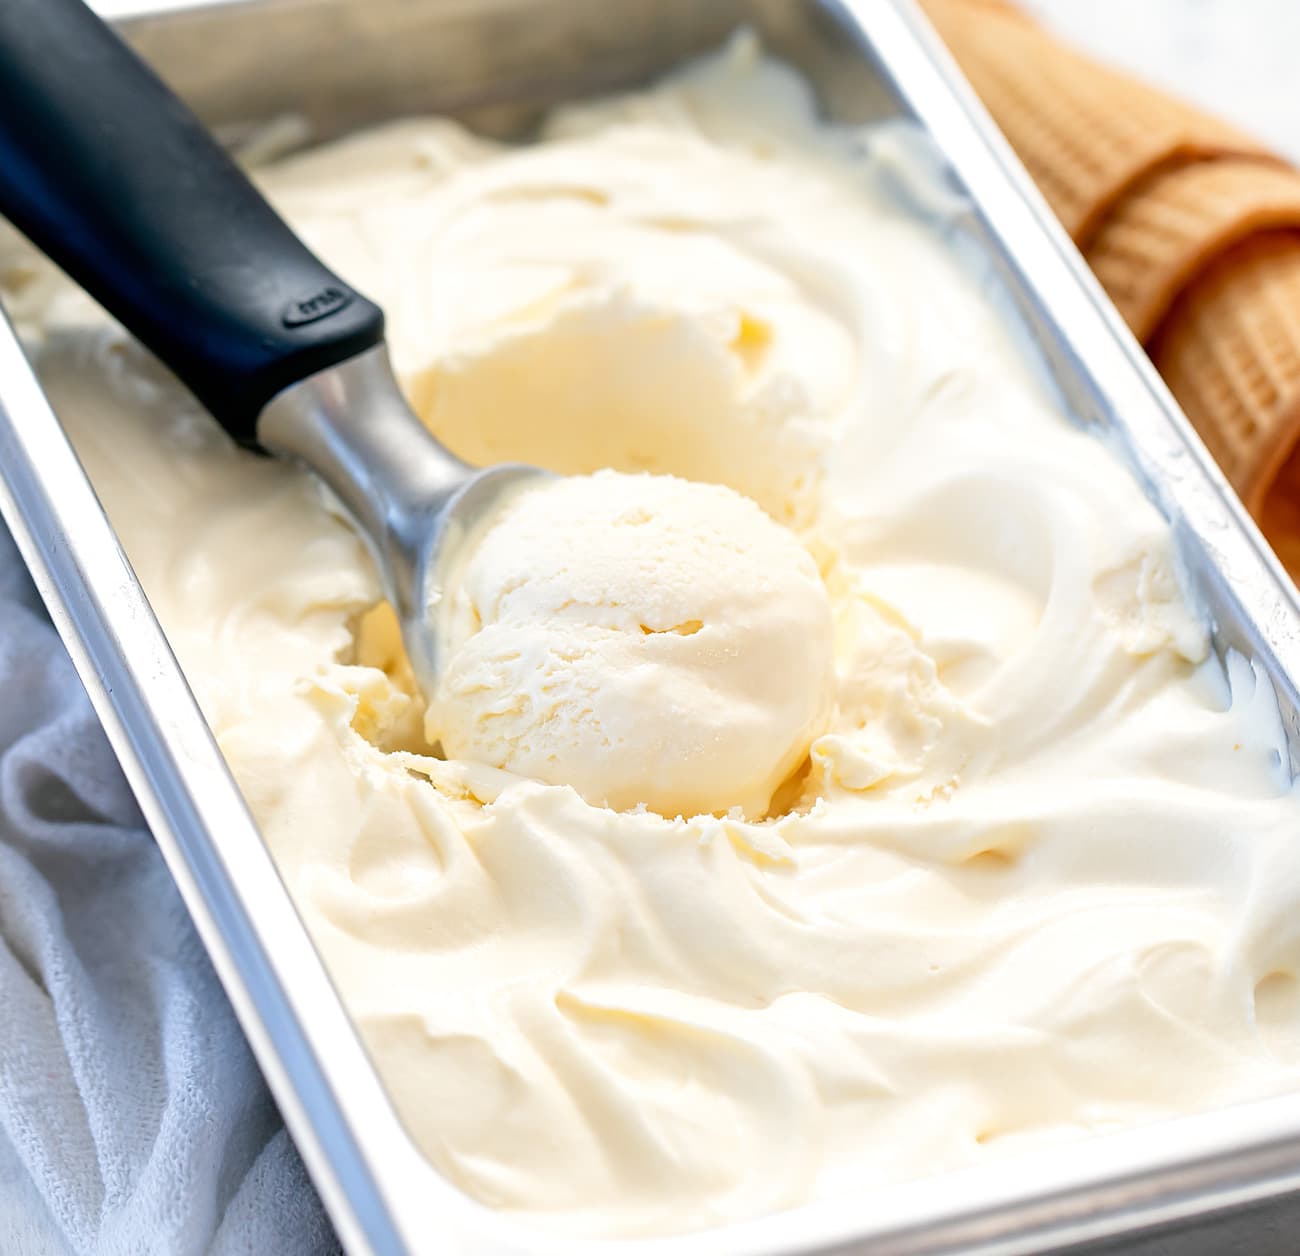
1. Remove the gelato from the freezer: Take the gelato out of the freezer and allow it to sit at room temperature for a few minutes. This will slightly soften the gelato, making it easier to scoop.
2. Scoop and serve: Use an ice cream scoop or a spoon to gently scoop the gelato into bowls or cones. Serve it as is, or you can experiment with toppings such as fresh fruits, nuts, chocolate sauce, or sprinkles to enhance the experience.
3. Enjoy the flavors: Take a moment to savor the delicious flavors and creamy texture of your homemade gelato. Notice the nuances in taste and appreciate the hard work you put into creating this delightful dessert.
4. Share with others: Gelato is best enjoyed in good company. Share your homemade creation with your loved ones, family, and friends. Seeing their faces light up as they enjoy your gelato is a true joy.
5. Store any leftovers: If you have any leftover gelato, cover it tightly with plastic wrap or store it in an airtight container in the freezer. However, homemade gelato is best enjoyed fresh, so try to consume it within a few days for the best flavor and texture.
Congratulations! You have successfully made homemade gelato without an ice cream maker. By following these steps and infusing your creativity into flavor choices, you have created a delectable treat to be proud of. Now, sit back, relax, and indulge in the pleasures of your very own gelato masterpiece!