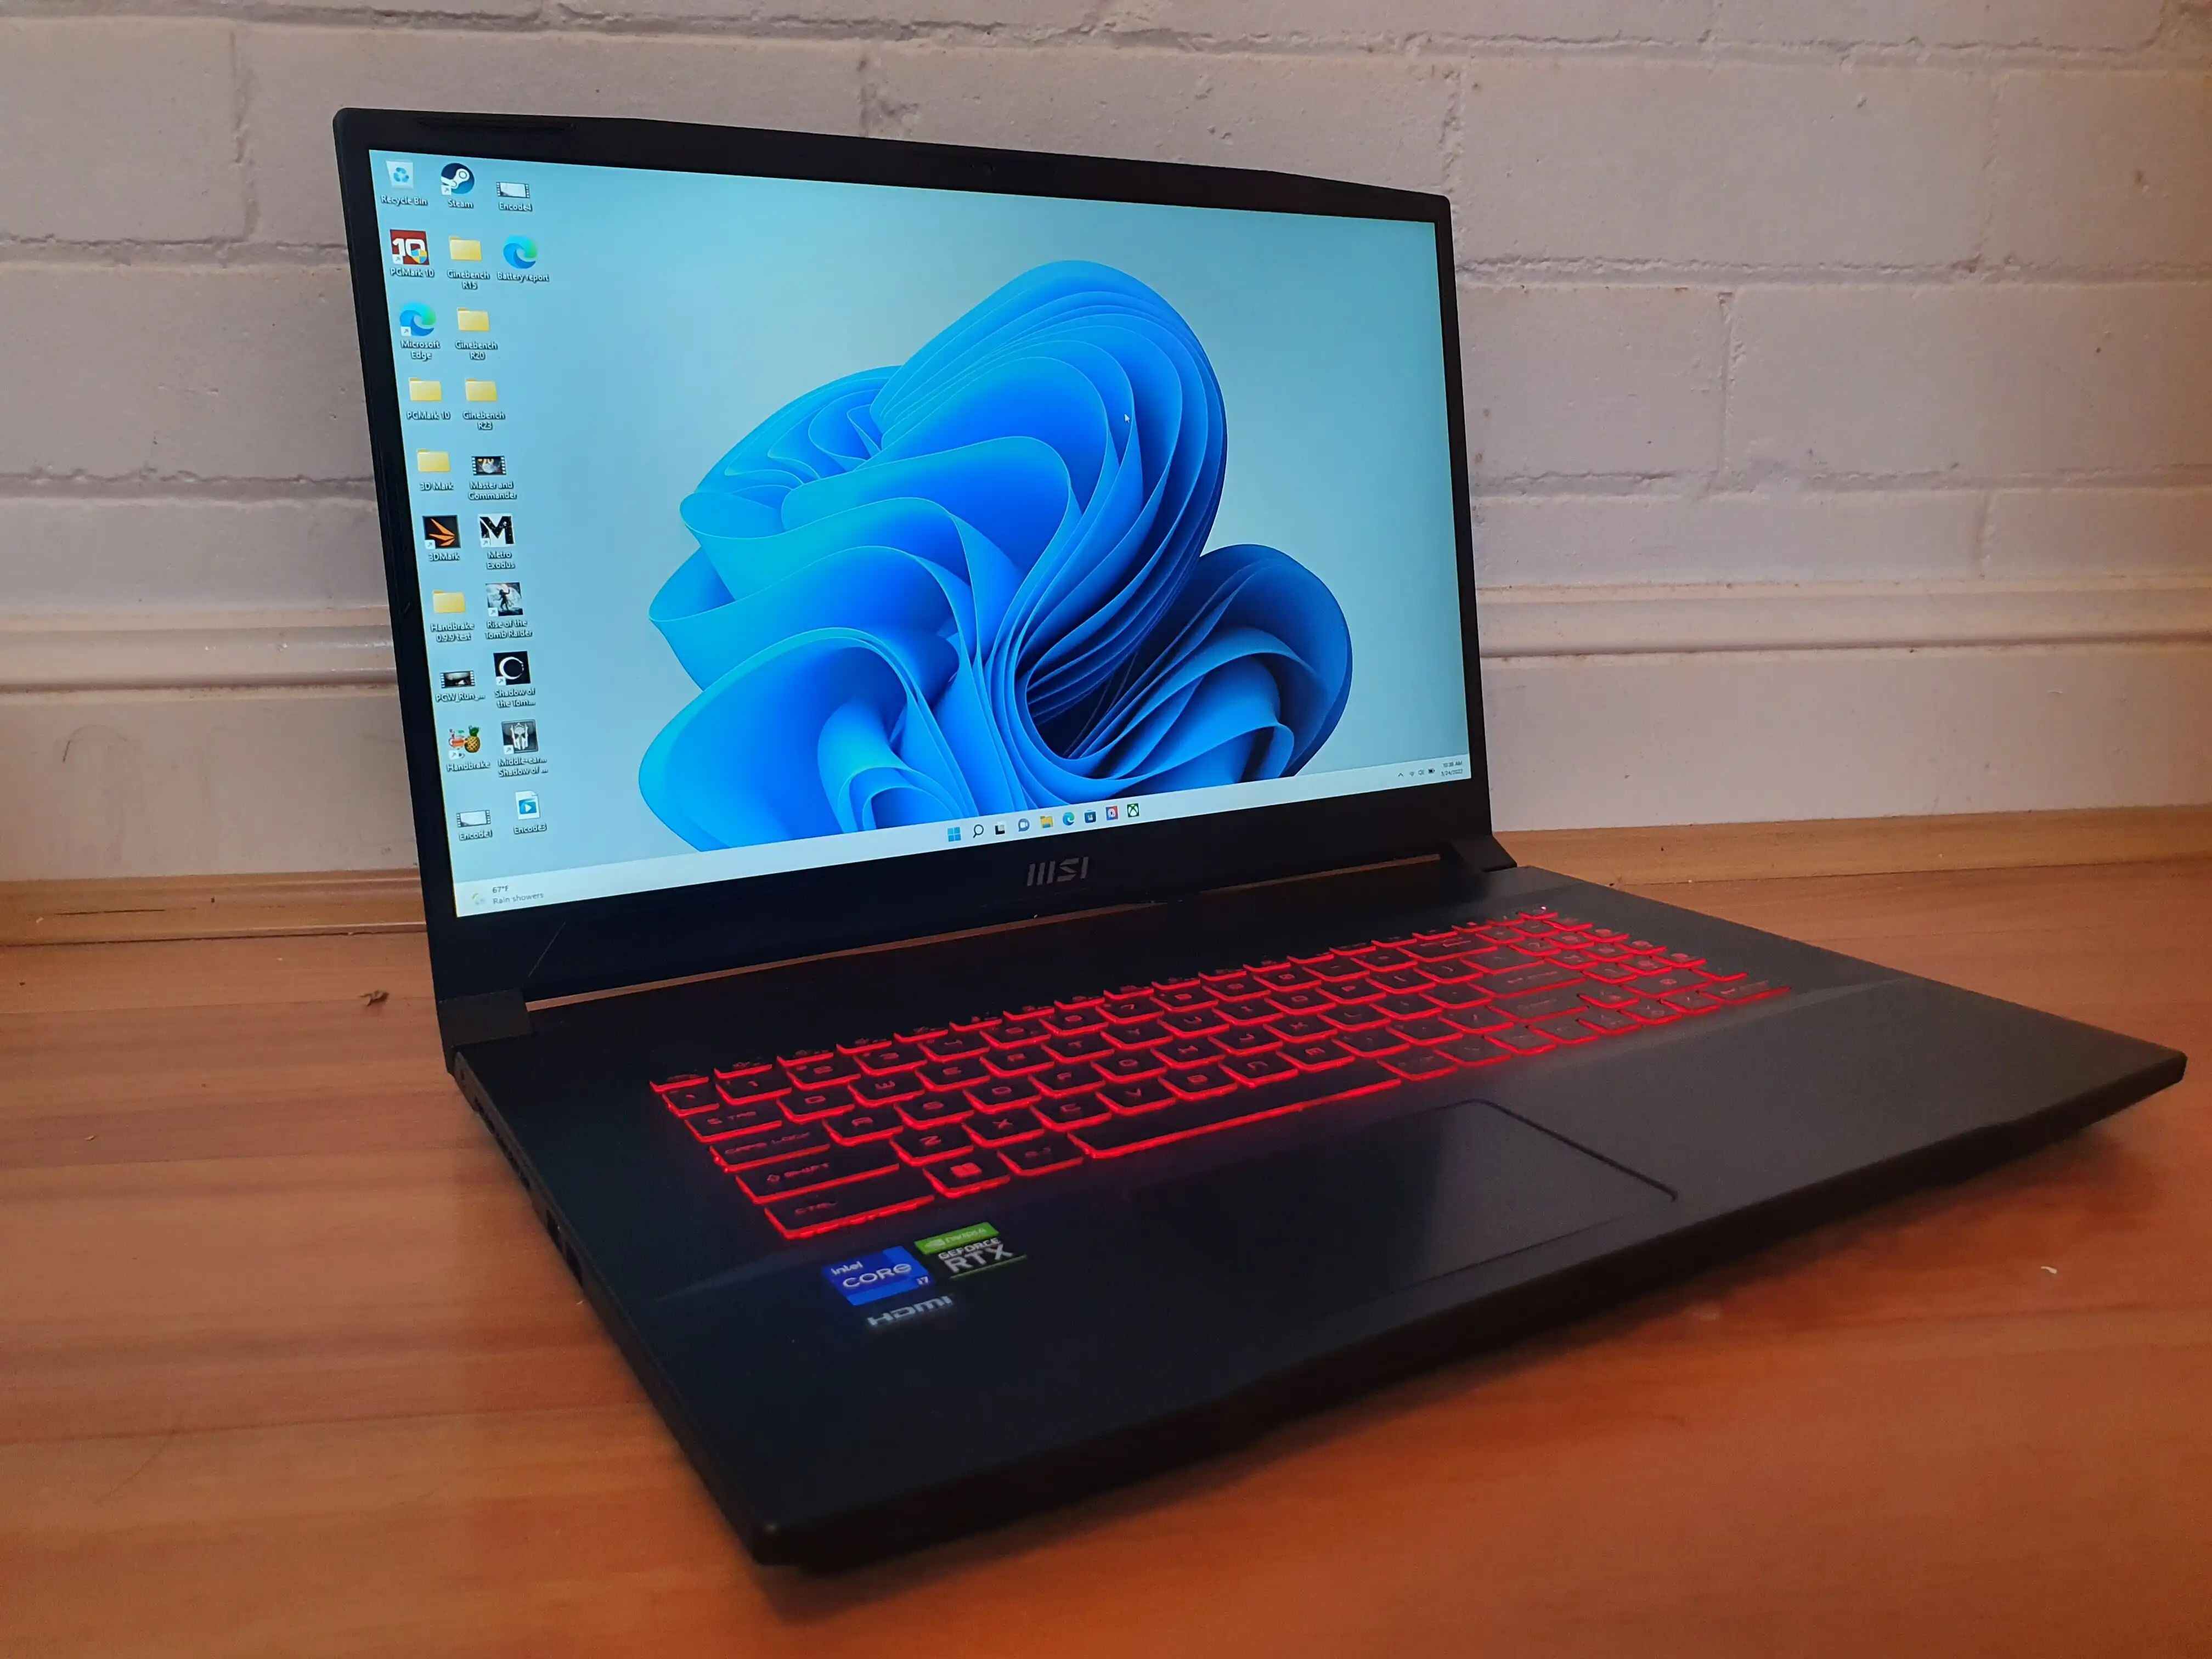
Quick Tips to Make Your Gaming Laptop Faster
When it comes to gaming, a fast and responsive laptop can significantly enhance your gaming experience. If you find that your gaming laptop is not performing as well as it used to, there are several quick tips that can help you give it a speed boost. From optimizing Windows settings to upgrading hardware components, here are some effective ways to make your gaming laptop faster:
1. Optimize Windows Settings: Start by optimizing the power settings to ensure your laptop is running at its full potential. Adjust the performance settings to prioritize performance over energy saving.
2. Update Graphics Drivers: Keeping your graphics drivers up to date can help improve performance and fix any compatibility issues with games. Visit the manufacturer’s website or use the device manager to update your graphics drivers.
3. Manage Background Processes: Close any unnecessary background processes that might be consuming CPU and memory resources. Use the Task Manager to identify resource-hogging applications and end them.
4. Disable Unnecessary Startup Programs: Some programs automatically start when you boot up your laptop, slowing down the startup time. Disable any unwanted startup programs through the Task Manager or System Configuration tool.
5. Increase Virtual Memory: Adjusting the size of your virtual memory (page file) can help improve performance when you have multiple applications running simultaneously. Set it to a higher value or let the system manage it automatically.
6. Clean Up Hard Drive Space: Regularly clean up your hard drive by removing unnecessary files, temporary files, and old downloads. Use the built-in Disk Cleanup tool or third-party software to free up space.
7. Defragment Your Hard Drive: Over time, files on your hard drive can become fragmented, resulting in slower access times. Run the built-in Disk Defragmenter tool to optimize your hard drive’s performance.
8. Upgrade Your RAM: If your laptop has limited RAM, upgrading it can significantly improve performance. Check your laptop’s specifications and install additional RAM if needed.
9. Check for Malware or Viruses: Malware and viruses can consume system resources, leading to slower performance. Use a reliable antivirus program to scan and remove any threats.
10. Reduce Visual Effects: Disable unnecessary visual effects in Windows settings to allocate more resources to gaming. Choose the “Adjust for best performance” option or manually disable specific effects.
These quick tips can help you optimize your gaming laptop and ensure it is running at its best performance. Implementing these strategies can make a noticeable difference in your gaming experience, allowing you to enjoy smooth and lag-free gameplay. Experiment with these tips and find the ones that work best for your specific laptop configuration.
Optimize Windows Settings
Optimizing the Windows settings on your gaming laptop is essential to ensure it runs at its full potential. By tweaking a few settings, you can improve performance and make your gaming experience smoother. Here are some tips to optimize your Windows settings:
Adjust Power Settings: Start by adjusting the power settings to prioritize performance over energy saving. Go to the Control Panel and navigate to Power Options. Choose the High Performance plan to maximize your laptop’s performance while gaming. Keep in mind that this may affect your battery life.
Disable Background Processes: Background processes running on your laptop can consume valuable system resources. To manage these processes, open the Task Manager by pressing Ctrl + Shift + Esc. In the Processes tab, identify any unnecessary applications or processes that are hogging CPU and memory usage. Right-click on them and select End Task to free up resources.
Update Windows: Keeping your Windows operating system up to date is crucial for optimal performance and security. Windows updates often include bug fixes, performance improvements, and driver updates. Go to the Settings app, click on Update & Security, and check for updates. Install any available updates to ensure your system is running on the latest version.
Adjust Visual Effects: Windows comes with a variety of visual effects that can consume system resources. By adjusting these settings, you can free up resources for gaming. Right-click on This PC or My Computer, select Properties, then click on “Advanced system settings.” Under the Performance section, click on Settings and choose “Adjust for best performance” to disable visual effects. Alternatively, you can customize which effects to disable individually according to your preference.
Disable Unnecessary Services: Windows services can also run in the background and use up system resources. To disable unnecessary services, press Win + R to open the Run dialog, type “msconfig,” and press Enter. Go to the Services tab, check the “Hide all Microsoft services” box, and then disable any services that you don’t need for gaming. Be cautious and research services before disabling them to avoid any negative consequences.
These optimizations will help ensure that your gaming laptop is running efficiently and maximizing performance. Experiment with these settings to find the configuration that works best for your specific needs. By fine-tuning your Windows settings, you can enhance the overall speed and responsiveness of your gaming laptop, allowing you to immerse yourself fully in the gaming experience without any lag or performance issues.
Update Graphics Drivers
One of the key factors influencing the performance of your gaming laptop is the graphics drivers. Graphics drivers act as a bridge between your operating system and the graphics hardware, ensuring smooth communication and optimal performance. Updating your graphics drivers can significantly improve gaming performance and fix any compatibility issues. Follow these steps to update your graphics drivers:
Identify Your Graphics Card: Before updating your drivers, you need to know the exact make and model of your graphics card. To find this information, right-click on the Start menu, select Device Manager, and expand the Display adapters category. Note down the name of your graphics card.
Visit the Manufacturer’s Website: Once you have identified your graphics card, visit the manufacturer’s website to download the latest graphics drivers. Manufacturers regularly release updated drivers to improve performance, fix bugs, and enhance compatibility with the latest games.
Download and Install the Drivers: Look for the support or drivers section on the manufacturer’s website. Enter the model number or search for your graphics card model to find the specific download page. Select the latest driver that matches your operating system and download it.
Install the Drivers: Once the driver is downloaded, run the installer and follow the on-screen instructions to install the updated graphics drivers. During the installation process, make sure to select the custom installation option if available, as this allows you to perform a clean installation without any unnecessary extras.
Restart Your Laptop: After installing the updated drivers, restart your gaming laptop to apply the changes. This will ensure that the new drivers are properly loaded and integrated into the system.
Automated Driver Update Tools: If you find it challenging to manually search for and update your graphics drivers, you can use automated driver update tools. These tools scan your system, detect outdated drivers, and automatically download and install the latest versions. Popular tools include Driver Booster, Snappy Driver Installer, and Driver Easy.
By regularly updating your graphics drivers, you can ensure that your gaming laptop is running with the latest performance optimizations and fixes. Updated drivers can provide better graphics rendering, improved game compatibility, and enhanced stability. Take the time to check for driver updates periodically and stay up to date with the latest releases from your graphics card manufacturer. This will help you maximize the potential of your gaming laptop and enhance your gaming experience without any performance issues.
Manage Background Processes
Background processes running on your gaming laptop can significantly impact its performance. These processes consume valuable system resources such as CPU, memory, and disk usage, which can result in reduced gaming performance. By managing and controlling background processes, you can optimize your laptop’s performance and ensure that resources are allocated efficiently for gaming. Here are some tips for managing background processes:
Identify Resource-Hogging Processes: The first step is to identify which processes are consuming the most resources on your laptop. Open the Task Manager by pressing Ctrl + Shift + Esc or right-clicking on the taskbar and selecting Task Manager. In the Processes or Details tab, you can see the list of running processes along with the resources they are using. Sort the processes by their CPU or memory usage to identify any significant resource hogs.
End Unnecessary Background Processes: Once you have identified resource-hogging processes, you can selectively end those that are not essential. Right-click on the process you want to end and select End Task. Exercise caution and avoid terminating processes that are critical for your system’s stability and functionality.
Disable Startup Programs: Some programs automatically launch when you start your laptop, running in the background and consuming system resources. To manage these startup programs, open the Task Manager and navigate to the Startup tab. Here, you can see a list of programs that start automatically with your laptop. Disable any programs that you don’t need to launch at startup by right-clicking on them and selecting Disable.
Use System Configuration: Another way to manage background processes is through the System Configuration tool. Press Win + R to open the Run dialog, type “msconfig,” and press Enter. In the System Configuration window, go to the Startup tab to see a list of startup programs. Uncheck the programs that you don’t want to run at startup and click Apply to save the changes.
Third-Party Process Managers: In addition to the built-in Task Manager, you can also use third-party process managers to gain more control over background processes. Tools like Process Explorer and Process Hacker provide additional features and insights into running processes, allowing you to manage them more effectively.
By managing background processes, you can free up valuable system resources and ensure that they are utilized for gaming purposes. This will result in improved performance, reduced system lag, and smoother gameplay. Regularly review and adjust your background processes to optimize your gaming laptop’s performance and maximize its potential.
Disable Unnecessary Startup Programs
When you start up your gaming laptop, numerous programs and applications may also start automatically, running in the background and consuming valuable system resources. These unnecessary startup programs not only slow down the booting process but also impact the overall performance of your laptop. By disabling unnecessary startup programs, you can significantly enhance your laptop’s speed and free up valuable system resources for gaming. Follow these steps to disable unnecessary startup programs:
Using Task Manager:
1. Press Ctrl + Shift + Esc or right-click on the taskbar and select Task Manager to open it.
2. In the Task Manager window, go to the Startup tab. This tab displays a list of programs that launch automatically when your laptop starts.
3. Review the list of startup programs and identify the ones that you don’t need to launch at every startup.
4. Right-click on the unnecessary startup program and select “Disable” to prevent it from launching at startup.
5. Repeat the process for all the programs that you want to disable.
Using System Configuration:
1. Press Win + R to open the Run dialog box.
2. Type “msconfig” and press Enter to open the System Configuration window.
3. In the System Configuration window, go to the Startup tab.
4. Uncheck the boxes next to the unnecessary startup programs that you want to disable.
5. Click Apply and then OK to save the changes.
6. Restart your laptop for the changes to take effect.
Using Third-Party Software:
Alternatively, you can use third-party software to manage your startup programs. Tools like CCleaner and Autoruns provide comprehensive features to enable or disable startup programs conveniently. Install a trusted third-party software, open the startup manager section, and selectively disable unnecessary programs.
By disabling unnecessary startup programs, you not only improve the boot time of your laptop but also prevent resource-intensive programs from running in the background. This allows your laptop to allocate its resources more efficiently, resulting in improved performance during gaming sessions. Regularly review and manage your startup programs to ensure that only essential programs are running at startup, making the most of your gaming laptop’s capabilities.
Increase Virtual Memory
Virtual memory, also known as the page file, is a portion of your hard drive that is used as additional RAM when your physical RAM is fully utilized. By increasing the size of your virtual memory, you can provide your gaming laptop with more space to store temporary data, which can help improve performance when you have multiple applications running simultaneously. Here’s how you can increase virtual memory:
Access System Properties:
1. Right-click on the Start menu and select System.
2. In the System window, click on “Advanced system settings” on the left sidebar.
3. In the System Properties window that appears, select the Advanced tab.
Configure Virtual Memory:
4. Under the Performance section, click on the Settings button.
5. In the Performance Options window, go to the Advanced tab.
6. Under the Virtual Memory section, click on the Change button.
Adjust Virtual Memory Size:
7. Uncheck the “Automatically manage paging file size for all drives” option at the top.
8. Select the drive where Windows is installed (usually the C: drive).
9. Choose the “Custom size” option.
10. Specify the initial size (MB) and maximum size (MB) for the virtual memory. The maximum size should generally be 1.5 to 3 times the size of your physical RAM (e.g., if you have 8GB RAM, you can set the maximum size to 12GB to 24GB).
11. Click the Set button, then OK to apply the changes.
Restart Your Laptop:
12. Restart your gaming laptop to let the changes take effect.
By increasing the size of your virtual memory, you provide your laptop with additional memory resources, which can help prevent performance issues caused by excessive memory usage. However, it’s important to note that virtual memory cannot match the speed and efficiency of physical RAM. Therefore, it’s recommended to have an adequate amount of physical RAM installed in your laptop for optimal gaming performance.
Regularly monitoring the performance of your laptop and adjusting the virtual memory settings can help ensure that your system is utilizing its resources efficiently and maximizing performance while gaming. Experiment with different virtual memory sizes to find a configuration that works best for your specific needs and hardware setup.
Clean Up Hard Drive Space
Over time, your gaming laptop’s hard drive can become cluttered with unnecessary files, temporary data, and other digital debris. This accumulation of files can take up valuable disk space and lead to slower performance. By cleaning up your hard drive and freeing up space, you can improve the overall speed and responsiveness of your gaming laptop. Here are some tips to effectively clean up your hard drive:
Use Disk Cleanup: Windows provides a built-in tool called Disk Cleanup that helps you remove unwanted files. To access Disk Cleanup, follow these steps:
1. Press Win + R to open the Run dialog box.
2. Type “cleanmgr” and press Enter.
3. Select the drive you want to clean up (usually the C: drive).
4. Disk Cleanup will analyze your disk and present a list of file categories.
5. Select the file categories you want to clean up, such as temporary files, system files, and recycle bin.
6. Click OK and then confirm the deletion.
Delete Unnecessary Files and Downloads: Manually review your hard drive and remove any files and folders that you no longer need. Look for old documents, pictures, videos, and downloads that can be safely deleted. Be cautious and ensure that you don’t delete any essential system files or personal files that you want to keep.
Uninstall Unnecessary Programs: In addition to files, uninstalling unnecessary programs can also free up significant amounts of hard drive space. Open the Control Panel, go to Programs and Features, and review the list of installed programs. Uninstall any programs that you no longer use or need.
Use Third-Party Disk Cleanup Tools: Consider using third-party disk cleanup tools that offer advanced features and a more comprehensive cleaning process. Examples of popular disk cleanup software include CCleaner, Wise Disk Cleaner, and BleachBit. These tools can identify and remove additional unnecessary files that the built-in Disk Cleanup tool might miss.
Empty the Recycle Bin: When you delete files, they are moved to the Recycle Bin, where they still consume disk space. Emptying the Recycle Bin will permanently delete these files and free up space on your hard drive. Simply right-click on the Recycle Bin icon on your desktop and select “Empty Recycle Bin.”
By regularly cleaning up your hard drive, you can remove unnecessary files and free up valuable disk space. This not only improves the performance of your gaming laptop but also ensures that you have enough space for new games and applications. Make it a habit to clean up your hard drive periodically to maintain optimal performance and keep your laptop running smoothly.
Defragment Your Hard Drive
As you use your gaming laptop, files on your hard drive can become fragmented. This means that parts of a single file are scattered across different physical locations on the hard drive, leading to slower access times and reduced overall performance. Defragmenting your hard drive can help optimize file placement and improve the speed at which data is accessed. Here’s how you can defragment your hard drive:
Use the Built-in Windows Defragmentation Tool:
1. Press the Win + R keys to open the Run dialog box.
2. Type “dfrgui” and press Enter to open the Disk Defragmenter tool.
3. Select the drive you want to defragment (usually the C: drive).
4. Click on the “Analyze” button to see the current fragmentation status of the drive. The tool will determine whether or not the drive needs defragmentation.
5. If the tool recommends defragmentation, click on the “Defragment” button to start the process. This may take some time to complete, depending on the size and fragmentation level of your hard drive.
Consider Third-Party Defragmentation Software:
While the built-in Windows Disk Defragmenter tool is sufficient for most users, you may opt to use third-party defragmentation software for additional features and more advanced control over the process. Some popular third-party defragmentation tools include Defraggler, Auslogics Disk Defrag, and MyDefrag. These tools can provide more detailed analysis and customization options for defragmenting your hard drive.
Schedule Regular Defragmentation:
To maintain optimal performance, it is recommended to schedule regular automatic defragmentation. This ensures that your hard drive remains optimized without manual intervention. In Windows, you can set up scheduled defragmentation by going to the Disk Defragmenter tool, clicking on “Configure schedule,” and selecting the frequency and timing for automatic defragmentation.
Consider an SSD:
If your gaming laptop has a solid-state drive (SSD) instead of a traditional hard drive, note that SSDs do not require defragmentation. In fact, defragmenting an SSD can reduce its lifespan. SSDs have different methods of managing data, and they benefit more from regular TRIM operations to optimize their performance. So, if your laptop has an SSD, focus on regular maintenance and TRIM operations rather than defragmenting the drive.
Defragmenting your hard drive can help rearrange file fragments and improve the overall performance of your gaming laptop. By periodically defragmenting your hard drive or using an automatic schedule, you can ensure that your files are organized and easily accessible. This results in faster loading times for games and applications, providing a smoother gaming experience.
Upgrade Your RAM
One of the most effective ways to improve the performance of your gaming laptop is by upgrading your RAM (Random Access Memory). RAM plays a crucial role in the overall speed and responsiveness of your system, especially when running demanding games and applications. Upgrading your RAM can provide your laptop with additional memory resources, allowing it to handle more tasks simultaneously and reducing the chances of performance bottlenecks. Here’s how you can upgrade your RAM:
Determine the Compatible RAM:
1. Check your laptop’s specifications to determine the type and maximum capacity of RAM it supports. This information is usually available on the manufacturer’s website or in the user manual.
2. Identify the RAM module size and speed. This information can be found on the existing RAM module or by using system information tools like CPU-Z or Speccy.
Purchase the New RAM Modules:
3. Once you have the required information, purchase the compatible RAM modules from a trusted retailer or online store. Ensure that the modules match the specifications of your laptop’s RAM slots.
Prepare Your Laptop:
4. Before installing new RAM modules, make sure to power off your laptop and unplug it from the power source. Remove the battery, if possible.
Access the RAM Slots:
5. Locate the RAM slots on your laptop. In most cases, the RAM slots are located at the bottom of the laptop or under a removable panel. Refer to your laptop’s user manual for specific instructions.
Install the New RAM Modules:
6. Carefully insert the new RAM modules into the available slots. Align the notch on the module with the corresponding slot and gently push it in until it clicks into place. Make sure the modules are seated properly.
Close and Power Up:
7. Once the new RAM modules are installed, close any panels or covers that were opened. Reinsert the battery, if applicable.
8. Connect the power cable and turn on your laptop to ensure that the new RAM modules are recognized and functioning correctly.
Upgrading your RAM can significantly boost the performance of your gaming laptop by allowing it to handle more data and applications simultaneously. With increased RAM capacity, your laptop will experience smoother multitasking, faster loading times, and improved overall system responsiveness during gaming sessions. Research your laptop’s compatibility, purchase the right RAM modules, and follow the installation steps carefully to enjoy the benefits of an upgraded RAM system.
Check for Malware or Viruses
Malware and viruses can significantly impact the performance and security of your gaming laptop. These malicious programs consume system resources, slow down processes, and may even compromise your personal data. Regularly checking for malware and viruses on your laptop is essential to ensure optimal performance and maintain a safe gaming environment. Here’s how you can effectively check for malware or viruses:
Use Antivirus Software:
1. Install a reputable antivirus software on your gaming laptop. There are several trusted options available, such as Avast, McAfee, Norton, and Bitdefender.
2. Update the antivirus software to ensure it has the latest virus definitions and security patches.
3. Perform a full system scan using the antivirus software. This scan will thoroughly examine your entire laptop, including files, programs, and system memory.
Malware Removal Tools:
4. Consider using additional malware removal tools alongside your antivirus software for a more comprehensive scan. Popular tools include Malwarebytes, Spybot Search & Destroy, and AdwCleaner. These tools can help detect and remove adware, spyware, and other potentially unwanted programs that may not be detected by traditional antivirus software.
Keep Your Software Updated:
5. Regularly update your operating system, web browsers, and other software installed on your laptop. Software updates often include security patches that fix vulnerabilities and protect against known malware or virus threats.
Exercise Safe Internet Practices:
6. Be cautious when downloading files or visiting websites. Avoid clicking on suspicious links, downloading files from untrusted sources, or opening emails from unknown senders. These practices can help mitigate the risk of malware infections.
Scan External Devices:
7. If you connect external devices, such as USB drives or external hard drives, to your gaming laptop, scan them for malware before accessing any files. External devices can serve as a potential source of malware transfer.
Checking for malware or viruses on your gaming laptop is a crucial step to ensure a secure and high-performing system. By using reputable antivirus software, performing regular scans, and keeping your software updated, you can minimize the risk of malware infections and maintain the integrity of your gaming experience. Make it a habit to perform regular scans and stay vigilant when browsing the internet to protect your gaming laptop and personal data from potential threats.
Reduce Visual Effects
Gaming laptops often come equipped with high-quality graphics capabilities, allowing games to be displayed with stunning visual effects. However, these visual effects require a significant amount of system resources, which can impact the overall performance of your gaming laptop. By reducing or disabling unnecessary visual effects, you can allocate more resources to the actual gameplay and improve the overall speed and responsiveness of your system. Here’s how you can reduce visual effects:
Access Visual Effects Settings:
1. Right-click on the Start menu and select System.
2. In the System window, click on “Advanced system settings” on the left sidebar.
3. In the System Properties window that appears, select the Advanced tab.
4. Under the Performance section, click on the Settings button.
Adjust Visual Effects:
5. In the Performance Options window, you can choose between predefined settings or customize individual visual effects.
6. If you prefer a quick and easy solution, select the “Adjust for best performance” option, which will disable all visual effects.
7. Alternatively, if you want to customize the visual effects, select the “Custom” option and manually enable or disable specific effects based on your preference.
Common Visual Effects to Disable:
8. Some visual effects consume more resources than others. Consider disabling effects such as animations, transparency, and shadows. These effects may enhance the visual aspects of your desktop but can be safely disabled to prioritize gaming performance.
Preview and Apply Changes:
9. As you disable or enable visual effects, you can click on the “Apply” button to see a preview of the changes. This allows you to assess how the changes affect the appearance of your desktop.
By reducing the visual effects on your gaming laptop, you free up valuable system resources that can be utilized for gaming, resulting in smoother gameplay and improved performance. Experiment with different settings and find a balance between visual quality and performance that suits your preferences. Remember to regularly review and adjust these settings as you install new games or update your system to optimize your gaming laptop’s performance.
Adjust Power Settings
Optimizing the power settings on your gaming laptop can significantly impact its performance and battery life. By adjusting the power settings to meet your specific needs, you can strike a balance between performance and energy efficiency. Here are some tips on how to adjust the power settings to optimize your gaming experience:
Access Power Options:
1. Right-click on the battery icon in the system tray or go to the Control Panel and navigate to Power Options.
2. The Power Options window will allow you to choose between various power plans. The available plans may vary depending on your laptop and operating system.
Select a Power Plan:
3. Choose a power plan that aligns with your gaming needs. Most laptops offer options like Balanced, Power Saver, and High Performance. Each power plan has different settings for the display brightness, sleep mode, and processor performance.
Modify Power Plan Settings:
4. To further customize the power plan, click on “Change plan settings” next to your selected power plan.
5. Adjust the sleep and display settings based on your preferences. For gaming, it’s recommended to set the “Turn off display” and “Put the computer to sleep” options to longer durations. This will prevent the laptop from entering sleep mode or turning off the display during gaming sessions.
Advanced Power Settings:
6. To access advanced power settings, click on “Change advanced power settings” in the Power Options window. This will open the Power Options dialog box.
7. Within the advanced power settings, you can fine-tune additional aspects such as processor power management, PCI Express settings, and USB power settings. These settings allow you to control the power usage of specific components.
Maximum Performance:
8. If you prioritize performance over battery life, you can choose the High Performance power plan or adjust the settings to optimize for maximum performance. This ensures that your laptop is using its full power potential, resulting in better gaming performance.
Battery Saver Mode:
9. Conversely, if you want to conserve battery life during gaming sessions, you can select the Power Saver power plan. This plan reduces the performance of your laptop to extend battery life, which may result in a slight decrease in gaming performance.
By adjusting the power settings on your gaming laptop, you can optimize the performance-to-power consumption ratio to meet your specific needs. Experiment with different power plans and settings to find the balance that works best for you. Remember to consider the trade-off between performance and battery life, especially when gaming on battery power.
Keep Your Laptop Cool
Ensuring that your gaming laptop stays cool is essential for its performance, longevity, and overall gaming experience. When your laptop gets too hot, it can lead to thermal throttling, decreased performance, and even hardware damage. Here are some tips on how to keep your laptop cool:
Clean the Cooling Vents:
1. Over time, dust and debris can accumulate in the cooling vents, obstructing airflow and impeding heat dissipation. Regularly clean the vents using compressed air or a soft brush to remove any debris or buildup.
Use a Cooling Pad or Stand:
2. Invest in a cooling pad or stand specifically designed to help keep laptops cool. These pads usually have built-in fans that provide extra airflow to help dissipate heat. Place your laptop on the cooling pad or stand while gaming to keep it cool during intense sessions.
Elevate Your Laptop:
3. Elevating your laptop can help improve airflow and prevent heat buildup. Use a laptop cooling stand or elevate your laptop using a book or a stand to allow air to circulate underneath.
Avoid Blocking the Vents:
4. When using your laptop, ensure that the cooling vents are not blocked by placing it on a flat surface. Avoid using your laptop on soft materials like pillows or blankets, as they can block airflow and cause the laptop to overheat.
Use Thermal Paste:
5. Over time, the thermal paste between the CPU and the heat sink can degrade, leading to poor heat transfer. If you’re comfortable with it, you can apply new thermal paste to improve heat dissipation. However, exercise caution and be aware that this may void your warranty.
Monitor Temperatures:
6. Install temperature monitoring software to keep an eye on your laptop’s internal temperatures. Several free software options are available, such as Core Temp and HWMonitor. Monitor the temperatures while gaming and take necessary precautions if they are consistently reaching high levels.
Avoid Overclocking:
7. While overclocking your laptop’s components can boost performance, it also generates more heat. If you notice that your laptop is already running hot, it’s advisable to avoid overclocking to prevent further heating issues.
Avoid Extreme Ambient Temperatures:
8. Gaming in extremely hot or cold environments can impact the temperature of your laptop. Avoid exposing your laptop to direct sunlight or cold drafts, as these extreme temperatures can affect its performance and potentially damage the components.
By implementing these cooling techniques, you can help maintain optimal performance and extend the lifespan of your gaming laptop. Remember to clean the cooling vents regularly, use a cooling pad or stand, elevate your laptop for better airflow, and monitor temperatures to prevent overheating. Taking care of the cooling aspects will ensure that your laptop stays cool during intense gaming sessions, allowing you to enjoy smooth and uninterrupted gameplay.
Use Game Boosting Software
To enhance the performance of your gaming laptop, you can utilize game boosting software specifically designed to optimize system resources, improve gameplay, and eliminate performance bottlenecks. These software applications employ various techniques to maximize your laptop’s potential and provide a smoother gaming experience. Here’s how game boosting software can help enhance your gaming performance:
Optimize System Resources:
1. Game boosting software works by prioritizing system resources for the game you’re playing. It allocates more CPU, GPU, and RAM resources to the game, ensuring that it receives maximum power and computing capabilities.
Disable Non-Essential Processes:
2. Many game boosting software applications automatically disable non-essential processes and services that may be running in the background. By doing so, they free up valuable system resources and reduce CPU usage, resulting in improved gaming performance.
Manage System Settings:
3. Game boosting software often offers features to tweak and optimize various system settings for the best gaming performance. These settings may include CPU performance modes, GPU overclocking, and network optimization.
Update Drivers:
4. Some game boosting software includes a driver update feature that can automatically detect and update outdated graphics card and other hardware drivers. Keeping your drivers up to date is crucial for optimal gaming performance and compatibility.
Provide Game-Specific Optimization:
5. Game boosting software may offer game-specific optimizations, such as adjusting graphical settings, disabling unnecessary visual effects, and optimizing network settings. These optimizations can help achieve the best balance between visual quality and performance for each game.
Monitor FPS and System Metrics:
6. Many game boosting software applications provide real-time monitoring of frames per second (FPS) and system metrics. This information allows you to keep an eye on your laptop’s performance during gameplay and make necessary adjustments.
Overclocking and Performance Enhancements:
7. Some game boosting software can provide overclocking capabilities, allowing you to push your hardware beyond its default settings for enhanced performance. However, overclocking should be done cautiously and within safe limits.
Compatibility and Support:
8. Game boosting software is designed to be compatible with a wide range of games and hardware configurations. They often offer customer support and updates to ensure compatibility with the latest games and hardware updates.
While game boosting software can offer performance enhancements, it’s important to note that results may vary depending on your laptop’s hardware, software configuration, and the games you play. Additionally, some game boosting software may require a subscription fee or offer limited functionality in their free versions. Before using any game boosting software, research and choose a reputable and trusted application to ensure the best experience.
Game boosting software can be a valuable tool to optimize your gaming laptop’s performance, boost FPS, and eliminate performance bottlenecks. It’s worth experimenting with different software applications to find the one that suits your specific needs and enhances your gaming experience to its fullest potential.
Perform Regular Maintenance
Regular maintenance is key to keeping your gaming laptop running smoothly and performing at its best. By performing routine maintenance tasks, you can prevent issues, optimize performance, and extend the lifespan of your laptop. Here are some essential maintenance tasks you should regularly carry out:
Clean Your Laptop:
1. Dust and debris can accumulate on your laptop’s exterior and cooling vents, leading to overheating and reduced performance. Use a soft cloth or compressed air to clean the exterior of your laptop, including the keyboard, screen, and ports. Additionally, clean the cooling vents to ensure proper airflow.
Update Software:
2. Keep your operating system, drivers, and software updated to benefit from performance improvements, bug fixes, and security patches. Set up automatic updates or manually check for updates regularly.
Scan for Malware and Viruses:
3. Use antivirus software to regularly scan your laptop for malware and viruses. Schedule periodic scans to ensure that your system is protected and running smoothly.
Manage Storage Space:
4. Regularly review and clean up your storage space. Delete unnecessary files, uninstall unused applications, and move larger files to external storage devices or cloud storage. This frees up space and helps maintain optimal storage performance.
Check and Optimize Startup Programs:
5. Review the programs that launch at startup and disable any unnecessary ones to speed up the booting process. Use tools like Task Manager or System Configuration to manage startup programs.
Perform Disk Cleanup:
6. Use the built-in Disk Cleanup utility to remove temporary files, cache, and unnecessary data that accumulate on your hard drive over time. This helps free up space and optimize disk performance.
Defragment Your Hard Drive:
7. Hard drives can become fragmented over time, leading to slower file access. Use the built-in Windows Defragmentation tool or third-party software to defragment your hard drive and improve performance.
Backup Your Data:
8. Regularly back up your important files and data to an external storage device, cloud storage, or a network drive. This ensures that your data is safe and can easily be restored in case of any issues.
Monitor Temperatures:
9. Download temperature monitoring software to keep track of your laptop’s internal temperatures. High temperatures can cause performance issues and potential hardware damage. Take necessary measures, such as cleaning cooling vents or using a laptop cooling pad, to maintain optimal temperatures.
Check for Hardware Issues:
10. Periodically check your laptop’s hardware components for any signs of wear or malfunction. Pay attention to the performance of your laptop, unusual noises, or any hardware-related issues. Address any hardware problems promptly.
By performing regular maintenance tasks, you can keep your gaming laptop in peak condition, minimize performance issues, and ensure optimal gaming performance. Devote some time to these tasks on a consistent basis, whether it’s weekly, monthly, or on a schedule that suits your needs. Regular maintenance will help you get the most out of your gaming laptop and enjoy a smoother and more immersive gaming experience.
Upgrade Your Hard Drive to an SSD
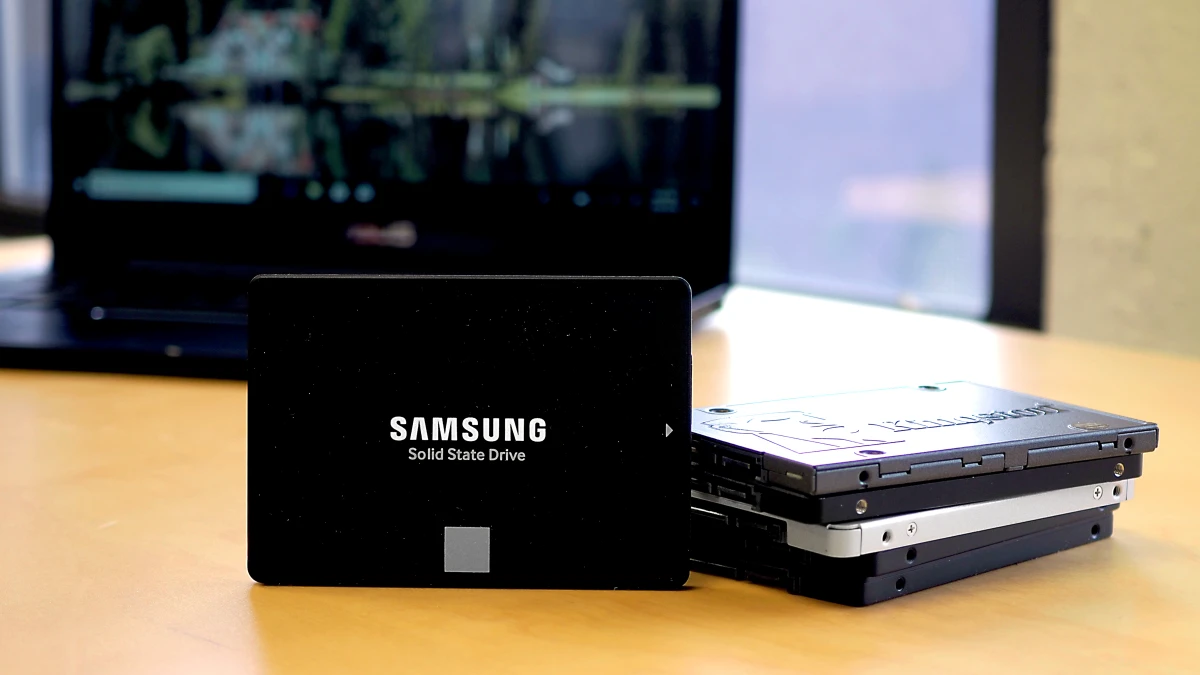
Upgrading your gaming laptop’s hard drive to a solid-state drive (SSD) can have a significant impact on its performance and overall speed. SSDs offer faster read and write speeds compared to traditional hard disk drives (HDDs), resulting in quicker boot times, reduced game loading times, and improved system responsiveness. Here’s why upgrading to an SSD is a worthwhile investment for your gaming laptop:
Improved Speed and Performance:
1. SSDs are significantly faster than HDDs since they have no moving parts. This allows for faster data access, resulting in quicker game load times and improved system performance during gameplay.
Faster Boot Times:
2. SSDs have faster boot times compared to HDDs, allowing your laptop to start up and be ready for gaming much more quickly.
Reduced Game Load Times:
3. Games installed on an SSD will load much faster compared to when they are stored on an HDD. This means you can spend more time playing games and less time waiting for them to load.
Improved System Responsiveness:
4. The faster read and write speeds of an SSD enable smoother multitasking, faster file transfers, and quicker access to your applications and files. This significantly enhances the overall responsiveness of your gaming laptop.
Silent Operation:
5. Unlike HDDs, SSDs have no moving mechanical parts, resulting in silent operation. This can make your gaming experience more immersive and enjoyable without the noise of a spinning hard drive.
Enhanced Durability and Reliability:
6. SSDs have no moving parts, making them more resistant to shock, vibration, and physical damage. This increased durability ensures that your data and gaming experience are more secure and reliable.
Energy Efficiency:
7. SSDs consume less power compared to HDDs, which can help improve your laptop’s battery life. This allows for extended gaming sessions without worrying about constantly recharging your laptop.
Easy Installation:
8. Upgrading your laptop’s hard drive to an SSD is relatively straightforward. Many laptops have easily accessible drive bays, making the installation process quick and hassle-free.
While SSDs may have a higher price per gigabyte compared to HDDs, the benefits they offer in terms of speed, performance, and reliability are well worth the investment for gaming enthusiasts. Consider the capacity you need and find an SSD that suits your budget and storage requirements. Migrating your data from the old hard drive to the new SSD can be done using cloning software or a fresh operating system installation. Upgrade your hard drive to an SSD and enjoy a significant boost in performance for your gaming laptop.
Disable Windows Game Bar and Game DVR
When gaming on a Windows operating system, the Game Bar and Game DVR features are designed to enhance the gaming experience by allowing you to capture screenshots, record gameplay, and access various gaming-related settings. However, these features can consume system resources and impact gaming performance, especially on lower-end or older gaming laptops. Disabling the Windows Game Bar and Game DVR can help optimize your laptop’s performance and ensure a smoother gaming experience. Here’s how you can disable these features:
Disable Windows Game Bar:
1. Open the Settings app by pressing Win + I.
2. In the Settings window, click on “Gaming.”
3. In the left sidebar, click on “Game Bar.”
4. Toggle off the “Record game clips, screenshots, and broadcast using Game Bar” option.
Disable Game DVR:
5. While still in the Gaming section of the Settings app, click on “Captures” in the left sidebar.
6. Toggle off the “Record in the background while I’m playing a game” option.
Disable Xbox Game Bar via Registry Editor:
7. Press Win + R to open the Run dialog box.
8. Type “regedit” and press Enter to open the Registry Editor.
9. In the Registry Editor, navigate to “HKEY_CURRENT_USER\Software\Microsoft\Windows\CurrentVersion\GameDVR.”
10. Locate the “AppCaptureEnabled” DWORD value and set its data to “0” to disable the Xbox Game Bar.
Disabling the Windows Game Bar and Game DVR features can help free up system resources that are otherwise dedicated to recording and screenshots. This allocation of resources can improve gaming performance, especially on laptops with limited hardware capabilities. Remember that disabling these features will also prevent you from accessing their functionalities, such as capturing gameplay or taking screenshots, so consider your needs before disabling them.
With the Windows Game Bar and Game DVR disabled, you can enjoy a more streamlined gaming experience on your laptop, focusing solely on your gameplay without the overhead of these features running in the background. If you ever wish to re-enable them, simply follow the same steps and toggle the options back on. Customize your gaming settings to extract the best performance from your laptop and fully immerse yourself in your gaming adventures.
Adjust Graphics Settings in Games
Adjusting the graphics settings in games can have a significant impact on the performance and visual quality of your gaming experience. Every game offers a range of graphics settings that allow you to customize the level of detail and effects rendered on your gaming laptop. By finding the right balance between visual quality and performance, you can optimize your gaming experience and ensure smooth gameplay. Here’s how you can adjust graphics settings in games:
Access the Graphics Settings:
1. Launch the game that you want to adjust the graphics settings for.
2. Look for a “Settings,” “Options,” or “Graphics” menu within the game’s main menu or pause menu.
Visual Quality Presets:
3. Many games offer visual quality presets such as “Low,” “Medium,” “High,” and “Ultra.” These presets automatically adjust multiple graphics settings to predefined levels. Choose a preset that suits your preferences and hardware capabilities. Lower presets sacrifice visual quality for better performance, while higher presets offer more detailed visuals but require stronger hardware.
Individual Graphics Settings:
4. For more control, games often allow you to adjust individual graphics settings. These settings may include resolution, texture quality, anti-aliasing, shadow quality, lighting effects, and more. Experiment with different settings to find the right balance between visual quality and performance.
Resolution:
5. The resolution determines the number of pixels displayed on your screen. Higher resolutions offer sharper visuals but demand more processing power. Lowering the resolution can improve performance on laptops with lower-end graphics cards.
Texture Quality:
6. Texture quality affects the level of detail and clarity of in-game textures. Higher-quality textures enhance visual fidelity but require more VRAM. Lowering the texture quality can improve performance, especially on laptops with limited VRAM.
Anti-Aliasing:
7. Anti-aliasing smooths out jagged edges in games. It can have a significant impact on performance, especially at higher levels. Experiment with different anti-aliasing settings or consider disabling it altogether if you prioritize performance over visual quality.
Shadow Quality and Lighting Effects:
8. Shadow quality and lighting effects contribute to the overall realism and atmosphere in games. Higher settings provide more accurate and detailed shadows, but they can impact performance. Adjust these settings according to your hardware capabilities and personal preferences.
Save and Apply Changes:
9. After adjusting the graphics settings, save and apply the changes. Some games may require a restart to apply the new settings.
By adjusting the graphics settings in games, you can find the optimal balance between visual quality and performance that suits your gaming laptop’s capabilities. Note that different games may offer different graphics settings and terminology, so familiarize yourself with each game’s settings menu. Regularly reviewing and adjusting these settings can help ensure smooth gameplay and an enjoyable gaming experience tailored to your preferences and hardware configuration.
Overclock Your GPU
Overclocking your GPU (Graphics Processing Unit) is a technique that can boost the performance of your gaming laptop by pushing your graphics card beyond its default settings. By increasing the clock speed and potentially adjusting voltage, you can achieve higher frame rates and better overall gaming performance. However, it’s important to note that overclocking carries some risks, including increased heat generation and potential stability issues. Here’s how you can overclock your GPU:
Research and Preparation:
1. Before attempting to overclock your GPU, research the specific model and manufacturer guidelines. Review online resources, forums, and user experiences to familiarize yourself with the process and potential risks.
Stability Testing Software:
2. Download and install stability testing software, such as FurMark or Heaven Benchmark, to assess the stability of your overclocked GPU. These programs stress-test the graphics card to identify any potential issues.
Overclocking Tools:
3. Many graphics card manufacturers provide their own overclocking software with user-friendly interfaces. Examples include MSI Afterburner, EVGA Precision X1, and ASUS GPU Tweak. These tools allow you to adjust clock speeds, voltages, and fan curves to overclock your GPU safely.
Incremental Adjustments:
4. Start by incrementally increasing the core clock speed and memory clock speed of your GPU. Make small adjustments, such as increasing the core clock speed by 25 MHz, and test for stability using the stability testing software mentioned earlier.
Monitoring Temperatures:
5. Keep a close eye on your GPU temperatures while overclocking. Higher clock speeds can increase heat generation. Use monitoring software such as MSI Afterburner, GPU-Z, or HWMonitor to monitor temperature levels.
Finding the Maximum Stable Overclock:
6. Continue incrementally increasing the clock speeds and testing for stability until you encounter instability or artifacts during gameplay or stability testing. If instability occurs, reduce the clock speeds slightly until stability is restored.
Fine-tuning and Stress Testing:
7. Once you find a stable overclock, fine-tune the settings to optimize performance. Test the overclocked GPU under heavy gaming loads for prolonged periods to ensure stability.
Temperature and Power Limit:
8. Adjust the fan curve to increase cooling capacity and lower GPU temperatures if necessary. Be mindful of the power consumption and adjust the power limit if available.
Caution and Potential Risks:
9. Overclocking your GPU can void warranties and may cause damage if done improperly. Be cautious and monitor your temperatures regularly to prevent excessive heat buildup. If you encounter instability or excessive heat, dial back the overclock or revert to default settings.
Remember that not all laptops and GPUs are guaranteed to overclock the same. Each unit may have different overclocking potential and stability thresholds. Be patient, take small steps, and understand that not all GPUs can be overclocked to extreme levels. Overclocking is personal and requires trial and error to find the balance between performance gains and stability.
Before attempting to overclock, ensure that your laptop’s cooling system is adequate and capable of handling the increased heat generated by the overclocked GPU. Overclocking should be done responsibly and within the limits of your specific hardware configuration to prevent any potential damage.
Disable Windows Updates While Gaming
Windows updates are essential for maintaining the security and functionality of your gaming laptop. However, they can sometimes interfere with your gaming experience by causing unexpected system restarts or using up valuable system resources while you’re in the middle of a game. To prevent interruptions and allocate resources more efficiently, it may be beneficial to temporarily disable Windows updates while gaming. Here’s how you can do it:
Using Windows Settings:
1. Press Win + I to open the Settings app.
2. Click on “Update & Security.”
3. In the Windows Update section, click on “Advanced options.”
4. In the Advanced options, click on “Pause updates for 7 days” to temporarily pause updates. You can also select “Select date” and choose a specific date to pause updates until that date.
5. This will prevent Windows from automatically downloading and installing updates for the specified period.
Using Group Policy Editor:
6. Press Win + R to open the Run dialog box.
7. Type “gpedit.msc” and press Enter to open the Group Policy Editor.
8. In the Local Group Policy Editor window, navigate to “Computer Configuration” > “Administrative Templates” > “Windows Components” > “Windows Update.”
9. Double-click on “Configure Automatic Updates” in the right pane.
10. Select the “Disabled” option to prevent Windows updates from automatically installing.
11. Click Apply and then OK to save the changes.
Using Registry Editor:
12. Press Win + R to open the Run dialog box.
13. Type “regedit” and press Enter to open the Registry Editor.
14. In the Registry Editor, navigate to “HKEY_LOCAL_MACHINE\SOFTWARE\Policies\Microsoft\Windows\WindowsUpdate.”
15. Right-click on the WindowsUpdate key in the left pane and select New > DWORD (32-bit) Value.
16. Name the new value “AUOptions” and set its value data to “2” to disable automatic updates.
17. Restart your gaming laptop for the changes to take effect.
Remember to re-enable Windows updates once you finish gaming to ensure that your system remains up to date and secure. Keep in mind that disabling Windows updates for a significant period of time can leave your laptop vulnerable to security risks, so it’s important to strike a balance and regularly allow updates to install when you’re done gaming.
By temporarily disabling Windows updates while gaming, you can prevent unexpected interruptions and allocate system resources more effectively. This allows you to have a smoother and uninterrupted gaming experience without unnecessary disruptions from Windows updates.
Upgrade Your Gaming Laptop’s Processor (CPU)
The processor, or CPU (Central Processing Unit), is one of the most critical components in your gaming laptop. It plays a crucial role in executing game instructions and determining overall performance. If you find that your current CPU is limiting your gaming experience, upgrading it can provide a significant boost in performance. However, it’s important to note that CPU upgrades in laptops can be challenging and may require professional assistance. Here’s what you should consider when upgrading your gaming laptop’s processor:
Compatibility:
1. Check your laptop’s specifications and verify if the processor is upgradable. Certain laptop models have soldered or non-upgradable CPUs, while others provide socketed CPUs that can be replaced.
Socket and Motherboard Compatibility:
2. Identify the socket type of your laptop’s motherboard. The new CPU must be compatible with the existing socket to ensure proper installation and functioning.
Power Consumption:
3. Consider the power requirements of the new CPU. Ensure that your laptop’s cooling system is capable of handling the increased heat generated by a higher-end processor.
Heat Dissipation and Cooling:
4. Upgrading to a more powerful CPU may require improved cooling solutions. Verify if your laptop’s cooling system can effectively dissipate the increased heat generated by the new CPU. You may need to upgrade the cooling system or modify cooling solutions, such as replacing the thermal paste or installing an additional cooling fan.
Research and Performance Comparison:
5. Thoroughly research different CPU options and compare their performance benchmarks. Look for CPUs that offer better performance within your budget range. Websites, forums, and tech publications can provide valuable insights and comparisons.
Professional Assistance:
6. Upgrading a laptop’s CPU can be complex and delicate. Consider seeking professional assistance or consulting a reputable technician to ensure a successful and proper installation.
Operating System and Driver Compatibility:
7. Check if the new CPU is compatible with your laptop’s operating system. Ensure that the necessary drivers are available for proper functionality and compatibility.
Upgrading your gaming laptop’s CPU can significantly enhance performance by providing faster and more efficient processing power. However, it’s crucial to carefully consider the compatibility, power consumption, cooling requirements, and other implications of the upgrade. Depending on the specific laptop model and its design, upgrading the CPU may not be feasible or may have limited options.
Before proceeding with a CPU upgrade, evaluate your specific gaming needs and determine if the upgrade will provide a significant performance improvement. Consider other aspects of your gaming laptop, such as the graphics card, RAM, and storage, as they also contribute to overall gaming performance. Collect information, consult professionals, and weigh the cost-benefit ratio before making a final decision on upgrading your gaming laptop’s processor.


