Introduction
Welcome to the exciting world of augmented reality (AR), where technology blends with the real world to create immersive experiences like never before. AR has become increasingly popular and is being integrated into various industries, from gaming and entertainment to education and healthcare. In this article, we will explore the fundamentals of augmented reality and provide a step-by-step guide on how to get started with AR development.
Augmented reality refers to the technology that overlays digital information, such as images, videos, and 3D models, onto the real world. Unlike virtual reality, which creates a completely virtual environment, AR enhances the physical world by adding digital elements. This is typically achieved using a combination of sensors, cameras, and display devices, such as smartphones or smart glasses.
The concept of augmenting reality has been around for decades, but recent advancements in hardware and software have made it more accessible and practical. Today, AR is not limited to high-end devices; it can be experienced on smartphones and tablets, making it accessible to a wider audience.
AR has opened up new possibilities for businesses and developers to create innovative and engaging applications. Whether you want to develop games with interactive elements, enhance e-commerce experiences, or provide virtual tours of real estate properties, AR can bring your ideas to life.
In the following sections, we will dive deeper into how augmented reality works, the different types of AR experiences, and guide you through the process of developing your own AR applications. By the end, you will have a solid understanding of the core concepts and practical skills necessary to embark on your augmented reality journey.
What is Augmented Reality?
Augmented reality (AR) is a technology that integrates digital information into the real-world environment, enhancing our perception and interaction with the physical world. By overlaying virtual elements such as images, videos, and 3D models onto the real-world environment, AR creates an interactive and immersive experience for users.
The goal of augmented reality is to seamlessly blend virtual and real-world elements in a way that allows users to perceive and interact with the virtual content as if it were part of their physical surroundings. This is achieved through the use of various technologies such as cameras, sensors, and display devices.
Unlike virtual reality, which completely immerses users in a virtual environment, augmented reality enhances the real world by adding virtual elements. This technology provides a unique and powerful way to bridge the gap between the digital and physical worlds, offering a wide range of applications across different industries.
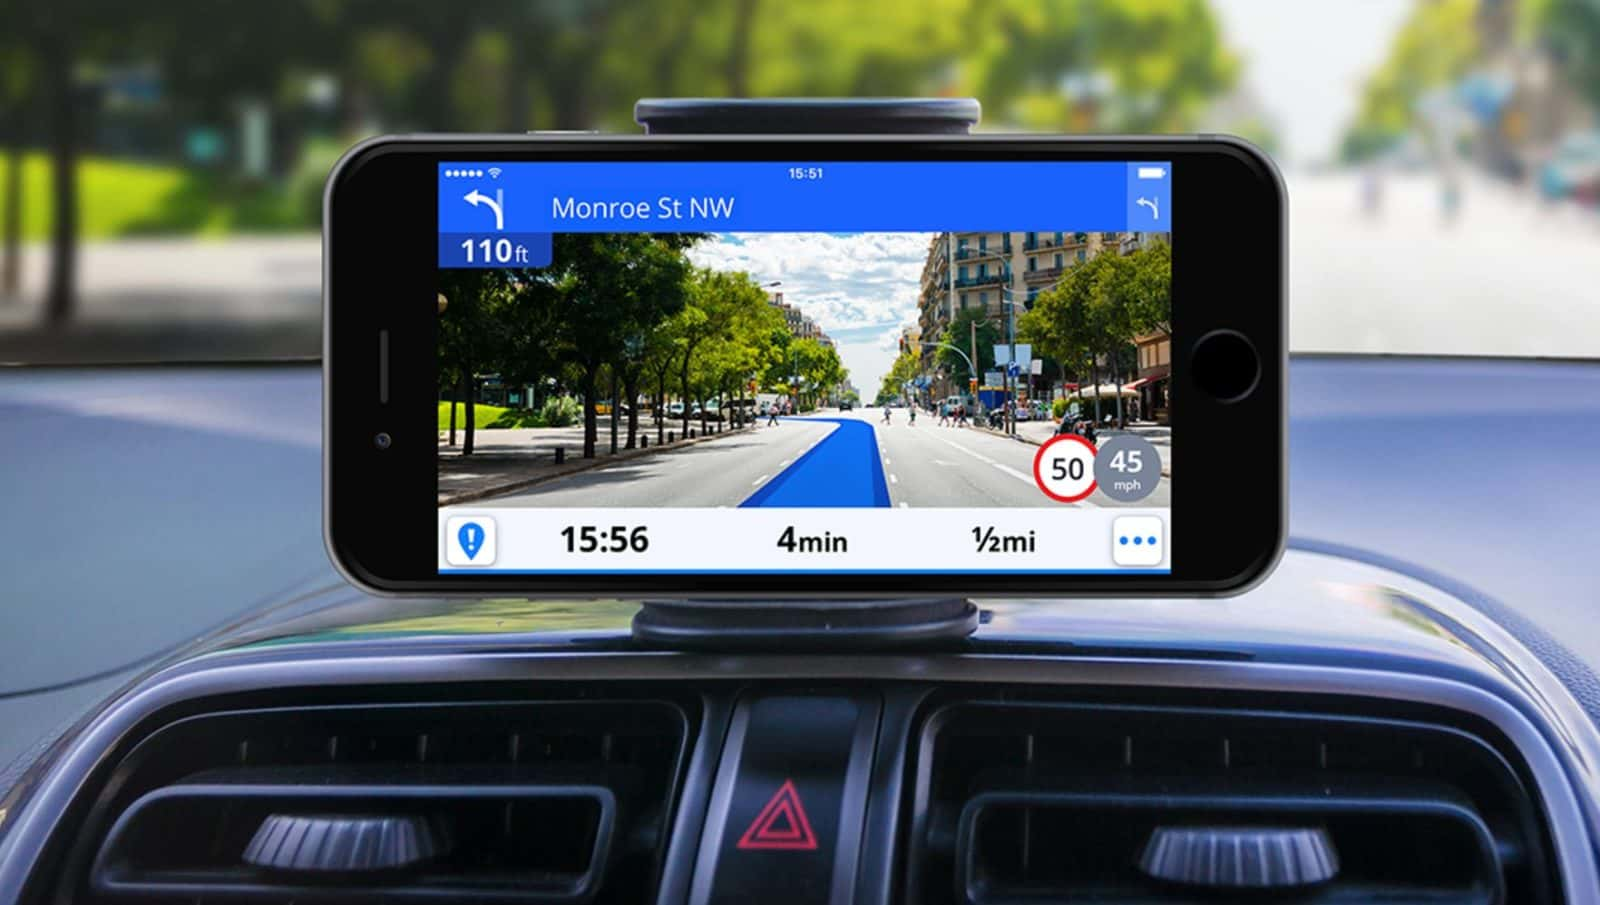
One of the key advantages of augmented reality is its ability to provide real-time information and contextual guidance. For example, AR can overlay navigation instructions onto the real world, making it easier for users to navigate unfamiliar environments. Similarly, AR can be used in educational settings to provide interactive and visually engaging learning experiences.
Augmented reality is not limited to a specific platform or device. It can be experienced through smartphones, tablets, smart glasses, and even wearable devices. With the widespread availability of mobile devices and the advancements in AR technology, AR applications have become more accessible and user-friendly.
Overall, augmented reality has the potential to transform the way we perceive and interact with the world around us. It opens up new opportunities for entertainment, education, marketing, healthcare, and many other industries. As the technology continues to evolve, we can expect to see even more innovative and immersive augmented reality experiences in the future.
How does Augmented Reality work?
Augmented Reality (AR) technology works by leveraging sensors, cameras, and display devices to merge digital content with the real world. The process involves several key components and techniques that enable the seamless integration of virtual elements into our physical environment. Let’s take a closer look at how augmented reality works.
First, AR relies on a device with a camera to capture the user’s surroundings in real time. This can be a smartphone, tablet, or specialized AR glasses. The camera feed is then processed by the AR software, which analyzes the visual data and identifies key features in the environment, such as objects, surfaces, and markers.
Next, the AR software uses tracking algorithms to precisely locate and track the position and orientation of the device in relation to the real world. This is crucial for accurately overlaying digital content onto the user’s view. Tracking can be achieved through various methods, including marker-based tracking, which uses predefined patterns or markers, and markerless tracking, which relies on computer vision techniques to track objects and surfaces.
Once the device’s position and orientation are determined, the AR software can overlay digital content onto the live camera feed. This content can range from 2D images, videos, and text to 3D models and animations. The virtual elements are positioned and scaled to align with the real-world objects and surfaces, creating the illusion that they are part of the user’s environment.
To ensure a realistic and immersive AR experience, the software may also apply lighting and shading effects to the virtual content to match the lighting conditions of the real world. This helps to blend the digital and physical elements seamlessly, making the virtual objects appear more natural and integrated.
In order for users to interact with the AR content, the technology also incorporates input methods such as touch gestures, voice commands, and even hand tracking or spatial mapping. These input methods allow users to manipulate and navigate the virtual objects, enhancing the level of engagement and interactivity in the AR experience.
Overall, augmented reality works by combining real-world perception with virtual content, creating an immersive and interactive user experience. By leveraging computer vision, tracking algorithms, and input methods, AR technology brings digital content into our physical reality, opening up new possibilities for entertainment, education, marketing, and various other industries.
Understanding the different types of Augmented Reality
Augmented Reality (AR) encompasses a range of experiences and technologies, each with its own unique characteristics and applications. By understanding the different types of AR, you can better determine which approach is best suited for your project. Let’s explore some of the key categories of augmented reality.
1. Marker-based AR: This type of AR relies on predefined markers or patterns to trigger the display of virtual content. When the camera detects a specific marker, the AR software overlays the corresponding digital content onto the marker. Marker-based AR can be used for interactive print media, product packaging, and educational materials.
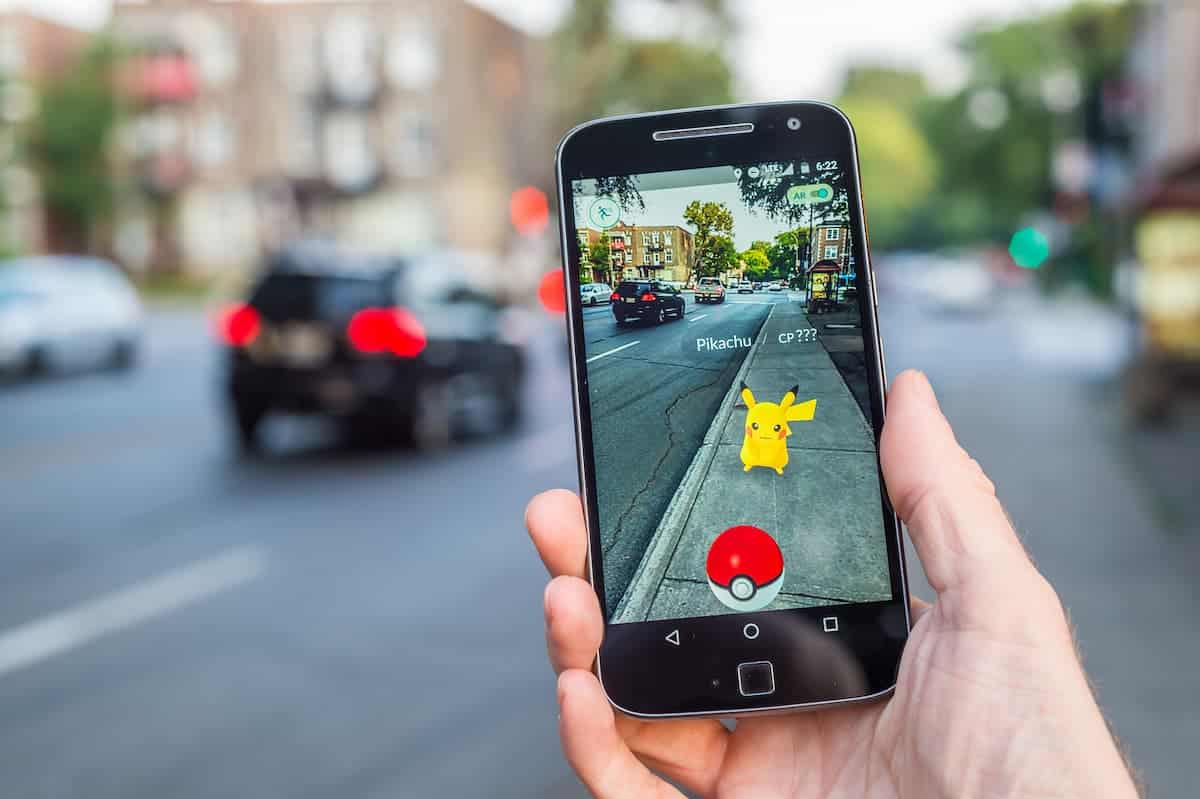
2. Markerless AR: Also known as location-based or GPS-based AR, markerless AR uses the device’s GPS, compass, and other sensors to identify the user’s location and orientation. This allows virtual content to be overlaid onto specific geographic locations in real time. Markerless AR is often used for location-based gaming, navigation apps, and tourism experiences.
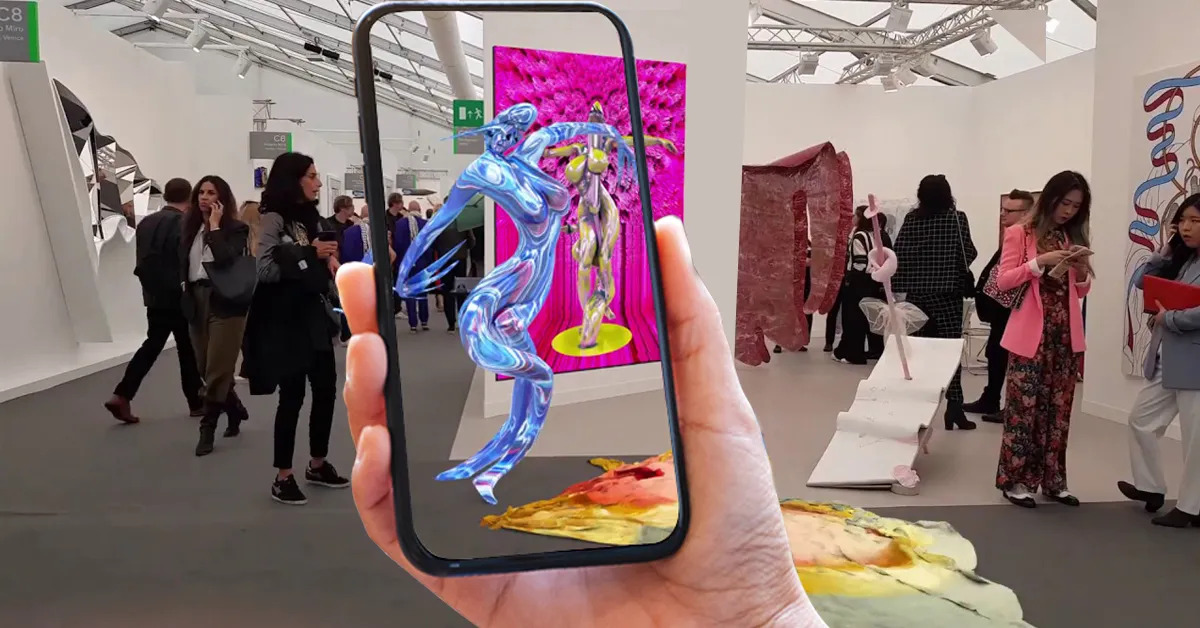
3. Projection-based AR: This type of AR involves projecting digital content onto real-world surfaces or objects. Projectors and sensors are used to track the position and movement of the projected surface, enabling interactive and dynamic experiences. Projection-based AR is commonly used in exhibitions, art installations, and interactive displays.
4. Superimposition-based AR: Superimposition-based AR overlays virtual content onto the real world without the need for markers or predefined patterns. The AR software analyzes the scene and identifies the relevant objects or surfaces to place the digital content onto. Superimposition-based AR is ideal for enhancing industrial training, interior design, and virtual try-on experiences.
5. Recognition-based AR: This type of AR uses computer vision techniques to recognize and track specific objects or visual features in the real world. By recognizing objects, the AR software can provide relevant contextual information or interactive elements. Recognition-based AR is commonly used in retail, advertising, and educational applications.
6. Wearable AR: This category includes AR experiences that are delivered through wearable devices such as smart glasses, headsets, or contact lenses. These devices provide a hands-free AR experience, allowing users to seamlessly interact with digital content while still being aware of their physical surroundings. Wearable AR is being explored in industries such as healthcare, manufacturing, and remote assistance.
These are just a few examples of the types of augmented reality experiences available. It’s important to consider the specific requirements and goals of your project when choosing the most suitable AR approach. By understanding the different types of AR, you can harness the power of this technology to create compelling and immersive experiences for your users.
Getting started with Augmented Reality development
Embarking on your journey into Augmented Reality (AR) development may seem daunting, but with the right approach and tools, you can unlock the potential of this exciting technology. Here are some steps to help you get started on your AR development journey.
1. Identify your goals: Before diving into AR development, clarify your goals and determine what you want to achieve with your AR application. Whether it’s creating an immersive gaming experience, enhancing e-commerce product visualization, or providing educational content, having a clear vision will guide your development process.
2. Familiarize yourself with AR concepts: Take the time to understand the core concepts and principles of AR technology. Learn about marker-based and markerless tracking, spatial mapping, computer vision, and how AR content is rendered and displayed in the real world. This knowledge will lay the foundation for your development journey.
3. Choose your development platform: Selecting the right development platform will depend on your target platform and programming language preference. Unity and Unreal Engine are popular choices for creating AR experiences, while platforms like ARKit for iOS and ARCore for Android provide frameworks and tools specifically designed for AR development.
4. Set up your development environment: Install the necessary software and development tools for your chosen platform. This may include downloading the appropriate SDKs, installing IDEs (integrated development environments), and setting up your development device or emulator for testing and debugging.
5. Learn the AR development tools: Familiarize yourself with the AR development tools provided by your chosen platform. Explore the documentation, sample projects, and tutorials to understand how to handle AR tracking, detect objects, and overlay digital content in the real world. Practice working with 3D assets and understand how to optimize them for AR experiences.
6. Start with small projects: Begin your AR development journey with small, achievable projects. This will help you grasp the fundamentals and gain confidence in working with AR technology. Experiment with basic interactions, such as tapping on objects, moving virtual content, or integrating simple animations.
7. Leverage available resources: Take advantage of the vast resources available in the AR development community. Join forums, participate in online communities, and attend workshops or meetups to learn from experienced developers and share insights. Additionally, explore online tutorials, documentation, and sample projects provided by the platform you’re using.
8. Test and iterate: Testing your AR application is crucial to ensure a seamless and immersive user experience. Continuously test and iterate your project, making adjustments and improvements based on user feedback and performance optimization. Embrace a user-centric mindset and strive for a polished and enjoyable AR experience.
Remember, AR development is an ongoing learning process, and the technology is constantly evolving. Stay up to date with the latest advancements, explore new possibilities, and keep experimenting with innovative AR techniques to create memorable and engaging experiences for your users.
Choosing the right development platform
When it comes to developing augmented reality (AR) applications, choosing the right development platform is crucial. The platform you select will impact the tools, resources, and capabilities available to you throughout the development process. Here are some factors to consider when choosing the right AR development platform.
1. Target platform: Determine which platforms you want your AR application to be compatible with. Are you developing for mobile devices, such as iOS or Android? Or do you have a specific device, like smart glasses or a mixed reality headset, in mind? Understanding your target platform will help you narrow down the available options.
2. Programming language familiarity: Consider your familiarity with different programming languages. Some AR platforms support multiple programming languages, while others may be limited to a specific language. Choose a platform that aligns with your language expertise, as it will make the development process smoother and more efficient.
3. SDK support and features: Evaluate the software development kits (SDKs) provided by each platform. An SDK is a set of tools, libraries, and documentation that enables developers to create AR applications. Look for SDKs that offer robust tracking capabilities, 3D rendering, and relevant APIs for interacting with AR content. Additionally, consider the availability of extensions, plugins, or modules that can enhance your development experience.
4. Community and resources: Examine the size and activity of the developer community associated with each platform. A vibrant and active community can provide invaluable support, resources, and knowledge-sharing opportunities. Join online forums, attend meetups, and review documentation and tutorials to gauge the level of community engagement.
5. Platform stability and updates: Consider the stability and frequency of updates from the platform provider. AR technology is evolving rapidly, and you want to ensure that the platform you choose will continue to receive updates and improvements. Regular updates demonstrate the platform’s commitment to staying current with AR advancements and fixing any bugs or issues that arise.
6. Cost and licensing: Evaluate the cost associated with using the AR development platform. Some platforms offer free versions with limited features, while more advanced features may require purchasing a license or subscription. Assess your budget and compare the pricing models of different platforms to find a balance between functionality and cost-effectiveness.
7. Integration capabilities: Consider the platform’s integration capabilities with other tools and technologies. Does it support popular game engines like Unity or Unreal Engine? Does it offer compatibility with external libraries or APIs that you may need for specific functionalities? Seamless integration with existing tools and technologies can streamline your development workflow.
Ultimately, choosing the right AR development platform will depend on your specific project requirements, goals, and technical expertise. Take the time to research and evaluate different platforms, and consider starting with a platform that aligns with your familiarity and provides the necessary features and support to bring your AR vision to life.
Setting up your development environment
Before you can start creating augmented reality (AR) applications, you need to set up your development environment. This involves installing the necessary software, tools, and frameworks to support AR development on your chosen platform. Here are the steps to get you started with setting up your AR development environment.
1. Choose your development platform: Determine the platform you will be developing for, such as iOS, Android, or a specific AR hardware device. This will dictate the tools and software you need to install. For example, if you’re developing for iOS, you will need Xcode, Apple’s integrated development environment (IDE) for iOS app development.
2. Install the required software and tools: Once you have chosen your development platform, you need to install the necessary software and tools. This may include the IDE, compiler, and any additional libraries or frameworks that are specific to AR development. Refer to the documentation provided by your chosen platform for specific installation instructions.
3. Set up the development device or emulator: If you’re developing for a mobile device, you will need to set up the development device or emulator. Connect your device to your computer and configure it for development mode. For emulators, set up the virtual device that matches your target device specifications. This will allow you to test and debug your AR application directly on the device or emulator.
4. Download the AR development kit: Depending on your platform, you may need to download the AR development kit (SDK) provided by the platform provider. The SDK contains the necessary tools, libraries, and documentation for creating AR experiences. Follow the platform-specific instructions to download and install the SDK.
5. Set up the development project: Create a new project in your chosen IDE and configure it for AR development. This may involve linking the necessary libraries and frameworks provided by the AR SDK. Set up the project structure and configure any necessary build settings specific to AR development.
6. Explore sample projects and documentation: Familiarize yourself with the AR development tools by exploring the sample projects and documentation provided by the platform. The sample projects can give you a starting point and showcase best practices for AR development. The documentation will provide guidance on using the AR SDK, accessing AR features, and implementing AR functionality in your application.
7. Set up version control: Consider setting up version control for your AR development project, using tools like Git. Version control allows you to track and manage changes to your codebase, collaborate with other developers, and easily revert to previous versions if needed.
Once you have your development environment set up, you are ready to start coding and building your AR application. Keep in mind that AR development can be complex, so be prepared for a learning curve. Consult the platform documentation, explore online resources, and don’t hesitate to ask for help from the development community when you encounter challenges. With your development environment properly configured, you can now dive into the exciting world of AR development and bring your imaginative AR experiences to life.
Creating a basic Augmented Reality app
Now that you have set up your development environment, it’s time to dive into creating your first basic augmented reality (AR) application. This will serve as a foundation for more complex AR projects in the future. Here are the steps to get started on building your basic AR app.
1. Define your AR app concept: Start by defining the concept and purpose of your AR app. Determine the key features and functionality you want to include. Are you creating a virtual try-on experience, a 3D object viewer, or an interactive game? Clarify your goals to guide your development process.
2. Choose an AR development platform: Select an AR development platform that aligns with your goals and target platform. For example, if you’re developing for iOS, consider using ARKit, while ARCore is suitable for Android. These platforms provide prebuilt APIs and libraries to simplify AR development.
3. Set up the AR scene: Create a new project in your chosen development platform and set up the AR scene. This involves configuring the camera feed, setting up tracking, and preparing the scene to display virtual content. Follow the platform-specific documentation or tutorials to understand how to set up the AR scene properly.
4. Add virtual content: Once your AR scene is set up, you can start adding virtual content. This can include 3D models, videos, animations, or interactive elements. Import or create the content that aligns with your app concept and integrate it into the AR scene.
5. Implement interactivity: Make your AR app interactive by implementing user interactions. This can include gestures like tapping, swiping, or pinching to manipulate virtual objects. Use the APIs provided by the development platform to capture user input and trigger actions within the AR scene.
6. Test and iterate: Regularly test your AR app on the target devices or emulators to ensure proper functionality and user experience. Pay attention to tracking accuracy, performance, and stability. Collect feedback from users and iterate on your app to refine and improve its features and usability.
7. Optimize for performance: Optimize your AR app for performance by managing resources efficiently. Optimize rendering, use level of detail (LOD) techniques for 3D models, and test your app on different devices with varying processing power to ensure a smooth AR experience for users.
8. Polish the user interface (UI): Pay attention to the user interface design of your AR app. Ensure that the UI elements and AR content blend seamlessly and provide clear instructions to users. Consider visual cues, animation, and appropriate feedback to enhance the overall user experience.
By following these steps, you can create a basic AR app and gain valuable experience in working with augmented reality. As you become more comfortable with AR development, you can explore more advanced features and concepts to create even more immersive and engaging AR experiences. Remember to continuously learn, experiment, and iterate to enhance your skills and create compelling AR applications.
Adding 3D models to your Augmented Reality app
One of the key elements in creating immersive augmented reality (AR) experiences is adding 3D models to your AR app. 3D models can enhance the visual appeal and interactivity of your AR app, allowing users to interact with virtual objects in the real world. Here are the steps to add 3D models to your AR app.
1. Prepare your 3D models: Start by preparing the 3D models that you want to include in your AR app. You can create your own models using 3D modeling software like Blender or Maya, or you can use pre-made models from online marketplaces or libraries. Ensure that your models are optimized for real-time rendering and are in a format compatible with your AR development platform.
2. Import the 3D models into your AR project: Once you have your 3D models ready, import them into your AR project. Use the appropriate tools or APIs provided by your AR development platform to import and handle 3D assets. This may involve importing the models into a scene or attaching them to specific markers or tracking points.
3. Set the position and scale of the 3D models: Position and scale the 3D models within the AR scene to ensure they align with the real-world surroundings. This can be done manually by adjusting the position and scale parameters or using features like anchor points or image targets to accurately position the models based on real-world objects or markers.
4. Implement interaction with the 3D models: Enhance user interaction by adding functionality to allow users to interact with the 3D models. This can include allowing users to rotate, scale, or move the models with gestures or touch controls. Implement the appropriate APIs or input handlers provided by your AR development platform to capture user input and enable interaction.
5. Apply materials and textures to the 3D models: Add materials and textures to your 3D models to improve their visual quality and make them more realistic. Use texture maps to add color, surface details, or special effects to your models. Experiment with different materials and textures to achieve the desired visual style and enhance the realism of your 3D models in the AR scene.
6. Test and optimize the performance: Test your AR app on target devices or emulators to ensure that the 3D models perform well and the app runs smoothly. Pay attention to the performance of the models, especially if you have multiple complex models, and optimize them as needed. Use techniques like level of detail (LOD) or culling to improve rendering performance without compromising visual quality.
7. Iterate and refine: Continuously iterate on your 3D models and their integration into the AR app. Gather feedback from users and make improvements based on their experience. Consider factors like lighting, shadows, and animations to enhance the realism and visual impact of your 3D models.
By following these steps, you can successfully add 3D models to your AR app, creating an engaging and interactive experience for users. Experiment with different models, textures, and interaction techniques to bring your vision to life and create captivating AR experiences. With practice and exploration, you will be able to create AR apps that combine virtual and real-world elements seamlessly and provide unforgettable experiences for your users.
Tracking and placing objects in Augmented Reality
One of the fundamental aspects of creating immersive augmented reality (AR) experiences is the ability to track and place virtual objects accurately in the real world. This allows users to interact with digital content as if it were part of their physical environment. Here are the steps to effectively track and place objects in AR.
1. Choose a tracking method: There are several tracking methods available in AR development, such as marker-based tracking, markerless tracking, or object tracking. Select the tracking method that best suits your AR app requirements. Marker-based tracking uses predefined markers or patterns to anchor virtual objects in the real world, while markerless tracking relies on the environment’s visual features for object detection and tracking.
2. Set up tracking targets: If you choose marker-based tracking, you need to set up tracking targets by generating or printing markers. These markers serve as visual cues for the AR software to track and place virtual objects. Ensure that the markers have enough contrast and are placed in locations where they can be easily detected by the camera.
3. Implement object recognition: For markerless tracking or object tracking, implement object recognition algorithms to detect and track specific objects or features in the real world. These algorithms use computer vision techniques to analyze the camera feed and identify the objects or features of interest. Train the recognition model using suitable data to improve accuracy.
4. Establish precise tracking: Establishing precise tracking is crucial for accurately placing virtual objects in the real world. Use robust tracking algorithms provided by your AR development platform to track the device’s movement and position relative to the tracking targets or recognized objects. This ensures that virtual objects align correctly with the real-world environment.
5. Calibrate the tracking: Calibrate the tracking system to improve accuracy and alignment. This involves performing a calibration process to account for any offset or distortion in the camera’s perspective. Calibration actions may include capturing reference points or performing geometric transformations to ensure that the virtual objects are placed accurately in the real world.
6. Place virtual objects: Once tracking is established, place virtual objects in the AR scene based on the real-world environment. Use the tracking data to set the position, orientation, and scale of the virtual objects in relation to the tracking targets or detected objects. Ensure that the virtual objects blend seamlessly with the surrounding physical environment.
7. Test and refine: Regularly test your AR app to ensure that the virtual objects are correctly tracked and placed in the real world. Experiment with different lighting conditions, distances, and angles to validate the accuracy and stability of the tracking system. Continuously refine the tracking algorithms and parameters based on user feedback and improve the positioning of virtual objects as needed.
By mastering the techniques of tracking and placing objects in AR, you can create captivating and realistic user experiences. Invest time in understanding the different tracking methods, implementing robust algorithms, and fine-tuning the system to ensure precise and reliable object tracking in your AR app. With practice and experimentation, you’ll be able to create seamless integrations between the virtual and real worlds, immersing users in engaging AR experiences.
Enhancing user interaction in your app
An important aspect of creating a compelling augmented reality (AR) app is enhancing user interaction. When users can intuitively interact with digital content in the AR environment, it enhances their overall experience and engagement. Here are some strategies to enhance user interaction in your AR app.
1. Gesture-based interactions: Integrate gesture-based interactions to allow users to manipulate and control virtual objects in the AR scene. Common gestures include tapping, swiping, pinching, and rotating. Use gesture recognition libraries or APIs provided by your AR development platform to capture and interpret user gestures accurately.
2. Voice commands: Implement voice commands to enable hands-free interaction in your AR app. Users can trigger actions or navigate through the app by speaking specific commands. Utilize speech recognition APIs or libraries to process and respond to user voice inputs effectively. Provide feedback to let users know that their commands have been recognized.
3. Physics-based interactions: Incorporate physics-based interactions to simulate realistic interactions between virtual objects and the real world. Enable objects to react to gravity, collisions, and user interactions. This can create a more immersive and engaging experience, making the virtual objects feel more tangible and natural within the AR environment.
4. Object detection and tracking: Enhance user interaction by detecting and tracking real-world objects in the AR scene. Enable users to interact with virtual content based on the presence or position of specific objects. For example, allow users to place virtual furniture in their real physical space or provide interactive instructions when a specific object is recognized.
5. Haptic feedback: Incorporate haptic feedback to provide a tactile response to user interactions in your AR app. Use the vibration motor on the device to provide haptic feedback when users perform actions, interact with virtual objects, or trigger specific events. Haptic feedback adds a layer of realism and responsiveness, enhancing the overall user experience.
6. Augmented reality markers: Utilize augmented reality markers to enable interactive experiences. Create markers that trigger specific actions or display additional information when recognized by the AR app. For example, users could scan a marker on a product packaging to access additional product details or trigger a 3D animation.
7. Real-time feedback and visual cues: Provide real-time feedback and visual cues to guide users’ interactions in the AR app. Display clear instructions or hints to help users understand how to interact with the virtual objects. Provide visual indicators or animated cues to notify users when an interaction has been successfully executed.
8. Gamification elements: Incorporate gamification elements, such as rewards, points, or achievements, to encourage user engagement and motivate further interaction within the AR app. By introducing game mechanics, users will be more inclined to explore and interact with the AR content, creating a more enjoyable and immersive experience.
By implementing these strategies, you can enhance the user interaction within your AR app, creating a more engaging and immersive experience. Experiment with different interaction techniques and prioritize user feedback to refine and optimize the interaction design. Ultimately, the goal is to create an intuitive and enjoyable AR experience that keeps users coming back for more.
Designing user-friendly Augmented Reality experiences
Designing user-friendly augmented reality (AR) experiences is crucial for creating engaging and intuitive interactions. A well-designed AR app ensures that users can easily navigate and understand the digital content within the real-world environment. Here are some key considerations to keep in mind when designing user-friendly AR experiences.
1. Simplify the user interface (UI): Keep the UI of your AR app simple and intuitive. Minimize clutter and provide clear visual cues, making it easy for users to understand how to interact with the AR content. Use concise and descriptive labels or icons to guide users and ensure a smooth and seamless user experience.
2. Consider the physical environment: Take into account the physical environment in which the AR app will be used. Account for different lighting conditions, angles, and real-world objects that may obstruct or interact with the digital content. Ensure that the AR elements are visible, legible, and seamlessly integrated into the user’s surroundings.
3. Optimize for performance: AR apps rely on real-time rendering and tracking, so it’s important to optimize the app’s performance. Aim for smooth animations, minimal latency, and fast response times. Optimize the rendering of 3D models, consider level of detail (LOD) techniques for complex scenes, and prioritize stable tracking to provide a seamless and immersive experience.
4. Provide informative instructions: Clearly communicate to users how to navigate and interact with the AR app. Use instructional overlays or tooltips to guide users through the app’s features and functionalities. Offer brief tutorials or interactive onboarding processes to help users familiarize themselves with the AR app’s capabilities.
5. Ensure accessibility: Design your AR app with accessibility in mind. Consider users with various abilities by incorporating features like adjustable font sizes, color contrast options, or voice-activated controls. Ensure that your AR app is usable and accessible for a wide range of users, accommodating different needs and preferences.
6. Conduct usability testing: Regularly conduct usability testing with real users to gather feedback and identify areas for improvement. Observe how users interact with the AR app and listen to their feedback to understand pain points, confusion, or areas of improvement. Iterate on the design based on user insights to optimize the user experience.
7. Balance form and function: Find a balance between the visual appeal of the AR content and its functionality. While aesthetics are important, prioritize clear visibility, legibility, and ease of use. Ensure that the design elements do not overshadow the primary purpose of the app or hinder users’ ability to interact with the AR content effectively.
8. Prioritize user-centered design: Adopt a user-centered design approach throughout the development process. Consider the needs, goals, and preferences of your target audience. Conduct user research, create user personas, and involve end-users in the design process through feedback sessions or user testing. This will help you create an AR experience that meets their expectations and enhances user satisfaction.
By considering these design principles, your AR app can deliver a user-friendly and immersive experience. Remember, the goal is to minimize complexity, provide clear instructions, and ensure seamless integration between the digital content and the real-world environment. With a well-designed AR experience, users will be more engaged and excited to explore your app’s augmented reality features.
Testing and debugging your Augmented Reality app
Testing and debugging are essential steps in the development process of any augmented reality (AR) app. Thorough testing ensures that your app functions as intended, provides a seamless AR experience, and is free from bugs or performance issues. Here are some key considerations for testing and debugging your AR app.
1. Device compatibility: Test your AR app on different devices with varying specifications and screen sizes. This helps ensure that your app performs well across a range of devices and delivers a consistent experience to users. Pay attention to device-specific features and limitations, such as camera capabilities, sensors, and processing power.
2. Real-world testing: Conduct real-world testing in different environments to evaluate how your AR app performs under various lighting conditions, distances, and angles. Test your app indoors and outdoors to account for differences in lighting and surroundings. This will help identify any issues related to object tracking, marker detection, or AR content placement.
3. Usability testing: Involve real users in the testing process to assess the usability and intuitiveness of your AR app. Observe how users interact with the app, listen to their feedback, and identify any points of confusion or difficulty. Gathering user insights will help you refine the user interface, improve interactions, and enhance the overall user experience.
4. Tracking accuracy and stability: Test and evaluate the accuracy and stability of the tracking system in your AR app. Ensure that virtual objects align precisely with real-world objects or markers and that the tracking system responds accurately to user movements. Monitor for any drift or inconsistency in tracking performance and make the necessary adjustments to improve stability.
5. Performance optimization: Test the performance of your AR app to ensure smooth and fluid rendering. Monitor and optimize factors like frame rate, loading times, and memory usage. Consider the complexity of 3D models, textures, and visual effects to strike a balance between visual quality and performance. Use performance profiling tools and debugging techniques to identify and resolve performance bottlenecks.
6. Error handling and edge cases: Test for edge cases and exceptional scenarios that may occur during AR usage. Consider situations such as low light conditions, occlusion of markers or objects, or interruptions in the tracking system. Implement proper error handling and provide clear feedback or instructions to users when unexpected situations arise.
7. Regression testing: When introducing changes or updates to your AR app, conduct regression testing to ensure that new features or fixes do not introduce new bugs or issues. Revisit previously tested functionalities to verify that they still work as intended. This helps maintain the stability and reliability of your AR app throughout its development lifecycle.
8. Continuous iteration and improvement: Testing and debugging should be an ongoing process. As you gather user feedback and uncover issues, prioritize and address them in subsequent development iterations. Regularly update and optimize your AR app based on testing results to provide the best possible experience to your users.
By thoroughly testing and debugging your AR app, you can identify and resolve issues before releasing it to your users. Rigorous testing ensures that your app is stable, performs well, and provides an immersive and user-friendly AR experience. Incorporate testing into your development workflow from the beginning and make it an integral part of your iterative development process.
Deploying your Augmented Reality app
After successfully developing and thoroughly testing your augmented reality (AR) app, it’s time to deploy it to your target audience. Deploying an AR app involves packaging and distributing it to the intended users, ensuring a seamless installation and launch process. Here are the steps to deploy your AR app effectively.
1. Platform-specific preparations: Understand the requirements and guidelines set by the platform on which you want to deploy your AR app. Whether it’s the App Store for iOS or the Google Play Store for Android, familiarize yourself with the submission process, app store guidelines, and any specific assets or information that need to be provided during the submission process.
2. Compile and package your app: Compile your AR app into a distributable format compatible with the target platform. This typically involves creating an executable file or an app package that contains all the necessary assets, libraries, and dependencies required for the app to run correctly on the user’s device.
3. Test on target devices: Before deploying your AR app, perform final testing on the target devices to ensure compatibility and functionality. Test the app on various devices, screen sizes, and operating system versions to identify any platform-specific issues or performance considerations that may need to be addressed before release.
4. App store submission: Follow the guidelines provided by the chosen platform to prepare and submit your AR app for review. This typically involves providing a detailed app description, setting appropriate app ratings, uploading promotional images or videos, and ensuring that your app complies with any legal or regulatory requirements.
5. Beta testing and feedback: Consider conducting a beta testing phase to gather valuable feedback and identify any remaining bugs or usability issues. This can involve distributing the app to a small group of trusted users or utilizing beta testing platforms provided by the app stores. Use this feedback to further refine and improve your AR app before its official release.
6. Release and promotion: Once your AR app has been approved, schedule a release date and plan your marketing and promotion strategies. Leverage social media, your website, and other relevant channels to create awareness and generate excitement for your AR app. Consider reaching out to relevant influencers or industry publications to showcase your app and gain visibility.
7. App updates and maintenance: Deploying your AR app is not the end of the process. Continuously monitor user feedback and reviews to identify areas for improvement or bug fixes. Regularly release updates to address any issues, incorporate new features, or enhance the user experience. Listen to user feedback and iterate on your app based on their needs and expectations.
8. User support and engagement: Provide user support and engage with your users by promptly responding to inquiries, addressing their concerns, and seeking feedback on future updates. Create a support system, such as a help center or FAQ section, to assist users with any questions or technical issues they may encounter while using your AR app.
By following these steps, you can successfully deploy and release your AR app to your target audience. Remember, deployment is just the beginning of your AR app’s journey. Continuously improve and iterate on your app based on user feedback, embrace new technologies and platforms, and explore opportunities to expand its reach and impact in the dynamic world of augmented reality.
Conclusion
Augmented reality (AR) is a rapidly evolving technology with the potential to transform industries and create captivating user experiences. Throughout this article, we have explored the different aspects of AR development, from understanding the fundamentals to deploying your app to the world.
We began by delving into what augmented reality truly is and how it works, gaining insights into the integration of digital content into the real world. We discussed the importance of choosing the right development platform, setting up your environment, and creating a basic AR app as a starting point for your journey.
Adding 3D models, tracking and placing objects, and enhancing user interaction are critical steps in creating immersive and engaging AR experiences. By following best practices in design, testing, and debugging, you can ensure that your AR app delivers a seamless and user-friendly experience.
Additionally, we explored the significance of designing user-friendly AR experiences, considering factors such as a simple user interface, physical environment considerations, and performance optimization. We emphasized the importance of continually testing to improve stability, performance, and overall user satisfaction.
Finally, we discussed the process of deploying your AR app, including preparing your app for the App Store or Play Store, finalizing testing on target devices, and engaging in ongoing maintenance and user support.
As you embark on your AR development journey, remember that AR is continually evolving, presenting exciting opportunities for innovation and growth. Stay informed about the latest advancements, engage with the AR development community, and keep exploring new possibilities to push the boundaries of what AR can achieve.
With the knowledge and skills gained through this guide, you are well-equipped to unlock the potential of augmented reality and create remarkable experiences that blur the line between the physical and digital worlds. Enjoy the journey and let your creativity soar in the realm of augmented reality!