Introduction
Welcome to this guide on how to make audio go through HDMI in Windows 10. In today’s digital world, HDMI (High-Definition Multimedia Interface) has become the standard connection for transmitting high-quality audio and video signals between devices. Whether you’re connecting your computer to a monitor or a home theater system, getting the audio to go through HDMI can sometimes be a frustrating experience.
Before we delve into the troubleshooting steps, let’s start with a brief overview of what HDMI is and how audio works through this interface.
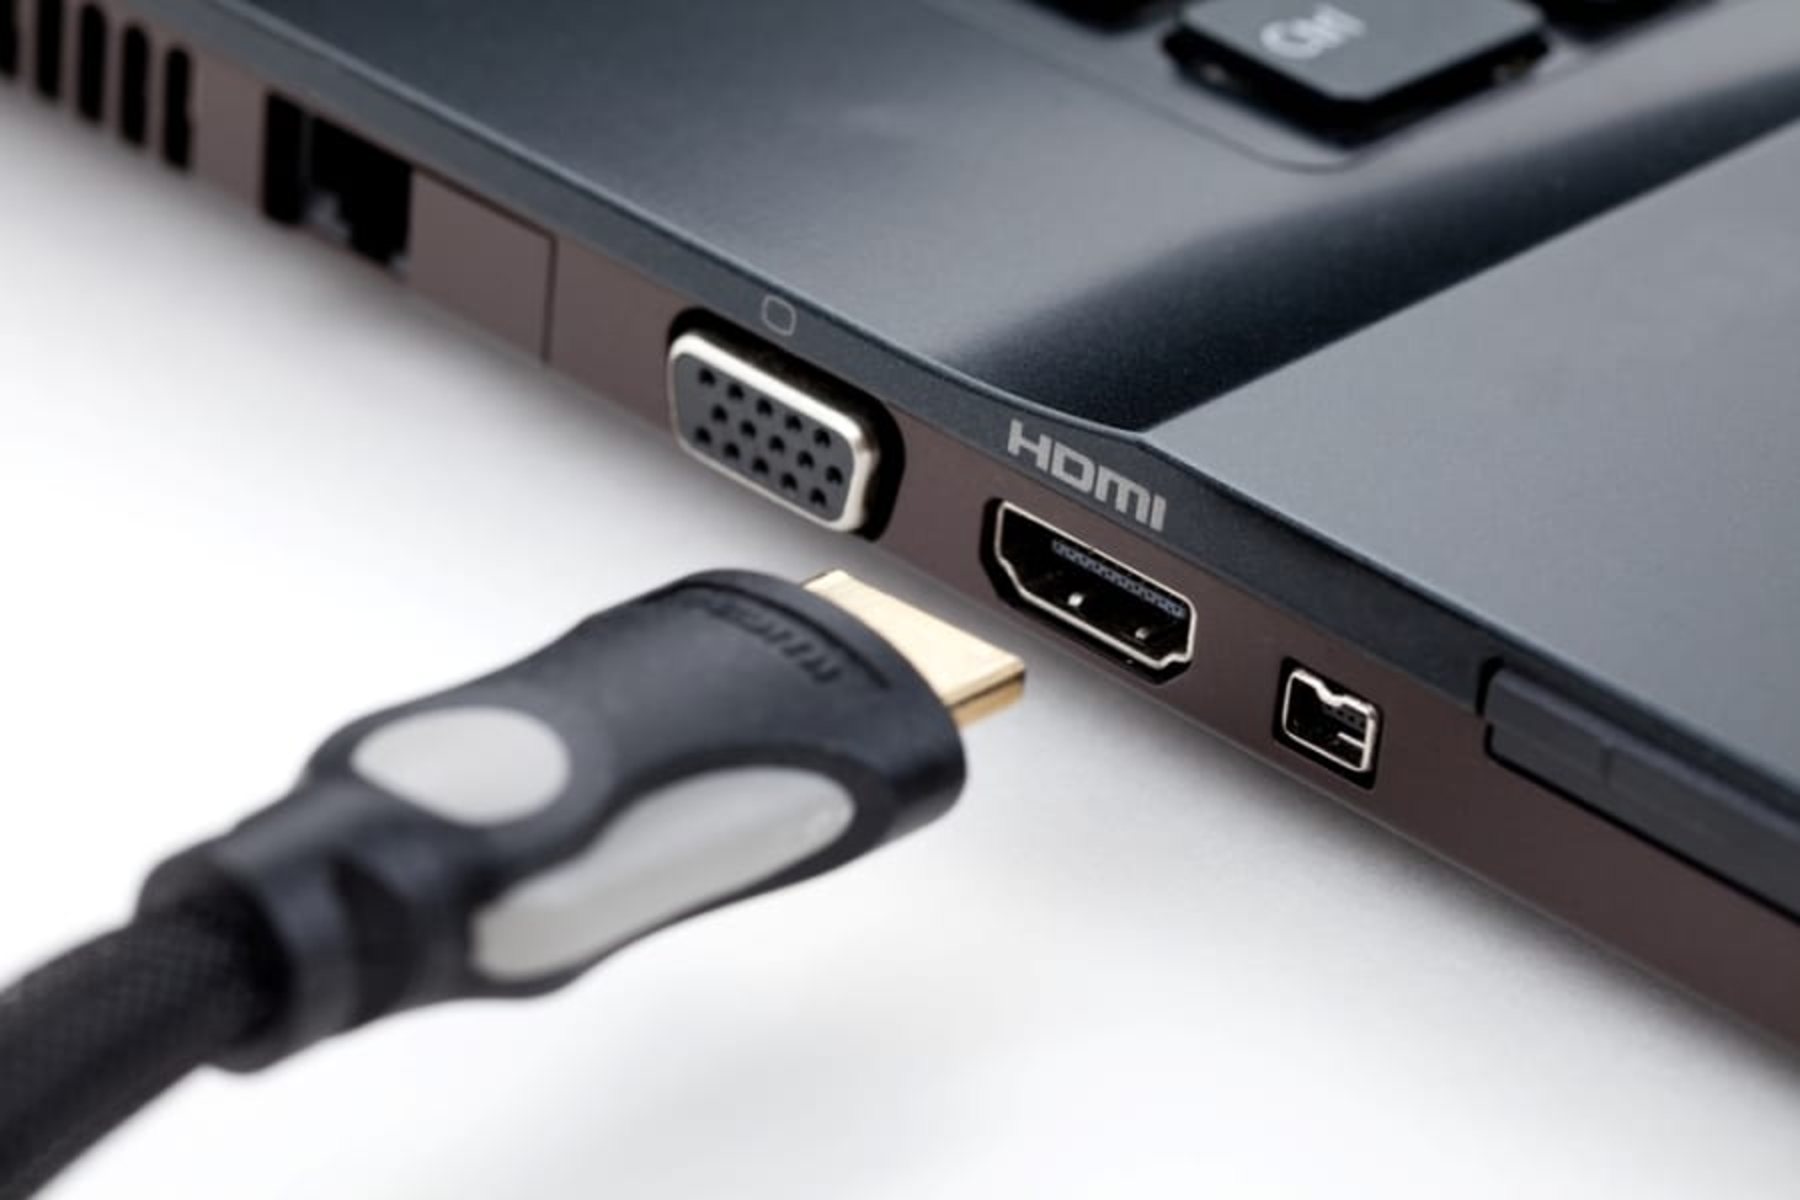
HDMI is a digital connection that allows for the transmission of uncompressed audio and video signals. It is commonly found on devices such as computers, TVs, gaming consoles, and home theater systems. The advantage of HDMI over other connections is its ability to transmit both audio and video through a single cable, eliminating the need for separate audio cables.
When audio is transmitted through HDMI, it is sent in a digital format from the source device (such as a computer) to the receiving device (such as a monitor or TV). The receiving device then decodes the digital audio signal and plays it through its built-in speakers or passes it to external speakers or a sound system.
Despite the convenience of HDMI, you may encounter situations where the audio fails to go through HDMI on your Windows 10 system. This can be caused by various factors, such as incorrect settings, outdated drivers, or a faulty HDMI cable. In this guide, we will walk you through the troubleshooting steps to help you resolve this issue and enjoy seamless audio playback through HDMI on your Windows 10 device.
What is HDMI?
HDMI, which stands for High-Definition Multimedia Interface, is a widely used digital connection standard that allows for the transmission of high-quality audio and video signals between devices. It has become the go-to interface for connecting devices such as computers, TVs, gaming consoles, and home theater systems.
HDMI cables consist of multiple pins that carry audio and video signals in a digital format. This means that the audio and video data are transmitted as binary code, ensuring optimal quality and eliminating the need for analog-to-digital conversions.
One of the key advantages of HDMI is its ability to transmit high-definition audio and video signals simultaneously through a single cable. This not only simplifies the connection process but also enables seamless synchronization of audio and video content.
On a Windows 10 system, HDMI can be used to connect your computer to a wide range of devices, such as a monitor, TV, or home theater system. When connected via HDMI, you can enjoy high-resolution video playback and immersive audio experiences without the hassle of multiple cables.
In terms of audio capabilities, HDMI supports a variety of audio formats, including stereo, surround sound, and even advanced formats like Dolby Atmos. This means that you can enjoy rich, high-quality audio through your HDMI-connected devices, whether you’re watching movies, playing games, or listening to music.
Furthermore, HDMI also supports audio return channel (ARC) functionality. This feature allows the audio signal from a display device, such as a TV, to be sent back to the audio device, such as a soundbar or AV receiver, through the same HDMI cable. This simplifies the setup and eliminates the need for additional audio cables.
Overall, HDMI is a versatile and convenient interface for transmitting audio and video signals between devices. Its digital nature ensures superior audio and video quality, while the simplicity of a single cable connection makes it a popular choice for home entertainment setups.
How Does Audio Work Through HDMI?
Audio transmission through HDMI involves converting digital audio signals into a format that can be transmitted and decoded by the receiving device. Here’s a breakdown of how audio works through HDMI:
1. Source Device: The audio signal originates from the source device, such as a computer, game console, or Blu-ray player. The source device processes the audio data and sends it to the HDMI output port.
2. HDMI Cable: The HDMI cable serves as the physical connection between the source device and the receiving device, such as a TV or home theater system. The cable carries both the video and audio signals in a digital format.
3. Audio Encoding: The digital audio signal is encoded using various formats such as PCM (Pulse-Code Modulation), Dolby Digital, or DTS (Digital Theater Systems). These formats specify how the audio data is organized and compressed for transmission.
4. Transmission: The encoded audio data is transmitted from the source device to the receiving device through the HDMI cable. The audio signals are embedded within the overall digital signal flowing through the cable.
5. Receiving Device: The receiving device, such as a TV or AV receiver, processes the incoming HDMI signal. It decodes the audio data and separates it from the video signal. The decoded audio signals are then sent to the device’s built-in speakers or external audio output ports.
6. Audio Playback: Once the receiving device has extracted the audio signals, it can play them through its own speakers or send them out to external speakers, soundbars, or other audio devices. This provides you with the desired audio output, whether it’s stereo, surround sound, or immersive formats like Dolby Atmos.
HDMI supports various audio formats, allowing for high-quality audio playback. The device’s capabilities and settings, as well as the audio formats supported by the receiving device, determine the audio quality and surround sound experience you can achieve through HDMI.
It’s important to note that audio settings and configurations can vary between devices. Therefore, it’s crucial to ensure that your Windows 10 system is correctly configured to send audio through HDMI and that your receiving device can properly decode the audio signals.
In the next sections, we will explore troubleshooting steps to help you resolve any issues you may encounter with audio not going through HDMI in Windows 10.
Why Might Audio Not Be Going Through HDMI in Windows 10?
There are several reasons why audio might not be going through HDMI in Windows 10. Let’s explore some common factors that could be causing this issue:
1. Incorrect Settings: One of the most common reasons for audio not going through HDMI is incorrect audio settings. It’s important to ensure that your Windows 10 system is configured to use HDMI as the default audio output device. If the settings are misconfigured, the audio signal may be routed to a different audio device, or there may be no audio output at all.
2. Outdated Audio Drivers: Outdated or incompatible audio drivers can also cause audio-related issues, including the failure to transmit audio through HDMI. Having the latest and compatible audio drivers installed is essential to ensure proper communication between your Windows 10 system and the HDMI-connected devices.
3. Faulty HDMI Cable: A faulty or damaged HDMI cable can sometimes be the culprit behind audio issues. If the cable is not transmitting the audio signals properly, it can result in no audio output or distorted audio. It’s important to check the HDMI cable for any physical damage or try using a different cable to rule out this possibility.
4. Disabled Windows Audio Service: The Windows Audio service is responsible for managing audio playback on your system. If this service is disabled or not functioning correctly, it can lead to audio problems, including the inability to transmit audio through HDMI. Restarting or enabling the Windows Audio service can help resolve this issue.
5. Unsupported Audio Formats: Some devices may have limitations when it comes to supporting certain audio formats through HDMI. If the audio format is not compatible with the receiving device, it may result in no audio output or limited audio options. Ensuring that the audio formats being used are supported by both the source and receiving devices can help address this problem.
By understanding these possible causes, you can start troubleshooting the audio issues and work towards resolving them. In the next sections, we will guide you through step-by-step troubleshooting steps to help you get audio to go through HDMI in Windows 10.
Troubleshooting Steps
If you’re experiencing audio issues and the audio is not going through HDMI in Windows 10, there are a few troubleshooting steps you can follow to resolve the problem. Let’s walk through these steps one by one:
Step 1: Check Your HDMI Cable
The first thing you should do is ensure that the HDMI cable is securely connected and not damaged. Disconnect the cable from both the source device and the receiving device, check for any physical damage or bent pins, and then reconnect it firmly. If possible, try using a different HDMI cable to rule out cable-related issues.
Step 2: Update Your Audio Drivers
Outdated or incompatible audio drivers can often cause audio problems. To update your audio drivers in Windows 10, follow these steps:
1. Press the Windows key + X on your keyboard and select “Device Manager”.
2. Expand the “Sound, video, and game controllers” category.
3. Right-click on your audio device (usually named “Realtek High Definition Audio” or similar) and select “Update driver”.
4. Choose the option to search automatically for updated driver software.
5. Follow the on-screen instructions to complete the driver update process.
Step 3: Set HDMI as Default Audio Output
In Windows 10, you need to ensure that HDMI is set as the default audio output device. Here’s how to do it:
1. Right-click on the volume icon in the system tray and select “Open Sound settings”.
2. Under the “Output” section, select the HDMI output device from the list.
3. Click on “Device properties” to validate that the audio format and settings are correct.
4. Test the audio by playing a video or audio file to see if the sound is going through HDMI.
Step 4: Restart Windows Audio Service
If the Windows Audio service is not functioning correctly, it can cause audio issues. To restart the Windows Audio service, follow these steps:
1. Open the Run dialog by pressing the Windows key + R.
2. Type “services.msc” and press Enter to open the Services window.
3. Scroll down and locate the “Windows Audio” service.
4. Right-click on “Windows Audio” and select “Restart”.
5. After the service restarts, check if the audio is going through HDMI.
Step 5: Test the HDMI Audio Output
After following the above steps, it’s important to test the HDMI audio output to ensure that it is working correctly. Connect your Windows 10 device to the HDMI-enabled receiving device, such as a monitor or TV, and play a video or audio file to see if the sound is coming through HDMI. Adjust the volume settings on both devices as needed.
By going through these troubleshooting steps, you should be able to resolve most audio-related issues and get the audio to go through HDMI in Windows 10. However, if the problem persists, you may need to consult the support resources for your specific devices or seek assistance from technical support.
Step 1: Check Your HDMI Cable
When experiencing audio issues with HDMI in Windows 10, it’s essential to start by checking your HDMI cable. A faulty or damaged cable can often be the culprit behind audio problems. Follow these steps to ensure that your HDMI cable is in good condition and properly connected:
1. Disconnect the HDMI Cable: Start by disconnecting the HDMI cable from both the source device (such as your computer) and the receiving device (such as your monitor or TV). Make sure to handle the cable gently and avoid bending or twisting it excessively.
2. Inspect the Cable: Take a close look at the HDMI cable for any visible signs of damage, such as frayed wires, bent pins, or physical breaks. Check both ends of the cable thoroughly. If you notice any issues, it’s likely that the cable needs to be replaced.
3. Clean the Cable and Ports: If the cable looks fine, use a soft, lint-free cloth to clean the HDMI connectors at both ends. Remove any dirt, dust, or debris that may have accumulated. Also, inspect the HDMI ports on both devices and clean them if necessary.
4. Reconnect the Cable: Once the cable and ports are clean, reconnect the HDMI cable firmly. Ensure that it is inserted all the way into the HDMI ports on both devices. Make sure it fits snugly and securely, but avoid using excessive force that could damage the connectors.
5. Try a Different HDMI Cable: If you’re still experiencing audio issues after checking and reconnecting the cable, it’s worth trying a different HDMI cable. Borrow one from a friend or use a spare cable if available. This will help determine if the original cable was faulty or incompatible.
6. Test Audio Output: After reconnecting the cable or trying a different one, test the audio output. Play a video or audio file on your Windows 10 device and see if the sound is going through HDMI. Adjust the volume settings on both devices as needed.
By thoroughly checking your HDMI cable for any damage and ensuring a secure connection, you can eliminate cable-related issues as a possible cause of the audio problem. If the issue persists even after performing these steps, move on to the next troubleshooting steps to further resolve the audio not going through HDMI in Windows 10.
Step 2: Update Your Audio Drivers
Outdated or incompatible audio drivers can often be the cause of audio issues, including the failure to transmit audio through HDMI in Windows 10. To ensure proper communication between your Windows 10 system and HDMI-connected devices, it’s important to have the latest and compatible audio drivers installed. Follow these steps to update your audio drivers:
1. Press the Windows key + X on your keyboard and select “Device Manager” from the menu that appears. The Device Manager window will open.
2. In the Device Manager window, locate and expand the “Sound, video, and game controllers” category.
3. Right-click on your audio device (it is usually named “Realtek High Definition Audio” or a similar name) and select “Update driver” from the context menu. This will open the Update Driver Software dialog box.
4. In the Update Driver Software dialog box, you will see two options: “Search automatically for updated driver software” and “Browse my computer for driver software”. Select the first option, “Search automatically for updated driver software”. Windows will then search online for the latest driver software for your audio device.
5. Wait for Windows to complete the driver search. If it finds a newer version of the audio driver, it will download and install it automatically. You may be prompted to restart your computer for the changes to take effect.
6. Once the driver installation is complete, restart your computer if necessary and check whether the audio is now going through HDMI. Play a video or audio file and verify that the sound is being transmitted correctly.
If Windows doesn’t find a newer driver for your audio device or if the issue persists after updating the driver, you can also try visiting the manufacturer’s website to manually download and install the latest driver specific to your audio device model.
Updating your audio drivers can often resolve audio-related problems and improve device compatibility. By ensuring that you have the most up-to-date drivers installed, you can enhance the audio experience and increase the chances of successfully transmitting audio through HDMI in Windows 10.
Step 3: Set HDMI as Default Audio Output
Setting HDMI as the default audio output device is crucial to ensure that the audio is correctly routed through HDMI in Windows 10. By following these steps, you can verify and adjust the audio settings to enable HDMI as the primary audio output:
1. Right-click on the volume icon located in the system tray of the taskbar. From the context menu that appears, select “Open Sound settings”. The Sound settings window will open.
2. In the Sound settings window, under the “Output” section, you will see a list of available audio output devices. Look for the device that represents your HDMI connection. It may be listed as “HDMI Output”, “Digital Output (HDMI)”, or something similar.
3. Once you have identified the HDMI output device, click on it to select it as the default audio output device. You can also click on “Device properties” to access additional settings and ensure that the audio format and settings are configured correctly.
4. Test the audio output by playing a video or audio file. Verify that the sound is going through HDMI and adjust the volume settings on both the Windows 10 system and the receiving device (such as a monitor or TV) as needed.
If you do not see the HDMI output device listed or it is not selectable, there may be a compatibility issue or a driver-related problem. In such cases, you may need to update your audio drivers or consult the support resources for your specific devices for further assistance.
It’s worth noting that changing the default audio output device to HDMI may affect other audio playback scenarios, such as using headphones or external speakers connected to the computer’s audio jack. You may need to switch back to the default audio device if you want to utilize these alternative audio options.
By correctly setting HDMI as the default audio output device, you can ensure that the audio is directed through the HDMI connection, allowing you to enjoy the desired audio playback through HDMI in Windows 10.
Step 4: Restart Windows Audio Service
If you’re experiencing audio issues with HDMI in Windows 10, one of the troubleshooting steps you can take is to restart the Windows Audio service. The Windows Audio service is responsible for managing audio playback on your system. Restarting this service can help resolve any issues that may be preventing audio from going through HDMI. Follow these steps to restart the Windows Audio service:
1. Open the Run dialog by pressing the Windows key + R on your keyboard. The Run dialog will appear.
2. Type “services.msc” into the Run dialog and press Enter. This will open the Services window.
3. In the Services window, scroll down and locate the “Windows Audio” service among the list of services.
4. Right-click on the “Windows Audio” service and select “Restart” from the context menu. This will stop and then restart the service.
5. After the service has restarted, close the Services window.
Now that the Windows Audio service has been restarted, check if the audio is now going through HDMI. Play a video or audio file and verify that the sound is being transmitted correctly.
If restarting the Windows Audio service doesn’t resolve the audio issue, you can also try right-clicking on the “Windows Audio” service again and selecting “Properties” from the context menu. In the Properties window, ensure that the Startup type is set to “Automatic” so that the service starts automatically with Windows.
If the issue persists even after restarting the Windows Audio service, you may need to explore other troubleshooting steps or seek further assistance from technical support or the manufacturer of your Windows 10 device.
By restarting the Windows Audio service, you can refresh the audio system and potentially resolve any software-related factors that are preventing audio from going through HDMI in Windows 10.
Step 5: Test the HDMI Audio Output
After following the previous troubleshooting steps, it’s important to test the HDMI audio output to ensure that it is working correctly. By performing this test, you can determine if the audio is successfully being transmitted through HDMI in Windows 10. Follow these steps to test the HDMI audio output:
1. Connect your Windows 10 device to the HDMI-enabled receiving device, such as a monitor, TV, or home theater system. Ensure that the HDMI cable is securely connected at both ends.
2. Once the connection is established, navigate to the audio or video file that you want to play. Open the file and start playback.
3. Pay attention to the audio output on the receiving device. Check if you can hear the sound coming through the speakers or the connected audio system.
4. Adjust the volume settings on both your Windows 10 device and the receiving device, if necessary, to achieve the desired audio level.
5. During playback, observe any synchronization issues between the audio and video. Make sure that the audio is properly in sync with the visual content.
If you are able to hear the audio coming through the HDMI connection and there are no synchronization issues, it indicates that the HDMI audio output is working correctly. Congratulations! You have successfully resolved the audio not going through HDMI problem in Windows 10.
However, if you are still experiencing issues, such as no audio output or distorted sound, despite following the troubleshooting steps, it may be necessary to consult the support resources for your specific devices or seek assistance from technical support.
Remember that some devices may have specific audio settings or limitations. It is beneficial to familiarize yourself with the user manual or consult the manufacturer’s support documentation for detailed information about audio configuration and compatibility.
By testing the HDMI audio output and ensuring that the audio is being transmitted properly, you can confirm that the troubleshooting steps have been successful and enjoy the seamless audio experience through HDMI in Windows 10.
Conclusion
In conclusion, resolving audio issues and getting audio to go through HDMI in Windows 10 can be achieved by following a series of troubleshooting steps. By checking the HDMI cable for any damage, updating audio drivers, setting HDMI as the default audio output, restarting the Windows Audio service, and testing the HDMI audio output, you can overcome common obstacles that may prevent audio from transmitting through HDMI.
HDMI provides a convenient and versatile interface for transmitting high-quality audio and video signals between devices. By utilizing HDMI, you can enjoy immersive audio experiences, whether you’re watching movies, playing games, or listening to music.
Throughout the troubleshooting process, it is important to pay attention to details such as cable connections, driver updates, and audio settings. These factors can greatly impact the successful transmission of audio through HDMI.
If you encounter any issues during the troubleshooting process, it is recommended to consult the support resources or documentation provided by the manufacturers of your specific devices. Additionally, reaching out to technical support can also provide valuable assistance in resolving more complex problems.
By diligently following the troubleshooting steps outlined in this guide, you should be able to resolve most audio-related issues and achieve seamless audio playback through HDMI in Windows 10. Remember to test the audio output after each step to ensure that the problem is resolved.
Enjoy the enhanced audio experience that HDMI offers and immerse yourself in the world of high-quality sound when using your Windows 10 system with HDMI-enabled devices.