Introduction
Welcome to the world of RAM drives! If you’re tired of sluggish file transfers, slow loading times, and limited storage space, then you’re in the right place. In this article, we will explore the wonderful world of RAM drives and guide you through the process of creating one for your computer.
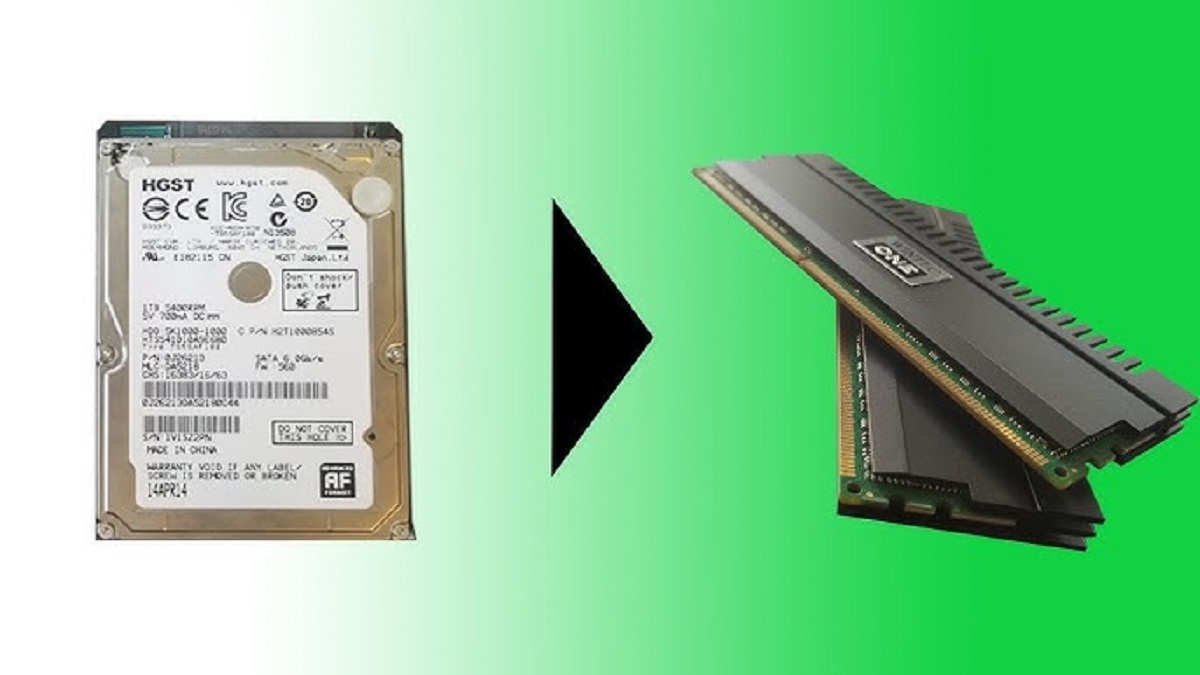
A RAM drive, also known as a virtual RAM disk, is a storage solution that utilizes a portion of your computer’s RAM (Random Access Memory) to function as a high-speed drive. Unlike traditional hard drives or solid-state drives (SSDs), which rely on physical storage media, a RAM drive stores data in the volatile memory of your computer. This results in lightning-fast read and write speeds, making it ideal for tasks that require quick access to files, such as video editing, gaming, and running virtual machines.
But why would you want to use a RAM drive when you already have a perfectly good hard drive or SSD? Well, that’s because RAM drives offer several benefits over their conventional counterparts. Firstly, as mentioned earlier, the speed of a RAM drive is unparalleled. By harnessing the power of your computer’s RAM, you can enjoy near-instantaneous file transfers and significantly reduce the time it takes to load applications and games.
Secondly, RAM drives can be incredibly useful for certain applications that require frequent read and write operations. For example, if you’re editing videos, working with large databases, or running software that constantly accesses temporary files, a RAM drive can greatly improve efficiency and save you valuable time.
Moreover, RAM drives provide a temporary storage solution that doesn’t take up any physical space on your hard drive or SSD. This can be particularly advantageous if you have limited storage capacity or if you want to keep your main drive clutter-free and reserved for long-term storage.
In the following sections, we will walk you through the step-by-step process of creating a RAM drive on your computer, from checking system compatibility to formatting the drive and optimizing its settings. So, without further ado, let’s get started on this exciting journey to supercharged storage performance!
What is a RAM Drive?
A RAM drive, also known as a virtual RAM disk, is a storage solution that utilizes a portion of your computer’s RAM (Random Access Memory) to function as a high-speed drive. Unlike traditional hard drives or solid-state drives (SSDs), which rely on physical storage media, a RAM drive stores data in the volatile memory of your computer. This means that when you power off your computer, all the data stored on the RAM drive is lost.
The concept of a RAM drive is not new; it has been around for decades. However, with the advancement in computer technology and the increasing availability of affordable RAM modules, creating a RAM drive has become more accessible to everyday users.
So, why would you want to use a RAM drive? The primary advantage of a RAM drive is its lightning-fast speed. RAM is significantly faster than any traditional storage medium, such as hard drives or SSDs, which have to physically read from and write to a physical disk. With a RAM drive, the data is accessed directly from the volatile memory, resulting in near-instantaneous read and write speeds.
This unparalleled speed makes RAM drives especially useful for tasks that require rapid file access, such as video editing, high-resolution image processing, and running resource-intensive software. By storing your working files or frequently accessed data on a RAM drive, you can greatly improve the overall performance and efficiency of these tasks.
It’s important to note that RAM drives are best suited for temporary data storage. Since RAM is volatile memory, the data stored on a RAM drive is lost when the power is turned off or when your computer restarts. This means that a RAM drive is not suitable for storing important files or data that needs to be persistent.
Another advantage of a RAM drive is its ability to reduce wear and tear on your primary storage device. By offloading read and write operations to the RAM drive, you can extend the lifespan of your hard drive or SSD, as they are subjected to fewer write cycles and can focus on long-term storage instead.
In summary, a RAM drive is a powerful storage solution that harnesses the high-speed capabilities of your computer’s RAM. It offers lightning-fast read and write speeds, making it ideal for tasks that require rapid data access. However, it is important to remember that a RAM drive is best suited for temporary storage, and the data stored on it is lost when the power is turned off. Now that you have a clearer understanding of what a RAM drive is, let’s explore the benefits it can bring to your computing experience in the next section.
Benefits of a RAM Drive
A RAM drive, also known as a virtual RAM disk, offers several advantages over traditional storage solutions. In this section, we will explore the key benefits of using a RAM drive for your computing needs.
1. Lightning-fast Speed: The most significant benefit of a RAM drive is its incredible speed. RAM is much faster than traditional storage media such as hard drives or SSDs. By utilizing your computer’s RAM as a storage solution, a RAM drive enables near-instantaneous read and write speeds. This can significantly improve the performance of tasks that require rapid data access, such as video editing, 3D rendering, and running resource-intensive applications.
2. Increased Efficiency: With a RAM drive, you can achieve higher efficiency in various computing tasks. Since the data is accessed directly from the volatile memory, there is no mechanical latency or physical read/write head movement involved. This eliminates the delay typically experienced with traditional storage devices and allows for seamless and quick data transfers. As a result, you can complete tasks faster, boost productivity, and reduce waiting times.
3. Reduces System Bottlenecks: One common bottleneck in computer performance is the speed at which data can be retrieved from the storage drive. When you use a RAM drive, it bypasses this bottleneck by storing and retrieving data from the much faster RAM instead. This frees up resources and improves overall system performance, especially for tasks that heavily rely on fast data access, such as gaming, graphic design, and database management.
4. Saves Wear and Tear on Primary Storage: By using a RAM drive, you can reduce wear and tear on your primary storage device, whether it’s a hard drive or SSD. Since a RAM drive operates in the volatile memory, data is not constantly written and rewritten to the physical storage device. This can prolong the lifespan of your primary storage and save you from costly replacements.
5. Instantaneous File Transfers: With a RAM drive, copying or moving files becomes an incredibly fast process. Whether you’re transferring large video files or a batch of high-resolution images, a RAM drive can perform file transfers at lightning speed. This is particularly useful for creative professionals, gamers, and anyone working with large files on a regular basis.
6. Temporary Storage Solution: RAM drives are best suited for temporary storage needs rather than long-term storage. They allow you to store and access temporary files or frequently used data quickly. This is especially beneficial for applications that generate and rely on a large number of temporary files, such as video editing software or virtual machines. By using a RAM drive, you can improve the overall performance and responsiveness of these applications.
In summary, a RAM drive offers numerous benefits, including lightning-fast speed, increased efficiency, reduced system bottlenecks, prolonged primary storage lifespan, instant file transfers, and a temporary storage solution. By harnessing the power of your computer’s RAM, you can unlock a whole new level of performance and productivity in your computing experience.
Steps to Make a RAM Drive
Creating a RAM drive is a relatively straightforward process. In this section, we will guide you through the step-by-step instructions to make your own RAM drive on your computer.
1. Check System Compatibility: The first step is to ensure that your computer’s hardware and operating system support RAM drives. Most modern computers are capable of creating RAM drives, but it’s always a good idea to check your system specifications.
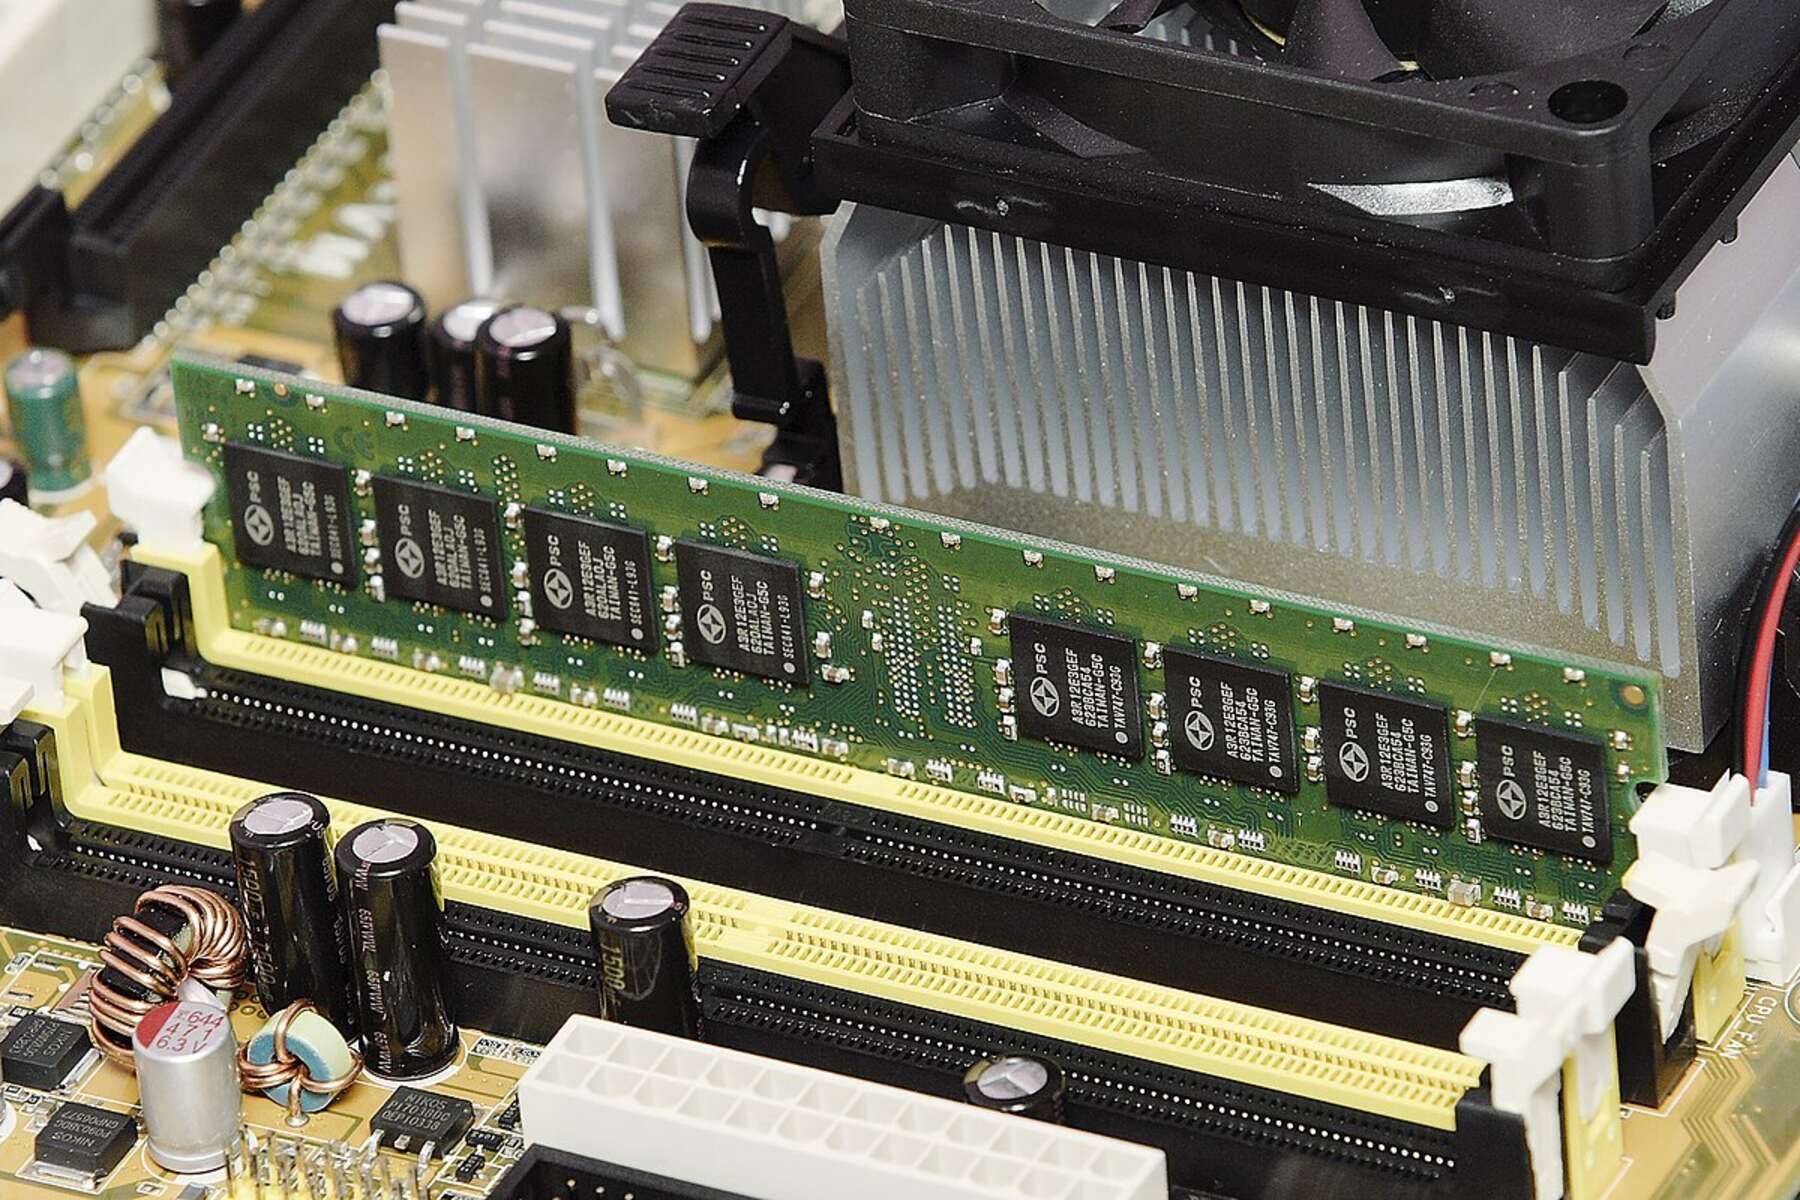
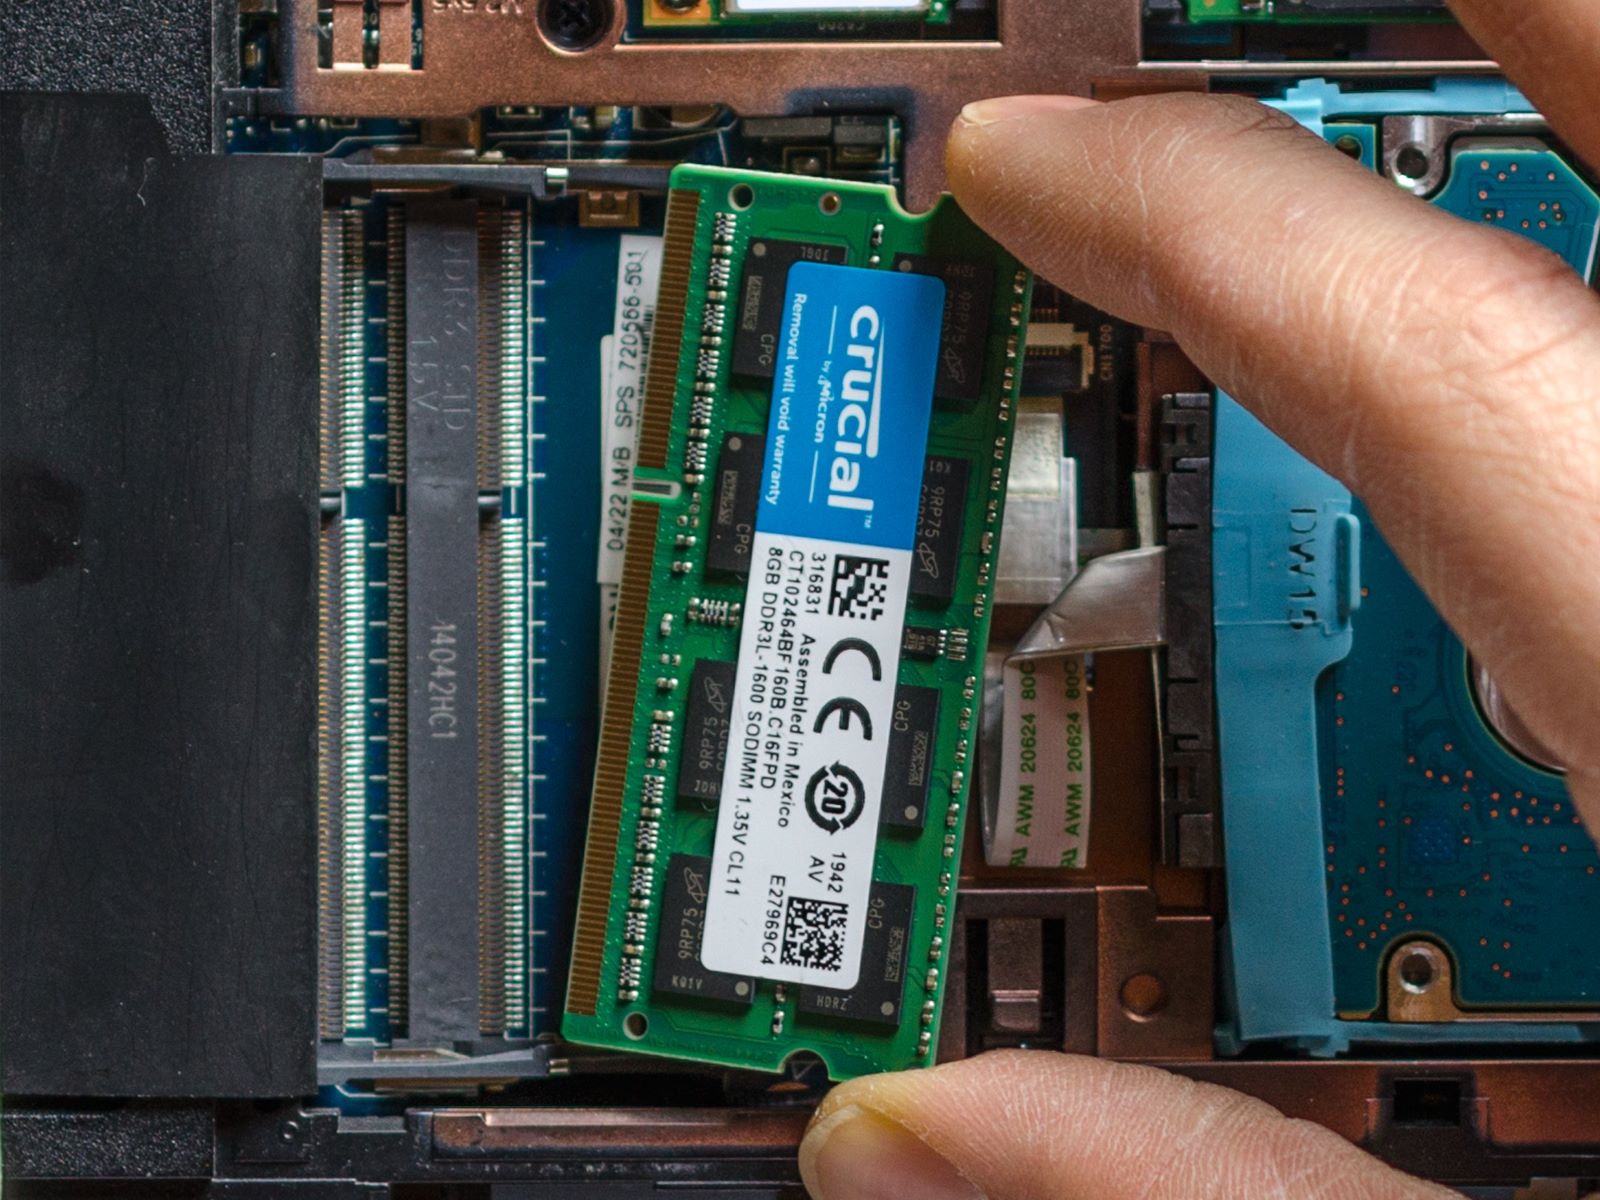
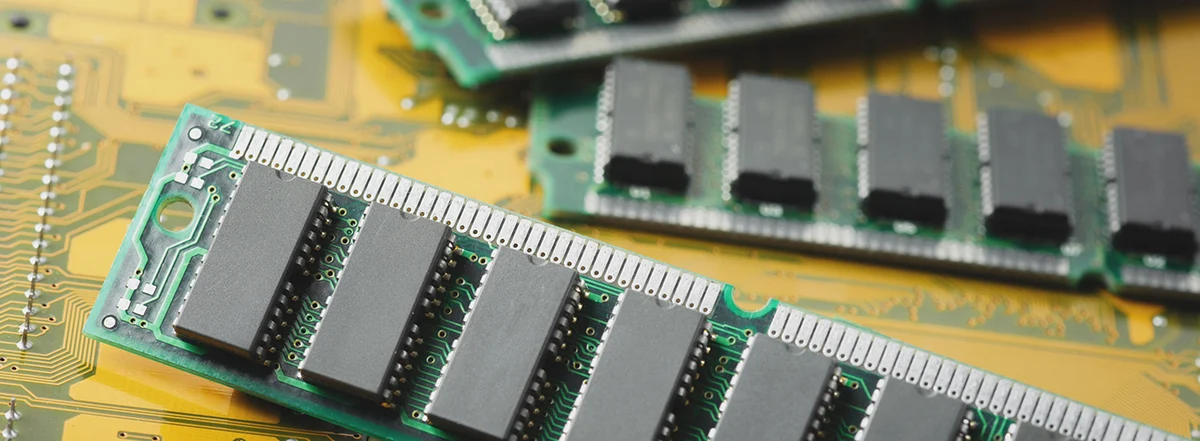
2. Prepare the Necessary Hardware: To create a RAM drive, you will need additional RAM modules. Check the maximum amount of RAM your motherboard supports and purchase the required modules. Make sure the RAM modules are of the correct type and compatible with your motherboard.
3. Install RAM into the Computer: Power off your computer and open the case. Insert the new RAM modules into the available slots on the motherboard. Ensure that they are securely seated in place. Close the case and power on your computer.
4. Access BIOS Settings: During the boot-up process, you will need to access the BIOS settings of your computer. The specific key to press will vary depending on your computer manufacturer. Common keys include Del, F2, or F10. Consult your computer’s manual or the manufacturer’s website for detailed instructions.
5. Allocate RAM for Drive: Once you’re in the BIOS settings, navigate to the memory settings section. Look for an option related to memory allocation or memory management. Adjust the settings to allocate a portion of your RAM for the RAM drive. The available options may vary depending on your computer’s BIOS.
6. Format the RAM Drive: After allocating the necessary RAM, save the settings and exit the BIOS. Boot into your operating system and go to the Disk Management utility. Locate the newly created RAM drive, right-click on it, and select the “Format” option. Choose the desired file system and format the drive.
7. Assign a Drive Letter: Once the RAM drive is formatted, right-click on it again and select the “Change Drive Letter and Paths” option. Choose an available drive letter to assign to the RAM drive. This will allow you to access it like any other storage device on your computer.
8. Adjust RAM Drive Settings: To maximize the performance and efficiency of the RAM drive, you can adjust its settings. This includes modifying the cache, adjusting the file system settings, and optimizing the read and write caching options. Experiment with these settings to find the configuration that works best for your needs.
9. Copy Files to RAM Drive: Finally, you can start utilizing your RAM drive by copying files to it. Simply drag and drop or use the regular file transfer methods to move files from your primary storage to the RAM drive. You can store temporary files, frequently accessed data, or any files that require fast access and performance.
By following these steps, you can successfully create a RAM drive on your computer. Enjoy the lightning-fast speed and improved performance that comes with utilizing your computer’s RAM as a high-speed storage solution.
Step 1: Check System Compatibility
The first step in creating a RAM drive is to ensure that your computer’s hardware and operating system support this feature. While most modern computers are capable of creating RAM drives, it’s always advisable to verify the system compatibility before proceeding. Here’s how you can check:
1. Operating System Compatibility: RAM drive support varies depending on the operating system (OS) you are using. Most major operating systems, including Windows, macOS, and Linux, have built-in support for RAM drives. However, it’s essential to confirm that your specific version of the OS has this feature. Check the official documentation or online resources for your OS to determine if it supports RAM drives.
2. RAM Capacity: The amount of RAM installed in your computer is an important factor in creating a RAM drive. In general, the more RAM you have, the larger the RAM drive you can create. Check your computer’s specifications to find the maximum supported RAM capacity. Keep in mind that allocating a significant amount of RAM for the RAM drive will reduce the available memory for other applications.
3. RAM Type and Speed: Different generations and types of RAM modules have varying speeds and compatibility with RAM drive functionality. Consult your computer’s documentation or the manufacturer’s website to determine the supported RAM types and their corresponding speeds. Ensure that your RAM modules are compatible with creating a RAM drive.
4. BIOS/UEFI Compatibility: The computer’s BIOS (Basic Input/Output System) or UEFI (Unified Extensible Firmware Interface) settings play a crucial role in enabling RAM drive functionality. Access your system’s BIOS/UEFI by restarting your computer and pressing the appropriate key during the boot sequence (e.g., Del, F2, F10). Once in the BIOS/UEFI settings, look for options related to memory management or memory allocation. Verify that these settings allow for the creation of a RAM drive.
5. Additional Software: While many operating systems support RAM drives natively, some may require additional software to enable this feature. Research and identify suitable RAM drive software that is compatible with your operating system, if necessary. These software tools provide additional flexibility and customization options for your RAM drive.
By thoroughly checking your system’s compatibility, you can ensure a smooth and successful RAM drive creation process. If your computer meets the necessary requirements, you can proceed to the next steps and unlock the benefits of lightning-fast storage with a RAM drive.
Step 2: Prepare the Necessary Hardware
Before you can create a RAM drive, it’s important to prepare the necessary hardware. While creating a RAM drive does not require any complex or special equipment, you will need additional RAM modules to allocate for the RAM drive. Here’s what you need to do:
1. Determine Compatibility: Begin by checking your computer’s specifications and the motherboard’s documentation to determine the type, speed, and maximum supported capacity of RAM modules. This will ensure that you purchase RAM modules that are compatible with your system and can be used for creating a RAM drive.
2. Purchase Additional RAM Modules: Once you have determined the compatibility, acquire the required RAM modules. Look for reputable brands and ensure that the modules meet the specifications advised by the manufacturer. Consider the amount of RAM you will allocate for the RAM drive and purchase additional modules accordingly. Keep in mind that allocating a significant amount of your total RAM to the RAM drive will reduce the available memory for other applications.
3. Static Electricity Precautions: Before handling the RAM modules, it’s crucial to take precautions against static electricity. Static electricity can damage sensitive electronic components, including RAM modules. To prevent this, ensure that you are in a static-free environment and that you ground yourself by touching a grounded metal object before handling the RAM modules.
4. Power Off and Open the Computer: Once you have the new RAM modules, power off your computer and unplug it from the power source. It’s important to ensure that the computer is completely powered down before opening it. Once powered off, open the computer case using the appropriate tools based on its design.
5. Locate the RAM Slots: Locate the RAM slots on your computer’s motherboard. These slots are usually located near the CPU socket. They may be color-coded or labeled for easy identification. Refer to your computer or motherboard’s documentation for specific instructions on locating the RAM slots.
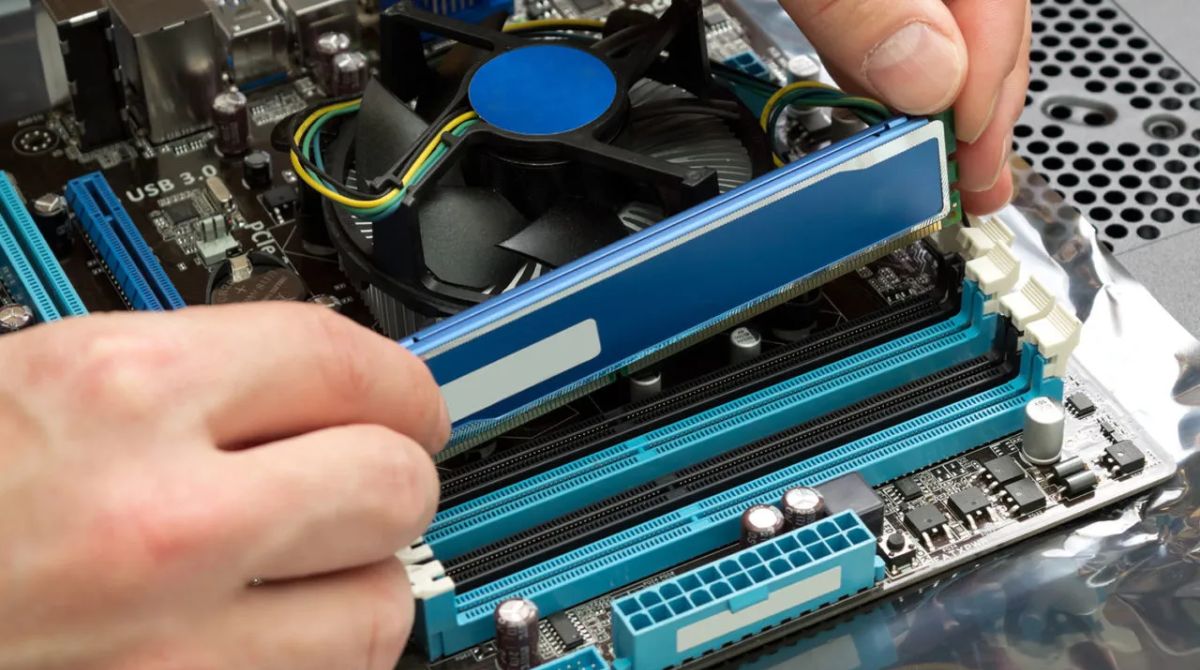
6. Insert the RAM Modules: Take the new RAM modules and align them with the corresponding RAM slots. Ensure that the notch on the RAM module matches the key in the slot. Gently insert the RAM module into the slot at a 45-degree angle and then press it down firmly until it clicks into place. Repeat the process for each RAM module you are installing.
7. Secure the RAM Modules and Close the Computer Case: Once all the RAM modules are securely installed, make sure they are seated properly by applying slight pressure on them. Check that they are evenly aligned and fully inserted into the slots. Finally, close the computer case and secure it using the appropriate screws or latches.
By following these steps, you can prepare the necessary hardware for creating a RAM drive. Now that your additional RAM modules are installed, you are one step closer to harnessing the power of your computer’s RAM for lightning-fast storage performance.
Step 3: Install RAM into the Computer
Now that you have obtained the necessary RAM modules, it’s time to install them into your computer. Installing RAM is a relatively simple process, but it requires careful handling to avoid any damage. Follow these steps to install the RAM modules properly:
1. Power Off and Unplug: Start by completely shutting down your computer and unplugging it from the power source. This will eliminate any risk of electrical shock and ensure the safety of both you and the computer during the installation process.
2. Open the Computer Case: Use the appropriate tools, such as a screwdriver, to open the computer case. This step may vary depending on the design of your computer. Follow the instructions provided by the manufacturer or consult the user manual if you are unsure how to open the case.
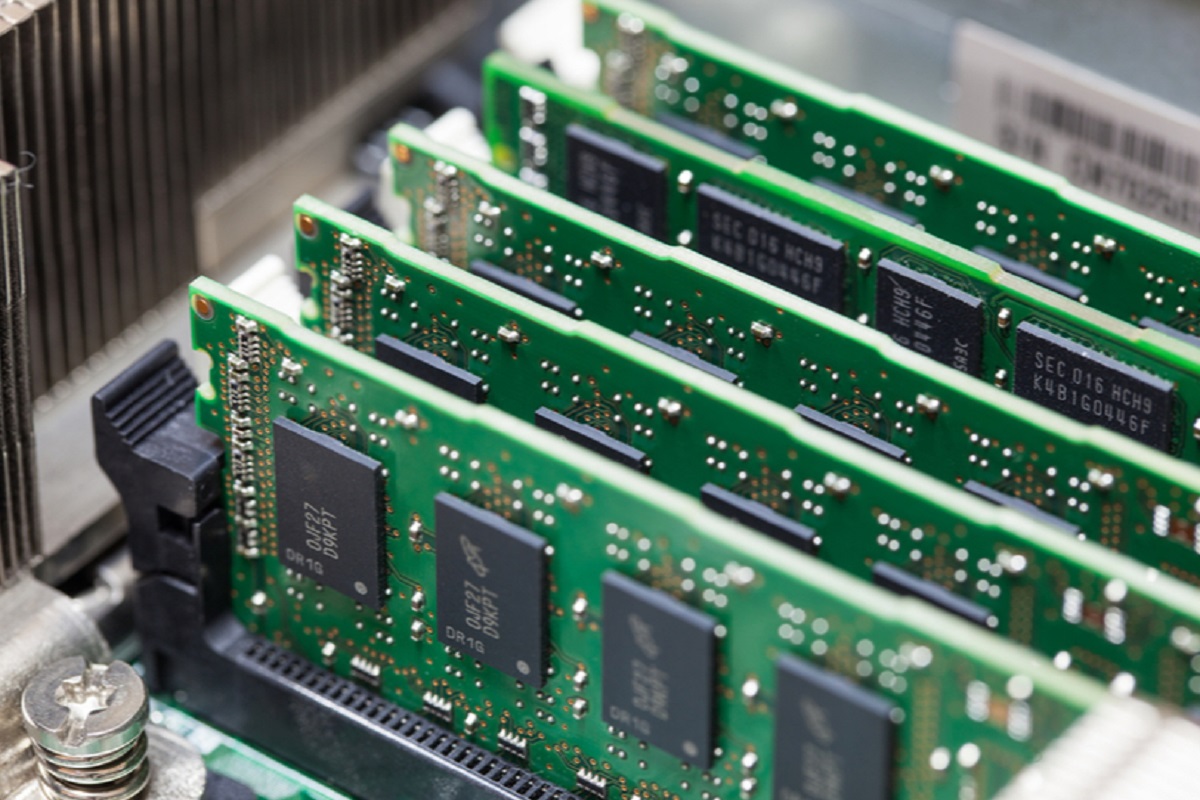
3. Locate the RAM Slots: Look inside the computer case and locate the RAM slots on the motherboard. These slots are typically long and have plastic clips or levers on either side to secure the RAM modules in place. Depending on your motherboard, there may be two or more RAM slots.
4. Handle RAM Modules Properly: Before removing the RAM modules from their packaging, ground yourself by touching a grounded metal object or wearing an anti-static wristband. This helps prevent any static discharge that could potentially damage the RAM or other components.
5. Remove Existing RAM (if applicable): If there are already RAM modules installed in the slots, you may need to remove them to make space for the new ones. To remove the existing RAM modules, gently push down on the plastic clips or levers at the sides of the slots until the RAM module pops up. Carefully lift it out of the slot at a 45-degree angle.
6. Align and Insert the New RAM Modules: Take one of the new RAM modules and align the notch on the module with the key in the RAM slot. Holding the RAM module by its edges, firmly insert it into the slot at a 45-degree angle. Apply even pressure and push down until the module is fully inserted into the slot and the clips or levers click into place. Repeat this process for each RAM module you are installing.
7. Verify Proper Installation: Once all the RAM modules are installed, double-check to ensure they are securely in place. Gently press down on each end of the module to ensure it is fully seated and locked into the slot. Make sure the modules are aligned properly and parallel to the motherboard.
8. Close the Computer Case: After confirming that the RAM modules are securely installed, carefully close the computer case. Ensure that any screws or latches are properly tightened to secure the case. Be cautious not to pinch any cables or wires when closing the case.
9. Power On and Verify Installation: Plug in the power cable and turn on your computer. After the computer boots up, access the BIOS or check your operating system to verify that the new RAM modules are detected and are functioning correctly. The increased RAM capacity will now be available for use, including allocating a portion for creating a RAM drive.
By following these steps, you can successfully install the new RAM modules into your computer. The increased RAM capacity will allow you to create a RAM drive and experience faster storage performance.
Step 4: Access BIOS Settings
In order to create a RAM drive, you need to access the BIOS (Basic Input/Output System) settings of your computer. By accessing the BIOS, you can configure the necessary settings to allocate a portion of your RAM for the RAM drive. Follow these steps to access the BIOS settings:
1. Power on or Restart your Computer: Start by turning on your computer if it is powered off, or restart it if it is already on. You will need to access the BIOS settings during the boot-up process.
2. Identify the Key: Pay attention to the initial screen displayed during boot-up, which usually includes the computer manufacturer’s logo. The specific key to access the BIOS settings may be mentioned on this screen. Common keys for accessing the BIOS include Del, F2, F10, or Esc. If the key information is not displayed on the screen, you can consult your computer’s manual or check the manufacturer’s website for the correct key.
3. Press the Key: Once you have identified the key, press it repeatedly during the boot-up process. Timing can be crucial, so start pressing the key as soon as you see the logo or the indication to access the BIOS settings. Be patient, as it may take a few seconds for the BIOS settings screen to appear.
4. Navigate with the Keyboard: Once you are in the BIOS settings, you will be presented with a menu or a series of tabs and options. Use the keyboard arrow keys to navigate through the different settings. Each BIOS has a different layout and menu structure, so it’s important to refer to your computer’s manual or the manufacturer’s documentation if you are unsure about the specific options to look for.
5. Locate Memory or RAM Settings: Look for options related to memory or RAM settings. These options may be under a section labeled “System Configuration,” “Advanced,” “Chipset,” or something similar. The available options can vary depending on the computer’s motherboard and BIOS version.
6. Adjust Memory Allocation: Once you have located the memory or RAM settings, find the option to allocate a portion of the RAM for the RAM drive. This option may be labeled as “Memory Allocation,” “Memory Settings,” or similar. Enter the amount of RAM you want to allocate for the RAM drive. Keep in mind that allocating a large amount of RAM for the RAM drive may have an impact on the memory available for other applications.
7. Save and Exit: After adjusting the memory allocation, save the changes you have made in the BIOS settings. Look for an option to save and exit, such as “Save and Exit,” “Exit and Save Changes,” or “Exit and Restart.” Confirm the changes and allow the computer to restart.
8. Verify Settings: Once the computer has restarted, you can verify that the changes you made in the BIOS settings have taken effect. You can do this by accessing the BIOS settings again or by checking the allocated RAM for the RAM drive in your operating system.
By following these steps, you can access the BIOS settings and allocate a portion of your computer’s RAM for the RAM drive. This ensures that the necessary configuration is in place to create and utilize the RAM drive effectively.
Step 5: Allocate RAM for Drive
Once you have accessed the BIOS settings, the next step in creating a RAM drive is to allocate a portion of your computer’s RAM specifically for the RAM drive. Allocating the RAM ensures that the operating system recognizes and utilizes the designated RAM for the RAM drive. Here’s how you can allocate the RAM for the drive:
1. BIOS Memory Settings: Within the BIOS settings, navigate to the section related to memory or RAM settings. The specific location and naming of this section may vary depending on your computer’s motherboard and BIOS version. Refer to your computer’s manual or the manufacturer’s documentation for specific instructions.
2. Allocate Memory: Once you have located the memory or RAM settings section, look for options related to memory allocation or memory management. These options may be labeled as “Memory Allocation,” “Memory Settings,” or similar. Select the option that allows you to set the amount of memory to allocate for the RAM drive.
3. Set the Allocation Amount: Enter the desired amount of RAM you want to allocate for the RAM drive. This allocation is typically set in megabytes (MB) or gigabytes (GB). Take into consideration the total amount of RAM available in your computer and the amount needed for other applications. Allocating too much RAM for the RAM drive may impact other tasks, so it’s important to find a balance between performance and system resources.
4. Save and Exit: After setting the desired amount of memory allocation, save the changes you have made in the BIOS settings. Look for an option to save and exit, such as “Save and Exit,” “Exit and Save Changes,” or “Exit and Restart.” Confirm the changes and allow the computer to restart.
5. Verify Allocation: Once the computer has restarted, verify that the allocated RAM has been recognized by the operating system and is available for use as a RAM drive. You can do this by checking the allocated RAM for the drive in your operating system’s disk management utility or by using third-party RAM drive software.
6. Adjust Allocation if Needed: If you find that the allocated amount of RAM is affecting the overall system performance or other applications, you can revisit the BIOS settings and adjust the allocation as necessary. This flexibility allows you to fine-tune the allocation based on your specific computing needs.
By following these steps, you can successfully allocate a portion of your computer’s RAM for the RAM drive. This ensures that the allocated RAM is reserved for the RAM drive’s use, providing you with the high-speed storage solution you desire for improved performance and efficiency.
Step 6: Format the RAM Drive
After allocating a portion of your computer’s RAM for the RAM drive, the next step is to format the newly created RAM drive. Formatting the RAM drive prepares it for use, creating a file system that allows you to store and organize data on the drive. Follow these steps to format the RAM drive:
1. Access Disk Management: Open the Disk Management utility on your operating system. On Windows, you can do this by searching for “Disk Management” in the Start menu or right-clicking the Start button and selecting “Disk Management” from the list of options.
2. Identify the RAM Drive: In the Disk Management window, locate the RAM drive among the list of storage devices. It should be labeled as an unformatted drive or labeled with the size you allocated for the RAM drive.
3. Right-Click on the RAM Drive: Right-click on the RAM drive and select the “Format” option from the contextual menu. This will open the Format dialog box.
4. Choose the File System: In the Format dialog box, choose the desired file system for the RAM drive. The most common file systems for Windows are NTFS and exFAT. Choose the file system that best suits your needs, considering factors like compatibility with other devices or maximum file size support.
5. Customize Formatting Options (Optional): You may have the option to customize the formatting options, such as allocation unit size or volume label. Unless you have specific requirements, it is generally recommended to leave these options at their default settings.
6. Start the Formatting Process: Once you have selected the file system and customized any desired options, click on the “Format” button to start the formatting process. Note that formatting the RAM drive will erase any existing data on it, as the RAM drive is a volatile storage solution.
7. Wait for the Formatting to Complete: The formatting process may take a few moments to complete, depending on the size of the RAM drive and the speed of your computer. During this time, it is important not to interrupt the process or power off your computer.
8. Verify Successful Formatting: After the formatting process completes, the RAM drive should appear as a formatted drive with a drive letter assigned to it in the Disk Management utility. You can now use the RAM drive to store and access files quickly.
9. Adjust Additional Settings (Optional): Depending on your specific requirements, you may want to adjust additional settings for the RAM drive. This can include changing drive letter assignments, adjusting caching settings, or exploring advanced features offered by RAM drive software.
By following these steps, you can successfully format the RAM drive and prepare it for use. Now that the RAM drive is formatted, you can start utilizing its high-speed capabilities for faster data access and improved storage performance.
Step 7: Assign a Drive Letter
After formatting the RAM drive, the next step is to assign a drive letter to the RAM drive. Assigning a drive letter allows you to easily access the RAM drive like any other storage device on your computer. Follow these steps to assign a drive letter to the RAM drive:
1. Open Disk Management: Begin by opening the Disk Management utility on your operating system. On Windows, you can access Disk Management by searching for “Disk Management” in the Start menu or right-clicking the Start button and selecting “Disk Management” from the list of options.
2. Locate the RAM Drive: In the Disk Management window, locate the RAM drive among the listed storage devices. It should appear as a formatted drive with the file system you selected during the formatting process.
3. Right-Click on the RAM Drive: Right-click on the RAM drive and select the “Change Drive Letter and Paths” option from the contextual menu. This will open the Change Drive Letter and Paths dialog box.
4. Add a Drive Letter: In the Change Drive Letter and Paths dialog box, click on the “Add” button. This will open a new dialog box displaying available drive letters.
5. Select a Drive Letter: Choose an available drive letter to assign to the RAM drive. You can select any letter that is not already in use by another drive. Typically, drive letters from D to Z are available for assignment.
6. Confirm the Assignment: After selecting a drive letter, click on the “OK” button to confirm the assignment. The RAM drive will now appear with the assigned drive letter in the Disk Management utility.
7. Verify Successful Assignment: To ensure that the drive letter assignment was successful, open Windows Explorer or File Explorer and look for the RAM drive with the assigned letter under “This PC” or “My Computer” section. You should be able to access the RAM drive and start using it for storage purposes.
8. Modify Drive Letter (Optional): If you later want to change the assigned drive letter for the RAM drive, you can return to the Change Drive Letter and Paths dialog box in Disk Management. Right-click on the RAM drive, select “Change Drive Letter and Paths” again, and follow the same steps to modify the drive letter assignment.
By following these steps, you can successfully assign a drive letter to the RAM drive, allowing for easy access and management of the drive within your operating system. With the drive letter assigned, you can now start using the RAM drive for speedy storage and high-performance computing tasks.
Step 8: Adjust RAM Drive Settings
After assigning a drive letter to the RAM drive, the next step is to adjust the settings of the RAM drive to optimize its performance and functionality. These settings can vary depending on the operating system and any RAM drive software you may be using. Follow these steps to adjust the RAM drive settings:
1. Cache Settings: Depending on the RAM drive software you are using, you may have the option to configure the caching settings. Caching determines how the RAM drive handles read and write operations. Explore the software’s options or settings to adjust the caching parameters according to your requirements.
2. File System Settings: If your operating system supports different file systems, you can experiment with the file system settings of the RAM drive as well. Some file systems may provide better performance in specific scenarios, so consider the demands of your tasks and the compatibility with your operating system when adjusting the file system settings.
3. Read and Write Caching: In some RAM drive software, you may have the ability to adjust the degree of read and write caching. This can impact the performance of the RAM drive. Experiment with different caching settings to find the optimal balance between speed and stability for your computing needs.
4. Advanced Features: If the RAM drive software offers advanced features, make sure to explore them. These features can include encryption, compression, or other performance-enhancing options. Consider how these features may benefit your specific use cases and adjust the settings accordingly.
5. Save and Apply Changes: Once you have adjusted the RAM drive settings to your preference, save and apply the changes. Depending on the RAM drive software, you may need to click on a “Save” or “Apply” button within the software interface to implement the modifications. Some changes may require a restart of the RAM drive or the computer for the settings to take effect.
6. Monitor and Fine-tune: After applying the settings, monitor the performance of the RAM drive during various tasks or applications. Assess if the adjustments have improved the efficiency, speed, or overall performance of the RAM drive. If necessary, iteratively fine-tune the settings to achieve the desired outcome.
7. Consult Documentation or Support: If you have any questions or need more guidance on adjusting the RAM drive settings, consult the software documentation or reach out to the software’s support resources. They can provide specific instructions or recommendations based on the software’s capabilities and your use-case requirements.
By following these steps, you can effectively adjust the settings of your RAM drive to optimize its performance and functionality. These settings can help you harness the full potential of the RAM drive, ensuring that it meets your specific computing needs and provides a high-speed storage solution.
Step 9: Copy Files to RAM Drive
Now that your RAM drive is set up and configured, it’s time to start using it for storing and accessing files at lightning-fast speeds. Here is a step-by-step guide on how to copy files to your RAM drive:
1. Open File Explorer: Start by opening File Explorer or any file management tool on your operating system. This will allow you to navigate through your computer’s file system and locate the files you want to copy to the RAM drive.
2. Locate the Source Files: Navigate to the directory containing the files that you want to copy to the RAM drive. You can select individual files or entire folders depending on your requirements.
3. Select Files: Use your preferred method to select the files you want to copy. You can click and drag to select multiple files, or use the Ctrl or Shift key along with the mouse click to select specific files or a range of files.
4. Copy Files: Once the files are selected, right-click on them and choose the “Copy” option from the contextual menu. Alternatively, you can use the Ctrl+C keyboard shortcut to copy the selected files.
5. Navigate to the RAM Drive: In File Explorer, navigate to the RAM drive by locating the assigned drive letter you previously assigned to the RAM drive. The RAM drive should be listed under “This PC” or “My Computer” section.
6. Paste Files: Once you have reached the RAM drive location, right-click inside the RAM drive folder and select the “Paste” option from the contextual menu. Alternatively, you can use the Ctrl+V keyboard shortcut to paste the files.
7. Monitor the Copy Progress: Depending on the size and number of files being copied, the copying process may take a few moments. Monitor the progress in the File Explorer window or in any progress dialog boxes that may appear.
8. Verify Successful Copy: After the copying process completes, verify that the files have been successfully copied to the RAM drive. You can do this by accessing the RAM drive and confirming that the copied files are present in the RAM drive folder.
9. Access and Use Files: Now that the files are stored on the RAM drive, you can access and use them at lightning-fast speeds. Open applications or perform tasks that require rapid access to these files, and experience the performance benefits provided by the high-speed RAM drive.
Remember that the RAM drive is a volatile storage solution, meaning that the data is temporary and will be lost when you power off or restart your computer. Ensure that you have backups of critical files stored on a persistent storage device.
By following these steps, you can easily copy files to your RAM drive and take advantage of its fast read and write speeds for improved storage performance. Enjoy the enhanced responsiveness and efficiency that a RAM drive offers for your computing tasks.
Conclusion
Creating a RAM drive can significantly enhance your computing experience by providing lightning-fast storage performance. By utilizing a portion of your computer’s RAM as a high-speed drive, you can enjoy quick access to files, faster data transfers, and improved overall system responsiveness. Throughout the steps outlined in this guide, we have explored the process of creating a RAM drive, from checking system compatibility and preparing the necessary hardware to formatting the drive and adjusting the settings.
A RAM drive offers several benefits over traditional storage solutions. Its unparalleled speed, thanks to the high-speed capabilities of RAM, makes it ideal for tasks that require rapid data access, such as video editing, gaming, and running resource-intensive software. The temporary storage nature of a RAM drive also helps reduce wear and tear on your primary storage device and keeps your main drive clutter-free.
Throughout the journey of creating a RAM drive, it’s crucial to consider factors like system compatibility, proper hardware installation, allocation of RAM, formatting, and adjustment of settings. Each step plays a vital role in setting up a well-functioning RAM drive that meets your specific needs.
With a properly configured RAM drive, you can copy files onto it and take advantage of the lightning-fast read and write speeds. Utilize the RAM drive for temporary storage, frequently accessed data, or tasks that demand high-performance computing. Remember to regularly back up your critical files on a persistent storage device, as the RAM drive is volatile and data stored on it will be lost upon system shutdown or restart.
In conclusion, a RAM drive can be a game-changer for various computing tasks that require fast data access. By harnessing the power of your computer’s RAM, you can unleash the full potential of your system and experience a new level of speed and efficiency. Take the time to set up and configure a RAM drive following the steps provided, and enjoy the remarkable performance boost it brings to your computing journey.