Introduction
Welcome to the world of concrete 3D printing! This innovative technology has revolutionized the construction industry, enabling the creation of complex and intricate structures with speed and precision. Whether you’re a DIY enthusiast or a professional contractor, learning how to make a concrete 3D printer opens up a world of possibilities.
Gone are the days of traditional construction methods that require extensive manpower and time. With a concrete 3D printer, you can bring your designs to life effortlessly, saving both time and money in the process.
Concrete 3D printing works by depositing layers of specialized concrete mixture to create three-dimensional objects. The process is guided by digital designs, offering unparalleled accuracy and intricacy. From architectural models to functional parts, the applications of concrete 3D printing are endless.
In this guide, we will take you through the step-by-step process of making a concrete 3D printer. Whether you’re building it from scratch or using a DIY kit, we’ll cover everything you need to know to get started on your concrete 3D printing journey.
Before we dive into the technical aspects, it’s important to note that concrete 3D printing requires some foundational knowledge of construction and engineering principles. While it may seem intimidating at first, with the right guidance and resources, you’ll be well on your way to mastering this cutting-edge technology.
So, if you’re ready to unlock the potential of concrete 3D printing and embark on an exciting journey of creativity and innovation, let’s jump right in and explore the fascinating world of making your very own concrete 3D printer.
Overview of Concrete 3D Printing
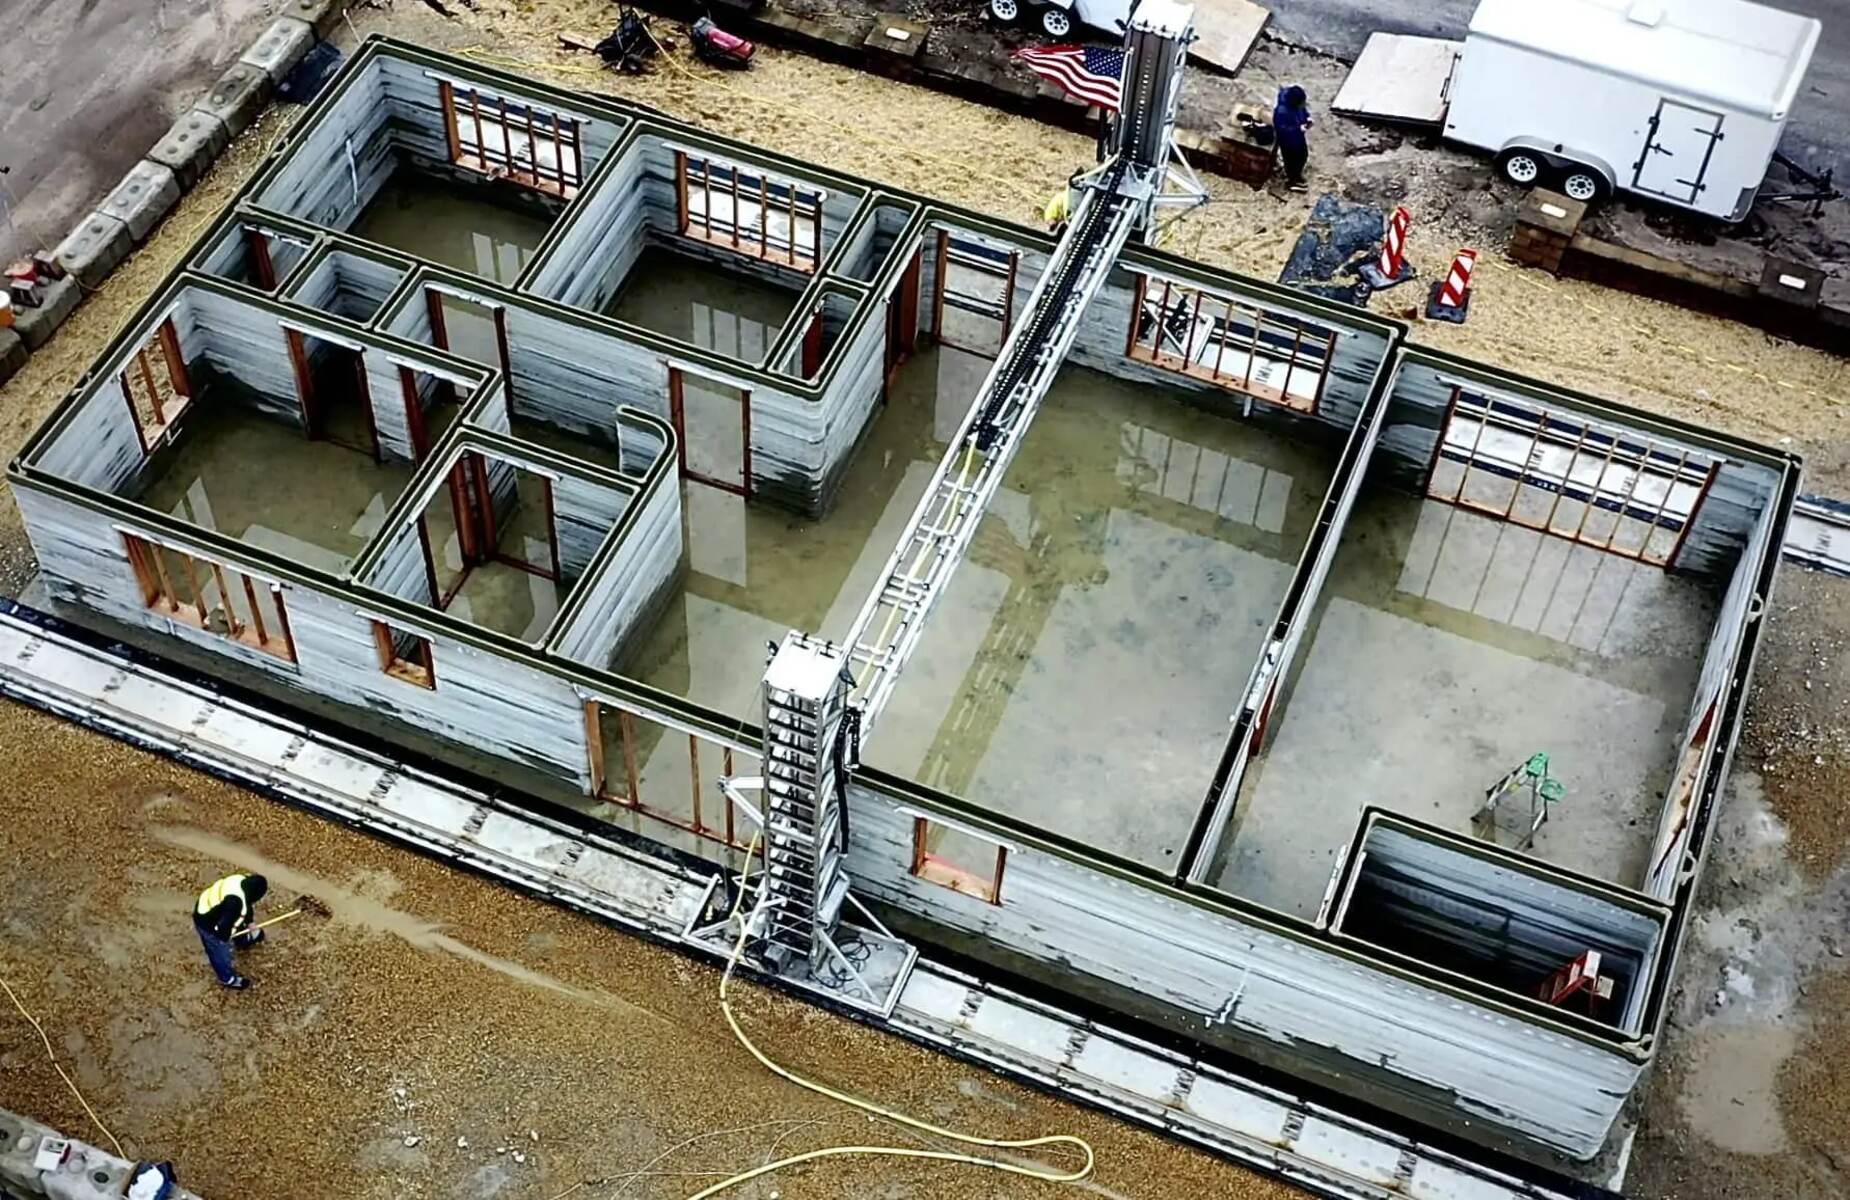
Concrete 3D printing, also known as additive construction, is a groundbreaking technology that allows for the fabrication of concrete structures layer by layer. This innovative approach to construction offers numerous advantages over traditional building methods.
One of the key benefits of concrete 3D printing is its ability to create intricate and complex geometries that would be challenging or even impossible to achieve using traditional construction techniques. This opens up a world of design possibilities, allowing architects and engineers to push the boundaries of what is structurally and aesthetically possible.
Furthermore, concrete 3D printing offers significant time and cost savings. By eliminating the need for formwork and reducing labor requirements, projects can be completed in a fraction of the time it would take using conventional methods. This not only improves efficiency but also reduces expenses, making it an attractive option for both small-scale projects and large-scale construction endeavors.
Another advantage of concrete 3D printing is its sustainability. By enabling the precise deposition of material, there is minimal waste generated during the printing process. Additionally, using concrete mixtures that incorporate recycled materials or are optimized for strength can further enhance the eco-friendliness of the construction.
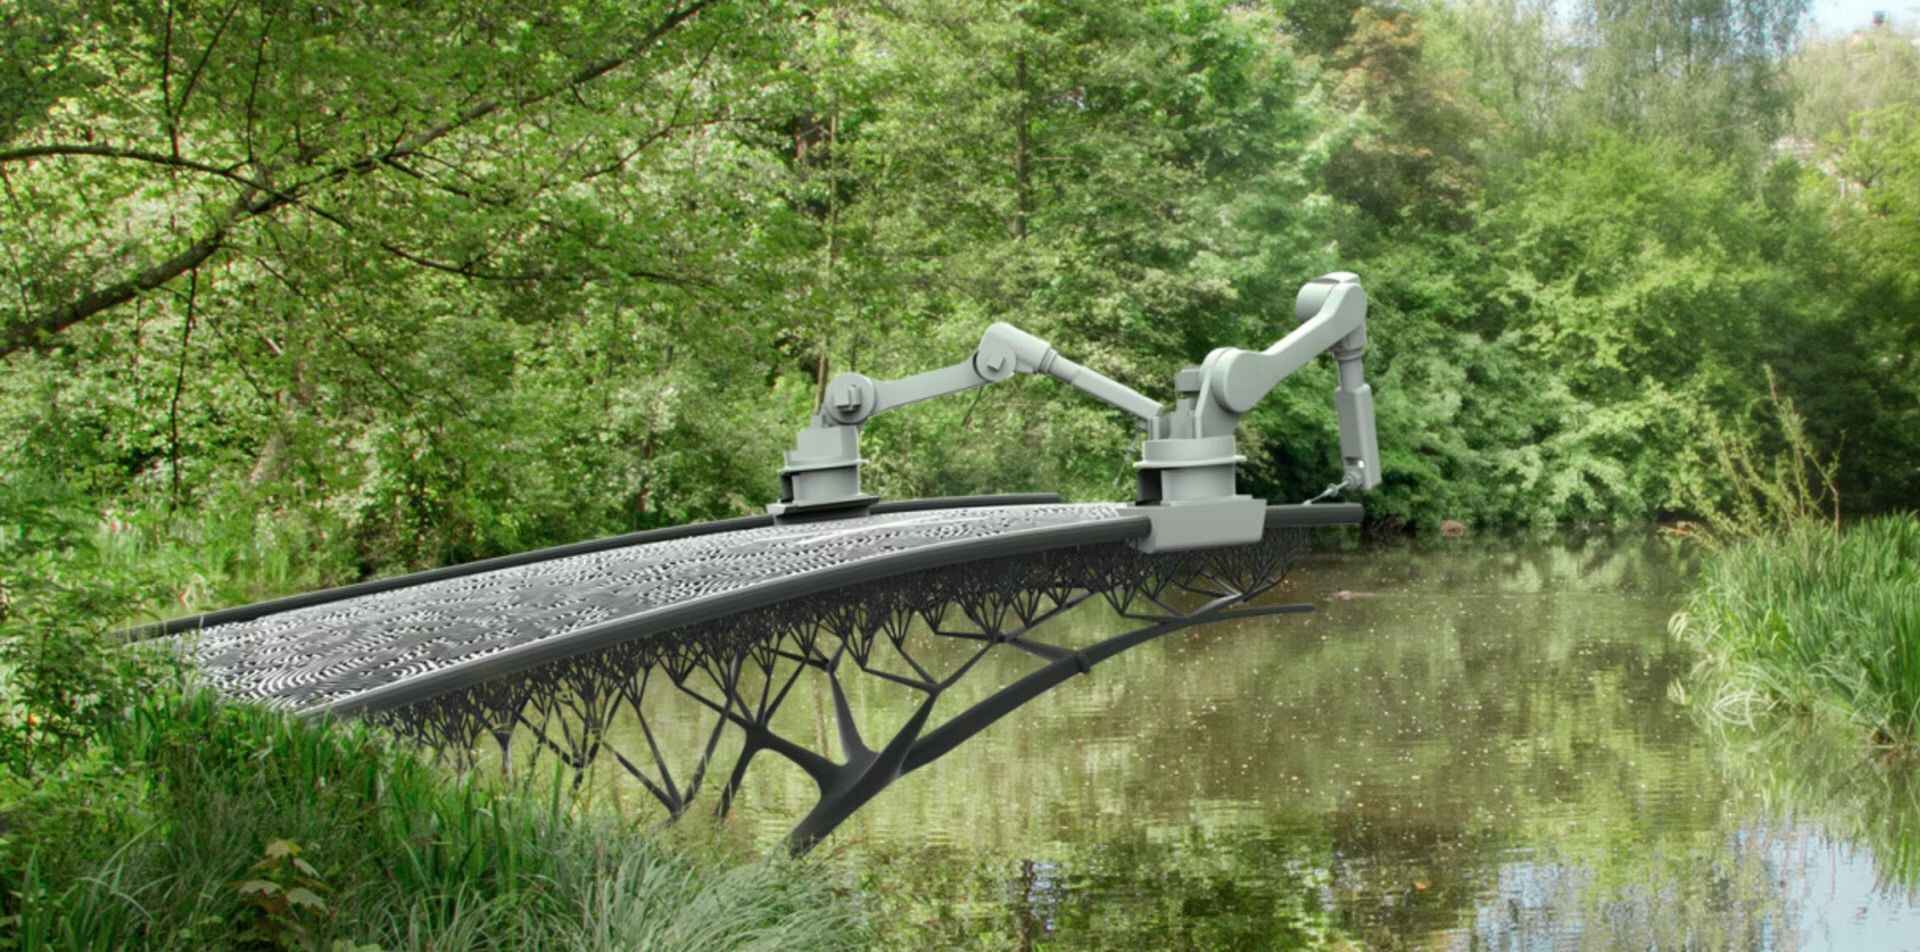
When it comes to the types of structures that can be created with concrete 3D printing, the possibilities are vast. From residential buildings and commercial spaces to infrastructure projects like bridges and dams, this technology has the potential to reshape the construction industry.
It’s important to note that while concrete 3D printing offers numerous benefits, it also comes with its own set of challenges. The selection of the appropriate concrete mixture, the calibration of the printer, and the post-processing of printed objects are all critical factors that require careful consideration and expertise.
Throughout this guide, we will delve into the intricacies of concrete 3D printing, providing you with the knowledge and skills needed to successfully navigate and overcome these challenges. With a solid understanding of the fundamentals and a passion for innovation, you’ll be well-equipped to embark on your concrete 3D printing journey.
Selecting the Right Materials
When it comes to concrete 3D printing, selecting the right materials is crucial to achieving the desired strength, durability, and workability of the printed objects. The choice of materials depends on various factors, including the intended application and the capabilities of your 3D printer.
The main component of the concrete mixture used in 3D printing is cement, which acts as the binding agent. Ordinary Portland cement is commonly used due to its availability and compatibility with additive manufacturing processes. However, there are other types of cement available, such as sulfate-resistant cement or slag cement, which offer specific properties that may be advantageous in certain applications.
Alongside cement, aggregates play a crucial role in the characteristics of the concrete mixture. Aggregates, such as sand and crushed stone, provide bulk and stability to the concrete. The size and gradation of the aggregates should be carefully considered to ensure proper flowability during the printing process.
Additives can also be incorporated into the concrete mixture to enhance specific properties. For example, superplasticizers can improve workability and reduce the water-to-cement ratio, while fibers can increase the tensile strength and crack resistance of the printed object. It’s important to understand the effects of these additives and select them based on the desired outcome of the printed structure.
Furthermore, the water content of the concrete mixture needs to be controlled to achieve the optimum consistency for 3D printing. Too much water can lead to excessive shrinkage and weakened strength, while too little water can result in poor workability and a compromised printing process. It’s essential to strike the right balance and carefully adjust the water content based on the specific requirements of the project.
Additionally, exploring sustainable alternatives in concrete production can contribute to environmentally friendly construction practices. Utilizing recycled materials, such as industrial waste byproducts or crushed concrete, can reduce the carbon footprint of the printed structures and support circular economy principles.
Lastly, it’s crucial to consider the compatibility between the selected materials and your 3D printer. The printer’s extrusion system and nozzle size should be taken into account to ensure smooth and consistent material flow. Conducting tests and trials with different material formulations is often necessary to find the optimal combination that meets both the printer’s capabilities and the desired properties of the printed objects.
By carefully selecting the right materials and optimizing their proportions, you can achieve high-quality and structurally sound 3D printed concrete objects. The next step is translating your designs into printable models, which we will explore in the following section.
Designing Your 3D Printed Object
Designing your 3D printed object is a crucial step in the concrete 3D printing process. It involves translating your ideas and concepts into digital models that can be understood and executed by the 3D printer. Effective design plays a significant role in ensuring the structural integrity and aesthetic appeal of the final printed object.
One of the first considerations when designing for concrete 3D printing is the complexity of the structure. This technology allows for the creation of intricate and geometrically complex shapes that were once difficult or impossible to achieve with traditional construction methods. Take advantage of this freedom and explore unique designs that maximize the capabilities of concrete 3D printing.
However, it’s important to keep in mind the limitations of your printer and the materials you’ll be using. Consider factors such as the layering process, support structures, and printing speed when designing your object. Paying attention to these details will help ensure a successful printing process and reduce the likelihood of structural or printing issues.
When it comes to the software used for designing your 3D printed object, various options are available, ranging from beginner-friendly software to more advanced modeling tools. Some popular choices include Tinkercad, Fusion 360, and Rhino. Choose a software that meets your level of experience and provides the necessary features for creating your desired design.
During the design process, it’s important to consider the intended use and requirements of your printed object. Are you creating a decorative piece or a functional structure? Understanding the purpose of the object will guide your design decisions and ensure that it meets the necessary specifications.
Structural stability is a critical aspect to consider when designing 3D printed concrete objects. Consider the load-bearing requirements and incorporate appropriate reinforcement if needed. Reinforcing elements can include steel bars, fibers, or other reinforcement materials that enhance the strength and durability of the printed structure.
Finally, it’s crucial to validate and finalize your design before initiating the printing process. Use design validation tools or software simulations to analyze the structural integrity and identify any potential weak points or issues. This step helps to minimize the chances of failures during the printing process and ensures that your object will meet the desired functionality and aesthetics.
By investing time and effort into the design phase, you will set yourself up for success in the concrete 3D printing process. The next step is preparing the concrete mixture, which we will delve into in the following section.
Preparing the Concrete Mixture
Preparing the concrete mixture is a critical step in the concrete 3D printing process. The quality and composition of the mixture will directly impact the strength, workability, and overall performance of the printed object. Proper preparation involves precise measurements and a thorough understanding of the desired properties of the concrete.
The first consideration when preparing the concrete mixture is the selection of the cement. Ordinary Portland cement is commonly used due to its availability and compatibility with 3D printing processes. However, other types of cement, such as sulfate-resistant cement or slag cement, can be chosen based on specific requirements or project conditions.
Next, aggregates are added to the mixture to provide bulk and stability. Aggregates, such as sand and crushed stone, should be properly graded and proportioned to ensure optimal flowability during the printing process. It’s important to carefully select aggregates with the appropriate particle sizes to prevent clogs or hinder the extrusion system.
In addition to cement and aggregates, additives can be incorporated to improve specific properties of the concrete. Superplasticizers can enhance workability by reducing the water-to-cement ratio while maintaining the desired flowability. Fibers can be added to increase the tensile strength and crack resistance of the printed object. Carefully consider the purpose and requirements of your printed object to determine the suitable additives and their proportions.
The water content of the concrete mixture is a critical factor that affects both workability and final strength. Proper hydration of the cement is essential for achieving the desired curing and hardening process. It’s important to carefully measure the water and adjust the ratio based on the specific requirements of the project. Avoid adding excessive water, as it can lead to shrinkage and weak structural integrity.
Once the components are measured and ready, it’s time to mix them thoroughly. Utilize a concrete mixer or a suitable mixing method to ensure a uniform distribution of all ingredients. Aim for a consistent and homogeneous mixture without any clumps or variations in composition.
During the mixing process, it’s also important to control the mixing time. Overmixing can lead to air entrainment or reduced workability, while undermixing can result in incomplete hydration and weak bond formation.
Throughout the preparation process, it’s recommended to periodically test and adjust the concrete mixture as needed. Conduct slump tests or rheological measurements to assess workability and adjust water content or additives as necessary.
By carefully selecting and proportioning the components, and diligently following the preparation steps, you will ensure a high-quality concrete mixture suitable for 3D printing. The next step is building the 3D printer, which we will explore in the following section.
Building the 3D Printer
Building the 3D printer is a crucial step in the concrete 3D printing process. The construction of a reliable and functional printer is essential for achieving accurate and precise prints. While there are different types and models of 3D printers available, we will provide a general overview of the key components and considerations involved in building your own printer.
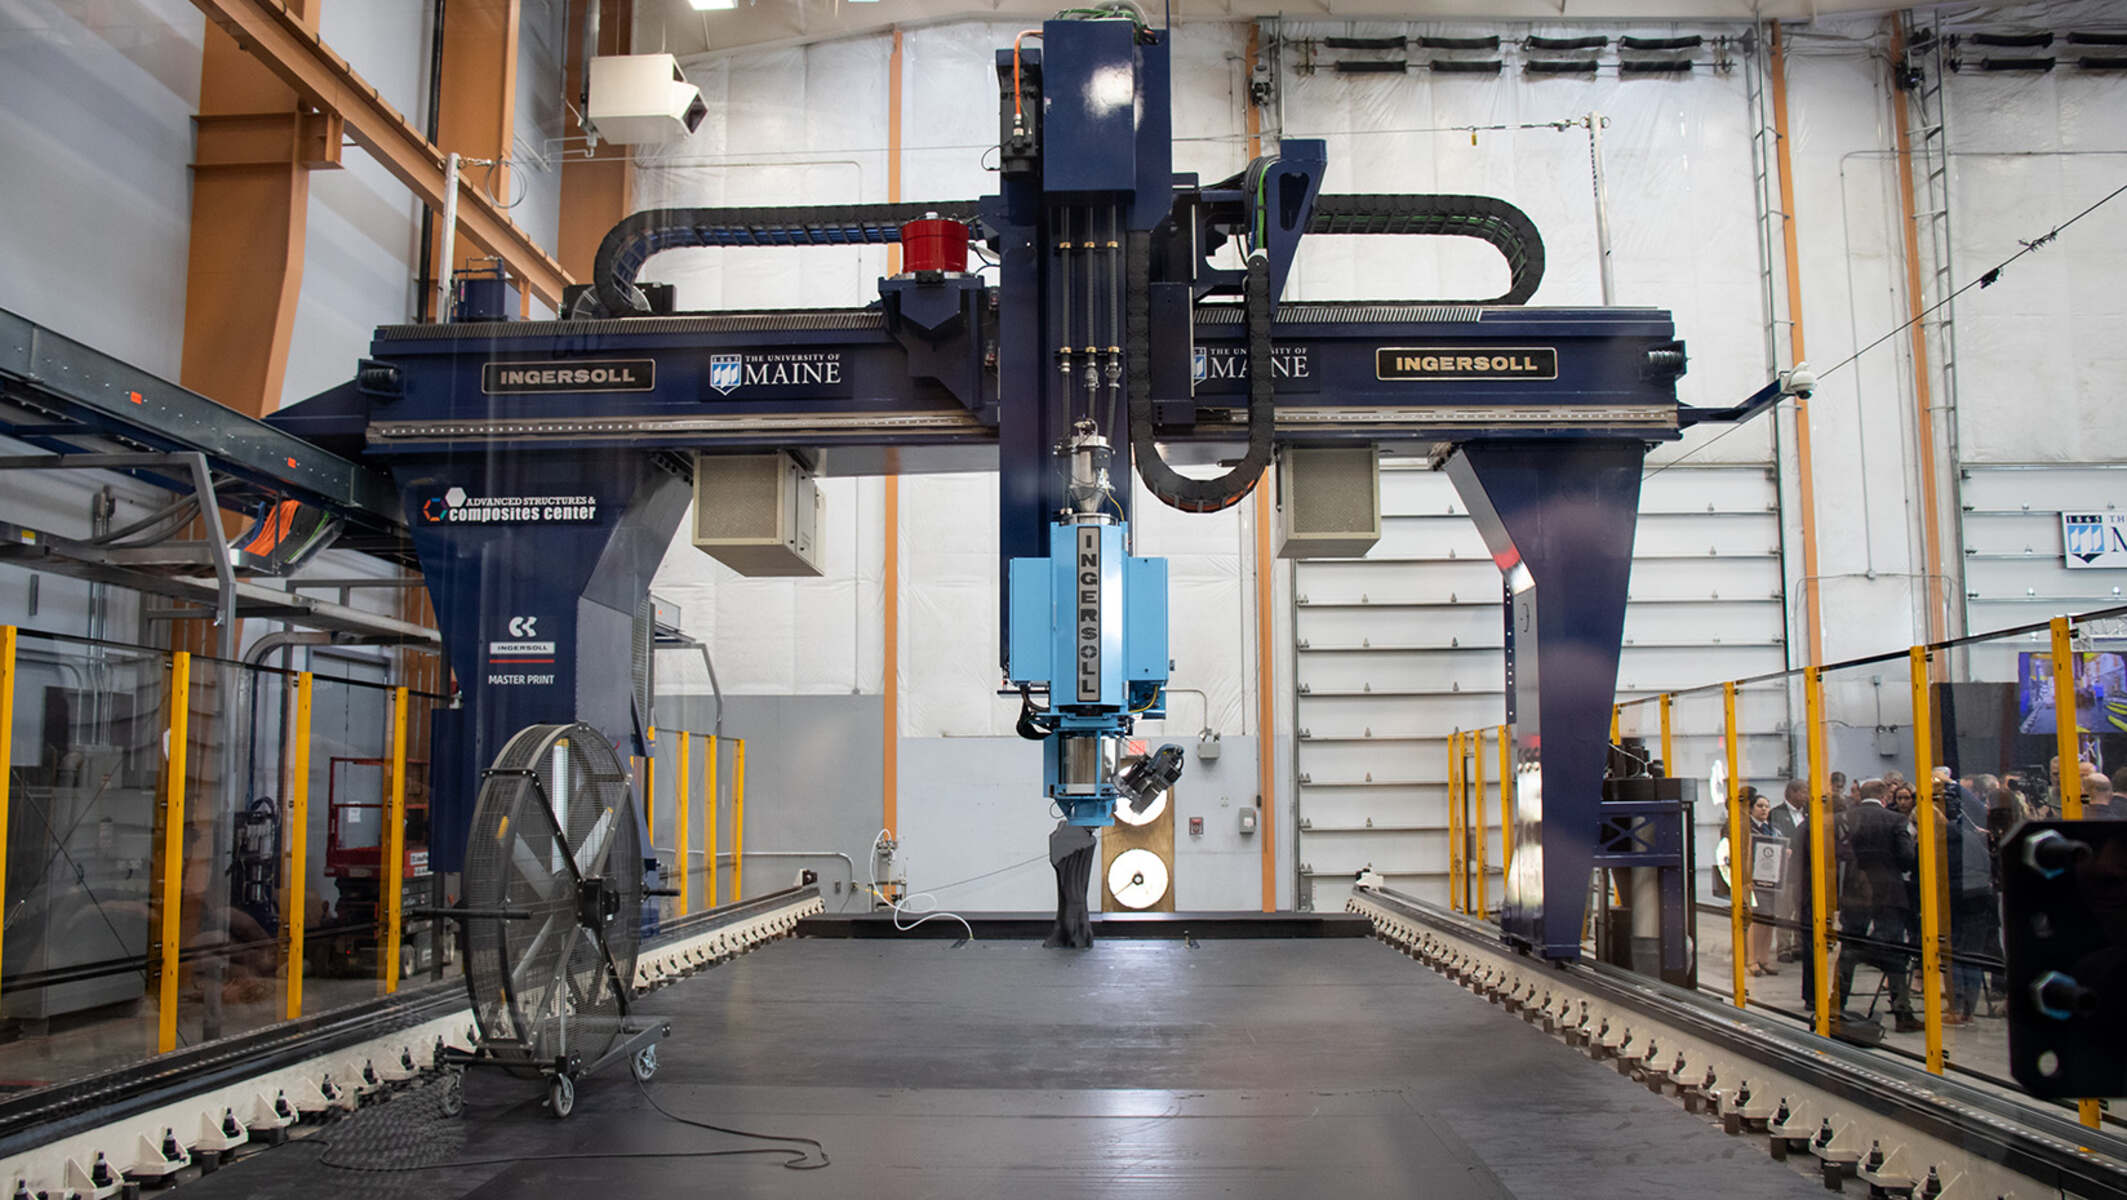
The first step in building a concrete 3D printer is to determine the type of printer you want to create. There are various configurations available, including gantry-based systems, delta printers, and robotic arm printers. Each has its own advantages and considerations, depending on factors such as the desired print size, build volume, and budget.
Once you’ve selected the printer configuration, the frame and structure need to be built. The frame should be sturdy and rigid to ensure stability during the printing process. Common materials used for the frame include aluminum extrusions, steel, or even 3D-printed parts for smaller-scale printers.
The next important component is the extrusion system, which is responsible for depositing the concrete mixture layer by layer. The extrusion system typically consists of a hopper or container to hold the concrete, a motor-driven screw or piston for pushing the material, and a nozzle or nozzle array for extrusion. The size and specifications of these components should be selected based on the desired print capabilities and the rheological properties of the concrete mixture.
Precision and control are crucial in 3D printing, and therefore, a reliable and accurate motion control system is essential. This includes motors, stepper motor drivers, belts, pulleys, and guide rods to move the extrusion system in a controlled manner. The choice of these components will depend on the size and complexity of your printer design.
An electronic control system is also necessary to manage and control the printer’s operations. This includes a microcontroller or controller board, such as an Arduino or RAMPS board, to receive and interpret instructions, as well as control the motors and other peripherals. It’s important to select a control system that is compatible with the software you plan to use for printing.
Furthermore, safety features, such as emergency stop buttons, limit switches, and thermal protection, should be incorporated into the printer design to ensure safe and reliable operation.
It’s worth mentioning that building your own 3D printer requires a certain level of technical knowledge and skills, especially in terms of electronics, mechanics, and programming. If you’re new to these areas, consider starting with a DIY kit or collaborating with experienced makers to ensure a successful build process.
Once you have successfully built your 3D printer, the next step is calibrating the printer to ensure accurate and consistent prints. We will cover this extensively in the following section.
Calibrating the Printer
Calibrating your 3D printer is a crucial step in the concrete 3D printing process to ensure accurate, consistent, and high-quality prints. This calibration process involves adjusting various parameters and settings to optimize the performance and reliability of your printer.
One of the first calibration steps is to ensure that the printer’s axes are properly aligned. This involves checking and adjusting the perpendicularity of the printer’s X, Y, and Z axes to ensure that they are perfectly perpendicular to each other. This alignment is crucial for precise and accurate movements of the extrusion system.
Next, you need to calibrate the steps per millimeter (or steps per unit) of the printer’s motors. This calibration determines the proper number of steps that each motor should take to move a specific distance. By calibrating the steps per millimeter, you can achieve accurate and proportional movements of the extruder, ensuring precise layer deposition.
Another important calibration parameter is the extrusion flow rate, often referred to as the extruder’s E-steps or extrusion multiplier. This calibration helps fine-tune the amount of material extruded by the printer. By adjusting this parameter, you can achieve the desired flow rate of the concrete mixture during printing, ensuring consistent layer thickness and preventing over-extrusion or under-extrusion.
In addition to these basic calibrations, it’s important to perform a test print of a calibration object or a small sample before starting your actual project. This allows you to evaluate the print’s accuracy, surface finish, and dimensional accuracy. If you notice any deviations or inconsistencies, you can make further adjustments and calibrations to improve the print quality.
During the calibration process, it’s also essential to monitor and fine-tune other printer-specific settings, such as printing speed, nozzle temperature, layer height, and infill density. These settings can have a significant impact on the quality and strength of the printed object, as well as the overall printing time.
Keep in mind that calibration is an iterative process. It may take a few attempts to achieve the desired results, especially if you’re working with new materials or complex designs. Be patient and methodical in your approach, making small adjustments at a time to avoid drastic changes that could lead to other issues.
Lastly, documenting your calibration process and noting down the optimal settings for future reference is highly recommended. This documentation will be valuable in case you need to recalibrate or make adjustments in the future or if you plan to share your knowledge and experiences with the concrete 3D printing community.
Once your printer is properly calibrated, you’re ready to move on to the next steps of preparing the printing surface and loading the concrete mixture for the actual printing process.
Preparing the Printing Surface
Preparing the printing surface is a crucial step in the concrete 3D printing process. The printing surface, often referred to as the build platform or printing bed, plays a vital role in ensuring proper adhesion and stability of the printed object. Proper surface preparation helps to minimize the risk of print failures and improve the overall quality of the printed structure.
The first step in preparing the printing surface is ensuring that it is clean and free from any debris or contaminants. Use a clean cloth or brush to remove any dust, dirt, or leftover material from previous prints. It’s critical to have a smooth and clean surface to achieve proper adhesion between the printed layers and the bed.
Next, consider applying an appropriate adhesive material or primer to promote adhesion between the concrete mixture and the printing surface. Depending on the specific printer and materials used, options such as glue sticks, hairspray, or specialized bed adhesives can be used. Apply a thin and even layer of the adhesive, ensuring that it covers the entire printing area.
Additionally, consider the material of the printing surface itself. Many printers utilize a heated bed to promote better adhesion and minimize warping during the printing process. If your printer has a heated bed, ensure that it is at the appropriate temperature for the chosen concrete mixture.
It’s worth noting that different types of concrete mixtures may require specific surface treatments or modifications. Some mixtures may adhere well to a clean and uncoated surface, while others may require the application of release agents or specific treatment methods to ensure easy removal of the printed object after completion.
When preparing the printing surface, it’s also essential to consider the size and geometry of the object being printed. Ensure that the printing bed is level and properly aligned to accommodate the dimensions of the project. Consider using leveling screws or adjustment mechanisms to fine-tune the bed’s position and ensure even and consistent extrusion across the entire print area.
Lastly, keep in mind that repeated use of the printing surface can cause wear and tear over time. It’s important to regularly assess the condition of the printing bed and replace it if necessary. A damaged or uneven surface can compromise the quality and accuracy of the prints.
By properly preparing the printing surface and ensuring optimal adhesion, you’ll set a solid foundation for successful concrete 3D printing. Next, we will explore the process of loading the concrete mixture into the printer.
Loading the Concrete Mixture
Loading the concrete mixture into the 3D printer is a critical step in the concrete 3D printing process. Proper handling and preparation of the mixture are essential to ensure smooth extrusion and accurate layer deposition. With careful attention to detail, you can optimize the printing process and achieve high-quality prints.
Before loading the concrete mixture, ensure that it is well-mixed and has reached the desired consistency. The mixture should be homogeneous, free from lumps or variations in composition. It’s recommended to mix the concrete in batches to maintain a consistent quality throughout the printing process.
Once the mixture is ready, carefully fill the hopper or container of the printer with the concrete material. Take care to prevent any air pockets or voids from forming in the mixture, as this can lead to inconsistent extrusion and structural weaknesses in the printed object.
During the loading process, it’s important to avoid introducing any contaminants or foreign particles into the mixture. Keep the surrounding area clean and ensure that the tools and equipment used for loading are free from dirt or debris. Even a small foreign particle can disrupt the extrusion process and impact the quality of the print.
Additionally, consider the printing speed and extrusion rate when loading the concrete mixture. Different mixtures may require different settings to achieve optimal flow and deposition. Adjust the speed and extrusion rate accordingly to maintain a consistent and controlled flow of the material. It’s recommended to perform several test prints or calibration prints to fine-tune these parameters before embarking on a larger-scale project.
Monitor the extrusion process closely during the initial layers of the print to ensure that the flow and consistency of the mixture are appropriate. Check for any signs of nozzle clogging or material inconsistencies and make adjustments if necessary. This careful observation can help prevent potential issues and ensure a successful printing process.
Throughout the printing process, periodically check the hopper or container to ensure a sufficient supply of the concrete mixture. Running out of material in the middle of a print can lead to discontinuities or defects in the final object. Plan ahead and have enough material on hand to complete the desired print successfully.
Remember, each concrete mixture may have its own unique characteristics and requirements. It’s important to understand and take into account the specific properties and behavior of the material you are using to ensure optimal printing results.
By following proper procedures and taking careful consideration during the loading process, you’ll be well-prepared to initiate the printing process and bring your designs to life in concrete. The next section will explore the steps involved in initiating the printing process.
Initiating the Printing Process
Initiating the printing process is an exciting stage in the concrete 3D printing journey. This is when your ideas and designs start taking shape as tangible objects. With careful attention to detail and proper execution, you can ensure a successful and efficient printing process.
Before starting the printing process, double-check that all the components of your 3D printer are properly assembled and calibrated. Ensure that the printing surface is clean and prepared, and the concrete mixture is loaded and ready to be extruded.
With everything in place, it’s time to initiate the printing process. Start by sending the print command through the software or control interface of your 3D printer. Make sure that the printer’s settings, such as printing speed, layer height, and nozzle temperature, are appropriately configured for the specific project and concrete mixture being used.
As the printer begins to extrude the concrete mixture, closely monitor the initial layers of the print. Check for proper adhesion to the printing surface, consistent extrusion, and accurate layer deposition. Any adjustments or issues can be addressed promptly during these early stages to avoid significant print failures later on.
During the printing process, it’s important to maintain a controlled printing environment. Keep the printing area clean and free from dust or excess moisture that can affect the curing of the concrete. Monitor the ambient temperature and humidity levels to ensure optimal printing conditions.
While the printer continues its work, periodically check the progress of the print. Be cautious of any signs of nozzle clogging, material consistency issues, or other potential problems that can affect the quality of the print. It’s recommended to keep a record or log of any observations or adjustments made during the printing process for future reference and troubleshooting.
Depending on the size and complexity of your 3D printed object, the duration of the printing process can vary. It’s important to exercise patience and allow the printer to complete each layer and build up the structure incrementally. Rushing or interrupting the process can compromise the integrity and accuracy of the print.
Once the printing process is complete, carefully remove the printed object from the printing surface. If necessary, use appropriate tools or techniques to release the object without damaging it or the surface. Take care to follow any specific post-processing steps recommended for the concrete mixture being used, such as curing or drying processes.
Throughout the entire printing process, maintain a proactive and attentive approach. Be prepared to make adjustments, troubleshoot any issues promptly, and make notes of any learnings or improvements for future prints. With experience, you will gain a deeper understanding of the intricacies of the printing process and become more efficient in achieving the desired results.
Congratulations! You have successfully initiated the printing process and brought your designs to life in concrete form. The next section will delve into troubleshooting common issues that may arise during the printing process.
Troubleshooting Common Issues
While concrete 3D printing can offer incredible capabilities and possibilities, it’s not uncommon to encounter challenges or issues during the printing process. Understanding common problems and troubleshooting techniques will help you overcome these obstacles and achieve successful prints. Here are some common issues that may arise and their potential solutions:
1. Poor adhesion: If you notice that the layers of your printed object are not adhering well to each other or the printing surface, ensure that the printing surface is clean and properly prepared. Adjust the printing bed temperature to optimize adhesion, and consider using alternative adhesion methods such as glue sticks or specialized bed adhesives.
2. Uneven extrusion: Inconsistent extrusion can result in uneven layers or gaps in the printed object. Check the extruder system for any clogs or blockages and clean it if necessary. Ensure that the concrete mixture is well-mixed and has an optimal flow consistency. Adjust the flow rate or extrusion multiplier to ensure proper material deposition.
3. Cracks or deformations: Cracks or deformations in the printed object can be caused by various factors, including improper layer adhesion, excessive moisture in the concrete mixture, or rapid changes in temperature. Adjust the printing parameters to optimize the curing and cooling process. Consider the use of reinforcement materials or additives to enhance the strength and integrity of the printed structure.
4. Printer jams: A printer jam occurs when the extrusion system becomes clogged or blocked, leading to poor or no material extrusion. Clear the nozzle or extruder system of any obstructions, such as dried concrete residue, using appropriate cleaning tools. Adjust printing parameters, such as nozzle temperature or extrusion speed, to prevent jams in the future.
5. Excessive material usage: Excessive material usage can lead to unnecessary waste and increased costs. Adjust the printing parameters, such as the infill density or wall thickness, to optimize material usage while maintaining the desired strength and structural integrity of the printed object.
6. Inaccurate dimensions: If the printed object’s dimensions differ significantly from the design specifications, check the printer’s calibration and ensure that the steps per millimeter for each axis are properly configured. Adjust the printing parameters, such as the extrusion width or layer height, to achieve the desired dimensional accuracy.
7. Layer shifting: Layer shifting occurs when the layers of the printed object are not aligned, resulting in an uneven or distorted structure. Inspect the printer’s mechanical components, such as belts and pulleys, to ensure they are properly tensioned and aligned. Check for any loose or damaged parts and tighten or replace them as needed.
8. Overheating: Overheating can cause the printed object to warp or deform during the printing process. Ensure that the printer’s cooling system is functioning properly and provides sufficient airflow to cool the printed layers. Consider reducing the printing speed or adjusting the temperature settings to prevent overheating.
When troubleshooting any issue, it’s important to observe and document the symptoms, as well as the adjustments or solutions applied. This documentation will help in identifying recurring problems and refining the printing process over time.
Remember, each printing setup and concrete mixture may have specific challenges and considerations. Continuously learning and fine-tuning your approach will enable you to overcome obstacles and achieve consistent and high-quality prints.
With these troubleshooting techniques in your toolkit, you’re ready to address common issues and ensure smooth and successful concrete 3D prints. The final section will cover the finishing and post-processing steps to complete your printed object.
Finishing and Post-Processing
Finishing and post-processing are crucial steps in the concrete 3D printing process to enhance the aesthetics, durability, and functionality of your printed object. These steps involve refining the surface, removing support structures, and adding desired finishes or treatments. By paying attention to these details, you can elevate the final appearance and performance of your printed structure.
1. Surface refinement: Depending on your desired finish, you may need to refine the surface of the printed object. Use sandpaper or sanding blocks to smooth out rough areas or visible layer lines. Take care to maintain the overall shape and structural integrity of the object while achieving the desired surface texture.
2. Support removal: If your design included support structures, carefully remove them using appropriate tools and techniques. Take care not to damage or deform the printed object in the process. Depending on the complexity of the supports, it may be necessary to use a combination of pliers, wire cutters, or other specialized tools to ensure clean removal.
3. Curing and drying: Proper curing and drying of the printed object are essential to ensure optimal strength and durability. Follow the recommended curing guidelines for the specific concrete mixture used. This may involve maintaining the printed object under specific temperature and humidity conditions for a designated period of time.
4. Surface treatment: Consider applying surface treatments, coatings, or sealants to enhance the appearance and protect the printed object. This can include painting, varnishing, or applying protective coatings such as epoxy resin or polyurethane. These treatments can add a layer of aesthetics, weather resistance, or UV protection to the object.
5. Additions or modifications: Depending on the intended use of the printed object, you may want to incorporate additional features or make modifications. This can include attaching hinges, fasteners, or other components. Use appropriate adhesives or mechanical means to securely attach these additions while maintaining the structural integrity of the printed object.
6. Testing and quality assurance: Once the finishing and post-processing steps are complete, it’s important to perform thorough testing and quality assurance checks. Assess the integrity, strength, and functionality of the printed object through rigorous testing methods. This can involve load testing, impact testing, or functional testing to ensure that the object meets the desired specifications and requirements.
Throughout the finishing and post-processing steps, remember to document any treatments, modifications, or evaluations performed. This documentation will serve as a reference for future projects and enable you to refine your approaches based on your learnings and experiences.
By investing time and effort into the finishing and post-processing steps, you can elevate the quality and appearance of your concrete 3D printed object. These final touches will enhance its visual appeal and ensure its longevity and usability in its intended application.
With the completion of the finishing and post-processing steps, your concrete 3D printed object is now ready for use or display. Enjoy the fruits of your labor and continue exploring the endless possibilities of concrete 3D printing.
Conclusion
Congratulations on completing this comprehensive guide on how to make a concrete 3D printer! You’ve gained valuable insights into the world of concrete 3D printing, from selecting the right materials and designing your 3D printed objects to preparing the concrete mixture and building your own printer. You’ve also learned about the importance of calibrating the printer, preparing the printing surface, loading the concrete mixture, initiating the printing process, troubleshooting common issues, and finishing and post-processing the printed objects.
Concrete 3D printing holds tremendous potential to revolutionize the construction industry and unleash creative possibilities. By harnessing the benefits of this technology, you can create complex and intricate structures with efficiency, cost-effectiveness, and sustainability.
While the journey of mastering concrete 3D printing may come with its challenges, including material selection, calibration, and troubleshooting, continuous learning and experimentation will allow you to refine your skills and achieve exceptional results.
Remember that safety should always be a priority. Follow appropriate safety guidelines when working with concrete mixtures, 3D printers, and related equipment. Protect yourself and others in your workspace by wearing necessary protective gear and working in a well-ventilated area.
As you move forward in your concrete 3D printing journey, continue to explore new techniques, materials, and designs. Collaborate with others in the community, exchange knowledge, and push the boundaries of what’s possible with this emerging technology.
Whether you’re a DIY enthusiast, an architect, or a contractor, the skills acquired in concrete 3D printing can open up new doors of innovation and enhance your professional capabilities. Embrace the challenges and enjoy the rewards of creating unique, functional, and visually stunning concrete objects.
Now that you have the foundation, go forth and unleash your creativity with concrete 3D printing. Have fun, experiment, and continue to push the boundaries of what can be achieved in the world of construction and design.
Happy printing!