Introduction
Welcome to the world of kiss cut stickers and laser engraving! Stickers have become a popular medium for self-expression, branding, and creativity. Kiss cutting, a technique that partially cuts through the sticker material while leaving the backing intact, has revolutionized the sticker industry by allowing easy peeling and application.
In this article, we will explore the fascinating process of kiss cutting stickers using a laser engraver. Laser engravers have gained prominence in recent years for their precision and versatility. They offer a range of benefits over traditional methods, including faster production, intricate designs, and the ability to work with a variety of materials.
Whether you are a hobbyist looking to create custom stickers, a small business owner in need of branded merchandise, or an artist seeking a unique medium to showcase your artwork, learning how to kiss cut stickers with a laser engraver will open up a world of possibilities.
Throughout this article, we will provide you with a step-by-step tutorial on kiss cutting stickers, discuss the materials you will need, offer practical tips and tricks, and troubleshoot common issues that may arise during the process. So, let’s dive in and uncover the art of kiss cutting stickers with a laser engraver!
What is a kiss cut?
A kiss cut is a method of cutting stickers or decals where the cutting blade cuts through the sticker material but only leaves the backing layer intact. This allows the stickers to be easily peeled off from the backing without damaging the surrounding stickers. The process gets its name from the gentle “kiss” the blade makes on the material.
Kiss cutting is commonly used for stickers, labels, and adhesive-backed products as it offers numerous advantages. It allows for efficient production, precise cuts, and easy removal of stickers for application. It is especially popular for creating sticker sheets with multiple designs, allowing each sticker to be individually peelable.
The depth of the kiss cut depends on the material being used and the desired outcome. The blade can be adjusted to cut through just the top layer of vinyl or penetrate deeper to create a perforated effect. This flexibility makes kiss cutting suitable for a wide range of applications and materials, including vinyl, paper, and even fabric.
One of the main benefits of kiss cutting is that it eliminates the need for manual cutting or trimming of individual stickers. This saves time and effort, especially when dealing with large quantities or intricate designs. Additionally, since the stickers remain on the backing sheet until they are ready to be used, they can be easily stored and transported without the risk of damage or loss.
Overall, kiss cutting is a versatile and efficient method for producing high-quality stickers. Whether you’re a sticker enthusiast, a business owner, or a designer, understanding the concept of kiss cutting opens up endless possibilities for creating unique and professional-looking stickers with ease.
Why use a laser engraver for kiss cutting stickers?
When it comes to kiss cutting stickers, using a laser engraver offers several advantages over traditional cutting methods. Laser engravers utilize a high-powered laser beam to cut through materials with precision and accuracy. Here are some reasons why a laser engraver is the ideal choice for kiss cutting stickers:
- Precision: Laser engravers offer exceptional precision, ensuring clean and accurate cuts every time. The laser beam is controlled by advanced software, allowing for intricate designs and detailed cuts even on small stickers.
- Versatility: Laser engravers can work with a wide range of materials, including vinyl, paper, cardstock, and more. This versatility allows you to experiment with different textures and finishes, giving your stickers a unique look and feel.
- Speed and Efficiency: Laser engravers can kiss cut stickers at a much faster rate compared to manual cutting or traditional cutting machines. This makes them an excellent choice for high-volume production, saving you valuable time and effort.
- Customizability: Laser engravers offer endless possibilities for customization. You can easily adjust the settings to achieve varying depths and pressures, allowing you to create different effects and styles for your stickers.
- Scalability: Whether you need a small batch of stickers or a large quantity for commercial purposes, laser engravers can handle the task efficiently. They can easily reproduce designs with consistent quality, ensuring that all your stickers look professional and uniform.
- Complex Designs: Laser engravers can handle intricate designs with ease. Whether you’re working with fine details, intricate shapes, or delicate patterns, the laser beam can navigate through them effortlessly, resulting in beautifully cut stickers.
Using a laser engraver for kiss cutting stickers not only enhances the overall quality and precision of your products but also offers versatility and efficiency. It allows you to push the boundaries of design while eliminating the limitations of manual cutting methods.
With the advancements in technology, laser engravers have become more accessible and affordable, making them a valuable investment for individuals, small businesses, and large enterprises alike. So, if you’re looking to take your sticker production to the next level, consider using a laser engraver for kiss cutting.
Materials needed for kiss cutting stickers with a laser engraver
Before you begin kiss cutting stickers with a laser engraver, it’s important to gather the necessary materials. Having the right tools and supplies will ensure a smooth and successful cutting process. Here are the essential materials you’ll need:
- Sticker material: Choose a suitable sticker material that is compatible with laser engraving. Common options include vinyl, adhesive-backed paper, or specialty sticker sheets. Ensure that the material is designed for laser cutting to avoid any issues during the process.
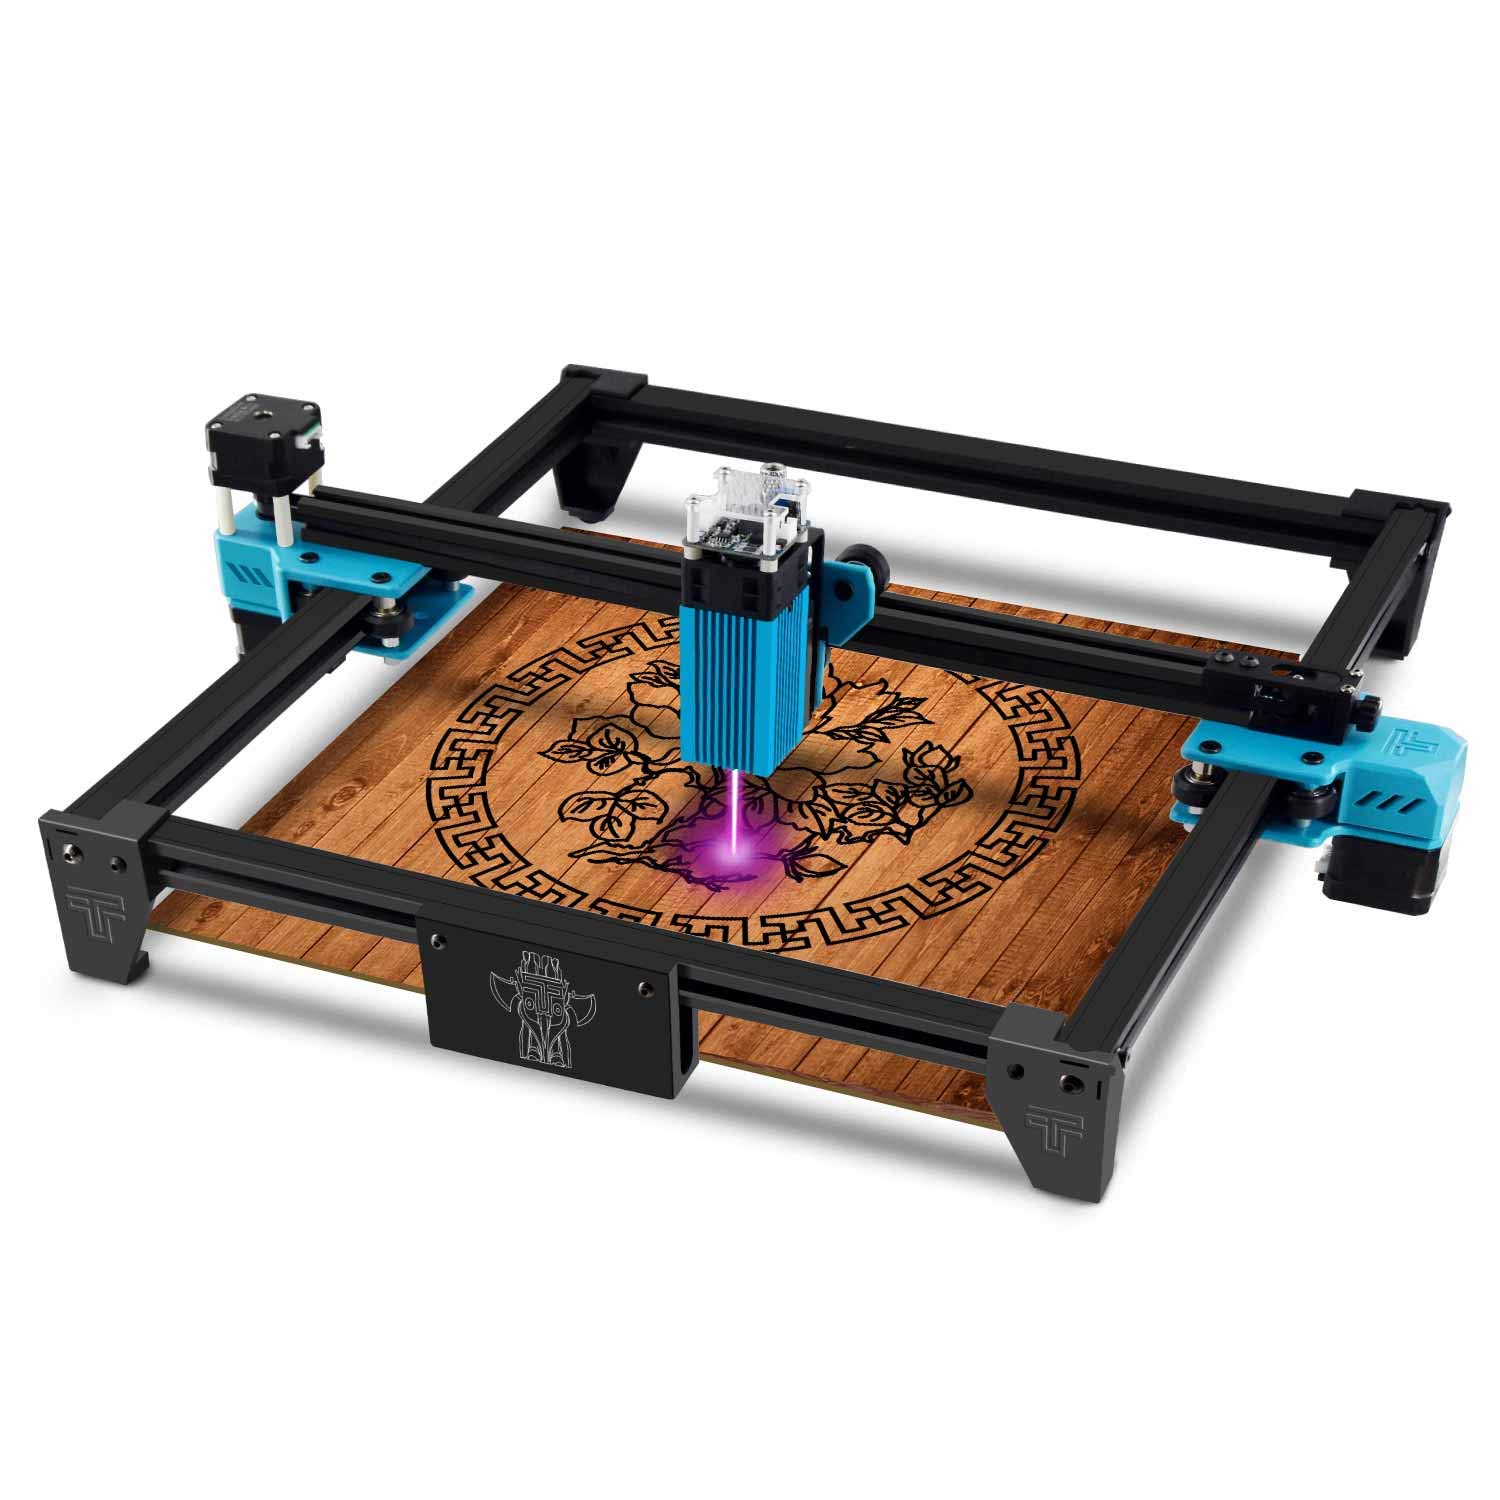
- Laser engraver: Invest in a laser engraver that is capable of kiss cutting. Look for a machine with adjustable settings, a cutting bed large enough to accommodate your sticker material, and a reliable laser system. Research different models and choose one that fits your needs and budget.
- Computer and graphic design software: You’ll need a computer to control the laser engraver. Make sure it meets the requirements of the laser engraver manufacturer. Additionally, install graphic design software such as Adobe Illustrator or CorelDRAW to create or modify sticker designs.
- Vector file of sticker design: Prepare your sticker design as a vector file. Vector files are scalable and allow for precise cuts. Ensure that the file is compatible with the graphic design software and can be easily imported into the laser engraver’s software.
- Masking tape or transfer tape: To protect the stickers during cutting and ensure easy transfer to the final surface, use masking tape or transfer tape. These tapes help hold the stickers in place and prevent them from shifting during the cutting process.
- Cutting mat or bed: Use a cutting mat or bed that is compatible with your laser engraver. It should be the appropriate size to accommodate your sticker material and provide a stable surface for cutting.
- Safety equipment: Laser engraving involves working with high-powered lasers, so safety is paramount. Wear appropriate safety glasses to protect your eyes from the laser beam. Follow all safety instructions provided by the laser engraver manufacturer.
By having these essential materials on hand, you’ll be well-prepared to embark on your sticker kiss cutting journey. Make sure to familiarize yourself with the operation of your laser engraver and follow all safety guidelines to ensure a smooth and successful cutting process.
Step-by-step tutorial on kiss cutting stickers with a laser engraver
Now that you have gathered the necessary materials, let’s go through a step-by-step tutorial on how to kiss cut stickers with a laser engraver:
- Prepare your sticker design: Start by creating or importing your sticker design into the graphic design software. Ensure that your design is in vector format, as this allows for precise cuts.
- Set up your laser engraver: Install the required software for your laser engraver and connect it to your computer. Adjust the settings according to the material and desired depth of your kiss cuts. Refer to the manufacturer’s instructions for specific guidance on setting up your laser engraver.
- Prepare the sticker material: Place your sticker material on the cutting mat or bed of the laser engraver. Make sure it is aligned properly and securely in place. If needed, use masking tape or transfer tape to secure the edges of the material.
- Import your sticker design: Import your sticker design into the software that controls the laser engraver. Scale and position the design appropriately on the sticker material, ensuring that it fits within the cutting area.
- Adjust the cutting settings: Set the cutting parameters such as speed, power, and frequency based on the type and thickness of your sticker material. Test the settings on a small area of the material to ensure optimal cutting without compromising the integrity of the stickers.
- Begin the kiss cutting process: Press the “Start” button on the laser engraver software to initiate the cutting process. The laser beam will follow the paths of your design, cutting through the top layer of the sticker material while leaving the backing intact.
- Monitor the cutting process: Keep an eye on the cutting process to ensure everything is running smoothly. If any issues arise, such as material shifting or incomplete cuts, stop the engraver and make necessary adjustments.
- Complete the kiss cutting: Once the engraver has finished cutting all the stickers, carefully remove the sticker sheet from the cutting mat or bed. Gently peel off any excess material from the backing, leaving the kiss-cut stickers intact.
- Store and use your kiss-cut stickers: Store your kiss-cut stickers in a clean, dry place for future use. When ready to use, simply peel off the backing and apply the stickers to the desired surface.
Remember to follow safety precautions throughout the entire process and refer to the specific instructions provided by the manufacturer of your laser engraver. With practice and experience, you will gain proficiency in creating beautiful kiss-cut stickers using a laser engraver.
Tips and tricks for successful kiss cutting with a laser engraver
Mastering the art of kiss cutting with a laser engraver requires practice and attention to detail. To help you achieve optimal results, here are some valuable tips and tricks to keep in mind:
- Choose the right settings: Experiment with different speed, power, and frequency settings to find the optimal combination for your specific sticker material. Adjusting these parameters can help you achieve clean cuts without burning or scorching the material.
- Perform test cuts: Before cutting a large batch of stickers, always perform test cuts on a small area of the material. This allows you to verify the cutting settings and make any necessary adjustments to ensure the desired depth of the kiss cuts.
- Ensure proper material alignment: Properly align the sticker material on the cutting mat or bed to prevent shifting during the cutting process. Use masking tape or transfer tape to secure the edges of the material, providing added stability.
- Work in a well-ventilated area: Laser engraving can produce fumes and odors, especially when working with certain materials. Ensure that you have proper ventilation or exhaust systems in place to maintain a safe and comfortable working environment.
- Regularly clean the laser lens: The laser lens can accumulate debris or smoke residue, affecting the quality of the cuts. Regularly clean the lens with a lens cleaning solution and a lint-free cloth to maintain optimal performance.
- Use appropriate software features: Explore the features of the software that controls your laser engraver. Utilize functions such as color mapping or layering to designate different cutting depths or settings for specific areas of your sticker design.
- Avoid overlapping designs: Ensure that your sticker designs do not overlap, as this can lead to incomplete or uneven cuts. Leave sufficient spacing between stickers to allow for easy separation after kiss cutting.
- Invest in a quality cutting mat: A good-quality cutting mat or bed is essential for stable and accurate cutting. Replace the mat as needed to maintain its effectiveness and prevent material slippage.
- Keep a log of successful settings: Maintain a record of the optimal cutting settings for different sticker materials. This will save you time and effort in the future, ensuring consistent results and reducing the need for extensive trial and error.
- Continuously monitor the cutting process: Stay attentive during the cutting process, particularly when working with larger batches of stickers. Keep an eye on the material and the laser engraver to address any issues promptly, ensuring the best possible outcome.
By applying these tips and tricks, you can enhance your proficiency and achieve excellent results when kiss cutting stickers with a laser engraver. Remember to practice patience, experiment with different techniques, and embrace the learning process to unlock the full potential of this cutting-edge technology.
Troubleshooting common issues during kiss cutting with a laser engraver
While kiss cutting stickers with a laser engraver is a versatile and efficient process, you may encounter occasional challenges. Here are some common issues that may arise during the kiss cutting process and practical solutions to troubleshoot them:
- Incomplete cuts: If the laser engraver is not cutting all the way through the sticker material, increase the power or decrease the cutting speed. Perform test cuts to find the optimal setting for your specific material.
- Burning or scorching: Excessive heat can cause burning or scorching on the edges of the stickers. Lower the power or increase the cutting speed to reduce the intensity of the laser beam. Additionally, ensure that the material is properly aligned and flat on the cutting bed to prevent overheating.
- Material shifting: If the sticker material shifts during the cutting process, it can result in misaligned or incomplete cuts. Use masking tape or transfer tape to secure the edges of the material to the cutting mat or bed, providing stability and reducing the chances of movement.
- Stickers not peeling off cleanly: If the kiss-cut stickers are not peeling off easily from the backing, check the cutting depth of the blade. Increase the depth slightly to ensure a clean separation between the sticker and the backing. Additionally, make sure the sticker material is not too stiff or thick, as it can affect the peeling ability.
- Inconsistent cutting depth: If the laser engraver is not maintaining a consistent cutting depth across all areas of the sticker design, calibrate the machine and ensure the laser beam is focused correctly. Clean the lens and mirrors regularly to prevent any distortion or misalignment that may affect the cutting depth.
- Excessive residue or debris: Laser engraving can produce residue or debris that may accumulate on the sticker material or the laser lens. Clean the lens regularly using a lint-free cloth and lens cleaning solution. Properly maintain the engraving area to prevent excessive debris buildup and ensure clean cuts.
- Software compatibility issues: If you’re experiencing software-related problems, ensure that your graphic design software is compatible with the laser engraver and supports the necessary file formats. Update the software to the latest version and check for any firmware updates for the laser engraver.
- Inadequate ventilation: If you’re encountering strong odors or excessive fumes during the engraving process, improve the ventilation in your workspace. Consider installing an exhaust system or working near an open window to maintain a well-ventilated environment.
Remember to consult the user manual or contact the manufacturer of your laser engraver for specific troubleshooting instructions. Each machine may have unique features or requirements that need to be considered when resolving issues. With patience and problem-solving skills, you’ll be able to overcome these common challenges and achieve successful kiss cutting results with your laser engraver.
Conclusion
Learning how to kiss cut stickers with a laser engraver opens up a world of possibilities for creativity and customization. The precision and versatility of laser engravers make them an ideal choice for achieving clean, intricate, and professional-looking cuts. By following the step-by-step tutorial, gathering the necessary materials, and implementing the tips and tricks provided, you can successfully create kiss-cut stickers that are ready for use or sale.
Remember to invest in a quality laser engraver that meets your specific needs and ensure that you have the right software for designing and controlling the machine. Conducting test cuts, adjusting settings, and monitoring the cutting process will help you optimize your results and troubleshoot any issues that may arise.
Whether you are a sticker enthusiast, a small business owner, or an artist, kiss cutting stickers with a laser engraver offers numerous benefits such as precision, speed, customizability, and scalability. Experiment with different materials, designs, and techniques to unleash your creativity and unlock endless possibilities for sticker production.
Embrace the learning process and continuously refine your skills to achieve the best possible outcomes. With practice and experience, you’ll be able to create stunning kiss-cut stickers that impress and delight your audience. So, get ready to embark on your sticker-making journey and let the magic of laser engraving bring your designs to life!