Introduction
Welcome to our guide on how to install a Sandisk SSD in your computer! If you’re looking to upgrade your system’s storage and boost its performance, installing an SSD is a great way to achieve that. Sandisk is a well-known and trusted brand when it comes to storage solutions, and their SSDs are reliable and efficient.
In this guide, we will walk you through the step-by-step process of installing a Sandisk SSD in your computer. Whether you’re a tech-savvy enthusiast or a beginner, this guide will provide you with all the information you need to successfully complete the installation.
Upgrading to an SSD offers several advantages over traditional hard drives. SSDs are much faster in terms of data transfer, which means your operating system and applications will load faster, and file transfers will be quicker. Additionally, SSDs are more durable and energy-efficient, making them a popular choice for both desktop and laptop users.
Before we dive into the installation process, it’s important to note that opening your computer case and working on the internals requires caution and care. Make sure to follow safety guidelines and precautions, such as grounding yourself to prevent electrostatic discharge. If you are unsure or uncomfortable with any of the steps, it’s always best to consult a professional.
Now that you understand the benefits and potential risks, let’s get started on the installation process. Make sure to gather all the necessary tools and materials before we begin, which we will cover in the next section.
Step 1: Gather the necessary tools and materials
Before you start the installation process, it’s essential to gather all the tools and materials required for a smooth and successful installation of your Sandisk SSD. Here’s a list of what you’ll need:
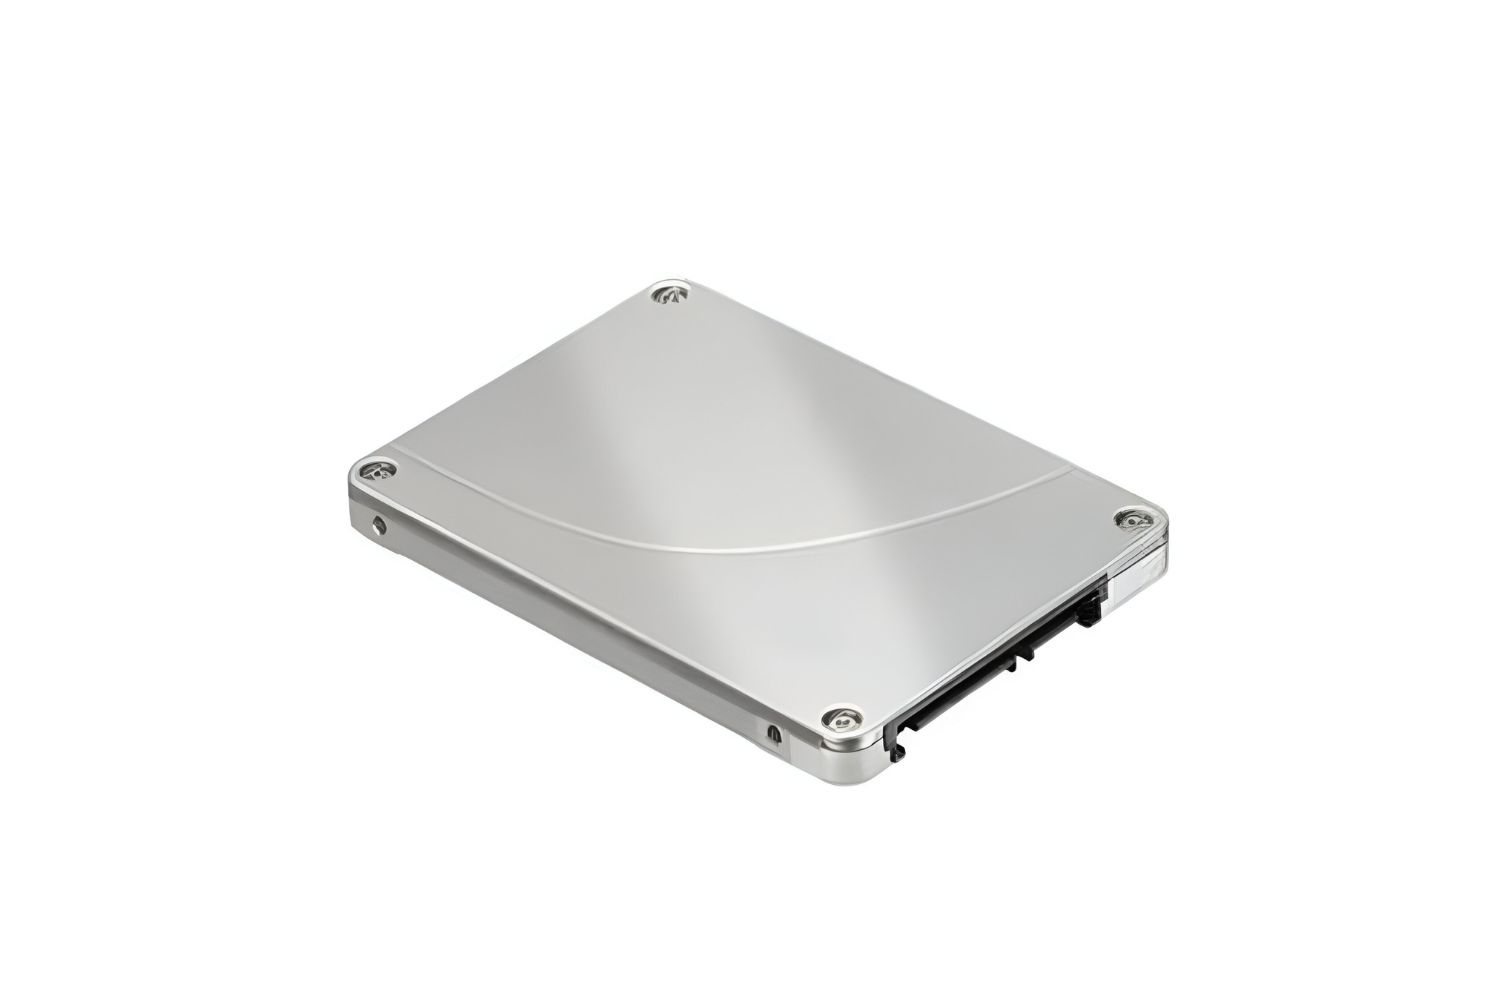
- Sandisk SSD: The star of the show, make sure you have your Sandisk SSD ready. Choose the appropriate model and storage capacity suitable for your needs.
- Computer screwdriver set: A set of screwdrivers in various sizes will come in handy for opening the computer case and securing the SSD.
- Static wristband or grounding strap: This will help prevent the buildup of static electricity and protect your computer’s components while handling them.
- Anti-static mat or surface: Placing your computer on an anti-static mat or surface will provide further protection against static discharge.
- Documentation and manuals: It’s always a good idea to have the documentation and manuals that came with your computer and SSD readily available for reference.
- Cable management ties: These small plastic ties are great for keeping your cables neat and organized during the installation process.
Make sure you have all these tools and materials collected before proceeding to the next steps. It’s important to have everything within reach to ensure a smooth and uninterrupted installation process.
Once you have gathered all the necessary tools and materials, you’re now ready to prepare your computer for the installation, which we will cover in the next step. Remember to follow proper safety precautions and guidelines throughout the process to protect both yourself and your computer.
Step 2: Prepare your computer for installation
Before you begin installing your Sandisk SSD, it’s important to prepare your computer for the installation process. This step involves some necessary preparations to ensure a smooth and successful installation. Follow these steps:
- Backup your data: It’s always a good practice to backup your important files and data before making any changes to your computer’s hardware. This step ensures that your data is safe in case of any unforeseen issues during the installation process.
- Read the manual: Take some time to thoroughly read the documentation and manuals that came with your computer and SSD. Familiarize yourself with any specific instructions or recommendations provided by the manufacturer.
- Identify available drive bays: Determine the location of the drive bays in your computer case. Most cases have multiple drive bays, and it’s essential to choose an available one for your Sandisk SSD.
- Take note of cables: Observe the existing cables inside your computer case, especially the ones connected to your current storage drives. You may need to disconnect and reconnect them later during the installation process.
- Clean the workspace: Clear your workspace of any clutter and ensure that there’s enough room to comfortably work on your computer. Having a clean and organized workspace will make the installation process less complicated.
- Power off and unplug your computer: Safety first! Shut down your computer properly and unplug it from the power source. This step is crucial to avoid any potential electrical hazards during the installation process.
By following these preparation steps, you are setting the stage for a successful installation of your Sandisk SSD. Taking the time to backup your data, familiarize yourself with the manuals, and ensure a clean workspace will help streamline the installation process and minimize any potential risks or issues.
Now that your computer is prepared for the installation, let’s proceed to the next step: shutting down and unplugging your computer.
Step 3: Shutdown and unplug your computer
Before you begin the installation process, it’s crucial to shut down and unplug your computer. This step ensures your safety and prevents any electrical damage during the installation. Follow these steps to properly shutdown and unplug your computer:
- Save and close all applications: Make sure to save your work and close all running applications on your computer. This ensures that your data is safely stored and reduces the risk of data loss during shutdown.
- Shut down your computer: Go to the Start menu, click on the power icon, and select the “Shut down” option. Wait for your computer to completely power off before proceeding to the next step.
- Unplug the power cable: Locate the power cable connected to the back of your computer’s central processing unit (CPU) or the power supply unit (PSU). Gently unplug the power cable from the socket and make sure there is no power supply connected to your computer.
- Disconnect any other cables: Take note of any other cables connected to your computer, such as Ethernet cables or peripherals. Disconnect them carefully to ensure a clutter-free installation process.
- Press the power button: Once you have shut down and unplugged the computer, press the power button on your computer’s case. This helps discharge any residual power left in the system.
Ensuring that your computer is properly shut down and unplugged is crucial to prevent any electrical shock or damage to the internal components. Always remember to take safety precautions and handle your computer with care during this process.
Now that your computer is safely powered off and disconnected, you are ready to move on to the next step: opening the computer case.
Step 4: Open the computer case
Now that your computer is safely shutdown and unplugged, it’s time to open the computer case to access the internal components. Follow these steps to open the case:
- Locate the screws: Look for the screws that hold the computer case together. These screws are typically located at the back or side of the case.
- Use the appropriate screwdriver: Select the screwdriver from your set that fits the screws on your computer case. Unscrew the screws in a counter-clockwise direction.
- Remove the side panel: Gently slide or lift off the side panel of the computer case once all the screws have been removed. Some cases may have a latch or release mechanism to unlock the side panel.
- Set aside the screws: Place the screws in a safe location, such as a small container, to prevent them from getting lost during the installation process.
Opening the computer case gives you access to the internal components, allowing you to install the Sandisk SSD. Take care not to force or apply excessive pressure when removing the side panel, as this may cause damage to the case or other components.
Once the case is open, you can move on to the next step: locating an available drive bay for your Sandisk SSD.
Step 5: Locate an available drive bay
Now that you have opened the computer case, the next step is to locate an available drive bay where you will install your Sandisk SSD. Follow these steps to identify the suitable drive bay:
- Inspect the interior: Take a look inside your computer case and examine the layout of the components. Look for the existing drives, such as hard disk drives (HDDs) or other SSDs, and identify the available drive bays.
- Consider the form factor: Ensure that the drive bay is compatible with the form factor of your Sandisk SSD. Most SSDs use the 2.5-inch form factor, but some may require an adapter to fit into a 3.5-inch drive bay.
- Check for mounting brackets: Some drive bays may include mounting brackets or adapters to securely hold the SSD in place. Ensure that the drive bay you choose has the necessary brackets or slots available.
- Evaluate cable connections: Take note of the SATA cables and power cables that are connected to the existing drives. Choose a drive bay that allows easy access to these cables and ensures a tidy cable management setup.
- Avoid obstructing other components: Ensure that the chosen drive bay does not obstruct other components, such as the graphics card, RAM slots, or the CPU cooler. This ensures proper airflow and prevents any potential heat buildup.
Locating an available drive bay is essential to ensure smooth installation and proper integration of your Sandisk SSD into your computer system. Choosing the right drive bay ensures compatibility, accessibility, and efficient cable management for a clean and organized setup.
Once you have identified the suitable drive bay, proceed to the next step: attaching the Sandisk SSD to the drive bay.
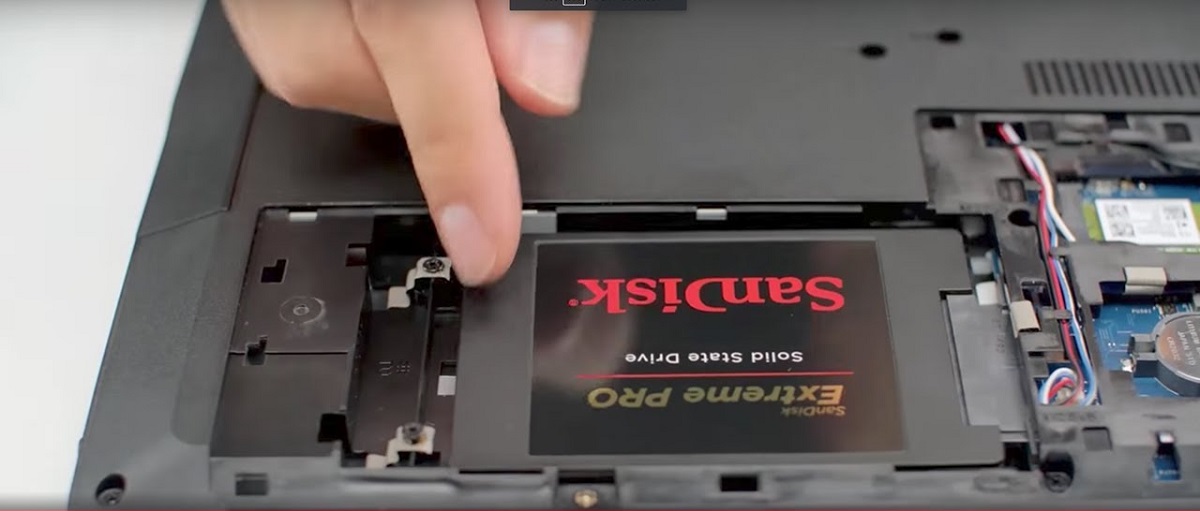
Step 6: Attach the SSD to the drive bay
With the drive bay selected, it’s time to attach your Sandisk SSD securely. Follow these steps to properly install the SSD:
- Prepare the SSD: Carefully remove your Sandisk SSD from its packaging or any protective covers. Be gentle and avoid touching the connectors or components on the SSD.
- Align the SSD: Hold the SSD by its edges and align it with the mounting holes or slots in the chosen drive bay. The connectors on the SSD should be facing towards the rear of the computer case.
- Slide or screw the SSD in place: Depending on your computer case and the mounting mechanism, either slide the SSD into the drive bay or use screws to secure it. Ensure that the SSD is firmly and securely held in place.
- Use mounting brackets (if applicable): If your drive bay requires mounting brackets or adapters, attach them to the SSD first and then secure the assembly to the drive bay. Follow the manufacturer’s instructions for a proper installation.
When attaching the SSD, avoid applying excessive force as it may damage the SSD or the drive bay. The SSD should fit snugly into the drive bay, without any wobbling or loose connections.
By correctly attaching the Sandisk SSD to the drive bay, you ensure that it is securely installed and ready for the next steps of the installation process. The next step involves connecting the necessary cables, which we will cover in the next section.
Step 7: Connect the cables
After securely attaching your Sandisk SSD to the drive bay, it’s time to connect the necessary cables to ensure proper functionality. Follow these steps to connect the cables:
- SATA data cable: Locate the SATA data cable, which is typically a thin flat cable with a smaller connector on both ends. Connect one end of the cable to the SSD’s SATA data port and the other end to an available SATA port on your motherboard. Ensure a secure connection by firmly pushing the connectors in.
- SATA power cable: Find an available SATA power cable from your power supply unit (PSU). Connect one end of the cable to the SSD’s SATA power port and the other end to an available SATA power connector from the PSU. Again, make sure the connection is secure.
- Cable management: As you connect the cables, pay attention to cable management. Keep the cables organized and away from any fans or components that may obstruct airflow. Use cable ties or clips to secure the cables and create a neat and tidy setup.
Make sure to handle the cables with care and avoid excessive bending or pulling, as this may cause damage to the cables or connectors. Properly connecting the SATA data cable and SATA power cable ensures that your Sandisk SSD can communicate with the motherboard and receive power.
Once the cables are securely connected, you are ready to move on to the next step: securing the SSD in place.
Step 8: Secure the SSD in place
After connecting the necessary cables, the next step is to secure your Sandisk SSD in its designated position. Follow these steps to ensure the SSD is properly secured:
- Double-check connections: Before proceeding, double-check that all the cables are securely connected to the SSD. Confirm that the SATA data cable and SATA power cable are firmly attached to both the SSD and the respective connectors on the motherboard and power supply.
- Use screws (if applicable): Some drive bays may require additional securing using screws. If your drive bay has mounting holes, use the appropriate screws to fasten the SSD to the drive bay. Place the screws through the mounting holes on the SSD and tighten them gently with a screwdriver.
- Ensure stability: Give the SSD a gentle wiggle to ensure it is secure and does not move or rattle within the drive bay. If there is any movement or instability, adjust the positioning or tighten the screws further to provide stability.
- Recheck cable management: Once the SSD is secured, take a moment to recheck the cable management. Make sure the cables are neatly organized and not obstructing any other components. Use cable ties or clips to keep the cables tidy and in place.
Securing your Sandisk SSD in place is crucial to prevent any accidental disconnection or damage during use. A properly secured SSD ensures reliability and longevity in your system, providing seamless performance without any movement or instability.
Once you have successfully secured the SSD, you can proceed to the next step: closing the computer case.
Step 9: Close the computer case
After securing the Sandisk SSD in place and ensuring all connections are properly made, it’s time to close the computer case. Follow these steps to safely and securely close the case:
- Double-check internal components: Before closing the case, take a quick look inside to ensure that all internal components, including cables and cards, are properly seated and not interfering with the closing process.
- Align the side panel: Carefully align the side panel of the computer case with the edges of the case. Ensure that any hooks or latches on the panel align with the corresponding slots or fasteners on the case.
- Slide or press the panel into place: Once aligned, smoothly slide or press the side panel back into its original position. Apply gentle pressure to ensure that the panel fits snugly and securely into the case.
- Tighten the screws: If your case requires screws to secure the side panel, tighten them in a clockwise direction using the appropriate screwdriver. Avoid over-tightening the screws to prevent damage to the case or strip the screw threads.
Closing the computer case provides protection for the internal components and helps maintain a clean and organized system. Ensure that the side panel is properly aligned and securely fastened to prevent any dust, debris, or electrical hazards from entering the case.
Once the case is closed, you are almost done with the installation process. All that’s left is the final step: powering on your computer and configuring the Sandisk SSD.
Step 10: Power on your computer
Now that you have successfully installed the Sandisk SSD and closed the computer case, it’s time to power on your computer. Follow these steps to ensure a smooth startup:
- Reconnect power and peripherals: Double-check that all cables, including the power cable, keyboard, mouse, and monitor cables, are securely connected to your computer.
- Ensure proper ventilation: Make sure that the computer case is in a well-ventilated area with sufficient airflow. Ensure that no vents or fans are obstructed, as this can cause overheating issues.
- Plug in and turn on the power supply: Connect the power cable back into the computer and plug it into a power outlet. Switch on the power supply using the switch located at the back of the unit.
- Press the power button: Locate the power button on your computer case and press it to turn on your system. Wait for a moment as your computer goes through the boot process.
As your computer starts up, it will detect the newly installed Sandisk SSD. Depending on your system’s settings, the SSD may need to be formatted and configured before it can be used as a primary storage device.
Follow the on-screen instructions or access your computer’s BIOS/UEFI settings to verify that the SSD is detected and set as the boot device. You may need to consult your computer’s manual or manufacturer’s website for specific instructions.
Congratulations! You have successfully installed the Sandisk SSD and powered on your computer. Now you can enjoy the improved speed and performance that the SSD brings to your system.
If you encounter any issues during the startup process or while configuring the SSD, consult the Sandisk product documentation or reach out to their support for assistance.
Conclusion
Congratulations on successfully installing your Sandisk SSD in your computer! By following the steps outlined in this guide, you have upgraded your system’s storage and unlocked the potential for faster and more efficient performance.
The installation process may have seemed daunting at first, but with the right tools, careful preparation, and attention to detail, you were able to seamlessly integrate the SSD into your system. By securely attaching the SSD to the drive bay, connecting the necessary cables, and closing the computer case, you have created a reliable and high-speed storage solution.
With the Sandisk SSD installed, you can expect faster boot times, improved application loading, and quicker file transfers. The SSD’s durability and energy efficiency will also enhance the overall performance and longevity of your computer.
Remember, if you encounter any difficulties during the installation or setup process, don’t hesitate to consult the Sandisk product documentation or seek assistance from their support team. It’s always better to seek professional guidance if you’re unsure of any steps or procedures.
Enjoy the enhanced speed and reliability that your Sandisk SSD brings to your computer. Take full advantage of the improved storage capacity and performance to boost your productivity and enhance your computing experience.
Thank you for following our guide, and happy computing with your new Sandisk SSD!