Introduction
Welcome to this step-by-step guide on how to install your Sandisk SSD (Solid State Drive) drive. Upgrading to an SSD is a fantastic way to give your computer a significant performance boost, greatly reducing boot times and improving overall system responsiveness. Whether you are upgrading a laptop or a desktop computer, this guide will walk you through the process of installing your Sandisk SSD drive with ease.
An SSD offers numerous benefits over traditional hard drives, including faster read and write speeds, lower power consumption, and increased reliability. With its compact size and high storage capacity, the Sandisk SSD is an excellent choice for anyone seeking a reliable and efficient storage solution.
This installation guide assumes that you already have a Sandisk SSD drive ready to install. If you haven’t purchased one yet, make sure to choose the appropriate model that suits your needs and fits your computer’s requirements.
Before we delve into the nitty-gritty details of the installation process, it’s essential to note that working inside a computer requires caution and attention to detail. Make sure to follow all safety precautions, such as grounding yourself to prevent static electricity damage, and ensure that the computer is powered off and unplugged before proceeding.
Now that we’ve covered the basics, let’s dive into the step-by-step instructions to install your Sandisk SSD drive and take your computer’s performance to the next level.
Step 1: Gather Materials
Before beginning the installation process, it’s important to gather all the necessary materials to ensure a smooth and successful SSD installation. Here’s a list of items you’ll need:
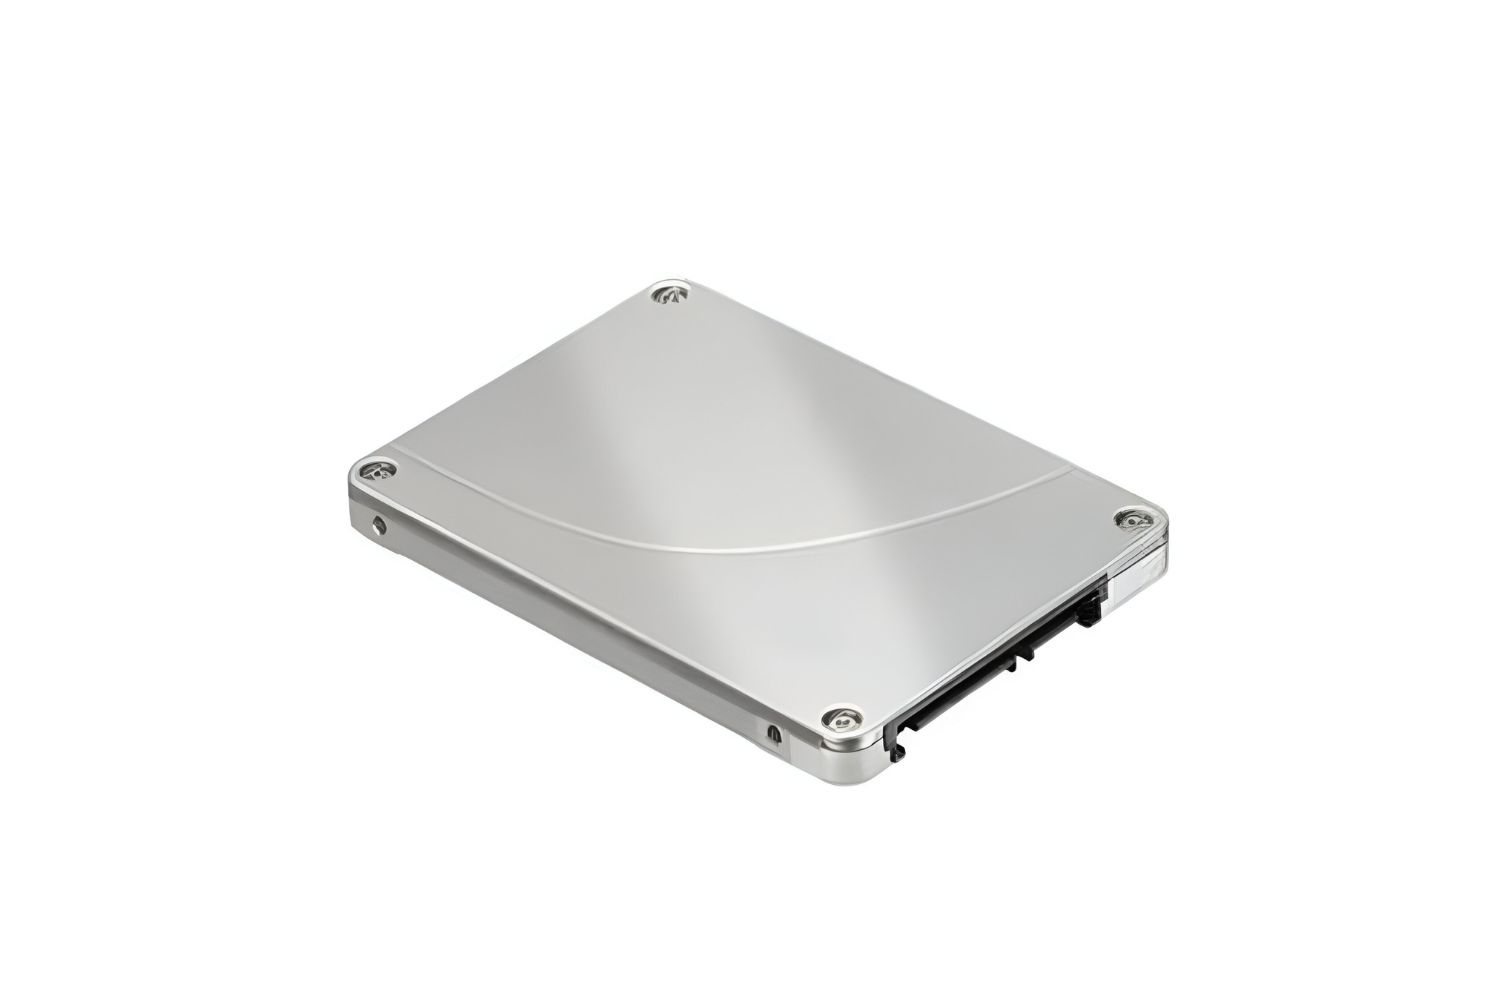
- Sandisk SSD Drive: Ensure that you have the Sandisk SSD drive specifically designed for your computer type (laptop or desktop). Take note of its storage capacity and specifications, such as the form factor and interface.
- Screwdriver: You may need a small screwdriver, depending on your computer model, to remove the existing hard drive or SSD and secure the new SSD in place.
- Data and Power Cables: Check if your computer requires any additional cables to connect the SSD to the motherboard and power supply. SATA cables are commonly used for this purpose.
- External Hard Drive or USB Drive: Having an external storage device or a USB drive will be useful for backing up your data from the old drive and transferring it to the new SSD.
- Operating System Installation Media: If you plan to install a fresh copy of the operating system on your Sandisk SSD, ensure you have the installation media, such as a USB drive or DVD, to install the OS properly.
- Updated Drivers and BIOS: It’s a good idea to have the latest drivers and BIOS updates ready to install on your computer after the SSD installation to ensure compatibility and optimal performance. Visit the manufacturer’s website to download the latest versions.
Double-check that you have all the necessary items on hand before proceeding. Having everything prepared ahead of time will save you any inconvenience or unnecessary delays during the installation process.
Step 2: Prepare the Computer
Before diving into the physical installation of the Sandisk SSD drive, it’s crucial to prepare your computer for the upgrade. Follow these steps to ensure a smooth transition:
- Back up Your Data: It’s essential to create a backup of all your important files and data before proceeding with the SSD installation. This step ensures that no data is lost in case of any unforeseen issues during the process.
- Shut Down the Computer and Unplug All Cables: Power down your computer and disconnect all cables, including the power cord, peripherals, and any external devices connected to the computer.
- Ground Yourself: To prevent static electricity damage to sensitive computer components, ground yourself by touching a grounded metal surface or wearing an anti-static wristband.
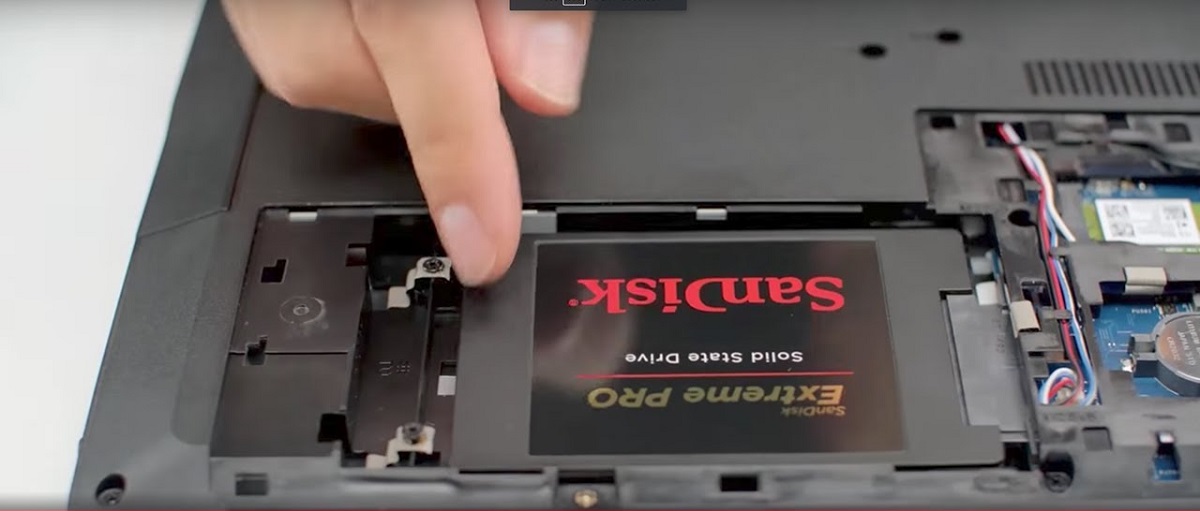
- Locate and Access the Hard Drive or SSD Compartment: Depending on your computer model, you may need to remove a side panel, access a bottom panel, or remove the laptop battery to reach the hard drive or SSD compartment. Consult your computer’s manual or manufacturer’s website for specific instructions on locating and accessing the drive compartment.
- Identify the Existing Drive: If your computer already has an existing hard drive or SSD, identify it and make a note of its connection type (SATA or NVMe) and size. This information will be helpful later when connecting the Sandisk SSD.
- Remove the Existing Drive (If Applicable): If you are upgrading an existing drive, carefully disconnect the cables connected to it and unscrew any screws securing it in place. Gently remove the drive from its slot or bay. Keep the screws and cables in a safe place, as you may need them later for the installation of the Sandisk SSD.
By following these preparatory steps, you’ll ensure that your computer is ready for the installation of the Sandisk SSD drive. Taking the time to prepare beforehand will make the installation process easier and minimize the risk of damaging any components during the upgrade.
Step 3: Connect the SSD
Once you have prepared your computer, it’s time to connect the Sandisk SSD drive. Follow these steps to ensure a proper and secure connection:
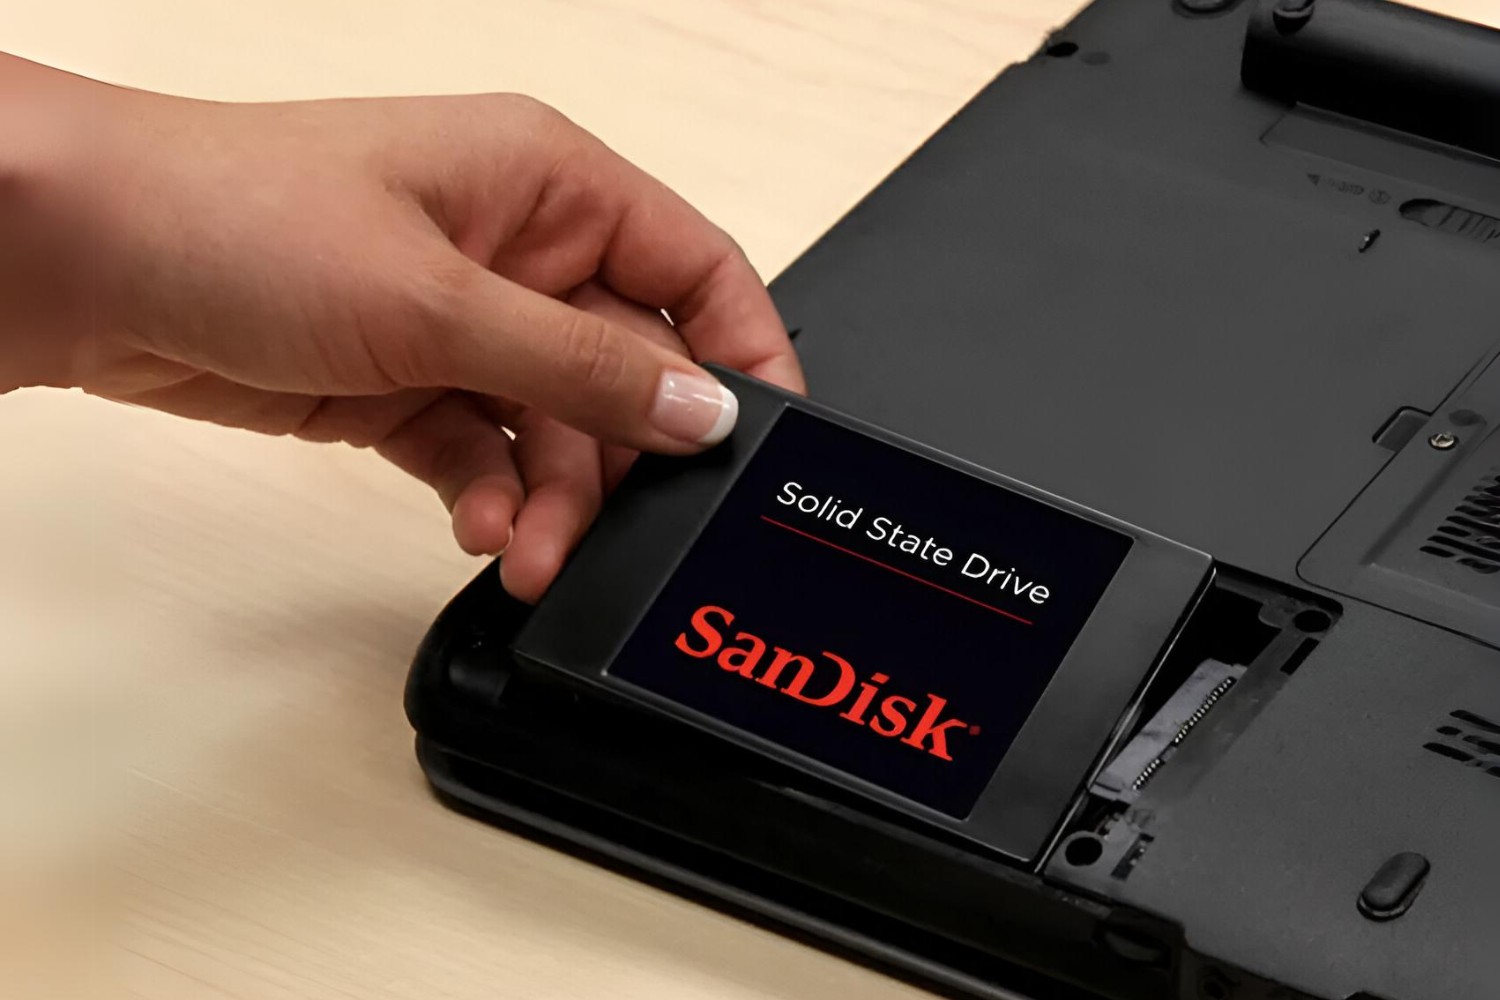
- Locate the SSD Slot: Identify the appropriate slot or bay for connecting the SSD in your computer. It may be located near the existing drive slot or in a different location, depending on your computer model.
- Align the SSD: Gently align the Sandisk SSD with the slot, ensuring that the connectors on the SSD are facing the correct way. The connectors should line up with the connectors in the slot.
- Connect the Data Cable: If using a SATA SSD, connect one end of the SATA data cable to the SSD’s data port and the other end to an available SATA port on the motherboard. Make sure the connection is secure but not overly tight.
- Connect the Power Cable: Attach the power cable to the SSD’s power port, either directly from the power supply or through an available SATA power connector. Again, ensure a secure connection without excessive force.
- Secure the SSD: If necessary, use screws to secure the Sandisk SSD in place. Refer to your computer’s manual or the SSD manufacturer’s instructions to determine if screws are required and where to position them.
It’s important to handle the SSD with care and avoid excess force when connecting the cables. Double-check that the data and power cables are firmly connected, and the SSD is properly secured in its slot. Taking the time to ensure a secure connection will minimize the risk of any loose connections that could cause issues with the drive’s functionality.
With the Sandisk SSD now connected to your computer, you’re ready to move on to the next step: initializing and formatting the SSD.
Step 4: Initialize and Format the SSD
After connecting the Sandisk SSD drive, the next step is to initialize and format it to prepare it for use. Here’s how to do it:
- Power On the Computer: Once the SSD is connected, power on your computer and enter the BIOS or UEFI settings by pressing the designated key (usually F2, F10, or Del) during startup. Consult your computer’s manual or the manufacturer’s website for specific instructions on accessing the BIOS or UEFI settings.
- Navigate to the Disk Management or Storage Configuration: Inside the BIOS or UEFI settings, navigate to the “Disk Management” or “Storage Configuration” section, which allows you to manage connected storage devices.
- Initialize the SSD: Locate the newly connected Sandisk SSD and select it. Choose the option to initialize the SSD, which prepares it for use within the computer system.
- Format the SSD: Once the SSD is initialized, you can proceed to format it. Choose the file system format that best suits your needs, such as NTFS for Windows or APFS for macOS. Select the formatting option and confirm the process.
- Assign a Drive Letter or Mount Point: After formatting, assign a drive letter or mount point to the Sandisk SSD to identify it within the computer system. This step allows you to access the SSD and store data on it.
- Exit the BIOS or UEFI Settings: Save the changes made in the BIOS or UEFI settings and exit the interface.
By initializing and formatting the Sandisk SSD, you are preparing it for use as a storage device within your computer. These steps ensure that the SSD is recognized by the system and ready to store and retrieve data.
With the SSD initialized and formatted, you are now ready to proceed to the next step: installing the operating system onto the Sandisk SSD.
Step 5: Install the Operating System
With the Sandisk SSD initialized and formatted, it’s time to install the operating system onto the SSD. Follow these steps to complete the installation:
- Insert the Installation Media: Insert the installation media, such as a USB drive or DVD, containing the operating system into the appropriate drive of your computer.
- Boot from the Installation Media: Restart your computer and access the BIOS or UEFI settings by pressing the designated key during startup. Configure the boot priority to prioritize the installation media, ensuring that the computer boots from it.
- Follow the on-screen prompts: Once the computer boots from the installation media, follow the on-screen prompts to begin the installation process. Select your desired language, time zone, and other necessary settings.
- Choose the SanDisk SSD as the Installation Destination: When prompted to choose the installation destination, select the Sandisk SSD as the target drive. Ensure that you are installing the operating system on the SSD and not any other drive.
- Complete the Operating System Installation: Proceed with the installation process, following the prompts to complete the installation of the operating system onto the Sandisk SSD. The installation time may vary depending on your computer’s specifications and the operating system being installed.
It’s important to note that during the installation, the computer will restart multiple times. Make sure to leave the installation media inserted until the operating system installation is complete and the computer has restarted.
Upon completion of the operating system installation, the computer will boot from the Sandisk SSD, loading the newly installed operating system. You can now enjoy the benefits of faster boot times and improved performance that the SSD brings.
In the next step, we will cover how to update drivers and BIOS to ensure compatibility and optimize the performance of your computer.
Step 6: Update Drivers and BIOS
After installing the operating system on your Sandisk SSD, it’s important to update the drivers and BIOS to ensure compatibility with the new hardware and optimize the performance of your computer. Follow these steps to update the drivers and BIOS:
- Identify Your Computer’s Manufacturer and Model: Determine the manufacturer and model of your computer. This information is typically found on a label attached to the computer or in the system information section of the operating system.
- Visit the Manufacturer’s Website: Go to the manufacturer’s official website using a web browser on your computer.
- Locate the Support or Downloads Section: Navigate to the support or downloads section of the manufacturer’s website, where you can find drivers and BIOS updates for your computer model.
- Download and Install the Latest Drivers: Look for the drivers specific to your computer model and the operating system you installed on the Sandisk SSD. Download the latest versions of the drivers and follow the manufacturer’s instructions to install them.
- Download and Install the Latest BIOS Update: If a BIOS update is available, download the latest version and carefully follow the manufacturer’s instructions to update the BIOS. This process may vary depending on your computer model, so make sure to read the provided documentation or instructions.
- Restart Your Computer: After updating the drivers and BIOS, restart your computer to apply the changes.
Updating drivers and the BIOS ensures that your computer is utilizing the latest software enhancements and compatibility improvements. This optimizes the performance of your computer and resolves any potential issues that may arise from outdated drivers or BIOS versions.
By following these steps, you can ensure that your computer is running on the most up-to-date drivers and BIOS, ensuring the best possible performance and compatibility with your Sandisk SSD.
Next, we will cover how to transfer data from your old drive to the new Sandisk SSD.
Step 7: Transfer Data from Old Drive
Transferring your data from the old drive to the new Sandisk SSD is an essential step to ensure that you have all your files and documents accessible on your upgraded system. Follow these steps to transfer your data:
- Connect the Old Drive: If you have a secondary drive or an external hard drive containing your data, connect it to your computer. Ensure that both the Sandisk SSD and the old drive are recognized by the system.
- Copy or Move Data: Open the file explorer or file manager on your operating system and navigate to your old drive. Select the files and folders you want to transfer to the Sandisk SSD and copy or move them to the appropriate location on the SSD.
- Organize and Arrange Files: Take the opportunity to organize your files and arrange them in a way that makes sense to you. Create new folders or categories as necessary and ensure that your data is well-organized for easy access.
- Verify Data Transfer: After the transfer is complete, double-check that all your important data has been successfully transferred to the Sandisk SSD. Open a few files or folders to ensure they can be accessed without any issues.
It’s important to note that if you are transitioning from a mechanical hard drive (HDD) to the Sandisk SSD, you may also need to re-install some applications and programs that were installed on the old drive. Check the installation files or internet sources to reinstall the necessary software onto the Sandisk SSD.
By carefully transferring your data, you ensure that all your important files, documents, and media are available on your upgraded system. This step completes the migration process from the old drive to the new Sandisk SSD, allowing you to fully utilize your SSD’s speed and performance.
Finally, we will cover an optional step: secure erasing the old drive to protect your confidential data.
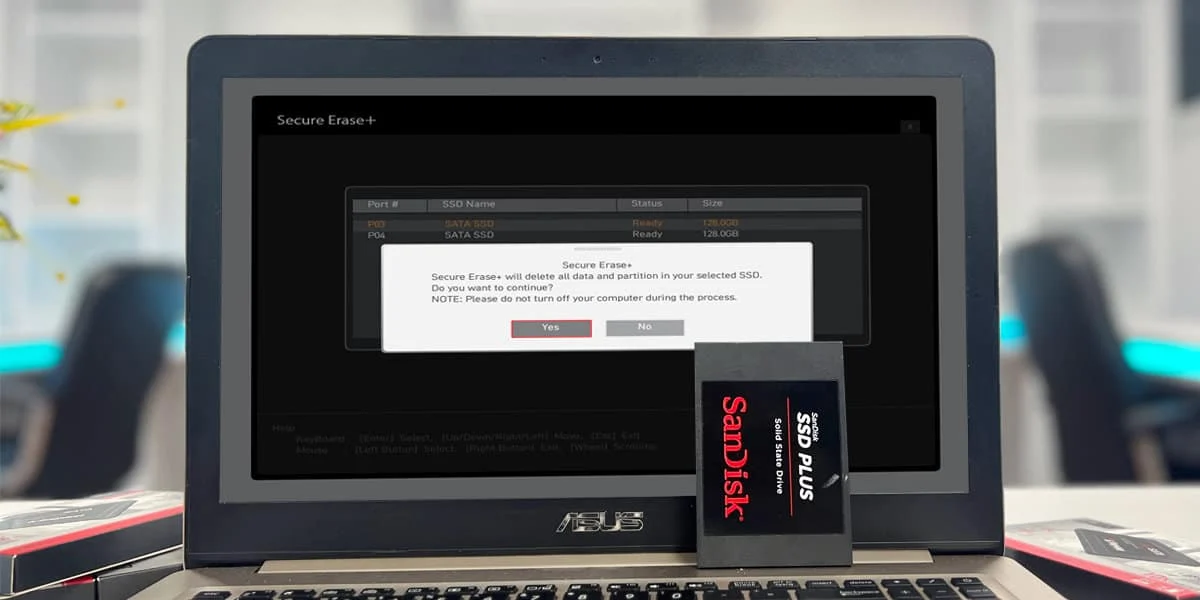
Step 8: Secure Erase Old Drive (Optional)
If you no longer plan to use your old drive or want to ensure that sensitive data is completely removed from it, you have the option to perform a secure erase. Follow these steps to securely erase your old drive:
- Back up Your Data: Before proceeding with a secure erase, make sure that you have backed up any important data stored on the old drive. This step is crucial to prevent permanent data loss.
- Use Manufacturer’s Tools: Check if the manufacturer of your old drive provides any specific software tools for secure erasing. Visit their website and download the appropriate tool for your drive model.
- Connect the Old Drive: If you have disconnected the old drive during the SSD installation process, reconnect it to your computer.
- Run the Secure Erase Tool: Open the secure erase tool provided by the manufacturer and follow the instructions to initiate the secure erase process. This process may take some time, depending on the size of the drive and the method used for secure erasing.
- Verify the Secure Erase: Once the secure erase process is complete, verify that all data has been removed from the old drive. Open a few files or folders to ensure that they are no longer accessible.
Performing a secure erase ensures that no recoverable data remains on your old drive, providing peace of mind when disposing of the drive or repurposing it for another use. However, exercise caution when performing a secure erase, as it cannot be undone, and all data will be permanently removed.
Keep in mind that secure erasing is an optional step, and if you plan to repurpose or donate the old drive, it’s always a good idea to securely erase it to protect your personal information.
With the completion of this step, you have successfully upgraded to a Sandisk SSD drive and secured your old drive if desired. The final step will conclude the installation process.
Step 9: Finalize Installation
Congratulations! You are in the final step of the Sandisk SSD installation process. Here are a few tasks to complete to finalize the installation:
- Restart Your Computer: Restart your computer to ensure that all changes and updates have taken effect. This step allows the system to recognize the newly installed Sandisk SSD as the primary storage device.
- Check Boot Priority: Access the BIOS or UEFI settings once again and verify that the Sandisk SSD is set as the primary boot device. Adjust the boot priority if necessary, ensuring that the computer boots from the SSD.
- Test Performance and Functionality: After booting from the Sandisk SSD, test the performance and functionality of your computer. Notice the improvements in boot time, application loading speed, and overall responsiveness.
- Update Software and Drivers: Check for any pending software updates for your operating system, applications, and drivers. Keeping your software up to date ensures that you have the latest features, bug fixes, and security patches.
- Organize and Back Up: Take some time to organize your files and folders on the Sandisk SSD. Create backup routines to ensure that your important data is always protected and easily recoverable.
- Dispose of Old Drive (If Applicable): If you no longer need the old drive and have securely erased it, properly dispose of it according to your local regulations and guidelines.
By completing these final steps, you have successfully installed the Sandisk SSD drive, optimized your computer’s performance, and ensured that your data is securely stored. Enjoy the enhanced speed, reliability, and efficiency that the SSD brings to your system.
Remember to periodically monitor the health and performance of your Sandisk SSD, and perform regular maintenance, such as cleaning up unnecessary files and optimizing storage, to keep it running smoothly for years to come.
Thank you for following this installation guide. If you have any further questions or need assistance, don’t hesitate to consult the Sandisk support resources or reach out to a knowledgeable technician.
Conclusion
Congratulations on successfully installing your Sandisk SSD drive! By following the step-by-step guide provided in this article, you have upgraded your computer with a high-performance storage solution that will enhance its speed and responsiveness.
Throughout the installation process, you learned how to gather the necessary materials, prepare your computer, connect the SSD, initialize and format the drive, install the operating system, update drivers and BIOS, transfer data from the old drive, and optionally secure erase the old drive. Each step was carefully explained to ensure a smooth and successful installation.
With the Sandisk SSD installed and your data transferred, it’s time to enjoy the benefits of improved performance and reliability. You will notice faster boot times, quicker load times for applications, and overall smoother operation of your computer.
Remember to periodically check for updates to your software and drivers to maintain optimal performance. Additionally, regularly backing up your data and maintaining proper storage practices will ensure the safety and security of your important files.
If you encounter any issues or have further questions, don’t hesitate to consult Sandisk’s support resources or seek assistance from knowledgeable technicians. They will be able to provide guidance and support for any challenges you may face related to your Sandisk SSD drive.
Thank you for choosing Sandisk and taking the time to upgrade your computer’s storage with a reliable and high-performance SSD. Enjoy the improved speed and efficiency that the Sandisk SSD brings to your computing experience!