Introduction
Installing PHP extensions is an essential task for developers who want to expand the functionality of their PHP applications. Extensions are pre-compiled libraries that provide additional features and capabilities to the PHP programming language. These extensions can be used to enhance performance, add support for specific protocols or databases, enable caching mechanisms, and much more.
By installing PHP extensions, developers can tap into a vast ecosystem of available tools and libraries, saving time and effort by leveraging existing solutions instead of reinventing the wheel. Whether you’re working on a small personal project or building enterprise-level software, knowing how to install PHP extensions is a valuable skill.
In this article, we will explore various methods of installing PHP extensions. We will cover the most commonly used approaches, including using a package manager, compiling from source, using the PHP Extension Community Library (PECL), and manual installation.
Before we dive into the installation methods, it’s important to note that the steps may vary depending on your operating system and PHP version. It’s recommended to check the official documentation and relevant resources specific to your environment.
Prerequisites
Before we proceed with the installation of PHP extensions, there are a few prerequisites to keep in mind:
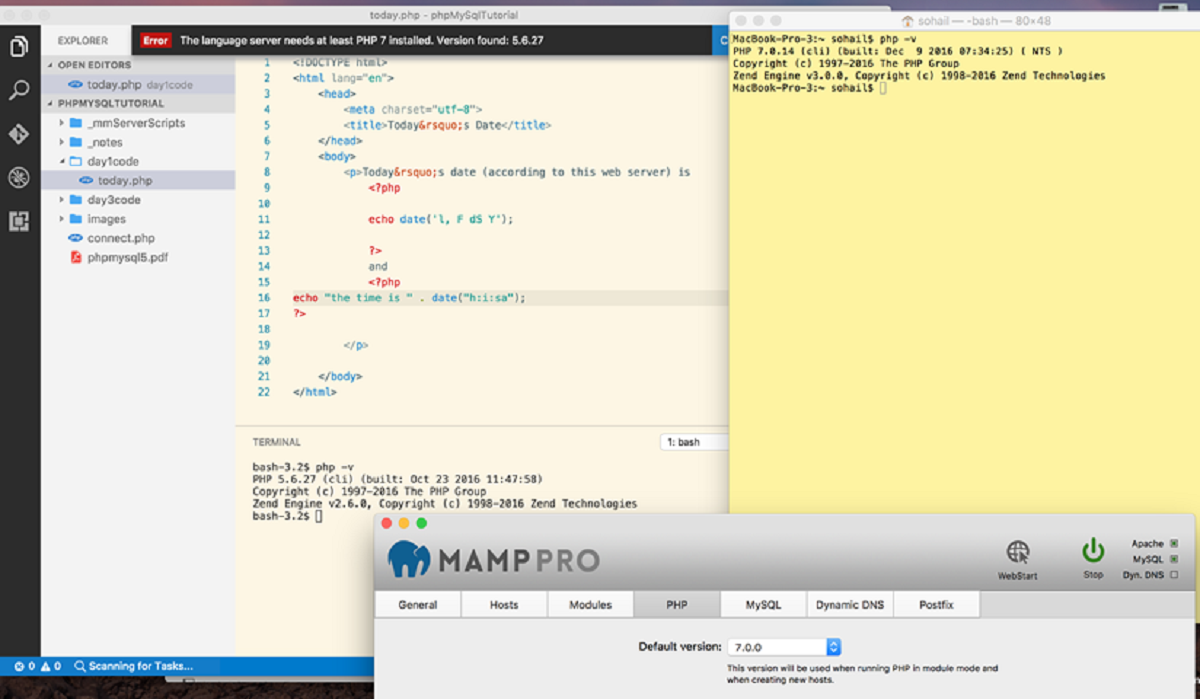
- PHP Installation: Ensure that you have PHP installed on your system. You can check this by running the command
php -vin your terminal or command prompt. If PHP is not installed, refer to the official PHP website for instructions on how to install it. - Operating System: Different operating systems may have specific requirements or steps for installing PHP extensions. Make sure you are familiar with the installation process specific to your operating system.
- Permissions: Depending on your system’s configuration, you may require administrative or root access to install PHP extensions. Ensure that you have the necessary permissions to carry out the installation.
- Dependencies: Some PHP extensions have dependencies on other software or libraries. To install extensions successfully, ensure that any required dependencies are already installed on your system. Consult the documentation or resources associated with the extension to identify and install the necessary dependencies.
By meeting these prerequisites, you can proceed with confidence to install PHP extensions using any of the methods outlined in the upcoming sections. Keep in mind that the installation process may vary depending on the specific extension and your system configuration. It’s always a good idea to refer to the official documentation and resources associated with the extension you want to install for detailed installation instructions.
Method 1: Using Package Manager
One of the easiest and recommended ways to install PHP extensions is by using a package manager. Package managers are tools that simplify the installation and management of software on your operating system. They handle downloading, dependency resolution, and integration with your system, making the installation process streamlined and efficient.
The exact package manager and commands will vary depending on your operating system. Here are a few commonly used package managers and their respective commands:
- Debian/Ubuntu (APT): If you are using Debian or Ubuntu, you can use the Advanced Packaging Tool (APT) to install PHP extensions. The package name usually follows the format
php-extensionname. To install an extension, run the commandsudo apt-get install php-extensionname. - Red Hat/CentOS (Yum/DNF): For Red Hat-based distributions like CentOS, you can use the Yellowdog Updater Modified (Yum) or Dandified YUM (DNF) package managers. The package name typically starts with
php-. To install an extension, use the commandsudo yum install php-extensionnameorsudo dnf install php-extensionname. - macOS (Homebrew): If you are using macOS, you can utilize Homebrew, a popular package manager. To install an extension, use the command
brew install php-extensionname.
These package managers automatically handle downloading and installing PHP extensions along with any dependencies required. They also provide tools to manage installed extensions, update them, and remove them if necessary. It’s important to keep your extensions and package manager up to date for security and performance reasons.
Using a package manager is generally recommended because it simplifies the installation process and ensures that the extensions are obtained from official repositories, which are usually tested and verified. However, it’s worth mentioning that not all PHP extensions may be available through package managers, especially if you are working with less common extensions or older versions.
In the next section, we will explore another method of installing PHP extensions: compiling from source.
Method 2: Compiling from Source
Installing PHP extensions by compiling from source provides more flexibility and customization options compared to using a package manager. This method involves manually downloading the source code of the extension and compiling it on your system. While it may require more effort and technical knowledge, it allows you to fine-tune the installation to suit your specific requirements.
Before you proceed with compiling from source, you need to ensure that you have a few prerequisites:
- Development Tools: Make sure you have the necessary development tools installed on your system. This typically includes a C compiler (such as GCC), make utility, and other build-related tools. Refer to the documentation of your operating system for instructions on how to install the required development tools.
- PHP Source Code: You will need to have the PHP source code installed on your system. If you don’t have it, you can download it from the official PHP website. Make sure to download the version that matches your currently installed PHP version.
Once you have the prerequisites in place, follow these general steps to compile and install a PHP extension from source:
- Download the source code of the extension: Visit the official website or repository for the extension and download the source code package or clone the repository using a version control system like Git.
- Extract the source code: Unpack the downloaded source code package into a directory of your choice.
- Configure the build: Navigate to the extracted source code directory and run the
configurescript with appropriate configurations and options. This script checks your system for any required dependencies and sets up the build environment accordingly. - Compile the extension: Run the
makecommand to compile the extension. This process involves compiling the necessary source code files and linking them with the PHP runtime. - Install the extension: Execute the
make installcommand to install the compiled extension into the appropriate directory. This step may require administrative or root access. - Configure PHP to use the extension: Edit your PHP configuration file (usually
php.ini) and enable the extension by adding or uncommenting the relevant line. - Restart PHP: Finally, restart your web server or PHP service to load the newly installed extension.
Keep in mind that the exact steps may vary depending on the extension’s specific installation instructions. It’s essential to consult the extension’s documentation or README file for accurate instructions and any additional configuration steps.
Compiling from source allows you to have more control over the installation process and can be useful when dealing with custom configurations, specific versions, or extensions that are not available through package managers.
In the next section, we will discuss another method of installing PHP extensions: using the PECL repository.
Method 3: Using PECL
The PHP Extension Community Library (PECL) is a repository of PHP extensions maintained by the PHP community. It provides a centralized location for developers to find and install additional PHP extensions. Using PECL, you can easily search for and install extensions with just a few simple commands.
To begin using PECL, make sure you have the following prerequisites:
- PHP installed: Ensure that you have PHP installed on your system. PECL relies on the PHP installation to compile and install extensions.
- Development Tools: Similar to compiling from source, you need to have the necessary development tools and libraries installed on your system. This includes a C compiler and other build-related tools.
- Internet Connection: PECL requires an active internet connection to search for and download extensions from the repository.
Once you have the prerequisites ready, follow these steps to install PHP extensions using PECL:
- Open the command line or terminal on your system.
- Update the PECL package manager by running the command
pecl channel-update pecl.php.net. - Search for the desired extension by executing
pecl search extensionname, replacing ‘extensionname’ with the name of the extension you want to install. - Identify the correct extension package from the search results and note its name.
- Install the extension package by running
pecl install extensionname, replacing ‘extensionname’ with the actual package name. - Follow any prompts or instructions that appear during the installation process.
- Once the installation is complete, enable the extension in your PHP configuration file (usually
php.ini), by adding or uncommenting the relevant line. - Restart your web server or PHP service to load the newly installed extension.
Using PECL simplifies the installation process of PHP extensions by automatically handling the download, compilation, and installation steps. It also takes care of any required dependencies and ensures compatibility with your PHP version. However, not all extensions may be available on PECL, so you may need to explore alternative methods for those specific extensions.
In the next section, we will discuss the manual installation method for PHP extensions.
Method 4: Manual Installation
In some cases, you may come across PHP extensions that are not available through package managers or the PECL repository. In such situations, you can resort to manual installation, which involves downloading the extension source code, compiling it, and configuring it on your own.
Before embarking on the manual installation process, ensure that you have the following prerequisites:
- PHP Installed: Make sure you have PHP installed on your system. Manual installation requires a functional PHP installation to compile and use the extension.
- Development Tools: Similar to compiling from source, you need to have the necessary development tools and libraries installed on your system. This includes a C compiler and other build-related tools.
- Dependencies: Some extensions may have dependencies on external libraries or software. Ensure that you have the required dependencies installed on your system before proceeding with the manual installation.
To manually install a PHP extension, follow these general steps:
- Visit the official website or repository of the extension and download the source code package or clone the repository.
- Extract the source code files from the package into a directory of your choice.
- Review the documentation or README file included with the extension for specific instructions on how to compile and install it.
- Configure the build by running any necessary scripts or commands. This may involve setting up options, paths, or environment variables.
- Compile the extension by executing the appropriate build command. This typically involves running a make or compile command.
- Once the compilation is complete, install the extension by copying the compiled files to the appropriate location or running an installation script.
- Edit your PHP configuration file (usually
php.ini) and add or uncomment the relevant line to enable the extension. - Restart your web server or PHP service to load the extension.
It’s important to note that the manual installation process can vary depending on the extension and its specific requirements. Always refer to the official documentation or instructions provided by the extension developer for accurate installation steps.
Manual installation gives you full control over the installation process, allowing you to adapt and customize it as needed. However, it may require more technical expertise and can be time-consuming compared to other installation methods.
With the completion of this section, you now have a comprehensive understanding of four different methods to install PHP extensions. Choose the method that best suits your needs and requirements for each specific extension.
Conclusion
Installing PHP extensions is a vital aspect of PHP development, as it enables developers to enhance the functionality and capabilities of their applications. In this article, we explored four different methods to install PHP extensions: using a package manager, compiling from source, using the PECL repository, and manual installation.
The package manager method offers a simple and convenient way to install extensions, leveraging official repositories and handling dependencies automatically. Compiling from source gives developers more control and customization options, but requires additional technical knowledge and effort.
The PECL repository is a valuable resource for finding and installing PHP extensions, providing an extensive collection of extensions that can be easily downloaded and installed. However, it may not have all the extensions available.
Lastly, manual installation gives developers complete control over the installation process but can be more complex and time-consuming, especially when dealing with dependencies and specific configurations.
Before diving into the installation process, always check the prerequisites, including having a PHP installation, necessary development tools, and any required dependencies. It’s important to refer to official documentation, README files, or extension-specific resources for accurate installation instructions.
By utilizing the appropriate method for each situation, developers can expand the capabilities of their PHP applications and optimize their development workflow. Whether it’s boosting performance, integrating with external services, or adding new functionality, installing PHP extensions is an essential skill for any PHP developer.


