Overview
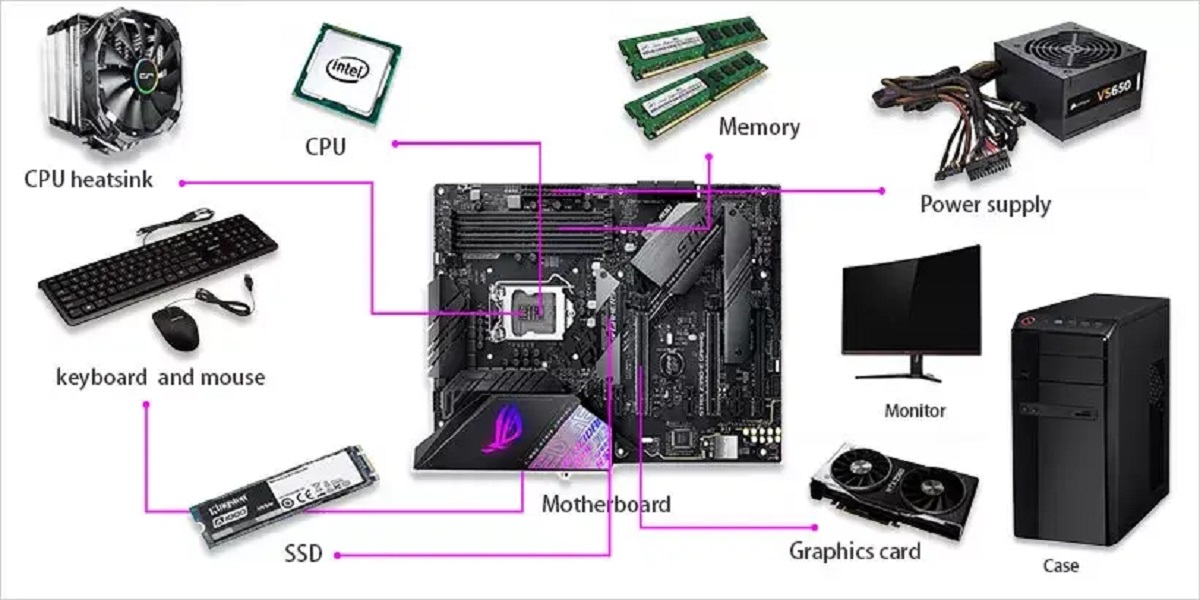
Installing a motherboard in your PC case is a crucial step in building your own computer. The motherboard is the main circuit board that connects all the components of your computer and allows them to communicate with each other. A properly installed motherboard ensures the stability and performance of your PC.
While installing a motherboard may seem like a daunting task, it can be easily accomplished by following a few simple steps. In this article, we will guide you through the process of installing a motherboard in your PC case, step by step.
We will start by preparing the motherboard for installation, ensuring that it is compatible with your case and properly configured. Next, we will align the standoffs, which are small metal pegs that provide support and electrical insulation for the motherboard. Once the standoffs are in place, we will carefully position the motherboard on them.
Securing the motherboard is the next important step. This involves using screws to fasten the motherboard to the standoffs, ensuring that it is firmly and securely attached. The motherboard should be tightened just enough to prevent movement, but not so tight that it risks damaging the board.
After securing the motherboard, we will connect the power supply cables. These cables provide the necessary power to the motherboard and its components. Properly connecting the power supply cables is crucial to ensure that the motherboard receives adequate power and functions correctly.
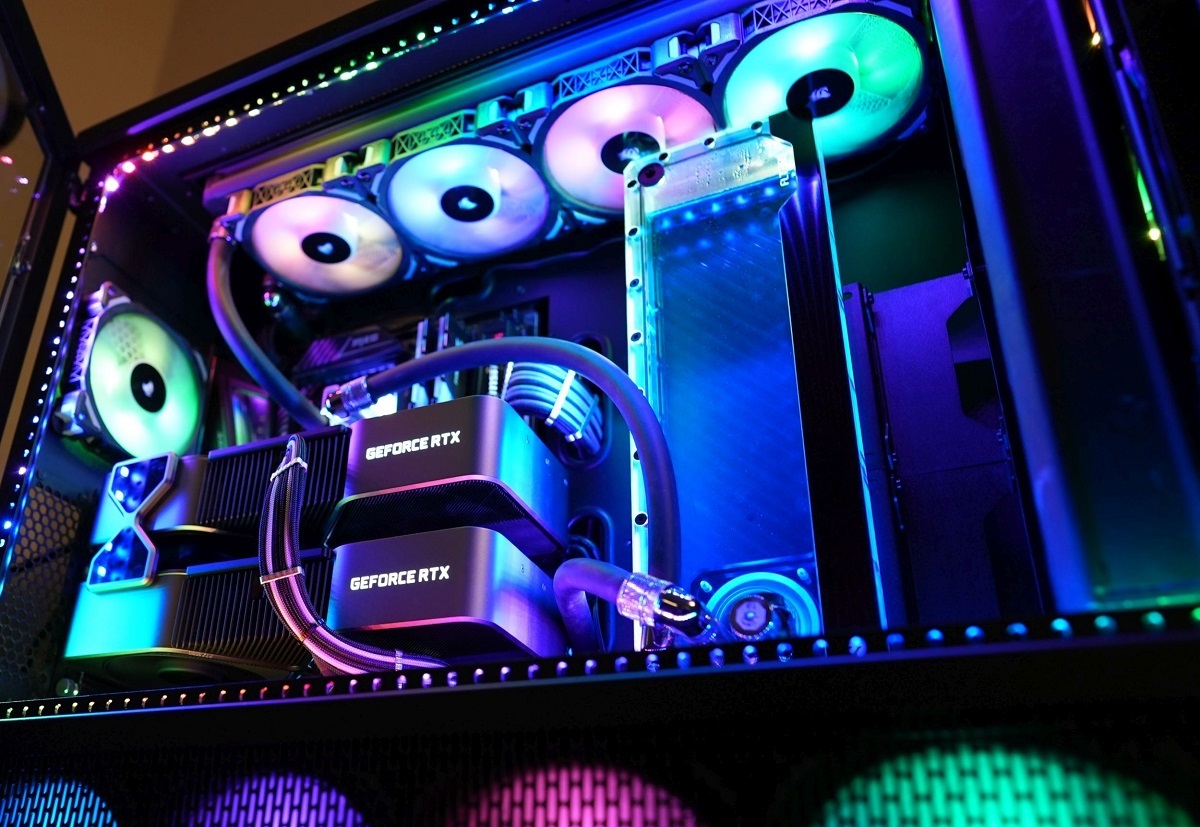
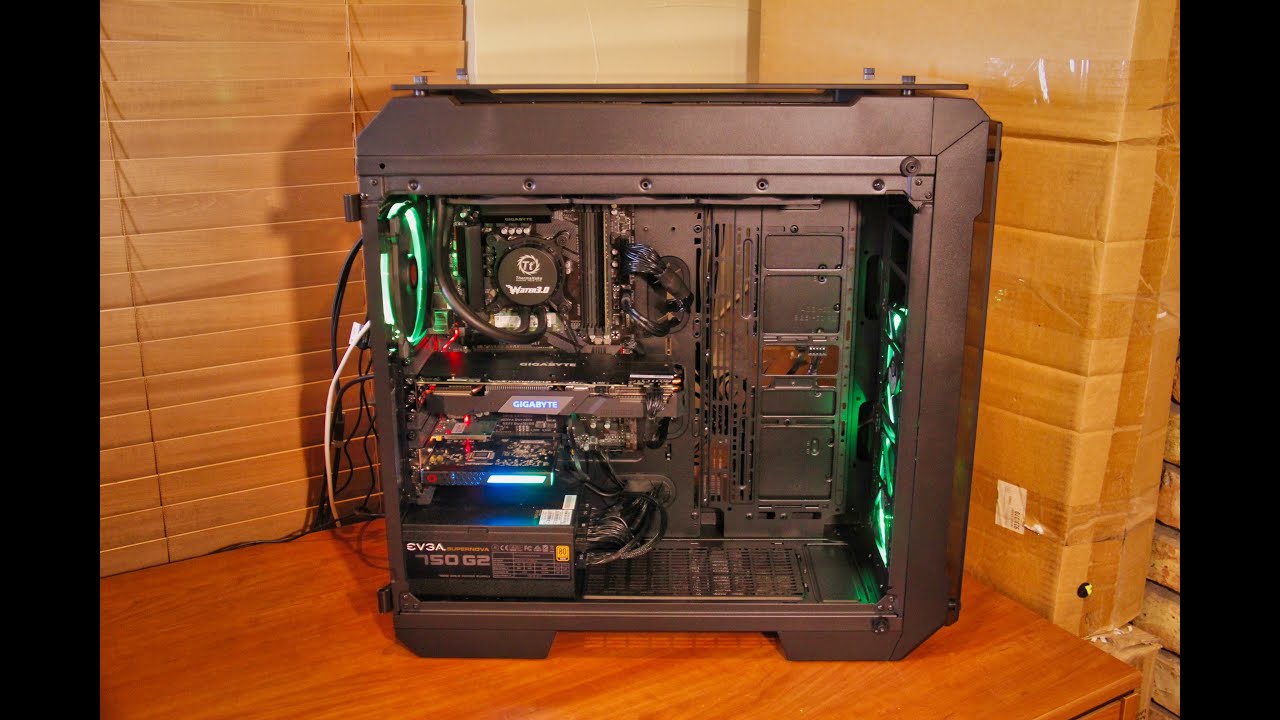
Once the power supply is connected, we will proceed to connect the drives and expansion cards to the motherboard. This includes connecting the hard drive, solid-state drive, DVD drive, and any other peripherals you may have. Additionally, we will insert any expansion cards, such as graphic cards, sound cards, or network cards, into their respective slots.
Before completing the installation, it is important to verify all connections. Check that all cables are securely plugged in and all cards are properly seated. This step helps prevent any potential issues that may arise due to loose connections.
Finally, we will start the PC and confirm that everything is functioning properly. Once the PC is powered on, you should be able to access the BIOS and ensure that all components are recognized by the system.
By following these step-by-step instructions, you can successfully install your motherboard in your PC case. It is important to remain cautious and handle the motherboard with care to avoid any damage. Now, let’s proceed to the first step: preparing the motherboard for installation.
Step 1: Prepare the Motherboard
Before installing the motherboard in your PC case, it is crucial to make some preparations to ensure a smooth installation process. Here are the essential steps to prepare the motherboard:
1. Gather Necessary Tools: Start by gathering the tools you’ll need, such as a Phillips screwdriver, an antistatic wrist strap, and thermal paste (if required).
2. Check Compatibility: Ensure that the motherboard is compatible with your PC case and other components. Check the motherboard’s specifications to verify compatibility with the CPU, RAM, and other peripherals.
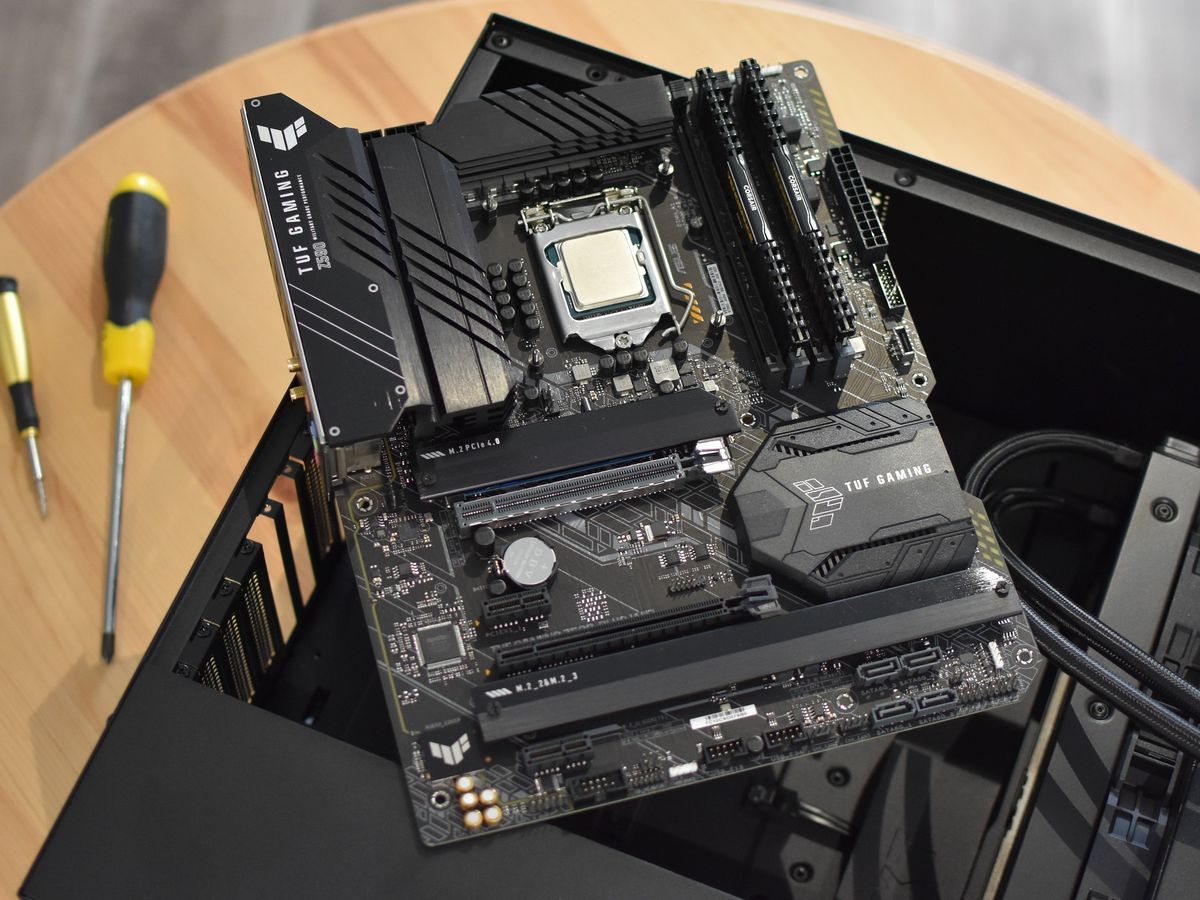
3. Install CPU and RAM: Before installing the motherboard, it’s best to install the CPU and RAM first. Refer to the instruction manuals that came with these components for the specific installation steps.
4. Apply Thermal Paste (if required): If your CPU requires thermal paste for optimal heat transfer, apply a thin layer on the top of the CPU. This will help dissipate the heat generated by the CPU.
5. Connect CPU Cooler: Depending on the type of CPU cooler you have, connect it to the CPU socket. Make sure it is firmly and securely attached. Refer to the cooler’s manual for instructions.
6. Remove Obstacles: Inspect the PC case and remove any obstacles that may interfere with the installation of the motherboard, such as drive cages or cable management brackets.
By following these steps, you will be well-prepared for installing the motherboard in your PC case. Taking the time to gather the necessary tools, ensuring compatibility, and preparing the CPU and RAM will help facilitate a successful motherboard installation. In the next step, we will guide you through aligning the standoffs in your PC case.
Step 2: Align the Standoffs
Aligning the standoffs is a crucial step in installing the motherboard in your PC case. Standoffs are small metal pegs that provide support and electrical insulation between the motherboard and the case. Here’s how to align the standoffs:
1. Locate the Standoff Mounting Holes: Check your PC case for standoff mounting holes. These are typically pre-drilled holes with threaded brass inserts already installed.
2. Determine the Required Standoffs: Look at the motherboard and determine the number of standoffs needed. Most standard ATX motherboards require six or nine standoffs.
3. Align the Standoffs: Place the standoffs into the corresponding mounting holes on the case. Make sure to align them with the motherboard’s mounting holes.
4. Tighten the Standoffs: Using a screwdriver, gently tighten the standoffs until they are securely fastened to the case. Be careful not to overtighten them, as it may damage the motherboard or the case.
5. Verify Alignment: Double-check that the standoffs are aligned properly with the motherboard’s mounting holes. They should be firmly attached and not wobble or move excessively.
Aligning the standoffs is crucial as it provides proper support and prevents the motherboard from coming into direct contact with the case, which could cause a short circuit. It is essential to align the standoffs accurately to ensure a stable and secure installation of the motherboard.
Now that the standoffs are aligned, we can proceed to the next step of placing the motherboard on the standoffs.
Step 3: Place the Motherboard on the Standoffs
With the standoffs properly aligned in your PC case, it’s time to carefully place the motherboard on top of them. Follow these steps to ensure a secure and accurate placement:
1. Position the Motherboard: Hold the motherboard by its edges and position it above the standoffs in the PC case. Make sure that the ports and connectors on the back of the motherboard align with the corresponding openings in the case’s I/O shield.
2. Lower the Motherboard: Slowly and carefully lower the motherboard onto the standoffs, ensuring that each standoff lines up with the corresponding mounting hole on the motherboard.
3. Apply Gentle Pressure: Once the motherboard is aligned correctly, apply gentle and even pressure to the center of the motherboard, gradually pressing it down onto the standoffs. This will help the motherboard to sit flush against the standoffs and I/O shield.
4. Check Alignment: After securing the motherboard onto the standoffs, visually inspect the alignment. Ensure that all the mounting holes on the motherboard are matching up with the standoffs.
5. Verify Stability: Shake the PC case gently to check the stability of the motherboard. It should not move or rattle. If there is any movement, check for any misaligned standoffs and adjust them if necessary.
It is important to handle the motherboard with care during this step. Avoid applying excessive pressure or forcing it into place, as this could damage delicate components or cause misalignment.
With the motherboard securely placed on the standoffs, we can now proceed to the next step of securing the motherboard with screws.
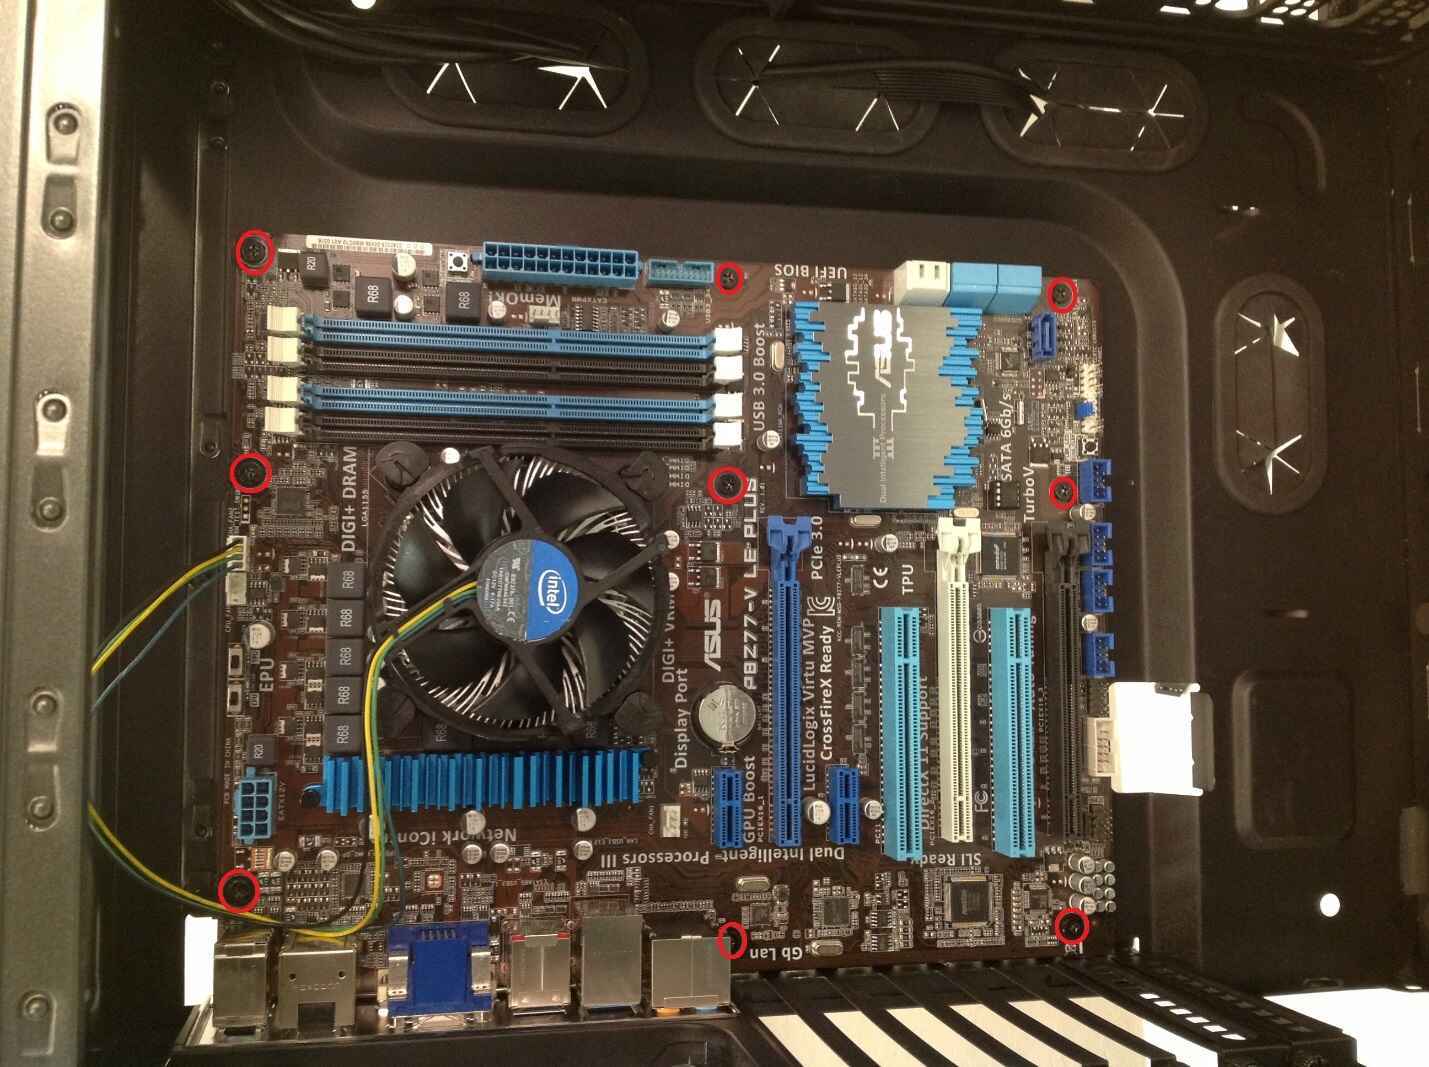
Step 4: Secure the Motherboard with Screws
Once the motherboard is properly positioned on the standoffs, the next step is to secure it in place using screws. This step is crucial to ensure the stability and longevity of your computer build. Follow these steps to securely fasten the motherboard:
1. Locate the Screw Holes: Check the motherboard for pre-drilled screw holes around the edges. These holes are where you will insert the screws to secure the motherboard.
2. Insert the Screws: Take the screws provided with your motherboard or PC case and insert them into the corresponding screw holes. Start with one corner of the motherboard and work your way around, tightening the screws one by one.
3. Tighten the Screws: Using a screwdriver, gently tighten each screw until it is snug but be careful not to overtighten, as it may damage the motherboard. Maintain a firm and even pressure while tightening the screws.
4. Double Check: After tightening all the screws, double-check the stability of the motherboard. Shake the PC case gently to ensure that the motherboard is securely fastened and does not wobble or move.
5. Cable Clearance: Ensure that there is sufficient clearance between the motherboard and any nearby cables or components. Avoid having cables pressing against the motherboard as it may cause interference or damage over time.
Securing the motherboard with screws is vital to protect it from any potential movement or vibrations that can occur during usage. By firmly attaching the motherboard to the standoffs, you help to maintain stable connections and prevent damage to the board or its components.
Now that you have successfully secured the motherboard in place, we can move on to the next step: connecting the power supply cables.
Step 5: Connect Power Supply Cables
Connecting the power supply cables to the motherboard is a crucial step in the installation process. This step ensures that the motherboard and its components receive the necessary power to function properly. Follow these steps to connect the power supply cables:
1. Locate Power Connectors: Identify the power connectors on your motherboard. The two main power connectors are the 24-pin ATX power connector and the 4 or 8-pin CPU power connector.
2. Connect the 24-pin ATX Power Connector: Take the 24-pin ATX power cable from your power supply and align it with the corresponding power connector on the motherboard. Gently push it in until it latches into place.
3. Connect the CPU Power Connector: Locate the CPU power connector on the motherboard, usually located near the CPU socket. Take the 4 or 8-pin CPU power cable from your power supply and connect it to the CPU power connector.
4. Secure Cable Connections: Ensure that the power cables are securely connected, with no loose connections or partial insertions. Take extra care to align the pins and slots properly before applying gentle pressure to make the connection.
5. Connect Additional Power Cables: Depending on your motherboard and components, you may need to connect additional power cables such as PCIe power connectors for graphics cards or SATA power connectors for drives. Refer to the motherboard and component manuals for specific instructions.
Properly connecting the power supply cables to the motherboard is essential for providing reliable power to the system. It ensures that the motherboard and its components receive the appropriate voltage and current, enabling them to function optimally.
Now that the power supply cables are properly connected, we can move on to the next step: connecting drives and expansion cards.
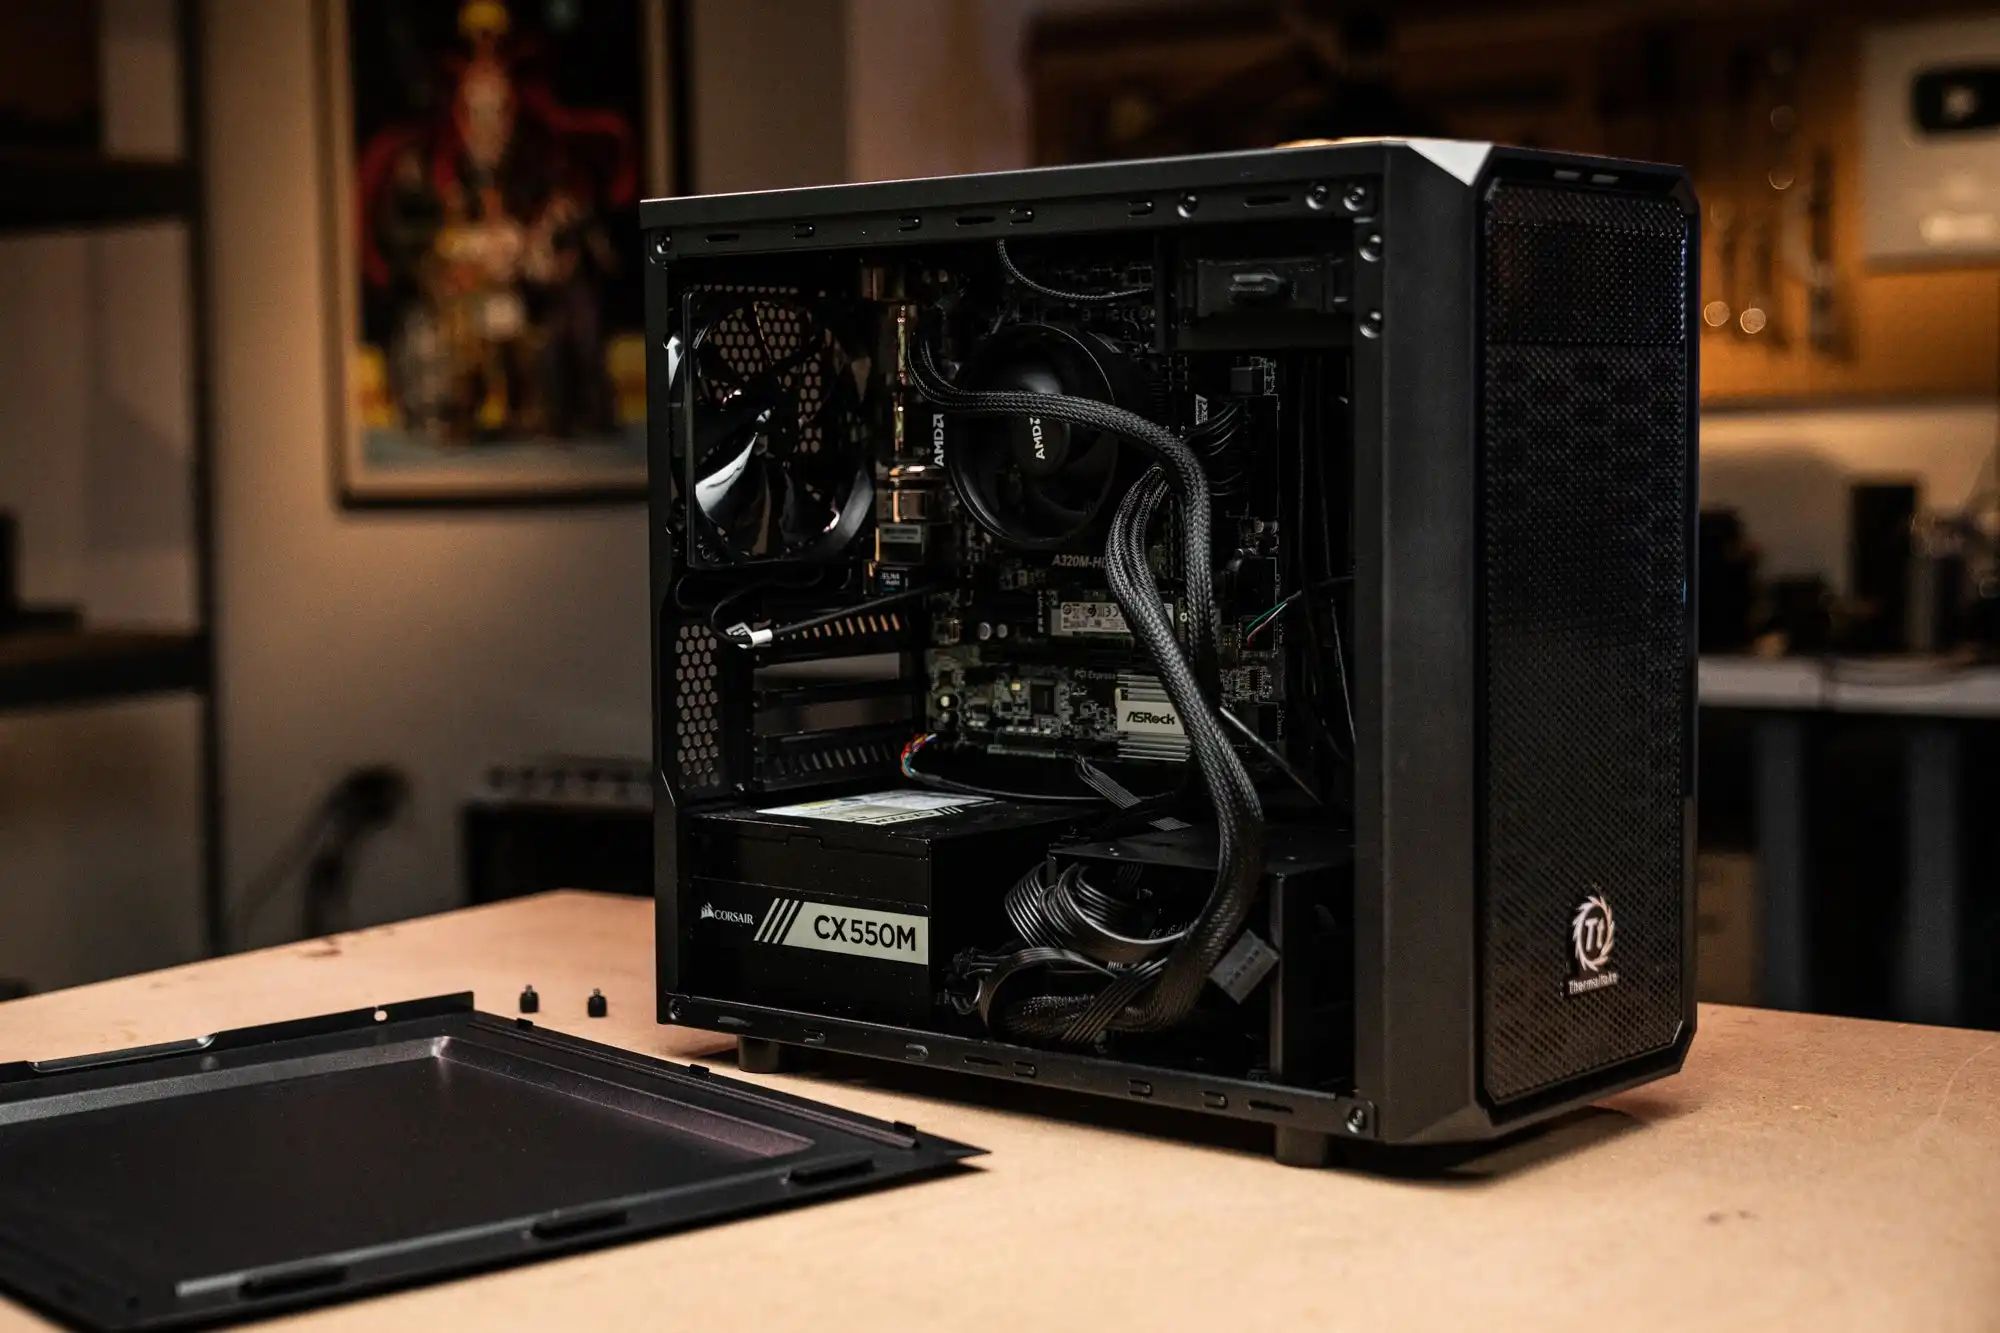
Step 6: Connect Drives and Expansion Cards
After connecting the power supply cables, the next step is to connect the drives and expansion cards to your motherboard. This step ensures that your computer can access storage devices and utilize additional hardware components. Follow these steps to connect drives and expansion cards:
1. Connect Drives: Identify the SATA ports on your motherboard, which are used to connect storage drives such as hard drives or solid-state drives. Connect one end of a SATA data cable to the drive and the other end to an available SATA port on the motherboard. Ensure that the connectors are aligned correctly and securely inserted.
2. Connect Power to Drives: Use SATA power cables from your power supply to provide power to the drives. Connect one end of the cable to the drive and the other end to an available SATA power connector. Ensure a secure connection.
3. Insert Expansion Cards: Identify the PCIe slots on your motherboard, which are used to install expansion cards such as graphics cards, sound cards, or network cards. Align the card’s connector and insert it firmly into an appropriate PCIe slot. Ensure it is fully seated and the retention mechanism latches securely.
4. Secure Expansion Cards: For larger and heavier cards, it may be necessary to use screws or brackets to secure them to the case to prevent sagging. Refer to the expansion card’s manual for specific instructions.
5. Connect Power to Graphics Cards: If you have a dedicated graphics card, it may require additional power. Connect the appropriate power cables from your power supply to the graphics card’s power connectors. Ensure a secure connection.
Connecting drives and expansion cards allows your computer to access storage devices and utilize additional functionalities. Ensure that all connections are secure and properly aligned to avoid any issues with data transfer or component operation.
Now that you have connected the drives and expansion cards, we can move on to the next step: verifying the connections and starting the PC.
Step 7: Verify Connections and Start the PC
After completing the installation of the motherboard, drives, and expansion cards, it is essential to verify all the connections and start the PC. This step ensures that everything is properly connected and functioning correctly. Follow these steps to verify the connections and start your PC:
1. Check External Connections: Double-check all external connections, such as the monitor, keyboard, mouse, and speakers, to ensure they are securely plugged in to the respective ports.
2. Check Internal Connections: Examine all internal connections, including the power supply cables, SATA cables, and any other cables connected to the motherboard or peripherals. Ensure they are firmly connected and properly aligned.
3. Check RAM Slots: Verify that the RAM modules are securely seated in their designated slots. Ensure they are aligned properly and fully inserted.
4. Check Expansion Cards: Ensure that all expansion cards, such as graphics cards or sound cards, are securely seated in their respective slots. Double-check all power cables connected to the expansion cards.
5. Start the PC: Connect the power cable to your PC and press the power button. Listen for any beeps or error codes during the boot process, as these may indicate issues with the hardware installation.
6. Access the BIOS: Once the PC powers on, access the BIOS by pressing the designated key on your keyboard (usually Del, F2, or Esc). Verify that all components, including the motherboard, RAM, and storage devices, are recognized by the system.
7. Test Functionality: After successfully accessing the BIOS, proceed to test the functionality of your PC by booting into the operating system. Check that all hardware components are working correctly and perform any necessary updates or configurations.
Verifying the connections and starting your PC is a crucial final step in ensuring a successful installation. By carefully checking all connections and components, you can minimize the risk of any potential issues and ensure that your PC is ready for use.
Congratulations! You have successfully completed the installation process for your motherboard in your PC case. Enjoy your newly built computer!
Conclusion
Installing a motherboard in your PC case may seem like a daunting task, but by following the step-by-step instructions outlined in this guide, you can successfully complete the process. From preparing the motherboard to securing it with screws, connecting power supply cables, attaching drives and expansion cards, and verifying all connections, each step plays a critical role in ensuring a stable and functioning computer build.
Throughout the installation process, it is important to handle the motherboard and other components with care, using the appropriate tools and techniques. Take your time to align the standoffs properly, secure the motherboard firmly, and make secure connections with power supply cables, drives, and expansion cards.
Furthermore, checking and double-checking all connections before starting the PC helps prevent potential issues and ensures that everything is properly set up. Accessing the BIOS and verifying that all components are recognized further validates a successful installation.
By completing these steps, you have successfully installed a motherboard in your PC case and have taken a significant step towards building your own computer. Enjoy the satisfaction of a successful build and the enhanced performance and capabilities that come with it.
Remember, if you encounter any difficulties during the installation process, consult the manuals and documentation that come with your components or seek assistance from a knowledgeable professional. With careful attention to detail and a little patience, you can confidently install a motherboard and create a custom PC tailored to your needs.