Introduction
Are you tired of dealing with tangled cords and limited mobility while using your keyboard? Look no further! The Logitech Wireless Keyboard K350 offers a seamless and convenient typing experience without the hassle of wires. Whether you are working, gaming, or simply browsing the web, this ergonomic keyboard provides comfort and versatility. In this guide, we will walk you through the step-by-step process of installing the Logitech Wireless Keyboard K350, from unboxing to customizing keyboard settings.
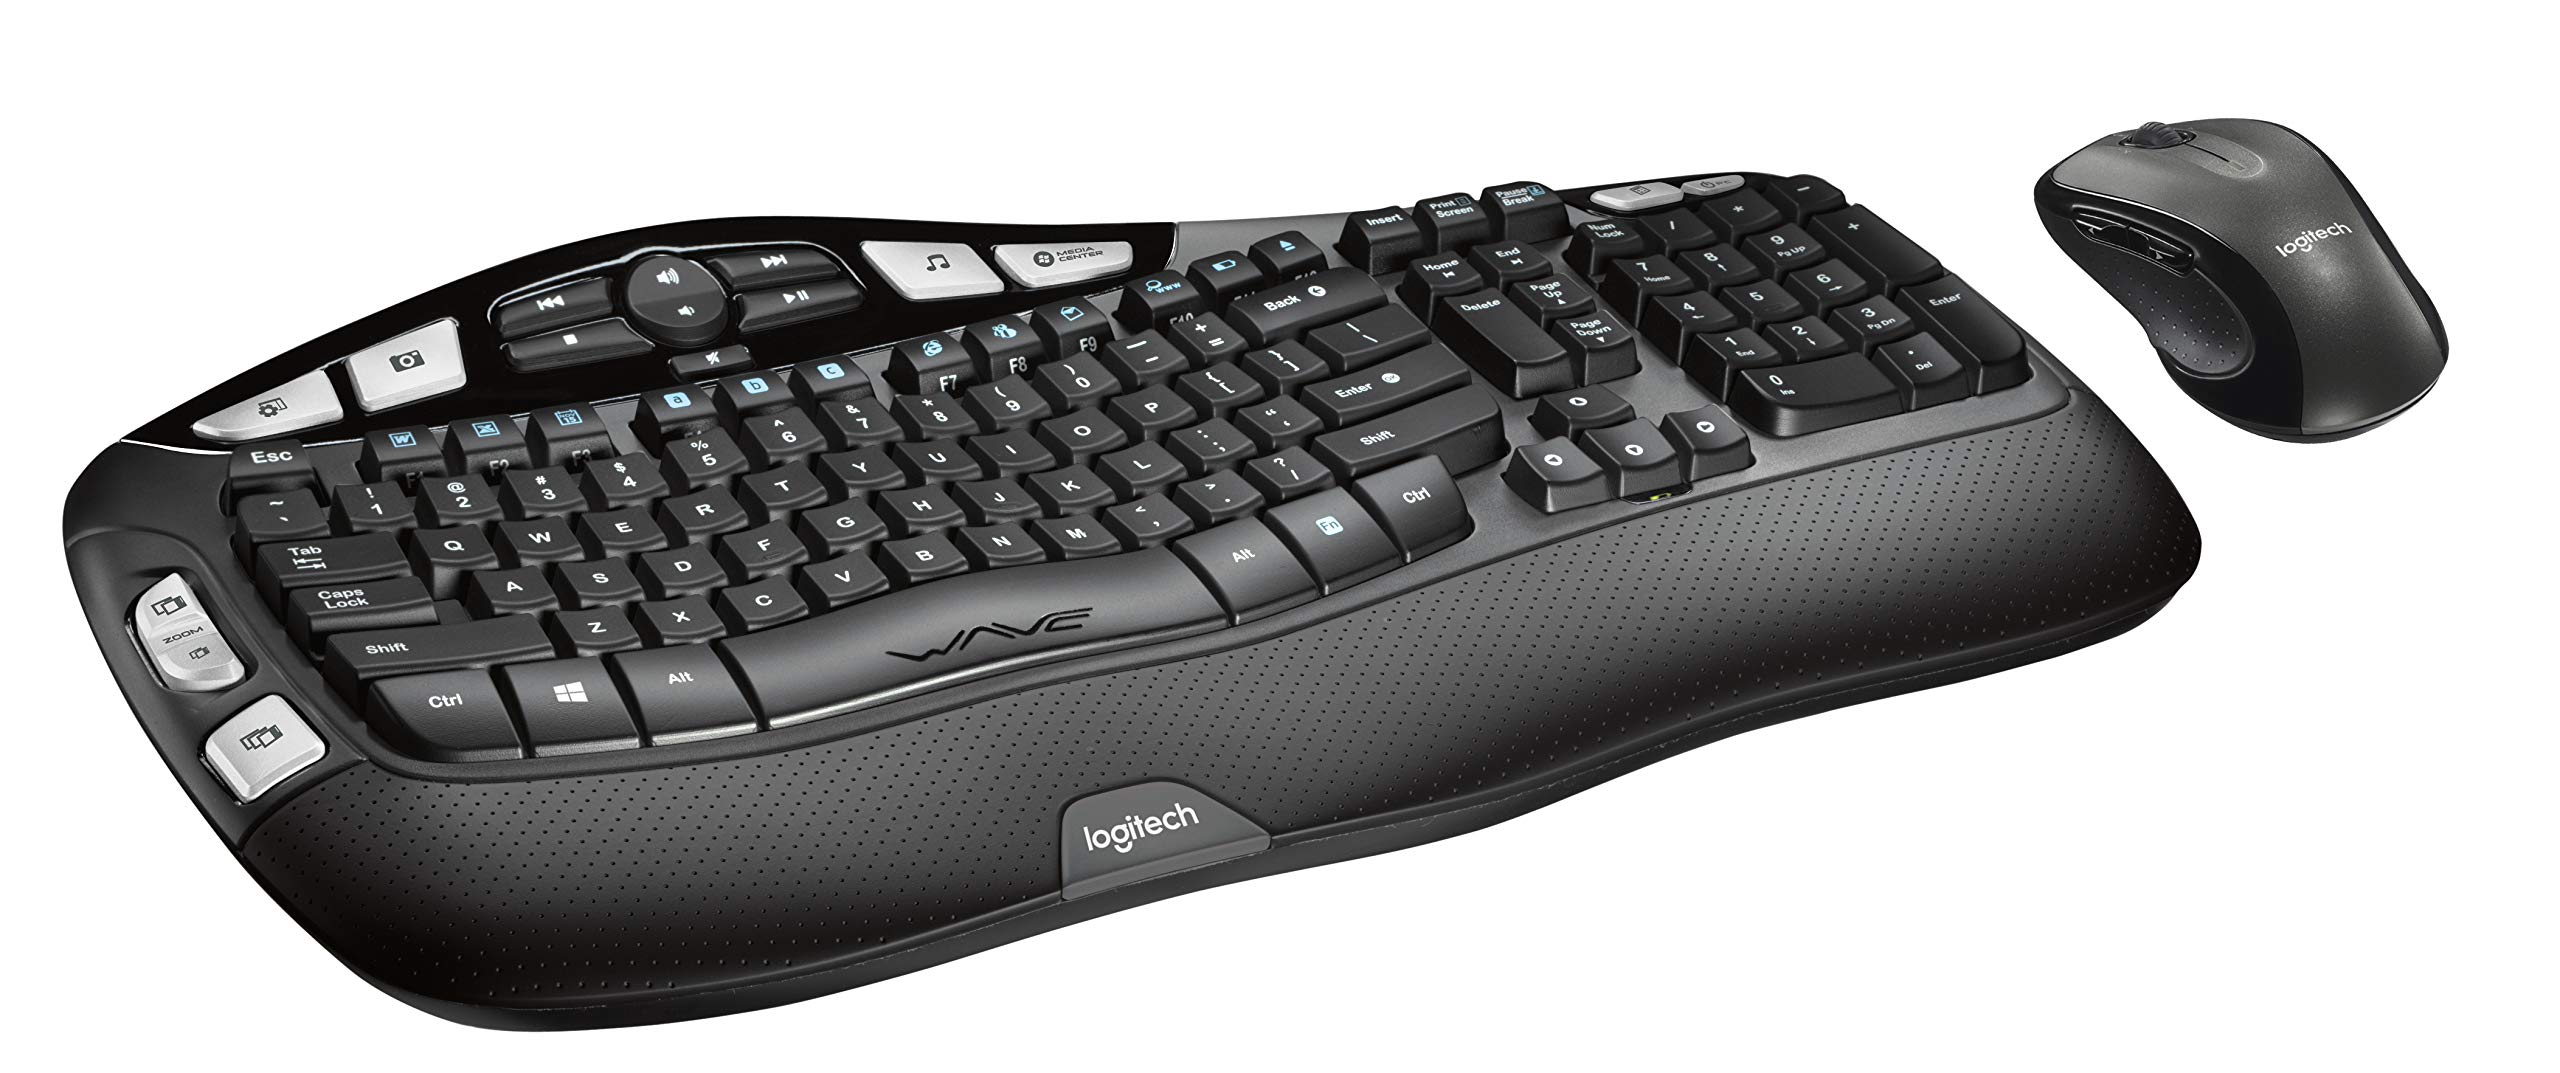
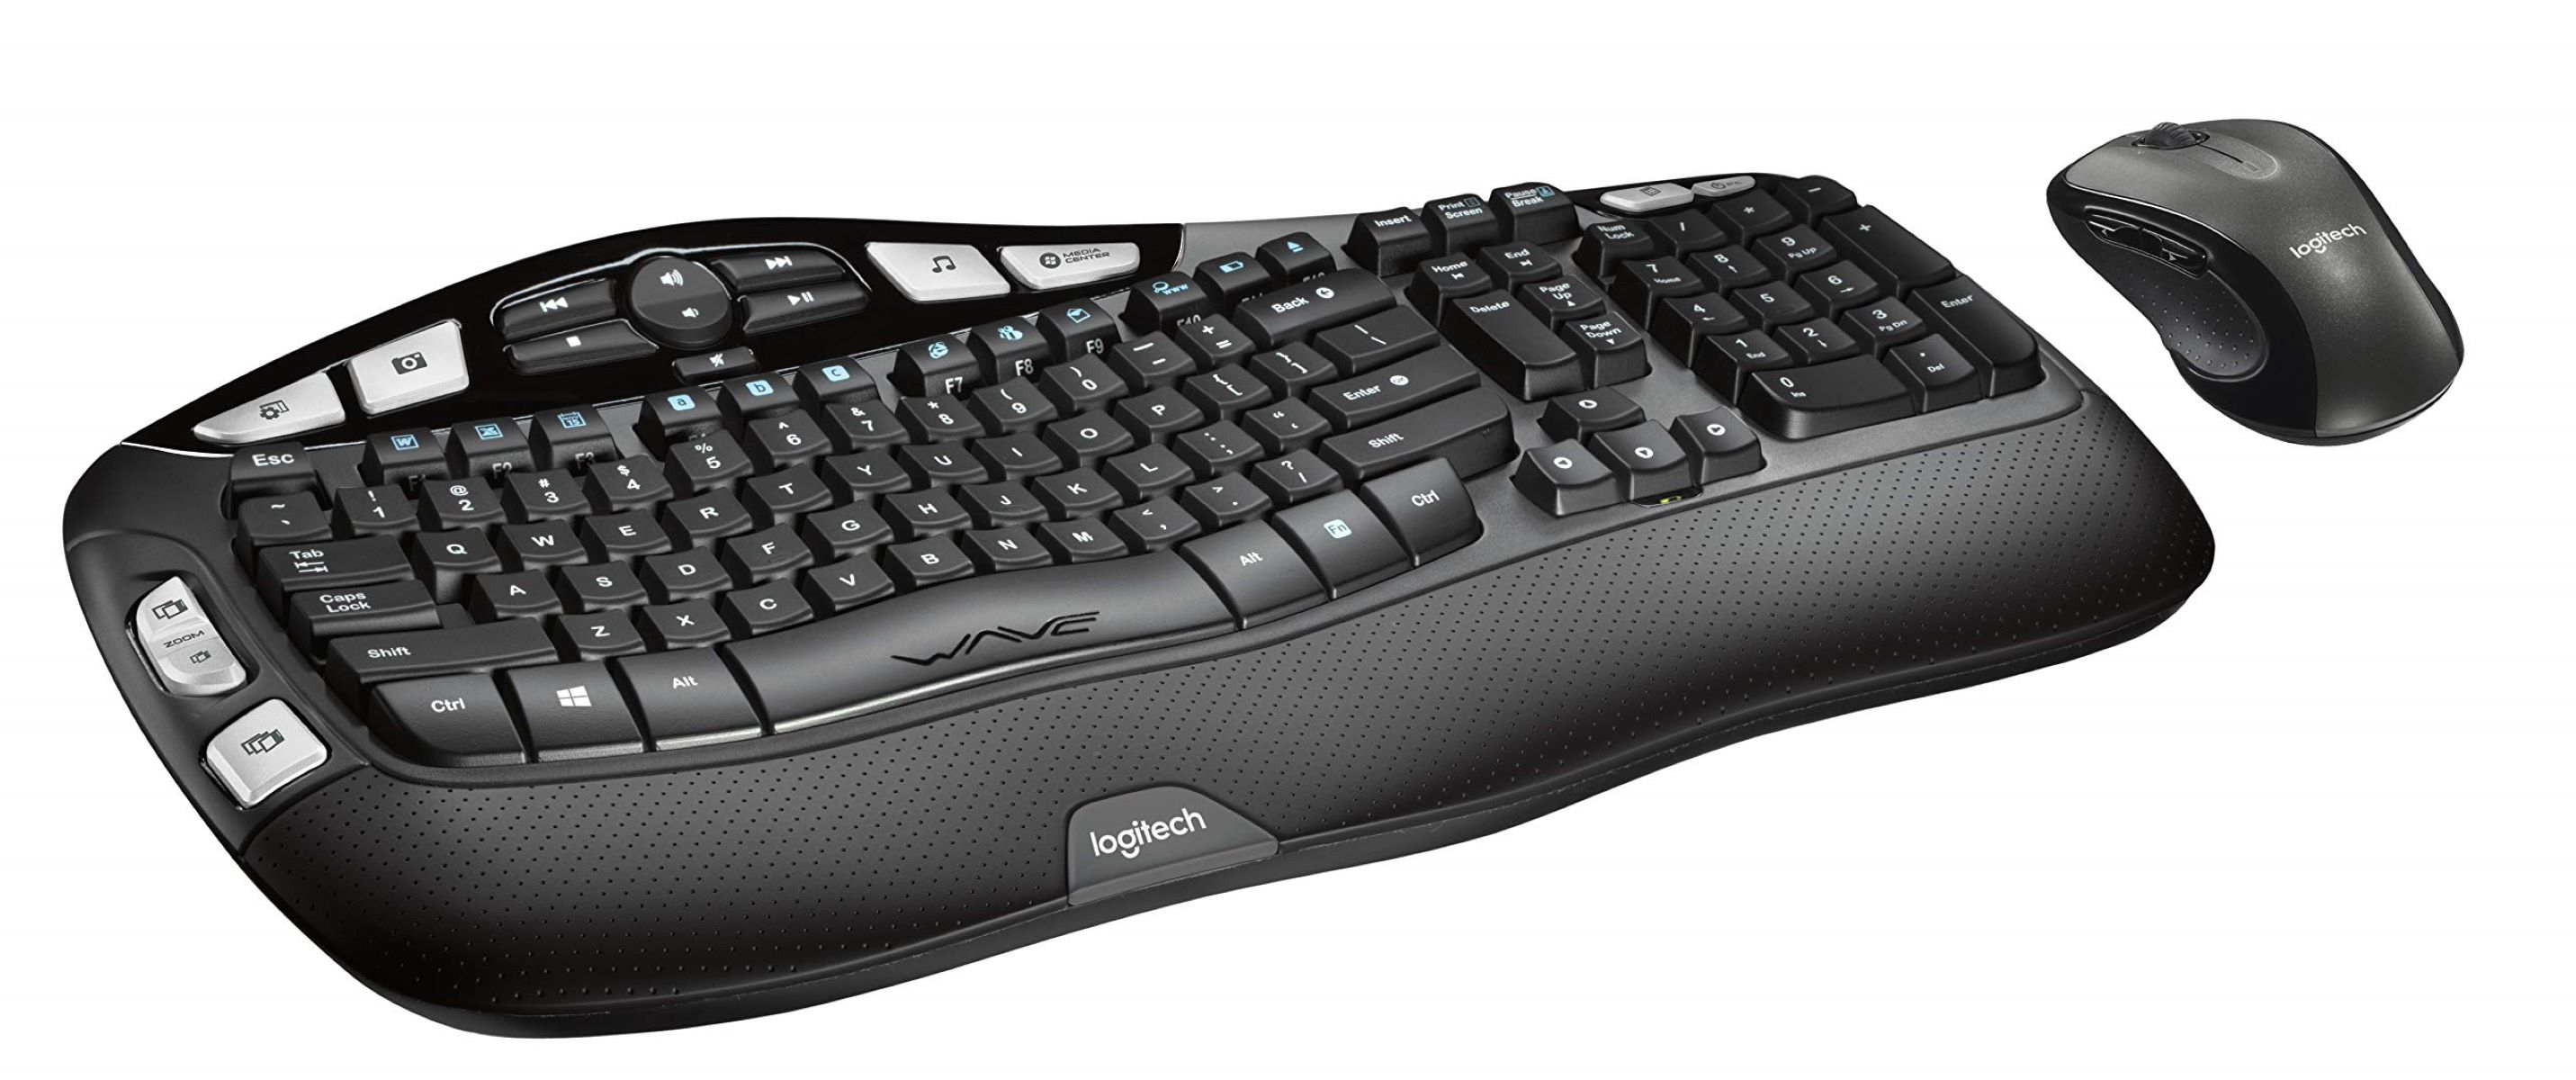
The Logitech Wireless Keyboard K350 is designed with comfort in mind. Its contoured wave design and cushioned palm rest provide a natural and relaxed typing position, reducing the strain on your wrists and hands. The keyboard features a full-size layout with dedicated media keys and programmable F-keys, allowing you to easily control your music, videos, and other multimedia content.
With its reliable wireless connection, the Logitech Wireless Keyboard K350 offers freedom and flexibility. The included USB receiver allows you to connect the keyboard to your computer without the need for any additional software or drivers. Plus, with a wireless range of up to 30 feet, you can type and navigate from a distance, giving you the freedom to move around your workspace or entertainment area.
So, if you’re ready to upgrade your typing experience and enjoy the freedom of wireless connectivity, let’s get started with the installation process. Follow along as we guide you through each step, ensuring that you can unleash the full potential of your Logitech Wireless Keyboard K350.
Step 1: Unboxing and Checking the Package Contents
Before you start using your Logitech Wireless Keyboard K350, the first step is to unbox the package and make sure that you have all the necessary components. Here’s what you need to do:
- Locate the package: Find the box containing the Logitech Wireless Keyboard K350. It should be labeled with the Logitech logo and the model name.
- Open the box: Gently open the box and remove the contents. Be careful not to damage any of the items inside.
- Check the package contents: Take a moment to inspect the contents of the package. You should find the following items:
- The Logitech Wireless Keyboard K350: This is the main component of the package. It should have a sleek and ergonomic design.
- USB Receiver: This small device is used to connect the wireless keyboard to your computer. It is usually stored in a compartment on the back of the keyboard.
- Batteries: The Logitech Wireless Keyboard K350 is powered by two AA batteries. Make sure that they are included in the package.
- User Manual: This booklet contains important information about the keyboard, including setup instructions and troubleshooting tips. It is recommended to read it thoroughly before proceeding.
- Optional Items: Depending on the package, you may also find additional accessories like a USB extension cable or a driver installation CD. These items are not always included.
- Inspect for any damage: Carefully examine all the components for any signs of damage or defects. If you notice any issues, contact Logitech customer support for assistance.
Once you have confirmed that all the necessary items are included and in good condition, you can proceed to the next step of the installation process. Keep in mind that it’s important to handle the keyboard and its components with care to avoid any accidental damage.
Now that you have successfully unboxed the Logitech Wireless Keyboard K350, it’s time to move on to the next step: inserting the batteries. This will ensure that your keyboard has the power it needs to function properly.
Step 2: Inserting the Batteries
Before you can start using your Logitech Wireless Keyboard K350, you need to insert the batteries to power it up. Follow these simple steps to get your keyboard ready:
- Locate the battery compartment: Turn your Logitech Wireless Keyboard K350 over and look for the battery compartment. It is usually located at the top or bottom of the keyboard.
- Open the battery compartment: Slide the battery compartment cover in the direction indicated by the arrows to open it. Some models may have a latch or button that needs to be pressed to unlock the compartment.
- Insert the batteries: Place two AA batteries into the battery compartment, ensuring correct polarity (+/-). The correct orientation is usually indicated inside the compartment. Make sure the batteries are securely in place.
- Close the battery compartment: Once the batteries are inserted, close the compartment cover securely. You should hear a click or feel it snap into place.
It’s important to use high-quality batteries to ensure optimal performance and battery life. Disposable alkaline batteries are recommended for this keyboard model, but you can also use rechargeable batteries if desired.
Now that you have inserted the batteries, your Logitech Wireless Keyboard K350 is ready to be connected to your computer. The next step is to connect the USB receiver, which will establish the wireless connection between the keyboard and your computer. Follow along as we guide you through the next step of the installation process.
Step 3: Connecting the USB Receiver
Once you have inserted the batteries into your Logitech Wireless Keyboard K350, it’s time to connect the USB receiver to your computer. This receiver allows your keyboard to communicate wirelessly with your computer. Follow these simple steps to establish the connection:
- Find the USB receiver: Locate the USB receiver that came with your Logitech Wireless Keyboard K350. It is a small device that resembles a USB flash drive. You may find it stored in a compartment on the back of the keyboard.
- Insert the USB receiver: Plug the USB receiver into an available USB port on your computer. If needed, you can use a USB extension cable to ensure that the receiver is within range of your keyboard.
- Wait for the driver installation: Your computer may take a few moments to recognize the USB receiver and install the necessary drivers. During this time, avoid touching the keyboard or the receiver to ensure a smooth installation process.
- Ensure a secure connection: Once the driver installation is complete, the USB receiver should be ready to establish a wireless connection with your keyboard. Make sure that the USB receiver is securely plugged in and positioned within range of the keyboard.
By connecting the USB receiver, you have successfully established the wireless connection between your Logitech Wireless Keyboard K350 and your computer. This allows you to enjoy the freedom of typing without being limited by cords or cables.
Next, we will guide you through the process of pairing your keyboard with the USB receiver. This step is crucial to ensure that your keyboard and receiver are synced and working together seamlessly.
Step 4: Pairing the Keyboard with the Receiver
After connecting the USB receiver to your computer, the next step is to pair your Logitech Wireless Keyboard K350 with the receiver. This process allows the keyboard and receiver to communicate securely and ensures a reliable wireless connection. Follow these steps to pair your keyboard:
- Turn on the keyboard: Look for the power switch on your Logitech Wireless Keyboard K350. It is usually located on the side or top of the keyboard. Slide the power switch to the “On” position.
- Press the connect button on the receiver: Locate the connect button on the USB receiver. It is typically a small button, often found on the top or side. Press and hold the connect button until the LED indicator starts blinking.
- Press the connect button on the keyboard: On the bottom of your Logitech Wireless Keyboard K350, you will find a connect button. Press and hold this button for a few seconds until the keyboard’s LED indicator starts blinking.
- Wait for the pairing process: The keyboard and receiver will now attempt to establish a secure connection. Wait for a few seconds while they pair with each other. Once the LED indicator on both devices stops blinking and remains steady, it indicates a successful pairing.
It is important to note that in some cases, your keyboard and receiver may pair automatically without the need to press any buttons. However, if the automatic pairing process does not occur, follow the steps outlined above to manually pair them.
Congratulations! You have successfully paired your Logitech Wireless Keyboard K350 with the USB receiver. Now you can enjoy the freedom and convenience of using your wireless keyboard.
In the next step, we will guide you through the process of installing the Logitech SetPoint software, which allows you to customize the settings of your keyboard and enhance your typing experience.
Step 5: Installing Logitech SetPoint Software
To unlock the full potential of your Logitech Wireless Keyboard K350 and customize its settings, it is recommended to install the Logitech SetPoint software. This software allows you to personalize your keyboard, assign custom functions to the programmable keys, and make adjustments to the keyboard’s settings. Follow these steps to install the Logitech SetPoint software:
- Visit the Logitech website: Open your web browser and go to the Logitech official website. Navigate to the support section and find the downloads or software page.
- Select your keyboard model: Look for the Logitech Wireless Keyboard K350 in the list of supported keyboard models. Click on it to proceed.
- Choose your operating system: Select the operating system that you are using on your computer, such as Windows or macOS. This will ensure that you download the correct version of the software.
- Download and run the installer: Locate the download link for the Logitech SetPoint software and click on it to start the download. Once the download is complete, run the installer file to begin the installation process.
- Follow the on-screen instructions: The installer will guide you through the installation process. Follow the prompts on the screen, accepting the terms and conditions, and choosing the desired installation options.
- Complete the installation: Once the installation is complete, restart your computer to ensure that the software is fully integrated.
After the Logitech SetPoint software is installed, you will have access to a wide range of customization options for your Logitech Wireless Keyboard K350. You can personalize the keyboard’s function keys, adjust the keyboard’s responsiveness and scrolling speed, and even create custom profiles for different applications or games.
Having the Logitech SetPoint software installed on your computer allows you to optimize your typing experience and tailor your keyboard to suit your individual preferences.
In the next step, we will guide you through the process of customizing the settings of your Logitech Wireless Keyboard K350 using the Logitech SetPoint software.
Step 6: Customizing Keyboard Settings
Now that you have installed the Logitech SetPoint software, you have the ability to customize the settings of your Logitech Wireless Keyboard K350 to suit your preferences. Whether you want to remap keys, adjust scrolling speed, or assign custom functions to the programmable keys, the SetPoint software offers a range of customization options. Follow the steps below to personalize your keyboard:
- Launch the Logitech SetPoint software: Open the Logitech SetPoint software on your computer. You can usually find it in your Start menu or system tray.
- Select your keyboard: In the SetPoint software, locate and select your Logitech Wireless Keyboard K350 from the list of supported devices.
- Explore the customization options: Once your keyboard is selected, you will be presented with a variety of customization options. These may include:
- Key assignments: Remap keys on your keyboard and assign custom functions to suit your needs.
- Scrolling and navigation: Adjust the scrolling speed and direction, as well as tweak other navigation settings.
- Device settings: Modify settings related to your keyboard’s response time, battery level indicator, and backlighting (if available).
- Make desired changes: Click on the specific customization option you wish to modify and make the desired changes according to your preferences. The SetPoint software usually provides clear instructions or intuitive interfaces to guide you through the customization process.
- Apply the changes: Once you have customized the keyboard settings to your liking, save the changes and apply them. The SetPoint software will update your keyboard with the new settings.
By customizing the settings of your Logitech Wireless Keyboard K350, you can enhance your typing experience, streamline your workflow, and make the keyboard work exactly the way you want it to. Take some time to explore the various customization options and experiment with different settings to find what suits you best.
Now that you have successfully customized the settings of your Logitech Wireless Keyboard K350, you’re ready to start enjoying the personalized typing experience. In case you encounter any issues or have questions about the customization process, refer back to the SetPoint software’s user manual or seek assistance from Logitech customer support.
In the next and final step, we will discuss some common troubleshooting tips and address any potential issues you may encounter with your Logitech Wireless Keyboard K350.
Step 7: Troubleshooting and Common Issues
While the Logitech Wireless Keyboard K350 is designed to provide a seamless and trouble-free typing experience, you may occasionally encounter some issues or face common problems. In this step, we will discuss a few troubleshooting tips and address some common issues you may encounter:
- Check battery levels: If your keyboard is not functioning properly or experiencing connectivity issues, check the battery level. Replace the batteries if necessary.
- Ensure a strong connection: Make sure that the USB receiver is securely plugged into an available USB port on your computer and that it is within range of the keyboard.
- Re-pair the keyboard: If the keyboard is not responding, try re-pairing it with the USB receiver. Follow the pairing instructions in Step 4 to establish a new connection.
- Restart your computer: Sometimes, a simple computer restart can resolve minor issues. Try restarting your computer and see if the keyboard functions properly afterward.
- Update SetPoint software: Ensure that you have the latest version of the Logitech SetPoint software installed on your computer. Check for updates and install them if available.
- Reset keyboard settings: If you’re experiencing persistent issues, you can try resetting the keyboard settings to their default values. Refer to the SetPoint software’s user manual for instructions on how to reset your keyboard.
- Contact Logitech support: If you have tried the above troubleshooting steps and are still experiencing issues with your Logitech Wireless Keyboard K350, reach out to Logitech customer support for further assistance. They can provide personalized guidance and help resolve any persistent problems.
Remember, troubleshooting steps can vary depending on the specific issue you are facing. It’s important to consult the Logitech SetPoint software’s user manual or refer to Logitech’s online support resources for more detailed instructions on troubleshooting specific issues.
By following these troubleshooting steps and seeking assistance when needed, you can overcome common issues and ensure a smooth and enjoyable experience with your Logitech Wireless Keyboard K350.
Congratulations! You have completed all the necessary steps to install, customize, and troubleshoot your Logitech Wireless Keyboard K350. Now you can fully enjoy the benefits of a wireless and ergonomic typing experience. Happy typing!
Conclusion
Congratulations on successfully installing and setting up your Logitech Wireless Keyboard K350! You have embarked on a journey towards a more comfortable and convenient typing experience. By following the step-by-step process outlined in this guide, you have unboxed the keyboard, inserted the batteries, connected the USB receiver, paired the keyboard, installed the Logitech SetPoint software, customized the keyboard settings, and learned some troubleshooting tips.
With its ergonomic design, wireless connectivity, and customizable features, the Logitech Wireless Keyboard K350 offers a seamless and enjoyable typing experience. Say goodbye to tangled cables and hello to freedom of movement as you type.
Remember, if you encounter any issues or have questions along the way, refer back to the user manual, reach out to Logitech customer support, or explore the online resources available. Logitech is dedicated to providing excellent support to its customers.
We hope that this guide has been helpful in assisting you with the installation and setup of your Logitech Wireless Keyboard K350. Now that you are familiar with your new keyboard, take some time to explore its features and make it truly your own by customizing the settings to suit your needs.
Thank you for choosing Logitech and enjoy your enhanced typing experience with the Logitech Wireless Keyboard K350!