Introduction
Are you looking to enhance your streaming experience by adding custom graphics, overlays, or interactive elements to your live broadcasts? The CLR Browser Source Plugin for OBS (Open Broadcaster Software) is the solution you need. Whether you’re a professional streamer, a content creator, or a gamer who wants to spruce up their streams, this plugin allows you to seamlessly incorporate web-based content into your OBS scenes.
But what exactly is the CLR Browser Source Plugin, and how can you install and use it effectively? In this article, we will guide you through the steps to install and configure the CLR Browser Source Plugin in OBS. Before diving into the installation process, let’s take a moment to understand what this plugin is all about.
The CLR Browser Source Plugin is a powerful tool that allows you to bring dynamic web-based content directly into your OBS scenes. With this plugin, you can effortlessly integrate chat overlays, alerts, donation trackers, social media feeds, and more. It leverages HTML, CSS, and JavaScript to display the web content, making it highly customizable and compatible with a wide range of web elements and services.
By utilizing the CLR Browser Source Plugin, you can elevate your streaming visuals and deliver an engaging viewing experience for your audience. Whether you want to add your branding elements, display real-time information, or create interactive elements, this plugin gives you the flexibility to do so.
In the following sections, we will walk you through the step-by-step process of downloading, installing, and configuring the CLR Browser Source Plugin in OBS. By the end of this guide, you will be ready to unleash the full potential of this plugin, taking your live streams to the next level.
What is CLR Browser Source Plugin?
The CLR Browser Source Plugin is a powerful and versatile tool that allows streamers and content creators to integrate web-based content into their OBS scenes. It is a plugin specifically designed for OBS, which is an open-source software used for live streaming and video recording. With the CLR Browser Source Plugin, you can easily incorporate dynamic and interactive elements such as chat overlays, alerts, social media feeds, and more.
This plugin works by leveraging HTML, CSS, and JavaScript to display web-based content within your OBS scenes. It acts as a “browser source,” meaning it can load and render web content directly into your streaming software. This allows you to seamlessly blend web elements with your live stream, making your broadcasts more visually appealing and engaging.
One of the greatest advantages of the CLR Browser Source Plugin is its flexibility and compatibility with various web elements and services. Whether you want to display your Twitch chat, showcase the latest donations on your stream, or integrate a live Twitter feed, this plugin can handle it all. It allows you to customize the appearance and behavior of these elements through HTML and CSS, giving you full control over the visual aspects.
Moreover, the CLR Browser Source Plugin supports features like transparency, allowing you to create stunning overlays that seamlessly blend with your gameplay or video footage. This makes it easy to add your branding elements, logos, or other graphical assets to your streams, enhancing your personal brand and creating a cohesive visual identity.
Another key benefit of using the CLR Browser Source Plugin is its ability to interact with web services and APIs. You can utilize JavaScript to create event-based triggers, such as displaying an alert when a new donation is received or changing the content based on specific conditions. This allows for dynamic and interactive elements that keep your viewers engaged and entertained.
Overall, the CLR Browser Source Plugin is a must-have tool for streamers and content creators who want to elevate their live broadcasts. It opens up a world of possibilities for adding personalized and professional-looking web-based content to your streams. In the next section, we will guide you through the process of downloading the CLR Browser Source Plugin.
Step 1: Download CLR Browser Source Plugin
Before you can start using the CLR Browser Source Plugin in OBS, you need to download and install it on your system. Follow these steps to get the plugin up and running:
- Visit the OBS Project website (https://obsproject.com/) and navigate to the “Plugins” section.
- Search for “CLR Browser Source Plugin” in the search bar or browse through the available plugins until you find it.
- Click on the plugin’s name to access its page, where you will find more information and download links.
- Choose the correct version of the plugin that matches your system’s architecture (32-bit or 64-bit). OBS will typically detect your system’s architecture during the installation process.
- Once you have selected the appropriate version, click on the download link to start the download.
- Depending on your browser settings, you may be prompted to choose a location to save the downloaded file. Select a directory that is easily accessible, such as your desktop or downloads folder.
- Wait for the download to complete. The file will usually have a .zip extension.
- Locate the downloaded ZIP file and extract its contents using an extraction tool like WinRAR or 7-Zip.
Congratulations! You have successfully downloaded the CLR Browser Source Plugin. In the next section, we will guide you through the installation process, so you can start using the plugin in OBS.
Step 2: Install CLR Browser Source Plugin
Now that you have downloaded the CLR Browser Source Plugin, it’s time to install it in OBS. Follow these steps to complete the installation process:
- Open OBS on your system. If you haven’t installed OBS yet, you can download it from the official OBS Project website (https://obsproject.com/).
- In the OBS main window, click on the “Tools” menu at the top and select “Plugins.”
- A new window will open, displaying all the installed OBS plugins. To install the CLR Browser Source Plugin, click on the “Browser Plugin” tab.
- Click on the “Add Plugin” button located at the bottom left corner of the window.
- In the file browser window that appears, navigate to the directory where you extracted the CLR Browser Source Plugin files.
- Select the plugin file with the .dll extension (e.g., clr-browser.dll) and click “Open.”
- Once you’ve selected the plugin file, OBS will install the CLR Browser Source Plugin. You may see a progress bar indicating the installation process.
- After the installation is complete, close the plugins window and restart OBS if necessary.
That’s it! You have successfully installed the CLR Browser Source Plugin in OBS. Now, you can move on to the next step, where we will guide you through the process of configuring the plugin in OBS.
Step 3: Configure CLR Browser Source Plugin in OBS
After installing the CLR Browser Source Plugin in OBS, it’s time to configure the plugin to start incorporating web-based content into your scenes. Follow these steps to configure the CLR Browser Source Plugin:
- Open OBS on your system and navigate to your desired scene where you want to add the web-based content.
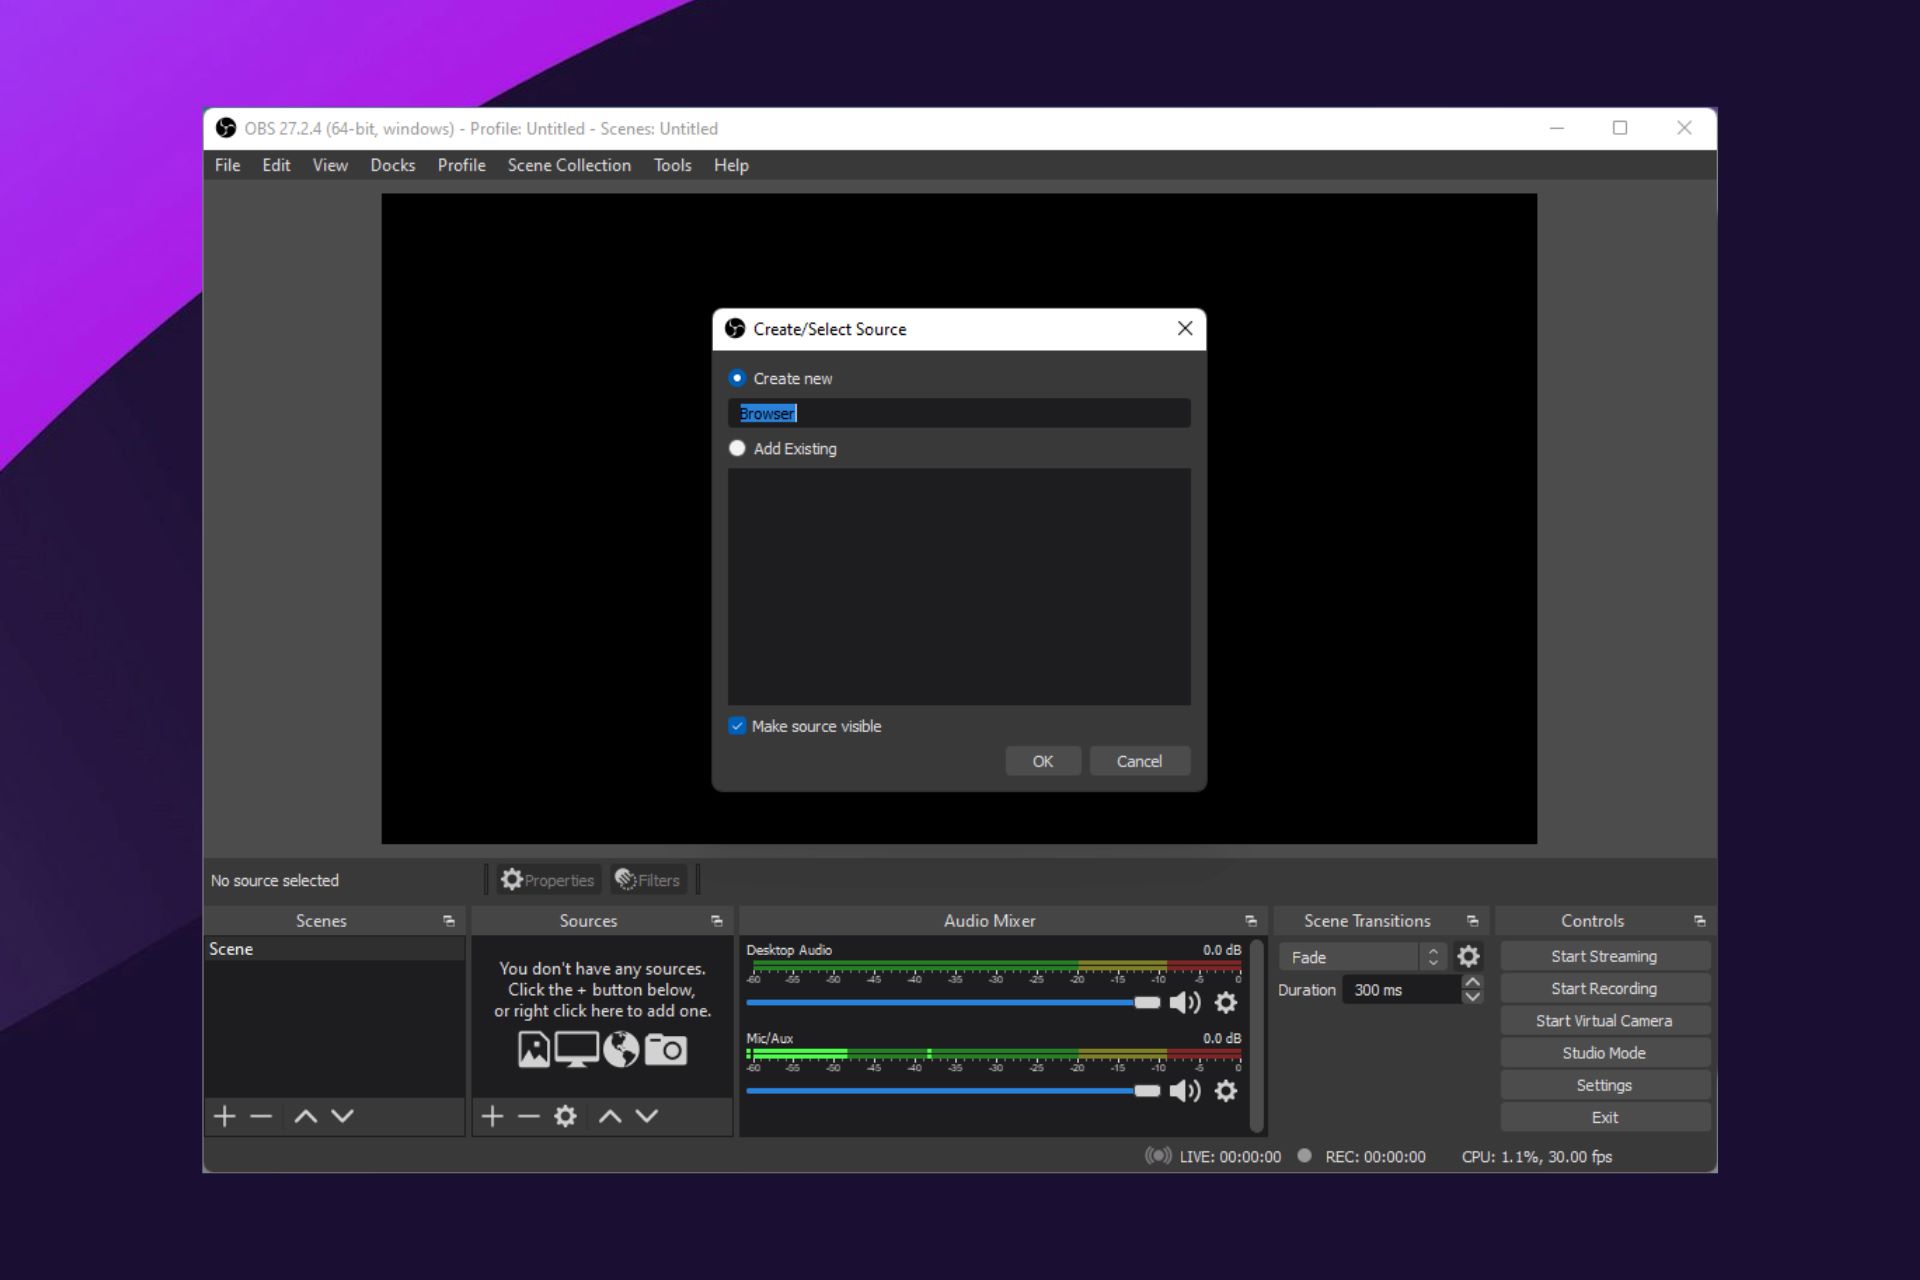
- In the Sources panel on the bottom left of the OBS window, click on the “+” button and select “CLR Browser” from the dropdown menu.
- In the “Create/Select Source” window, enter a name for your CLR Browser Source (e.g., “Web Overlay”) and click “OK.”
- A configuration window for the CLR Browser Source will appear. In the URL field, enter the web address (URL) of the content you want to display. This could be a chat overlay, a donation tracker, or any other web-based element.
- Configure the width and height of the CLR Browser Source to match your desired dimensions. You can also adjust settings like FPS, cache size, and enable or disable hardware acceleration based on your needs.
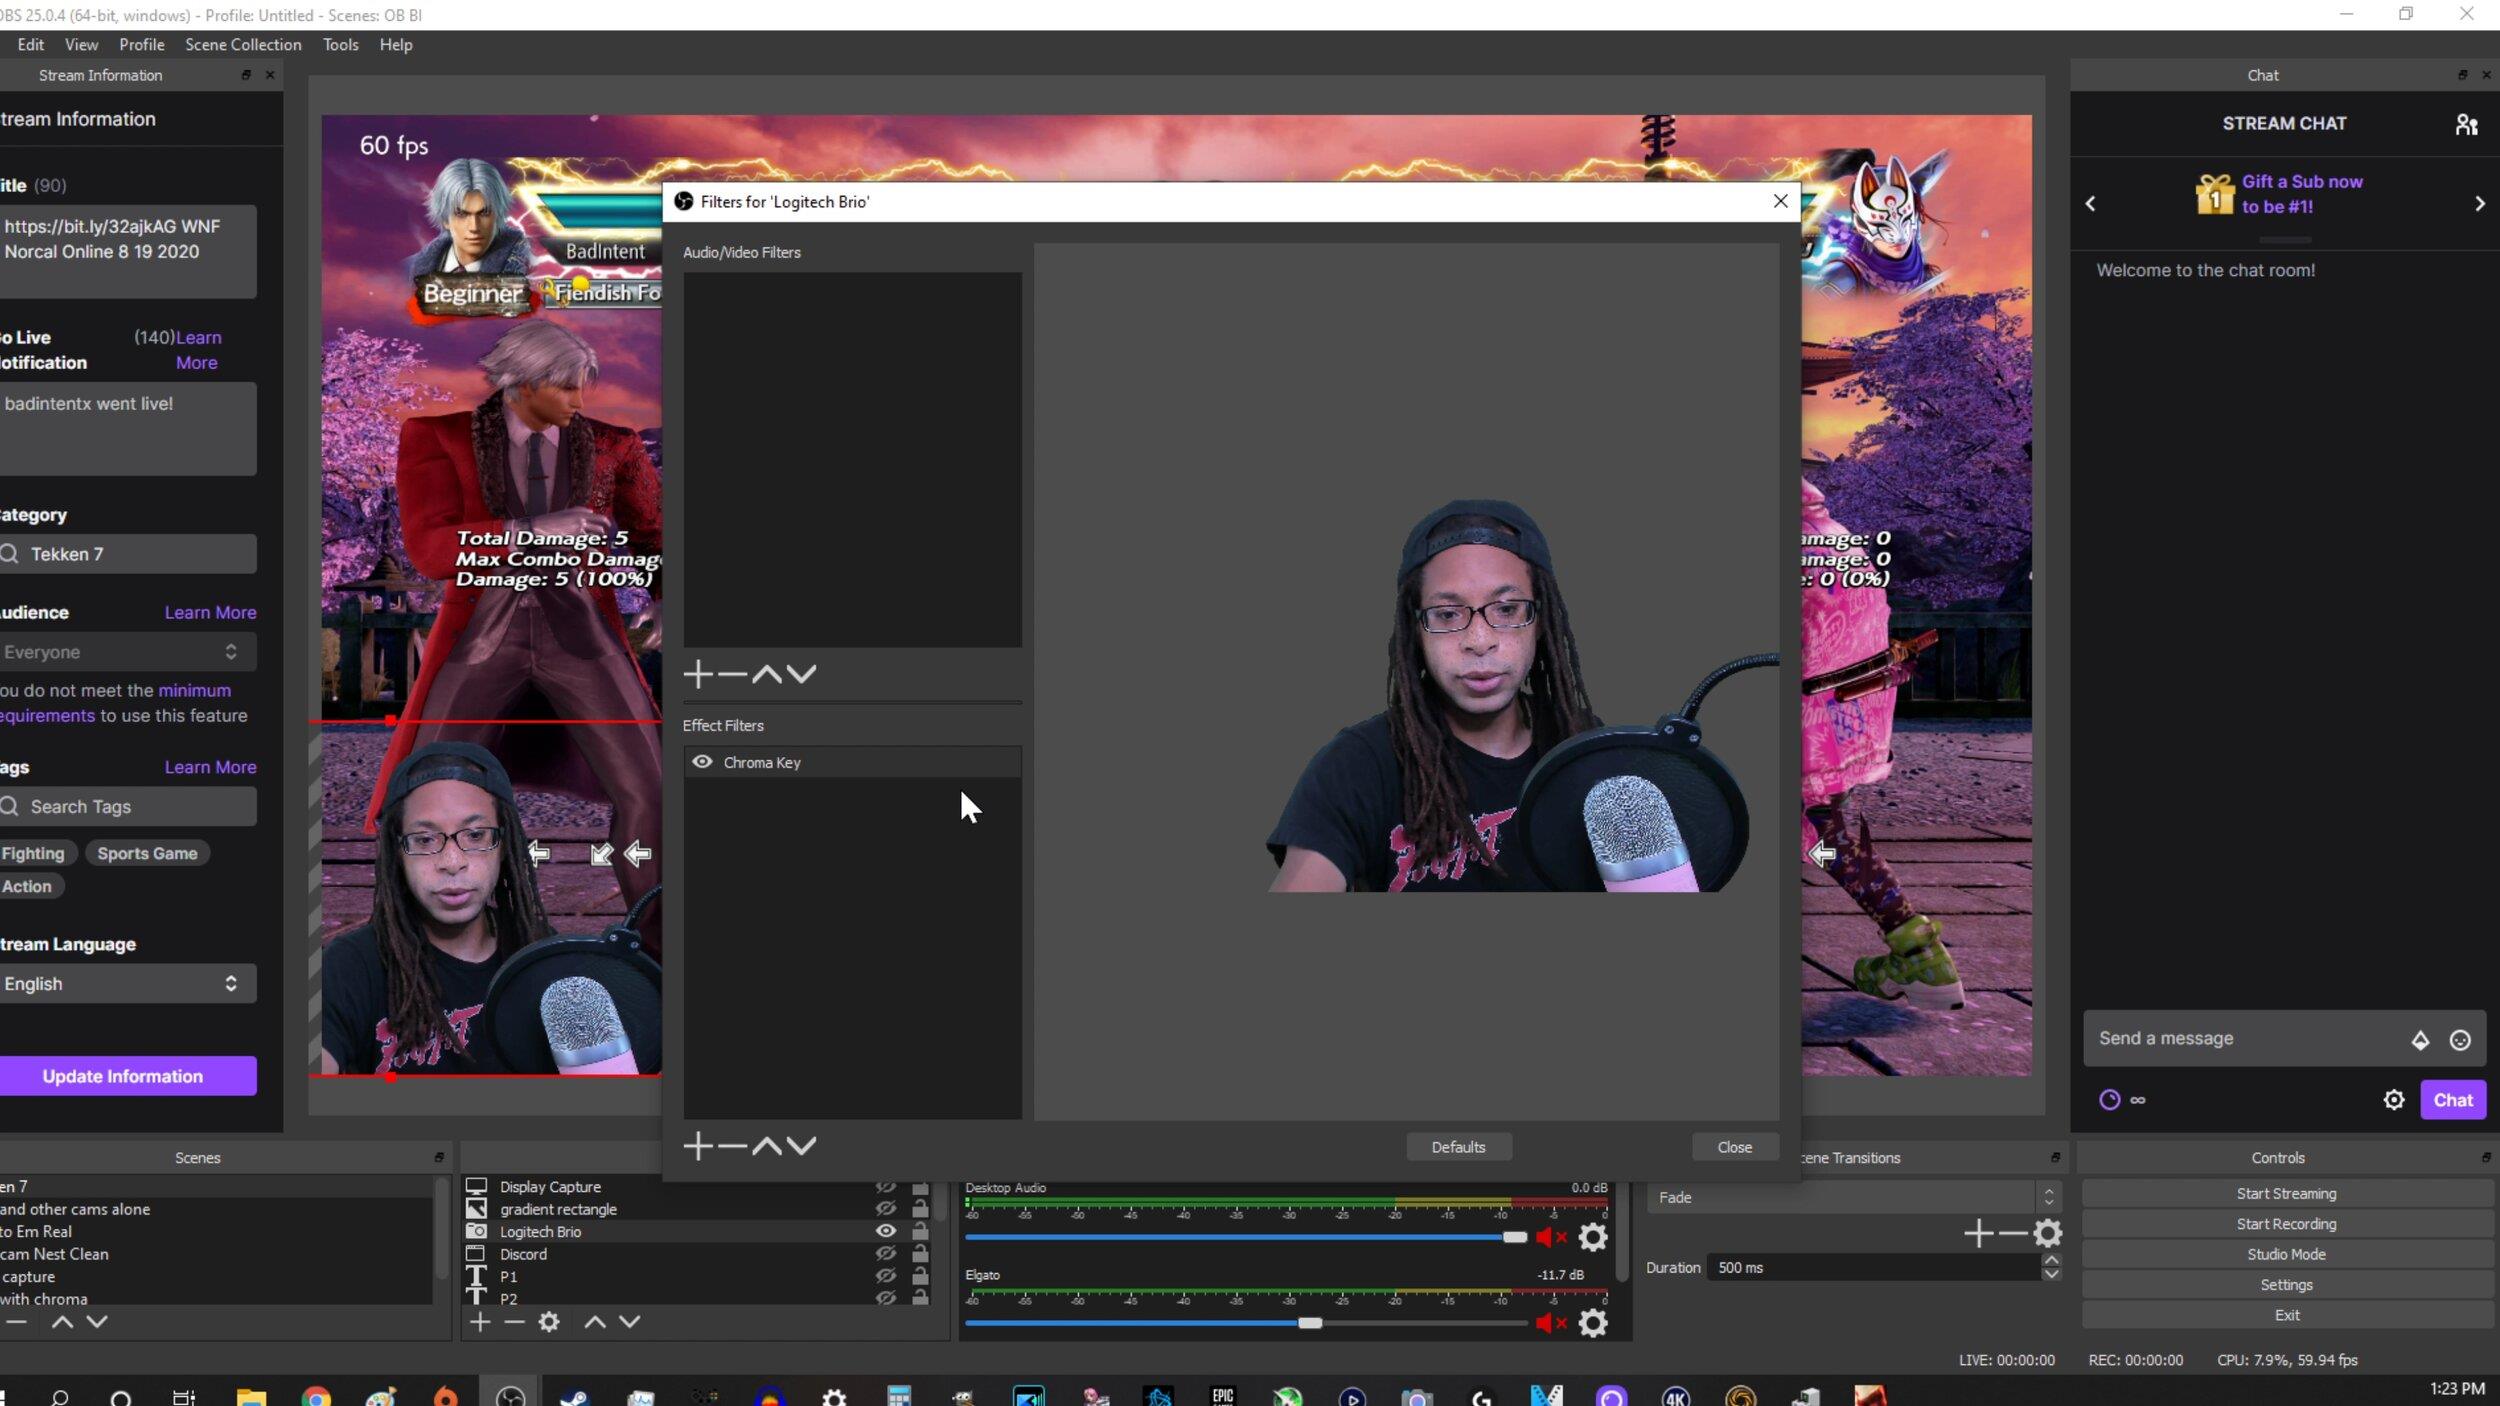
- If you need transparency in your overlay, make sure to check the “Enable Chroma Key” option in the configuration window. This will allow you to specify a specific color to be transparent.
- Once you’ve configured the CLR Browser Source settings, click “OK” to save your changes and close the configuration window.
That’s it! You have successfully configured the CLR Browser Source Plugin in OBS. You can now see your web-based content displayed in your scene. Feel free to customize and position the CLR Browser Source to fit seamlessly into your stream layout.
Note that you can add multiple CLR Browser Source instances to display different web content in different scenes. Simply repeat the steps outlined above to add and configure additional CLR Browser Sources.
In the next step, we will guide you through how to use the CLR Browser Source Plugin effectively in OBS, so you can make the most out of this powerful tool.
Step 4: Using CLR Browser Source Plugin in OBS
Now that you have successfully configured the CLR Browser Source Plugin in OBS, it’s time to start using it to enhance your live streams. Follow these steps to make the most out of the CLR Browser Source Plugin:
- Ensure that your desired stream scene is selected in OBS.
- In the Sources panel, locate and select the CLR Browser Source you configured in the previous step.
- Drag and position the CLR Browser Source within your scene to the desired location. You can resize the source by clicking and dragging on the edges.
- To test your web-based content, click on the “Preview Stream” button in OBS to see a preview of your stream with the CLR Browser Source.
- Make any necessary adjustments to the positioning, dimensions, or content within the web overlay to ensure it looks perfect in your stream.
- Whenever you go live, the CLR Browser Source will display the web content in real-time, providing interactive elements, chat overlays, donation trackers, or any other web-based content you have integrated.
- Monitor the performance of the CLR Browser Source during your stream. If you notice any issues, such as lag or incorrect rendering, you may need to adjust settings like FPS, cache size, or hardware acceleration.
- Experiment with different web-based content and overlays to keep your stream fresh and engaging for your viewers. Consider adding social media feeds, upcoming stream schedules, or on-screen alerts to enhance the interactivity and visual appeal of your stream.
By effectively using the CLR Browser Source Plugin in OBS, you can take your live streams to the next level, providing a visually engaging and interactive experience for your audience.
Remember to regularly update and maintain your web-based content and overlays to keep your stream fresh and exciting. Stay creative, explore new possibilities, and have fun integrating web-based elements into your streams.
Congratulations! You have successfully learned how to use the CLR Browser Source Plugin in OBS. Now, it’s time to put your knowledge into practice and create captivating streams that will leave a lasting impression on your viewers.
Conclusion
The CLR Browser Source Plugin for OBS is a game-changer for streamers and content creators looking to add an extra layer of visual appeal and interactivity to their live broadcasts. With its ability to seamlessly integrate web-based content, such as chat overlays, social media feeds, and donation trackers, this plugin opens up endless possibilities for enhancing your streams.
In this article, we guided you through the step-by-step process of downloading, installing, and configuring the CLR Browser Source Plugin in OBS. We covered everything from understanding what the plugin is all about to effectively using it to elevate your streaming experience.
By downloading and installing the CLR Browser Source Plugin, you gained the ability to incorporate dynamic and interactive web content into your OBS scenes. The plugin’s compatibility with HTML, CSS, and JavaScript allows for extensive customization and flexibility in displaying web elements.
We walked you through the steps of configuring the CLR Browser Source Plugin, ensuring that you can display your desired web content seamlessly within your scenes. By adjusting settings like width, height, and transparency, you can create overlays that perfectly integrate with your stream layout.
Lastly, we explored how to use the CLR Browser Source Plugin effectively, emphasizing the importance of positioning the source within your scenes and testing your web-based content before going live. We encouraged you to experiment with different overlays and interactive elements to keep your streams engaging and visually appealing.
Now that you have learned how to install and use the CLR Browser Source Plugin in OBS, it’s time to get creative and unleash the full potential of this powerful tool. Whether you’re a seasoned streamer or just starting your streaming journey, integrating web-based content into your streams will undoubtedly captivate your audience and take your stream to the next level.
So, why wait? Download the CLR Browser Source Plugin, follow the steps outlined in this article, and start creating impressive and interactive live streams that will leave a lasting impact on your viewers. Happy streaming!