Introduction
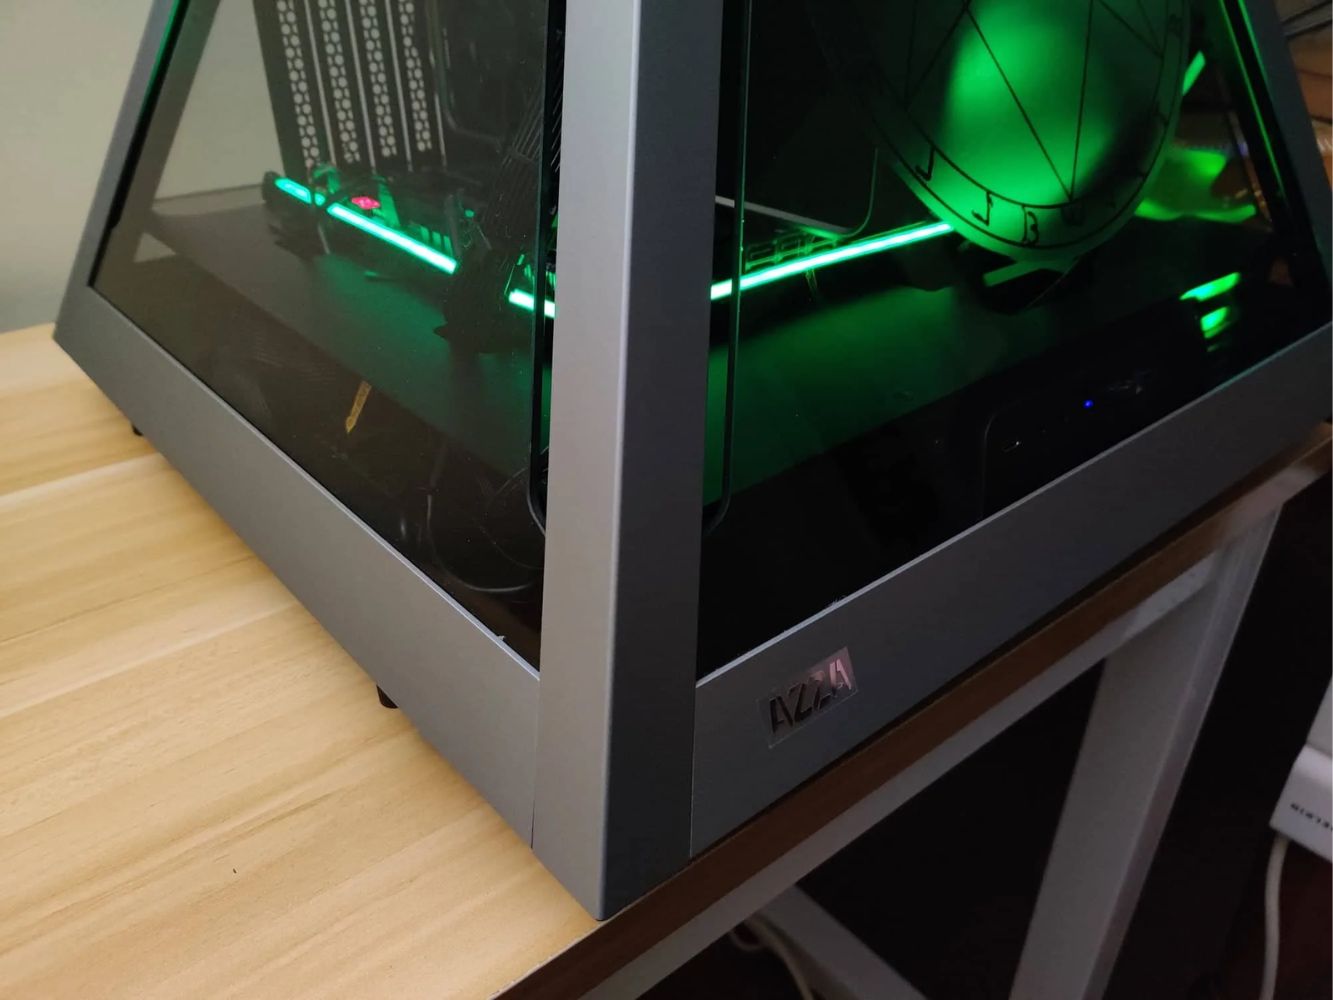
Welcome to our step-by-step guide on how to install a power supply into an Azza PC Case Mid Tower. The power supply is a crucial component of any computer system, as it provides the necessary electrical power to run all the other hardware components. Whether you are building a new PC or upgrading your existing one, properly installing the power supply is essential for the overall functionality and performance of your computer.
In this guide, we will walk you through each step of the installation process, ensuring that you have a clear understanding of how to mount and connect the power supply in an Azza PC Case Mid Tower. We will also provide helpful tips and precautions to make the installation process as smooth as possible.
Before we dive into the installation process, it is important to note that working with computer hardware requires caution and attention to detail. Make sure to follow each step carefully and double-check your work to avoid any potential damage to your components. Additionally, be sure to read the instruction manual that came with your Azza PC Case Mid Tower and the power supply unit for any specific guidelines or recommendations.
Now, let’s gather the necessary tools and materials before we begin the installation process.
Step 1: Gather all necessary tools and materials
Before we start installing the power supply into your Azza PC Case Mid Tower, it’s important to gather all the necessary tools and materials. This will ensure a smooth and successful installation process. Here’s a list of everything you’ll need:
- Azza PC Case Mid Tower – Make sure you have the correct model that is compatible with your power supply.
- Power Supply Unit (PSU) – Choose a power supply that meets the power requirements of your computer system.
- Phillips screwdriver – This will be used to remove and secure screws during the installation process.
- Anti-static wrist strap – This prevents static electricity from damaging your computer components.
- Additional screws – Some power supplies may require extra screws for proper mounting.
- Power supply cables – Most power supplies come with a set of cables for connecting to various components.
Ensure that you have all the tools and materials readily available before proceeding with the installation. This will save you time and prevent any interruptions during the process.
Once you have gathered everything on the list, you are ready to move on to the next step: preparing the PC case.
Step 2: Prepare the PC case
Before we can install the power supply into your Azza PC Case Mid Tower, we need to properly prepare the case for the installation process. Here are the steps to follow:
- Power off your computer – Before working on any hardware components, it’s important to turn off your computer and unplug it from the power source. This will ensure your safety and prevent any damage to the components.
- Remove any existing power supply – If you are replacing an old power supply, disconnect all the cables and remove it from the PC case. Take note of how the cables were connected for reference later.
- Clean the case – Use a soft cloth or compressed air to remove any dust or debris from the PC case. This will prevent any interference with the installation process and ensure optimal airflow for cooling.
- Inspect the mounting area – Take a close look at the mounting area where the power supply will be installed. Ensure that there are no obstructions or loose screws that could interfere with the installation.
By properly preparing the PC case, you will ensure a clean and organized installation process. This will also help in safeguarding your components and maintaining the overall functionality of your computer system.
Once you have prepared the PC case, you are now ready to move on to the next step: removing the side panel.
Step 3: Remove the side panel of the PC case
In order to access the internal components of your Azza PC Case Mid Tower, the side panel needs to be removed. Follow these steps to remove the side panel:
- Locate the screws or latches – Depending on the design of your PC case, the side panel may be secured with screws or latches. Look for them along the edges of the panel.
- Use a screwdriver or release the latches – If there are screws holding the side panel, use a screwdriver to loosen and remove them. If the case has latches, gently press or release them to unlock the panel.
- Slide or swing open the side panel – Once the screws or latches are removed, you can either slide or swing open the side panel, exposing the internal components of the case.
When removing the side panel, be cautious not to force it or use excessive pressure. If it doesn’t come off easily, double-check if there are any additional screws or latches that you may have missed. It’s important to handle the side panel with care to avoid any damage to the case or its components.
With the side panel successfully removed, you are now ready to proceed to the next step: locating the power supply mounting area.
Step 4: Locate the power supply mounting area
Before you can install the power supply into your Azza PC Case Mid Tower, you need to locate the specific area where it will be mounted. Here’s how to find the power supply mounting area:
- Examine the interior of the PC case – Look inside the case and identify the area where the power supply will be installed. Most PC cases have a designated space at the bottom rear of the case for the power supply.
- Check for mounting screw holes – Look for screw holes or mounting brackets near the power supply area. These will be used to secure the power supply in place.
- Take note of cable cutouts – Look for any cable cutouts or routing options near the power supply area. These allow for proper cable management and will make the installation process easier.
Locating the power supply mounting area is crucial as it ensures that you install the power supply in the correct position with proper support. This area is designed to accommodate the power supply and provide the necessary ventilation for cooling.
Once you have located the power supply mounting area, you are ready to move on to the next step: inserting the power supply into the mounting area.
Step 5: Insert the power supply into the mounting area
Now that you have located the power supply mounting area in your Azza PC Case Mid Tower, it’s time to proceed with inserting the power supply. Follow these steps to ensure a proper installation:
- Position the power supply correctly – Carefully align the power supply so that the fan (usually located at the bottom) is facing towards the inside of the case. This will allow for proper airflow and cooling.
- Slide the power supply into the mounting area – Gently slide the power supply into the designated mounting area, making sure it fits securely. Take care not to force it or damage any components inside the case.
- Avoid blocking other components – Ensure that the power supply is not blocking any other components such as the motherboard, graphics card, or storage drives. Proper positioning will prevent any interference with the rest of your system.
During this step, it’s important to handle the power supply with care and avoid any unnecessary movements or jolts. This will prevent any damage to the power supply or other components inside the case.
With the power supply securely inserted into the mounting area, you are now ready to proceed to the next step: securing the power supply with screws.
Step 6: Secure the power supply with screws
Now that you have inserted the power supply into the mounting area of your Azza PC Case Mid Tower, it’s time to secure it in place using screws. Follow these steps to ensure a stable and secure installation:
- Locate the screw holes – Identify the screw holes on the back of the power supply that align with the mounting holes or brackets in the case.
- Align the power supply and holes – Align the power supply with the mounting holes, ensuring that it is placed correctly and snugly in the designated area.
- Insert and tighten the screws – Insert screws into the mounting holes and carefully tighten them using a screwdriver. Start with one screw and then gradually tighten the remaining screws in a diagonal pattern to ensure even pressure.
- Check for stability – Once all the screws are tightened, gently shake the power supply to ensure that it is securely fastened and doesn’t move or wobble excessively.
It’s important not to over-tighten the screws, as this can cause damage to the power supply or the case. Apply enough pressure to ensure a secure fit without putting excessive force.
With the power supply properly secured with screws, you have completed this step. Next, let’s move on to connecting the power supply cables.
Step 7: Connect the power supply cables
Now that the power supply is securely installed in your Azza PC Case Mid Tower, it’s time to connect the necessary cables. Follow these steps to ensure a proper and reliable connection:
- Identify the cable connectors – Take a look at the cables coming from the power supply and identify the different connectors. Each cable will have a specific purpose and should be connected accordingly.
- Connect the motherboard cables – Start by connecting the main power cables to the motherboard. This usually includes a 24-pin connector and an additional 4 or 8-pin connector for CPU power.
- Connect the peripheral cables – Depending on your computer setup, you may need to connect additional cables for components such as hard drives, solid-state drives, graphics cards, and fans. Refer to your component’s documentation for the specific connections.
- Check for loose connections – Ensure that all the cables are securely plugged into their respective connectors. Give them a slight tug to make sure they are firmly seated.
Make sure to carefully route the cables in a neat and organized manner. This will help with airflow, cable management, and overall aesthetics of your PC build.
Take extra care when handling the cables and connectors, as they can be delicate. Avoid applying excessive force or bending the cables at sharp angles to prevent damage.
With the power supply cables properly connected, you have completed this step successfully. Next, let’s move on to reattaching the side panel of the PC case.
Step 8: Reattach the side panel of the PC case
With the power supply installed and all the necessary cables connected, it’s time to reattach the side panel of your Azza PC Case Mid Tower. Follow these steps to ensure a secure and proper reinstallation:
- Align the side panel – Position the side panel so that it aligns with the edges of the PC case. Make sure it is properly aligned and ready for reattachment.
- Slide or swing the panel back into place – Depending on the type of case, gently slide or swing the side panel back into place. Ensure that it fits snugly and aligns with the case’s edges.
- Screw or latch the panel – If your case uses screws, insert them into the corresponding holes and use a screwdriver to tighten them. If latches were used, press or close them to secure the side panel.
- Double-check the panel – Give the side panel a gentle shake to ensure it is firmly attached and doesn’t wobble or move. Ensure that it is properly secured in place.
Ensure that you do not overtighten the screws or apply excessive pressure when attaching the side panel. This can cause damage to the case or strip the screw holes.
Once the side panel is reattached, your PC case will be sealed and ready for use. The side panel helps to provide stability, security, and proper airflow within the case.
With the side panel successfully reattached, we will now move on to the next step: testing the power supply installation.
Step 9: Test the power supply installation
After completing the power supply installation in your Azza PC Case Mid Tower, it’s important to test its functionality before fully powering on your computer. Follow these steps to ensure that the power supply is working as expected:
- Double-check all connections – Take a moment to review all the connections made to the power supply. Make sure each cable is securely plugged in and properly seated.
- Reconnect power to the PC – Plug your computer back into the power source and ensure that the power switch on the wall or surge protector is turned on.
- Power on your computer – Press the power button on your computer to start it up. Pay attention to the fans, lights, and any other indicators to ensure they are functioning.
- Listen for any unusual noises – As the system starts up, listen for any strange noises coming from the power supply. Unusual clicking, buzzing, or grinding sounds could indicate a problem.
- Monitor the system – Keep an eye on your monitor and check if your computer successfully boots up. Ensure that the operating system loads properly without any error messages.
If everything appears to be working smoothly without any issues, it is a good indication that the power supply installation was successful. However, if you encounter any problems or your computer fails to power on, double-check all connections and consult the manual for your power supply and PC case for troubleshooting guidance.
By testing the power supply installation, you can ensure that your computer is receiving the necessary electrical power and that all components are functioning properly.
With the power supply successfully tested, you are ready to move on to the final step: finalizing the installation process.
Step 10: Finalize the installation process
After successfully installing and testing the power supply in your Azza PC Case Mid Tower, it’s time to finalize the installation process. Here are the final steps to ensure a complete and secure setup:
- Check cable management – Take a moment to organize and manage the cables inside your PC case. Proper cable management improves airflow, reduces clutter, and prevents any interference with other components.
- Secure loose cables – Use zip ties, Velcro straps, or cable clips to secure any loose cables. This will prevent them from obstructing airflow or getting tangled up in other parts of the case.
- Perform a final visual check – Inspect the entire installation, ensuring that all components are securely in place. Look for any loose screws, cables, or other potential issues that may need attention.
- Clean up any debris – Use a can of compressed air or a soft brush to remove any dust or debris that may have accumulated during the installation process.
- Close your PC case – Once you are confident that everything is properly installed and secured, close the PC case by reattaching the remaining side panel following the steps outlined earlier.
By finalizing the installation process, you ensure that your power supply is securely installed, all cables are organized, and the overall setup is clean and functional. This will contribute to the performance and longevity of your computer system.
Now that you have completed the installation process for the power supply, you can confidently power on your computer and enjoy its increased efficiency and reliability.
Congratulations on successfully installing a power supply into your Azza PC Case Mid Tower! You are now ready to power up your computer and make the most of its capabilities.
Conclusion
Installing a power supply into your Azza PC Case Mid Tower is a crucial step in setting up or upgrading your computer system. By following the step-by-step guide outlined in this article, you have successfully completed the installation process and ensured a proper and reliable power supply setup.
Throughout the installation process, we covered important steps such as gathering the necessary tools and materials, preparing the PC case, removing and reattaching the side panel, locating the power supply mounting area, inserting and securing the power supply, connecting the power supply cables, testing its functionality, and finalizing the installation by managing cables and performing a visual check.
By properly installing the power supply, you have provided your computer system with the necessary electrical power to run efficiently and effectively. The power supply ensures that all of your hardware components receive the required voltage and wattage, allowing them to function at their best performance.
Remember, when working with computer hardware, always exercise caution, follow the instructions carefully, and double-check your work. It’s crucial to handle sensitive components with care and ensure they are securely and properly installed.
With the power supply successfully installed, you are one step closer to enjoying a reliable and powerful computer system. Now, you can power on your computer with confidence, knowing that your hardware is connected and ready to take on your computing needs.
Thank you for following this guide. We hope that it has provided you with the knowledge and guidance you needed to successfully install a power supply into your Azza PC Case Mid Tower. Happy computing!


