Why Does a Game Need More RAM?
RAM, short for Random Access Memory, is a crucial component that plays a significant role in enhancing the performance of games. In simple terms, RAM is the temporary storage space where games and other applications are loaded when you run them on your computer.
Games nowadays are becoming more advanced and resource-intensive, featuring stunning graphics, immersive sound effects, and complex simulations. These advancements require a substantial amount of RAM to allow games to run smoothly without experiencing lag or stutters.
When you launch a game, it loads various assets such as textures, models, audio files, and game logic into the RAM. This allows the game to access these resources quickly and efficiently as it runs. The more RAM you have, the more game data can be stored in memory, reducing the need for the system to continuously retrieve files from slower storage devices like the hard drive or solid-state drive.
Insufficient RAM can lead to several performance issues in games. When a game doesn’t have enough memory to store its assets, it may have to constantly swap data in and out of the RAM, causing noticeable lag or stuttering. This can greatly impact gameplay, especially in fast-paced games where split-second reactions are crucial.
In addition, modern games often run multiple threads or processes simultaneously to handle various tasks such as rendering graphics, calculating physics, and managing artificial intelligence. Each of these processes requires memory allocation, and if there isn’t enough RAM available, the system may struggle to allocate sufficient memory to each process, resulting in decreased performance and even crashes.
Another reason why games need more RAM is the ever-increasing size of game files. High-definition textures, expansive open-world environments, and complex character models contribute to larger game sizes. With more RAM, the game can load and store these large files efficiently, preventing frequent loading screens or delayed asset loading during gameplay.
Furthermore, having more RAM allows you to run other applications simultaneously while gaming. Many gamers like to have other software running in the background, such as voice chat programs, web browsers to look up game guides, or media players for background music. These applications also require their own memory allocation, and having more RAM ensures smoother multitasking without affecting game performance.
In the next sections, we will explore various methods to allocate more RAM to games, optimize RAM usage, and upgrade physical RAM to enhance your gaming experience.
How Does RAM Affect Game Performance?
RAM, or Random Access Memory, is a critical component that directly impacts game performance. It plays a vital role in storing and accessing game data, which significantly affects the overall gameplay experience. Understanding how RAM affects game performance can help you optimize your system for better gaming results.
When you launch a game, it loads various assets into the RAM, including textures, models, audio files, and game logic. The more RAM you have, the more of these assets can be stored in memory, ensuring faster access and smoother gameplay. Insufficient RAM can lead to performance issues, such as slow load times, frame rate drops, and occasional stutters.
One of the primary benefits of having more RAM is reducing the need for the system to retrieve game data from slower storage devices like hard drives or solid-state drives. With more RAM, the game can store a significant portion of data in memory, allowing for quicker access and reducing loading times. This results in improved overall performance, especially when transitioning between different areas or loading new levels.
In addition, RAM affects the rendering of graphics in games. When playing visually demanding games, the textures and models need to be loaded into the RAM for the GPU to process and render them on the screen. Insufficient RAM can lead to texture pop-ins, where lower quality textures are temporarily displayed before the higher quality ones are loaded. More RAM allows for a larger cache of textures, ensuring smoother and more immersive visuals.
RAM also plays a crucial role in multitasking while gaming. Many gamers like to have other applications running simultaneously, such as voice chat programs, web browsers, or streaming software. These applications require their own memory allocation, and having more RAM ensures smoother performance when running them alongside games. Without sufficient RAM, the system may struggle to allocate memory to each application, resulting in decreased performance or even crashes.
Furthermore, games with complex simulations or artificial intelligence require additional RAM for storing and processing data related to these systems. More RAM allows for larger memory buffers, enabling the game to handle complex calculations and simulations more efficiently. This leads to improved AI behavior, physics interactions, and overall gameplay realism.
Overall, RAM plays a critical role in gaming performance. It affects load times, frame rates, visual fidelity, multitasking abilities, and the overall smoothness of the gaming experience. Ensuring you have sufficient RAM for your gaming needs can result in more enjoyable and immersive gameplay.
Checking System Requirements for RAM Upgrade
Before upgrading the RAM in your system, it’s essential to check the system requirements to ensure compatibility and identify the optimal amount of RAM needed for your gaming needs. Here are the steps to follow when checking the system requirements for a RAM upgrade:
- Research the Game Requirements: Start by researching the specific game or games that you intend to play. Visit the game’s official website or consult reputable gaming forums to find the recommended system requirements. Look for the section that mentions the required RAM for smooth gameplay.
- Check the Operating System Requirements: Different operating systems have different RAM requirements. Make sure to check the recommended RAM specifications for your particular operating system. For example, Windows 10 generally requires a minimum of 8GB of RAM for smooth performance.
- Consider Other Applications: Take into account any other applications that you frequently run alongside your games. If you tend to have multiple applications open at the same time, such as voice chat programs, web browsers, or streaming software, you may need additional RAM to accommodate these applications.
- Assess Current RAM Capacity: Check your current system’s RAM capacity. This information can typically be found in the system’s settings or by using system information tools. If your system has empty RAM slots, you may be able to add more RAM without replacing the existing modules. If all slots are occupied, you may need to replace the current RAM modules with higher-capacity ones.
- Consider RAM Type and Speed: RAM modules come in different types (such as DDR3, DDR4) and speeds (measured in MHz). It’s important to ensure that the RAM modules you purchase are compatible with your system’s motherboard. Consult your system’s documentation or motherboard specifications to determine the appropriate RAM type and speed.
Once you have gathered all the necessary information, you can make an informed decision about the amount and type of RAM you need for your system upgrade. Remember that upgrading your RAM can significantly improve game performance and overall system responsiveness, allowing you to run your games smoothly and efficiently.
How to Allocate More RAM to a Game
If you’re experiencing performance issues with a particular game and have sufficient RAM available, you can allocate more RAM to the game to improve its performance. Here are a few methods to allocate more RAM to a game:
- Launch Options or Game Settings: Some games have launch options or in-game settings that allow you to allocate specific amounts of RAM. Check the game’s official documentation, forums, or support website to see if there are any configuration options available. Adjusting these settings can dedicate more RAM to the game and potentially enhance its performance.
- Task Manager: On Windows, you can use the Task Manager to allocate more RAM to a game. Right-click on the taskbar and select “Task Manager” from the menu. In the Task Manager window, navigate to the “Processes” tab, find the game’s process, right-click on it, and select “Set Priority.” Choose a higher priority level to allocate more system resources, including RAM, to the game.
- Third-Party Programs: There are third-party programs available, such as RAMDisk software, that allow you to create a virtual disk in your RAM. By allocating a portion of your RAM as a disk specifically for the game, you can enjoy faster load times and reduced stutters. However, keep in mind that this method requires technical knowledge and careful configuration to avoid potential data loss or system instability.
- Task Scheduler (Windows Only): In Windows, you can use the Task Scheduler to allocate more RAM to a game automatically. Open the Task Scheduler from the Start menu or search bar. Select “Create Basic Task” and follow the prompts to set up a task that runs your game with a higher priority and allocated RAM. This method ensures that the game always starts with the specified resources without manual intervention.
It’s important to note that allocating more RAM to a game doesn’t guarantee a significant performance improvement in all cases. If the game is already optimized and your system meets the recommended requirements, the benefits may be minimal. Additionally, allocating too much RAM to a game can potentially impact the performance of other applications running in the background.
Before implementing any changes, it’s recommended to monitor system performance, keep track of resource utilization, and adjust settings gradually to find the optimal configuration for your specific setup. Experimenting with different methods and settings can help you optimize the allocation of RAM and potentially enhance the gaming experience.
Adjusting Virtual Memory Settings for Games
Virtual memory, a component of the Windows operating system, can be adjusted to help enhance game performance, especially when faced with memory-related issues. By configuring virtual memory settings, you can allocate additional storage space on your hard drive to supplement the physical RAM. Here’s how you can adjust virtual memory settings for games:
- Open the System Properties: Right-click on “This PC” or “My Computer” and select “Properties” from the drop-down menu. In the System Properties window, click on the “Advanced system settings” link located on the left-hand side.
- Navigate to Virtual Memory Settings: In the System Properties window, click on the “Advanced” tab and select the “Settings” button found under the Performance section.
- Access Virtual Memory Settings: In the Performance Options window, switch to the “Advanced” tab and click on the “Change” button under the Virtual Memory section.
- Modify Virtual Memory Allocation: Uncheck the box labeled “Automatically manage paging file size for all drives.” Then, select the drive where your games are installed and click on “Custom size.” Adjust the initial size (minimum) and maximum size values accordingly. The recommended values are typically 1.5 times the amount of physical RAM installed.
- Set Virtual Memory and Restart: Enter the preferred initial and maximum size values in megabytes for the selected drive and click on the “Set” button. Finally, restart your computer to apply the changes.
By adjusting virtual memory settings, you effectively provide additional space for the operating system to store data that exceeds the capacity of physical RAM. This can prevent excessive swapping of data between RAM and the hard drive, leading to improved game performance.
It’s important to note that altering virtual memory settings may have varying effects on different systems and games. While increasing the virtual memory can help alleviate memory-related performance issues in some cases, it may not provide a significant improvement if other factors are affecting the game’s performance. It’s advisable to monitor system performance and adjust virtual memory settings cautiously.
Keep in mind that setting the virtual memory too high or too low can cause issues. Setting it too high may consume excessive storage space, while setting it too low can result in out-of-memory errors. It’s recommended to follow the guidelines provided by your game’s system requirements and consider the specifications of your computer when making adjustments.
By adjusting virtual memory settings appropriately, you can optimize memory allocation and potentially enhance the performance of games running on your system.
Optimizing Game Settings for Efficient RAM Usage
Optimizing game settings not only involves adjusting graphics and performance options but also optimizing the usage of RAM. By optimizing game settings for efficient RAM usage, you can enhance overall performance and ensure smoother gameplay. Here are some methods to optimize game settings for efficient RAM usage:
- Lower Texture and Graphics Settings: High-resolution textures and complex graphics can consume a significant amount of RAM. Lowering the texture quality and graphics settings can reduce the amount of RAM required to render the game, allowing for smoother gameplay. Experiment with different settings to find the right balance between visual quality and performance.
- Disable Unnecessary Background Processes: Close any unnecessary applications or processes running in the background while playing games. These processes consume RAM and system resources, impacting game performance. Use the Task Manager or third-party software to identify unnecessary processes and terminate them to free up RAM for the game.
- Limit Background Applications: Before launching a game, ensure that no resource-intensive background applications are running. This includes antivirus scans, software updates, or file downloads. By limiting background applications, you allocate more RAM to the game, resulting in improved performance.
- Adjust Render Distance and Draw Distance: Many games allow you to control the render distance and draw distance settings. These settings determine the range at which objects or environments are rendered in the game. Lowering these distances can reduce the RAM requirements, as the game doesn’t have to load and render objects that are far away from the player’s viewpoint.
- Disable Resource-Intensive Features: Some games offer resource-intensive features like real-time reflections, dynamic shadows, or detailed particle effects. Disabling or reducing the quality of these features can significantly reduce the RAM usage while still maintaining a visually appealing gaming experience.
- Close Unused Tabs and Background Browsers: If you have a web browser open while gaming, make sure to close any unnecessary tabs and extensions. Websites with complex multimedia content or web applications can consume a considerable amount of RAM. Closing unused tabs and background browsers will free up resources and allocate more RAM to the game.
Remember that optimizing the game settings for efficient RAM usage is not a one-size-fits-all solution. Different games have different RAM requirements and optimization options. It’s essential to refer to the game’s documentation or online resources to understand the specific settings that impact RAM usage.
By adjusting game settings to efficiently utilize RAM resources, you can optimize game performance, reduce RAM bottlenecks, and enjoy a smoother and more enjoyable gaming experience.
Clearing Unnecessary Background Processes
Clearing unnecessary background processes is an effective way to free up system resources, including RAM, and improve game performance. When running games, your computer may have various background processes running simultaneously, consuming valuable system resources. By clearing these unnecessary background processes, you can allocate more RAM to your game and ensure a smoother gameplay experience. Here are some methods to clear unnecessary background processes:
- Close Unused Applications: Before launching a game, close any applications that you are not actively using. These applications continue to run in the background, utilizing system resources, including RAM. Close unnecessary applications by clicking the “X” button in the top-right corner or using the “File” menu to exit the application properly.
- End Unnecessary Processes: Sometimes, there may be processes running in the background that are not essential for your game or system. These processes can be terminated using the Task Manager. To access the Task Manager, press Ctrl+Shift+Esc, select the “Processes” tab, and identify processes that are using a significant amount of CPU or RAM. Right-click on the process and select “End Task” to terminate it.
- Disable Startup Programs: Many applications automatically launch when you start your computer, running in the background and consuming system resources. To disable startup programs, press Ctrl+Shift+Esc to open the Task Manager, navigate to the “Startup” tab, and disable any unnecessary programs from launching at startup. This helps prevent them from consuming RAM while gaming.
- Use System Configuration: You can also use the System Configuration utility (msconfig) to disable unnecessary startup processes. Press the Windows key + R, type “msconfig” in the Run dialog box, and press Enter. In the System Configuration window, go to the “Startup” tab and uncheck any programs that are not needed. Apply the changes and restart your computer for the modifications to take effect.
- Run Clean-Up and Optimization Tools: Utilize reputable clean-up and optimization tools that can automatically analyze and remove unnecessary files, clear temporary data, and optimize your system for better performance. These tools help identify and remove hidden background processes, freeing up valuable system resources, including RAM.
By clearing unnecessary background processes, you can free up RAM and CPU resources, reducing the potential bottlenecks that can affect game performance. However, it’s important to exercise caution when terminating processes or disabling startup programs. Avoid terminating critical system processes or disabling necessary programs that your computer requires for proper functioning.
Regularly clearing unnecessary background processes and optimizing your system can help maintain optimal performance while gaming, allowing you to make the most of your computer’s resources and ensuring a smooth and enjoyable gaming experience.
Upgrading Physical RAM for Superior Gaming Experience
One of the most effective ways to improve your gaming experience is by upgrading the physical RAM in your computer. Upgrading RAM can provide a significant boost in performance, allowing for smoother gameplay, reduced loading times, and enhanced multitasking capabilities. Here’s how upgrading your physical RAM can provide a superior gaming experience:
- Increased Memory Capacity: Upgrading your RAM allows for a higher memory capacity, enabling your system to handle more data simultaneously. With more RAM, your computer can store and access game assets, such as textures, models, and audio files, more efficiently, resulting in faster load times and improved overall performance.
- Reduced Lag and Stuttering: In games that require a substantial amount of memory, insufficient RAM can lead to lag and stuttering issues. Upgrading your RAM provides a larger working space for games, allowing them to run smoothly without having to constantly swap data between RAM and slower storage devices like hard drives.
- Better Multitasking: Many gamers like to multitask while playing games, whether it’s running voice chat programs, streaming gameplay, or having a web browser open for reference. Upgrading your RAM provides the necessary resources to run multiple applications simultaneously without impacting game performance, resulting in a more seamless multitasking experience.
- Improved Performance in Modern Games: As games become more advanced and graphically demanding, they often require more resources to run smoothly. Upgrading your RAM ensures that you meet or exceed the recommended system requirements, enabling you to enjoy the latest games without compromising on visual quality or performance.
- Future-Proofing Your System: Investing in a RAM upgrade not only enhances your current gaming experience but also future-proofs your system. As game requirements continue to evolve, having a higher amount of RAM ensures that your system can handle upcoming games and updates without the need for frequent hardware upgrades.
- Easier Upgradability: Upgrading RAM is relatively straightforward and often requires minimal technical expertise. Many desktop computer systems have easily accessible RAM slots, making it a convenient and cost-effective upgrade option.
Before upgrading your RAM, it’s essential to ensure compatibility with your computer’s motherboard. Check the specifications of your system’s motherboard to determine the type and maximum capacity of RAM it supports. It is also recommended to purchase RAM modules of the same speed and capacity for optimal performance.
Whether you’re experiencing performance issues or looking to enhance your gaming experience, upgrading your physical RAM can greatly improve your system’s capabilities. The increased memory capacity, reduced lag, better multitasking, improved performance in modern games, and future-proofing benefits make RAM upgrades a valuable investment for gamers.
Understanding RAM Types and Compatibility
When considering a RAM upgrade, it’s important to be familiar with different RAM types and their compatibility with your system. Understanding RAM types and compatibility ensures that you choose the right modules for your computer. Here’s an overview of common RAM types and their compatibility:
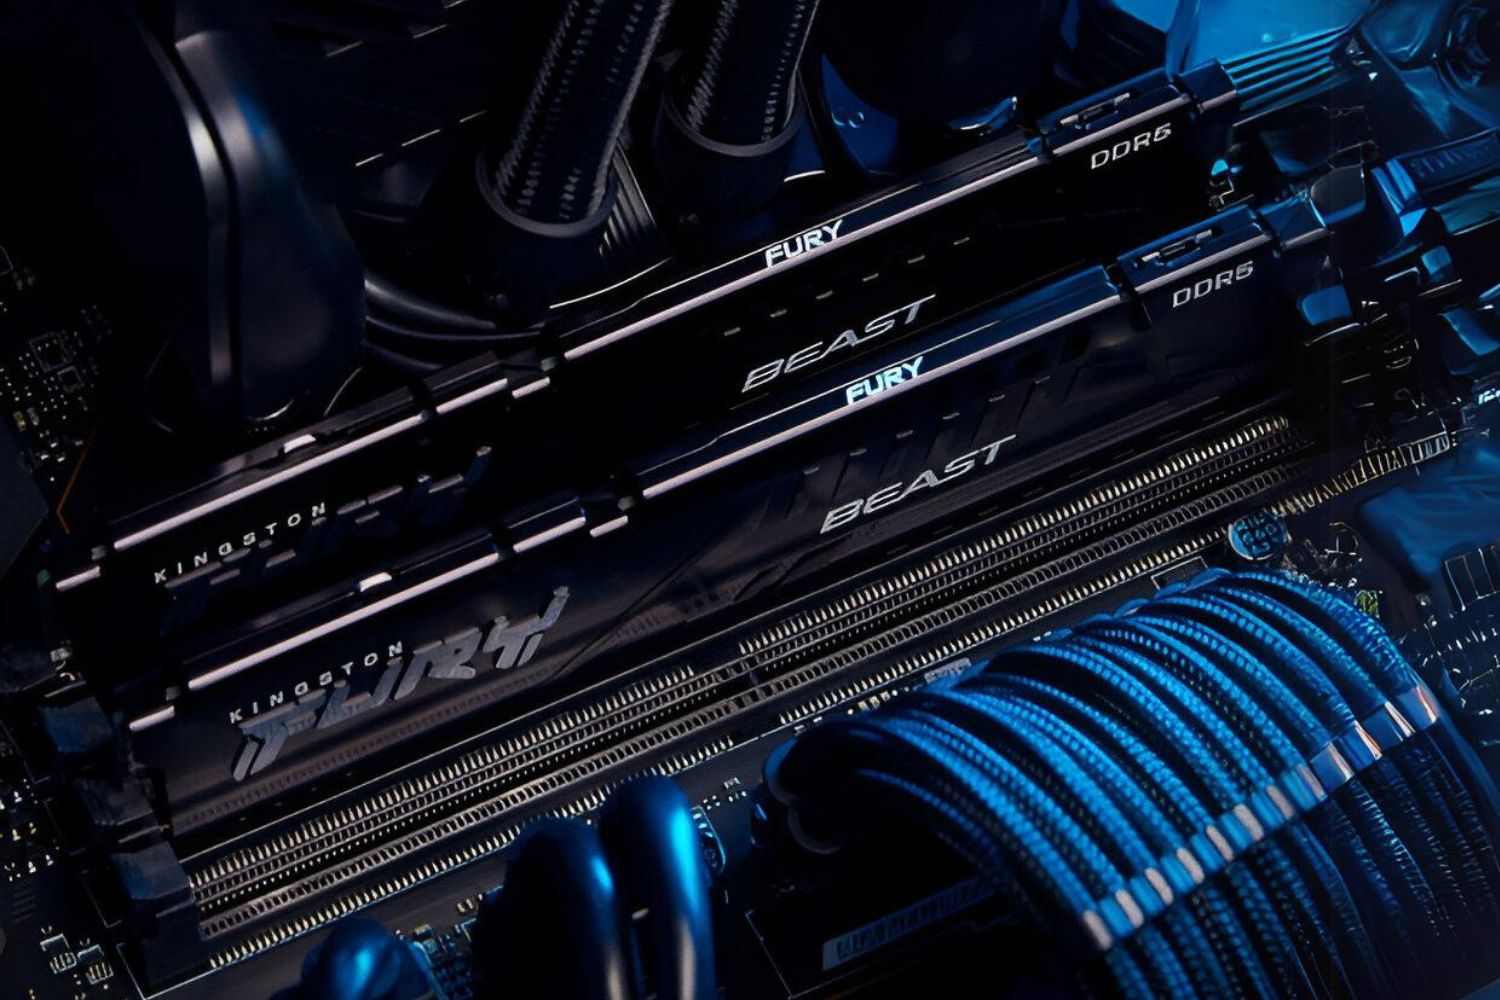
- DDR (Double Data Rate): DDR RAM is the most commonly used type of RAM. It has undergone several iterations, including DDR2, DDR3, DDR4, and the latest DDR5. Each iteration features advancements in speed, energy efficiency, and capacity. When upgrading RAM, it’s crucial to ensure compatibility with your motherboard as each generation of DDR RAM has a unique physical interface and voltage requirement.
- SODIMM: Small Outline Dual In-Line Memory Modules (SODIMM) are used primarily in laptops, mini PCs, and small form factor systems. SODIMM modules are smaller and have a different physical layout compared to standard desktop RAM (DIMM). It’s important to check if your system requires SODIMM or DIMM modules based on its form factor and motherboard specifications.
- ECC (Error-Correcting Code) RAM: ECC RAM is a specialized type of RAM used in workstations and servers. It includes additional error detection and correction capabilities, ensuring data integrity and reliability. ECC RAM is not commonly used in consumer desktops or gaming systems, so it’s important to verify whether your system supports ECC RAM before considering this upgrade.
- RAM Speed: Besides the type of RAM, the speed at which it operates is also a crucial factor. RAM speed is measured in megahertz (MHz) and indicates how quickly data can be accessed and transferred. Higher RAM speeds can provide a slight performance boost in certain applications, including games. However, it’s essential to check your motherboard’s specifications to ensure compatibility with higher-speed RAM.
- Capacity and Maximum Supported RAM: The capacity of RAM modules refers to the amount of memory they can hold, typically measured in gigabytes (GB). Different systems have different maximum supported RAM capacities, determined by the motherboard and operating system. It’s important to verify the maximum capacity your system can support to avoid purchasing modules that exceed this limit.
When upgrading RAM, consult your system’s documentation or motherboard specifications to determine the type, form factor, speed, and maximum supported capacity. Additionally, consider your budget and the requirements of the applications or games you intend to use. Striking a balance between performance, compatibility, and cost will help you make an informed decision when upgrading your RAM.
Remember that mixing different types or speeds of RAM modules may result in compatibility issues, and the system may not operate at its optimal performance. It’s best to stick to the same type, speed, and capacity of RAM across all modules for the best compatibility and performance.
By understanding the different RAM types and compatibility factors, you can confidently choose the right RAM modules that are compatible with your system and enhance your computer’s performance.
Step-by-Step Guide to Install Additional RAM
Installing additional RAM is a relatively straightforward process that can significantly improve your computer’s performance. Here’s a step-by-step guide to help you install additional RAM in your system:
- Power Off and Unplug: Shut down your computer and unplug it from the power source. This ensures your safety and prevents any electrical damage during the installation process.
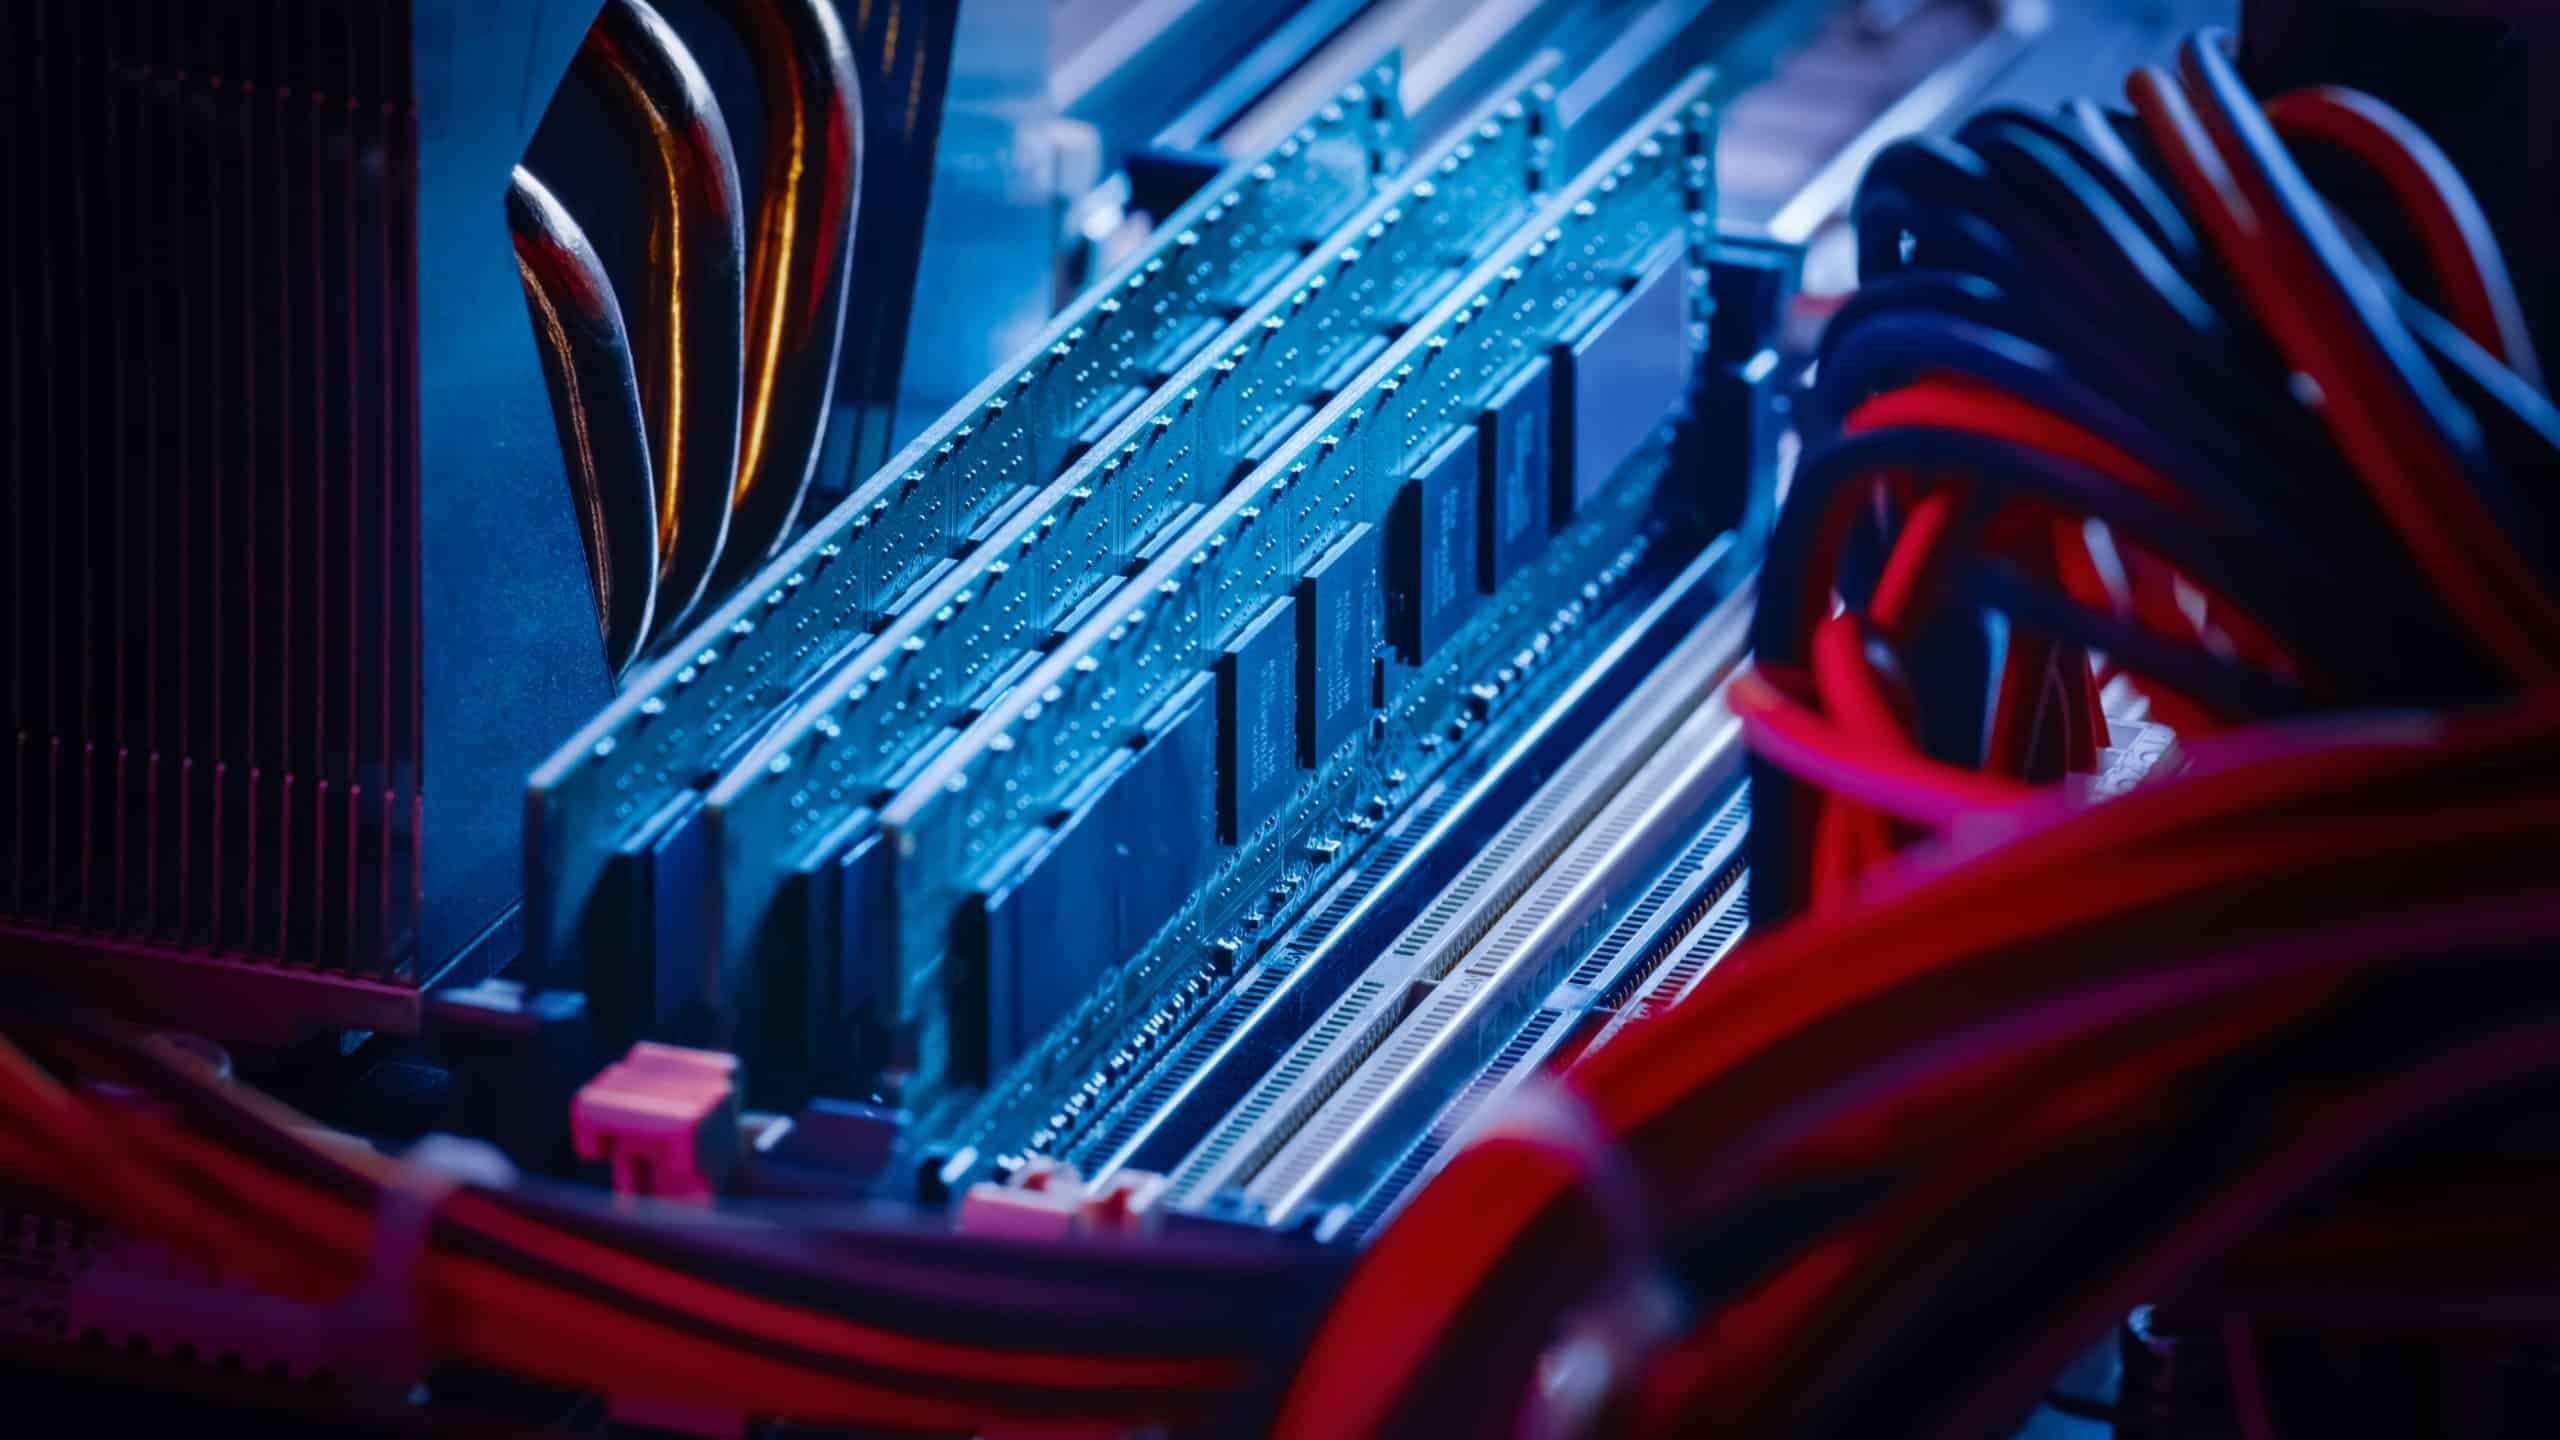
- Identify RAM Slots: Open your computer’s case or access panel to locate the RAM slots. These slots are typically found near the CPU and are easily identifiable. Check your computer’s documentation or motherboard manual to determine the location and number of available slots.
- Ground Yourself: Before handling any computer components, it’s essential to discharge any static electricity to avoid damaging sensitive electronic parts. You can do this by touching a metal object or wearing an anti-static wristband.
- Remove Existing RAM (Optional): If all slots in your system are occupied, you may need to remove the existing RAM modules before installing new ones. Gently press down on the side clips on the RAM module to release it from the slot, then carefully remove it from the slot.
- Check Alignment and Insert RAM: Align the notches on the RAM module with the corresponding slots in the RAM slot. Press the module firmly but gently into the slot until the side clips click into place, securing the RAM module in position. Ensure that the module is inserted evenly and fully seated in the slot.
- Install Multiple RAM Modules: If you’re installing multiple RAM modules, repeat the process for each module. Consult your motherboard documentation to ensure you’re following the correct slot order if there are specific memory configurations required.
- Secure the Case: Once all the new RAM modules are installed, secure the computer case or access panel. Make sure all screws are properly tightened to ensure the components are secure.
- Power On and Verify: Plug in your computer and power it on. Once the system starts up, go to your operating system and check if the newly installed RAM is recognized. This can typically be done by checking the system properties or using system information tools.
- Configure BIOS (If Required): In some cases, the system may not recognize the newly installed RAM or may need additional configuration. If necessary, enter the BIOS settings by pressing the appropriate key during startup (usually displayed on the screen) and enable the XMP profile or manually adjust the RAM settings to match the module specifications. Save the changes and exit the BIOS.
It’s important to note that while the installation process is relatively straightforward, it’s crucial to ensure compatibility between the new RAM modules and your system. Check the maximum supported capacity, type, and speed of RAM that your motherboard can accommodate.
By following this step-by-step guide, you can install additional RAM in your system and enjoy the benefits of increased memory capacity, improved multitasking, and enhanced overall performance.
Troubleshooting Common RAM Installation Issues
While installing RAM is generally a straightforward process, you may encounter some common issues that can arise during or after the installation. Here are some troubleshooting steps to help you resolve common RAM installation issues:
- Improper Installation: Double-check the installation of the RAM modules to ensure they are fully seated in the slots. Sometimes, modules may not be inserted evenly or may not be securely locked in place. Remove and reinsert the RAM modules, ensuring they are properly aligned in the slots and securely fastened.
- Incompatible RAM: Ensure that the RAM modules you have purchased are compatible with your motherboard. Check the motherboard documentation or manufacturer’s website for the supported RAM specifications, including the type, speed, and maximum capacity. Installing incompatible RAM can cause compatibility issues and lead to system instability or failure to boot.
- Physical Damage: Inspect the RAM modules for any physical damage. Check for bent or broken pins, excessive dust, or signs of corrosion. Replace any damaged modules before proceeding with the installation.
- Insufficient Power: In some cases, installing additional RAM modules may require a higher power supply. Ensure that your power supply unit (PSU) can adequately support the increased power requirements. Insufficient power can lead to system instability or random crashes.
- Mismatched Modules: If you’re installing multiple RAM modules, try using identical modules from the same manufacturer or kit. Mixing different brands or models of RAM may result in compatibility issues and prevent the system from recognizing the modules. Remove any mismatched modules and reinstall with matched modules.
- BIOS Incompatibility: Check for BIOS updates for your motherboard. Outdated BIOS versions may have compatibility issues with newer RAM modules. Visit the motherboard manufacturer’s website and download the latest BIOS update, following the instructions provided to update your BIOS.
- Reseat other Components: Occasionally, RAM installation can inadvertently cause other components, such as graphics cards or cables, to become loose. Reseat these components to ensure they are securely connected. Loose connections can cause system instability or prevent the system from booting properly.
- Perform MemTest: If you continue to experience issues after troubleshooting, you can use a diagnostic tool like MemTest86 to check for errors in the RAM modules. This tool identifies potential issues with your RAM by performing extensive memory tests. If errors are detected, consider replacing the faulty RAM module.
If you are uncertain about how to troubleshoot RAM installation issues or encounter persistent problems, it is recommended to seek assistance from a professional or consult the documentation and support resources provided by your system or motherboard manufacturer.
By following these troubleshooting steps, you can address common RAM installation issues and ensure your system is running smoothly with the newly installed RAM.
Final Tips for Maximizing Game Performance with More RAM
Once you have upgraded your RAM or allocated more memory to your games, there are several additional tips you can follow to maximize game performance and get the most out of your new RAM:
- Close Unnecessary Background Applications: Prioritize running only essential applications while gaming. Close any unnecessary background applications, such as web browsers, media players, or software updaters, to free up system resources, including RAM, for the game.
- Update Drivers and Game Patches: Ensure that your graphics card drivers and game software are up to date. Driver and game updates often include performance optimizations and bug fixes that can improve game performance and stability.
- Monitor Resource Usage: Use monitoring software to keep an eye on your system resource usage while gaming. This will help you identify any bottlenecks, such as excessive disk usage, high CPU utilization, or lack of available RAM, that may be impacting game performance.
- Optimize Game Settings: Adjust in-game settings to strike a balance between visual quality and performance. Lower graphical settings, reduce anti-aliasing, and disable resource-heavy features when necessary to ensure a smoother gaming experience.
- Keep Your System Clean: Regularly clean your system by removing temporary files, uninstalling unused applications, and performing disk defragmentation or optimization. This helps maintain system performance and prevents clutter that can impact game performance.
- Manage System Temperature: Ensure that your computer stays within optimal operating temperatures. Excessive heat can cause performance issues or even damage components. Keep the system well-ventilated, clean dust from fans and heatsinks regularly, and consider improving cooling solutions if necessary.
- Regularly Restart Your System: To ensure optimal performance, restart your computer periodically. This helps refresh system resources and clear any lingering processes that may be consuming memory or causing slowdowns.
- Consider SSD Upgrade: If you haven’t already, consider upgrading to a solid-state drive (SSD) for your game installation. SSDs offer significantly faster read and write speeds compared to traditional hard drives, reducing loading times and improving overall game performance.
- Stay Updated with System Requirements: Keep up-to-date with the system requirements of new games. As games become more demanding, staying informed about recommended RAM specifications and other hardware requirements can help you plan future upgrades and ensure smooth gameplay.
By following these final tips, you can make the most of your upgraded RAM and ensure optimal game performance. Remember that every system is unique, so it’s important to experiment with settings and find the configuration that works best for your specific hardware and gaming preferences.


