Introduction
With the increasing concern over online privacy and data security, many internet users are turning to private browsers as a means of protecting their sensitive information. Private browsing is a feature offered by web browsers that allows users to surf the internet without leaving any trace of their online activities. In this article, we will explore what private browsing is, the benefits of using a private browser, and how you can access and utilize a private browser for your online activities.
A private browser, also known as incognito mode or privacy mode, is a setting within a web browser that helps users maintain their privacy while browsing the internet. When the private browsing mode is activated, the browser does not record your browsing history, cookies, or form data. It also prevents websites from tracking your online activities and blocks pop-up ads that may compromise your online security.
The main benefit of using a private browser is the ability to browse the internet without leaving behind a trace of your browsing history. This can be particularly helpful if you are using a shared computer or accessing the internet on a public network, as it ensures that your personal information and online activities remain private.
Another advantage of private browsers is that they provide an added layer of security. Since private browsers do not store your browsing history or cookies, it becomes difficult for hackers or other malicious entities to track your online activities and gain access to your personal information.
Private browsers also offer convenience for certain browsing activities. For example, if you are researching a sensitive topic or shopping for a surprise gift, using a private browser ensures that these activities remain confidential and do not interfere with your regular browsing history or personalized recommendations.
Now that we understand the benefits of using a private browser, let’s explore how you can access and utilize one for your online activities. The process is relatively simple and can be done using popular web browsers such as Chrome, Firefox, Safari, or Edge. In the following sections, we will guide you through the steps of downloading, installing, and setting up a private browser, as well as share some tips for secure browsing. Let’s get started!
What is a Private Browser?
A private browser, also referred to as incognito mode or privacy mode, is a feature offered by most modern web browsers. It allows users to browse the internet without leaving any trace of their online activities. Unlike regular browsing, where the browser records your history, cookies, and other data, private browsing offers a temporary session that is not saved once you close the browser window.
When you use a private browser, your browsing history is not stored, which means that any websites you visit, searches you perform, or forms you fill out will not be visible in your browsing history. Additionally, any cookies that are usually stored on your computer to remember your preferences or track your online behavior are not saved when using private browsing.
Private browsers also prevent websites from tracking your online activities. Websites often place tracking cookies on your computer to monitor your behavior and gather information about your interests for targeted advertising purposes. However, in private browsing mode, these tracking cookies are not stored, providing you with a higher level of anonymity and privacy.
It’s important to note that while private browsing does not save your history or cookies, it does not make you completely anonymous online. Your internet service provider (ISP), the websites you visit, and other potential factors can still track your activities. Private browsing is primarily designed to protect your privacy on the local device and prevent others who have access to the same computer from seeing your browsing history.
Private browsing can be a useful feature for various purposes. It allows you to conduct sensitive searches or browse websites without leaving traces on your computer or sharing your preferences with other users of the same device. It can also come in handy when you want to sign in to multiple accounts on the same website without conflicts created by stored cookies from previous logins.
It’s worth noting that private browsing is not a substitute for other security measures, such as using a VPN (Virtual Private Network) or practicing safe browsing habits. While private browsing can help protect your privacy locally, it does not encrypt your internet connection or provide protection against other online threats.
In the next sections, we will explore the benefits of using a private browser and guide you through the process of accessing and utilizing one for your online activities. Stay tuned!
Benefits of Using a Private Browser
Using a private browser offers a range of benefits when it comes to protecting your online privacy and enhancing your browsing experience. Let’s take a closer look at some of the key advantages:
- Enhanced Privacy: When you use a private browser, your browsing history, cookies, and other browsing data are not stored on your device. This means that you can browse the internet without leaving any traces of your online activities. It is particularly useful if you are using a shared computer or if you want to keep your browsing habits hidden from others.
- Prevent Tracking: Private browsers block websites from tracking your online behavior. This means that websites cannot use cookies or other tracking technologies to collect data about your browsing habits, interests, or personal information. This can help protect your privacy and prevent targeted advertising.
- Avoid Auto-Fill and Suggestions: Private browsing mode does not save your form data, which means that your login credentials, addresses, and other sensitive information won’t be automatically filled in when you visit websites. This feature can be beneficial if you are concerned about accidentally revealing personal details or if you prefer to enter information manually each time.
- Multiple Account Management: Private browsers allow you to manage multiple accounts on the same website simultaneously. This can be helpful if you need to log in to different accounts without having to sign out and sign back in each time. It provides convenience and eliminates the need to constantly switch between different browser profiles or clear cookies manually.
- Safe Online Shopping: Private browsing mode can be advantageous when conducting online shopping. Since private browsers do not retain information about your browsing or purchasing history, they can help prevent targeted ads or price manipulation based on your previous shopping activity. It can also be useful if you are researching a surprise gift for someone and want to keep it a secret.
- Testing and Development: Private browsing can be valuable for web developers and QA testers. It allows them to view a website without any cached data or stored cookies, ensuring that the changes or updates they make are immediately visible. It can also help identify any issues related to cookies, session management, or caching.
These are just a few of the benefits of using a private browser. By safeguarding your privacy, preventing tracking, and allowing for better control over your browsing experience, private browsers offer a valuable tool for anyone concerned about online privacy and security.
In the next section, we will walk you through the process of accessing and utilizing a private browser for your online activities. Stay tuned!
How to Access a Private Browser
Accessing a private browser is a straightforward process. Most popular web browsers, such as Chrome, Firefox, Safari, and Edge, offer private browsing features. Follow these steps to access a private browser:
- Step 1: Open your preferred web browser: Launch the web browser that you normally use.
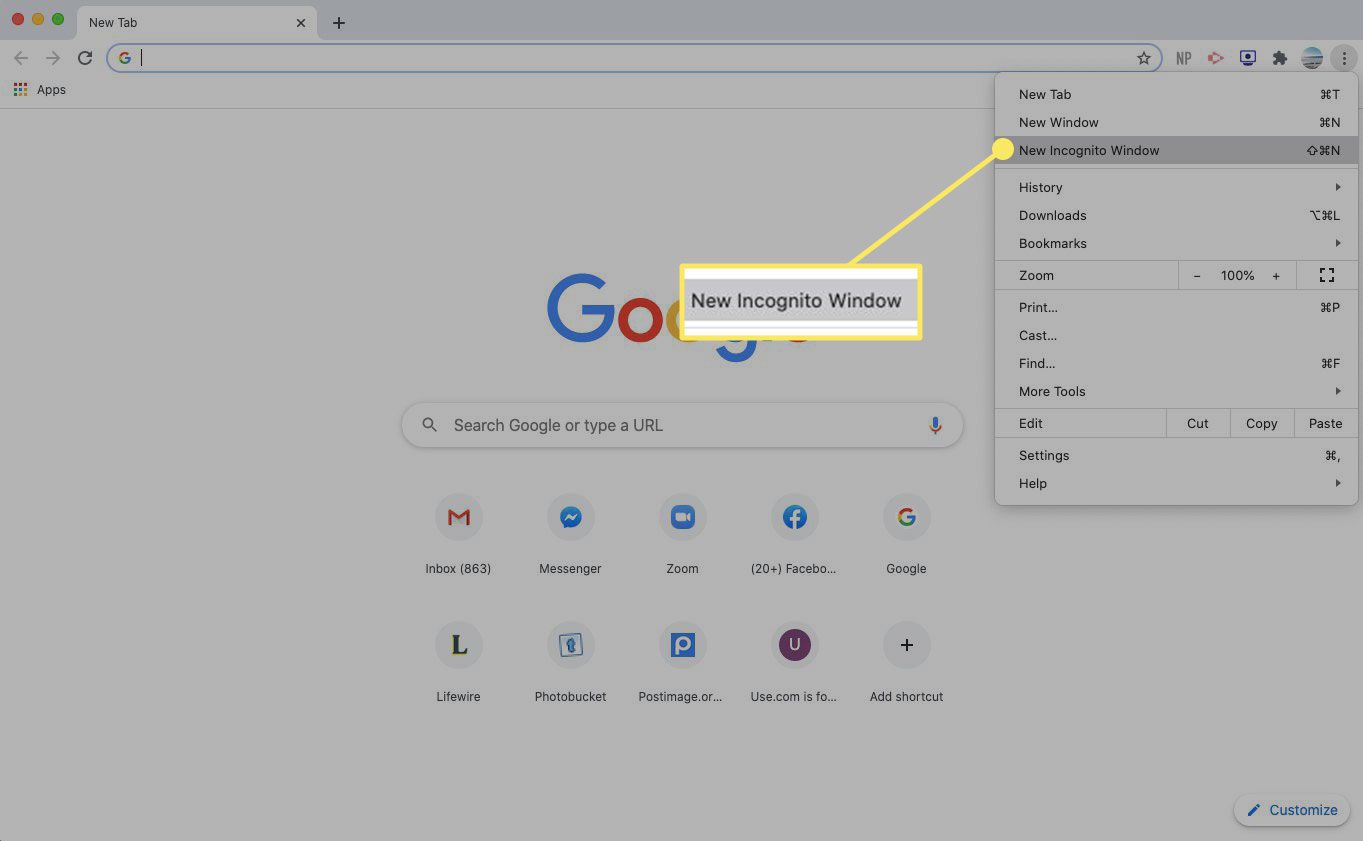
- Step 2: Activate private browsing mode: Look for the option to open a new private browsing window. This option is usually available in the browser’s menu or can be accessed through keyboard shortcuts. In Chrome, for example, you can open a new incognito window by clicking on the three-dot menu icon in the top right corner and selecting “New incognito window,” or by pressing Ctrl+Shift+N (Windows) or Command+Shift+N (Mac).
- Step 3: Start browsing privately: Once you have opened a private browsing window, you can start browsing the internet without leaving a trace. Any websites you visit, searches you perform, or forms you fill out will not be saved to your browsing history or stored as cookies.
It’s important to note that while private browsing mode helps protect your privacy on the local device, it does not provide complete online anonymity. Your internet service provider (ISP), the websites you visit, and other factors can still track your activities. For additional privacy and security, consider using a reliable VPN (Virtual Private Network) to encrypt your internet connection.
Private browsing mode is ideal for situations where you want to keep your browsing history hidden or when you need to sign in to multiple accounts on the same website. It is also useful when using public computers or shared devices, as it helps protect your personal information from being accessed by others.
Now that you know how to access a private browser, let’s move on to the next section where we will guide you through the process of downloading, installing, and setting up a private browser for your online activities. Stay tuned!
Step 1: Downloading a Private Browser
The first step to accessing a private browser is downloading it onto your device. Most popular web browsers offer private browsing features as a built-in option. Here’s how you can download a private browser:
- Identify the preferred private browser: Before downloading, decide which private browser you want to use. Some common options include Google Chrome, Mozilla Firefox, Apple Safari, and Microsoft Edge. Each of these browsers has their own private browsing mode, which you can access once downloaded.
- Visit the official website: Open a web browser that you currently have installed on your device, such as your default browser, and visit the official website of the private browser you have chosen. For example, if you want to download Google Chrome, go to the official Google Chrome website.
- Locate the download page: Once you’re on the official website, look for the download page or button. It’s usually easy to spot, as the website is designed to provide a seamless download experience for users.
- Click on the download button: Click on the download button to start the download process. Ensure that you’re downloading the correct version for your operating system – whether it’s Windows, macOS, or another platform.
- Follow the installation prompts: Once the download is complete, locate the downloaded file and open it to begin the installation process. Follow the on-screen prompts to install the private browser on your device.
It’s important to only download applications from trusted sources. Stick to the official websites of the private browsers to ensure that you’re getting a secure and legitimate version.
After successfully downloading a private browser, you’re ready to move on to the next step: installing the private browser on your device. We will discuss this in detail in the following section. Stay tuned!
Step 2: Installing the Private Browser
Once you have downloaded the private browser onto your device, the next step is to install it. Follow these steps to install the private browser:
- Locate the downloaded file: Open the folder or directory where the downloaded file is saved. This is usually the Downloads folder on your device, but it can differ depending on your browser settings.
- Double-click on the downloaded file: Find the file you just downloaded and double-click on it to start the installation process. This action will launch the installer for the private browser.
- Follow the installation wizard: The installation wizard will guide you through the installation process. Read and understand each step before proceeding. You may be asked to agree to the terms and conditions of the software or select installation preferences such as the installation location or shortcuts.
- Wait for the installation to complete: Once you have completed the necessary steps, click on the “Install” or “Next” button to begin the installation. The installer will then copy the necessary files and configure the private browser for your device.
- Launch the private browser: After the installation is complete, you will usually be prompted to launch the private browser. If the browser does not automatically launch, look for its icon on your desktop or in your applications folder and double-click to open it.
It is important to note that the installation process may vary slightly depending on the private browser you have chosen. The instructions provided here are a general guideline, and it is always recommended to refer to the specific instructions provided by the browser’s official documentation or installer.
Once you have installed the private browser, you are ready to move on to the next step: launching the private browser. We will explore this in detail in the following section. Stay tuned!
Step 3: Launching the Private Browser
After successfully installing the private browser on your device, the next step is to launch it. Follow these steps to open the private browser:
- Locate the private browser icon: Look for the icon of the private browser on your desktop or in your applications folder. The icon is typically representative of the browser brand or may have a specific symbol indicating private browsing mode.
- Double-click on the icon: Once you have located the private browser icon, double-click on it to launch the application. Alternatively, you can also right-click on the icon and select “Open” from the context menu.
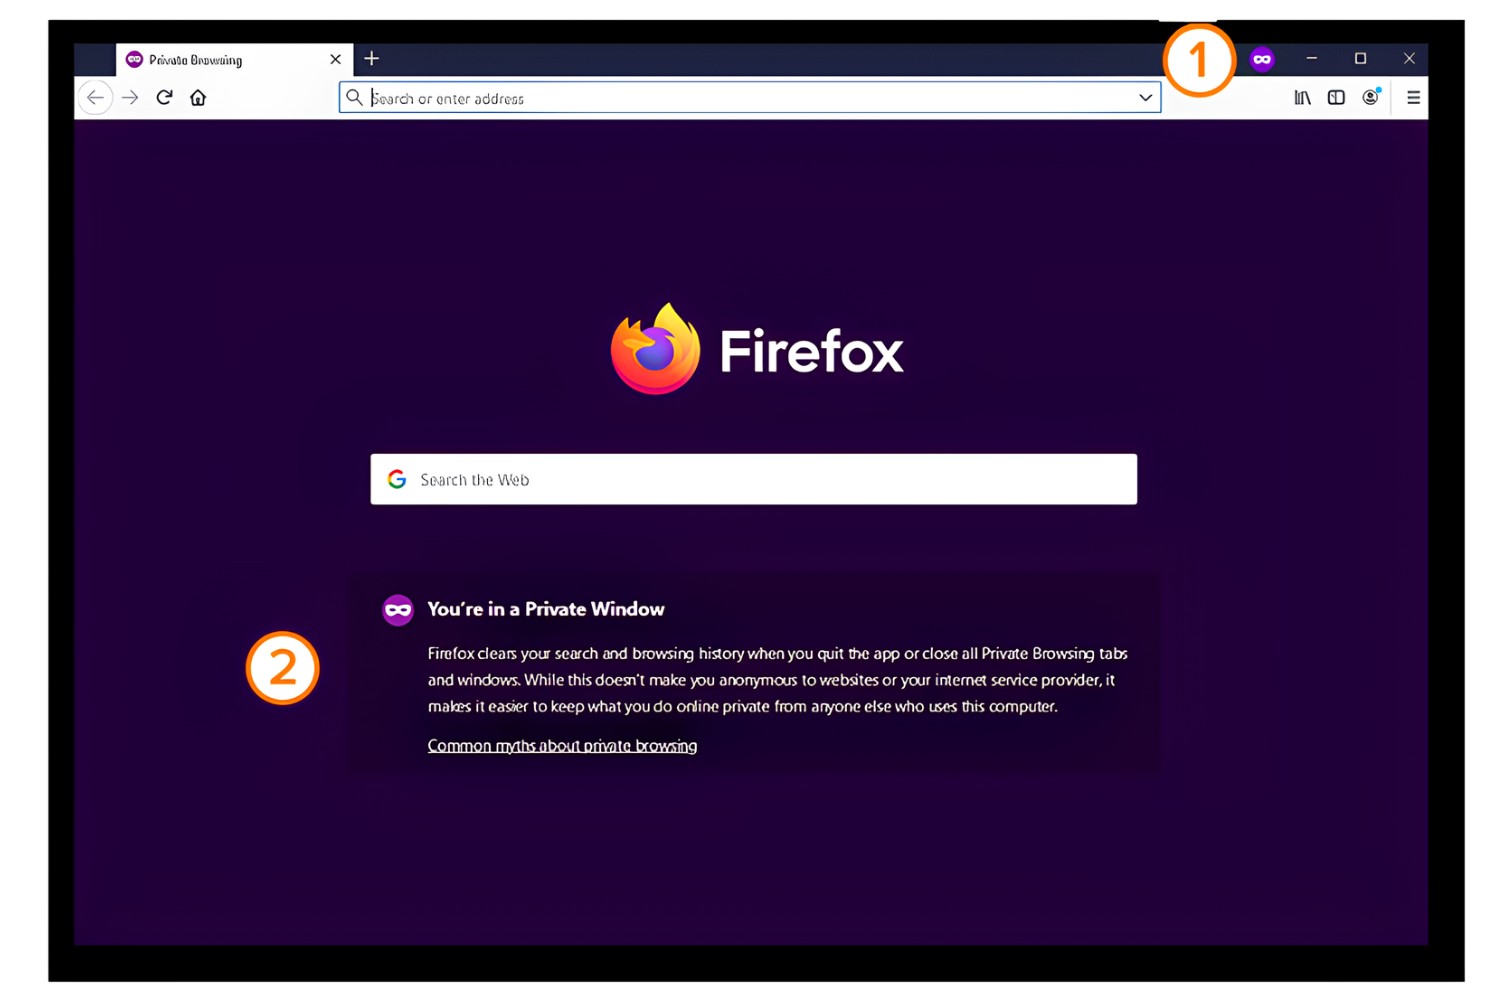
- Wait for the private browser to open: After clicking on the icon, the private browser will open, and you will be presented with a new browser window. This window signifies that you are now in private browsing mode.
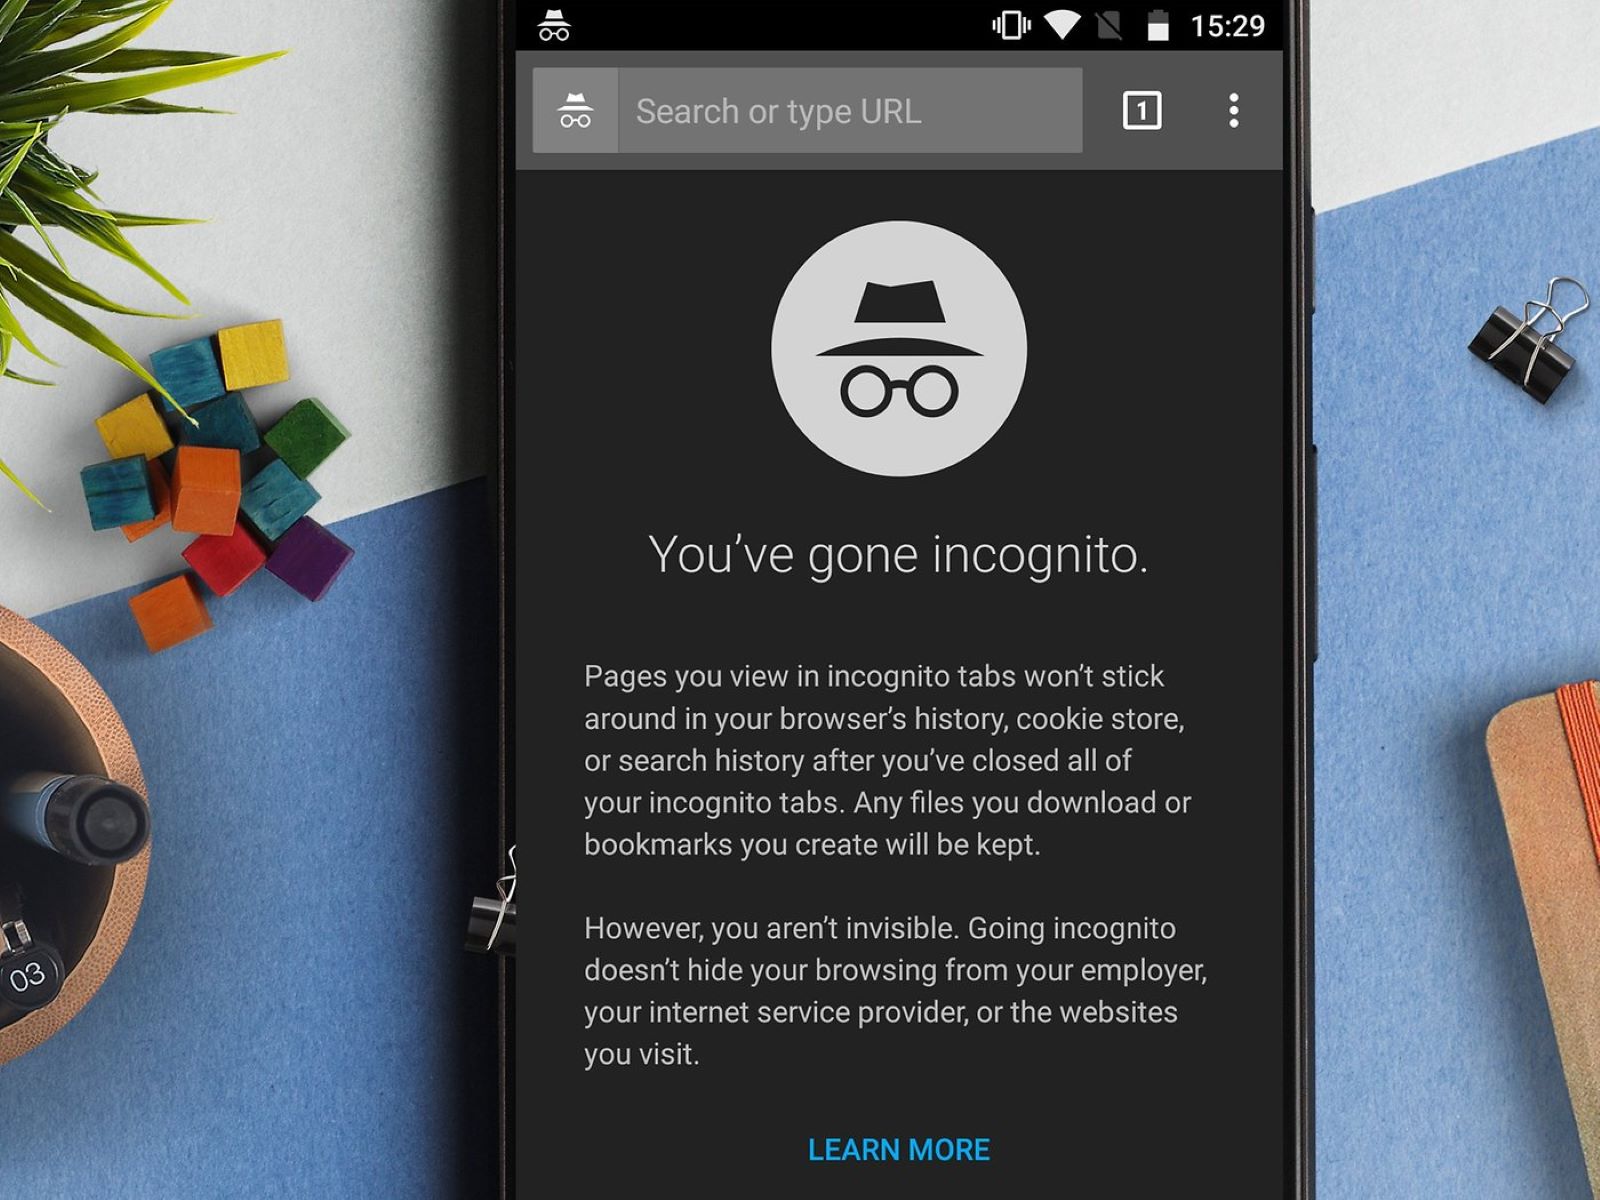
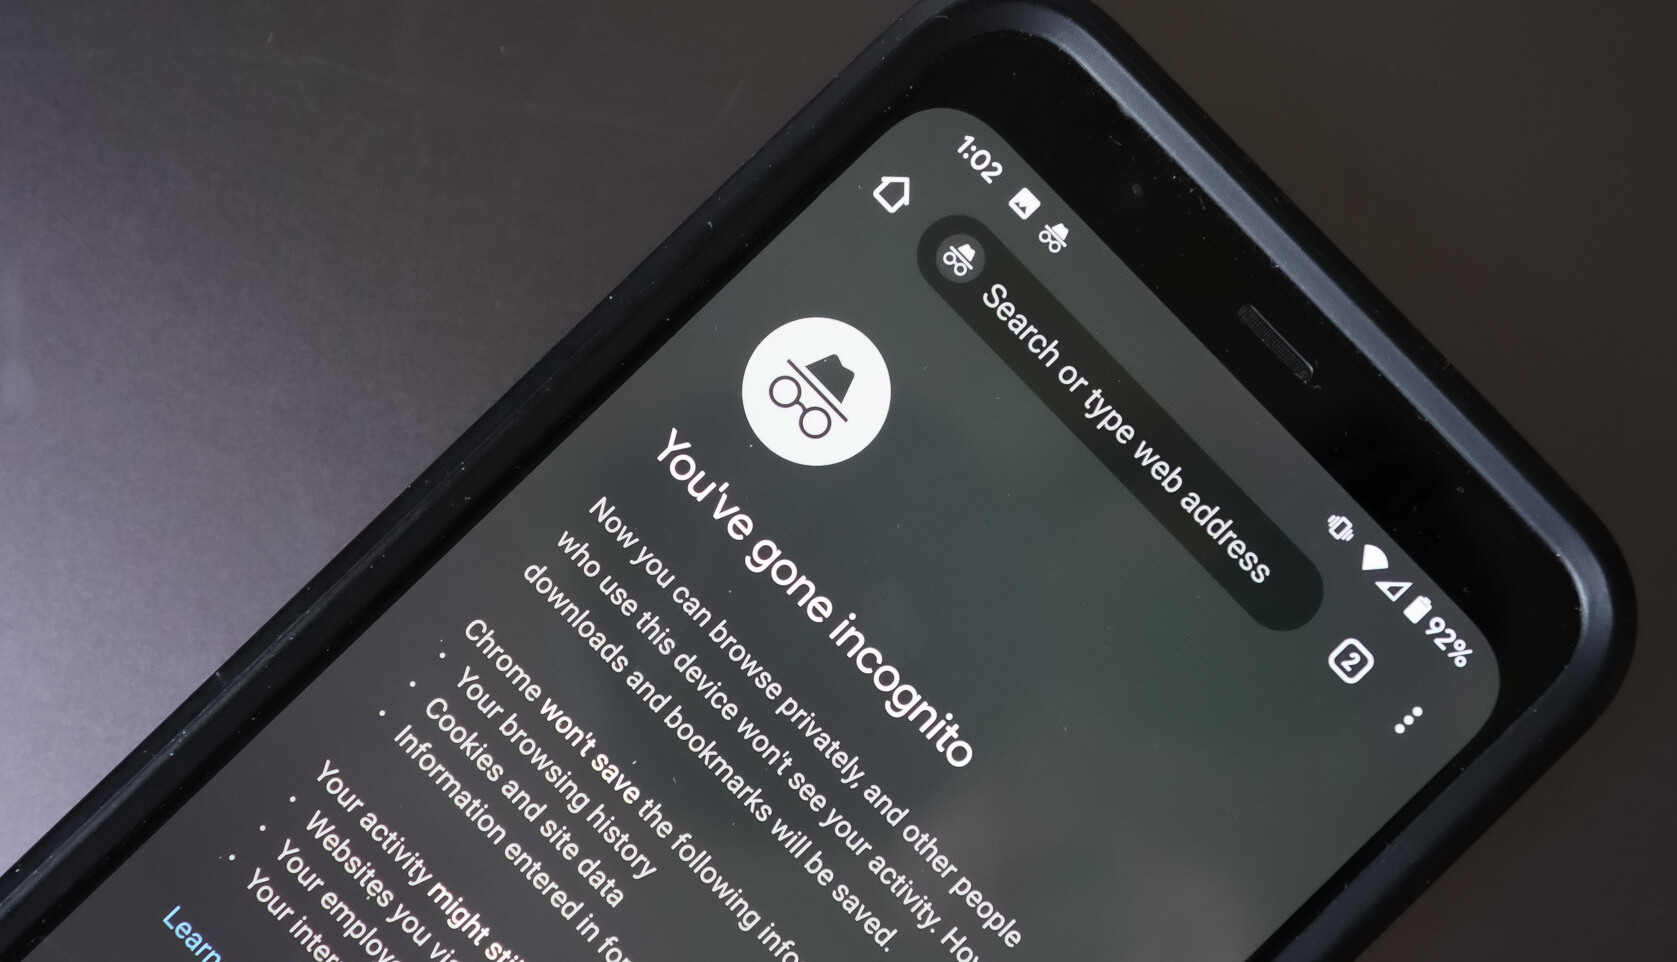
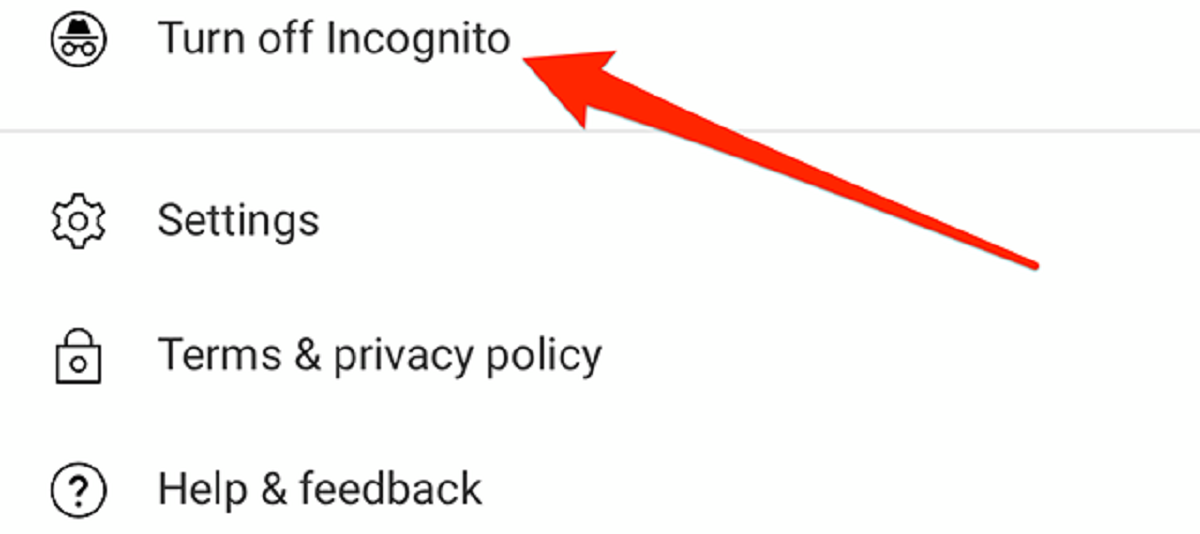
- Confirm private browsing mode: To ensure that you are in the private browsing mode, look for indicators such as a special icon, notification, or name in the browser window. For example, in Google Chrome, you will see a detective hat icon labeled “Incognito Mode” in the top corner of the browser window.
It is important to note that launching the private browser does not automatically mean that you are browsing privately. You need to ensure that you open a new private browsing window or activate the private browsing mode within the browser.
Once you have successfully launched the private browser and confirmed that you are in private browsing mode, you can proceed to the next step, which is setting up preferences in the private browser. We will explore this in detail in the following section. Stay tuned!
Step 4: Setting Up Preferences in a Private Browser
After launching the private browser, it is important to customize your preferences to ensure that you are maximizing your privacy and security while browsing. Follow these steps to set up preferences in a private browser:
- Access the browser settings: Look for the settings menu within the browser. In most browsers, you can find it by clicking on the menu icon, usually represented by three dots or lines, located in the top right or left corner of the browser window.
- Navigate to the privacy and security settings: Within the browser settings, locate the section related to privacy and security. This section may be labeled differently depending on the browser, but it typically contains options for managing cookies, clearing browsing data, and controlling privacy-related features.
- Customize privacy settings: Within the privacy and security settings, you will find various options to customize your privacy preferences. Some common settings to consider include:
- Blocking third-party cookies: This setting prevents websites from placing tracking cookies on your computer.
- Clearing browsing data on exit: Enabling this option ensures that your browsing history, cookies, and other data are automatically cleared when you close the private browser.
- Disabling autofill and search suggestions: Turning off these features prevents the browser from saving and suggesting personal information or search queries.
- Managing site permissions: Review and control the permissions granted to websites for accessing your location, camera, microphone, and other sensitive data.
- Consider additional privacy extensions or plugins: Depending on your browser, you may have the option to install additional extensions or plugins specifically designed to enhance privacy and security. These extensions can add extra layers of protection against tracking, block ads, or encrypt your connection. Explore the browser’s extension store and choose trusted extensions that align with your privacy needs.
- Save and apply the changes: Once you have customized your privacy preferences, be sure to save the changes within the browser settings. The browser will then apply these settings whenever you use the private browsing mode.
By customizing your privacy preferences in the private browser, you can tailor the browsing experience to suit your needs and enhance your privacy and security. These settings will help ensure that your online activities remain confidential and protect your personal information from being shared or tracked.
Now that you have set up your preferences in the private browser, it’s time to move on to the next step: browsing privately with the private browser. We will cover this in detail in the following section. Stay tuned!
Step 5: Browsing Privately with a Private Browser
Now that you have set up your preferences and customized the privacy settings in the private browser, you are ready to start browsing the internet privately. Follow these steps to ensure a secure and private browsing experience:
- Open a new private browsing window: To begin browsing privately, open a new private browsing window in the private browser. This can usually be done by clicking on the menu icon and selecting “New private window” or using the corresponding keyboard shortcut.
- Start browsing: Once the private browsing window is open, you can start browsing the internet without leaving any traces. Any websites you visit, searches you perform, or forms you fill out will not be saved to your browsing history or stored as cookies. It is important to note that private browsing only applies to the specific window or tab that you open in private mode. If you navigate to a non-private window or tab within the same browser session, your activities may be tracked and stored.
- Use caution with downloads and plugins: While private browsing helps to protect your privacy by not saving browsing history or cookies, it does not provide full protection against malware or malicious downloads. Exercise caution when downloading files or installing plugins while using a private browser. Ensure that you trust the website and only download files from reputable sources.
- Avoid logging into accounts: It is advisable to avoid logging into your personal accounts, such as email, social media, or online banking, while using a private browser on a shared or public computer. Private browsing mode may prevent the browser from remembering login credentials, which could lead to you inadvertently leaving your account information exposed.
- Monitor your behavior: Remember that private browsing only ensures privacy on your local device. It does not guarantee the anonymity of your internet traffic. Be aware of the websites you visit, links you click on, and the information you share online. Exercise caution when entering personal or sensitive information on websites.
By following these steps and practicing safe browsing habits, you can browse the internet with a higher level of privacy and security using a private browser. However, it is important to note that private browsing does not make you completely anonymous online or protect you from other potential threats, such as malware or phishing attacks.
Now that you know how to browse privately with a private browser, let’s move on to the next section, where we will share some valuable tips for secure browsing on a private browser. Stay tuned!
Tips for Secure Browsing on a Private Browser
While browsing on a private browser provides a certain level of privacy and security, it’s important to follow best practices for secure browsing. Here are some tips to further enhance your security while using a private browser:
- Keep your browser up to date: Regularly update your private browser to ensure you have the latest security patches and bug fixes. Browser updates often include improved security measures that help protect against known vulnerabilities.
- Use strong, unique passwords: Create strong and unique passwords for all your online accounts, including websites you visit while using a private browser. Avoid using the same password for multiple accounts and consider using a password manager to securely store and generate strong passwords.
- Be cautious of phishing attempts: Private browsing alone cannot protect you from falling victim to phishing attacks. Be vigilant of suspicious emails, messages, or websites that attempt to trick you into disclosing personal information. Double-check the website’s URL and look for HTTPS encryption to ensure a secure connection.
- Enable two-factor authentication (2FA): Whenever possible, enable two-factor authentication for your online accounts. This adds an extra layer of security by requiring an additional verification step, such as a code sent to your mobile device, when logging in.
- Use a trusted VPN: Consider using a reputable VPN (Virtual Private Network) service in conjunction with private browsing. A VPN encrypts your internet connection, providing an added layer of privacy and security by masking your IP address and encrypting your traffic.
- Be mindful of public Wi-Fi: When using a private browser on public Wi-Fi networks, exercise caution. Public Wi-Fi hotspots may not be secure, allowing potential attackers to intercept your online activities. Avoid entering sensitive information or accessing personal accounts on public Wi-Fi.
- Regularly clear your browsing data: Even though private browsing does not save your browsing history or cookies, it’s a good practice to periodically clear your browsing data, including cookies, cache, and saved form data. This helps minimize the potential for information leakage and enhances your privacy.
- Exercise caution with extensions: While browser extensions can enhance your browsing experience, be cautious when installing them. Only download extensions from trusted sources and regularly review the permissions and access they require. Remove any unnecessary or suspicious extensions.
By following these tips, you can further enhance your security and privacy while browsing on a private browser. Remember, secure browsing involves a combination of using updated software, practicing good password hygiene, staying vigilant against threats, and making informed choices about the tools and services you use.
Now that you’re equipped with these valuable tips, you’re ready to browse the internet securely and privately with a private browser. In the next section, we’ll wrap up our guide. Stay tuned!
Conclusion
Private browsers offer a valuable tool for maintaining privacy and security while browsing the internet. By utilizing private browsing mode, you can ensure that your online activities remain confidential, your personal information stays protected, and you minimize the risk of being tracked by websites and advertisers. Throughout this guide, we have explored what private browsers are, the benefits they provide, and the steps to access and utilize them effectively.
We began by understanding what a private browser is and how it differs from regular browsing. We learned that private browsers help protect your privacy by not saving browsing history, cookies, or other personal data. Instead, they offer a temporary session that does not leave any traces once you close the browser window.
The benefits of using a private browser became evident as we discovered how it enhances privacy, prevents tracking, and allows for convenient multiple account management. We also explored the steps to access a private browser, including downloading and installing one onto your device.
Setting up preferences in a private browser is crucial for tailoring your privacy and security settings. By customizing options like blocking third-party cookies, clearing browsing data, and managing site permissions, you can maximize your level of privacy during your browsing sessions.
With a private browser in place, we then delved into the importance of browsing privately. We highlighted the significance of opening a new private browsing window, exercising caution with downloads and plugins, and avoiding logging into accounts on shared or public computers.
Lastly, we provided tips for secure browsing on a private browser. The recommendations included keeping your browser up to date, using strong and unique passwords, being cautious of phishing attempts, and considering additional layers of security like two-factor authentication and VPNs.
By following these guidelines and maintaining safe browsing habits, you can enjoy a secure and private online experience with the use of private browsers. It’s essential to remember that while private browsing offers a certain level of privacy, it does not guarantee complete anonymity or protection against all online threats.
With our comprehensive guide, you are now equipped with the knowledge and tools to browse the internet confidently and privately. So, go ahead and start using a private browser to safeguard your online activities and protect your sensitive information. Happy browsing!