Introduction
Welcome to the world of podcasting, where you have the power to share your voice and connect with an audience on a deeper level. However, it’s crucial to ensure that your podcast has a polished and professional sound. That’s where the art of podcast editing comes into play.
Editing your podcast allows you to refine the audio, remove any issues, and create a seamless listening experience for your audience. Whether you are a seasoned podcaster or just starting out, this guide will walk you through the essential steps to edit your podcast like a pro.
Before diving into the technical aspects, it’s important to have a clear vision of what you want your podcast to sound like. Consider the tone, style, and format that best aligns with your content and target audience. This will help guide your editing decisions and ensure consistency throughout.
Now, let’s explore the key components of editing a podcast, from selecting the right software to exporting the final edited audio.
Finding the Right Editing Software
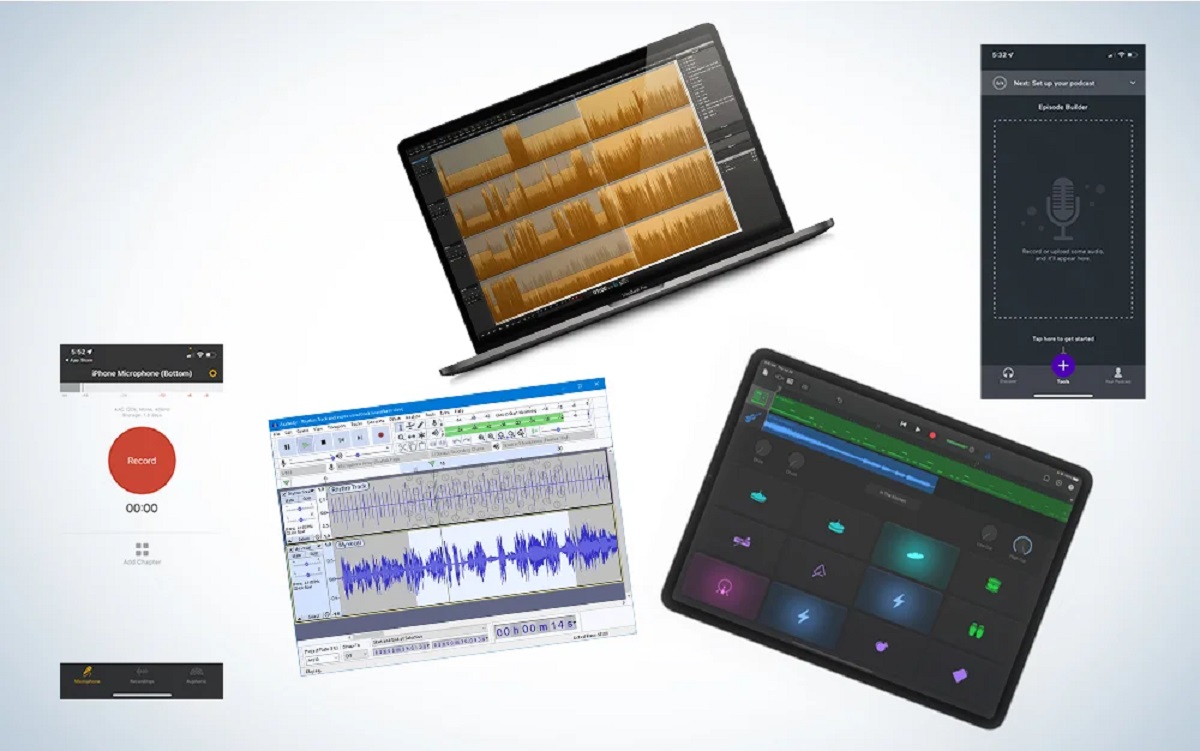
When it comes to editing your podcast, finding the right software is crucial. There are plenty of options available, each with their own set of features and capabilities. Here are some factors to consider:
1. User-Friendly Interface: Look for software that has an intuitive and user-friendly interface, especially if you’re new to podcast editing. It should make the editing process easy and enjoyable, allowing you to focus on refining your content.
2. Audio Editing Features: Ensure that the software provides all the necessary audio editing features. This includes the ability to cut, trim, and rearrange audio clips, as well as adjust volume levels, apply effects, and remove background noise.
3. Compatibility: Check if the software is compatible with the operating system you’re using. Whether you’re on Windows, Mac, or Linux, make sure the software you choose is compatible with your system.
4. Integration with External Tools: Consider whether the software can integrate seamlessly with other external tools and plugins. This can enhance your editing experience by giving you access to additional effects, virtual instruments, and audio processing tools.
5. Pricing: Evaluate the pricing options and choose software that fits your budget. Some editing software offers free versions with limited features, while others may require a one-time purchase or a subscription-based model.
6. Technical Support: It’s always helpful to have reliable technical support available in case you encounter any issues while editing your podcast. Look for software providers who offer comprehensive customer support.
7. Recommendations and Reviews: Seek recommendations from other podcasters and read reviews to gauge the experiences of others who have used the software. This can give you valuable insights into the pros and cons of each option.
Remember, the right editing software will depend on your specific needs and preferences. Take your time to research and experiment with different options to find the one that suits you best. Once you’ve selected the software, you can move on to the next step of importing and organizing your audio files.
Importing and Organizing Your Audio Files
Once you have chosen the editing software that suits your needs, it’s time to import and organize your audio files. This step is crucial to maintain a well-structured workflow throughout the editing process. Here’s how you can do it:
1. Create a New Project: Open your editing software and create a new project for your podcast. This will serve as a dedicated space to organize and work on your audio files.
2. Import Your Raw Audio Files: Locate the raw audio files of your podcast episodes and import them into the project. Most editing software allows you to simply drag and drop the files into the project workspace.
3. Organize Files in a Logical Order: Arrange the imported files in the order they will appear in your podcast episode. This can be achieved by dragging and dropping the files within the editing software’s timeline or workspace.
4. Use Folders and Naming Conventions: Create folders within the project to group related audio files. For example, you can have separate folders for intros, interviews, segments, and outros. Additionally, use descriptive names for each file to easily identify them.
5. Label and Color Code: If your editing software supports it, consider labeling and color coding your audio files. This can help differentiate between different types of audio or indicate sections that need specific attention, such as background noise removal or volume adjustments.
6. Save Regularly: As you organize your audio files, make sure to save your project regularly. This is crucial to avoid losing any changes or progress you have made during the editing process.
By importing and organizing your audio files efficiently, you set the foundation for a smooth editing process. Taking the time to structure your project will save you valuable time and make it easier to navigate and edit your podcast episodes.
Cleaning Up Background Noise
Background noise can be distracting and diminish the overall quality of your podcast. To ensure a clear and professional sound, it’s important to clean up any unwanted background noise. Here are some techniques you can use:
1. Noise Reduction: Most editing software provides a noise reduction tool or plugin. This tool analyzes the audio and removes consistent background noise while preserving the clarity of the main audio. Select a section of the audio that contains only the background noise and use this as a reference to apply the noise reduction effect to the entire track.
2. EQ and Filters: Utilize the equalizer (EQ) and filters in your editing software to target specific frequency ranges where background noise is prominent. By reducing or eliminating these frequencies, you can effectively minimize the impact of background noise on your podcast audio.
3. Silence Removal: During pauses or breaks in your podcast recording, there may be subtle background noise that you want to eliminate. Use the silence removal tool in your editing software to automatically detect and remove these periods of background noise.
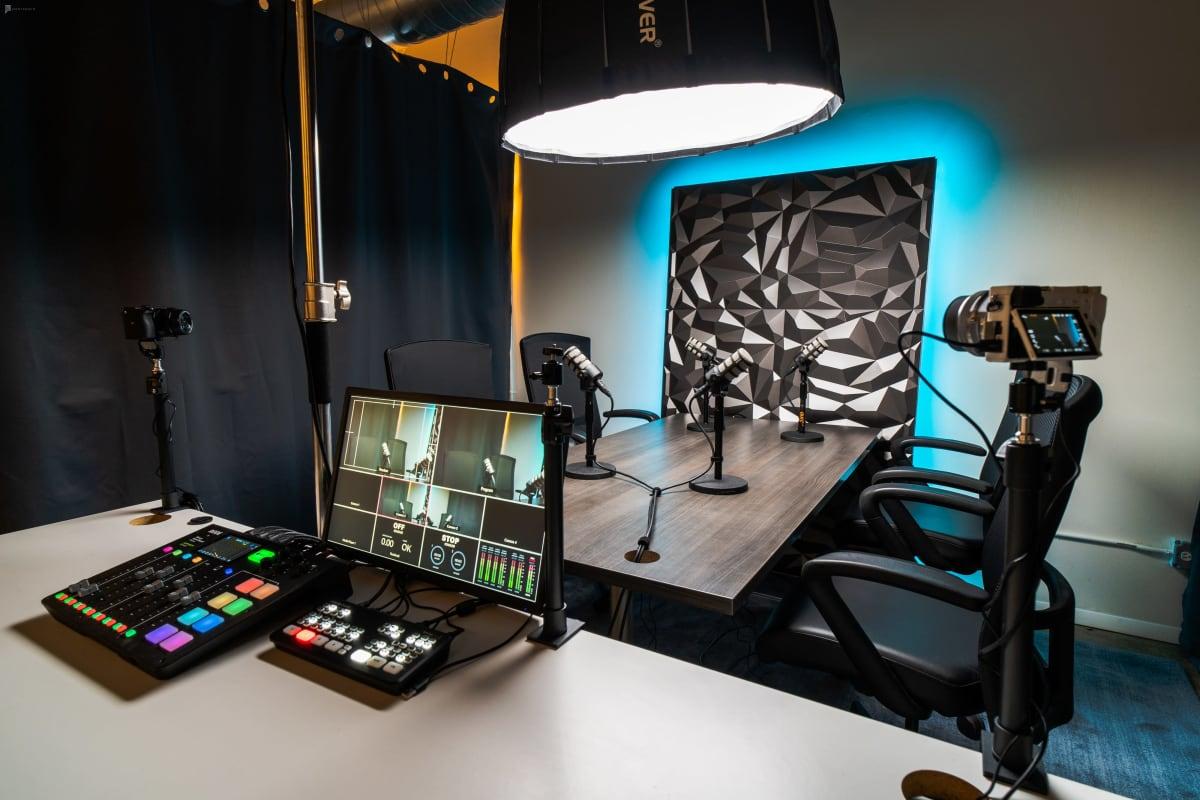
4. Room Treatment: If you consistently face background noise issues in your recording environment, consider improving the acoustics of your room. Adding sound-absorbing materials such as diffusers, acoustic panels, or foam can help reduce unwanted noise reflections and reverberations.
5. Noise Gates: Noise gates are useful tools for eliminating low-level background noise when the main audio is not playing. They work by automatically muting or reducing the volume of audio below a certain threshold. Experiment with different threshold settings to find the right balance between noise reduction and natural audio flow.
6. Multiple Takes: In some cases, re-recording certain sections or retakes can be an effective way to eliminate background noise. If you notice excessive noise in a specific segment, consider recording that portion again in a quieter environment or using a noise-isolating microphone.
Remember, the goal is to strike a balance between removing background noise and maintaining the natural sound of your podcast. Regularly listen to your edited audio with headphones to ensure it sounds clean and professional.
Removing Unwanted Sections
Editing your podcast involves removing any unwanted sections to create a smooth and concise listening experience. Here are some techniques to help you effectively remove unwanted sections from your podcast:
1. Identify the Sections: Listen to your podcast recording carefully and identify any sections that are off-topic, contain errors, or are not relevant to the overall message. These could include long pauses, interruptions, or tangents that disrupt the flow of your podcast.
2. Use the Editing Software: Within your editing software, locate the timeline or waveform representation of your podcast audio. Use the selection tool or cursor to highlight the unwanted section you want to remove. You can then delete the selected section or cut it out from the main audio track.
3. Maintain Smooth Transitions: When removing sections, ensure that the transitions between the remaining audio segments are seamless and natural. Listen to the edited version to make sure it flows smoothly without any abrupt cuts or awkward pauses.
4. Save the Original Version: Before making any edits, consider saving a backup or duplicate of your original audio file. This allows you to revert back to the unedited version if needed, providing a safety net in case of errors or changes of mind during the editing process.
5. Keep an Archive of Deleted Sections: If you remove any sections that you may want to use in the future, such as interesting anecdotes or bonus content, consider keeping an archive of these deleted segments. They can be repurposed for other episodes, bonus episodes, or promotional material in the future.
6. Listen and Review: After removing unwanted sections, listen to the edited version of your podcast to ensure that it flows smoothly and maintains its coherence. Make any necessary adjustments or fine-tuning to guarantee a polished final product.
By removing unwanted sections, you are optimizing the content and structure of your podcast, making it more engaging and enjoyable for your audience. Remember to strike a balance between removing unnecessary portions and preserving the authentic nature of your conversation or narration.
Equalizing the Audio
Equalizing the audio is an essential step in podcast editing that helps balance the frequency levels and improve the overall sound quality. By adjusting the frequencies of your audio, you can enhance clarity, remove unwanted resonances, and ensure a more pleasant listening experience. Here’s how you can effectively equalize the audio in your podcast:
1. Understand Frequency Ranges: Familiarize yourself with the different frequency ranges and their corresponding characteristics. For example, lower frequencies (bass) range from 20Hz to 250Hz, while higher frequencies (treble) range from 4kHz to 20kHz. This knowledge will help you identify and address specific issues during the equalization process.
2. Identify Problematic Frequencies: Listen to your podcast audio and identify any frequencies that stand out in a negative way, such as harshness, muddiness, or excessive bass. This could be caused by the recording environment, microphone quality, or recording technique.
3. Use Graphic Equalizer: Most editing software provides a graphic equalizer tool that allows you to adjust the frequency levels visually. Move the sliders up or down to increase or decrease the intensity of specific frequency ranges as required. For example, you can boost the mid-range frequencies to enhance vocal clarity or reduce the low frequencies to minimize rumbling noises.
4. Apply Presets: Many editing software also offer pre-set equalization settings specifically designed for podcasts or speech. Experiment with these presets to find one that suits your audio and provides a balanced sound.
5. Multiband Compression: In addition to equalization, you can utilize multiband compression to control the dynamics of your audio. This helps ensure consistent volume levels by compressing specific frequency ranges without affecting the entire audio track.
6. Test and Adjust: After applying equalization settings, listen to the edited audio with headphones to ensure that it sounds natural and well-balanced. Make any necessary adjustments to the equalization settings until you achieve the desired sound.
Remember to exercise moderation when applying equalization, as excessive adjustments can result in an unnatural or artificial-sounding audio. The goal is to achieve a smooth and balanced sound that enhances the clarity and intelligibility of your podcast.
Adding Intro and Outro Music
Adding intro and outro music to your podcast can add a professional touch and create a memorable listening experience for your audience. The right music sets the tone and builds anticipation for the content that follows. Here are some steps to effectively add intro and outro music to your podcast:
1. Choose the Right Music: Select music that aligns with the theme, mood, and overall vibe of your podcast. Consider the genre, tempo, and instrumentation that best represents your content. You can find royalty-free music libraries or work with a composer to create a custom intro and outro.
2. Determine the Length: Decide on the ideal length for your intro and outro music. Ideally, they should be short and concise, typically lasting 5 to 15 seconds. This ensures that they don’t overshadow the main content of your podcast episodes.
3. Import the Music: Import the chosen intro and outro music files into your editing software. Place them in separate tracks or segments, making sure they don’t overlap with the main audio content.
4. Adjust Volume Levels: Balance the volume levels of the intro and outro music with the main audio. The music should be loud enough to be heard clearly but not overpowering or distracting. Adjust the volume levels using the volume automation or gain controls available in your editing software.
5. Create Smooth Transitions: Fade in the intro music gradually at the beginning of each episode to smoothly transition from silence or ambient sound to the main content. Similarly, fade out the outro music at the end of the episode to create a seamless transition back to silence or any post-show elements.
6. Customize for Each Episode: If desired, you can customize the intro or outro music for specific episodes or guests. This can create a personalized touch and add uniqueness to your podcast episodes.
7. Test and Listen: Listen to the edited version of your podcast with the intro and outro music to ensure that it complements the overall sound and enhances the listener’s experience. Make any necessary adjustments to the volume levels or timing if needed.
Remember, intro and outro music should not only capture the attention of your audience but also reflect the identity and style of your podcast. They serve as a powerful branding tool, so choose music that resonates with your target audience and enhances the overall impact of your content.
Adjusting Volume Levels
One of the key aspects of podcast editing is ensuring that the volume levels are properly adjusted throughout the episode. Proper volume balancing ensures that your audience can hear and understand your content without having to constantly adjust the volume on their end. Here are some steps to effectively adjust volume levels in your podcast:
1. Normalize the Audio: Normalize the audio of your podcast to ensure a consistent volume level across all tracks. Most editing software has a “Normalize” function that automatically adjusts the volume of each track to a standard level, eliminating any extreme variations.
2. Avoid Clipping: Clipping occurs when the audio volume exceeds the maximum capacity, resulting in distortion and an unpleasant listening experience. Keep an eye on the waveform representation in your editing software and make sure it doesn’t exceed the maximum level during louder sections. If clipping occurs, lower the volume levels for those sections to prevent distortion.
3. Use Volume Automation: In certain cases, you may need to manually adjust the volume of specific segments within your podcast. Volume automation allows you to create gradual volume changes, such as lowering the volume during background music or increasing it during softer spoken parts. This helps maintain a balanced and clear audio throughout the episode.
4. Pay Attention to the Peaks: Peaks are the higher or louder parts of your audio waveform. Analyze the peaks and adjust the volume levels accordingly, ensuring that they are balanced and don’t overpower other parts of the episode. Use compression or manual volume adjustments to even out the peaks and valleys, creating a more dynamic and enjoyable listening experience.
5. Listen with Headphones: Use headphones to listen to your podcast while editing, as they provide a more detailed and accurate representation of the volume levels. Pay attention to any sections that may be too loud or too quiet, and adjust the volume accordingly to achieve a consistent and comfortable listening experience for your audience.
6. Test Across Different Devices: After adjusting the volume levels on your editing software, export a test version of your podcast and listen to it on different devices and platforms. This ensures that your podcast sounds balanced and clear across a variety of listening environments, such as smartphones, tablets, and various audio players.
Remember, maintaining consistent volume levels in your podcast is crucial to deliver an optimal listening experience. By adjusting the volume levels effectively, you improve the audio quality and ensure that your audience can enjoy your content without having to constantly adjust the volume.
Applying Effects and Enhancements
Applying effects and enhancements to your podcast can elevate its overall sound quality and engage your listeners on a deeper level. These effects help polish the audio and create a more immersive experience. Here are some techniques to apply effects and enhancements to your podcast:
1. Compression: Compression is a vital tool for balancing the dynamic range of your podcast. It reduces the difference between the loudest and softest parts of the audio, resulting in a more consistent volume level. Use compression to ensure that softer sections are audible while preventing peaks from being too loud or overwhelming.
2. Equalization (EQ): EQ allows you to adjust the frequencies in your audio, enhancing clarity and removing unwanted resonances. Use EQ to boost or cut specific frequency ranges to improve the tonal balance of your podcast. For example, you can enhance the warmth of voices by boosting the mid-range frequencies or reduce excessive bass frequencies that may create muddiness.
3. Reverb and Ambience: Adding a touch of reverb or ambience can enhance the spaciousness and depth of your podcast audio. Be subtle, so it doesn’t overshadow the main content. Adjust the amount of reverb or ambience to create a natural-sounding space that complements your podcast’s tone and style.
4. Noise Reduction: If there is background noise or unwanted hiss in your audio, utilize noise reduction tools. These tools analyze the background noise and remove it while preserving the clarity of the main audio. Apply noise reduction to minimize distractions and create a cleaner listening experience for your audience.
5. De-essing: De-essing is used to reduce or remove the harsh “s” and “t” sounds known as sibilance. It is particularly useful when editing podcasts with spoken audio. By lowering the volume of these frequency ranges, you can achieve a smoother, more natural vocal sound.
6. Panning and Stereo Imaging: Panning allows you to position audio elements within the stereo field, creating a sense of space and separation. Experiment with panning to place different tracks in specific locations, enhancing the overall audio experience and making it more immersive for your listeners.
7. Volume Automation: Use volume automation to manually adjust the volume levels of specific sections within your podcast. This can help emphasize important points, control background music levels, or enhance the impact of certain audio elements.
Remember, the goal is to enhance the quality and listenability of your podcast without overdoing it. Apply effects and enhancements with care, ensuring that they serve the purpose of enhancing the content rather than overshadowing it. Regularly listen to your edited podcast with headphones to ensure that the applied effects enhance the overall audio experience.
Editing Multiple Tracks
Editing multiple tracks in your podcast allows you to incorporate different audio elements, such as interviews, music, sound effects, and more. By managing and synchronizing these tracks effectively, you can create a cohesive and engaging podcast episode. Here’s how to edit multiple tracks in your podcast:
1. Organize Your Tracks: Start by organizing your tracks in the editing software’s timeline or workspace. Place each audio element on a separate track, such as the main spoken track, guest interviews, background music, and sound effects. This organization makes it easier to manipulate each track individually.
2. Synchronize the Tracks: Ensure that all the tracks are properly synchronized. Align the start of each track to match the desired timing, taking into consideration any pauses or overlap that needs to be preserved. This creates smooth transitions between different audio elements.
3. Crossfades: Use crossfades to seamlessly blend different audio segments. When transitioning between tracks, apply a crossfade at the overlapping point to eliminate any sudden changes or audio artifacts. Crossfades create natural and smooth transitions between various audio elements, such as switching between speakers or introducing music.
4. Adjusting Levels: Balance the volume levels of each track to ensure they blend well together. Pay attention to the relative volume between the spoken audio, music, and other elements. Lower the music or sound effects during important spoken sections to ensure clarity, and raise them during appropriate moments to enhance the listener’s experience.
5. Editing Multiple Takes: If you have recorded multiple takes of the same segment, choose the best version and delete or mute the remaining ones. By selecting the most coherent and engaging take, you can maintain the flow and improve the overall quality of your podcast.
6. Editing Transitions: Edit transitions between segments to create a smooth and cohesive flow. Remove any unnecessary pauses, stutters, or mistakes to maintain the pace and energy of your podcast. Consider using transitional elements, such as music or sound effects, to enhance the audience’s engagement and signal a change in topic or tone.
7. Use Markers and Labels: Utilize markers or labels in your editing software as visual cues to highlight specific sections or important timestamps. This helps you navigate through the tracks more efficiently and locate specific segments during the editing process.
Editing multiple tracks requires careful attention to detail and organization. By synchronizing the tracks, adjusting volume levels, and applying seamless transitions, you can create a professional and engaging podcast episode that captivates your listeners from start to finish.
Exporting and Saving Your Edited Podcast
Once you have completed the editing process for your podcast, it’s time to export and save your edited episode in a suitable format. Here are the steps to follow when exporting and saving your edited podcast:
1. Select the Desired Format: Determine the format that is most appropriate for your podcast. The most common formats for podcasts include MP3 and WAV. MP3 is widely supported and compressed, making it ideal for online streaming and sharing. WAV offers uncompressed and high-quality audio, suitable for professional use or if you plan to further process the audio.
2. Set the Bitrate and Sample Rate: Configure the bitrate and sample rate for your exported file. The bitrate determines the audio quality and file size, so choose a suitable bitrate based on your intended distribution and storage capabilities. The sample rate typically ranges from 44.1kHz to 48kHz, with higher rates providing more fidelity but larger file sizes.
3. Set the Export Range: Specify the start and end points for the exported audio. If your podcast has an intro and outro, ensure that you export the main content without including those sections. This ensures that you export only the relevant content for your listeners.
4. Export with Metadata: Include metadata such as episode title, description, and artwork in your exported file. This metadata provides crucial information for your podcast platform and listeners, allowing them to easily identify and access your episode.
5. Save a Backup: Before exporting, consider saving a backup copy of your edited project file. This safeguards against any potential issues or the need to make future revisions to your edited podcast episode.
6. Listen and Review: After exporting, listen to the exported file to ensure the audio sounds as expected. Pay particular attention to the overall quality, volume levels, and any anomalies that may have occurred during the export process.
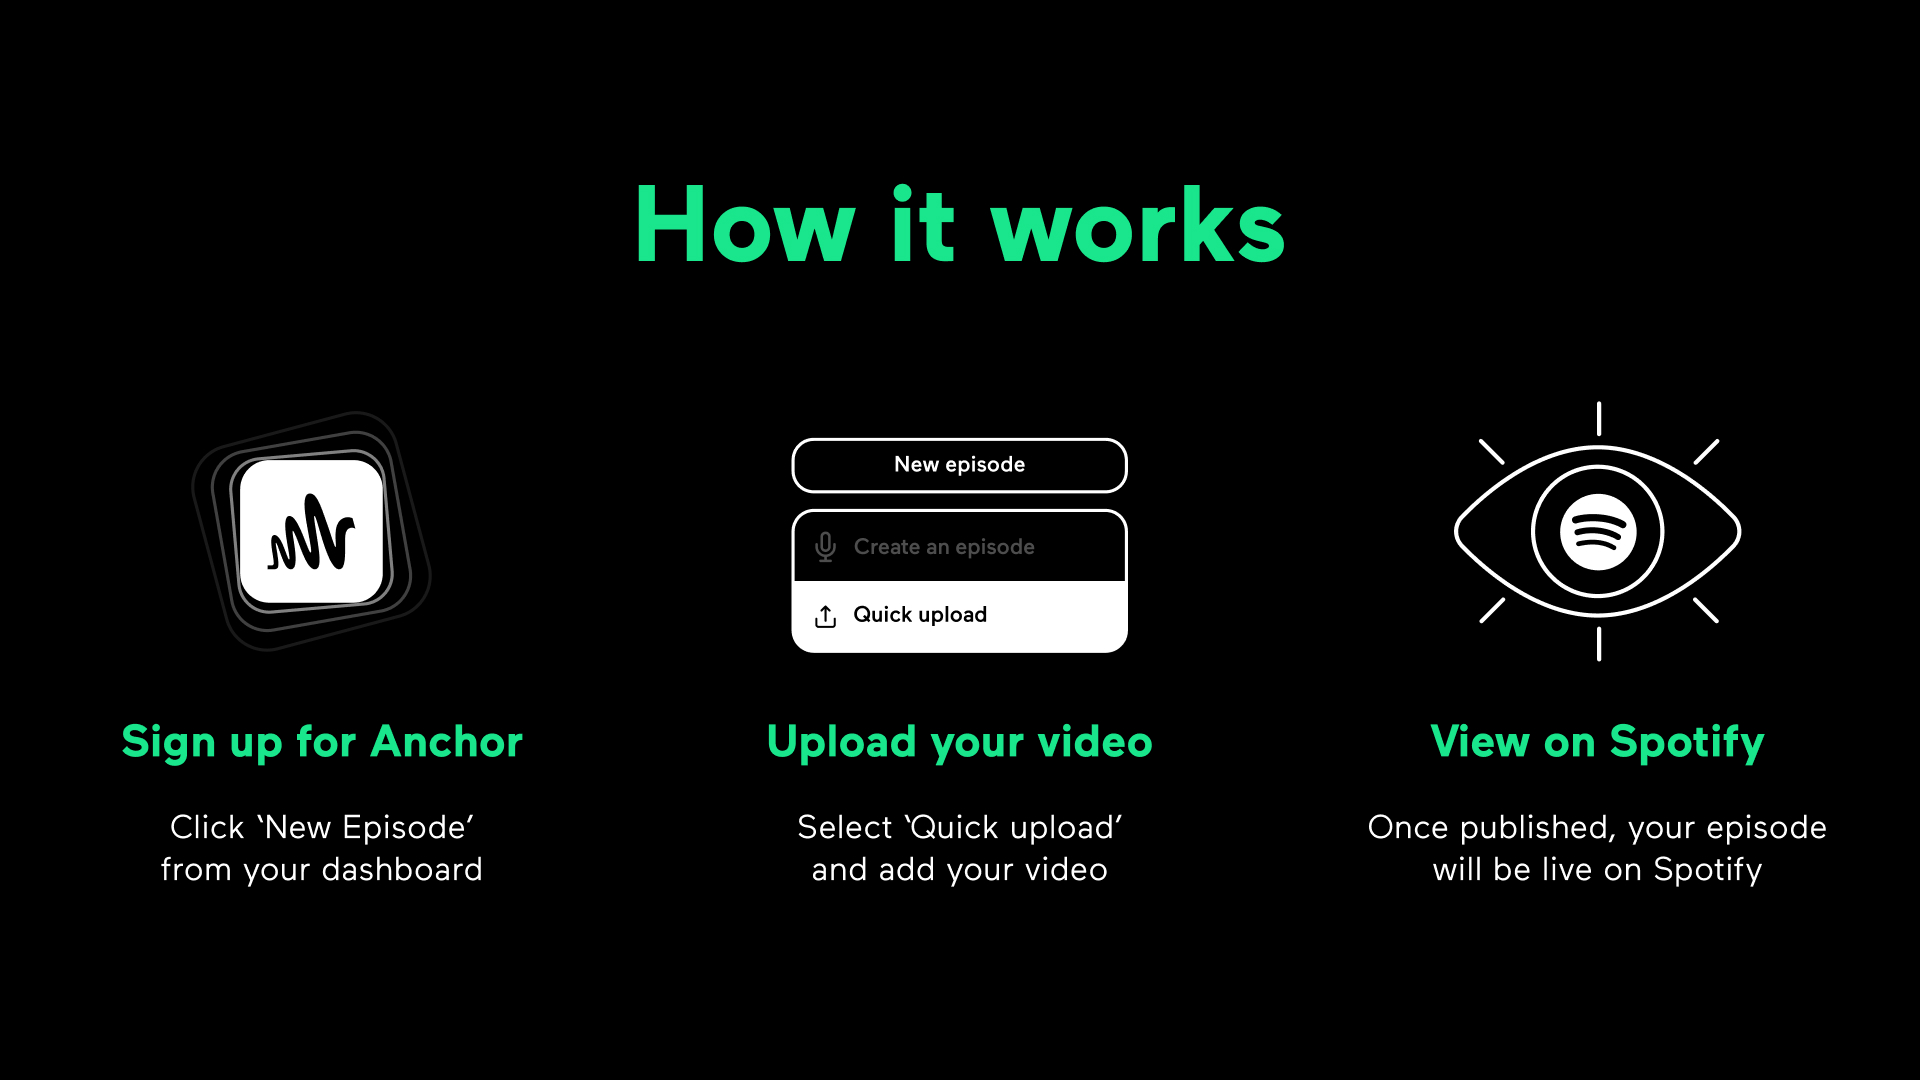
7. Distribute and Publish: Upload the exported file to your chosen podcast hosting platform or distribute it through other channels such as your website or social media platforms. Follow the required steps and guidelines provided by your hosting platform to publish your episode and make it accessible to your audience.
Remember, it’s essential to properly name and organize your exported podcast files for easy management and future reference. By following these steps, you can confidently export and save your edited podcast, ensuring that it is ready for distribution and consumption by your eager audience.
Conclusion
Congratulations! You have learned the essential steps to edit your podcast like a professional. Editing is a crucial part of the podcasting process, allowing you to refine your content, enhance the audio quality, and engage your audience on a deeper level. By following the steps outlined in this guide, you can take your podcast to the next level and create a seamless, polished, and captivating listening experience.
Remember to choose the right editing software that suits your needs, import and organize your audio files efficiently, and clean up any unwanted background noise. By adjusting volume levels, applying effects and enhancements, and editing multiple tracks, you can create a well-balanced and cohesive podcast episode. Finally, export and save your edited episode in a suitable format, ensuring it is ready to be shared and enjoyed by your audience.
Throughout the editing process, always keep your audience in mind. Regularly listen to your edited podcast with headphones, seeking to provide an enjoyable and immersive experience. Pay attention to the flow, clarity, and overall quality of the audio, making any necessary adjustments to ensure a professional and engaging result.
Remember, your podcast is a reflection of your passion, expertise, and unique voice. Embrace the opportunity to connect with your audience, share valuable insights, and make a lasting impact through the power of podcasting. With dedication, practice, and continued learning, you can refine your editing skills and continually improve the quality of your podcast episodes.
Now it’s time to put your knowledge into practice and unleash your creativity. Happy podcasting!