Introduction
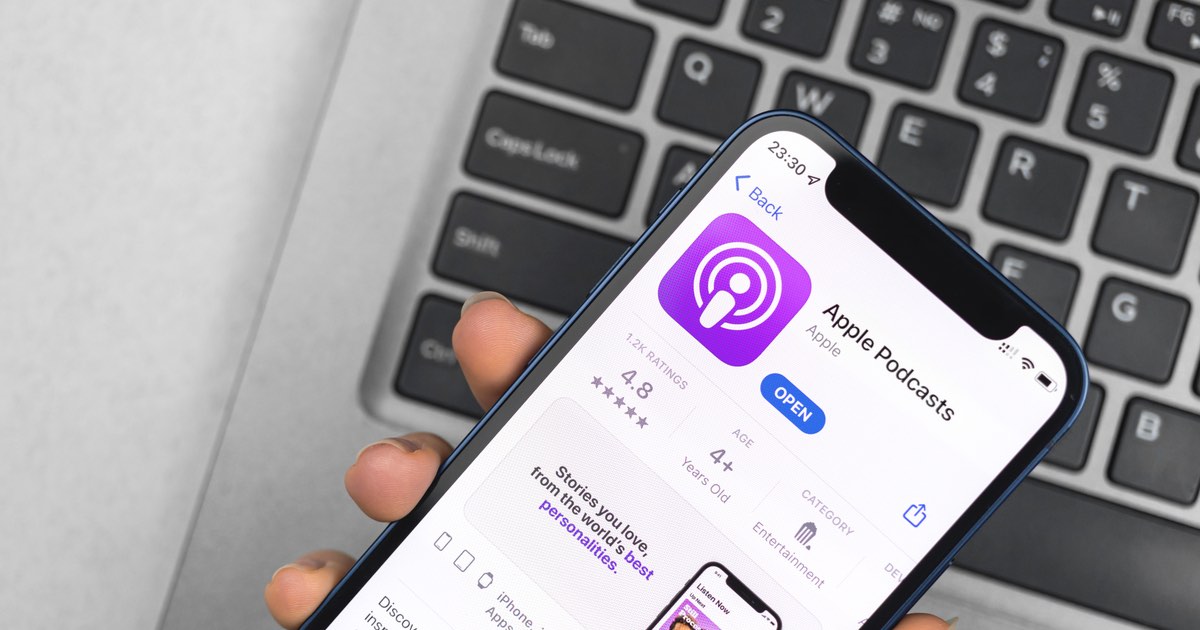
Welcome to the exciting world of podcasting, where you can share your thoughts, stories, and expertise with a wide audience. Whether you’re a seasoned podcaster or just starting out, getting your podcast on popular platforms is essential to reach your target audience. One of the most popular podcast platforms is Apple Podcasts, with millions of users worldwide.
Apple Podcasts offers a vast audience and a user-friendly interface, making it an ideal platform to showcase your podcast. In this guide, we will walk you through the process of uploading your podcast to Apple Podcasts, ensuring that your podcast reaches thousands of potential listeners.
Before we dive into the step-by-step process, it’s important to note that Apple Podcasts requires you to have an Apple ID and a Podcasts Connect account. It might seem daunting at first, but fear not! We will guide you through these steps to ensure a smooth and hassle-free process.
So, let’s get started and learn how to navigate the world of Apple Podcasts to upload your thrilling podcast episodes!
Step 1: Sign Up for an Apple ID
The first step in uploading your podcast to Apple Podcasts is to sign up for an Apple ID. An Apple ID is necessary to access various Apple services, including Podcasts Connect, which is the platform where you will submit your podcast.
If you already have an Apple ID, skip to the next step. If not, here’s how you can create one:
- Visit the Apple ID account creation page on the Apple website.
- Click on the “Create Your Apple ID” button.
- Fill in the required information, including your name, email address, and password. You may also need to provide security questions and enter a phone number for verification purposes.
- Agree to the Terms and Conditions.
- Click on the “Continue” button to create your Apple ID.
Once you have created your Apple ID, make a note of your Apple ID login details, as you will need them throughout the podcast uploading process.
Having an Apple ID not only allows you to submit your podcast, but it also gives you access to various tools and resources provided by Apple. These tools can help you monitor your podcast’s performance, analyze listener data, and even monetize your podcast through advertising partnerships.
Now that you have your Apple ID ready, it’s time to move on to the next step and prepare your podcast files for upload to Apple Podcasts Connect.
Step 2: Prepare Your Podcast Files
Before you can upload your podcast to Apple Podcasts, you need to ensure that your podcast files are properly prepared. Here are some key steps to follow:
- Create and Edit Your Podcast Episodes: Use an audio editing software to record and edit your podcast episodes. Make sure to remove any background noise, enhance the audio quality, and add intro/outro music if desired. Ensure that each episode is saved in a compatible audio format such as MP3 or AAC.
- Organize Your Podcast Metadata: Metadata is essential for describing and organizing your podcast. Prepare the following details for each episode:
- Episode title
- Episode description (a concise summary of the episode content)
- Episode artwork (square cover art in JPG or PNG format, ideally 1400×1400 pixels)
- Episode duration (the length of the episode in minutes and seconds)
- Episode publication date
- Create and Validate Your Podcast RSS Feed: An RSS feed acts as a link between your podcast episodes and podcast platforms like Apple Podcasts. You can create an RSS feed using a podcast hosting platform or a content management system (CMS) that supports podcasting. Ensure that your RSS feed adheres to the Apple Podcasts RSS feed specifications and validate it using online validation tools.
- Optimize Your Episode Titles and Descriptions: Craft compelling and keyword-rich titles and descriptions for each episode. This will help potential listeners discover your podcast when searching on Apple Podcasts.
- Ensure Consistent Audio Quality: Maintain a consistent audio quality across all episodes to provide listeners with a seamless listening experience. This includes ensuring that the volume levels are balanced and background music or effects are at an appropriate level.
- Review and Edit Transcripts (if applicable): If you choose to provide transcripts for your podcast episodes, review and edit them for accuracy. Transcripts can enhance accessibility and help search engines understand your content better.
By following these preparation steps, you’ll be ready to move forward and create your Apple Podcasts Connect account, which we’ll cover in the next step.
Step 3: Create an Apple Podcasts Connect Account
In order to submit your podcast to Apple Podcasts, you’ll need to create an account on Apple Podcasts Connect. This platform allows you to manage your podcast, track performance metrics, and make necessary updates to your podcast listing.
Follow these steps to create your Apple Podcasts Connect account:
- Open a web browser and visit the Apple Podcasts Connect website.
- Click on the “Sign In” option located at the top right corner of the page.
- Enter your Apple ID and password associated with your podcast.
- If you are signing in for the first time, you’ll need to agree to the Terms of Service and the Apple Podcasts terms and conditions.
- Click on the “Sign In” button to proceed.
- On the Apple Podcasts Connect dashboard, click on the “Add Show” button.
- Fill in the necessary details for your podcast, including the podcast title, host name or organization, and primary language.
- Upload your podcast artwork, which should be a square image in JPG or PNG format, with a minimum size of 1400×1400 pixels. This artwork will be displayed as the cover image for your podcast on Apple Podcasts.
- Click on the “Next” button to continue.
- Review the details you provided and make any necessary edits.
- Click on the “Submit” button to create your Apple Podcasts Connect account and submit your podcast details.
Once you have successfully created your Apple Podcasts Connect account, you can proceed to the next step of adding your podcast show on Apple Podcasts Connect.
Creating an Apple Podcasts Connect account is a crucial step in getting your podcast ready for submission and gaining access to the powerful tools and insights offered by Apple Podcasts. Now that your account is set up, let’s move forward and add your podcast show!
Step 4: Add Your Podcast Show on Apple Podcasts Connect
Adding your podcast show on Apple Podcasts Connect is a crucial step in making your podcast available on the Apple Podcasts platform. It involves providing essential information about your podcast and customizing its appearance. Here’s how you can add your podcast show:
- Sign in to your Apple Podcasts Connect account using your Apple ID credentials.
- On the Apple Podcasts Connect dashboard, click on the “Add Show” button if you haven’t done so already.
- Fill in the necessary details for your podcast show, including the show title, author name, and show description. The show description provides a brief overview of your podcast to potential listeners, so make it engaging and informative.
- Choose the appropriate show type and category that best represents your podcast. This helps listeners find your podcast easily when browsing Apple Podcasts.
- Specify the show’s explicit content rating if applicable. This helps ensure that your podcast reaches the appropriate audience based on their content preferences.
- Upload an attractive cover art image for your podcast show, ideally in JPG or PNG format with a minimum size of 1400×1400 pixels. This cover art will be displayed prominently on your podcast’s Apple Podcasts page, so make it visually appealing.
- Add additional contributors if there are other individuals involved in your podcast. This could include co-hosts, guest speakers, or production team members.
- Review the information you provided and make any necessary edits to ensure accuracy.
- Click on the “Submit” button to save your podcast show details.
By following these steps, you have successfully added your podcast show to Apple Podcasts Connect. The information you provided will populate your podcast’s page on Apple Podcasts, making it visible to a vast audience of potential listeners.
Now that your podcast show is added to Apple Podcasts Connect, the next step is to submit your podcast’s RSS feed, which we’ll cover in the next step. This step is vital for Apple to receive your podcast episodes and make them available to listeners on the platform.
Step 5: Submit Your Podcast RSS Feed
Submitting your podcast’s RSS feed is a crucial step in getting your episodes on Apple Podcasts. The RSS feed acts as a link between your podcast and the Apple Podcasts platform. Here’s how you can submit your podcast’s RSS feed:
- Sign in to your Apple Podcasts Connect account using your Apple ID and password.
- On the Apple Podcasts Connect dashboard, click on your podcast’s name to access the show settings.
- Scroll down to the “Podcast Feed” section and click on the “Copy Feed URL” button to copy your podcast’s RSS feed URL to your clipboard.
- Paste the copied RSS feed URL into the appropriate field or section of your podcast hosting platform or CMS. This will allow Apple Podcasts to fetch and display your podcast episodes.
- Verify that your RSS feed is correct and up-to-date by clicking on the “Refresh Feed” button in Apple Podcasts Connect. This ensures that Apple has the latest episodes from your podcast.
- Review and confirm that all the information displayed on Apple Podcasts Connect matches the details you provided in your RSS feed. This includes the podcast title, author name, artwork, description, categories, and any other metadata.
- Click on the “Save” or “Submit” button to finalize the submission of your podcast’s RSS feed.
Once you have submitted your podcast’s RSS feed, Apple Podcasts will process the information and the episodes should appear on the platform within a few hours or days. It’s important to note that it may take some time for Apple to review and approve your podcast submissions.
As your podcast evolves, make sure to update your RSS feed with new episodes and any necessary changes. This will ensure that your podcast remains fresh and up-to-date for your listeners on Apple Podcasts.
Now that you have successfully submitted your podcast’s RSS feed, let’s move on to the next step of reviewing and verifying your podcast submission on Apple Podcasts Connect.
Step 6: Review and Verify Your Podcast Submission
After submitting your podcast’s RSS feed to Apple Podcasts, it’s important to review and verify your podcast submission on Apple Podcasts Connect. This step ensures that your podcast information is accurate, and everything is set up correctly. Here’s how you can review and verify your podcast submission:
- Sign in to your Apple Podcasts Connect account using your Apple ID and password.
- On the Apple Podcasts Connect dashboard, locate and click on your podcast’s name to access the show settings.
- Review all the information displayed, including the podcast title, description, artwork, categories, and metadata. Make sure everything is correct and reflects your podcast’s branding and content accurately.
- Click on the various tabs and sections to explore the configuration options available. Take your time to review and adjust settings as necessary. For example, you can customize your show’s landing page, manage contributors, and enable monetization options.
- Listen to a sample episode on Apple Podcasts to ensure that the audio quality and formatting are as intended.
- Verify that your podcast episodes are displaying correctly and appearing in the correct order.
- Take a look at your podcast’s page on Apple Podcasts to see how it appears to potential listeners. Ensure that your artwork is displayed properly and that the overall presentation is appealing.
- If you notice any discrepancies or need to make updates, use the appropriate editing options in Apple Podcasts Connect to make the necessary revisions.
- Repeat the review process multiple times if needed to ensure that your podcast’s information is accurate and consistent.
By reviewing and verifying your podcast submission, you can ensure that your podcast is displayed correctly on Apple Podcasts and accurately represents your brand and content.
Once you are satisfied with the review and verification process, you can proceed to the next step and wait for Apple Podcasts approval. This approval process determines when your podcast will be officially available to the vast audience of Apple Podcasts listeners.
Step 7: Wait for Apple Podcasts Approval
After submitting your podcast to Apple Podcasts and completing the necessary steps, it’s time to sit back and wait for Apple Podcasts to review and approve your submission. This approval process can take some time, often ranging from a few days to a couple of weeks. Here’s what you need to do during this waiting period:
- Stay patient: While it’s natural to be eager for your podcast to be live on Apple Podcasts, remember that the approval process can take some time. Apple ensures that all podcasts meet their guidelines and standards, so be patient and avoid rushing the process.
- Check your email regularly: Keep an eye on your email inbox during this period. Apple often sends notifications regarding the status of your podcast submission. These email updates can provide valuable information about any necessary revisions or the approval of your podcast.
- Make any necessary updates: If Apple requests revisions or adjustments to your podcast during the review process, take prompt action and make the required updates. This may involve adjusting your podcast description, artwork, or other metadata elements.
- Monitor your podcast hosting platform: While waiting for Apple’s approval, monitor your podcast hosting platform or CMS for any updates or recommendations related to Apple Podcasts. They may provide additional guidance or ways to optimize your podcast for a successful launch on Apple Podcasts.
- Prepare for promotion: Utilize this waiting period to plan and prepare for the promotion of your podcast. Create a marketing strategy, explore social media sharing options, and consider ways to engage with your potential audience. Building anticipation and excitement can help generate interest in your podcast once it’s live.
It’s important to remember that the waiting period can vary, and there might be delays in the approval process. If you haven’t received any updates from Apple Podcasts after a reasonable amount of time, you can contact their support team for assistance or further clarification.
Once your podcast is approved and live on Apple Podcasts, you can move on to the final step of promoting your podcast on the platform. So, stay patient, keep an eye on your notifications, and get ready to take your podcast to the next level!
Step 8: Promote Your Podcast on Apple Podcasts
Now that your podcast is live on Apple Podcasts, it’s crucial to promote it to reach a wider audience and grow your listener base. Promoting your podcast on Apple Podcasts can help you gain visibility and attract new listeners who are actively searching for content in your niche. Here are some effective ways to promote your podcast on Apple Podcasts:
- Share on Social Media: Leverage the power of social media platforms to promote your podcast. Create engaging posts, share episode highlights, and encourage your followers to listen and subscribe. Utilize hashtags and engage with relevant communities to extend your reach.
- Utilize Your Website: Embed the Apple Podcasts player on your website or create a dedicated page for your podcast. Make sure to provide easy access to your Apple Podcasts link for visitors to listen and subscribe.
- Engage with Podcast Directories: List your podcast on various podcast directories and platforms beyond Apple Podcasts. These directories can further increase your podcast’s visibility and help people discover your show.
- Collaborate with Other Podcasters: Connect with other podcasters in your niche and explore collaboration opportunities. Consider guest appearances on other podcasts or hosting guest episodes on your own podcast. Cross-promotion can help expose your podcast to a new audience.
- Ask for Reviews and Ratings: Encourage your listeners to leave reviews and ratings on Apple Podcasts. Positive reviews can attract new listeners and boost your podcast’s credibility and ranking within the platform.
- Interview Influencers and Experts: Invite influential guests or experts in your field as guests on your podcast. This not only adds value to your content but also increases the chances of your episode being shared by your guests to their own audience.
- Create Engaging Visual Content: Create visually appealing graphics or teaser videos to promote your podcast on visual platforms like YouTube, Instagram, and LinkedIn. Use captivating visuals and compelling captions to catch the interest of potential listeners.
- Engage with Your Audience: Foster a sense of community and engage with your audience by responding to comments, messages, and reviews. Show appreciation for their support and encourage them to share your podcast with others.
- Consistency and Quality: Continuously produce high-quality episodes and stick to a consistent release schedule. Consistency builds trust with your audience and keeps them coming back for more.
Remember, promoting your podcast is an ongoing effort. Experiment with different strategies, track their effectiveness, and adjust accordingly. Building a dedicated audience takes time, so stay proactive and patient in your promotion efforts.
By following these promotion tips, you can increase your podcast’s visibility, attract new listeners, and grow your podcasting presence on Apple Podcasts.
Conclusion
Congratulations! You’ve successfully navigated the process of uploading your podcast to Apple Podcasts. By following the step-by-step guide we’ve provided, you’ve ensured that your podcast can reach a vast audience of potential listeners on one of the most popular podcast platforms.
Remember, the journey doesn’t end here. Once your podcast is live on Apple Podcasts, it’s important to continue creating high-quality content, engaging with your audience, and promoting your podcast to attract new listeners. Consistency, quality, and effective promotion strategies are key to growing your podcast and establishing yourself as a respected voice in your niche.
Continue to explore different avenues for promoting your podcast, such as social media, collaborations, and guest appearances on other podcasts. Engage with your audience, respond to their feedback, and foster a sense of community around your podcast.
Additionally, use the analytics and insights provided by Apple Podcasts Connect to track the performance of your podcast. Monitor metrics such as downloads, audience demographics, and engagement to make data-driven decisions and further refine your podcasting strategy.
Remember, building a successful podcast takes time and dedication. Stay passionate, keep improving, and adapt your approach based on listener feedback and changing trends in the podcasting landscape.
Thank you for choosing Apple Podcasts as a platform to share your podcast with the world. We wish you all the best in your podcasting journey and hope you achieve great success as you reach and connect with a growing audience of dedicated listeners!