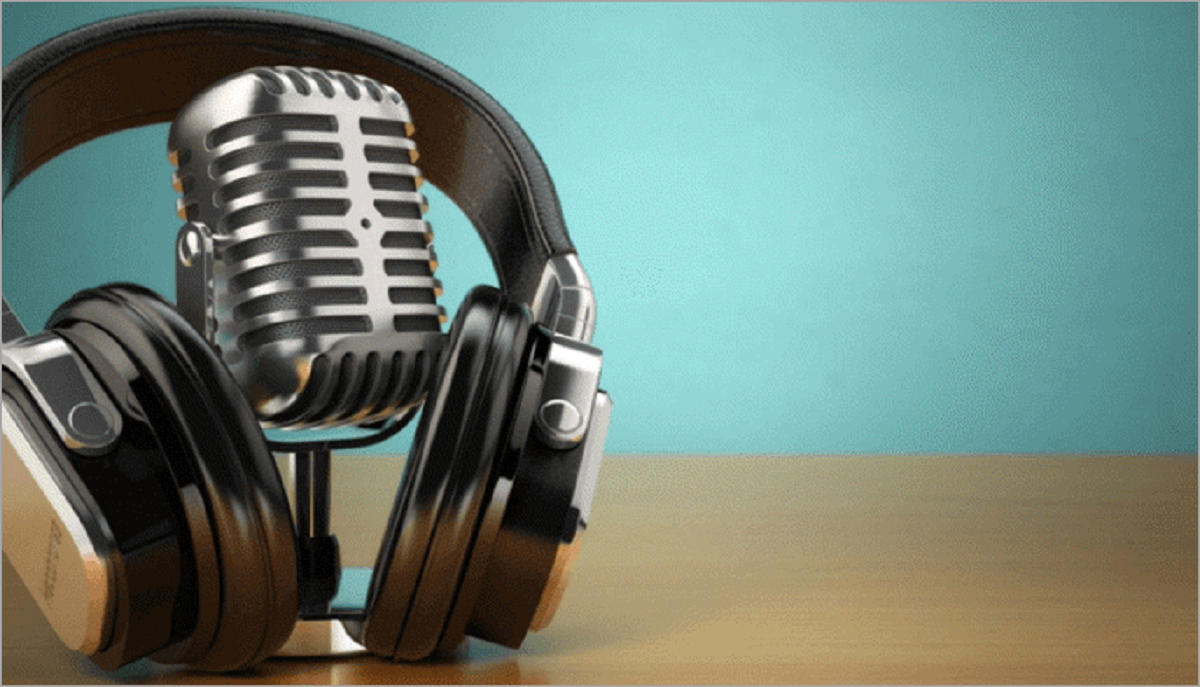
Introduction
Welcome to the world of podcasting! Whether you are a seasoned content creator or just starting out, having a dedicated podcast studio can greatly enhance the quality of your recordings. Setting up a podcast studio may seem like a daunting task, but with the right equipment and setup, you can create a professional and immersive audio experience for your audience.
In this guide, we will walk you through the process of setting up your own podcast studio from start to finish. From the essential equipment needed to the intricacies of soundproofing and mic placement, we’ll cover everything you need to know to get started.
Before diving into the technical aspects, it’s important to have a clear vision of what you want to achieve with your podcast. Are you aiming for a conversational style or a more scripted approach? Identifying your podcast’s format, tone, and target audience will help you make informed decisions when it comes to equipment and studio setup.
Creating engaging and well-produced content is essential, but a comfortable and functional environment is equally important. A dedicated space for your podcast studio will not only improve the quality of your recordings but also make the overall production process more enjoyable.
Whether you have a spare room or a corner of your living space, consider the size, acoustics, and layout of the room. A room with minimal echo and ambient noise will provide a more professional sound. Additionally, ensure that the room can accommodate your equipment and allow for easy movement and comfort during recording sessions.
Once you have selected the space for your podcast studio, it’s time to dive into the technical aspects. In the following sections, we will discuss the necessary equipment, soundproofing techniques, mic placement, mixing boards, recording and editing software, and even setting up a podcast hosting platform.
By the end of this guide, you will have a comprehensive understanding of how to set up a podcast studio and be well on your way to creating high-quality content that captivates your audience.
Equipment Needed
Setting up a podcast studio begins with having the right equipment. While there are various options available depending on your budget and requirements, here are the essentials you’ll need to get started:
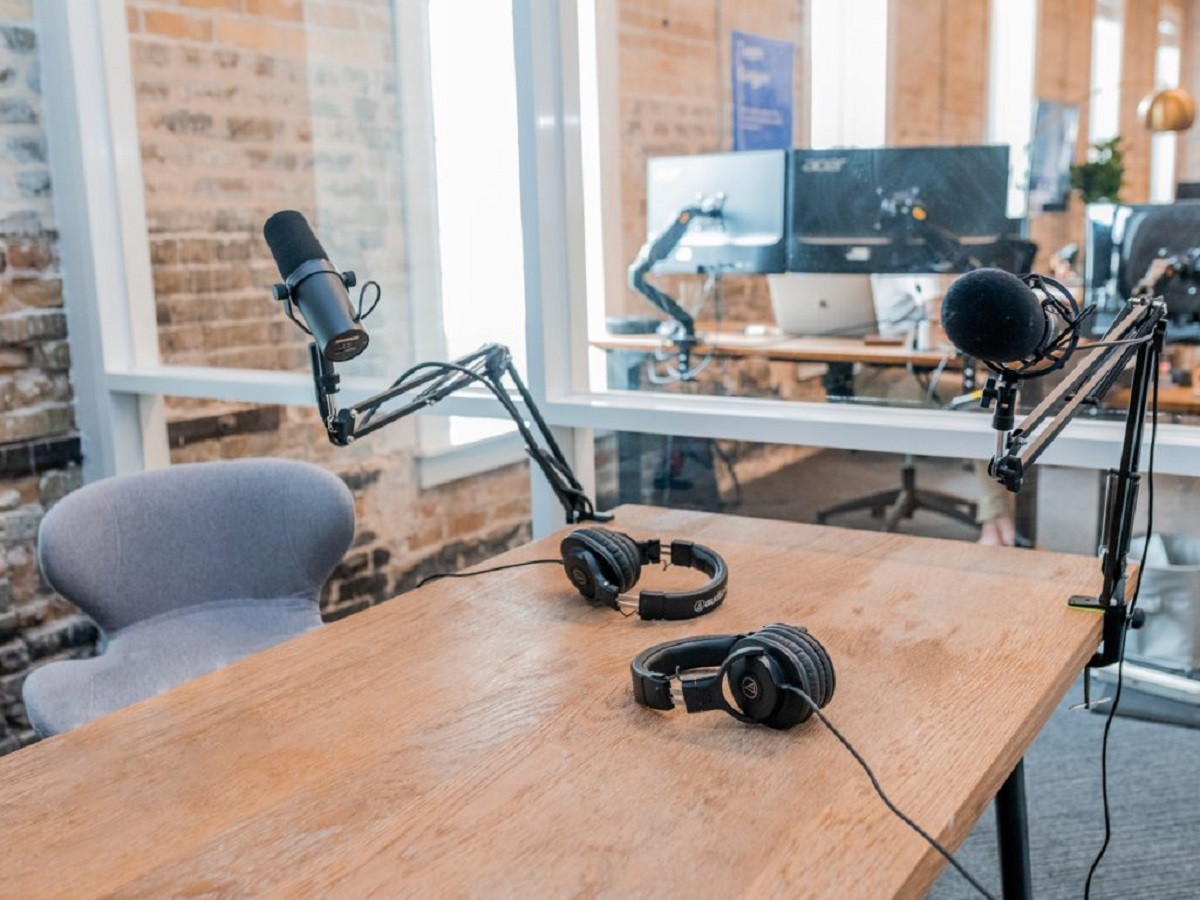
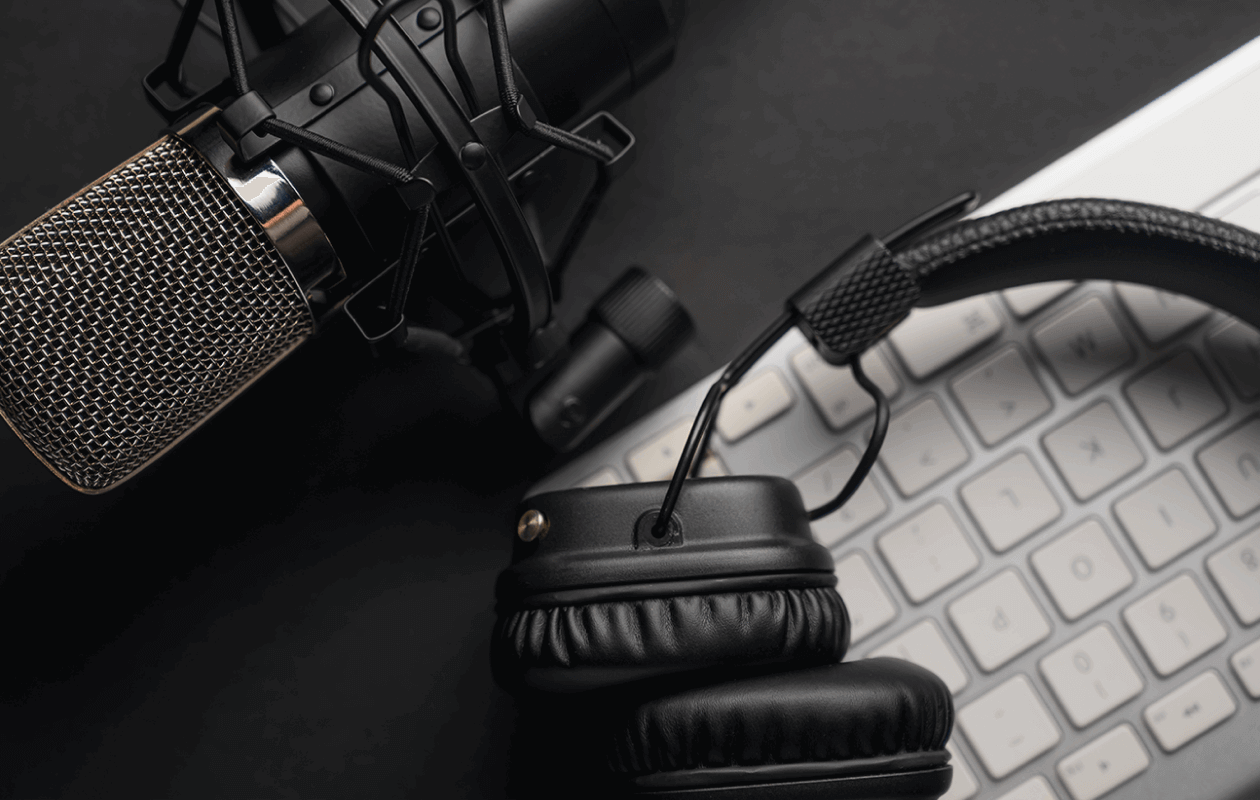
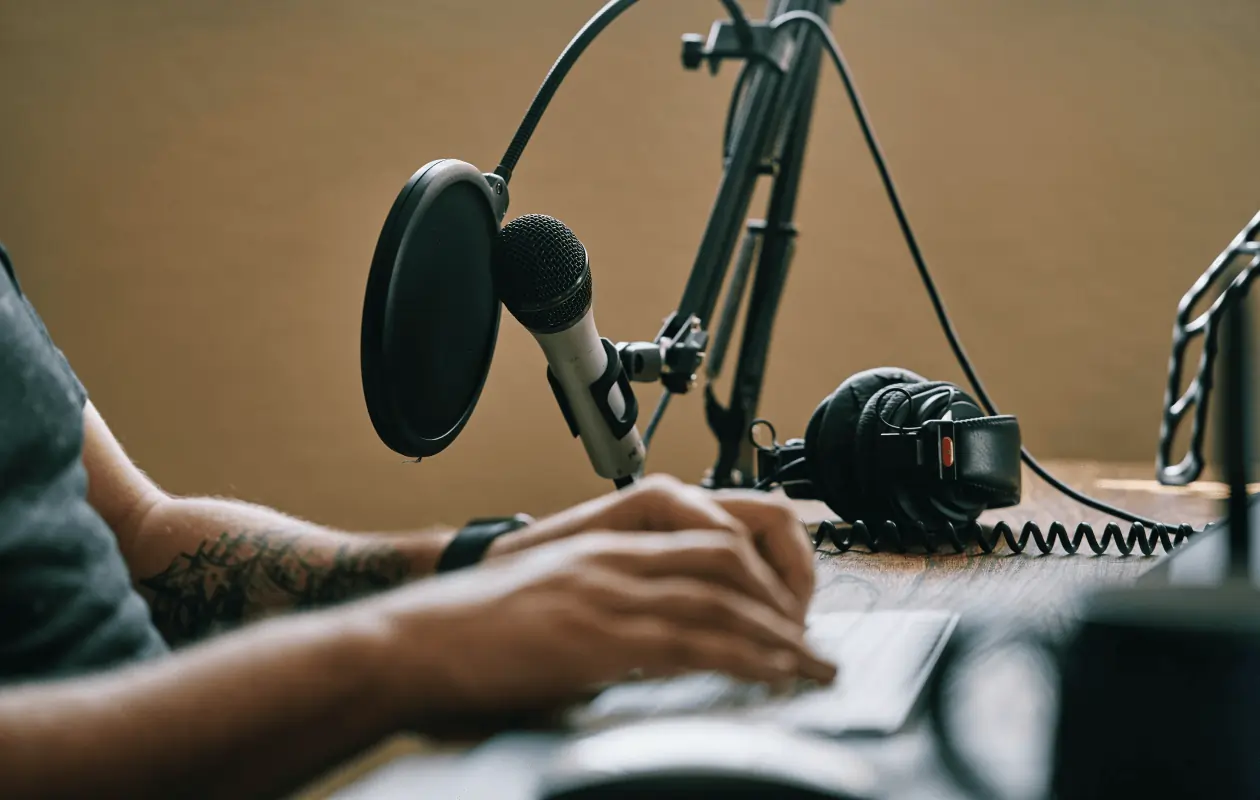
- Microphones: Invest in quality microphones that capture clear and crisp audio. Dynamic microphones are popular for podcasting as they reduce background noise and are more forgiving with room acoustics. Some popular options include the Shure SM58 and the Audio-Technica ATR2100x.
- Headphones: A good pair of closed-back headphones is crucial for monitoring your audio while recording and editing. Look for headphones that provide accurate sound reproduction, comfort, and noise isolation, such as the Audio-Technica ATH-M50x or the Beyerdynamic DT 770 Pro.
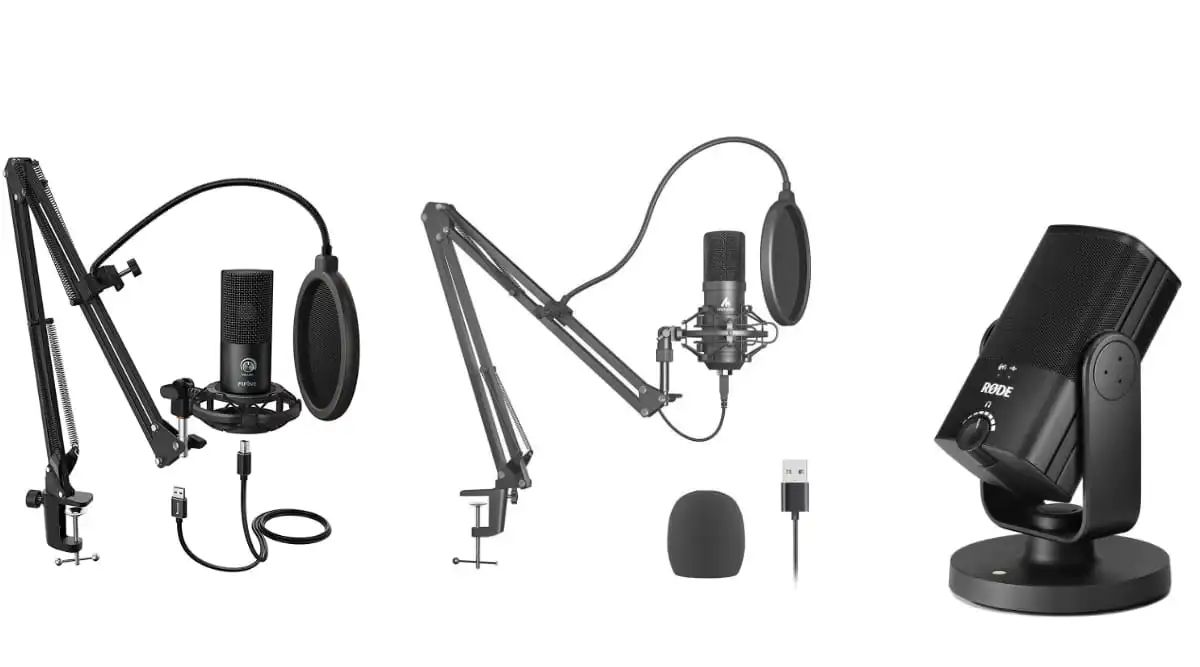
- Microphone Stands or Boom Arms: Sturdy microphone stands or boom arms are necessary to securely position your microphones at the desired height and angle. Desktop stands or boom arms attached to your desk are popular choices.
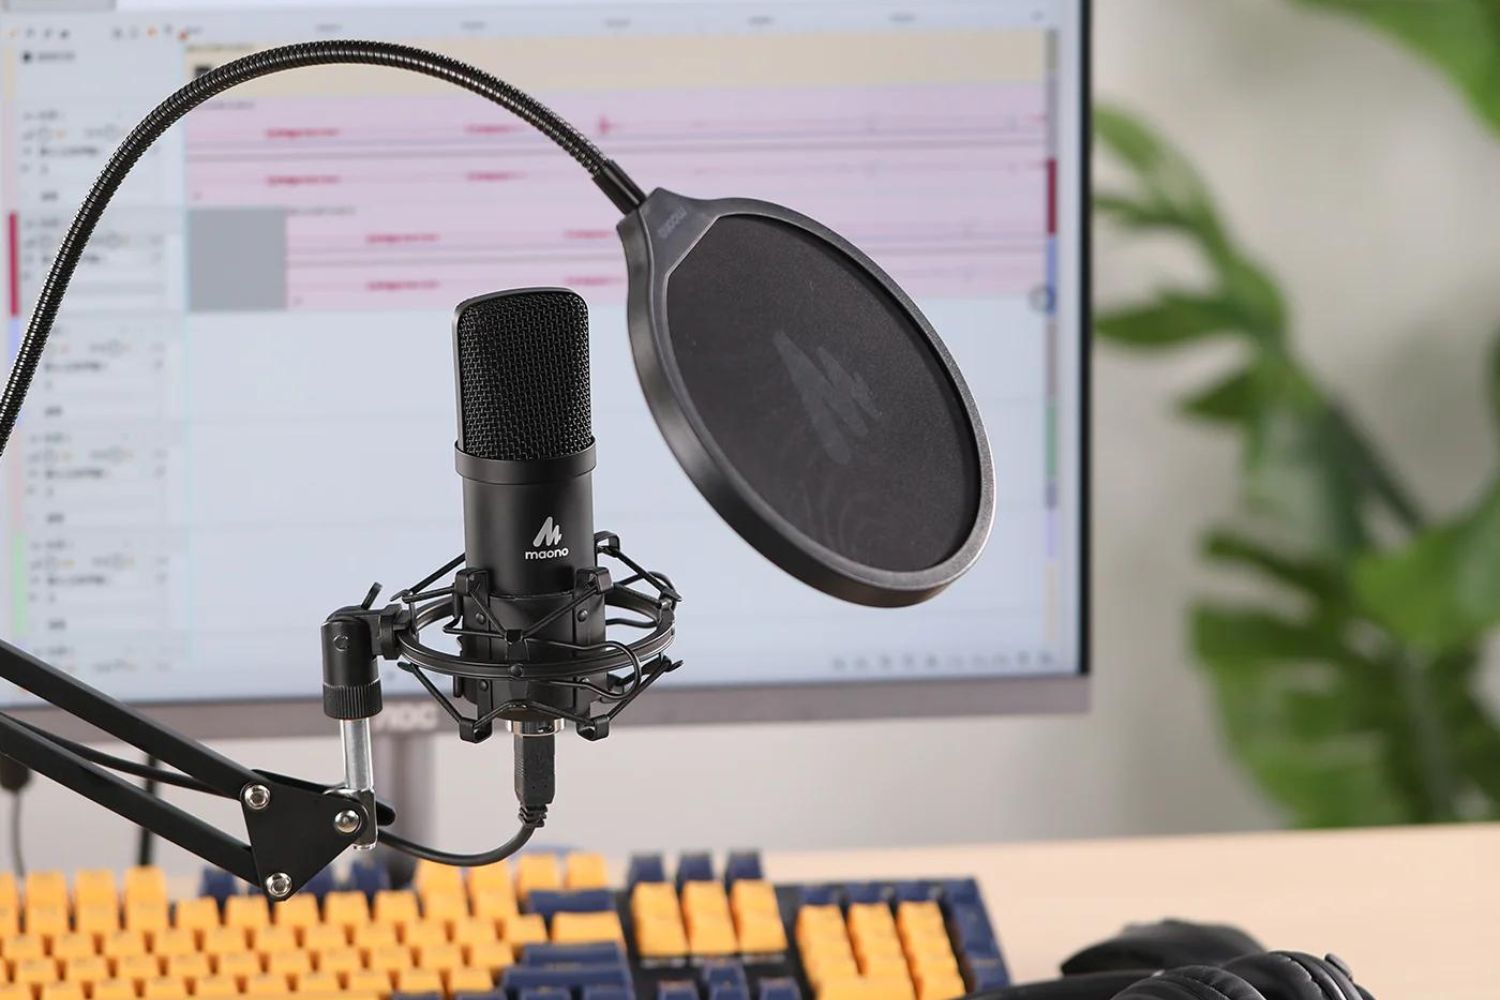
- Pop Filters: Pop filters are used to minimize plosive sounds caused by certain consonants like “p” and “s.” They are typically placed in front of the microphone to reduce unwanted bursts of air hitting the microphone diaphragm.
- Shock Mounts: Shock mounts help reduce vibrations and handling noise, ensuring that any accidental bumps or movements do not translate into unwanted sounds during recording.
- Audio Interface: An audio interface is the bridge between your microphone and computer. It converts analog audio signals into a digital format that your computer can process. Focusrite Scarlett and PreSonus AudioBox are popular options for beginner podcasters.
- Mixer or Mixing Board: While not essential, a mixer or mixing board allows you to have more control over the audio levels and can accommodate multiple microphones and other audio sources. Mixers like the Behringer Xenyx Q802USB are commonly used in podcast studios.
- Pop-up Reflection Filter: If you are unable to soundproof your recording space fully, a pop-up reflection filter can help reduce room reflections and improve the overall audio quality of your recordings.
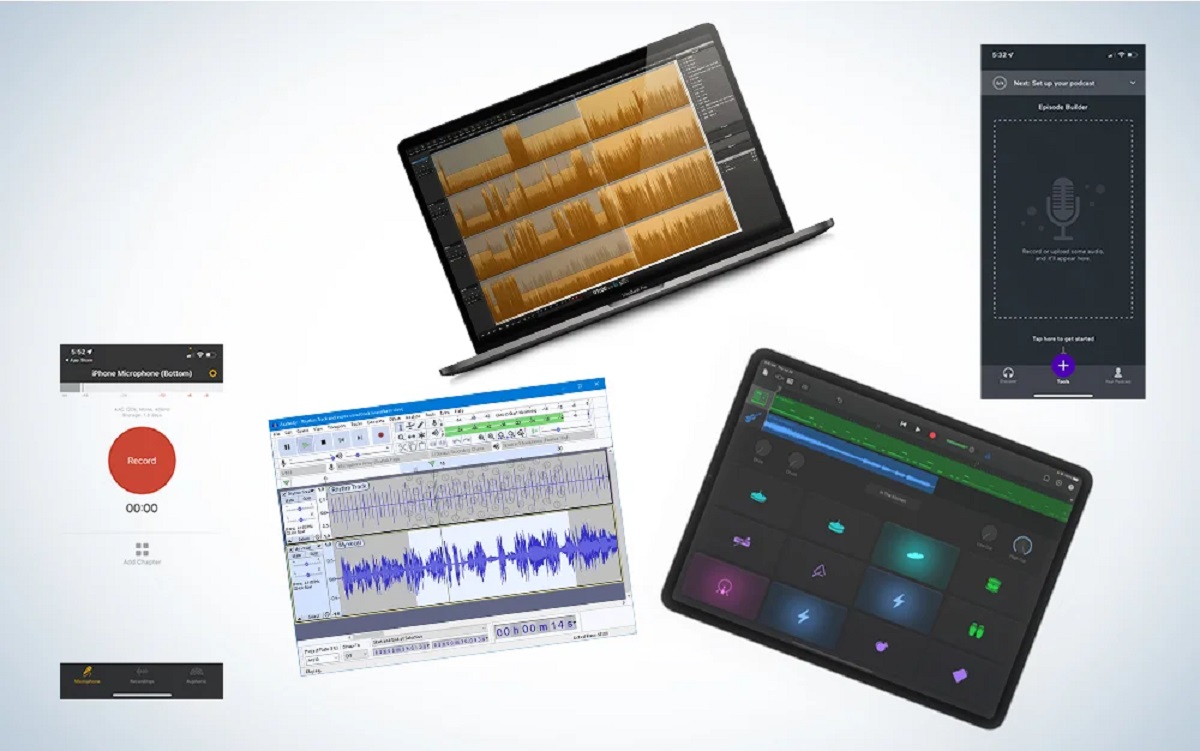
- Computer and Recording Software: You will need a computer with enough processing power to handle audio recording and editing. Choose recording software compatible with your operating system, such as Audacity (free), Adobe Audition, or Logic Pro X for macOS.
Remember, the quality of your podcast recordings depends on the quality of your equipment. While it’s tempting to cut corners, investing in reliable and professional-grade gear will significantly elevate your podcasting experience.
Setting Up the Room
The room in which you set up your podcast studio plays a crucial role in the overall sound quality of your recordings. Here are some steps to follow when setting up the room:
- Clear the Space: Start by removing any unnecessary clutter from the room. This will help minimize unwanted reflections and echoes.
- Consider Room Acoustics: Pay attention to the acoustics of the room. Hard surfaces like bare walls, windows, and floors can cause reflections, leading to a less-than-ideal sound. To address this, you can add furniture, carpets, or acoustic panels to help absorb and diffuse sound waves.
- Arrange Furniture: Position your desk, chairs, and equipment in a way that maximizes comfort and functionality. Consider the flow of movement during podcast sessions and ensure easy access to your microphone, computer, and any other equipment you need.
- Minimize External Noise: Find ways to minimize external noises that can interfere with your recordings. Choose a room away from high-traffic areas, and if needed, use soundproofing techniques like sealing gaps around doors and windows and using soundproof curtains or foam panels.
- Lighting: Good lighting is important for both video and audio recordings. Use a combination of natural and artificial lighting to create a well-lit and comfortable atmosphere.
- Cable Management: Proper cable management is crucial to avoid unnecessary clutter and potential tripping hazards. Use cable clips, ties, or cable sleeves to keep your cables organized and out of the way.
- Ergonomics: Consider the ergonomics of your setup to prevent discomfort during long recording sessions. Ensure your chair and desk are at the right height to maintain good posture and minimize fatigue.
- Ventilation: Podcasting can be a time-consuming endeavor, so ensuring proper ventilation is essential. A well-ventilated room will prevent discomfort and help maintain focus and energy throughout your recording sessions.
Take the time to assess and optimize your room setup before diving into recording. The effort you put into creating a clean, sound-optimized space will lead to improved audio quality and a more enjoyable podcasting experience.
Soundproofing the Room
Creating a soundproof environment is crucial for achieving high-quality audio recordings. Here are some soundproofing techniques to consider when setting up your podcast studio:
- Seal Gaps and Cracks: Inspect the room for any gaps or cracks in the walls, windows, and doors, and seal them with weatherstripping or acoustic caulk. This will prevent outside noise from leaking into the room.
- Install Soundproof Curtains: Soundproof curtains are heavy and dense, designed to absorb sound waves and reduce external noise. Hang these curtains over windows and doors to minimize sound transmission.
- Add Acoustic Panels: Placing acoustic panels on the walls and ceiling can help absorb and diffuse sound reflections, improving the overall sound quality. These panels are available in various sizes, shapes, and materials suitable for different room configurations.
- Apply Acoustic Foam: Acoustic foam panels are specially designed to absorb sound waves and reduce echo and reverberation. Place these panels strategically on the walls to improve the recording quality and eliminate unwanted reflections.
- Use Bass Traps: Bass traps are effective in absorbing low-frequency sound waves that can build up in corners of the room. Install bass traps in the corners to minimize bass resonance and achieve a cleaner sound.
- Use a Vocal Booth: If you have limited space or want to prioritize sound isolation, consider using a portable vocal booth. These booths are designed to absorb sound waves and provide a controlled environment for recording vocals.
- Use Isolation Pads: Place isolation pads under your microphone, speakers, and other equipment to reduce vibrations and prevent them from transferring to the desk or floor, thus minimizing unwanted noise.
- Consider Door and Window Upgrades: If budget allows, upgrading to solid-core doors and double-paned windows can significantly reduce sound transmission through these areas.
- Use Noise Gates and Noise Reduction Plugins: While not a soundproofing technique in the traditional sense, utilizing noise gates and noise reduction plugins in your recording and editing software can help eliminate background noise during post-production.
Keep in mind that achieving complete soundproofing may be challenging, especially in shared spaces or areas near high-traffic areas. However, implementing these soundproofing techniques will certainly help minimize outside noise and improve the overall audio quality of your podcast recordings.
Mic Placement
The placement of your microphone is crucial in capturing clear and balanced audio. Here are some tips for optimal mic placement in your podcast studio:
- Distance from the Microphone: Generally, positioning the microphone 6-8 inches away from your mouth is a good starting point. This distance helps maintain a good balance between capturing your voice clearly and reducing plosive sounds.
- Microphone Angling: Angle the microphone slightly downwards towards your mouth to ensure that you are speaking directly into the diaphragm. This will help capture your voice more accurately and reduce unwanted room reflections.
- Using a Pop Filter: Place a pop filter between your mouth and the microphone to minimize plosive sounds caused by strong bursts of air. Position the pop filter approximately 2-3 inches away from the microphone to achieve optimal effectiveness.
- Adjusting Mic Gain: Set the microphone gain level appropriately to avoid distortion or low volume issues. Experiment with different gain settings while monitoring your audio levels to find the right balance for clear and distortion-free recordings.
- Single or Multiple Microphones: Depending on your podcast format, you may need to use multiple microphones. For interviews or conversations, position the microphones slightly off to the side and angle them towards each speaker to capture their voices accurately while maintaining a good balance.
- Controlling Room Reflections: Minimize reflections from the room by using acoustic treatment, such as foam panels or diffusers, behind and around the microphone. This helps prevent sound reflections from reaching the microphone and compromising the audio quality.
- Testing and Adjusting: Before recording, perform tests and check the audio quality to ensure proper mic placement. Listen for any unwanted noise, distortion, or room reflections. Make adjustments as needed to achieve optimal sound capture.
- Consider Microphone Type: Different microphone types may require slightly different placement techniques. Dynamic microphones are more forgiving and versatile, while condenser microphones are more sensitive and may require a quieter environment and closer placement for optimal results.
- Experiment and Fine-tune: Every podcast studio and voice is unique, so don’t be afraid to experiment and make necessary adjustments to find the best mic placement for your specific needs. Fine-tuning your setup will ensure the best possible audio quality for your podcasts.
Remember that mic placement is not a one-size-fits-all approach. It may require some trial and error to find the perfect positioning for your microphone. Take the time to test, adjust, and fine-tune your mic placement to achieve the best sound quality for your podcast recordings.
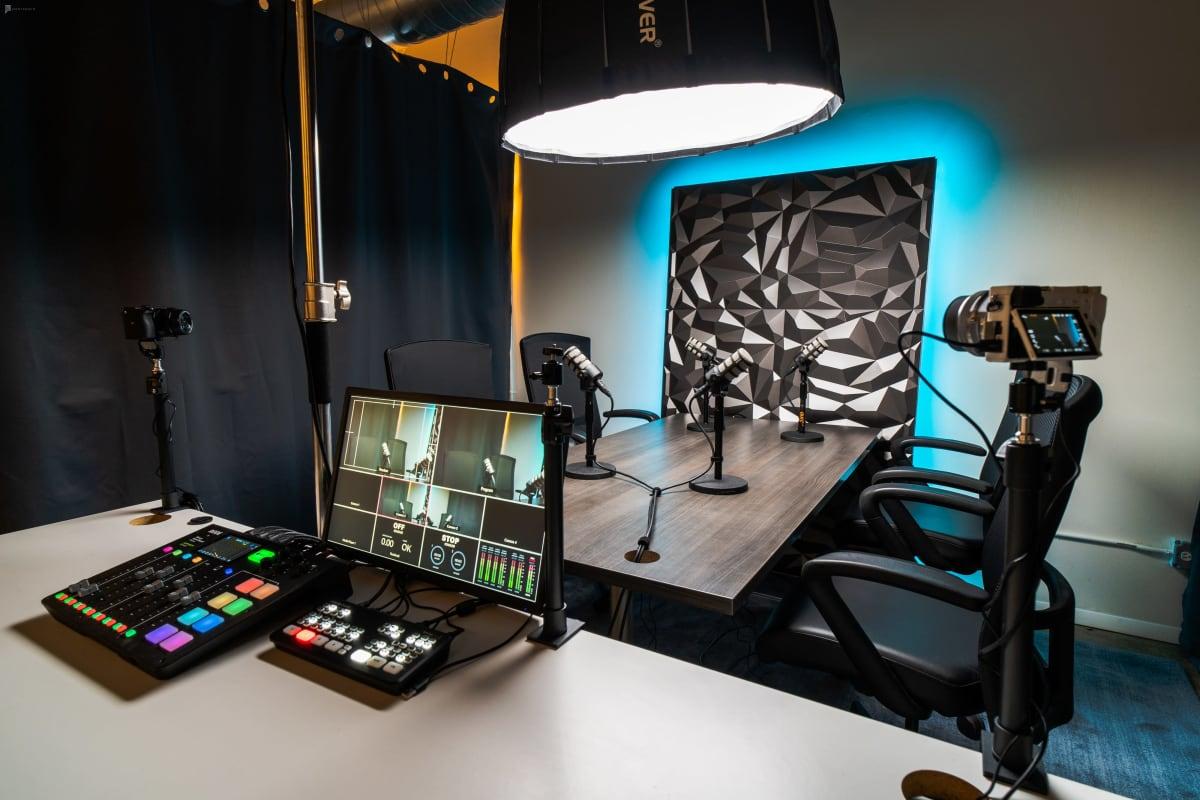
Mixing Board and Audio Interface
A mixing board and audio interface are important components of your podcast studio setup. They allow you to control and manage your audio signals with precision. Here’s what you need to know about these essential pieces of equipment:
Mixing Board:
A mixing board, also known as a mixer, is a control surface that allows you to adjust the audio levels, apply effects, and route audio signals. Here are some key points to consider:
- Channel Inputs: Look for a mixing board with enough channel inputs to accommodate the number of microphones and other audio sources you plan to use. Consider future expansion as well.
- Preamps: Quality preamps are crucial for capturing clean and clear audio signals. Make sure the mixing board has high-quality preamps suitable for your needs.
- EQ and Effects: Built-in EQ (equalizer) and effects can enhance the audio quality and add professional touches to your recordings. Look for a mixing board with EQ controls and effects options that meet your requirements.
- USB or Audio Interface Integration: Some mixing boards offer built-in USB or audio interface capabilities, allowing you to connect directly to your computer without the need for a separate audio interface. This can simplify your setup and reduce the number of cables.
- Control and Monitoring: Consider the control layout, ergonomics, and ease of use when choosing a mixing board. Additionally, look for features like headphone output and monitoring options to facilitate real-time monitoring of your audio.
Audio Interface:
An audio interface serves as the bridge between your microphones and computer. It converts analog audio signals into digital format and provides high-quality audio input and output. Here are some important points to consider:
- Connectivity: Ensure that the audio interface has the necessary inputs and outputs to accommodate the number of microphones and audio sources you plan to use. USB or Thunderbolt connectivity is popular and widely supported.
- Preamps: Just like with a mixing board, high-quality preamps are crucial for capturing clean and clear audio signals. Ensure that the audio interface has good preamps suitable for your needs.
- Sample Rate and Bit Depth: Higher sample rates and bit depths offer better audio quality, but they can also require more processing power and storage space. Choose an audio interface that offers the right balance for your requirements.
- Compatibility: Check the compatibility with your operating system and recording software. Most audio interfaces are compatible with popular recording software like Audacity, Adobe Audition, and Logic Pro.
- Phantom Power: If you plan to use condenser microphones, make sure the audio interface provides phantom power to power these microphones.
- Monitoring Options: Look for headphone outputs and volume control options on the audio interface for real-time monitoring of your recordings. This allows you to hear exactly what your listeners will hear.
Choosing the right mixing board and audio interface is crucial for achieving professional sound quality in your podcast recordings. Consider your specific needs, budget, and compatibility requirements when selecting these pieces of equipment.
Headphones and Monitoring
Headphones and monitoring play a critical role in ensuring accurate audio reproduction and monitoring during podcast recordings. Here’s what you need to know about choosing the right headphones and setting up effective monitoring for your podcast studio:
Headphones:
When selecting headphones for podcasting, there are a few key factors to consider:
- Closed-Back Design: Closed-back headphones are preferable for podcasting as they provide better noise isolation by blocking out external sounds and preventing audio leakage.
- Comfort: Since podcasting often involves long recording or editing sessions, choose headphones that are comfortable to wear for extended periods. Look for padded headbands, adjustable earcups, and lightweight designs.
- Sound Quality: Opt for headphones that provide accurate and balanced sound reproduction. This ensures that you can hear details and nuances in your audio recordings without any artificial enhancements or biases.
- Wide Frequency Response: Look for headphones with a wide frequency response range to cover the full spectrum of audio frequencies. This helps you capture and monitor all the nuances of your recordings accurately.
- Durability: Consider the build quality and durability of the headphones, especially if you will be using them regularly. Look for sturdy construction and quality materials to ensure they can withstand frequent use.
Monitoring:
In addition to choosing the appropriate headphones, it’s crucial to set up effective monitoring for your podcast studio. Here are some tips:
- Real-Time Monitoring: Use an audio interface or a mixing board that allows for real-time monitoring of your recordings. This allows you to hear exactly what is being recorded and make adjustments as needed.
- Headphone Amplifier: If you are using multiple headphone outputs or need to boost the audio signal for better headphone performance, consider using a separate headphone amplifier.
- Volume Control: Ensure that you have control over the volume levels for your headphones. This allows you to adjust the volume to a comfortable level and avoid potential hearing damage.
- Cross-Checking: When editing and mixing your podcast episodes, consider cross-checking your audio on different playback systems, such as speakers or car stereo, to ensure the audio translates well across various devices and environments.
- Room Acoustics: Take into account the room’s acoustics and how they may affect your monitoring. If necessary, incorporate acoustic treatment to minimize unwanted reflections and improve the accuracy of your monitoring.
Remember to regularly check and calibrate your headphones to ensure accurate sound reproduction. By choosing the right headphones and setting up proper monitoring, you can make informed decisions during recording and editing, resulting in high-quality podcast episodes.
Recording Software
Choosing the right recording software for your podcast studio is essential to capture and edit your audio effectively. Here are some key factors to consider when selecting recording software:
Compatibility:
Ensure that the recording software you choose is compatible with your operating system. Leading recording software options such as Audacity, Adobe Audition, and Logic Pro X are available for both Windows and macOS.
User-Friendliness:
If you are new to podcasting or recording software, consider options that are user-friendly and have intuitive interfaces. Easy-to-navigate software with clear and accessible features will help streamline your recording and editing workflow.
Recording and Editing Capabilities:
Look for recording software that offers essential features such as multi-track recording, real-time monitoring, and editing capabilities. This allows you to record and edit each audio track separately, mix them together, and make necessary adjustments to achieve professional-quality results.
Effects and Plugins:
Consider the availability of built-in effects and plugin support in the recording software. Effects like EQ, compression, and noise reduction can help enhance the audio quality and ensure a polished final product. Additionally, the ability to integrate third-party plugins allows for further customization and fine-tuning of your recordings.
File Formats and Export Options:
Ensure that the recording software supports the file formats you need for your podcast episodes, such as WAV, MP3, or FLAC. It’s also beneficial to have options for exporting and saving your recordings at different bitrates and sample rates to meet various platform requirements.
Stability and Reliability:
Choose a recording software known for its stability and reliability. Software crashes or glitches can result in lost recordings or wasted editing time. Read reviews or seek recommendations from fellow podcasters to gain insight into the stability and performance of different software options.
Learning Resources and Community:
Consider the availability of learning resources such as tutorials, documentation, and online communities. Having access to a supportive community and educational materials can greatly assist you in learning and leveraging the full potential of the recording software.
Ultimately, the best recording software for your podcast studio will depend on your specific needs and preferences. Consider your budget, level of experience, and desired features when making your decision. Remember, it’s always a good idea to try out different software options before committing to one, as it will help you find the software that best suits your podcasting style and workflow.
Editing Software
Editing software is a crucial tool in transforming raw recordings into polished and professional podcast episodes. Here are some key considerations when selecting the right editing software for your podcast studio:
Compatibility:
Ensure that the editing software you choose is compatible with your computer operating system. Popular editing software options such as Adobe Audition, Audacity, and GarageBand are available for both Windows and macOS.
User-Friendliness:
Look for editing software with a user-friendly interface that is intuitive and easy to navigate. This will allow you to quickly learn the software and efficiently edit your podcast episodes without a steep learning curve.
Editing Capabilities:
The editing software should offer a range of essential editing features, including cutting, trimming, fading, and adjusting audio levels. Look for software that provides multi-track editing capabilities, allowing you to work on different audio elements separately while maintaining precise control over your podcast’s overall sound.
Effects and Plugins:
Consider the availability of built-in effects and the ability to integrate third-party plugins in the editing software. These effects and plugins can help enhance your podcast’s audio quality and add creative elements, such as EQ, compression, noise reduction, and voice modulation.
Audio Restoration Tools:
Editing software with audio restoration tools can be invaluable for cleaning up background noise, reducing unwanted clicks or pops, and repairing audio issues. Look for features such as noise reduction, de-essing, and spectral editing to enhance the overall sound quality of your recordings.
Export Options:
Ensure that the editing software supports the necessary file formats and export options for your podcast episodes. Common formats include MP3, WAV, or FLAC. Additionally, having the flexibility to adjust the bitrate and sample rate during export can be useful for optimizing file size and quality.
Stability and Reliability:
Choose editing software known for its stability and reliability. Frequent crashes or software glitches can result in data loss or wasted editing time. Prioritize software that is regularly updated and has a reputation for being stable and reliable.
Learning Resources and Community:
Consider the availability of learning resources, such as tutorials, documentation, and online communities. A supportive community and educational materials can help you master the editing software, troubleshoot issues, and discover new editing techniques.
Ultimately, the best editing software for your podcast studio will depend on your specific needs, budget, and level of expertise. It’s recommended to try out different software options, experiment with their features, and get a feel for their workflow before committing to one. By choosing the right editing software, you can effectively refine and enhance your podcast episodes to captivate your audience.
Setting Up a Podcast Hosting Platform
Once you have recorded and edited your podcast episodes, the next step is to choose and set up a podcast hosting platform. A podcast hosting platform is a service that stores and distributes your podcast episodes to various podcast directories and platforms. Here’s what you need to know about setting up a podcast hosting platform:
Choose a Reliable Hosting Platform:
There are several podcast hosting platforms to choose from, each offering different features and pricing plans. Some popular options include Libsyn, Podbean, Anchor, and Buzzsprout. Research and compare the features, storage limits, analytics, monetization options, and pricing plans of these platforms to determine which one best suits your needs.
Sign Up and Create an Account:
Visit the website of the chosen hosting platform and sign up for an account. Provide the necessary information, such as your podcast name, description, and artwork. Some platforms may require you to input your RSS feed URL and podcast category at this stage.
Upload Your Podcast Episodes:
Once you’ve created an account, you can start uploading your podcast episodes to the hosting platform. Typically, you’ll have the option to upload the audio files directly or connect the platform to your editing software for automatic upload. Ensure that your episodes are in the required audio format and meet any specified file size or duration limits.
Customize Your Podcast Information:
Take advantage of the hosting platform’s customization options to personalize your podcast. This includes adding episode titles, descriptions, show notes, and episode artwork. Many hosting platforms also allow you to set up your podcast website, customize your RSS feed, and even generate a podcast player for your website.
Submit Your Podcast to Directories:
After uploading your podcast episodes, the hosting platform will generate an RSS feed for your podcast. This feed contains the necessary metadata and audio links for your episodes. Submit your RSS feed to popular podcast directories such as Apple Podcasts, Spotify, Google Podcasts, and Stitcher. This ensures that your podcast is available to a wider audience across various platforms.
Monitor Analytics and Promote Your Podcast:
Utilize the analytics tools provided by your hosting platform to gain insights into your podcast’s performance, such as episode downloads, listener demographics, and referral sources. This information can help you understand your audience and tailor your content accordingly. Additionally, leverage social media, email newsletters, and other marketing channels to promote your podcast and attract new listeners.
Regularly Update and Maintain Your Podcast:
Keep your hosting platform updated with new episodes as you release them. Regularly engage with your audience, respond to comments or feedback, and consider incorporating listener suggestions into your podcast. Continuously monitor the performance of your podcast and make adjustments as needed to ensure its growth and success.
Setting up a podcast hosting platform is an important step in making your podcast available to a wide audience. Choose a reliable platform, upload your episodes, customize your podcast information, and promote your podcast effectively to reach and engage your target audience.
Conclusion
Setting up a podcast studio is an exciting endeavor that allows you to create compelling and professional audio content for your audience. By following the steps outlined in this guide, you can create a podcasting space that enhances the quality of your recordings and elevates your overall podcasting experience.
Starting with the right equipment, such as high-quality microphones, headphones, and a reliable audio interface, sets the foundation for capturing clear and crisp audio. Take the time to understand the different features and options available in the market, and choose the equipment that best suits your budget and podcasting goals.
Next, pay attention to the setup and acoustics of your room. Clear the space, consider room acoustics, and arrange furniture to create a comfortable and functional environment for your podcast studio. Implement soundproofing techniques to minimize external noise and reflections that could impact the audio quality. Take advantage of acoustic treatment options, such as acoustic panels and pop-up reflection filters, to create a more controlled recording environment.
Understanding the art of mic placement is crucial to capturing professional-quality audio. Experiment with different distances and angles to find the optimal positioning for your microphone, taking into account the type of microphone you are using and the desired audio capture. Pay attention to room reflections and invest in quality pop filters and shock mounts to reduce unwanted noises and vibrations.
A mixing board and audio interface give you control over audio levels, effects, and routing. Choose a mixing board with enough channel inputs and good preamps, and find an audio interface that provides the necessary connectivity and features for your setup. These tools will help you fine-tune your sound and achieve a balanced and polished final product.
Equally important is selecting the right recording and editing software. Consider factors such as compatibility, user-friendliness, available editing features, effects, and export options. Find a software that fits your needs and allows you to bring your creative vision to life.
Once your episodes are recorded and edited, setting up a podcast hosting platform is key to distributing your content to a larger audience. Choose a reliable hosting platform, sign up, and upload your episodes. Customize your podcast information and submit your RSS feed to popular podcast directories. Promote your podcast effectively, monitor analytics, and regularly update and maintain your podcast to ensure its growth and success.
Remember, setting up a podcast studio is a journey of learning and improvement. It may take time to find the perfect setup and configuration that suits your podcasting style and goals. Embrace experimentation, seek feedback from your audience, and continuously refine your craft to create podcasts that engage and captivate your listeners.