Introduction
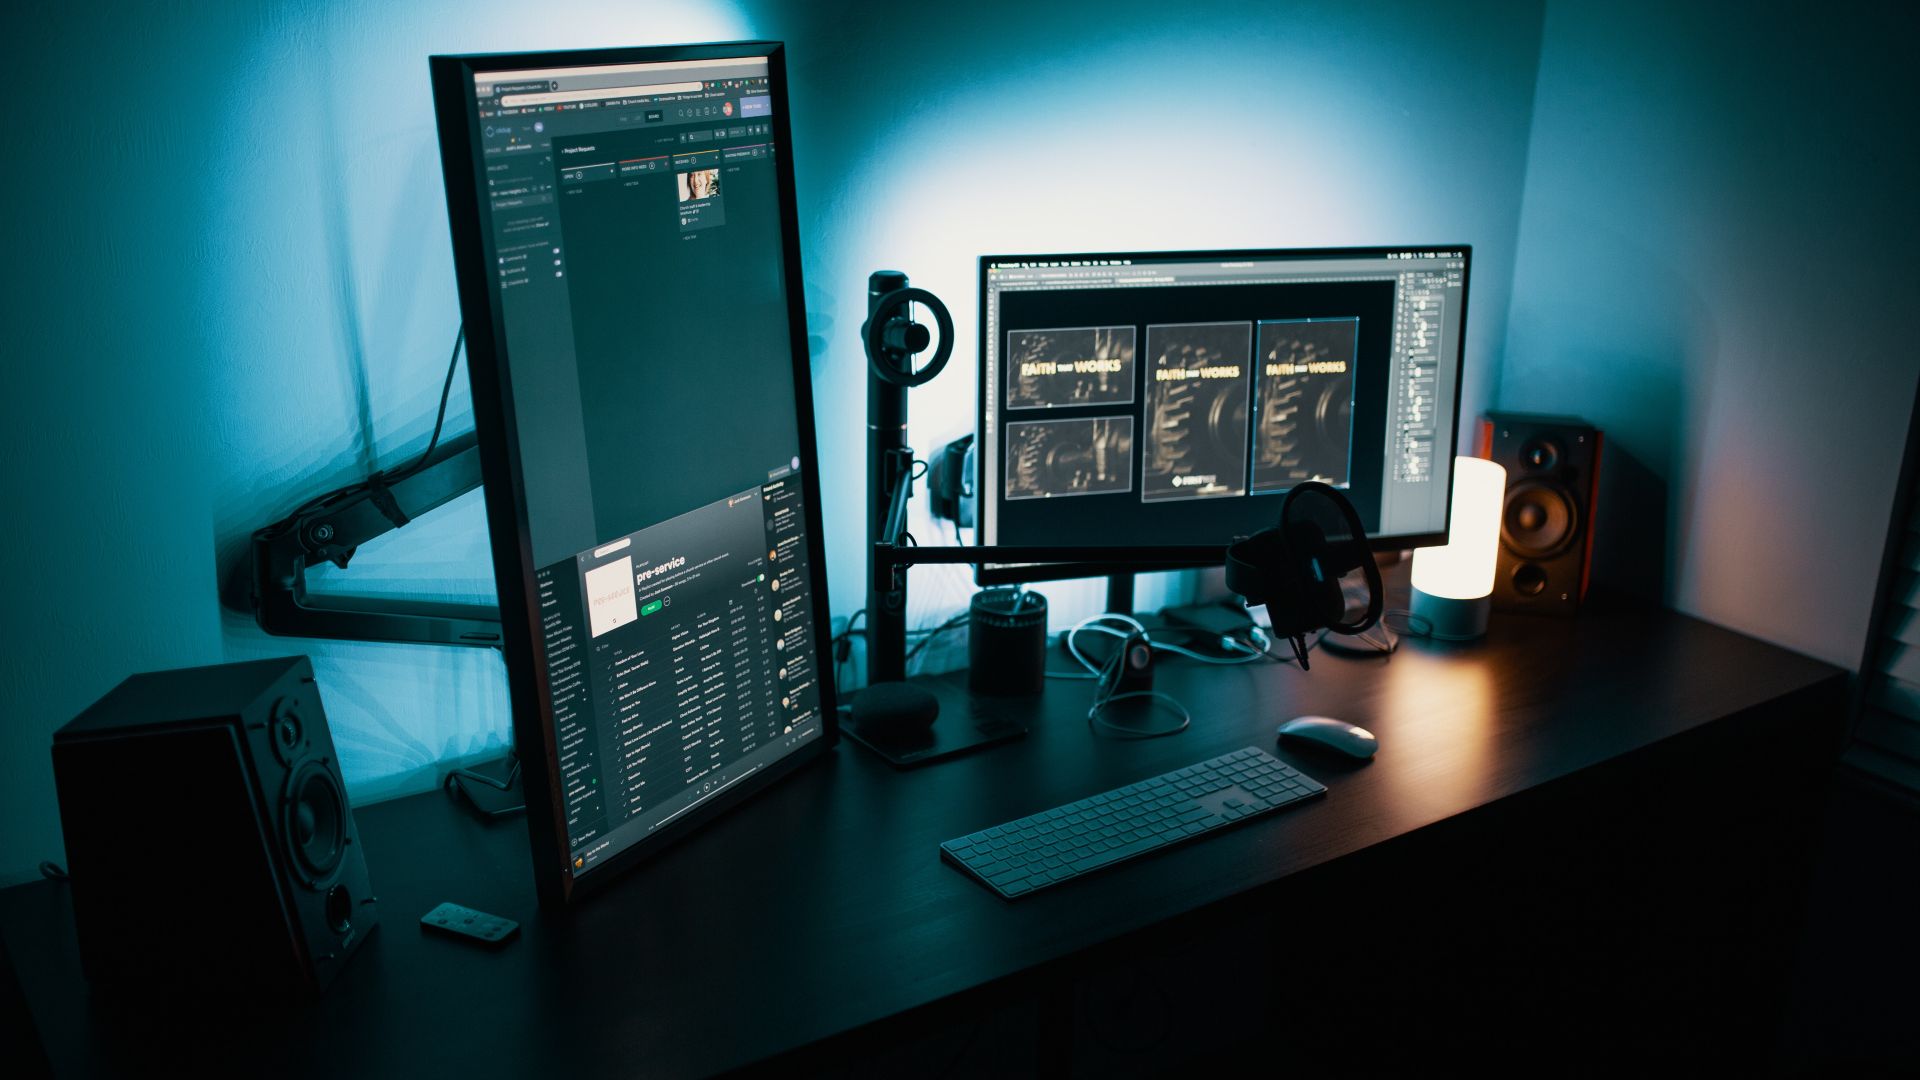
Welcome to the world of dual monitors! If you find yourself constantly juggling multiple tasks on your computer, a dual monitor setup can offer a significant boost in productivity and convenience.
With a dual monitor configuration, you can expand your digital workspace and have multiple applications and windows open simultaneously. This allows for seamless multitasking, smoother workflow, and better organization of your work.
But how exactly do you set up dual monitors with just one graphics card? In this guide, we will walk you through the process step by step, highlighting the benefits of using dual monitors, checking graphics card compatibility, connecting the monitors, configuring display settings, and troubleshooting common issues.
Whether you’re a designer, programmer, writer, or simply a multitasking enthusiast, discovering the power of dual monitors can revolutionize the way you work and enhance your overall computing experience.
Before we delve into the nitty-gritty of setting up dual monitors, let’s take a moment to explore the numerous benefits associated with this configuration.
Benefits of Using Dual Monitors
There are several advantages to using a dual monitor setup that can greatly enhance your productivity and efficiency while working on your computer.
Increased Screen Real Estate: One of the primary benefits of dual monitors is the additional screen space they provide. With two monitors side by side, you have a larger viewing area, allowing you to display more content simultaneously. This is particularly useful for tasks that require multitasking or working with multiple applications at once.
Improved Workflow: Dual monitors can significantly improve your workflow by eliminating the need to switch between tabs or applications constantly. You can have your main task or project open on one monitor while keeping supportive applications, such as email, chat, or reference materials, on the other. This creates a seamless work environment and allows for smoother transitions between different tasks.
Enhanced Multitasking: With dual monitors, you can easily work on multiple projects or tasks simultaneously. For example, you can have a Word document open on one screen while conducting research on the other. This eliminates the need to constantly resize or switch windows, speeding up your work and reducing distractions.
Better Organization: Dual monitors help improve organization by providing more space to arrange and manage your digital files and applications. You can dedicate one monitor to your main workspace while using the other for file management, notes, or reference materials. This allows for a clutter-free working environment and quicker access to the resources you need.
Increased Efficiency: Utilizing dual monitors promotes efficiency by enabling seamless drag-and-drop functionality between applications. You can easily transfer files or content from one screen to another, eliminating the need for excessive clicking or navigating through various folders.
Enhanced Visual Experience: Dual monitors can also enhance your visual experience. You can enjoy wider panoramic views, compare documents side by side, or engage in immersive gaming experiences with a more immersive field of view.
Flexibility and Customization: Dual monitor setups provide a high level of flexibility and customization options. You can choose to extend your desktop across both screens or use one as a primary display and the other as an extended display. This flexibility allows you to adapt your setup to match your specific workflow and preferences.
Overall, incorporating dual monitors into your workstation can boost productivity, improve multitasking capabilities, and enhance your overall computing experience. Now that we’ve highlighted the advantages, let’s move on to checking the compatibility of your graphics card.
Checking Graphics Card Compatibility
Before setting up dual monitors, it’s crucial to ensure that your graphics card is compatible with this configuration. Here are a few steps to help you determine if your graphics card can support dual monitors:
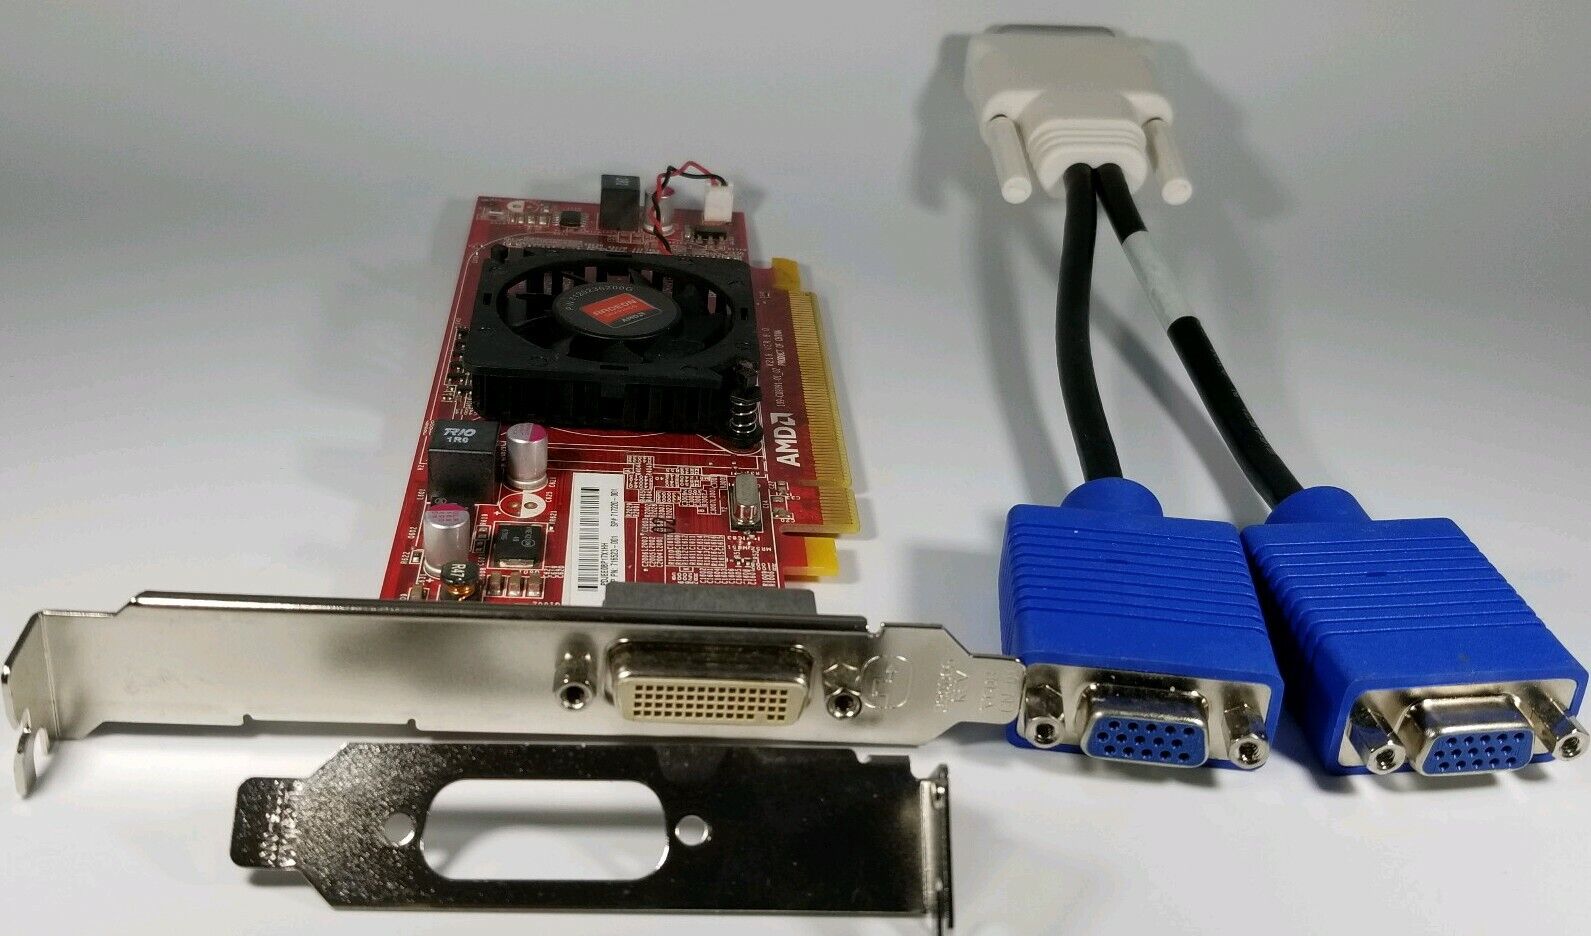
1. Check the Number of Video Ports: Take a look at the back of your computer or graphics card and identify the number of video ports available. Most modern graphics cards come equipped with multiple video ports, such as HDMI, DisplayPort, or DVI. Having more than one video port is a clear indication that your graphics card supports dual monitors.
2. Consult the Graphics Card Manual: If you’re unsure about the capabilities of your graphics card, refer to the manufacturer’s manual or documentation. Search for information related to dual monitor support or multiple display configurations. The manual should provide detailed specifications and guidelines on how to set up multiple monitors with your specific graphics card.
3. Research Online: In case you don’t have access to the manual or need additional information, conducting a quick search online can be helpful. Visit the manufacturer’s website or search for forums, FAQs, or user guides related to your graphics card model. These resources often contain valuable insights and instructions regarding dual monitor compatibility.
4. Hardware Requirements: Apart from the graphics card, check if your computer meets the hardware requirements for using dual monitors. Ensure that your computer has sufficient RAM, processing power, and available ports to accommodate the additional display. Insufficient hardware resources may result in poor performance or limited functionality of the dual monitor setup.
5. Software Support: Determine if your operating system and graphics card drivers support multiple monitor configurations. Most modern operating systems, such as Windows 10 or macOS, have built-in features for managing dual monitors. Also, check for the latest graphics card drivers and ensure they are up to date. Outdated drivers may not provide optimal support for dual monitors or may lack necessary compatibility features.
By following these steps and gathering the necessary information, you can ensure that your graphics card is compatible with dual monitor setups. Once you’ve confirmed compatibility, it’s time to move on and connect your monitors.
Connecting the Monitors
Now that you’ve confirmed the compatibility of your graphics card, it’s time to connect your monitors. Follow these steps to properly connect your dual monitors:
1. Identify the Video Ports: Look at the back of your graphics card or computer to identify the available video ports. Common video ports include HDMI, DisplayPort, and DVI. Ensure that you have matching cables for your monitors and that they are compatible with the video ports on your graphics card.
2. Connect the Cables: Take the video cables and connect them from each monitor to the respective video ports on your graphics card. Make sure the cables are securely plugged in.
3. Power On the Monitors: Once the cables are connected, power on the monitors. Use the power buttons on each monitor or the main power switch if available. Ensure that both monitors are receiving power and displaying a signal.
4. Adjust Display Settings: By default, your computer might detect and configure the monitors in the correct order. However, if the screen order or orientation needs adjustment, proceed to the next steps.
5. Open Display Settings: Right-click on your desktop and select “Display settings.” This will open the display settings control panel on your operating system.
6. Identify the Monitors: In the display settings, you should see a visual representation of both monitors. They will likely be labeled as “Monitor 1” and “Monitor 2.”
7. Adjust Screen Order and Orientation: Drag and drop the monitor icons to rearrange their order according to your physical setup. If your monitors have different resolutions or are positioned at different angles, you can also adjust the screen orientation by selecting the appropriate option.
8. Apply the Changes: Once you’re satisfied with the screen order and orientation, click “Apply” to save the settings. Your computer will adjust the display accordingly, and you should see changes on your dual monitors.
That’s it! You have successfully connected your dual monitors. Take a moment to confirm that both monitors are displaying the expected content. If everything looks good, you can move on to the next step—configuring the display settings to optimize your dual monitor experience.
Configuring Display Settings
Once you’ve connected your dual monitors, it’s essential to configure the display settings to optimize your dual monitor experience. Here are the steps to follow:
1. Open Display Settings: Right-click on your desktop and select “Display settings” from the context menu. This will open the display settings control panel on your operating system.
2. Identify the Monitors: In the display settings, you should see a visual representation of both monitors. They will likely be labeled as “Monitor 1” and “Monitor 2.”
3. Adjust Resolution: Select the first monitor and scroll down to the “Resolution” section. Here, you can adjust the screen resolution to match your preference and monitor specifications. Higher resolutions offer sharper image quality and more screen real estate, but make sure your graphics card can handle the chosen resolution for optimal performance.
4. Adjust Scale and Layout: If your monitors have different resolutions or sizes, it’s important to adjust the scale and layout settings. You can choose to make one monitor the primary display, which will house the taskbar and show the desktop icons. Additionally, you can choose to extend the desktop or duplicate the display, depending on your needs and preferences.
5. Arrange the Monitors: If your monitors are not arranged correctly in the virtual display settings, drag and drop the monitor icons to rearrange them. This will ensure that your cursor moves seamlessly between the monitors in a physically accurate manner.
6. Adjust Additional Settings: Depending on your operating system, you may have additional display settings to customize. These might include color calibration, screen brightness, contrast, or advanced graphics settings. Explore these options to fine-tune your dual monitor setup according to your preferences.
7. Apply the Changes: Once you’ve made the necessary adjustments, click “Apply” to save the changes. Your computer will adjust the display settings accordingly, and you should see the changes take effect on your dual monitors.
Take a moment to test if everything is working as desired. Move your mouse cursor across both monitors to ensure a seamless transition, open applications on different monitors to verify proper functionality, and adjust any settings as needed to achieve the best dual monitor experience for your workflow.
Now that you’ve configured your display settings, you’re ready to take full advantage of your dual monitor setup. Whether you’re a professional seeking increased productivity or a casual user looking for a more immersive computing experience, having dual monitors will undoubtedly enhance the way you work and play.
Adjusting Screen Resolution and Orientation
After connecting your dual monitors and configuring the display settings, you may need to adjust the screen resolution and orientation to ensure optimal visual clarity and usability. Here’s how to adjust screen resolution and orientation:
1. Open Display Settings: Right-click on the desktop and select “Display settings” from the context menu to open the display settings control panel.
2. Select the Monitor: In the display settings, you’ll see a visual representation of both monitors. Click on the monitor that you want to adjust the resolution or orientation for.
3. Adjust Resolution: Scroll down to the “Resolution” section for the selected monitor. Here, you can choose from a list of available resolutions supported by your monitor and graphics card. Select a resolution that provides a balance between screen real estate and visual clarity. Higher resolutions offer more workspace, but smaller text and icons can be more challenging to read.
4. Adjust Orientation: If you need to change the orientation of a monitor, scroll down to the “Orientation” section. Here, you can choose from options like landscape, portrait, or flipped orientations. Select the orientation that best suits your needs and the physical setup of your monitors. Keep in mind that changing the orientation affects how content is displayed, so adjust it to match the physical placement of your monitors.
5. Apply Changes: Once you’ve made the necessary adjustments, click “Apply” to save the changes and apply them to the selected monitor. Your computer will adjust the resolution and orientation accordingly, and you should immediately see the changes displayed on the monitor.
6. Repeat for Additional Monitors: If you have multiple monitors, repeat the same process for each monitor, adjusting the resolution and orientation individually as needed.
7. Fine-tune and Test: Take a moment to fine-tune the resolution and orientation settings for your dual monitors. Test different settings, open applications, and view content on both monitors to ensure that everything is displayed correctly and to your preference.
By adjusting the screen resolution and orientation, you can optimize the visual experience and usability of your dual monitor setup. Tailoring these settings to your specific needs and preferences will enhance your productivity and overall enjoyment while working or gaming across multiple screens.
Extending or Duplicating the Desktop
Once you’ve connected your dual monitors and adjusted the display settings, you have the option to choose between extending or duplicating your desktop. This decision depends on how you want to utilize your dual monitor setup. Here’s how to extend or duplicate the desktop:
Extending the Desktop:
Extending the desktop allows you to have separate screens for different applications, providing a larger workspace. Here’s how to extend your desktop:
1. Open Display Settings: Right-click on the desktop and select “Display settings” from the context menu to open the display settings control panel.
2. Identify the Monitors: In the display settings, you’ll see a visual representation of both monitors labeled as “Monitor 1” and “Monitor 2.”
3. Activate the Extend Option: Scroll down to the “Multiple displays” section. Make sure the “Extend these displays” option is selected. If not, click on the drop-down menu and choose the “Extend these displays” option.
4. Arrange the Monitors: Drag and drop the monitor icons in the display settings to arrange them in the order that matches your physical setup. This ensures that your cursor moves smoothly between the monitors without any disruption.
5. Adjust Settings as Needed: If you have specific requirements for each monitor, such as different display resolutions or screen orientations, you can adjust those settings individually for each monitor as explained in the previous sections.
6. Apply the Changes: Once you’ve made the adjustments, click “Apply” to save the changes. Your computer will extend the desktop to both monitors, effectively creating a larger workspace.
Duplicating the Desktop:
Duplicating the desktop allows you to mirror the same content on both monitors, which can be useful for presentations or situations where you want to display the same information on multiple screens. Here’s how to duplicate your desktop:
1. Open Display Settings: Right-click on the desktop and select “Display settings” from the context menu to open the display settings control panel.
2. Identify the Monitors: In the display settings, you’ll see a visual representation of both monitors labeled as “Monitor 1” and “Monitor 2.”
3. Activate the Duplicate Option: Scroll down to the “Multiple displays” section. Choose the “Duplicate these displays” option from the dropdown menu.
4. Adjust Settings as Needed: If you have specific settings for resolution or orientation, ensure they are identical for both monitors to achieve the desired duplication effect.
5. Apply the Changes: Once you’ve made the adjustments, click “Apply” to save the changes. Your computer will duplicate the desktop, displaying the same content on both monitors.
By selecting the extended or duplicate display options, you can choose the setup that best suits your workflow and preferences. Experiment with both options to find the configuration that enhances your productivity and maximizes the potential of your dual monitor setup.
Troubleshooting Common Issues
Setting up dual monitors with one graphics card can sometimes come with challenges or issues that need troubleshooting. Here are some common problems you may encounter and possible solutions:
1. No Display on Second Monitor: If your second monitor is not displaying anything, check the cable connections first. Ensure that the cable is securely plugged into both the monitor and the graphics card. If the cables are properly connected, try rebooting your computer or updating your graphics card driver to resolve any compatibility issues.
2. Incorrect Monitor Order: If your monitors are not displaying in the correct order, causing the wrong screen to be the primary display, go to the display settings and click and drag the monitor icons to rearrange their order. This will align the virtual display with your physical setup.
3. Resolution or Scaling Issues: In case you are experiencing resolution or scaling problems, navigate to the display settings and ensure that the resolution for each monitor is set correctly. Adjust the scaling settings if necessary to prevent any issues with font or icon sizes on your dual monitors.
4. Misaligned Screen Content: If the content on the monitors is not aligned, such as the mouse cursor moving awkwardly between screens, go to the display settings and drag and drop the monitor icons to match the physical placement of your monitors. This will help align the screens and ensure proper cursor movement.
5. Screen Flickering or Refresh Rate Issues: If you notice screen flickering or irregular refresh rates, access the display settings to check and adjust the refresh rate for each monitor. Select a compatible refresh rate that matches your monitor capabilities and offers a smooth visual experience.
6. Graphics Card Overheating: Setting up dual monitors can put an additional load on your graphics card, potentially leading to overheating. Ensure that your graphics card has proper ventilation and is not obstructed by any objects. Consider using software to monitor the temperature of your graphics card and adjust the fan curve or install additional cooling solutions if necessary.
7. Incompatible Applications: Some older applications or games may not fully support dual monitor setups. In such cases, you may encounter issues like reduced performance, black bars, stretched images, or game windows opening on the wrong monitor. Try running the application or game in windowed mode or consult the application’s documentation or support forums for instructions on optimizing dual monitor compatibility.
If you encounter any other issues that are not listed here, it can be helpful to search online forums or contact the manufacturer’s support for further assistance. Remember that troubleshooting can be unique to your system configuration, so it’s essential to explore various solutions and adapt them to your specific needs.
With patience and a bit of troubleshooting, you can overcome these common problems and enjoy a seamless and productive dual monitor experience.
Conclusion
Congratulations! You have successfully learned how to set up dual monitors with just one graphics card. By following the steps outlined in this guide, you can now enjoy the benefits of an expanded digital workspace, improved productivity, and a more immersive computing experience.
From checking the compatibility of your graphics card to connecting the monitors, configuring display settings, and troubleshooting common issues, each step was essential in achieving a well-functioning dual monitor setup.
Dual monitors provide increased screen real estate, improved workflow, enhanced multitasking capabilities, better organization, and increased efficiency. Whether you’re a creative professional, a business user, or a casual gamer, the advantages of a dual monitor setup are undeniable.
Remember to periodically check for graphics card driver updates and ensure that your hardware can handle the demands of dual monitors. Keeping your system up to date can provide optimal performance and compatibility for your dual monitor configuration.
As you continue to explore the world of dual monitors, don’t be afraid to experiment and customize the setup to match your unique needs and preferences. Whether you choose to extend your desktop, duplicate the display, or find a combination that works best for you, the flexibility of dual monitors allows for endless possibilities.
We hope this guide has provided you with the necessary knowledge and confidence to successfully set up and optimize your dual monitor experience. With the increased productivity and visual immersion it offers, you will be able to accomplish more tasks with ease and enjoy a more seamless computing experience.
Now, seize the potential of dual monitors and take your work and play to the next level!