What is NAT?
NAT, which stands for Network Address Translation, is a fundamental technology used in computer networks to translate private IP addresses into public IP addresses and vice versa. It allows multiple devices on a private network, like a home or office network, to share a single public IP address when communicating with the internet.
When data packets are sent from a device on the private network to a destination on the internet, NAT modifies the source IP address of the packets to the public IP address assigned to the router. This allows the packets to be routed across the internet and reach their intended destination. Similarly, when data packets are received from the internet, NAT changes the destination IP address to the private IP address of the device on the local network.
NAT has become an essential component of modern networking because the number of available public IP addresses is limited. With NAT, networks can conserve IP addresses and allow multiple devices to connect to the internet using a single public IP address.
There are different types of NAT, including NAT Type 1, NAT Type 2, and NAT Type 3. NAT Type 1, also known as Open NAT, provides the least restrictive NAT settings and allows for a direct connection between the device and the internet without any limitations. On the other hand, NAT Type 3, also known as Strict NAT, has the most restrictive settings and can limit the device’s ability to connect to other devices and online services.
Understanding the NAT type is crucial, especially for online gaming, as it can determine the quality of your gaming experience. An Open NAT or Type 1 NAT is ideal for online gaming because it provides the least restrictions, enabling you to connect with other players seamlessly and without any limitations. However, many routers come with a default NAT Type 2 or Type 3 setting, which may cause connectivity issues and impact your gaming performance.
In the next sections, we will explore why you need to change NAT settings for online gaming and provide step-by-step instructions on how to do it.
Why Do You Need to Change NAT Settings for Online Gaming?
Online gaming has become increasingly popular, with millions of players worldwide engaging in multiplayer games across various platforms. However, to fully enjoy the online gaming experience, it is crucial to have optimal network connectivity. This is where changing your NAT settings comes into play.
The NAT settings of your router determine the level of connectivity and compatibility you have with other players, game servers, and online services. By default, many routers are set to NAT Type 2 or NAT Type 3, which can cause issues such as slow or inconsistent connections, frequent disconnections, and limited access to certain game features or multiplayer functionalities.
Changing your NAT settings to NAT Type 1, also known as Open NAT, can significantly improve your online gaming experience. Here are a few reasons why it is essential:
- Improved Connectivity: Open NAT allows for a direct connection between your gaming console or PC and game servers. This direct connection minimizes latency, reduces lag, and ensures a stable and reliable connection during gameplay.
- Unrestricted Multiplayer: Open NAT enables you to connect and play with other players seamlessly. It removes any limitations or restrictions that may prevent you from joining multiplayer lobbies, parties, or matchmaking sessions.
- Enhanced Voice Chat: Many online games feature voice chat functionality, allowing players to communicate with each other during gameplay. With Open NAT, you can enjoy uninterrupted voice chat without distorted audio or dropped connections.
- Full Game Functionality: Some games have specific features, such as hosting game sessions or participating in certain online activities, that require an Open NAT. By changing your NAT settings, you gain complete access to all the game’s functionalities.
By changing your NAT settings, you optimize your network for online gaming, ensuring smooth connectivity, better matchmaking, and an overall enhanced gaming experience. However, it is important to note that the process of changing NAT settings may vary depending on your router model and firmware. It’s recommended to consult the router’s user manual or the manufacturer’s website for specific instructions.
In the next sections, we will provide step-by-step instructions on how to change NAT settings for various router models, allowing you to unleash the full potential of online gaming on your preferred platform.
Step 1: Determine Your NAT Type
Before you can make any changes to your NAT settings, it’s crucial to determine your current NAT type. This will help you understand the level of connectivity and any limitations you may be experiencing while gaming online.
To determine your NAT type, follow these steps:
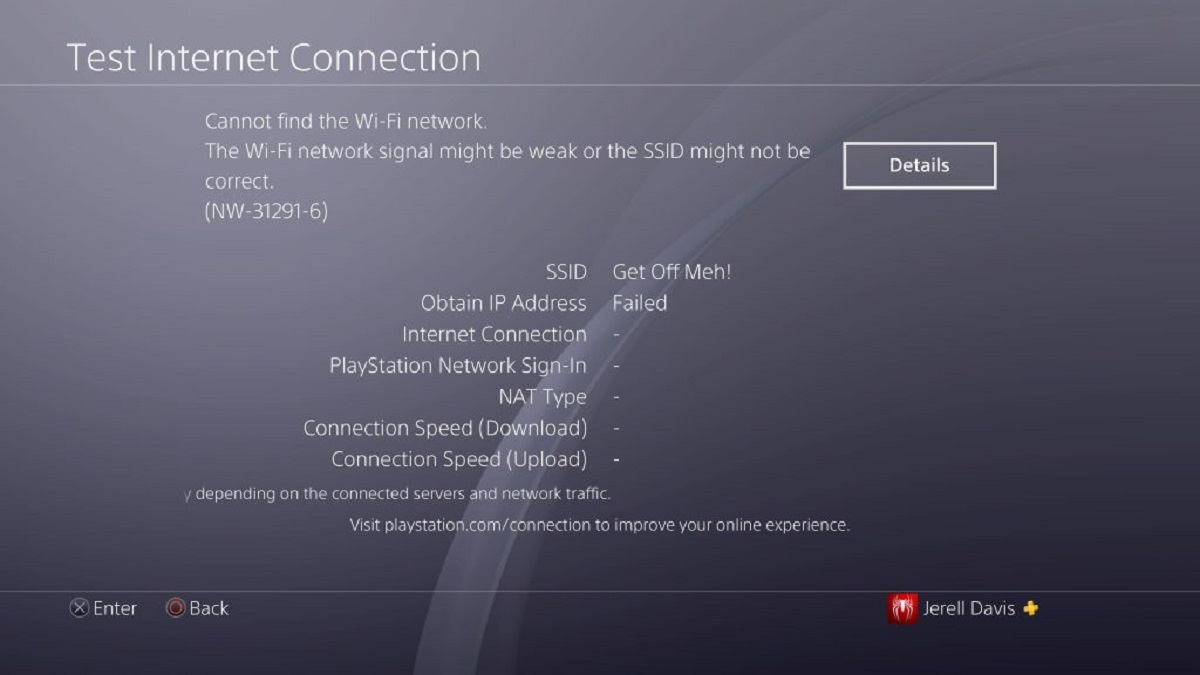
- Access your gaming console or PC’s network settings: This can usually be done through the console’s system settings or the network adapter settings on your PC.
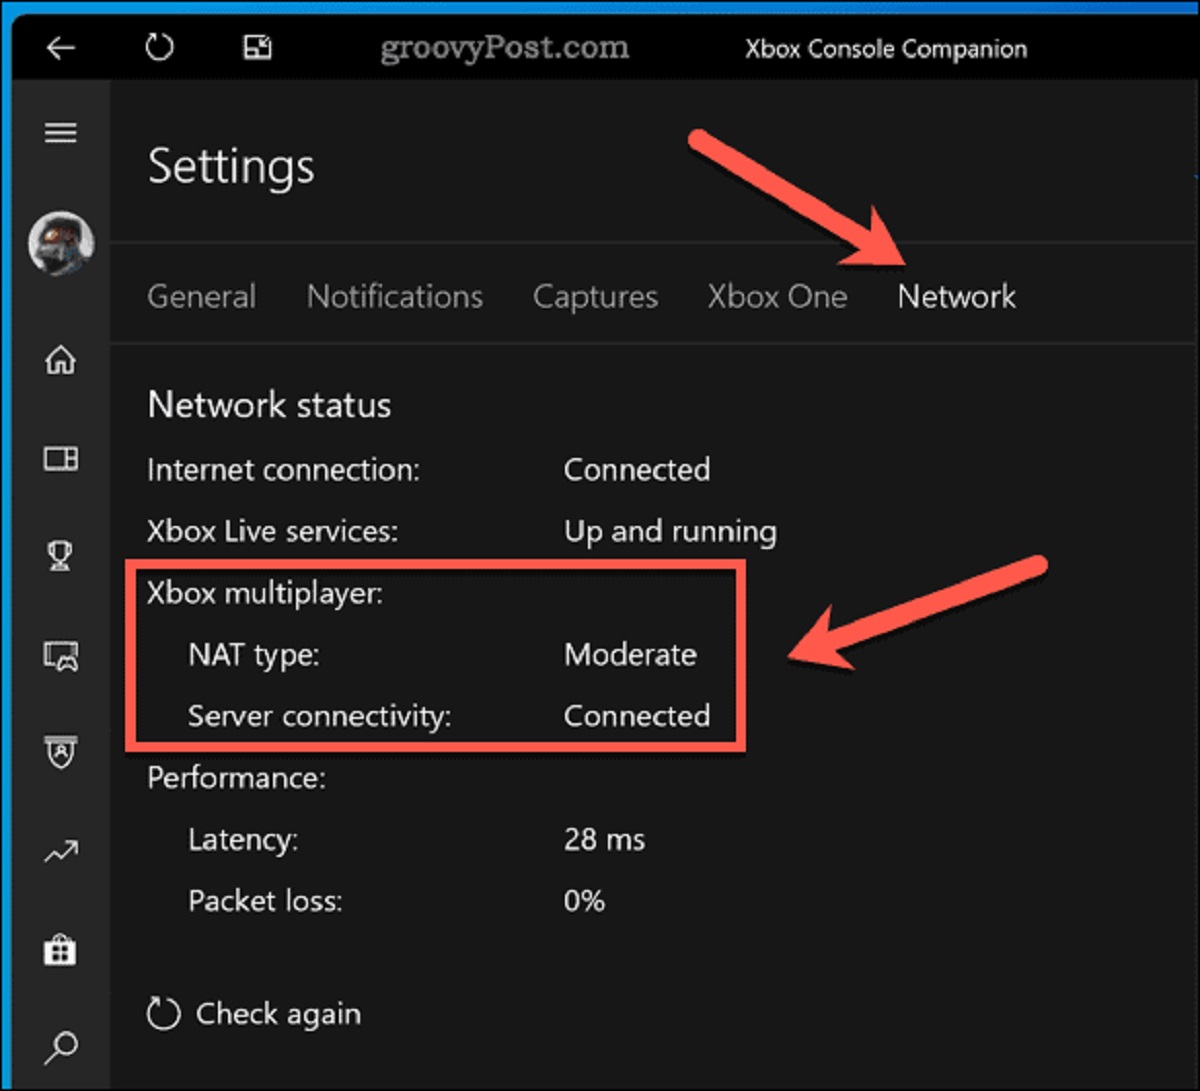
- Find the network status or connection details: Look for a section that provides information about your network connection, IP address, or NAT type. The exact location may vary depending on the console or operating system you are using.
- Identify your NAT type: There are generally three types of NAT: Type 1 (Open NAT), Type 2 (Moderate NAT), and Type 3 (Strict NAT). Type 1 indicates an open and unrestricted connection, while Type 2 and Type 3 impose certain restrictions that may affect your online gaming experience.
Once you have identified your current NAT type, you can proceed to the next steps to change your NAT settings and achieve a more optimal online gaming experience.
If you find that your NAT type is already set to Open (Type 1), you may not need to make any further changes. However, if you have a Moderate (Type 2) or Strict (Type 3) NAT, it’s recommended to proceed with the following steps to improve your connectivity and remove any limitations that might be hindering your online gaming experience.
Note that the process of changing NAT settings may differ depending on your router model and firmware. Consult your router’s user manual or the manufacturer’s website for specific instructions.
In the next section, we will guide you through the process of logging into your router’s settings to begin changing your NAT settings.
Step 2: Login to Your Router
In order to change your NAT settings, you will need to access your router’s configuration settings. To do this, you will need to log in to your router’s administration interface. Here are the steps to follow:
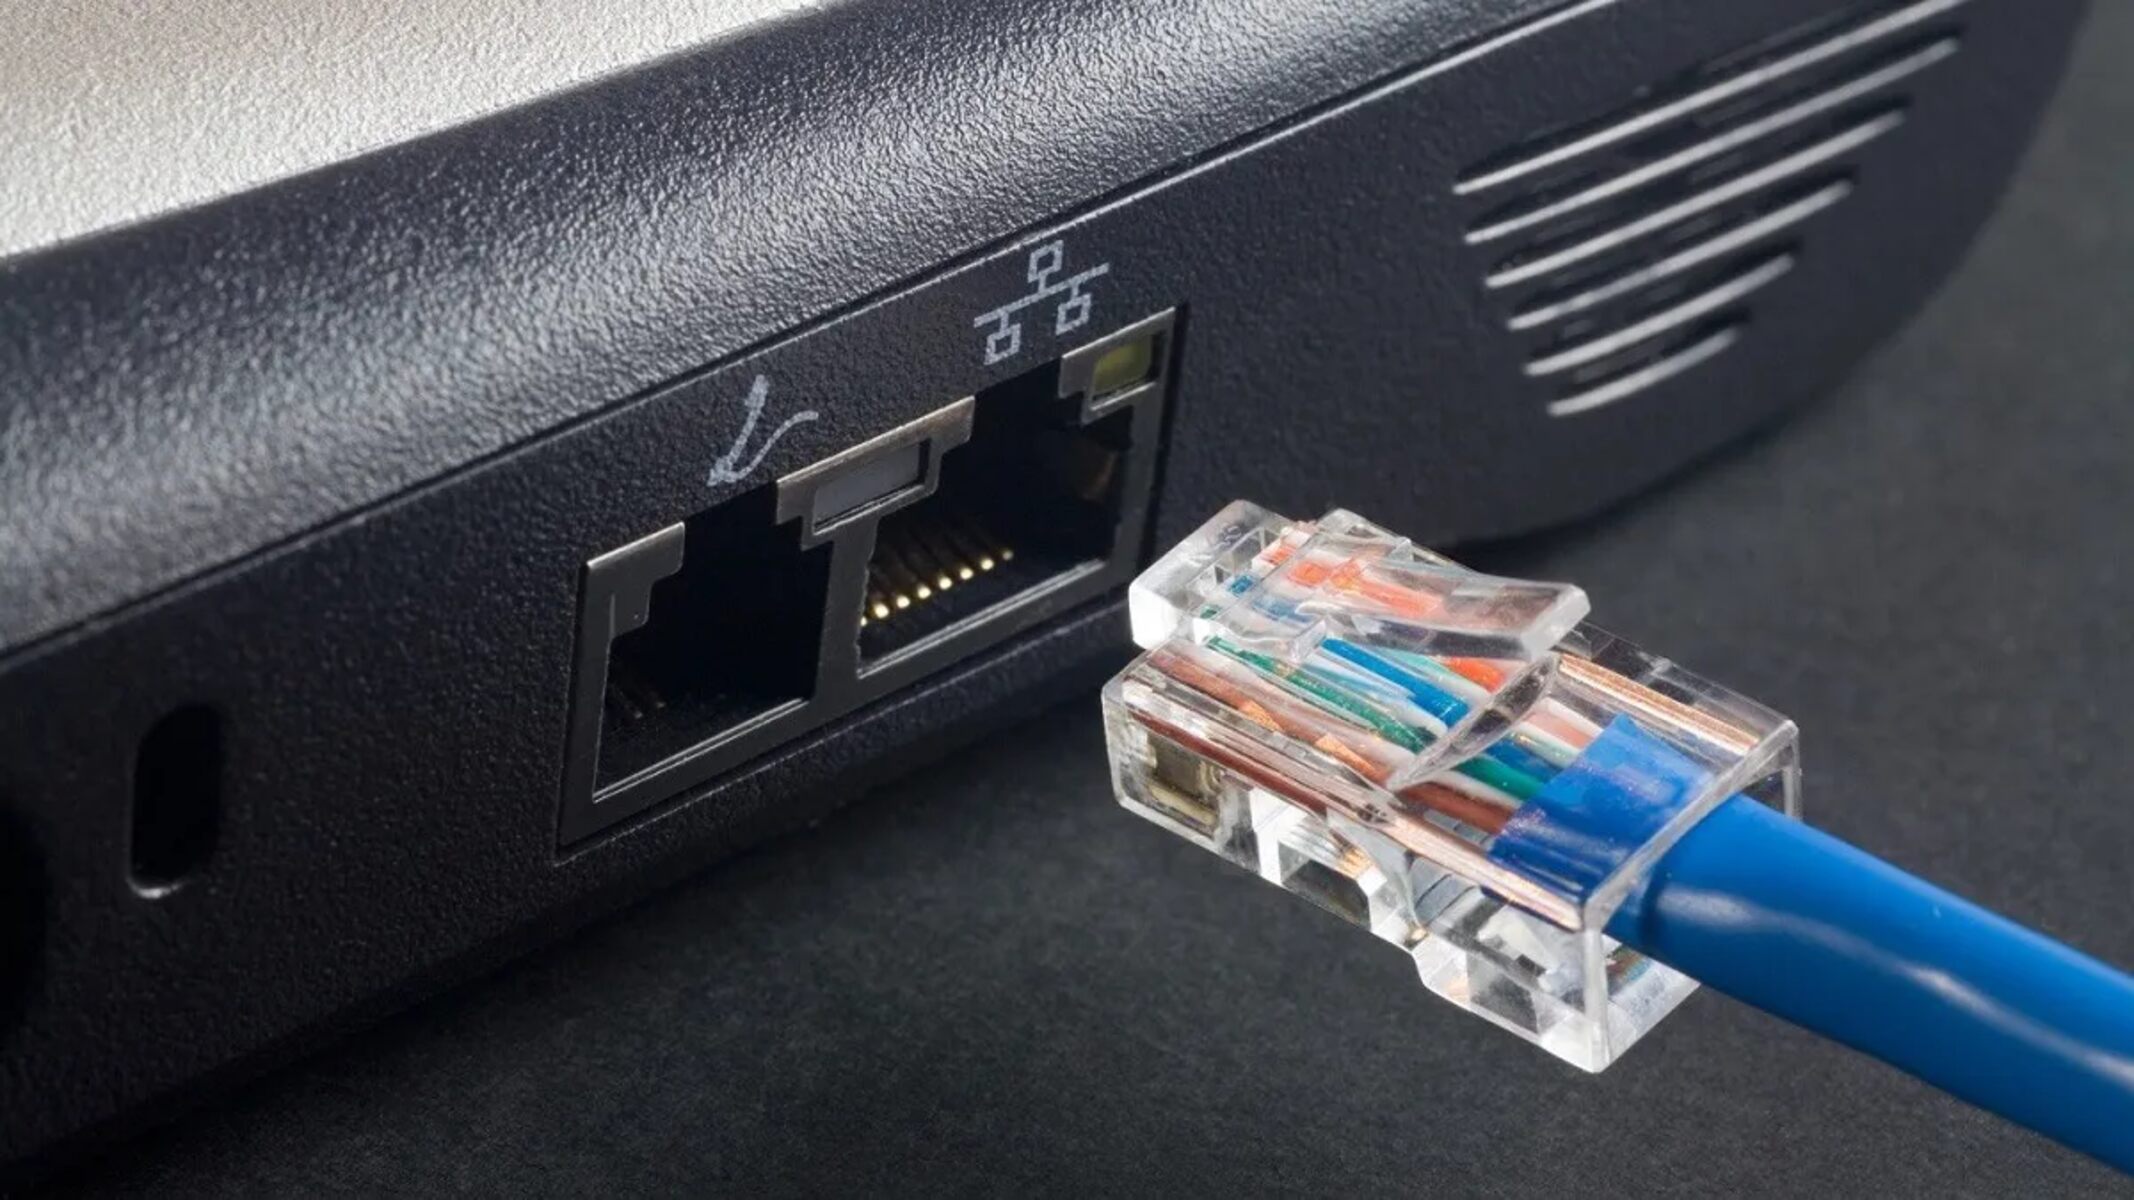
- Connect to your router: Ensure that your computer or device is connected to your router’s network either via Ethernet cable or Wi-Fi. Make sure that you have a stable internet connection.
- Open a web browser: Launch your preferred web browser, such as Google Chrome, Mozilla Firefox, or Safari.
- Enter the router’s IP address: In the address bar of your web browser, type in the IP address of your router. This IP address is typically printed on a label on the router itself or mentioned in the user manual. Common router IP addresses include 192.168.0.1 or 192.168.1.1. Alternatively, you can try typing “routerlogin.net” or “routerlogin.com.”
- Enter your login credentials: You will be prompted to enter a username and password to access the router settings. This information is usually printed on the router or mentioned in the user manual. If you have previously changed the login credentials and can’t remember them, you may need to perform a factory reset on the router.
- Access the router’s settings: After entering the correct login credentials, you will be redirected to the router’s administration interface or settings page.
Once you have successfully logged in, you are ready to proceed to the next step of changing your NAT settings for online gaming.
It’s important to note that the login process can vary depending on the router model and firmware version. If you encounter any difficulties, refer to the router’s user manual or the manufacturer’s website for specific instructions.
In the next section, we will guide you through the process of finding the port forwarding section in your router’s settings.
Step 3: Find the Port Forwarding Section
Once you have successfully logged in to your router’s administration interface, the next step is to locate the port forwarding section. This is where you will configure the necessary ports to optimize your NAT settings for online gaming. Here’s how you can find the port forwarding section:
- Look for the “Advanced” or “Advanced Settings” tab: Depending on your router’s user interface, the port forwarding section may be located under the advanced settings.
- Explore the “Port Forwarding” or “NAT” options: Once you have located the advanced settings section, navigate through the options or tabs to find the specific section related to port forwarding or NAT settings.
- Check the router’s user manual or manufacturer’s website: If you are having trouble finding the port forwarding section, refer to the router’s user manual or visit the manufacturer’s website for detailed instructions specific to your router model.
Every router’s interface can be slightly different, so these steps are a general guideline. It’s important to note that some router interfaces may use different terminology for the port forwarding section, such as “Virtual Server,” “Applications and Gaming,” or “Firewall” settings. However, the port forwarding functionality will still be present.
Once you have successfully located the port forwarding section, you are ready to move on to the next step of adding the necessary ports for your gaming console. This step will allow you to establish a more open and seamless connection for online gaming.
In the next section, we will guide you through the process of adding the required ports for your gaming console in the port forwarding settings.
Step 4: Add the Necessary Ports for Your Gaming Console
In this step, you will add the necessary ports for your gaming console in the port forwarding settings of your router. By forwarding these specific ports, you will ensure that your console has the appropriate access to the internet for seamless online gaming. Here’s how you can add the necessary ports:
- Identify the required ports: Determine the specific ports that your gaming console requires for online gaming. These ports are usually provided by the game developer or mentioned in the console’s user manual. Common ports used for gaming include TCP: 80, 443, 1935, and UDP: 3075, 3478-3480.
- Access the port forwarding settings: Return to the port forwarding section in your router’s settings where you located it earlier.
- Create a new port forwarding entry: Within the port forwarding settings, look for an option to create a new port forwarding rule or entry. This may be labeled as “Add Rule,” “New Port Forwarding,” or something similar.
- Enter the required details: In the new port forwarding entry, you will need to enter the following information:
- Service Name: Provide a name for the port forwarding rule. It can be descriptive, such as “Gaming Console Port Forwarding.”
- Internal IP Address: Enter the local IP address of your gaming console. This is the IP address assigned to the console within your home network. You can find this information in the network settings of your console.
- Protocol: Select the protocol used by the game or console. In most cases, this will be TCP/UDP.
- External Port Range: Enter the specific port number or range required for the game or console. Refer to the documentation provided by the game developer or console manufacturer for these details.
- Internal Port Range: Enter the same port number or range as the external port range.
- Save the port forwarding entry: Once you have entered all the necessary information, save the port forwarding rule or entry in your router’s settings.
It’s important to note that the exact steps and terminology may vary depending on your router model and firmware. Consult your router’s user manual or the manufacturer’s website for specific instructions tailored to your router.
Once you have successfully added the necessary ports for your gaming console, you are ready to proceed to the next step of enabling Universal Plug and Play (UPnP), which further optimizes your NAT settings for online gaming.
In the next section, we will guide you through the process of enabling UPnP on your router.
Step 5: Enable UPnP (Universal Plug and Play)
To further enhance your NAT settings for online gaming, it is recommended to enable Universal Plug and Play (UPnP) on your router. UPnP is a networking protocol that allows devices on your network to automatically discover and establish connections with each other.
Enabling UPnP simplifies the process of forwarding ports for your gaming console, as it automatically opens and closes ports as needed, eliminating the need for manual port forwarding. Here’s how you can enable UPnP on your router:
- Access your router’s settings: Return to your router’s administration interface, as you did in previous steps.
- Navigate to the UPnP settings: Look for the UPnP settings option, which may be located under the “Advanced” or “NAT” section, depending on your router’s interface.
- Enable UPnP: Check the box or toggle the switch to enable UPnP on your router.
- Save the changes: Once you have enabled UPnP, be sure to save the changes in your router’s settings.
Enabling UPnP allows your gaming console to automatically communicate with your router, opening the necessary ports when gaming sessions are initiated and closing them when they are no longer needed. This dynamic port mapping ensures a seamless and hassle-free gaming experience.
It’s important to note that while UPnP is generally considered safe, it may pose some security risks. Therefore, it’s recommended to keep your router’s firmware updated to protect against potential vulnerabilities and to regularly check your network for any unauthorized devices or suspicious activities.
With UPnP enabled, you have now optimized your NAT settings to accommodate online gaming. However, some routers may have additional features that could interfere with the proper functioning of your chosen ports. In the next step, we will guide you through disabling any firewall features that might block the necessary ports.
Step 6: Disable Any Firewall Features Blocking Ports
In order to ensure that the necessary ports for online gaming are accessible, it is important to check and disable any firewall features on your router that may be blocking the required ports. Firewalls are designed to protect your network from unauthorized access, but they can sometimes interfere with the proper operation of online games. Follow these steps to disable firewall features that may be blocking ports:
- Access your router’s administration interface: Open a web browser and enter your router’s IP address into the address bar. Log in using your router’s username and password as you did in previous steps.
- Navigate to the firewall settings: Look for a section in the router’s interface that is related to firewall settings. This section may be named “Firewall,” “Security,” or similar.
- Disable firewall features: Within the firewall settings, locate features such as “SPI (Stateful Packet Inspection),” “ALG (Application Layer Gateway),” or “DoS (Denial of Service) Protection.” Disable or turn off these features to ensure that they are not blocking the necessary ports for online gaming.
- Save the changes: Once you have disabled the firewall features, remember to save the changes in your router’s settings.
Disabling these firewall features will prevent them from hindering the performance and connectivity of your online games. However, it is important to understand the potential security risks associated with disabling firewall features. It is advisable to keep your router’s firmware updated and consider implementing other security measures to protect your network from unauthorized access.
With the firewall features blocking ports disabled, you have now optimized your NAT settings for online gaming. In the next step, we will guide you on how to save and apply the changes you have made to your router’s settings.
Step 7: Save and Apply Settings
After making the necessary changes to your router’s NAT settings, port forwarding, and firewall features, it’s important to save and apply these settings to ensure the changes take effect. Follow these steps to save and apply the settings:
- Review your settings: Take a moment to double-check all the changes you have made. Ensure that the port forwarding rules, UPnP settings, and firewall feature modifications are accurate and align with your gaming console’s requirements.
- Locate the Save or Apply button: In your router’s administration interface, there should be a button or option to save or apply the settings you have configured. This button may be labeled as “Save,” “Apply,” or something similar.
- Click on the Save or Apply button: Once you are confident that all settings are correct, proceed to save or apply the changes. Your router may require a reboot to implement the new settings.
- Wait for the changes to take effect: After saving or applying the settings, allow some time for the changes to take effect. This can vary depending on your router, but typically, it should only take a few moments.
By saving and applying the settings, you have successfully optimized your NAT settings, configured port forwarding, enabled UPnP, and disabled any firewall features that may have been blocking the necessary ports.
Before starting your online gaming session, it’s always a good idea to test your new settings to ensure they are working as intended. You can check your NAT type in your gaming console’s network settings, run network connection tests, or even play a few online games to confirm that the desired improvements have been achieved.
Congratulations! You are now ready to enjoy a smoother and more reliable online gaming experience with your optimized NAT settings.
Conclusion
Optimizing your NAT settings for online gaming is crucial to ensure a seamless and enjoyable gaming experience. By following the steps outlined in this guide, you can improve your connectivity, reduce lag, and enhance multiplayer interactions. Let’s recap the key points:
– NAT, or Network Address Translation, is a technology that allows multiple devices on a private network to share a single public IP address when accessing the internet.
– Changing your NAT settings to an Open NAT (Type 1) is ideal for online gaming as it provides the least restrictions and enables you to connect with other players seamlessly.
– Determining your current NAT type is the first step in the process, and you can find this information in your console or PC’s network settings.
– Logging into your router’s administration interface allows you to access the settings necessary to optimize your NAT settings.
– Finding the port forwarding section and adding the required ports for your gaming console is vital for establishing an open and reliable connection.
– Enabling UPnP simplifies the process of port forwarding and helps in dynamically opening ports when needed.
– Disabling firewall features that may be blocking ports is essential to ensure a smooth gaming experience.
– Finally, saving and applying the settings in your router’s interface completes the process and ensures the changes take effect.
It’s important to note that the specific steps may vary depending on your router model and firmware. Always consult your router’s user manual or the manufacturer’s website for detailed instructions tailored to your device.
By taking the time to optimize your NAT settings, you can enhance your online gaming performance, reduce connectivity issues, and fully immerse yourself in the world of multiplayer gaming. So, grab your controller, join your friends online, and enjoy a seamless and uninterrupted gaming experience!