Introduction
Have you ever wondered how to insert a check mark symbol (√) on your keyboard? Whether you’re creating a to-do list, filling out a form, or adding a symbol to your document, knowing how to easily type a check mark is a useful skill. In this article, we will explore various methods that you can use to insert a check mark symbol on your keyboard, allowing you to efficiently communicate completion or affirmation in your digital texts and documents.
With different methods available, including keyboard shortcuts, Unicode, AutoCorrect, a character map, and text expander tools, you can choose the method that suits your preferences and workflow. These methods are applicable in different software and applications, such as word processors, email clients, and even online platforms.
Whether you are a student, a professional, or simply an avid computer user, having the ability to insert a check mark symbol can save you time and add visual clarity to your work. So let’s dive into the various methods and discover how to do a check mark on your keyboard.
Method 1: Using Keyboard Shortcuts
One of the quickest and easiest ways to insert a check mark on your keyboard is by using keyboard shortcuts. Keyboard shortcuts are a combination of keys that, when pressed together, perform a specific function or action.
Here’s the step-by-step process for using keyboard shortcuts to insert a check mark symbol:
- Place your cursor where you want to insert the check mark symbol.
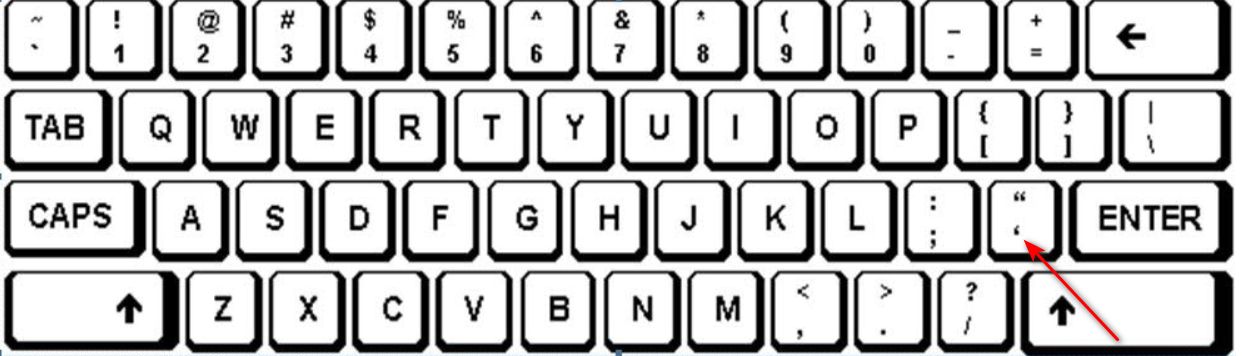
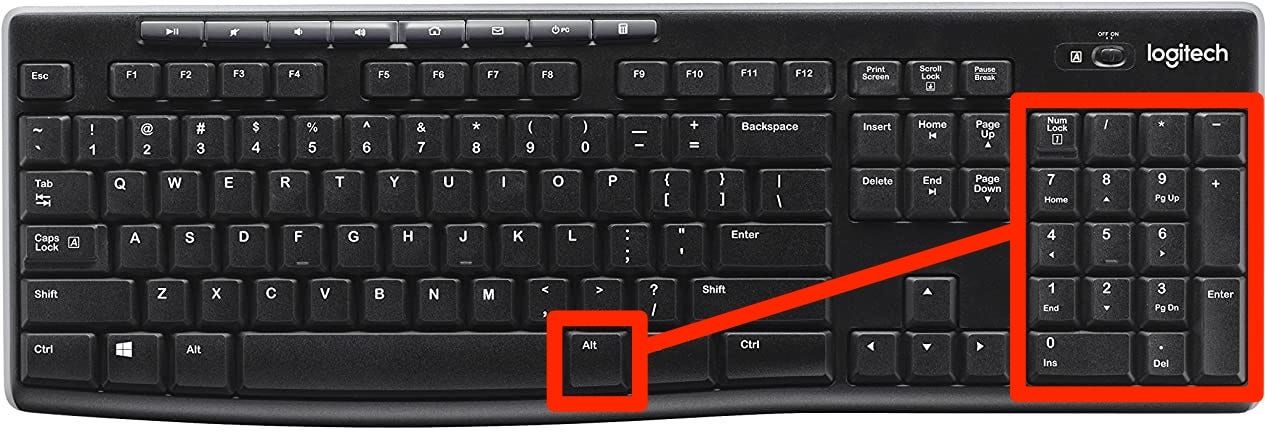
- Hold down the Alt key (Windows) or the Option key (Mac).
- While holding down the modifier key, type the corresponding numeric code for the check mark symbol. For example, on a Windows computer, you can use the numeric pad and press Alt + 0252 to insert a check mark (√).
- Release the modifier key, and the check mark symbol will appear at the cursor location.
It’s important to note that the numeric code may vary depending on your keyboard layout and operating system. If the above code doesn’t work, you can try alternative codes or search for a specific code for your keyboard layout.
Using keyboard shortcuts to insert a check mark symbol is a quick and efficient method, especially if you frequently need to use the symbol in your work. It saves you from having to navigate through menus or search for symbols in character maps or special character menus.
Now that you know how to use keyboard shortcuts to insert a check mark symbol, let’s move on to the next method, which involves using Unicode.
Method 2: Using Unicode
Unicode is a universal character encoding standard that assigns a unique number to every character across various scripts and languages. It allows us to use special characters, including check mark symbols, in our digital communication.
To insert a check mark symbol using Unicode, follow these steps:
- Place your cursor where you want to insert the check mark symbol.
- Activate the Unicode input mode on your operating system. On Windows, you can do this by pressing Win + . or Win + ; keys simultaneously to open the emoji picker. On Mac, press Control + Command + Space to open the Character Viewer.
- Search for “check mark” in the emoji picker or Character Viewer.
- Click or drag the check mark symbol (√) to insert it at the cursor location.
If you can’t find the check mark symbol in the emoji picker or Character Viewer, you can search for “check mark” on search engines like Google and copy the symbol from the search results. Then, paste it into your document or text editor.
Using Unicode to insert a check mark symbol provides a wide range of options and flexibility, as it supports various check mark styles and sizes. It also allows you to use the check mark symbol across different platforms and applications.
Now that you’re familiar with using Unicode, let’s explore another method: using AutoCorrect.
Method 3: Using AutoCorrect
If you find yourself frequently needing to insert a check mark symbol, you can leverage the AutoCorrect feature in word processors and text editors to automatically replace a specific word or combination of characters with the check mark symbol.
Here’s how you can set up AutoCorrect to insert a check mark symbol:
- Open your word processor or text editor application.
- Go to the settings or preferences menu.
- Look for the AutoCorrect or AutoReplace option.
- In the AutoCorrect/AutoReplace settings, add a new entry where you specify a unique keyword or combination of characters that will trigger the insertion of the check mark symbol (√).
- Save the settings and exit the preferences menu.
Now, whenever you type the specified keyword or combination of characters and press the spacebar or enter key, the check mark symbol will automatically appear in your text.
AutoCorrect is a convenient method for inserting a check mark symbol, as it eliminates the need to remember and input numeric codes or hunt for the symbol in character maps or special character menus. Additionally, if you use multiple devices or applications, AutoCorrect settings may synchronize across platforms, making it consistent and efficient.
With AutoCorrect set up with the desired keyword or combination of characters, you can effortlessly insert check mark symbols as you type, saving time and effort in your workflow.
Next, let’s explore another method: using a character map.
Method 4: Using a Character Map
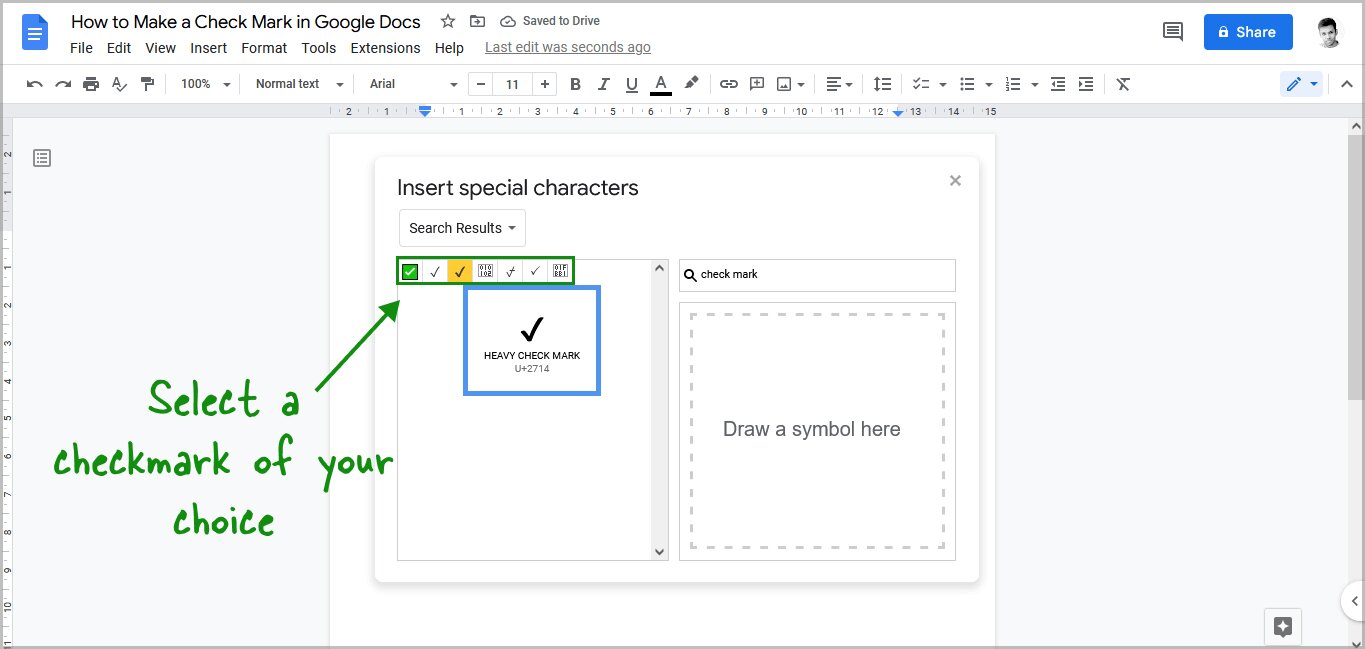
If you’re looking for a more visual and interactive way to insert a check mark symbol, using a character map can be a convenient option. A character map is a utility that displays a grid of characters, including various symbols, allowing you to select and insert them into your text.
Here’s how you can use a character map to insert a check mark symbol:
- Open the character map application on your computer. It may be pre-installed or available as a separate program.
- Search or browse for the check mark symbol (√) in the character map.
- Select the desired check mark symbol in the character map.
- Copy the selected symbol.
- Paste the symbol where you want to insert the check mark in your text.
Character maps typically offer a wide range of symbols and characters to choose from, allowing you to explore different check mark styles and sizes.
Using a character map to insert a check mark symbol can be beneficial if you prefer a visual representation of the symbols or if you need access to a broader range of special characters.
Now that you’re familiar with using a character map, let’s move on to the final method: using a text expander tool.
Method 5: Using a Text Expander Tool
If you frequently use check mark symbols or other symbols in your work, using a text expander tool can significantly improve your productivity. A text expander tool allows you to create shortcuts or snippets for commonly used phrases, sentences, or symbols, including check marks.
Follow these steps to use a text expander tool to insert a check mark symbol:
- Install a text expander tool on your computer or use a web-based text expander service.
- Open the text expander tool and create a new snippet for the check mark symbol.
- Assign a unique and easy-to-remember shortcut to the snippet. For example, you could use something like “checkmark” or “tick” as the shortcut.
- Set the expansion to automatically insert the check mark symbol (√) whenever you type the assigned shortcut.
- Save the snippet and exit the text expander tool.
Now, whenever you need to insert a check mark symbol, simply type the assigned shortcut in any text editor or word processor, and the text expander tool will automatically expand it to the check mark symbol.
Using a text expander tool saves you time and effort by eliminating the need to remember specific codes or search for symbols in character maps. It also provides consistency in your workflow, as the text expander tool works across different applications and platforms.
With a text expander tool, you can easily insert check mark symbols or any other commonly used texts or symbols with just a few keystrokes.
Now that you’re familiar with using a text expander tool, you can choose the method that suits your preferences and workflow the best to insert check mark symbols on your keyboard.
Conclusion
Inserting a check mark symbol on your keyboard is a valuable skill that can enhance your productivity and visually enhance your documents or digital communication. In this article, we explored five different methods for accomplishing this task: using keyboard shortcuts, Unicode, AutoCorrect, a character map, and a text expander tool.
Keyboard shortcuts provide a quick and straightforward way to insert a check mark symbol. By memorizing the specific key combinations, you can effortlessly add the symbol to your text. Unicode offers a wide range of options for check mark symbols and ensures compatibility across different platforms and applications.
AutoCorrect simplifies the process by automatically replacing a keyword or combination of characters with the check mark symbol. This method saves time and effort, particularly if you frequently need to insert the symbol. A character map offers visual selection and exploration of various check mark styles and sizes, adding a level of customization to your symbol choice.
Lastly, utilizing a text expander tool streamlines the process by creating shortcuts or snippets for the check mark symbol. With a few keystrokes, you can expand the shortcut into the symbol, improving your productivity.
Choose the method that aligns with your preferences, workflow, and specific software applications. Experiment with different methods to find the most efficient and comfortable approach for your needs.
Now that you’re equipped with the knowledge of these different methods, you can confidently insert check mark symbols on your keyboard and enhance your digital communication. Embrace the power of these techniques and bring visual clarity to your work with check mark symbols at your fingertips.