Introduction
Are you ready to elevate your cooking game with some mouthwatering eye of round steaks? Look no further than your trusty electric pressure cooker! This versatile kitchen appliance is a game-changer when it comes to tenderizing and infusing flavor into tougher cuts of meat like the eye of round. By using the unique combination of pressure and heat, you can achieve perfectly cooked steaks that are tender, juicy, and full of flavor.
In this guide, we will take you step-by-step through the process of cooking eye of round steaks in an electric pressure cooker. We’ll cover everything from choosing the right cut to enhancing the flavor with aromatics, and of course, achieving the perfect doneness for your steaks. Whether you’re a seasoned pro with the pressure cooker or a newbie looking to try something new, this guide will help you create delicious and impressive meals that will leave your taste buds begging for more.
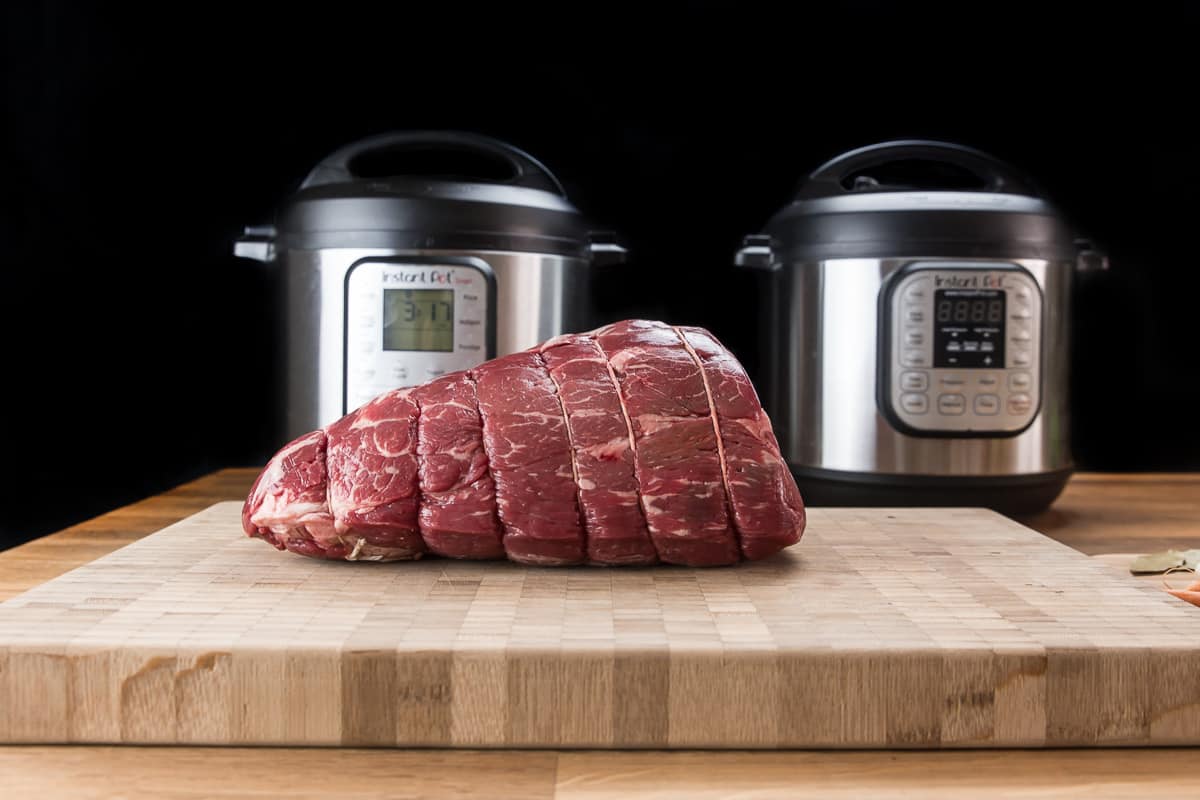
Before we dive into the cooking process, let’s first understand why the eye of round is an excellent choice for the electric pressure cooker. This particular cut comes from the hind leg of the cow, making it naturally lean and tough. While it may not be as tender as other steaks, the electric pressure cooker allows you to break down those tough fibers, resulting in a tender and flavorful piece of meat. Plus, the pressure cooker locks in the moisture, ensuring that your steaks are juicy and never dry.
So, if you’re ready to transform these humble eye of round steaks into a succulent and flavorful masterpiece, let’s get started!
Choosing the Right Cut
When it comes to cooking eye of round steaks in an electric pressure cooker, selecting the right cut of meat is the first crucial step. The eye of round is a lean and tough cut that requires proper cooking techniques to achieve tender results. Here are a few things to consider when choosing your steaks:
- Thickness: Opt for steaks that are about 1 to 1.5 inches thick. Thicker steaks will allow for better heat distribution during the pressure cooking process, resulting in more even cooking.
- Marbling: While the eye of round is naturally lean, a small amount of marbling can add juiciness and flavor to the meat. Look for steaks with some visible marbling, but avoid excessive fat.
- Freshness: Choose steaks that are fresh with a bright red color. Avoid steaks that have a grayish or brownish hue, as it indicates poor quality or aging.
When shopping for eye of round steaks, consider visiting a trusted butcher who can assist you in selecting the best cuts. They can guide you towards well-marbled steaks and provide advice on the thickness that works best for pressure cooking.
If you prefer to purchase pre-packaged steaks from the grocery store, take a moment to inspect the packaging. Look for steaks that are tightly sealed and check the expiration date to ensure freshness. It’s also helpful to touch the meat through the packaging to gauge its firmness. Fresh steaks should feel slightly firm and not overly soft or spongy.
Remember, investing a bit more time and effort in choosing the right cut will significantly impact the final result of your cooked eye of round steaks. So, take your time and choose wisely!
Prepping the Eye of Round Steaks
Before you start cooking your eye of round steaks in the electric pressure cooker, it’s essential to properly prep them to ensure maximum flavor and tenderness. Here are the steps to follow:
- Trimming: Begin by trimming any excess fat from the steaks. While a small amount of fat can add flavor, too much fat can become chewy and tough after pressure cooking. Trim the fat to your desired level, keeping in mind that leaner cuts may require slightly more care during cooking to prevent dryness.
- Seasoning: Season the steaks generously with your favorite herbs and spices. A simple combination of salt, pepper, and garlic powder works well, but feel free to get creative with your seasonings. You can also add a touch of olive oil or a marinade to enhance the flavor and aid in the tenderizing process.
- Resting: Allow the seasoned steaks to rest at room temperature for about 30 minutes before cooking. This step helps the seasoning penetrate the meat and allows for more even cooking.
If you prefer to marinate your steaks for an extended period, you can do so overnight in the refrigerator. Marinating can enhance the flavor and tenderness of the meat, but be sure to pat the steaks dry before cooking to avoid excess moisture in the pressure cooker.
Remember that the prepping process is your opportunity to infuse the steaks with your desired flavors. Don’t be afraid to experiment with different seasonings and marinades to create a dish that suits your taste preferences.
Once you’ve properly prepped your eye of round steaks, you’re ready to move on to the next step: searing the steaks. This additional step will help develop a delicious caramelized crust on the outside of the steaks, enhancing both the appearance and flavor of the final dish.
Searing the Steaks
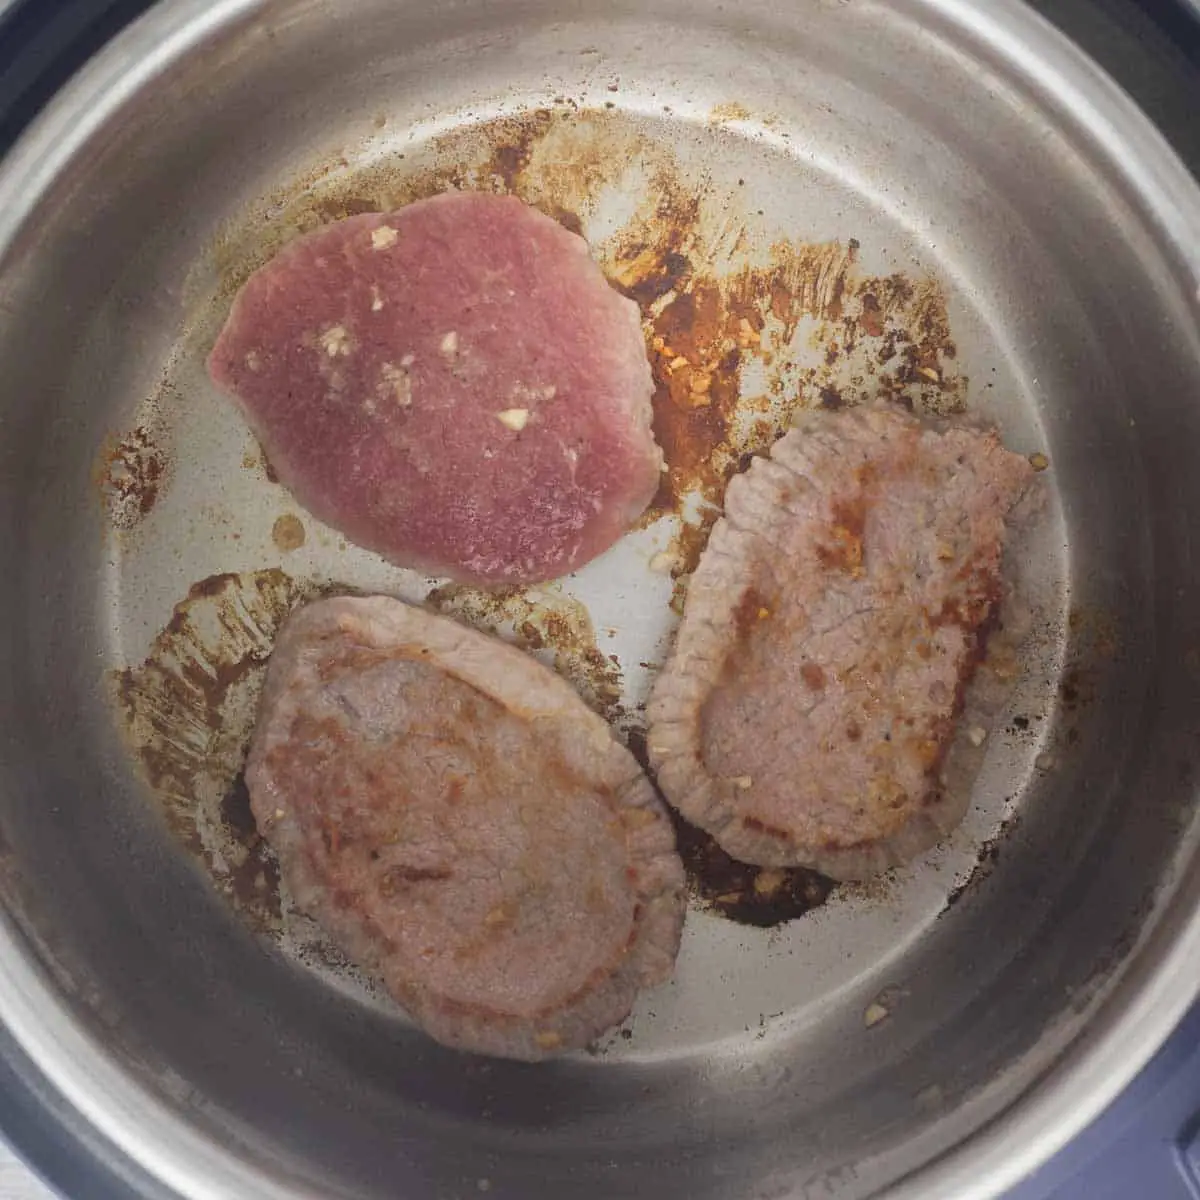
Before cooking eye of round steaks in the electric pressure cooker, it’s highly recommended to sear the steaks to create a crusty and caramelized exterior. Searing not only enhances the visual appeal of the steaks but also adds a depth of flavor to the dish. Follow these steps to achieve the perfect sear:
- Preheat: Heat a skillet or a stovetop-safe insert in your electric pressure cooker over medium-high heat. Allow it to heat up for a few minutes until it’s hot.
- Sear: Carefully place the seasoned eye of round steaks in the hot skillet. Sear the steaks for about 2-3 minutes on each side until they develop a golden brown crust. Flip them using tongs to ensure even browning.
- Remove: Once seared, transfer the steaks to a plate and set them aside momentarily.
Searing the steaks not only adds a beautiful caramelized color to the exterior but also creates a Maillard reaction, which enhances the flavor of the meat. The intense heat helps to lock in the juices and adds depth to each bite of the finished dish. It’s an extra step that is well worth the effort.
After searing the steaks, it’s time to move on to the next step of adding flavor with aromatics. This step will further enhance the taste profile of the dish and infuse the meat with aromatic goodness.
Adding Flavor with Aromatics
Now that you have seared the eye of round steaks, it’s time to take the flavor profile to the next level by adding aromatics. Aromatics are ingredients that bring depth and complexity to your dish. They can include herbs, spices, vegetables, and even liquids. Here’s how to infuse your steaks with aromatic goodness:
- Onions and Garlic: Begin by thinly slicing an onion and mincing a few cloves of garlic. These classic aromatics add a savory and sweet note to the dish. You can complement them with other vegetables like carrots, celery, or bell peppers for additional flavor.
- Herbs and Spices: Next, gather your favorite herbs and spices. Common choices include thyme, rosemary, bay leaves, and peppercorns. You can tie the herbs together with kitchen twine to make it easier to remove them later, or simply scatter them over the steaks.
- Liquid: To provide moisture and enhance the flavor, add a liquid to the pressure cooker. Beef broth, red wine, or a combination of both work well in this case. These liquids will infuse the meat with their flavors during the cooking process.
Spread the sliced onions and minced garlic over the seared steaks in the pressure cooker. Add the herbs and spices, distributing them evenly. Finally, pour in the chosen liquid, ensuring that it covers the bottom of the pressure cooker for proper steam generation.
The aromatics will complement the natural flavors of the eye of round steaks and infuse them with a delightful aroma. As the pressure builds and the steaks cook, these flavors will penetrate the meat, creating a truly delicious and savory dish.
Now that you’ve successfully added flavor with aromatics, it’s time to move on to the cooking process itself. We’ll guide you through the steps of cooking the eye of round steaks in the electric pressure cooker to ensure optimal results.
Cooking the Steaks in the Electric Pressure Cooker
Now comes the exciting part: cooking the eye of round steaks in the electric pressure cooker. This cooking method will transform the tough cut of meat into tender and flavorful steaks. Follow these steps to achieve perfect results:
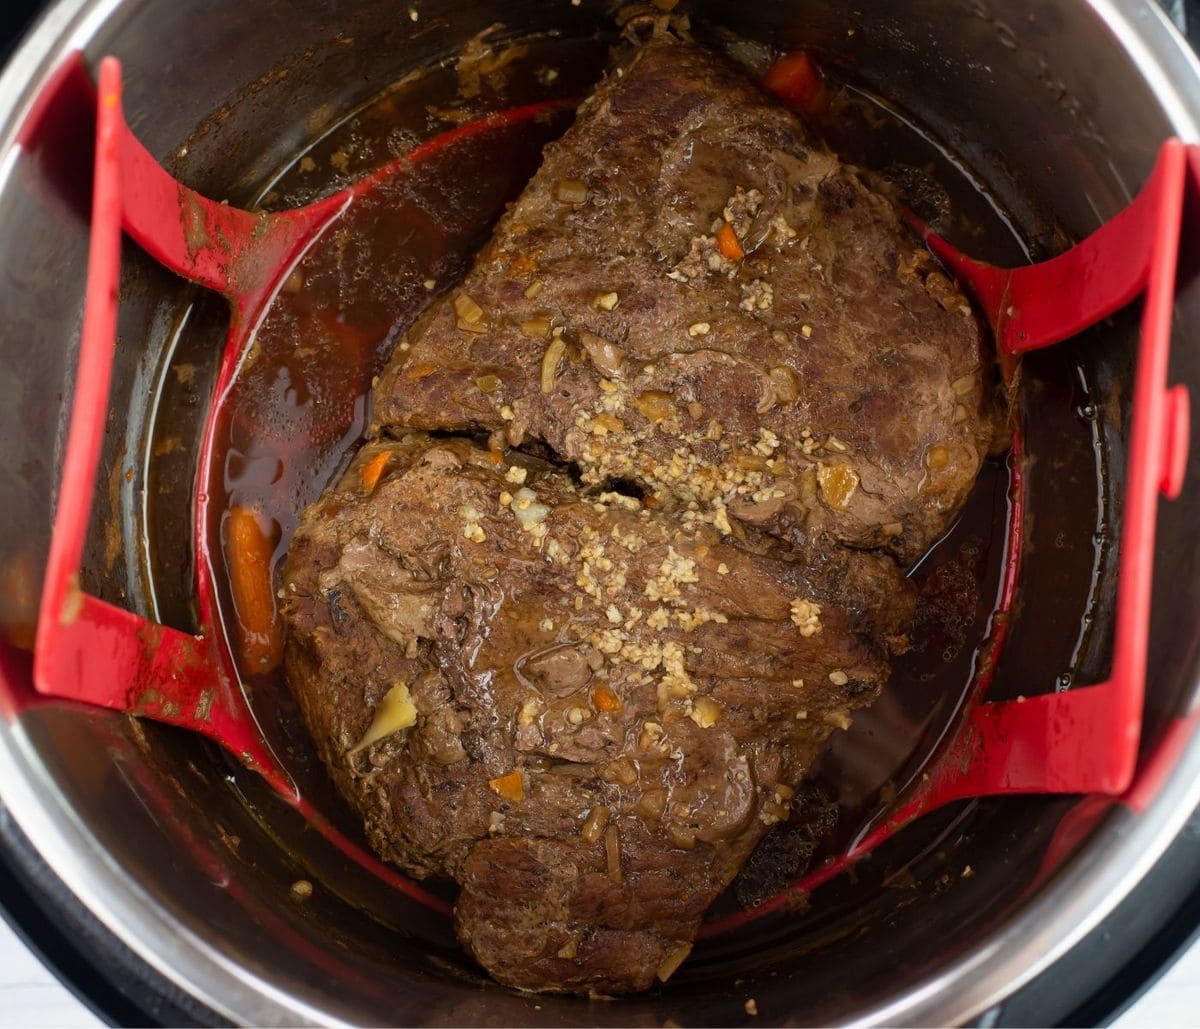
- Place the Steaks: Return the seared steaks to the electric pressure cooker, ensuring they are laying flat at the bottom.
- Add the Cooking Liquid: Pour in enough liquid to cover about a third of the steaks. This can be beef broth, red wine, or a mixture of both. The liquid will help create the necessary steam and maintain moisture during cooking.
- Seal the Pressure Cooker: Lock the lid of the electric pressure cooker in place, ensuring it is properly sealed. Follow the manufacturer’s instructions to do this correctly.
- Select the Cooking Setting: Set the electric pressure cooker to “High Pressure” or the appropriate setting for meat. Adjust the cooking time based on the thickness and desired doneness of your steaks. Generally, cooking eye of round steaks for 20-25 minutes under high pressure will yield tender results.
- Start the Cooking Process: Press the start button on your electric pressure cooker to begin the cooking process. The cooker will build up pressure and cook the steaks accordingly.
As the steaks cook under pressure, the combination of heat and moisture will break down the tough fibers, resulting in tender and juicy meat. The pressure also locks in the flavors, ensuring that each bite is rich and delicious.
Once the cooking time is complete, it’s time to release the pressure and check the doneness of the steaks.
Note: It’s important to follow the manufacturer’s instructions for your specific electric pressure cooker. The cooking settings and times may vary slightly based on the model you are using.
Now that the steaks are cooking, it’s essential to decide whether to perform a natural pressure release or quick pressure release. Let’s take a look at the differences between the two methods.
Natural Pressure Release vs Quick Pressure Release
When cooking eye of round steaks in the electric pressure cooker, the release of pressure is an important step that affects the final texture and juiciness of the meat. There are two methods to release the pressure: natural pressure release and quick pressure release. Let’s explore the differences between these two methods:
- Natural Pressure Release (NPR): This method involves allowing the pressure to gradually decrease on its own. After the cooking time is complete, you simply leave the electric pressure cooker untouched and let it release the pressure naturally. This can take around 10 to 15 minutes or more, depending on the cooker and the amount of liquid inside. Natural pressure release is ideal for delicate cuts of meat like eye of round steaks as it allows for a gentle and slow transition, ensuring the meat remains tender and succulent.
- Quick Pressure Release (QPR): Also known as manual pressure release or fast pressure release, this method involves manually releasing the built-up pressure in the cooker. After the cooking time is complete, carefully move the pressure release valve from the sealing position to the venting position. This allows the steam to escape rapidly, and the pressure inside the cooker will drop within a few minutes. Quick pressure release is useful when you’re short on time or cooking time-sensitive ingredients. However, be cautious as the rapid release of pressure can cause hot steam to escape, so use oven mitts or a towel to protect your hands.
When cooking eye of round steaks, the choice between natural pressure release and quick pressure release depends on several factors. If you have the luxury of time and want to ensure the most tender results, opt for natural pressure release. However, if you’re in a hurry or need to speed up the cooking process, quick pressure release can be a suitable option.
Once the pressure has been released, it’s time to check the doneness of the steaks and proceed with the next steps to perfect your dish.
Now that you’ve successfully released the pressure and checked the steak’s doneness, it’s crucial to let the steaks rest before serving. This resting period allows the juices to redistribute within the meat, resulting in a more flavorful and tender eating experience.
Checking the Steak’s Doneness
Checking the doneness of your eye of round steaks is crucial to ensure they are cooked to your desired level. The cooking time stated in the recipe is a general guideline, but individual preferences may vary. Here are a few methods to check the steak’s doneness:
- Visual Inspection: Observe the color and texture of the steaks. A well-done steak will be brown throughout, while a medium steak will have a slightly pink center. For a rare or medium-rare steak, the center will be pink or red, with a warm and tender texture.
- Thermometer: Use an instant-read meat thermometer to check the internal temperature of the steaks. Insert the thermometer into the thickest part of the meat without touching the bone or fat. The USDA recommends the following temperature guidelines for beef: 145°F (63°C) for medium-rare, 160°F (71°C) for medium, and 165°F (74°C) for well-done.
- Touch Test: The touch test is a handy method to determine the steak’s doneness, although it requires some practice. Gently press the center of the steak with your index finger. A rare steak will feel soft and squishy, medium will have a slight bounce back, and well-done will feel firm to the touch.
Remember that the cooking time may vary depending on the thickness of the steaks, the pressure cooker’s efficiency, and your desired level of doneness. It’s always better to slightly undercook the steaks as you can always return them to the pressure cooker for a few extra minutes if needed.
Once you’ve determined the doneness of the steaks, it’s essential to give them a resting period before serving. This allows the juices to redistribute and the fibers to relax, resulting in a tender and juicy final dish.
Now that your steaks are perfectly cooked and rested, it’s time to serve them up and enjoy the deliciousness you’ve created!
Resting the Steaks
Resting the eye of round steaks is a crucial step before slicing and serving. This period allows the juices within the meat to redistribute, resulting in a more tender and flavorful eating experience. Here’s how to properly rest your cooked steaks:
- Transfer to a Cutting Board: Carefully remove the steaks from the electric pressure cooker using tongs and place them on a clean cutting board. Be mindful of the hot liquid that may have accumulated in the cooker.
- Tent with Foil: Loosely cover the steaks with aluminum foil, creating a tent-like structure. This foil tent will help to retain heat and prevent excessive moisture loss while allowing the steaks to rest.
- Resting Time: Let the steaks rest for about 5-10 minutes. This rest time allows for the relaxation of the muscle fibers, ensuring that the juices redistribute evenly throughout the meat.
During the resting period, the temperature of the steaks may rise slightly due to residual heat. This is normal and contributes to the overall doneness of the meat. The resting time also allows the flavors to settle and intensify, resulting in a more flavorful bite.
Resist the temptation to cut into the steaks immediately after cooking as this will cause the flavorful juices to escape, resulting in a drier final dish. Patience is key, and the resting period is well worth it for tender, succulent steaks.
While the steaks are resting, it’s a good time to prepare any accompanying side dishes or garnishes. Use this time wisely to ensure everything is ready to serve when the steaks are sliced and plated.
Now that the eye of round steaks have rested and gathered their full deliciousness, it’s time to slice, plate, and savor the culmination of your cooking journey!
Serving and Enjoying the Eye of Round Steaks
Now that your perfectly cooked eye of round steaks have rested, it’s time to plate them up and indulge in their flavorful goodness. Here are some tips for serving and enjoying your eye of round steaks:
- Slice with Precision: Using a sharp knife, slice the steaks against the grain. This technique helps to break down the muscle fibers, resulting in more tender and easier-to-chew bites. Aim for slices that are about ¼ to ½ inch thick.
- Presentation Matters: Arrange the sliced steaks on a serving platter or individual plates. Consider the overall presentation by placing the slices in an appealing pattern. You can garnish the steaks with fresh herbs or a sprinkle of chopped parsley to add a touch of vibrancy.
- Serve Warm: Eye of round steaks are best enjoyed while still warm. Serve them promptly after slicing to retain their optimal temperature and tenderness.
- Pair with Complementary Sides: Accompany your eye of round steaks with flavorful side dishes that complement the meat. Some classic choices include roasted vegetables, mashed potatoes, a fresh salad, or a crusty bread roll. These sides will add variety and balance to your meal.
- Enjoy and savor: Finally, take a moment to appreciate the effort and care you’ve put into preparing the eye of round steaks. Take your first bite and savor the tender texture and delightful flavors. Close your eyes, indulge your taste buds, and enjoy the fruits of your labor!
Remember, cooking is a creative process, and you can always experiment with different seasonings and sauces to elevate the flavors of your eye of round steaks. Feel free to drizzle with a homemade pan sauce, a sprinkle of sea salt, or a squeeze of lemon juice to add an extra layer of flavor.
Whether for a special occasion or a weeknight dinner, serving and enjoying eye of round steaks is a delightful experience. So gather your loved ones, pour a glass of your favorite beverage, and relish in a memorable dining experience with these deliciously cooked steaks.
Conclusion
Congratulations! You have successfully learned how to cook eye of round steaks in an electric pressure cooker. By following the step-by-step guide, you have transformed a lean and tough cut of meat into a tender and flavorful masterpiece. Here’s a quick recap of the key points we covered:
1. Choosing the right cut: Selecting the appropriate thickness, marbling, and freshness of the eye of round steaks is crucial for optimal results.
2. Prepping the steaks: Trim any excess fat, season generously, and let the steaks rest for enhanced flavor absorption.
3. Searing the steaks: Develop a beautiful caramelized crust by searing the steaks in a hot skillet before pressure cooking.
4. Adding flavor with aromatics: Enhance the taste profile by incorporating onions, garlic, herbs, spices, and liquids into the pressure cooker.
5. Cooking in the electric pressure cooker: Follow the recommended cooking time and pressure settings for perfectly tenderized steaks.
6. Natural pressure release vs quick pressure release: Decide between a slow and gentle release of pressure or a rapid release, depending on your cooking preferences and time constraints.
7. Checking the steak’s doneness: Utilize visual inspection, meat thermometers, or the touch test to ensure your steaks are cooked to your desired level.
8. Resting the steaks: Allow the meat to rest after cooking to ensure optimal juiciness and flavor distribution.
9. Serving and enjoying: Slice the steaks against the grain, plate them with complementary sides, and savor each bite with appreciation.
Now armed with this knowledge, you can confidently prepare delicious eye of round steaks that will impress your friends, family, or even yourself. Don’t be afraid to experiment with different seasonings and techniques to make the recipe uniquely yours.
So what are you waiting for? Gather your ingredients, fire up your electric pressure cooker, and embark on a culinary journey that will delight your taste buds and satisfy your cravings. Happy cooking!