Introduction
Welcome to the world of cooking with an electric pressure cooker! If you’re a fan of quick and convenient cooking methods, then you’re in for a treat. In this article, we will discuss how to cook chickpeas in an electric pressure cooker, unlocking the secret to perfectly tender and flavorful legumes.
Chickpeas, also known as garbanzo beans, are a versatile and nutritious ingredient that can be used in a wide variety of dishes. From hearty soups and stews to flavorful curries and salads, chickpeas add both texture and substance to your meals. However, cooking chickpeas from scratch can be time-consuming, requiring hours of soaking and simmering. That’s where the electric pressure cooker comes to the rescue, reducing the cooking time significantly without compromising the taste and texture of the chickpeas.
Whether you’re a seasoned cook or just starting your culinary journey, an electric pressure cooker is a valuable addition to your kitchen. With its ability to cook food under pressure, this appliance helps retain the flavors and nutrients in your ingredients, resulting in tender and delicious chickpeas in a fraction of the time.
In this article, we will guide you through the process of cooking chickpeas in an electric pressure cooker, from choosing and preparing the legumes to seasoning and storing the finished product. We will also provide some delicious recipes that make use of cooked chickpeas, giving you plenty of options to explore and enjoy.
So, without further ado, let’s dive into the world of cooking chickpeas in an electric pressure cooker and discover the wonders it brings to your kitchen. Get ready to elevate your cooking game and enjoy the goodness of homemade chickpeas with minimal effort and maximum flavor.
Choosing and Preparing Chickpeas
When it comes to cooking chickpeas in an electric pressure cooker, it’s important to start with high-quality dried chickpeas. Look for chickpeas that are clean, dry, and free from any signs of moisture or insect damage.
Before cooking the chickpeas, it’s recommended to give them a good rinse under cold water to remove any dirt or debris. You can also sort through them and remove any damaged or discolored chickpeas.
Soaking the chickpeas is an optional step, but it can help to soften the beans and reduce the cooking time. To soak the chickpeas, place them in a large bowl and cover with enough water to fully submerge them. Let them soak for at least 4 hours or overnight. If you’re short on time, you can also use the quick soak method by bringing the chickpeas to a boil for 1 minute, then removing them from the heat and letting them soak for 1 hour.
Once the chickpeas have been soaked, drain the water and rinse them thoroughly. This step helps to remove any residue and reduce the gas-inducing compounds in the beans.
Now that you have prepared the chickpeas, they are ready to be cooked in the electric pressure cooker. However, it’s important to note that chickpeas will expand during cooking, so make sure not to fill the pressure cooker more than halfway to avoid any overflow or clogging of the pressure release valve.
With the chickpeas chosen and prepared, you’re now ready to move on to the next step: cooking them in the electric pressure cooker. Don’t worry; it’s a simple and straightforward process that will yield delicious and tender chickpeas every time.
Soaking Chickpeas
Soaking chickpeas before cooking is a common practice that helps to soften the beans and reduce the cooking time. While not necessary, soaking can improve the texture and digestibility of the chickpeas.
There are two methods for soaking chickpeas: the overnight soak and the quick soak method. Let’s explore both options:
1. Overnight Soak:
- Place the chickpeas in a large bowl and cover them with enough water to fully submerge.
- Let the chickpeas soak for at least 8 hours or overnight. This longer soak allows the beans to fully absorb the water and soften.
- After the soaking time is complete, drain the water and rinse the chickpeas thoroughly before cooking them in the electric pressure cooker.
2. Quick Soak Method:
- In a large pot, bring the chickpeas and enough water to cover them to a boil.
- Let the chickpeas boil for 1 minute, then remove them from the heat.
- Cover the pot and let the chickpeas soak for 1 hour.
- After the soaking time is complete, drain the water and rinse the chickpeas thoroughly before cooking them in the electric pressure cooker.
Note: Soaking the chickpeas helps to reduce the cooking time, but it is not mandatory. If you’re short on time, you can skip the soaking step and proceed directly to cooking the chickpeas in the electric pressure cooker. However, keep in mind that the cooking time will be longer and the texture may not be as tender as soaked chickpeas.
Now that you have learned how to soak chickpeas, you’re ready to move on to the next step: cooking them in the electric pressure cooker. Whether you choose to soak or not, the pressure cooker will yield delicious and tender chickpeas that can be used in a variety of dishes.
Cooking Chickpeas in an Electric Pressure Cooker
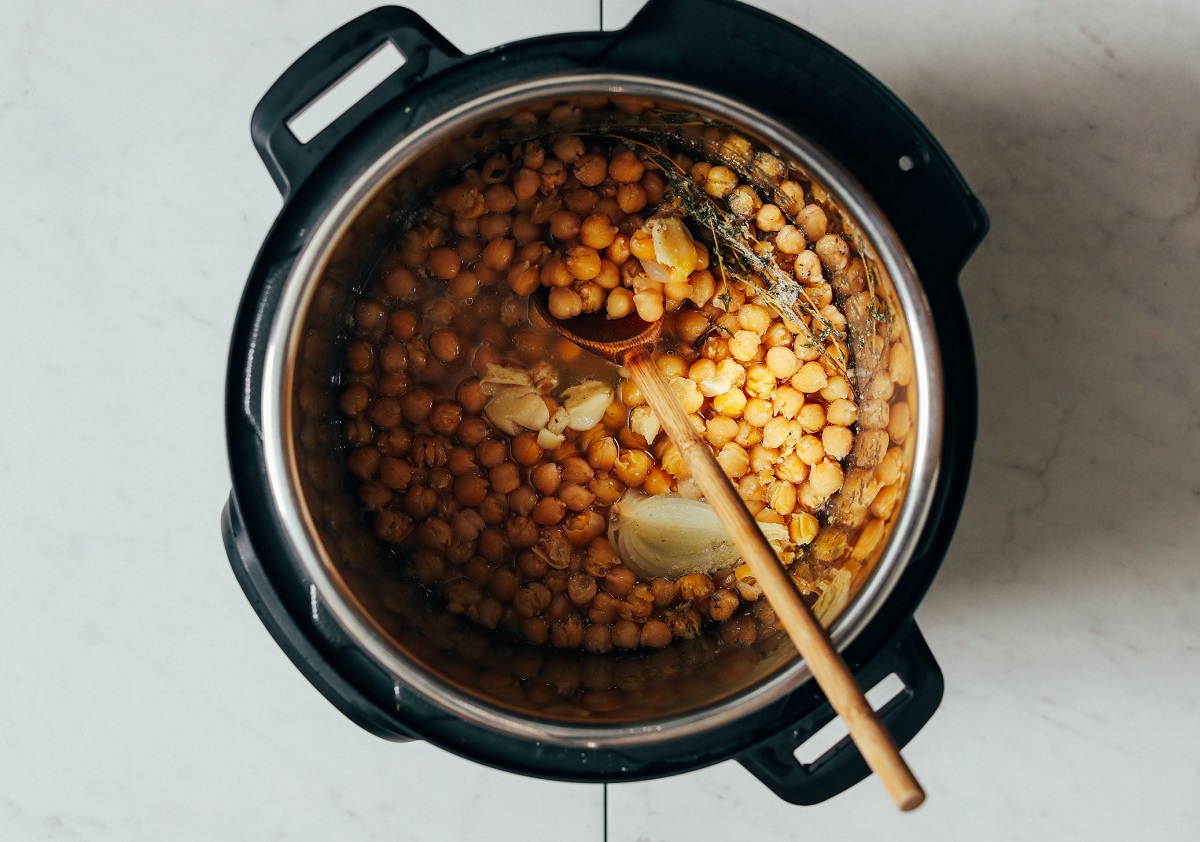
Cooking chickpeas in an electric pressure cooker is a game-changer when it comes to convenience and time-saving. The pressure cooker allows you to achieve perfectly cooked chickpeas in a fraction of the traditional cooking time. Here’s how to do it:
- Add the soaked or unsoaked chickpeas to the electric pressure cooker. Make sure not to fill it more than halfway to avoid any overflow or clogging of the pressure release valve.
- Add enough water to fully cover the chickpeas by at least 1 inch. You can also use vegetable or chicken broth for added flavor.
- Secure the lid of the pressure cooker and ensure it is properly sealed.
- Set the pressure cooker to high pressure and adjust the cooking time. For soaked chickpeas, a cooking time of 8-10 minutes is usually sufficient. If using unsoaked chickpeas, increase the cooking time to around 20-25 minutes.
- Start the cooking process by pressing the “Cook” or “Start” button on your electric pressure cooker.
- Allow the pressure cooker to come to pressure. This typically takes about 10-15 minutes, depending on your specific model.
- Once the cooking time is complete, let the pressure release naturally for about 10-15 minutes. This allows the flavors to meld, and the chickpeas to continue cooking gently.
- If you’re short on time, you can opt for a quick pressure release. Carefully switch the pressure release valve to the “Venting” position, following the instructions specific to your electric pressure cooker.
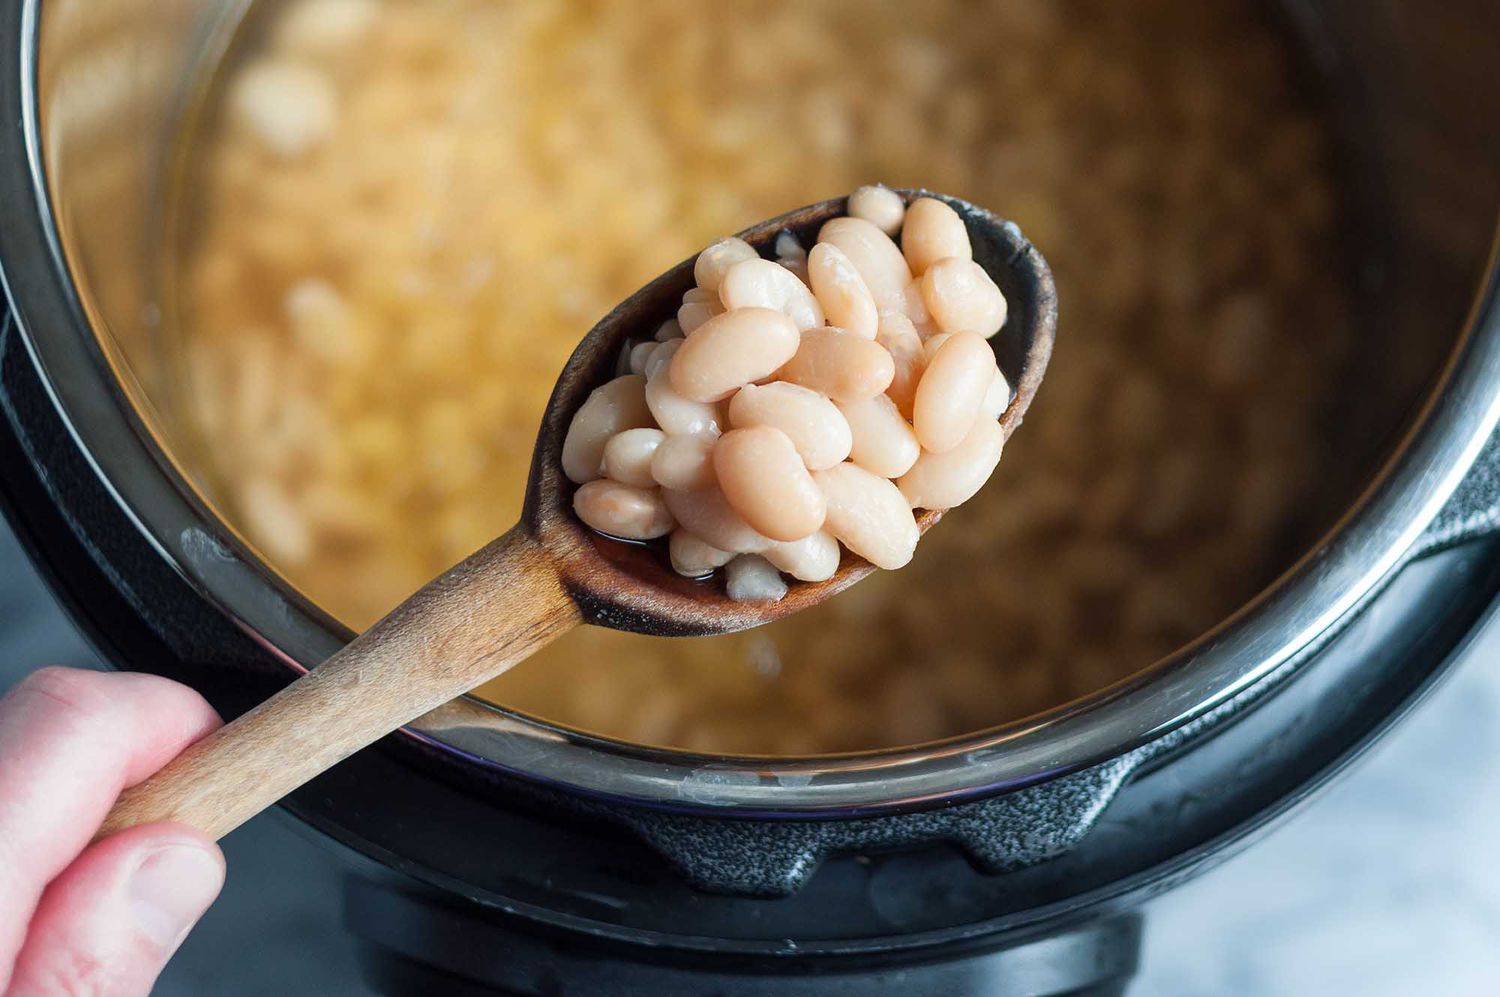
- When the pressure has been fully released, open the lid carefully, facing it away from you to avoid any steam burns.
- Your perfectly cooked chickpeas are now ready to be enjoyed in various recipes or stored for later use.
Using an electric pressure cooker simplifies the cooking process and reduces the effort required, allowing you to enjoy delicious and tender chickpeas in no time. Experiment with different cooking times to achieve your desired level of softness. Now that the chickpeas are cooked, it’s time to add some flavor and seasonings to enhance their taste.
Natural Pressure Release vs. Quick Pressure Release
When cooking chickpeas or any other food in an electric pressure cooker, you have two options for releasing the pressure: natural pressure release (NPR) or quick pressure release (QPR). Understanding the differences between the two methods is crucial to achieving the desired texture and flavor of your chickpeas.
Natural Pressure Release (NPR):
Natural pressure release involves allowing the pressure cooker to release the pressure gradually on its own, without any intervention from you. After the cooking time is complete, simply turn off the heat and let the pressure cooker sit undisturbed. During this time, the pressure inside the cooker reduces naturally as the temperature inside the pot drops.
NPR is generally recommended for foods like chickpeas that have a longer cooking time or are more prone to foaming. It helps prevent the chickpeas from becoming overcooked or mushy and allows for additional cooking of the chickpeas in the residual heat.
The length of the natural pressure release can vary depending on the recipe and the size of the pressure cooker. Typically, it takes around 10-15 minutes for the pressure to release naturally. You’ll know it’s done when the float valve on the lid drops, indicating that the pressure has fully released.
Quick Pressure Release (QPR):
Quick pressure release, as the name suggests, involves manually releasing the pressure from the cooker using the pressure release valve. This method rapidly releases the built-up pressure and allows you to open the cooker immediately after the cooking time is complete.
QPR is ideal for foods that require a precise cooking time and benefit from stopping the cooking process quickly. It’s commonly used for vegetables or delicate foods that can easily overcook if left in the residual heat.
Be cautious while performing a quick pressure release, as the steam released from the valve can be hot and may cause burns. Always follow the manufacturer’s instructions for your specific electric pressure cooker to ensure a safe and successful quick pressure release.
Whether you choose to use natural pressure release or quick pressure release depends on the recipe and your desired outcome. Both methods have their advantages, so it’s worth experimenting to find what works best for you and your cooking needs.
Now that you understand the differences between natural pressure release and quick pressure release, it’s time to season and flavor your cooked chickpeas to take them to the next level.
Seasoning and Flavoring Chickpeas
Cooked chickpeas serve as a versatile base for a wide range of dishes, and seasoning them properly is key to creating delicious and flavorful meals. Whether you plan to use chickpeas in salads, stews, curries, or dips, here are some seasoning and flavoring options to enhance their taste:
1. Herbs and Spices:
Add depth and complexity to your chickpeas by incorporating a variety of herbs and spices. Common options include cumin, paprika, coriander, turmeric, garlic powder, onion powder, and chili powder. Experiment with different combinations to find your preferred flavor profile.
2. Salt and Pepper:
Simple seasoning goes a long way. Salt and pepper are essential seasonings that can enhance the natural flavors of chickpeas. Add them to taste, keeping in mind that chickpeas tend to absorb flavors, so it’s best to start with a little and adjust as needed.
3. Citrus Zest and Juice:
For a vibrant and fresh flavor, consider adding citrus zest and juice to your chickpeas. Lemon, lime, or orange zest and their corresponding juices can brighten up the dish and provide a tangy and refreshing twist to the flavor.
4. Aromatics:
Infuse your chickpeas with aromatic ingredients like onions, garlic, ginger, or shallots. Sauté these aromatics in a bit of oil before adding the cooked chickpeas to deepen the flavor and create depth in your dish.
5. Tamari or Soy Sauce:
Add an umami-rich element to your chickpeas by including tamari or soy sauce. These savory sauces bring a depth of flavor and can help to balance other seasonings in the dish.
6. Fresh Herbs:
Finish off your chickpeas with a sprinkling of fresh herbs just before serving. Fresh parsley, cilantro, or mint add a burst of freshness and brighten up the flavors of your dish.
Remember, the key to seasoning and flavoring chickpeas is experimentation. Feel free to customize your spices and seasonings according to your taste preferences and the specific dish you’re preparing. Don’t be afraid to get creative and discover unique flavor combinations that make your chickpea dishes stand out.
Now that you have seasoned and flavored your chickpeas, you may be wondering how to store them for future use. Let’s explore some tips for proper storage and freezing of cooked chickpeas.
Storing and Freezing Cooked Chickpeas
Once you have cooked a batch of chickpeas, it’s important to store them properly to maintain their freshness and flavor. Here are some tips for storing and freezing cooked chickpeas:
Storing Cooked Chickpeas:
If you plan to use the cooked chickpeas within a few days, storing them in the refrigerator is a convenient option. Follow these steps:
- Allow the cooked chickpeas to cool to room temperature.
- Transfer them to an airtight container or a resealable plastic bag.
- Label the container with the date to keep track of freshness.
- Store the chickpeas in the refrigerator for up to 3-4 days.
Using the refrigerated chickpeas within this time frame will ensure the best quality and flavor.
Freezing Cooked Chickpeas:
If you have a surplus of cooked chickpeas or want to meal prep for the future, freezing is a great option. Follow these steps:
- Allow the chickpeas to cool completely
- Transfer them to a freezer-safe container or resealable plastic bag.
- Label the container with the date and portion size if desired.
- Seal the container tightly, removing any excess air from the bag.
- Place the chickpeas in the freezer, ensuring they are stored flat to prevent them from sticking together.
Frozen cooked chickpeas can be stored for up to 3-4 months. To use them, simply thaw the desired amount in the refrigerator overnight or soak them in cold water for a few hours. Avoid thawing and refreezing chickpeas multiple times, as this can compromise their texture and flavor.
Tips for Using Thawed Chickpeas:
When using thawed or refrigerated chickpeas, keep the following tips in mind:
- Drain and rinse the chickpeas before using them in recipes to remove any excess moisture.
- Use the thawed chickpeas in a variety of dishes, including salads, soups, stews, curries, or even as a topping for roasted vegetables.
- Experiment with different flavor combinations and seasonings to enhance the taste of the thawed chickpeas.
Properly storing and freezing cooked chickpeas allows you to have a convenient and versatile ingredient at your fingertips whenever you need it. With your chickpeas safely stored, you can now explore a myriad of delicious recipes that feature cooked chickpeas as the star ingredient.
Recipes Using Cooked Chickpeas
Now that you have a batch of perfectly cooked chickpeas, let’s explore some tasty and versatile recipes that showcase the deliciousness of these legumes:
1. Chickpea Salad:
Combine cooked chickpeas with diced cucumbers, tomatoes, red onions, and fresh herbs. Toss with a simple vinaigrette made from olive oil, lemon juice, garlic, and spices. This refreshing salad is perfect as a side dish or a light meal on its own.
2. Chickpea Curry:
Sauté onions, garlic, ginger, and your choice of spices in a pan. Add cooked chickpeas, coconut milk, tomato puree, and vegetables of your choice. Simmer until the flavors meld together, and serve over rice or with naan bread.
3. Roasted Chickpeas:
Toss cooked chickpeas with olive oil, salt, and spices such as paprika, cumin, or chili powder. Spread them on a baking sheet and roast in the oven until crispy. These flavorful and crunchy roasted chickpeas make a delightful snack or a topping for salads and soups.
4. Chickpea Stew:
Sauté onions, garlic, and your favorite vegetables in a pot. Add cooked chickpeas, vegetable broth, diced tomatoes, and herbs. Simmer until the flavors meld together and the stew thickens. Serve with crusty bread for a hearty and comforting meal.
5. Hummus:
In a food processor, blend cooked chickpeas with tahini, lemon juice, garlic, olive oil, and salt. Adjust the seasonings to your liking and blend until smooth. Enjoy this creamy and flavorful hummus as a dip, spread, or as a base for sandwiches and wraps.
These are just a few examples of the countless ways you can utilize cooked chickpeas in your cooking. Feel free to get creative and adapt these recipes to your preferences. Adding cooked chickpeas to your meals not only enhances the nutritional value but also brings a delightful taste and texture to your dishes.
With your repertoire of chickpea recipes expanded, you’re ready to impress your taste buds and those of your loved ones with these delectable chickpea creations! Remember to have fun in the kitchen and experiment with different flavor combinations to discover your favorite chickpea dishes.
Conclusion
Congratulations! You have now learned how to cook chickpeas in an electric pressure cooker, unlocking a world of culinary possibilities. From choosing and preparing the chickpeas to seasoning and flavoring them, you now have the knowledge to create delicious and versatile dishes with this nutritious legume.
The electric pressure cooker has revolutionized the way we cook, allowing us to achieve tender and flavorful chickpeas in a fraction of the time. Soaking the chickpeas is optional but can help to reduce the cooking time and improve the texture. Cooking times may vary, so adjust accordingly based on whether you soaked the chickpeas or not.
Seasoning and flavoring the cooked chickpeas is where you can get creative. From herbs and spices to citrus zest and aromatics, the options are endless. Experiment with different flavor combinations to suit your taste preferences and the specific dishes you’re preparing.
Don’t forget about storing and freezing your cooked chickpeas. Proper storage ensures their freshness and allows you to enjoy them in various recipes for days or even months to come. Whether you refrigerate them for short-term use or freeze them for future meals, having cooked chickpeas readily available makes meal planning a breeze.
Now armed with these cooking techniques and recipes, you can confidently incorporate cooked chickpeas into your culinary repertoire. Whether you choose to make chickpea salads, curries, stews, or hummus, you’ll discover the versatility and nutritional benefits of this legume.
So, fire up your electric pressure cooker, gather your ingredients, and let your creativity flow in the kitchen. Cooking chickpeas has never been easier, and with each delicious meal, you’ll appreciate the convenience and satisfaction of home-cooked chickpeas.
Get ready to savor every bite and delight in the knowledge that you can now enjoy perfectly cooked chickpeas whenever you desire. Happy cooking!