Introduction
If you’re a photography enthusiast looking to explore new creative possibilities, converting a digital camera to infrared can open up a whole new world of captivating images. Infrared photography involves capturing light that is not visible to the human eye, resulting in stunning, ethereal images that showcase a different perspective of the world.
In this guide, we will walk you through the process of converting a digital camera to infrared, allowing you to unleash your creativity and experiment with this unique photographic technique. We will cover everything from understanding infrared photography to choosing the right camera for conversion, as well as the step-by-step process of removing the camera’s original infrared (IR) filter and installing a new one.
Before we delve into the technical aspects, it’s important to note that converting a digital camera to infrared is a complex process that requires a level of technical expertise. If you’re not comfortable with disassembling and modifying your camera, it’s recommended to seek the assistance of a professional camera technician.
Now, let’s dive into the fascinating realm of infrared photography and explore the steps to convert your digital camera to capture the unseen.
Understanding Infrared Photography
Infrared photography is a unique technique that involves capturing light in the infrared spectrum, which is not visible to the human eye. This type of photography unveils a different dimension of reality, showcasing the world in a stunning and surreal manner.
Light consists of different wavelengths, and the visible spectrum that our eyes can perceive is just a small portion of the electromagnetic spectrum. Beyond the visible range lies the infrared spectrum, which encompasses longer wavelengths. Infrared light is emitted by objects and is also reflected by surrounding surfaces.
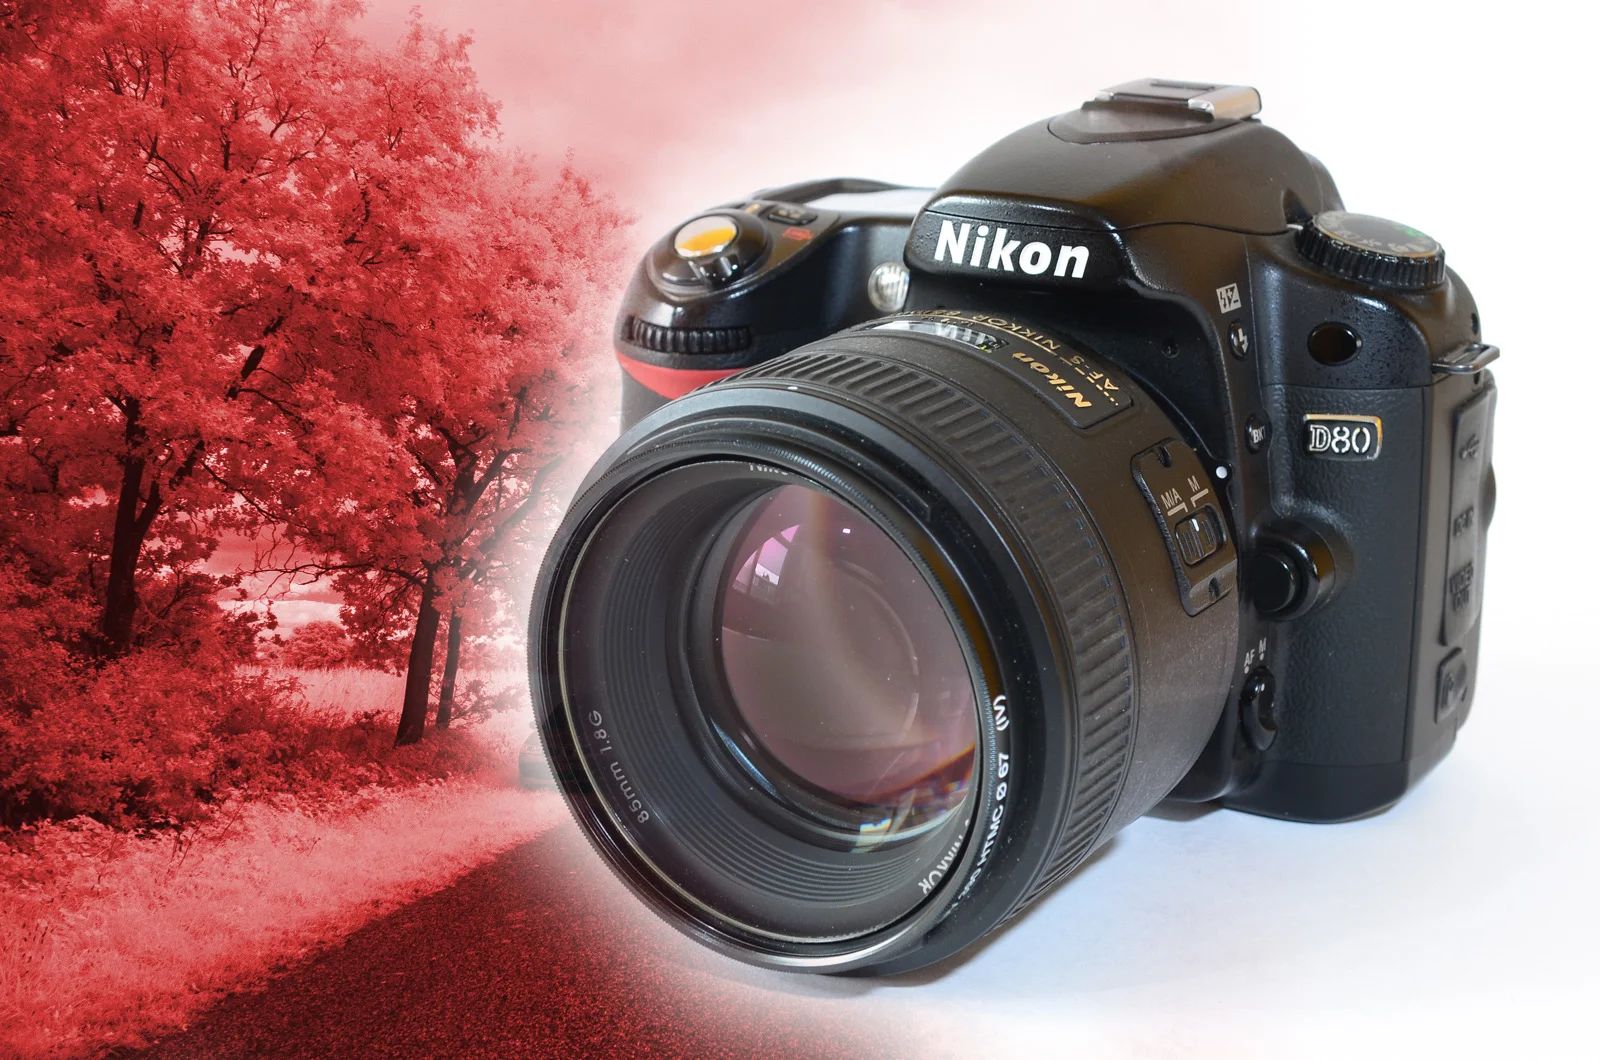
When we talk about capturing infrared images, we are referring to using a camera specifically modified to capture light in the infrared range. Regular digital cameras are equipped with an infrared-blocking filter, also known as the IR filter, which prevents infrared light from reaching the camera’s sensor.
By removing or replacing the camera’s IR filter, we can allow infrared light to reach the sensor, resulting in unique, otherworldly images. Infrared photographs often feature dreamy effects, as foliage appears white or light-colored, while skies and bodies of water can take on deep, dramatic shades.
Understanding how different objects reflect and absorb infrared light is vital in mastering infrared photography. For instance, foliage tends to reflect a significant amount of infrared light, making it appear brighter in infrared images. On the other hand, human skin and synthetic materials absorb more infrared light, resulting in a distinctive, contrasting look.
Another crucial element to consider in infrared photography is the time of day. Infrared light is more prevalent during midday when the sun is high in the sky. This means that landscapes and outdoor scenes are often best captured during this time for optimal infrared results.
Now that you have a basic understanding of infrared photography, let’s move on to the next step: choosing the right camera for conversion.
Choosing the Right Camera for Conversion
When it comes to converting a digital camera for infrared photography, not all cameras are created equal. The type of camera you choose will impact the quality and versatility of your infrared images. Here are some factors to consider when selecting a camera for conversion:
1. Compatibility: Not all digital cameras are suitable for infrared conversion. It’s essential to choose a camera with a removable lens and a compatible lens mount, as this will make the conversion process much easier.
2. Image Sensor: The type and quality of the image sensor can significantly impact the outcome of your infrared images. Full-frame sensors are generally preferred for their ability to capture more light and produce higher-resolution photographs.
3. ISO Sensitivity: Infrared photography often requires shooting at higher ISO settings to compensate for the reduced amount of visible light. Look for a camera that offers a wide ISO range and performs well at higher ISO settings to achieve optimal image quality.
4. Live View Functionality: Live View mode can be a valuable tool for infrared photography, as it allows you to preview and compose your shots in real-time, considering the unique characteristics of infrared light. Look for a camera with a reliable Live View function.
5. Availability of Conversion Services: Research whether your chosen camera model is widely supported by camera conversion companies. It’s important to ensure that conversion services are available in case you don’t want to tackle the modification process yourself.
Once you’ve considered these factors, you can start searching for the ideal camera model for infrared conversion. Popular choices include cameras from Sony, Canon, Nikon, and Fujifilm. It’s worth exploring camera forums and communities to gather insights and experiences from photographers who have already converted cameras for infrared photography.
In the next section, we’ll delve into the detailed step-by-step process of removing the camera’s original IR filter and preparing it for infrared photography.
Removing the Camera’s IR Filter
Before you can convert your digital camera for infrared photography, you’ll need to remove the camera’s original infrared (IR) filter. This filter is designed to block infrared light from reaching the camera’s sensor, and its removal is necessary to allow infrared light to pass through.
Here is a step-by-step guide on how to remove the camera’s IR filter:
1. Gather the Necessary Tools and Materials: You will need a set of precision screwdrivers, including Phillips and flathead, a clean workspace, and a detailed guide or manual specific to your camera model.
2. Safely Open Up the Camera: Remove the camera’s battery and memory card, and gently unscrew the screws on the camera body using the appropriate screwdriver. Be careful not to force or strip the screws.
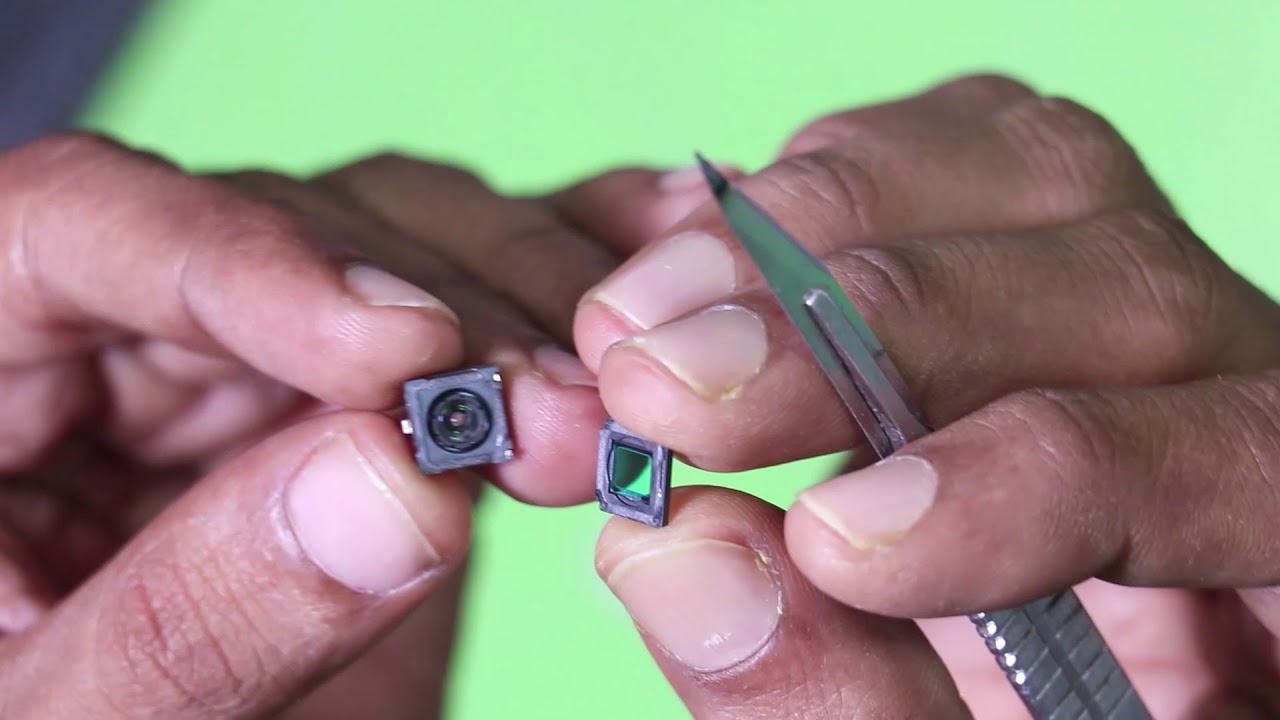
3. Locate the IR Filter: Once the camera is opened, locate the IR filter, which is typically situated in front of the camera’s image sensor. Refer to your camera’s guide or manual for assistance in finding the specific location.
4. Remove the IR Filter: Carefully unscrew the screws or clips holding the IR filter in place. Use caution and gentle pressure to avoid damaging any delicate components or wires surrounding the IR filter.
5. Clean and Inspect: After removing the IR filter, take a moment to clean the camera’s sensor and inspect the internal components for any dust or debris. Use a lint-free cloth or a specialized sensor cleaning kit for this step.
6. Optional: Replace the IR Filter: If you plan to replace the removed IR filter with a new one specifically designed for infrared photography, follow the manufacturer’s instructions for installation. This step is not necessary if you prefer to capture unfiltered infrared light.
7. Close Up the Camera: Once the IR filter has been removed or replaced, carefully place it back into its original position and secure it with the screws or clips. Make sure all connections are intact before closing up the camera.
It’s important to note that performing the IR filter removal yourself carries some risks, as it involves delicate components and sensitive electronics. If you are unsure or uncomfortable with this procedure, it is recommended to seek professional assistance from a camera technician.
With the IR filter successfully removed, your camera is now ready for infrared photography. In the next section, we will explore the details of gathering the necessary tools and materials for the conversion process.
Gathering the Necessary Tools and Materials
Before you begin the conversion process, it’s crucial to gather the necessary tools and materials to ensure a smooth and successful modification of your digital camera for infrared photography. Having everything prepared in advance will save you time and minimize the risk of damaging any components. Here’s a list of essential items you’ll need:
1. Precision Screwdrivers: Invest in a set of precision screwdrivers with various sizes and tip types such as Phillips and flathead. These will be essential for opening up your camera and removing screws from internal components.
2. Tweezers and Anti-static Tools: Tweezers will come in handy for handling small and delicate parts with precision. Additionally, it’s advisable to use anti-static tools, such as an anti-static wristband or mat, to prevent any electrostatic discharge that could potentially damage sensitive camera components.
3. Cleaning Supplies: A clean workspace and specialized cleaning tools are essential for maintaining a dust-free environment and ensuring optimal image quality. Lens and sensor cleaning kits, lint-free cloths, and cleaning solutions specifically designed for camera equipment will help you effectively remove any dust or debris during the conversion process.
4. Camera Guide or Manual: Having access to your camera’s guide or manual is crucial for locating components and understanding the specific steps involved in opening up and modifying your camera. Ensure you have the relevant documentation for your camera model readily available.
5. Replacement IR Filter (optional): If you plan to replace the removed IR filter with a new one specifically designed for infrared photography, ensure you have a compatible filter ready. Research and purchase the appropriate IR filter that matches your camera’s sensor size and mount.
6. Storage Containers: It’s wise to have small containers or compartments to store and organize the screws and other small components that you will be removing during the conversion process. This helps prevent any accidental loss or confusion later on when assembling the camera back together.
7. Patience and Care: While not an actual tool or material, having patience and exercising caution throughout the entire process is essential. Take your time, follow the instructions, and handle the camera and its components with care to avoid any accidental damage.
By gathering these necessary tools and materials in advance, you’ll be prepared for all the steps involved in converting your digital camera to infrared photography. In the next section, we will dive into the detailed process of opening up the camera and accessing the IR filter.
Opening Up the Camera
Before you can proceed with the conversion process, you’ll need to open up your digital camera to access the internal components. Opening up the camera requires precision and careful handling to avoid damaging any delicate parts. Follow these steps to open up your camera:
1. Prepare your Workspace: Find a clean and well-lit workspace where you can comfortably work on your camera. Clear any clutter and ensure you have enough space to lay out the camera and its components.
2. Power Down the Camera: Remove the camera’s battery to ensure there is no power running through the system. Additionally, remove any memory cards or other external accessories that may hinder the process.
3. Identify the Access Points: Consult your camera’s guide or manual to locate the screws or clips that need to be removed to access the internal components. These access points may vary depending on the camera model.
4. Use the Correct Tools: Select the appropriate precision screwdriver based on the size and type of screws used in your camera’s construction. Using the wrong tool can damage the screws or strip them.
5. Begin Unscrewing: Carefully remove the screws or clips located on the camera body according to the instructions provided in your camera’s guide or manual. Work methodically and keep track of where each screw or clip came from.
6. Separate the Camera Body: Once all the screws or clips have been removed, gently separate the camera body by carefully prying open any clasps or connectors. Take your time and ensure that you don’t force any components apart.
7. Handle Internal Components with Care: As you gain access to the internal components, be mindful of any wires, connectors, or delicate parts. Avoid touching the image sensor or any other sensitive areas to prevent damage or contamination.
8. Maintain a Dust-Free Environment: While the camera is open, make sure you minimize the presence of dust and debris. Keep the camera’s internal components and the workspace clean to avoid any unwanted particles from affecting image quality.
Remember, opening up your camera requires technical knowledge and manual dexterity. If you’re unsure or uncomfortable with this process, it’s recommended to seek the assistance of a professional camera technician to ensure the camera remains undamaged.
With the camera successfully opened up, you are now ready to locate and remove the infrared filter, which we will cover in the next section.
Locating and Removing the IR Filter
Once you have successfully opened up your digital camera, the next step in converting it for infrared photography is to locate and remove the infrared (IR) filter. The IR filter is situated in front of the camera’s image sensor and blocks infrared light from reaching the sensor. Follow these steps to find and remove the IR filter:
1. Refer to Your Camera’s Guide or Manual: Consult the camera’s guide or manual to identify the location of the IR filter. The specific location may vary depending on the camera model.
2. Inspect the Sensor Area: Take a close look at the camera’s image sensor area. The IR filter is typically located in front of the sensor and can be identified as a small rectangular or square-shaped component.
3. Handle the Components with Caution: As you locate the IR filter, be mindful of any wires, connectors, or delicate parts surrounding it. Avoid touching the image sensor or any other sensitive components to prevent damage or contamination.
4. Determine the Fastening Method: Examine the IR filter to determine how it is secured in place. It may be held by screws, clips, or other fastening mechanisms. Take note of the type and number of fasteners used.
5. Remove the Fasteners: Carefully unscrew the screws or unclip the fasteners holding the IR filter in place. Use the appropriate screwdriver or tweezers for this step, ensuring you apply gentle and even pressure to avoid damaging any components.
6. Lift Out the IR Filter: Once the fasteners are removed, gently lift the IR filter from its position. Be cautious not to apply excessive force or touch any sensitive areas of the camera. Place the removed IR filter in a safe, clean location.
7. Inspect and Clean the Sensor Area: With the IR filter removed, take a moment to inspect the camera’s image sensor area. Check for any dust, debris, or smudges. If necessary, use a lint-free cloth or a specialized cleaning tool to carefully remove any contaminants.
It’s important to handle the camera’s internal components with care and avoid touching the image sensor directly. Additionally, maintaining a clean and dust-free environment is crucial to prevent any particles from affecting the image quality.
Now that you have successfully located and removed the IR filter, you are one step closer to converting your digital camera for infrared photography. In the next section, we will explore the process of installing a new infrared filter, if desired, before closing up the camera.
Installing the New Infrared Filter
If you have chosen to replace the infrared (IR) filter with a new one designed specifically for infrared photography, this section will guide you through the process of installing the new filter in your converted digital camera. Follow these steps to install the new IR filter:
1. Acquire the Correct Infrared Filter: Make sure you have the appropriate replacement IR filter that matches your camera’s sensor size and mount. Consult reputable sources or manufacturers to ensure compatibility.
2. Familiarize Yourself with the New Filter: Take a moment to review the instructions or guidelines provided by the manufacturer for installing the new IR filter. Identify any specific installation steps or considerations.
3. Locate the Position for the Filter: Find the area on the camera where the previous IR filter was removed. Ensure the sensor area is clean and free from any dust or debris before proceeding.
4. Align the New Filter: Carefully align the new IR filter in the correct position over the sensor area. Pay close attention to the orientation and ensure a proper fit without forcing the filter into place.
5. Secure the Filter in Place: Depending on the design of the new IR filter, it may require fastening screws, clips, or other mechanisms to secure it in place. Follow the manufacturer’s instructions to properly secure the filter.
6. Verify Proper Alignment and Fit: After securing the new IR filter, double-check its alignment and fit. Ensure that it is securely fixed and remains in the correct position over the camera’s image sensor.
7. Clean the Filter Surface (If Necessary): If there are any smudges or fingerprints on the surface of the new IR filter, use a specialized cleaning tool or a lint-free cloth to gently remove them. Be cautious not to damage or scratch the filter surface.
8. Confirm Functionality: Once the new IR filter is installed and cleaned, verify that the camera functions as expected. Test the camera by taking sample shots and checking the LCD display or through the camera’s viewfinder for proper image capture.
It is crucial to be cautious and handle the new IR filter with care to prevent any damage or misalignment. If you are unsure about the installation process, consult professionals or camera technicians who can assist you with this step.
Now that the new IR filter is installed, the camera is ready to capture infrared light. In the next section, we will discuss the process of closing up the camera to complete the conversion.
Closing Up the Camera
After successfully installing the new infrared (IR) filter or completing the removal process, it’s time to close up your digital camera to complete the conversion for infrared photography. Follow these steps to safely and securely close up your camera:
1. Check Internal Components: Before closing the camera, ensure that all internal components such as the image sensor, wires, and connectors are properly positioned and undamaged. Take a moment to inspect and make any necessary adjustments.
2. Reconnect Cables and Wires: If any cables or wires were disconnected during the opening process, carefully reconnect them to their respective connectors. Double-check that each connection is secure and properly aligned.
3. Align the Camera Body: Gently align the camera body halves or sections, ensuring that the edges and seams fit together correctly. Take your time to properly align and avoid applying excessive pressure or force.
4. Fasten the Screws: Using the appropriate screwdriver, carefully tighten the screws that hold the camera’s body together. Start with corner screws to ensure balanced pressure distribution, then move to the remaining screws until they are all secure.
5. Test the Camera’s Functionality: Insert a fully charged battery and a memory card into the camera. Power it on and test its functionality by taking sample photos and checking various camera settings. Make sure all features are working as expected.
6. Inspect the Seals and Gaskets: If your camera is weather-sealed or has gaskets for dust and moisture protection, inspect them carefully to ensure they are intact and properly positioned. This step helps maintain the camera’s weather resistance.
7. Clean External Surfaces: Use a microfiber cloth or gentle cleaning solution to clean the external surfaces of your camera. This step helps remove any fingerprints, smudges, or dust that may have accumulated during the conversion process.
Remember to exercise caution and patience during the closing process to prevent damage to your camera. If you encounter any difficulties or feel unsure, it’s recommended to seek professional assistance from a camera technician.
With the camera securely closed up, you have successfully converted your digital camera for infrared photography. In the next section, we will explore the testing and editing of infrared images captured with your newly converted camera.
Testing the Converted Camera
After completing the conversion process, it’s crucial to test the functionality and performance of your newly converted camera for infrared photography. Testing allows you to ensure that the camera is capturing infrared images as expected and gives you an opportunity to adjust settings if necessary. Follow these steps to test your converted camera:
1. Choose an Ideal Shooting Location: Select a location with different light conditions, such as a park or garden, to capture a range of infrared scenes. Ensure the area has a variety of subjects, including foliage, landscapes, and stationary objects.
2. Set the Camera’s White Balance: Infrared images often have a unique color cast, with foliage appearing white or light-toned. Adjust the camera’s white balance settings to compensate for this color shift or choose a custom white balance tailored for infrared photography.
3. Experiment with Different Exposure Settings: Infrared photography requires different exposure settings than traditional photography due to the unique characteristics of infrared light. Explore various exposure settings such as shutter speed, aperture, and ISO to achieve the desired effect in your infrared images.
4. Pay Attention to Foliage and Skies: When capturing infrared images, observe how foliage appears in the frame. Infrared light is often reflected by foliage, creating a distinct white or lighter tone. Similarly, pay attention to how skies and bodies of water show dramatic contrast and different shades in infrared photography.
5. Use Live View and Histogram: Take advantage of your camera’s Live View function and histogram to evaluate the exposure and composition of your infrared images in real-time. This allows you to make adjustments and ensure optimal image capture.
6. Review and Analyze the Results: After each test shot, review the captured images on your camera’s LCD screen. Observe the overall composition, details, and contrast in the infrared images. Pay attention to any hotspots, lens flares, or artifacts that may require adjustments or troubleshooting.
7. Refine and Adjust Settings: Based on your test shots, fine-tune the camera’s settings, including exposure, white balance, and composition. Make note of the settings that produce the desired results and those that may need further adjustment for different shooting conditions.
By thoroughly testing the converted camera, you can familiarize yourself with its capabilities and make any necessary adjustments to achieve the desired infrared effect in your images. Utilize shooting techniques specific to infrared photography and experiment with different subjects and lighting conditions to expand your creative possibilities.
In the next section, we will explore the editing process for enhancing and bringing out the true beauty of infrared images captured with your converted camera.
Editing Infrared Images
Editing plays a crucial role in bringing out the true beauty and artistic expression of infrared images captured with your converted camera. Infrared photography often produces distinctive results with unique color tones and contrast. Here are some key steps and considerations to keep in mind when editing your infrared images:
1. Start with RAW Conversion: If you shoot in RAW format, begin by converting the RAW files into a format that can be edited, such as JPEG or TIFF. Use software like Adobe Camera Raw or Lightroom to adjust basic parameters like exposure, contrast, and white balance.
2. Enhance Contrast: Infrared images tend to have naturally high contrast, but you can further enhance it to add depth and drama. Utilize tools like curves or levels adjustments to amplify the contrast while maintaining detail in both the highlights and shadows.
3. Adjust White Balance: Infrared images often have a distinct color cast due to the characteristics of infrared light. Experiment with color temperature and tint adjustments to achieve the desired color rendition. Strive for a balance between realistic tones and the ethereal feel inherent in infrared photography.
4. Fine-Tune Exposure: Depending on the specific scene and lighting conditions, adjust the exposure to maintain balanced tones throughout the image. Pay attention to the highlights and shadows, ensuring that they retain detail without being over or underexposed.
5. Emphasize Foliage and Skies: Infrared photography is known for its striking foliage and dramatic skies. Use selective editing techniques to enhance and bring out the vibrant white tones in foliage while intensifying the contrast and textures in the skies. This can be achieved using adjustment brushes or masks in editing software.
6. Experiment with Black and White Conversion: Consider converting your infrared images to black and white to emphasize the textures, patterns, and contrast present in the scene. Black and white processing can give a classic, timeless feel to your infrared images, further enhancing their artistic impact.
7. Remove Sensor Dust: Due to the nature of infrared photography and the camera modification process, sensor dust can be more apparent in the final images. Use spot healing tools or clone stamp tools to remove any visible sensor dust or other imperfections from the image.
8. Fine-Tune Vibrancy and Saturation: Adjust the vibrancy and saturation levels selectively to enhance specific areas of the image, such as the foliage or certain color tones. Be careful not to overdo it, as infrared images are often appreciated for their subdued and ethereal color palette.
9. Apply Sharpening and Noise Reduction: Depending on the image’s level of detail and noise, apply appropriate sharpening techniques and noise reduction to achieve a clean and crisp final result. Balance the amount of sharpening to retain fine details without introducing excessive artifacts.
Remember that editing is subjective, and the editing process may vary depending on your personal style and artistic vision. Experiment with different settings, techniques, and software tools to achieve the desired look and feel for your infrared images.
With the editing process complete, you have transformed your infrared images, highlighting their unique characteristics and allowing their ethereal beauty to shine. In the final section, we will conclude with a summary of the infrared conversion process and its creative possibilities.
Conclusion
Converting a digital camera to infrared opens up a world of creative possibilities in photography. By removing or replacing the camera’s infrared (IR) filter, you can capture the unseen magic of infrared light and create stunning, ethereal images. In this guide, we have covered each step of the conversion process, from understanding infrared photography to locating and removing the IR filter, as well as installing a new filter and testing the converted camera.
Understanding the concepts behind infrared photography, including the behavior of infrared light and the unique characteristics it lends to images, is essential for achieving compelling results. Choosing the right camera for conversion ensures compatibility and optimal performance for infrared photography.
The process of removing the IR filter requires precision and care to avoid damaging delicate camera components. Gathering the necessary tools and materials beforehand, such as precision screwdrivers and cleaning supplies, is crucial for a smooth conversion process.
Once the camera is opened, locating and removing the IR filter is the next step. Paying attention to the fastening methods, handling components with caution, and maintaining a dust-free environment are essential during this step.
If desired, installing a new IR filter specifically designed for infrared photography offers further creative control. Ensuring proper alignment, cleaning the filter surface, and following the manufacturer’s instructions are important for successful installation.
Testing the converted camera allows you to assess functionality, exposure settings, and composition for capturing infrared images. Fine-tuning the camera to achieve optimal results ensures your images reflect the unique characteristics of infrared light.
Editing plays a crucial role in enhancing the visual impact of infrared images. Adjusting white balance, enhancing contrast, fine-tuning exposure, and emphasizing foliage and skies are key steps in bringing out the ethereal beauty of these images.
In conclusion, converting a digital camera to infrared opens up a new world of creative exploration in photography. It allows you to capture the unseen and explore the unique perspectives of the infrared spectrum. With the knowledge and guidance provided in this guide, you can embark on your journey into the captivating realm of infrared photography and create stunning, surreal images that leave a lasting impression.