Introduction
Welcome to the world of seamless connectivity and enhanced visual experiences! Connecting your phone to a projector opens up a world of possibilities, allowing you to share photos, videos, presentations, and more with a larger audience. Whether you’re delivering a business presentation or enjoying a movie night with friends, the ability to project your phone’s screen onto a bigger surface can truly elevate the experience.
In this article, we will walk you through the steps to effortlessly connect your phone to a projector. We’ll cover both wired and wireless connection options, ensuring that you have the flexibility to choose the method that suits your needs and available resources.
Connecting your phone to a projector is not only convenient, but it also expands the functionality of your device. Instead of crowding around a small screen, you’ll be able to enjoy content on a larger canvas, making it easier for everyone to see and engage. This is particularly useful in professional settings, such as meetings or conferences, where a larger display can enhance the impact and clarity of your presentations.
Before we dive into the step-by-step process, let’s first check if your projector supports the necessary connectivity options. Your projector may have multiple inputs, including HDMI, VGA, or wireless capabilities. Knowing which options are available will help you determine the best method to connect your phone and ensure a successful connection.
Now that we have set the stage, let’s move on to the first step: checking the connectivity options of your projector.
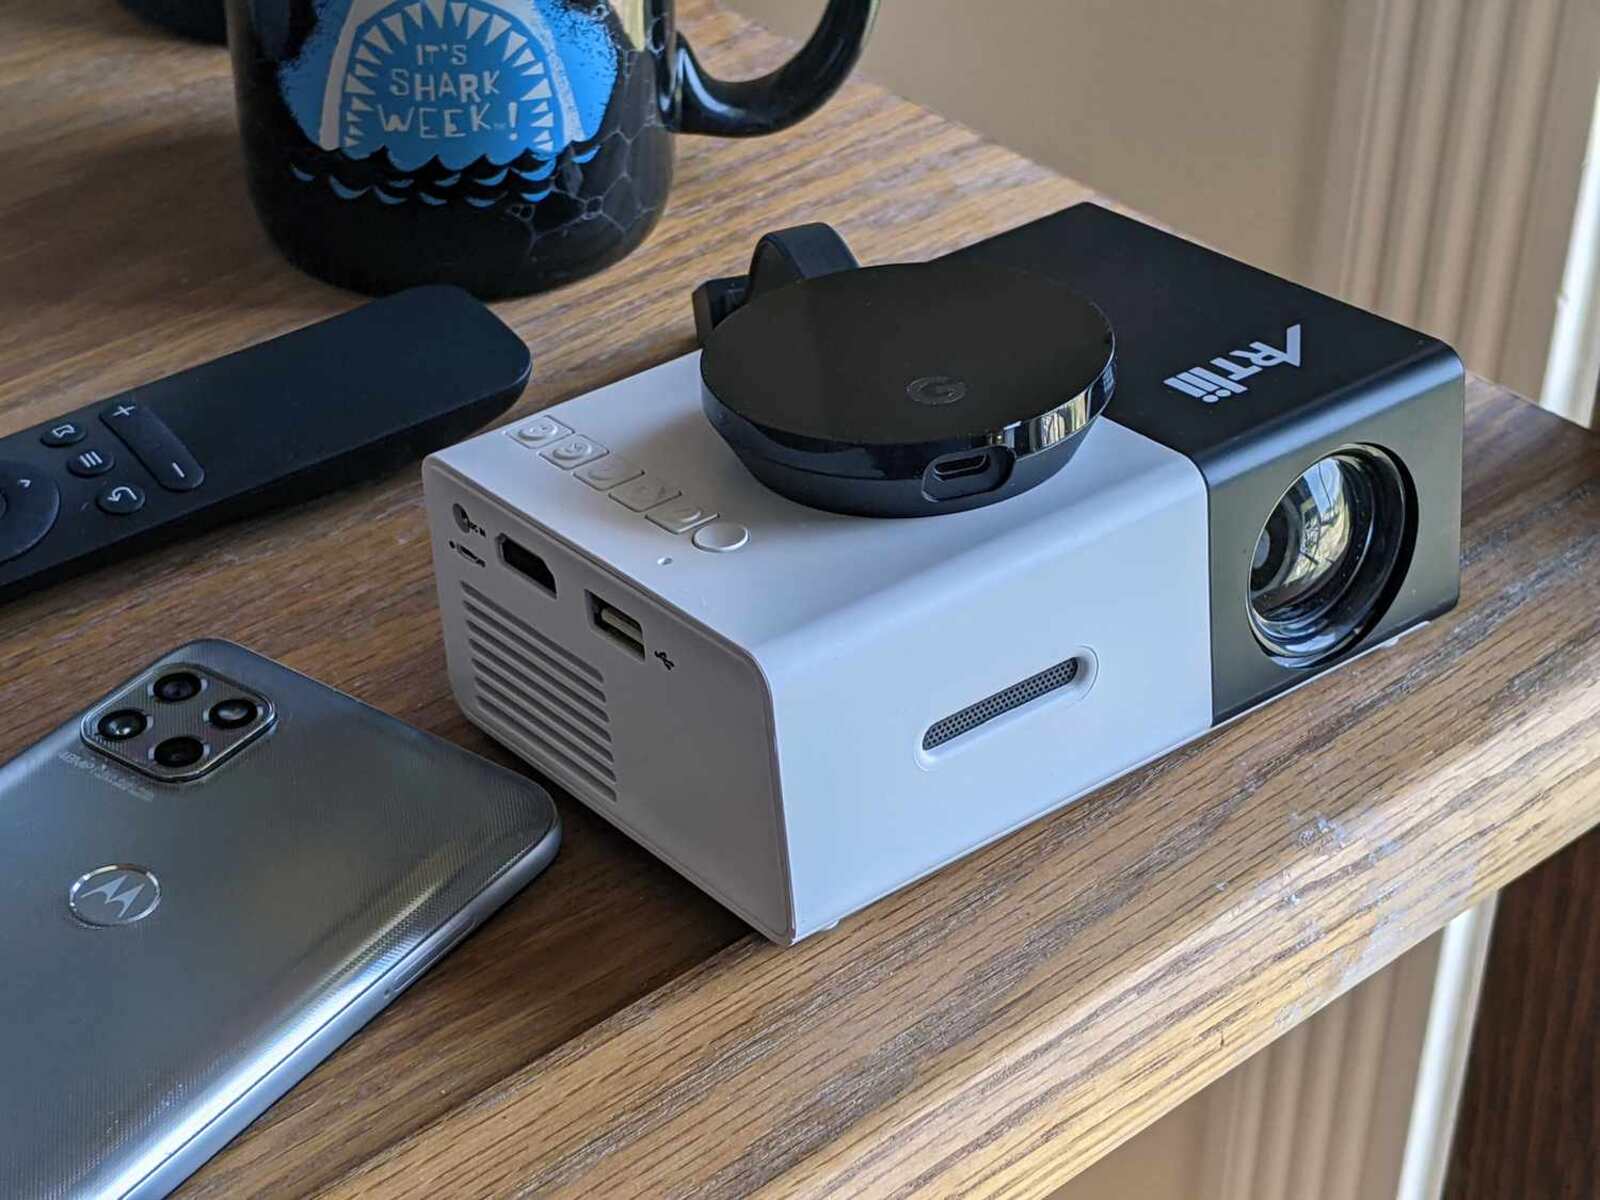
Step 1: Check Projector Connectivity Options
Before you can connect your phone to the projector, it’s essential to determine the available connectivity options on your projector. Most projectors offer various input ports, such as HDMI, VGA, USB, or wireless capabilities. By identifying the available options, you can choose the most suitable method for connecting your phone.
Here’s how you can check the connectivity options on your projector:
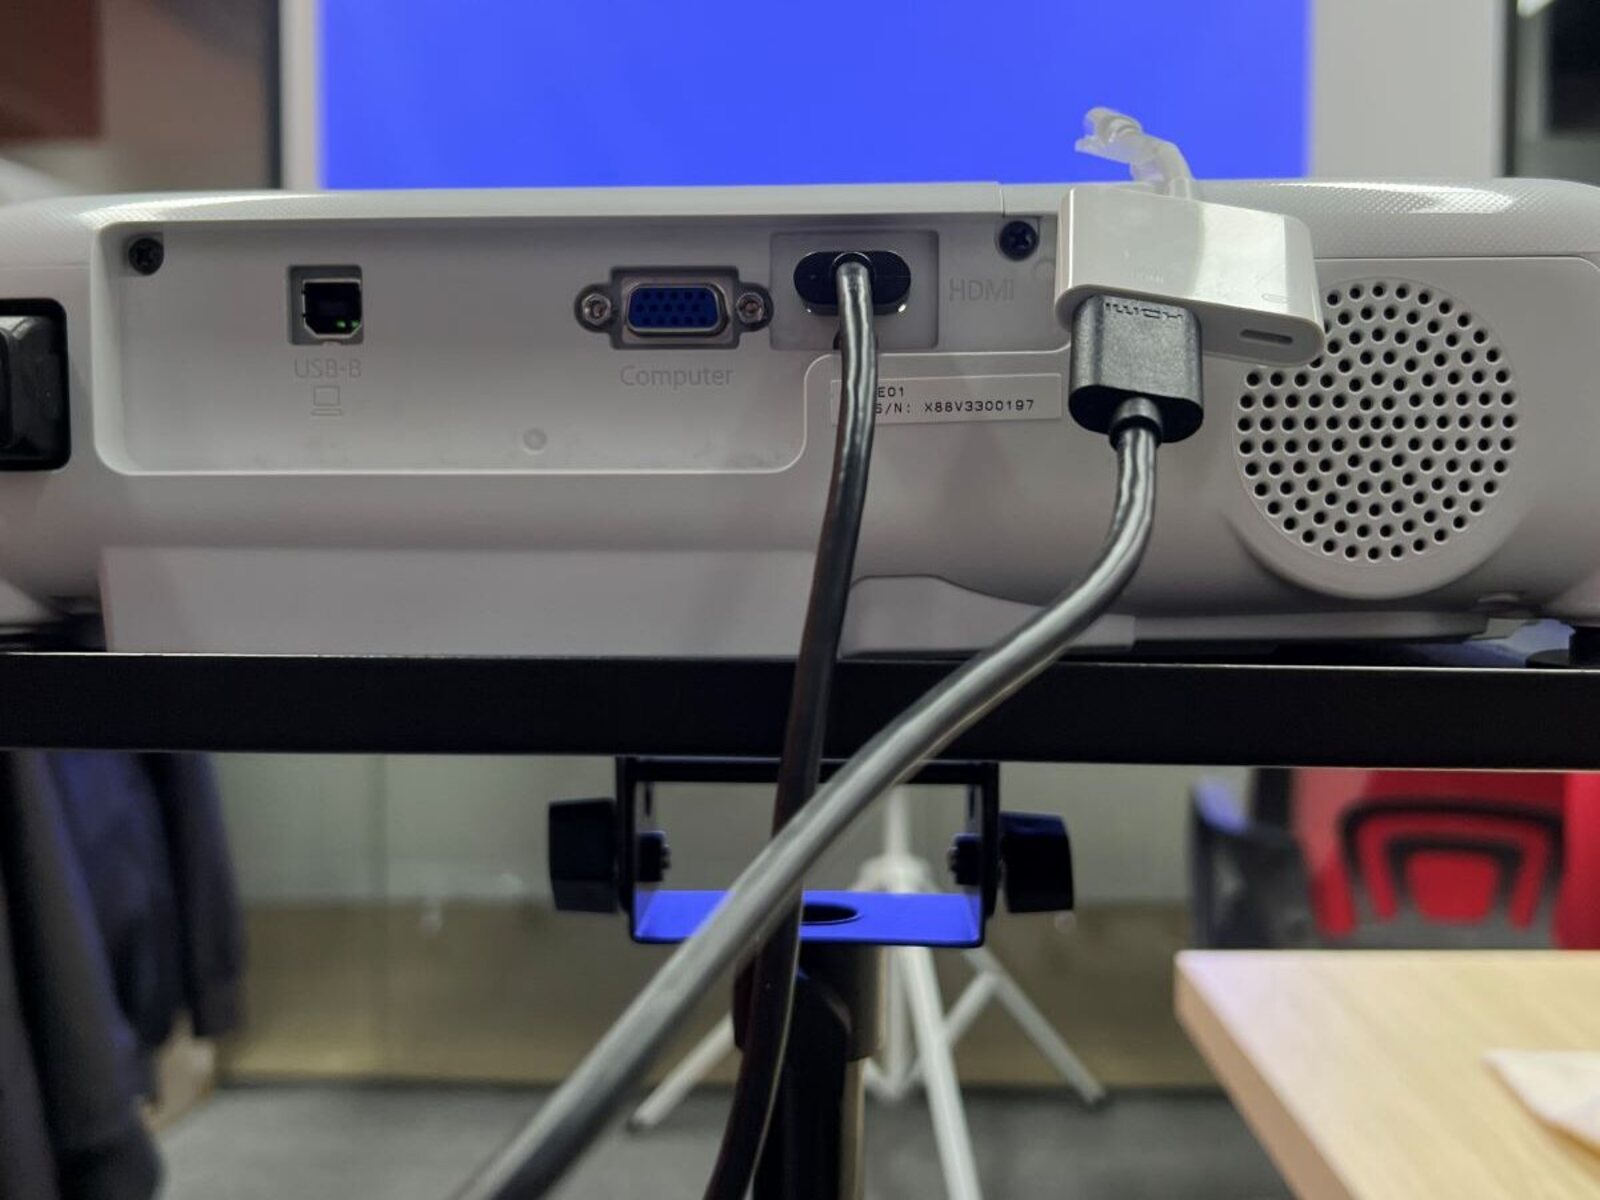
- Review the projector’s user manual: Start by referring to the user manual that came with your projector. It will provide detailed information about the available input ports and connectivity options. Look for sections that specifically mention the different input options or wireless connectivity.
- Inspect the physical ports: Take a close look at the back or side of the projector for physical ports. You may find HDMI, VGA, USB, or other ports labeled clearly. These ports are typically marked with corresponding icons to indicate their function.
- Consult the projector’s settings menu: Some projectors have a settings menu that allows you to check the available input options. Navigate to the settings menu on the projector and look for a section related to connectivity or input sources. Here, you should be able to see the various input ports or wireless connectivity options supported by the projector.
By following these steps, you can easily identify the connectivity options on your projector. Once you have determined the available ports, you can proceed to the next step and connect your phone to the projector. In the upcoming sections, we will explore both wired and wireless connection methods, offering you flexibility in choosing the most suitable option for your needs.
Step 2: Connect Your Phone to the Projector
Once you have identified the connectivity options on your projector, it’s time to connect your phone. Depending on the available ports and your phone’s capabilities, you can choose between a wired or wireless connection method.
Here are the two primary options:
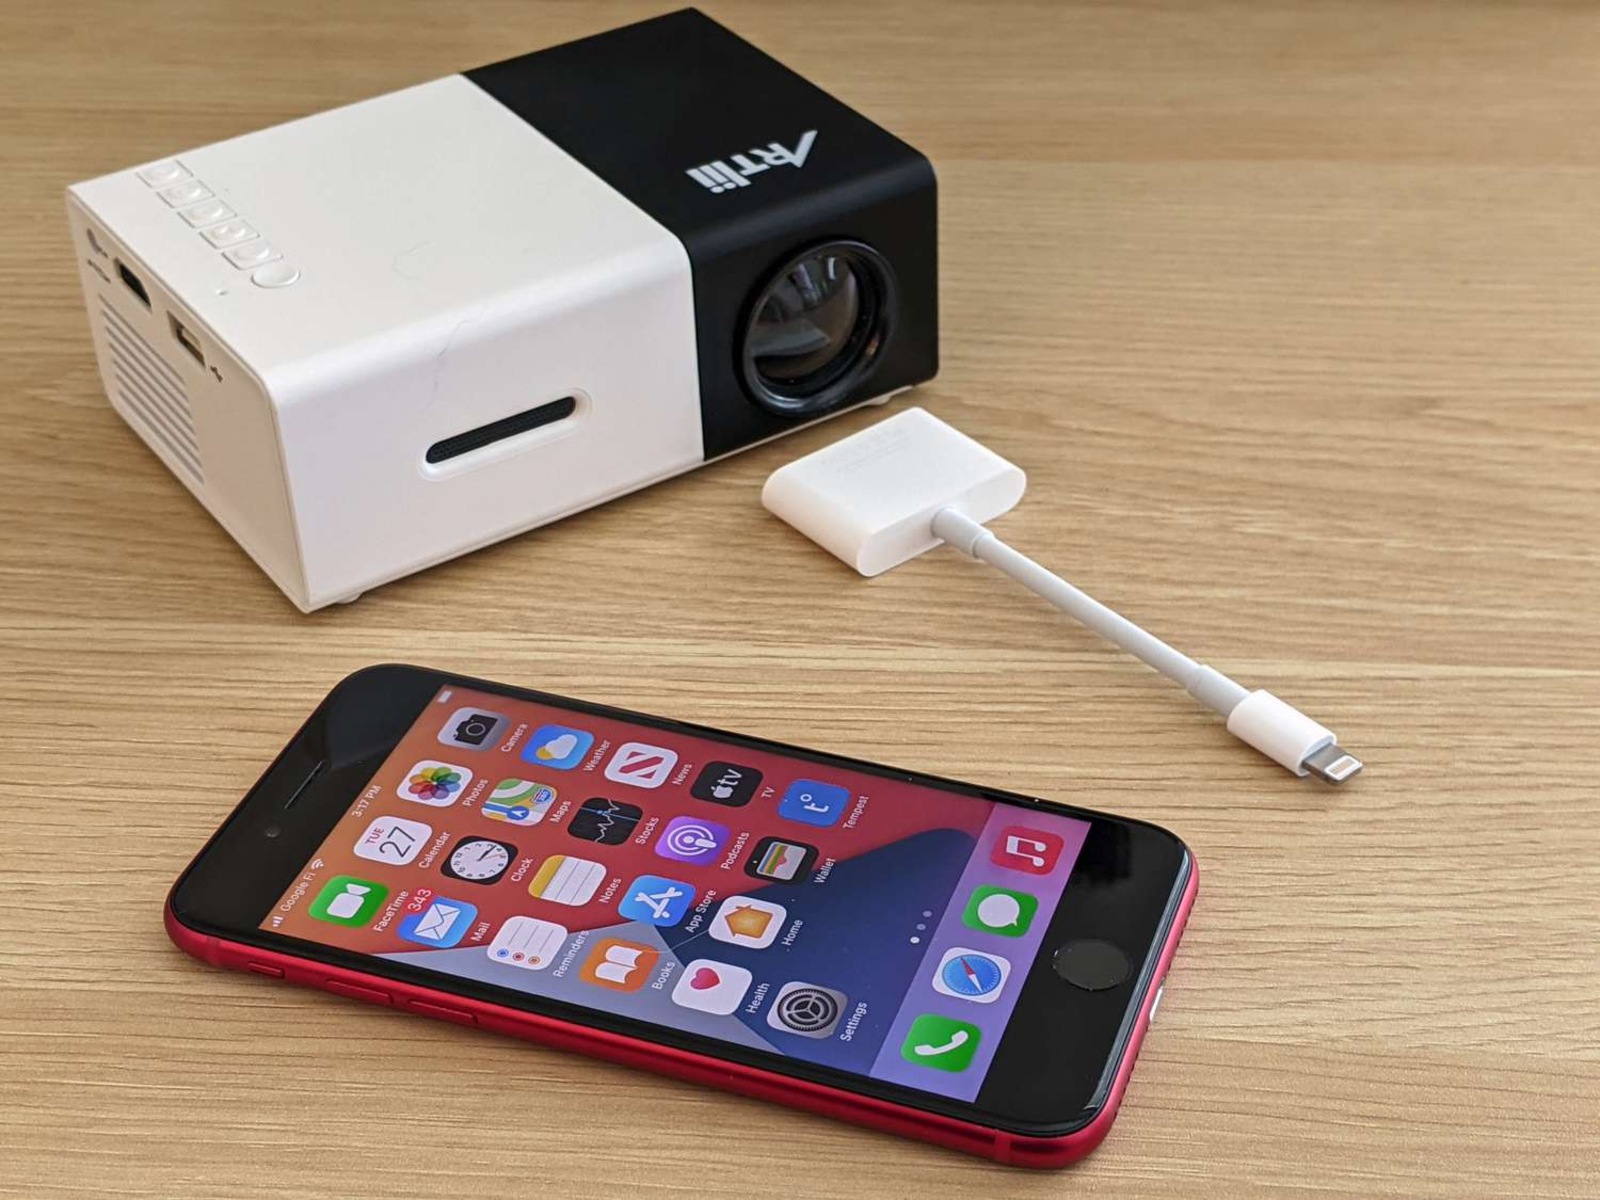
Option 1: Wired Connection
If your projector has HDMI or VGA input ports and your phone supports these connections, a wired connection is a straightforward and reliable option.
- For HDMI connection: Use a compatible HDMI cable to connect your phone to the projector. Plug one end of the HDMI cable into the HDMI port of your phone and the other end into the HDMI port on the projector.
- For VGA connection: If your phone does not have an HDMI port, you can use a VGA adapter or dongle. Connect one end of the VGA cable to the adapter and the other end to the VGA port of your projector. Then, attach the adapter to your phone, ensuring a secure connection.
Once the wired connection is established, you may need to select the corresponding input source on your projector. Consult your projector’s user manual for instructions on how to switch between input sources.
Option 2: Wireless Connection
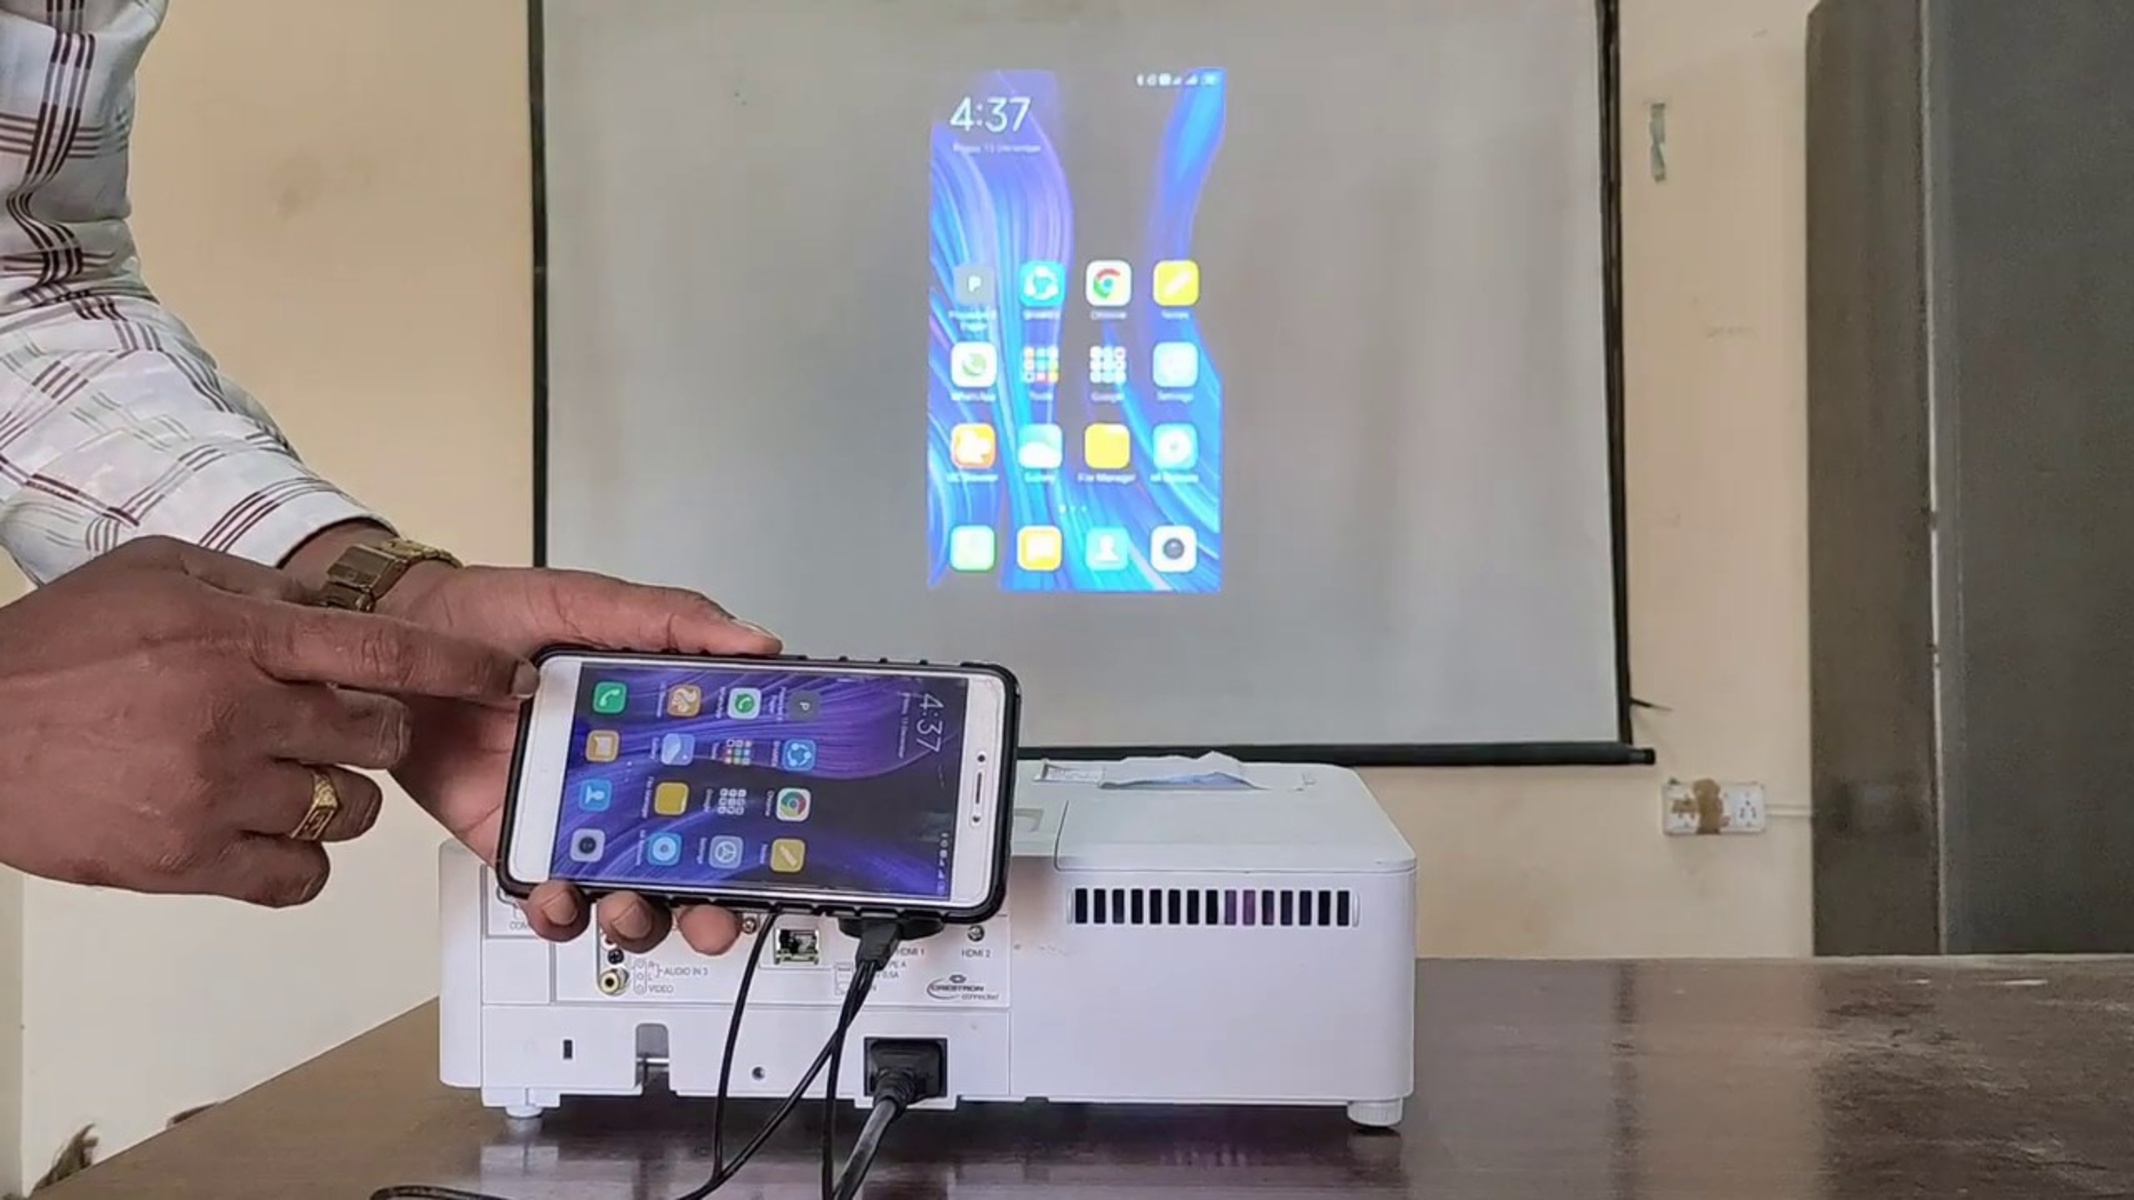
If your projector supports wireless connectivity and your phone is compatible with wireless display technology, you can opt for a wireless connection. This method eliminates the need for cables and provides greater flexibility during presentations or media playback.
- Enable Wi-Fi and screen mirroring: On your phone, go to the settings menu and enable Wi-Fi. Then, enable screen mirroring or wireless display options. The exact steps may vary depending on your phone’s make and model.
- Search for available devices: On your projector, navigate to the wireless connection settings or screen mirroring options. Activate the search or scan feature to locate available devices. Your phone should appear on the list of discoverable devices.
- Connect your phone: Select your phone from the list of available devices on the projector. Follow any on-screen instructions or prompts to complete the pairing process. Once connected, your phone’s screen will be mirrored on the projector.
With the wired or wireless connection established between your phone and the projector, you’re now ready to move on to the next step: adjusting the display settings.
Option 1: Wired Connection
If your projector has HDMI or VGA input ports and your phone supports these connections, a wired connection is a simple and reliable option for connecting your phone to the projector.
To establish a wired connection, follow these steps:
- For HDMI connection:
- Check if your phone has an HDMI port. If it does, you can directly connect your phone to the projector using an HDMI cable.
- Take one end of the HDMI cable and insert it into the HDMI port of your phone.
- Connect the other end of the HDMI cable into the HDMI input port on the projector.
- Ensure that the cable is securely plugged in on both ends.
- For VGA connection:
- If your phone does not have an HDMI port, you can use a VGA adapter or dongle to establish the connection.
- Connect one end of the VGA cable to the VGA port on the adapter.
- Insert the other end of the VGA cable into the VGA input port on the projector.
- Attach the adapter to your phone, making sure it is securely connected.
Once the wired connection is established, you may need to switch the input source on your projector to the corresponding HDMI or VGA input. Check your projector’s user manual for instructions on how to select the input source.
Wired connections provide a stable and high-quality display, ensuring that your content is projected on the screen without any lag or delay. They are particularly useful for delivering presentations, sharing videos, or engaging in gaming sessions where a reliable connection is crucial.
With the wired connection successfully established between your phone and the projector, you can proceed to the next step: adjusting the display settings to optimize the viewing experience.
Option 2: Wireless Connection
If your projector supports wireless connectivity and your phone is compatible with wireless display technology, you can opt for a wireless connection. This method eliminates the need for cables and offers greater flexibility during presentations or media playback.
To establish a wireless connection between your phone and the projector, follow these steps:
- Enable Wi-Fi and screen mirroring:
- Go to the settings menu on your phone and enable Wi-Fi.
- Next, enable screen mirroring or wireless display options. The location and naming of this option may vary depending on your phone’s make and model, but it is often found in the display or connectivity settings.
- Search for available devices on the projector:
- Access the wireless connection settings or screen mirroring options on your projector.
- Activate the search or scan feature to locate available devices.
- Wait a few moments as the projector scans for nearby devices.
- Connect your phone to the projector:
- On the list of available devices displayed on the projector, select your phone.
- Follow any on-screen instructions or prompts to complete the pairing process.
- Once successfully connected, your phone’s screen will be mirrored on the projector.
Wireless connections provide convenience and flexibility, allowing you to move around freely while maintaining a connection to the projector. Whether you’re giving a presentation and need to walk around the room or enjoying a movie night, wireless connections offer seamless interaction and an enhanced viewing experience.
It’s worth noting that the wireless connection method may differ based on the specific projector model and phone device. Some projectors may require additional software or apps to establish a wireless connection, so refer to the user manual or manufacturer’s instructions for detailed guidance.
With your phone successfully connected wirelessly to the projector, you’re now ready to proceed to the next step: adjusting the display settings to optimize your viewing experience.
Step 3: Adjust Display Settings
Now that you have successfully connected your phone to the projector, it’s time to ensure optimal display settings for the best viewing experience. Adjusting the display settings will help you achieve the desired clarity, resolution, and aspect ratio on the projected screen.
Follow these steps to adjust the display settings:
- Resolution:
- Access the settings menu on your phone and navigate to the display or screen settings.
- Select the resolution option and choose the recommended resolution for the projector. This will ensure that the content appears crisp and clear on the projected screen.
- Aspect Ratio:
- On your phone’s display settings, adjust the aspect ratio to match the aspect ratio supported by the projector. Common aspect ratios include 16:9 for widescreen displays or 4:3 for standard presentations.
- Screen Orientation:
- Ensure that the screen orientation on your phone is set to landscape mode. This will align the content correctly on the projector screen.
- Brightness and Contrast:
- Adjust the brightness and contrast settings on the projector to suit the lighting conditions in the room and enhance visibility. You may need to refer to the projector’s user manual for guidance on adjusting these settings.
- Audio Output:
- Check the audio settings on your phone to ensure that the sound is routed to the projector’s speakers or external audio system, if connected. Adjust the volume levels as needed.
By optimizing the display settings, you can ensure that the projected content is visually appealing and easy to view for your audience. Take a moment to review the settings and make any necessary adjustments to deliver the best possible visual experience.
With the display settings adjusted, you’re now ready to enjoy your phone’s screen on the projector. Whether you’re showcasing a presentation, sharing media, or enjoying a movie, your phone’s content will now be magnified onto a larger canvas.
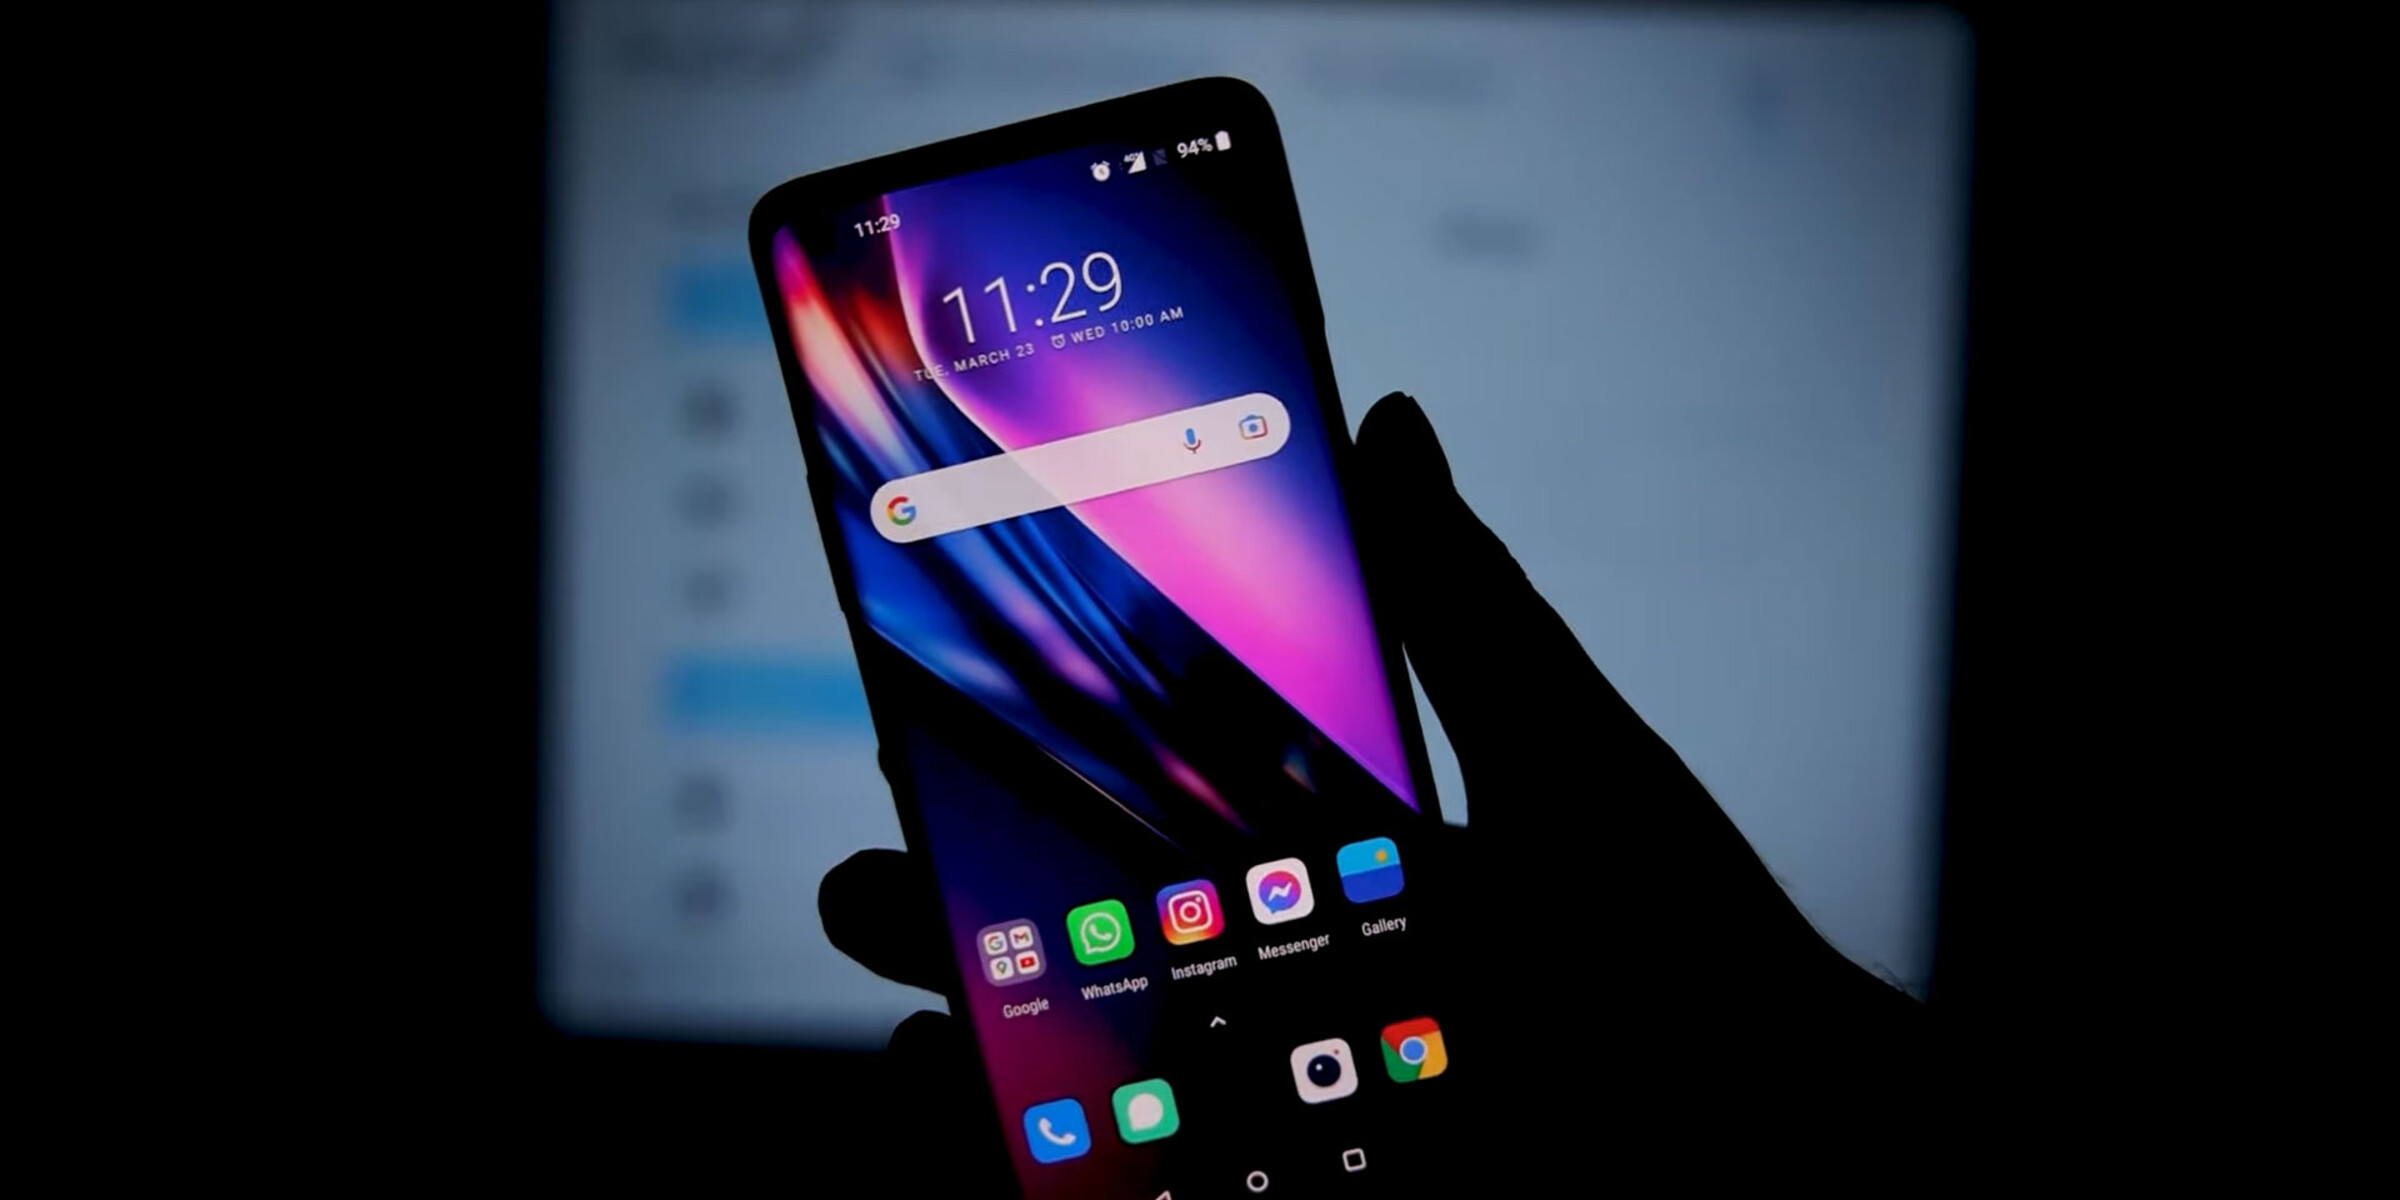
Step 4: Enjoy Your Phone Screen on the Projector
With all the necessary connections established and display settings adjusted, it’s time to enjoy your phone screen on the projector. Whether you’re sharing photos, delivering a presentation, or watching videos, projecting your phone’s screen onto a larger display can enhance the viewing experience for you and your audience.
Here are a few things you can do to make the most of this setup:
- Share photos and videos:
- Deliver presentations:
- Watch movies and videos:
- Play games:
- Collaborate and brainstorm:
Showcase your favorite photos and videos on the big screen, making them more immersive and enjoyable for everyone. Whether it’s a memorable trip, a family gathering, or a special occasion, sharing these moments on a projector can create a shared experience for all.
If you’re giving a professional presentation, projecting your phone’s screen can help capture your audience’s attention. The larger display allows for better visibility of your slides, charts, and visuals, making your presentation more impactful and engaging.
Experience the thrill of watching movies or your favorite videos on a larger screen. Gather your friends or family, connect your phone to the projector, and enjoy a cinematic experience in the comfort of your own home.
For gaming enthusiasts, connecting your phone to the projector adds a new dimension to your gaming experience. Immerse yourself in larger-than-life graphics and expand your field of view as you play your favorite mobile games on the big screen.
If you’re working on a team project or brainstorming ideas, projecting your phone’s screen onto a bigger display can facilitate collaboration. Everyone can easily see and contribute to the content being shared, ensuring that ideas are effectively communicated and discussed.
Remember to use the navigation controls on your phone to navigate through photos, presentations, videos, or games while they are being projected. This will allow you to control the content conveniently and engage with your audience effectively.
With Step 4 complete, you’re now fully equipped to make the most of your phone’s screen on the projector. Enjoy the immersive and engaging experience of sharing and projecting your phone’s content on a larger display.
Conclusion
Congratulations! You have successfully learned how to connect your phone to a projector and enjoy your phone’s screen on a larger display. By following the step-by-step process outlined in this guide, you can effortlessly connect your phone using either a wired or wireless connection, depending on the available options and your phone’s capabilities.
Connecting your phone to a projector opens up a world of possibilities, whether it’s giving professional presentations, sharing media with friends and family, or enjoying a larger-than-life gaming experience. The ability to project your phone’s screen onto a bigger canvas enhances visibility and engagement, making it easier for everyone to enjoy your content.
Remember to carefully check the connectivity options available on your projector and choose the most suitable connection method. A wired connection with HDMI or VGA cables ensures stability and reliability, while a wireless connection offers convenience and flexibility without the need for cables.
After connecting your phone to the projector, adjust the display settings to optimize the viewing experience. From resolution and aspect ratio to screen orientation and audio output, fine-tuning these settings ensures that your content is projected with clarity and precision.
Once everything is set up, dive into the possibilities that projecting your phone’s screen brings. Whether it’s sharing photos, delivering presentations, watching movies, playing games, or collaborating with colleagues, the larger display creates a more immersive and engaging experience for both you and your audience.
So, get ready to take your multimedia experience to the next level by connecting your phone to a projector. Embrace the versatility and convenience of projecting your phone’s screen, and enjoy the benefits of a larger display for all your content needs.