Introduction
Welcome to this guide on how to connect a wireless microphone to your smart TV. Having a wireless microphone can greatly enhance your TV viewing experience, allowing you to enjoy crisp and clear audio without being tethered to a microphone cable. It gives you the freedom to move around while still being able to communicate or sing along to your favorite shows, movies, or karaoke sessions.
Before we dive into the step-by-step process, it’s important to ensure the compatibility of your smart TV with a wireless microphone. Some older models may not have built-in support for wireless microphones, while newer models often come equipped with Bluetooth connectivity or USB ports designed for audio input. Checking the compatibility will help you determine the best method to connect your wireless microphone to your smart TV.
In this guide, we will explore different options for connecting a wireless microphone to your smart TV, including Bluetooth connectivity and using a wireless receiver. We will also provide instructions on adjusting the microphone settings on your smart TV and testing the microphone to ensure optimal audio quality. So, let’s get started with the first step: checking the compatibility of your smart TV.
Step 1: Check the compatibility of your smart TV
Before you begin connecting a wireless microphone to your smart TV, it’s essential to determine if your TV is compatible with this feature. While most modern smart TVs do offer Bluetooth connectivity or USB ports for audio input, older models may not support wireless microphones.
To check the compatibility of your smart TV, start by referring to the user manual or documentation that came with your TV. Look for information about audio input options or wireless connectivity. If you can’t find the manual, you can also try searching for your TV model online to find product specifications.
If your TV supports Bluetooth functionality, it will typically be mentioned in the features or connectivity section. To confirm this, look for terms such as “Bluetooth-enabled” or “Bluetooth audio support.” If your TV has a USB port designed for audio input, it may mention “USB audio support” or similar terminology.
Another way to check compatibility is by accessing the settings menu on your smart TV. Navigate to the audio settings and look for options related to Bluetooth connections or external audio input. If you see these options, it’s a good indication that your TV supports wireless microphone connectivity.
If you’re unable to find any information about Bluetooth or USB audio input on your smart TV, it’s possible that it doesn’t have built-in support for wireless microphones. In such cases, you may need to explore alternative methods, such as using an external device like a soundbar or AV receiver that supports wireless microphone connectivity.
Once you have confirmed the compatibility of your smart TV, you can proceed to the next step, where we will discuss the different types of wireless microphones available and how to choose the right one for your needs.
Step 2: Choose the type of wireless microphone you want to connect
Now that you have confirmed the compatibility of your smart TV, it’s time to choose the type of wireless microphone you want to connect. There are a few different options available, each with its own advantages and considerations.
1. Bluetooth Microphone: Bluetooth microphones are a popular choice for connecting to smart TVs. These microphones connect to your TV wirelessly via Bluetooth technology, eliminating the need for any additional cables or accessories. Bluetooth microphones are usually compact and portable, making them convenient for use with a smart TV.
2. USB Microphone: If your smart TV has a USB port with audio input support, you can choose a USB microphone. These microphones connect directly to the USB port of your TV, providing a simple and straightforward setup process. USB microphones often offer good audio quality and may come with additional features such as adjustable gain or mute buttons.
3. Wireless Receiver and Microphone Set: Another option is to use a wireless receiver and microphone set. This involves connecting a wireless receiver to your smart TV using an audio cable, and then using a wireless microphone that communicates with the receiver. This setup is more versatile and allows for longer wireless range, making it suitable for larger rooms or outdoor use.
When choosing the type of wireless microphone, consider your specific needs and preferences. If you value convenience and portability, a Bluetooth microphone or USB microphone may be the best choice. On the other hand, if you require a larger wireless range or plan to use the microphone for events beyond TV viewing, a wireless receiver and microphone set may be more suitable.
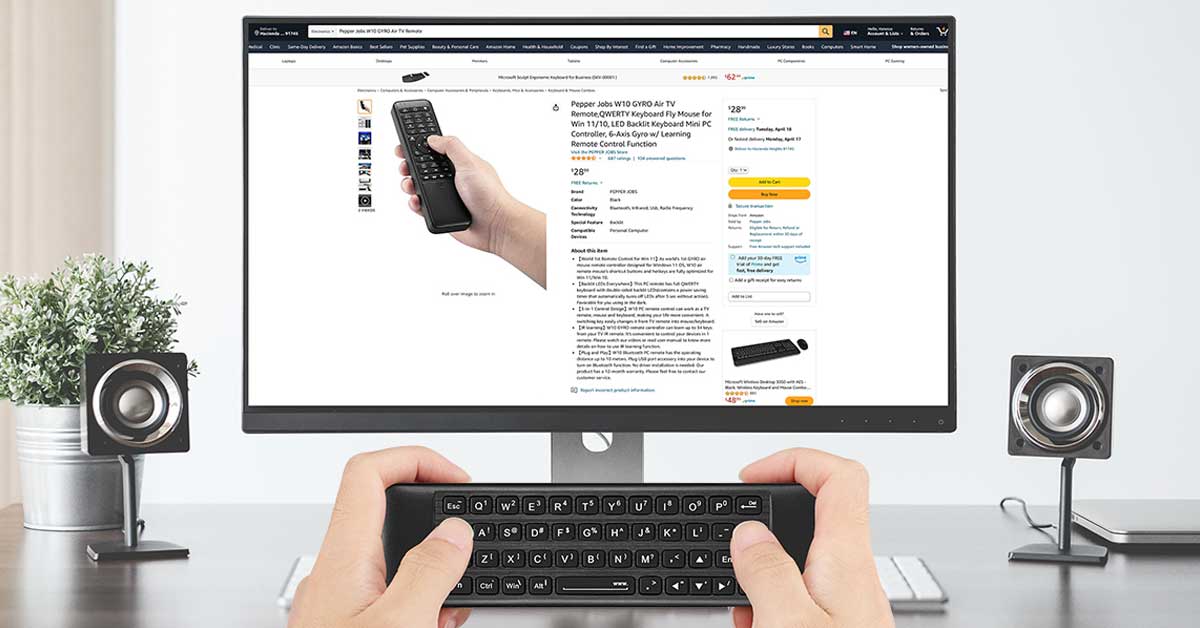
Additionally, keep in mind factors such as audio quality, battery life, and any specific features or controls you may require. Reading product reviews and researching different brands and models can help you make an informed decision.
Once you have selected the type of wireless microphone you want to connect, you are ready to proceed to the next step, where we will discuss the different connectivity options available for connecting your wireless microphone to your smart TV.
Step 3: Understand the different connectivity options
Now that you have chosen the type of wireless microphone you want to connect to your smart TV, it’s important to understand the different connectivity options available. Depending on the type of microphone you have selected, there are various methods you can use to establish a connection between the microphone and your smart TV.
1. Bluetooth Connectivity: If you opted for a Bluetooth microphone, the most common way to connect it to your smart TV is through Bluetooth technology. Ensure that both your smart TV and the Bluetooth microphone are turned on and in pairing mode. Then, go to the settings menu on your smart TV and navigate to the Bluetooth settings. Scan for available devices and select your microphone from the list. Follow the on-screen prompts to complete the pairing process. Once successfully paired, you can start using the microphone for your TV’s audio input.
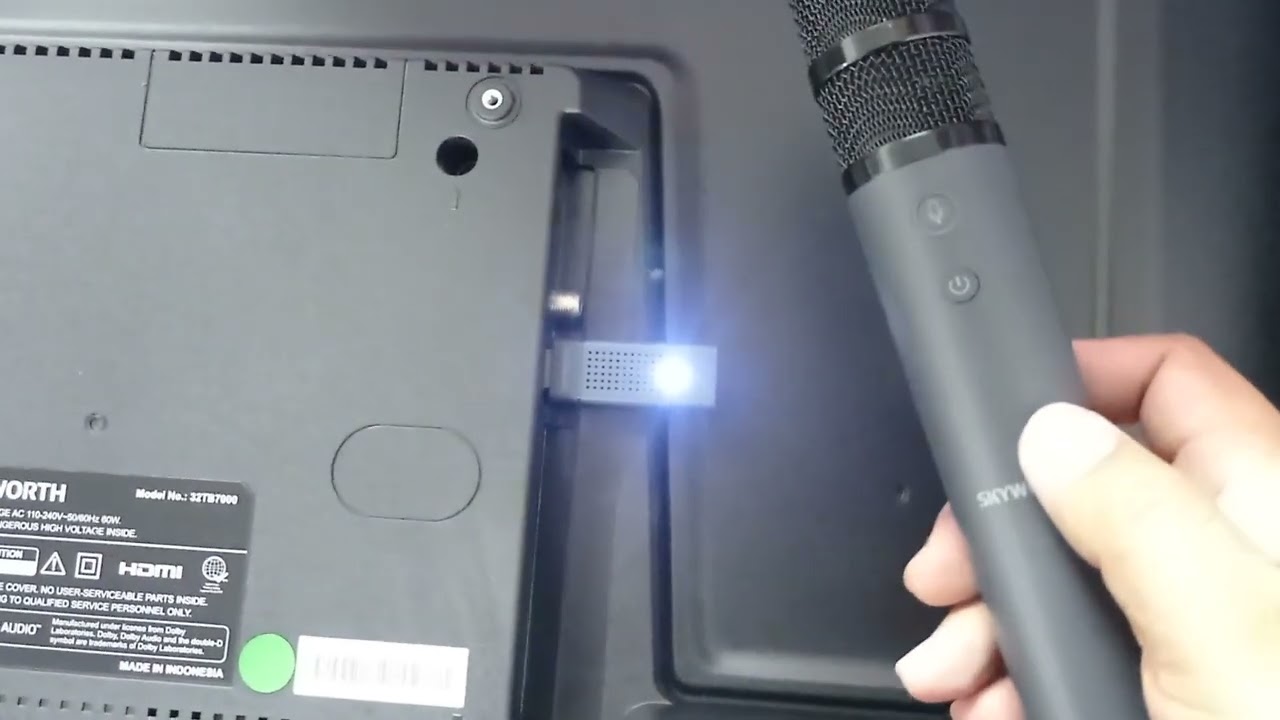
2. USB Connection: For a USB microphone, the connection process is usually straightforward. Plug the USB microphone into the USB port on your smart TV. The TV should automatically recognize the microphone and set it as the default audio input source. If required, navigate to the audio settings on your smart TV and verify that the USB microphone is selected as the input device. This method provides a direct and hassle-free connection that is often plug-and-play.
3. Wireless Receiver Connection: If you have opted for a wireless receiver and microphone set, you need to connect the receiver to your smart TV. Most wireless receivers come with an audio output, usually in the form of RCA or 3.5mm audio ports. Connect the corresponding audio cable (either RCA or 3.5mm) from the receiver’s audio output to the audio input of your smart TV. Make sure to select the correct audio input source on your TV settings. Next, follow the specific instructions provided with your wireless microphone set to pair the microphone with the receiver. Once paired, your smart TV will receive audio input from the wireless microphone via the connected receiver.
Understanding the different connectivity options for your chosen wireless microphone is crucial to ensure a seamless and successful connection process. Take the time to familiarize yourself with the instructions provided by the microphone manufacturer and refer to your smart TV’s user manual for specific guidance on connecting external audio devices.
Now that you have a clear understanding of the connectivity options, it’s time to move on to the next step, where we will guide you through the process of connecting your wireless microphone to your smart TV using Bluetooth.
Step 4: Connect the wireless microphone to your smart TV using Bluetooth
If you have chosen a Bluetooth microphone, connecting it to your smart TV is a simple and wireless process. Follow these steps to establish the Bluetooth connection:
1. Turn on your Bluetooth microphone and put it into pairing mode. Consult the user manual of your microphone to determine the specific steps for entering pairing mode, as it can vary between models. Generally, you may need to press and hold a button or combination of buttons until the microphone’s LED indicator starts flashing, indicating that it is ready to pair.
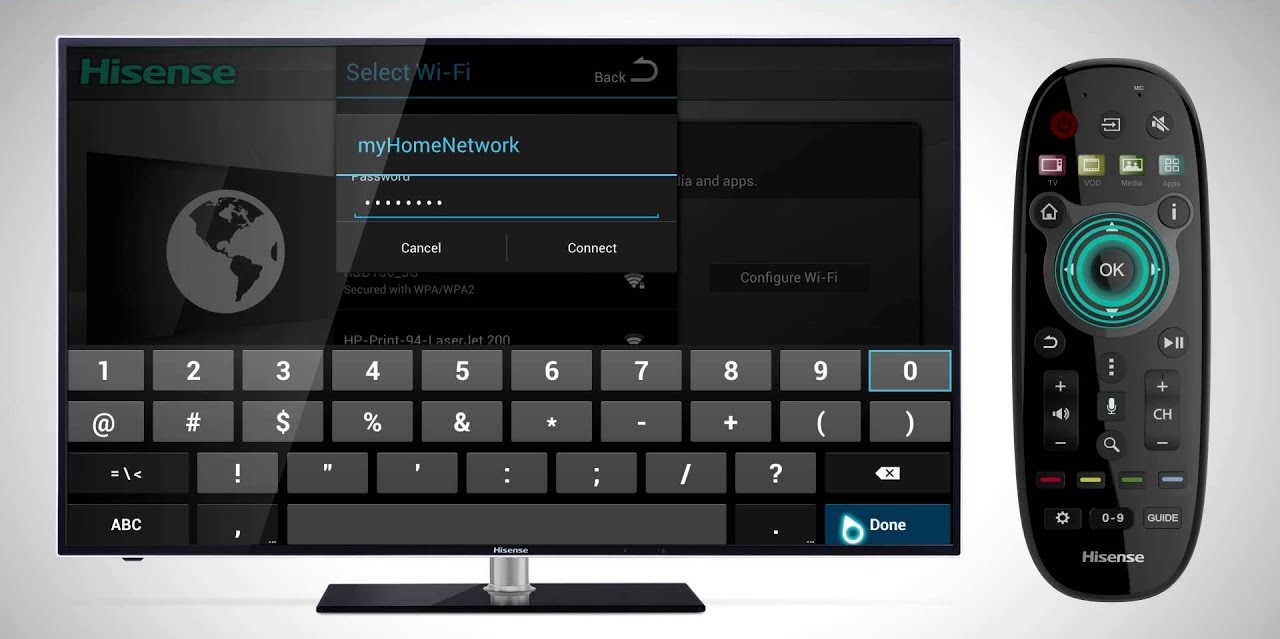
2. On your smart TV, navigate to the settings menu and find the Bluetooth settings. The exact location of the Bluetooth settings may vary depending on your TV’s brand and model. Look for options such as “Bluetooth devices,” “Connected devices,” or “Devices.” Select the appropriate option to access the Bluetooth settings.
3. In the Bluetooth settings of your smart TV, enable Bluetooth if it is not already turned on. Then, select the option to scan for available devices. Your TV will search for nearby Bluetooth devices, including the microphone.
4. Once the scan is complete, you should see a list of available devices. Find your Bluetooth microphone in the list and select it to initiate the pairing process. Follow any on-screen prompts or instructions to complete the pairing.
5. After successfully pairing your microphone with your smart TV, the TV should confirm the connection. At this point, you should be able to use the wireless microphone for audio input on your TV. Adjust the microphone volume settings on both the microphone itself and the TV to achieve the desired audio levels.
It’s important to note that the specific steps for connecting a Bluetooth microphone to a smart TV may slightly vary depending on your TV’s manufacturer or the microphone model. Refer to the user manuals or documentation provided with your devices for more detailed instructions.
Once the Bluetooth connection is established between the wireless microphone and your smart TV, you can enjoy the freedom of wirelessly capturing audio or participating in karaoke sessions without being restricted by cables.
In the next step, we will explore an alternative method of connecting a wireless microphone to your smart TV using a wireless receiver.
Step 5: Connect the wireless microphone to your smart TV using a wireless receiver
If you have opted for a wireless receiver and microphone set, connecting the wireless microphone to your smart TV involves a slightly different process. Follow these steps to establish the connection:
1. Start by connecting the wireless receiver to your smart TV using an audio cable. The type of cable required may vary depending on the output ports available on your receiver and the input ports on your TV. Common options include RCA cables or a 3.5mm audio cable. Plug one end of the cable into the audio output port of the receiver and the other end into the corresponding audio input port on your smart TV.
2. Once the receiver is connected to your TV, turn on both the receiver and your smart TV. Access the settings menu on your TV and navigate to the audio settings. Look for options such as “Audio input,” “External audio,” or similar terms. Select the input source that corresponds to the connected receiver.
3. Now, refer to the user manual or instructions provided with your wireless microphone set to pair the microphone with the receiver. Typically, this involves turning on the microphone and pressing a designated pairing button or following specific steps to establish a connection between the microphone and the receiver. The LED indicators on both devices will usually provide feedback on the pairing process.
4. Once the microphone is successfully paired with the receiver, your smart TV will receive audio input from the wireless microphone through the connected receiver. Adjust the volume settings on the microphone and the TV to achieve the desired audio levels. You may also want to explore any additional features or controls provided by your microphone set, such as adjustable gain or mute functions.
It’s worth noting that the range of the wireless microphone may vary depending on the specific model and any potential interference in your environment. For optimal performance, ensure that the microphone and receiver are within a reasonable range of each other without obstructions.
By connecting your wireless microphone to your smart TV using a wireless receiver, you can enjoy the flexibility and convenience of wireless audio input, making it ideal for karaoke sessions, presentations, or interactive discussions.
In the next step, we will discuss how to adjust the microphone settings on your smart TV to optimize the audio experience.
Step 6: Adjust the microphone settings on your smart TV
After successfully connecting your wireless microphone to your smart TV, it’s important to adjust the microphone settings on your TV to optimize the audio experience. This step ensures that the microphone’s volume, sensitivity, and other parameters are properly configured for your specific needs. Follow these guidelines to adjust the microphone settings on your smart TV:
1. Access the settings menu on your smart TV by using the remote control or navigating through the on-screen interface. Look for options related to audio settings, sound settings, or microphone settings.
2. Within the audio or microphone settings, you may find various adjustments that you can make. These may include microphone volume, microphone gain or sensitivity, echo effects, or in some cases, equalizer settings for fine-tuning the microphone audio.
3. Start by adjusting the microphone volume. Increase or decrease the volume level to achieve a comfortable and balanced audio output. It’s important to find the right balance so that the microphone’s audio is audible without overpowering other sounds or causing distortion.
4. Next, you may have options to adjust the microphone gain or sensitivity. This setting determines how sensitive the microphone is to sound. Higher sensitivity can pick up softer sounds, while lower sensitivity may help reduce background noise. Experiment with different settings to find the optimal level that suits your environment and desired audio clarity.
5. If available, explore any additional features such as echo effects. Echo effects can add depth and richness to the microphone’s audio output, simulating a more professional karaoke or stage-like experience. Adjust the echo effects to your preference, considering the genre of content you will be using the microphone for.
6. Some smart TVs may also have equalizer settings that allow you to fine-tune the frequency response of the microphone, helping you achieve a desired sound quality. If these settings are available, experiment with adjusting the equalizer to enhance the microphone’s audio output according to your preferences.
Remember to save any changes you make to the microphone settings before exiting the settings menu. This ensures that the adjustments are applied and retained for future use.
By properly adjusting the microphone settings on your smart TV, you can optimize the audio quality, minimize unwanted noise, and enhance your overall experience with the wireless microphone.
Now that you have adjusted the microphone settings, it’s time for the final step: testing the microphone and adjusting the volume levels.
Step 7: Test the microphone and adjust the volume levels
Once you have successfully adjusted the microphone settings on your smart TV, it’s crucial to test the microphone and fine-tune the volume levels for optimal performance. This step ensures that the microphone’s audio output is clear, balanced, and at a comfortable volume. Follow these steps to test the microphone and adjust the volume levels:
1. Speak or sing into the wireless microphone while monitoring the audio output through your smart TV’s speakers. Start with a normal speaking or singing voice to gauge the microphone’s sensitivity and audio clarity.
2. Pay attention to any excessive background noise or unwanted feedback. If you notice any issues, consider adjusting the microphone gain or sensitivity in the settings menu of your smart TV to address these concerns.
3. Gradually increase the volume of the microphone and observe how it blends with the audio from your smart TV. Ensure that the microphone’s volume isn’t overpowering or causing distortion in the overall audio output. Strike a balance where the microphone’s audio is clear and easily discernible within the context of the program or content you are watching.
4. In case you are using the microphone for karaoke purposes, verify that your voice is properly projected and aligned with the accompanying music. Adjust the microphone volume to achieve a harmonious balance between your singing and the instrumental track.
5. If you find that the microphone volume is too low or inadequate, consider increasing the gain or sensitivity settings in the microphone or TV settings. Conversely, if the microphone output is too loud or overpowering, reduce the gain or sensitivity to achieve a more balanced sound.
6. Keep in mind that different programs or content may have varying audio levels. It’s advisable to test the microphone with different types of content, such as movies, TV shows, or music, to ensure that the volume levels remain suitable across different scenarios.
7. Continuously listen and assess the microphone’s audio output while making necessary adjustments to the volume levels. Take breaks in between adjustments to avoid fatigue and maintain a fresh perspective on the sound quality.
By thoroughly testing the microphone and adjusting the volume levels, you can ensure an enjoyable and immersive experience with your smart TV and wireless microphone.
With the completion of this step, you have successfully connected and optimized your wireless microphone for use with your smart TV.
Remember to familiarize yourself with the specific features and controls of your wireless microphone and smart TV to make the most of your audio experience.
Conclusion
Connecting a wireless microphone to your smart TV can greatly enhance your audio experience and provide you with the freedom to communicate, sing, or participate in karaoke sessions without being tied down by cables. By following the steps outlined in this guide, you can easily connect your wireless microphone to your smart TV and enjoy the convenience and flexibility it offers.
Start by checking the compatibility of your smart TV to ensure it supports wireless microphones. Then, choose the type of wireless microphone that best suits your needs, whether it’s a Bluetooth microphone, USB microphone, or a wireless receiver and microphone set.
Understanding the different connectivity options is crucial before proceeding to connect your wireless microphone to your smart TV. Depending on the type of microphone you have chosen, you can establish the connection using Bluetooth technology, a direct USB connection, or by connecting a wireless receiver to your TV.
Don’t forget to adjust the microphone settings on your smart TV to optimize the audio quality and tailor it to your preferences. Fine-tune parameters such as volume, gain, and other audio effects to achieve the desired sound output.
Lastly, test the microphone and adjust the volume levels to ensure it integrates harmoniously with your smart TV’s audio. Make necessary adjustments to keep the microphone’s audio clear, balanced, and at a comfortable volume for your specific viewing preferences.
Remember, each smart TV and wireless microphone may have slight variations in terms of settings and functionality. Always refer to the user manuals and specific instructions provided with your devices for accurate guidance.
Now that you have successfully connected and configured your wireless microphone with your smart TV, you can enjoy an immersive audio experience, whether it’s watching your favorite shows, movies, or engaging in karaoke sessions from the comfort of your home.
Have fun exploring the possibilities and enjoying the freedom of wireless communication and audio input with your smart TV and wireless microphone setup!