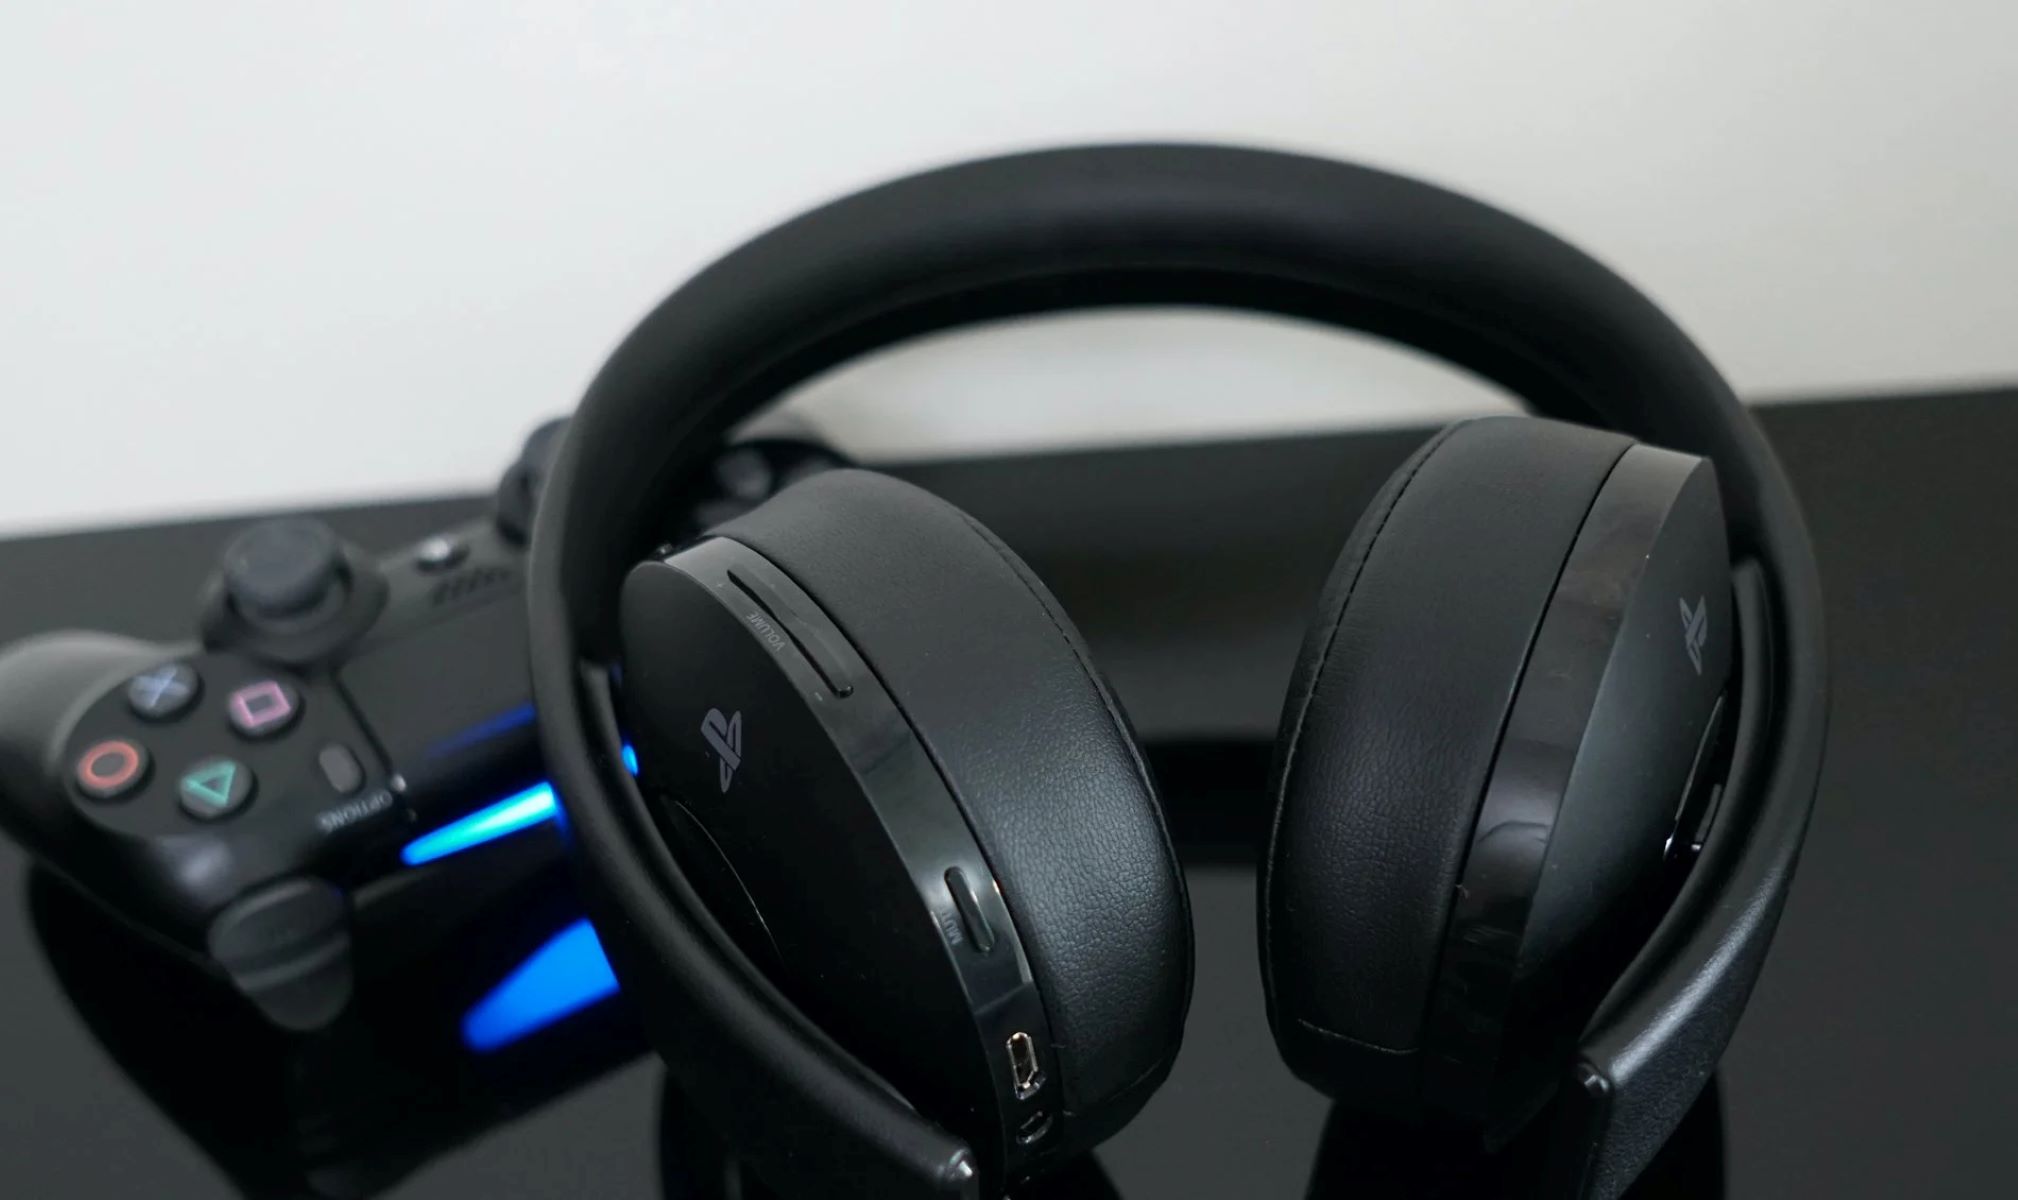
Introduction
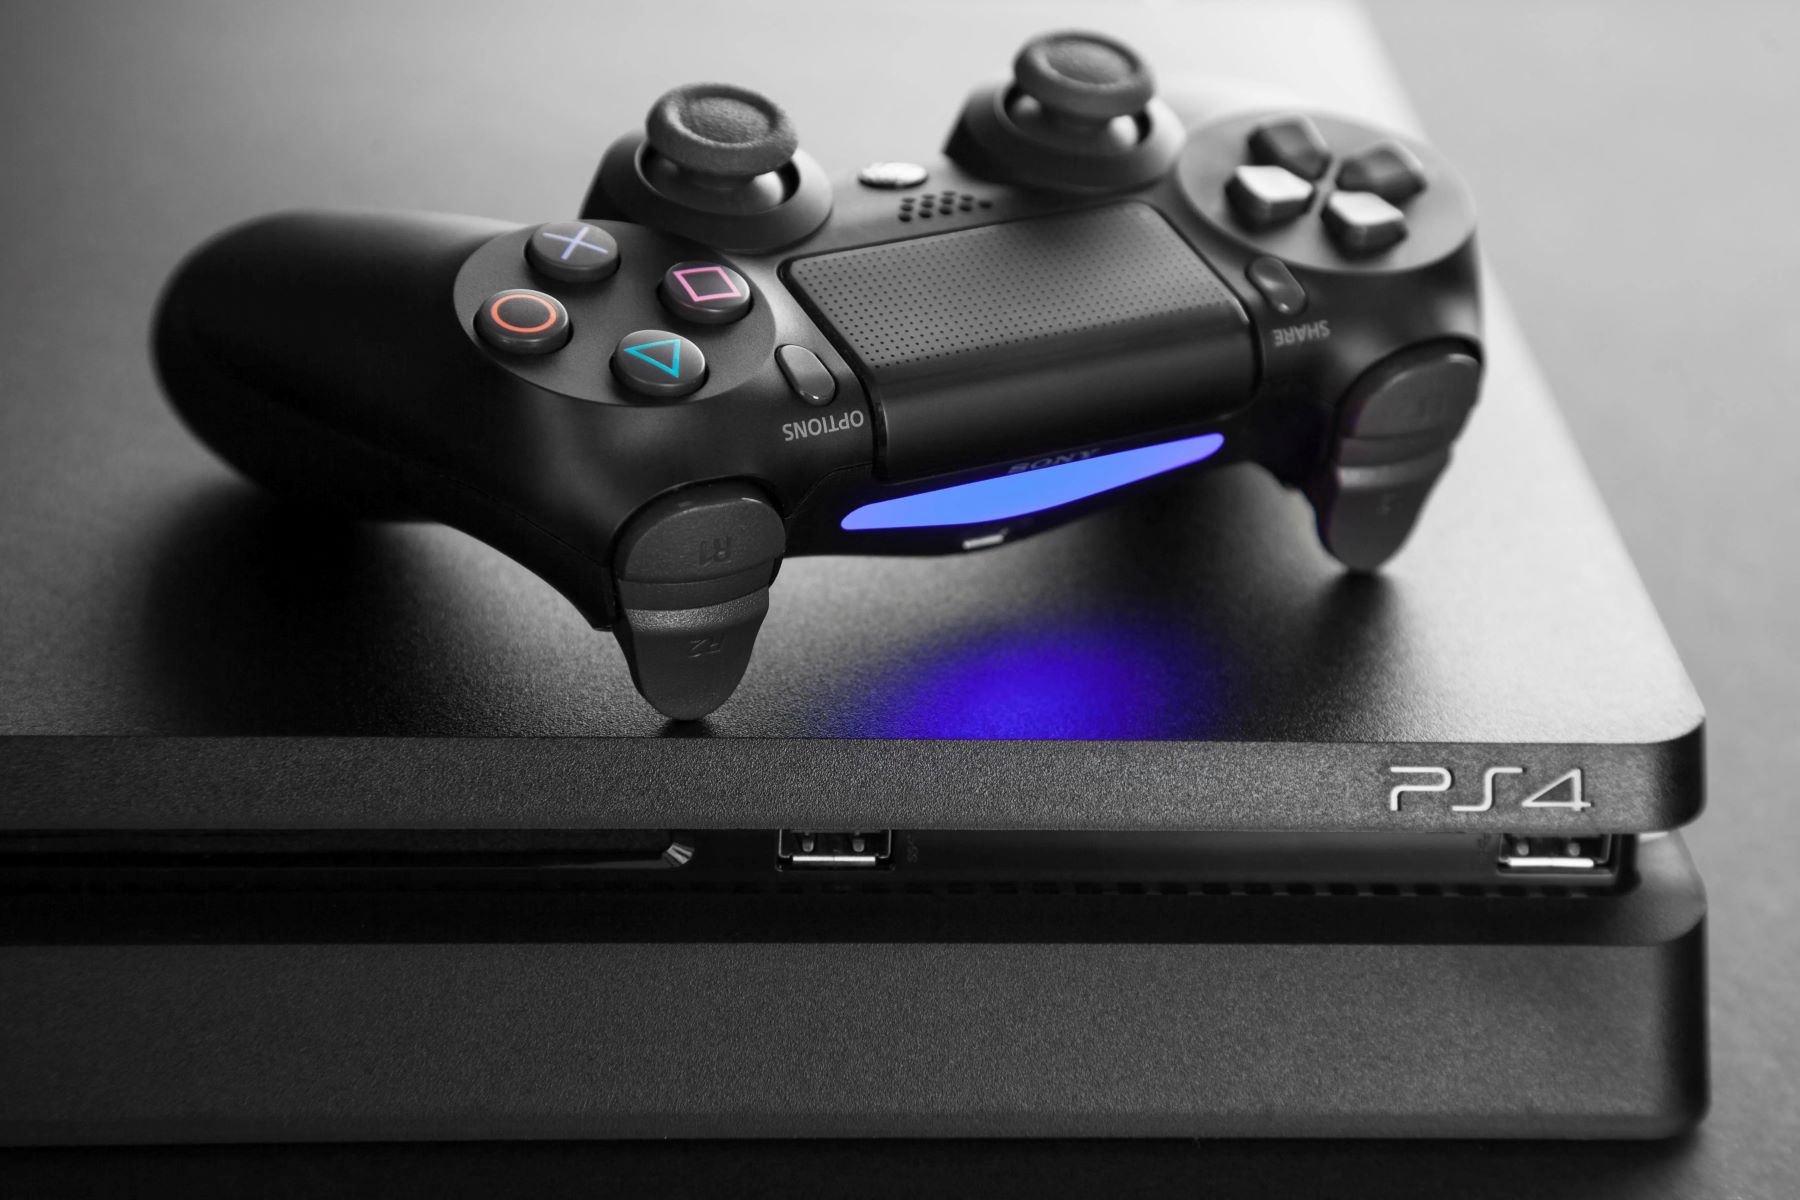
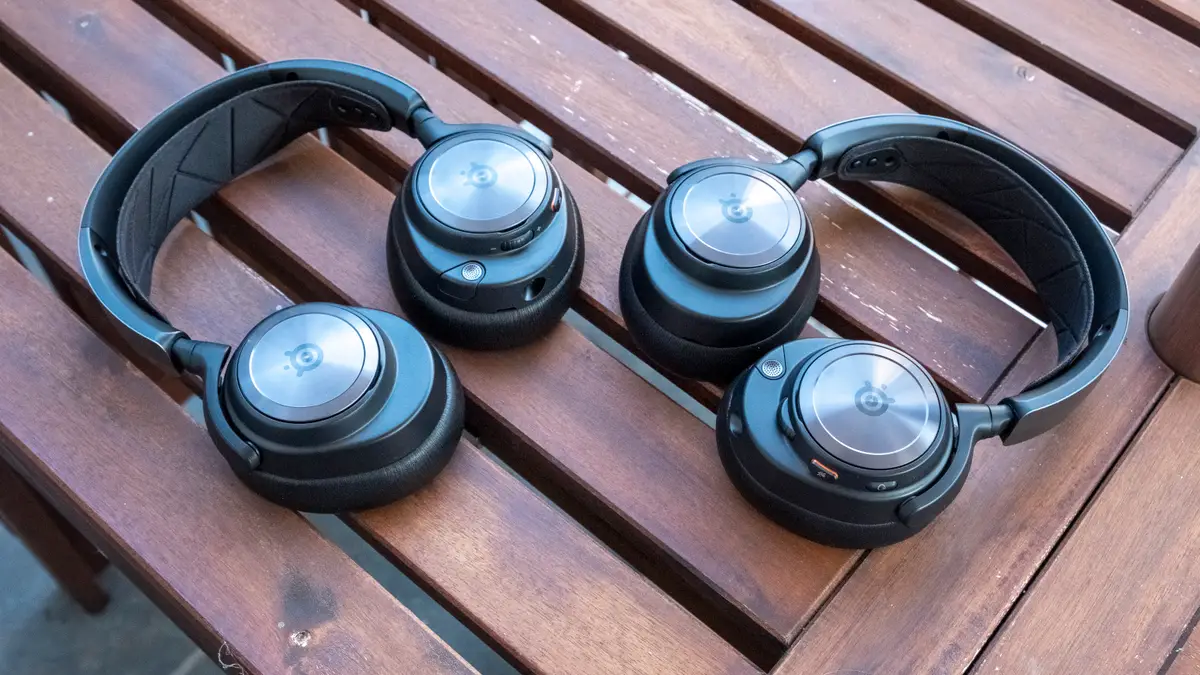
Wireless headphones have become increasingly popular in recent years, offering convenience and freedom of movement. If you own a PlayStation 4 (PS4) console and want to enjoy a more immersive gaming experience without the hassle of tangled wires, connecting wireless headphones is the way to go.
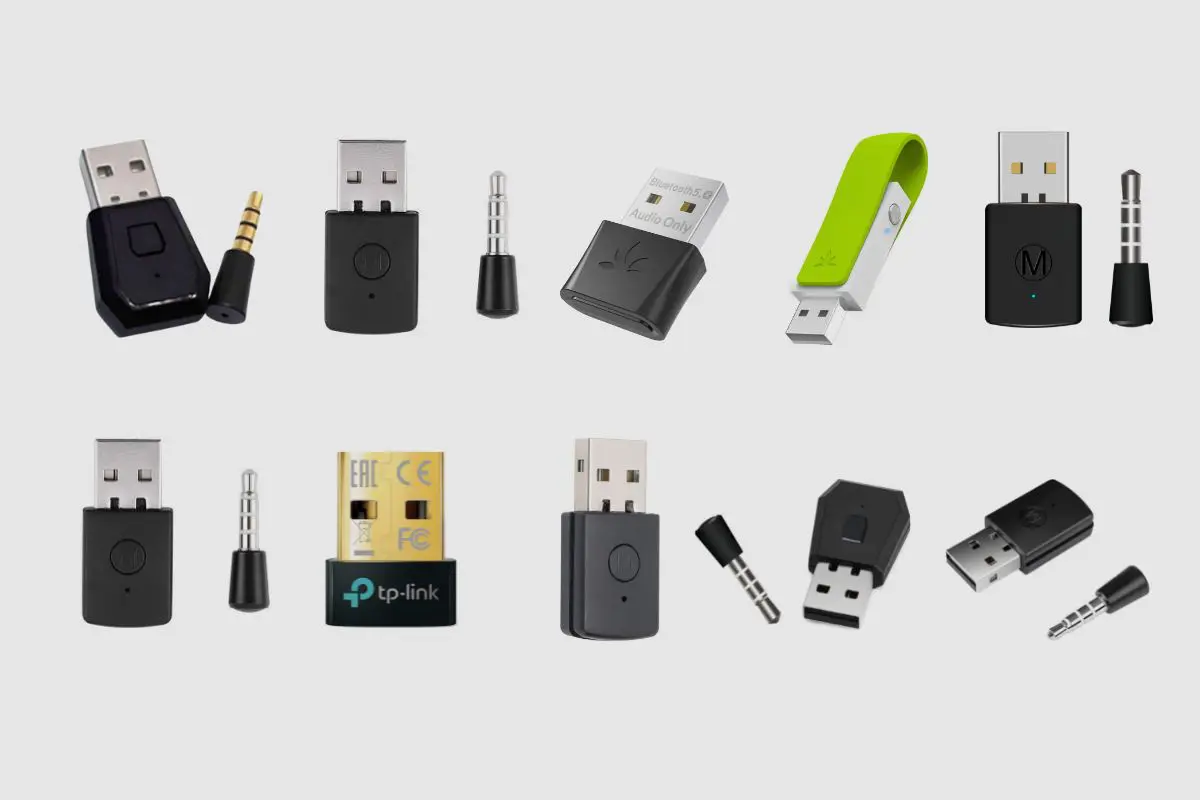
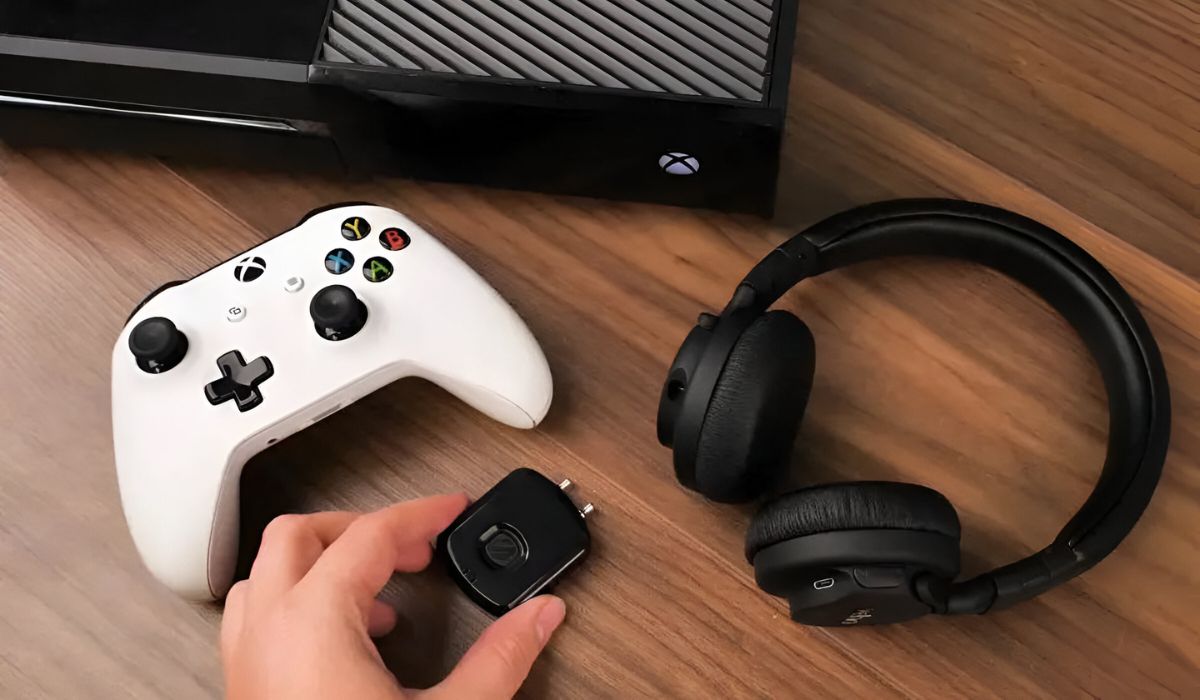
Connecting wireless headphones to your PS4 allows you to enjoy your favorite games, movies, and music without disturbing others or being restricted by the length of a headphone cable. Whether you have a Bluetooth-enabled set of headphones or utilize a USB dongle, the process of connecting wireless headphones to your PS4 is relatively simple.
In this guide, we will walk you through the step-by-step process of connecting wireless headphones to your PS4. Before we begin, it’s important to note that not all wireless headphones are compatible with the PS4 console. Therefore, it’s essential to check the compatibility of your wireless headphones before attempting to connect them to your PS4.
Additionally, make sure your wireless headphones are fully charged before beginning the connection process. This ensures a smooth and uninterrupted connection experience.
Now that we have covered the basics, let’s dive into the step-by-step process of connecting wireless headphones to your PS4.
Step 1: Check if your wireless headphones are compatible with PS4
The first step in connecting your wireless headphones to your PS4 is to ensure that they are compatible with the console. Not all wireless headphones work with the PS4, so it’s essential to check the compatibility before attempting to connect them.
There are a few different ways to check the compatibility. The first is to look for the “PS4 compatible” label on the packaging or product description of your wireless headphones. If they are labeled as compatible, you can proceed with the connection process. Alternatively, you can refer to the manufacturer’s website or user manual for information on compatibility with gaming consoles.
If you already own the wireless headphones and are unsure about their compatibility, you can try connecting them to the PS4 and see if they are recognized. Keep in mind that even if your wireless headphones are not officially listed as compatible, they may still work with the PS4 by using a workaround or adapter.
In some cases, you might need to update the firmware of your wireless headphones to ensure proper compatibility with the PS4. Refer to the manufacturer’s instructions on how to update the firmware if necessary.
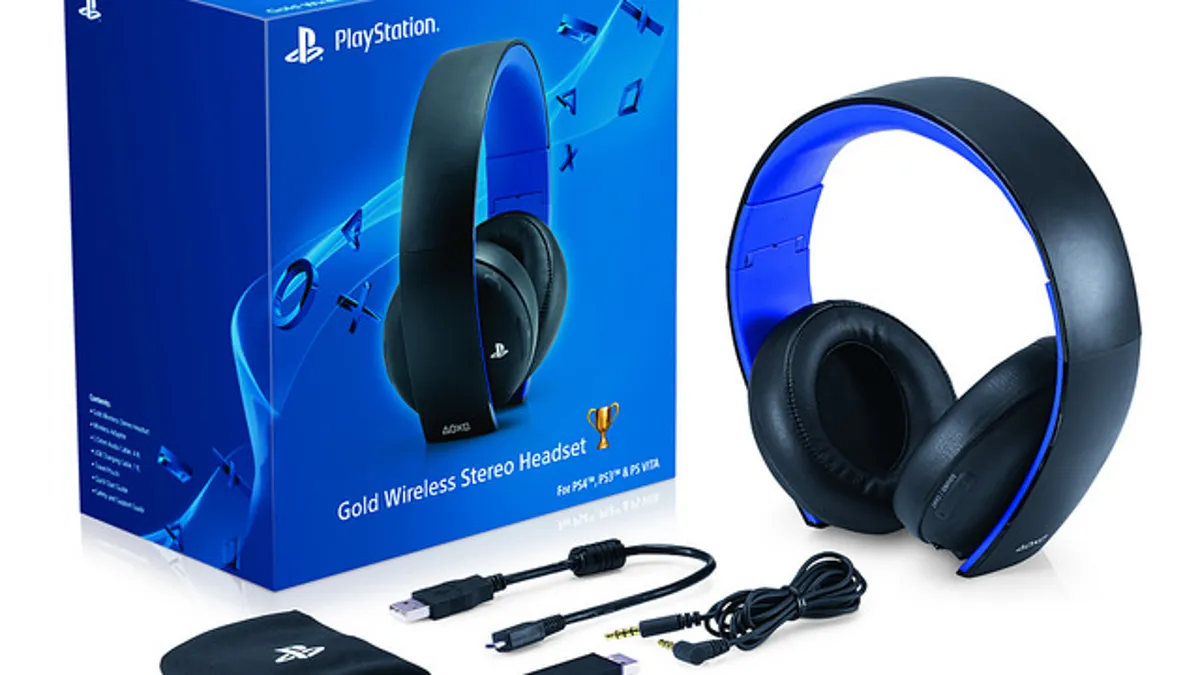
It’s important to note that not all wireless headphones will provide the same audio experience on the PS4. Some may offer a fully immersive 7.1 surround sound experience, while others may only provide stereo audio. Consider your preferences and the capabilities of your wireless headphones before proceeding.
Once you have confirmed that your wireless headphones are compatible with the PS4, you can move on to the next steps to connect them and enjoy an enhanced gaming experience.
Step 2: Ensure that your wireless headphones are fully charged
Before you begin the process of connecting your wireless headphones to your PS4, it’s crucial to make sure that they are fully charged. This ensures that you have an uninterrupted connection experience and can enjoy your gaming sessions without the worry of your headphones running out of battery.
Most wireless headphones come with a built-in rechargeable battery that allows for hours of use. The charging time may vary depending on the model and brand of your headphones, so it’s important to consult the user manual or the manufacturer’s website for specific charging instructions.
To charge your wireless headphones, locate the charging port on the headphones and connect it to an appropriate charging cable. Depending on the model, this may be a micro USB, USB-C, or a proprietary charging cable.
Once you have connected the headphones to a power source, such as a USB port on your computer or a wall charger, allow them to charge for the recommended amount of time. Avoid interrupting the charging process to ensure a complete charge.
Keep in mind that while some wireless headphones allow for continuous use while charging, others may require you to disconnect them from the charging cable during use. Refer to the user manual or manufacturer’s instructions to determine the charging limitations, if any, for your wireless headphones.
Having fully charged wireless headphones not only ensures a seamless connection to your PS4 but also provides optimal audio quality throughout your gaming sessions. It’s a small but essential step to guarantee an immersive and enjoyable gaming experience.
Once your wireless headphones are fully charged, you are ready to proceed to the next step in connecting them to your PS4.
Step 3: Put your wireless headphones in pairing mode
Putting your wireless headphones in pairing mode is a key step in the process of connecting them to your PS4. This mode allows your headphones to be discoverable by the PS4 and establish a connection between the two devices.
The method to activate pairing mode may vary depending on the brand and model of your wireless headphones. However, most wireless headphones have a designated button or a combination of buttons that need to be pressed to enter pairing mode.
Start by referring to the user manual or the manufacturer’s website for specific instructions on how to put your wireless headphones in pairing mode. Common methods include holding down the power button for a few seconds or pressing a dedicated pairing button on the headphones.
While your headphones are in pairing mode, you may see an indicator light that flashes or changes color. This indicates that the headphones are ready to be paired with a compatible device, such as your PS4.
It’s important to note that some wireless headphones automatically enter pairing mode when they are turned on. In this case, you don’t need to perform any additional steps to activate pairing mode.
During this step, it’s also a good idea to move your wireless headphones closer to the PS4 console. This eliminates any potential interference and ensures a stronger connection signal.
Once your wireless headphones are in pairing mode, you are ready to move on to the next steps to connect them to your PS4 and enjoy a wire-free gaming experience.
Step 4: Access the PS4 settings menu
To connect your wireless headphones to your PS4, you need to access the settings menu on your console. This menu allows you to customize various settings, including the Bluetooth connectivity options required for pairing your headphones.
Start by turning on your PS4 console and ensuring that it is connected to your TV or monitor. Use the controller to navigate to the main menu and locate the settings icon, which is represented by a toolbox or gear symbol.
Once you have found the settings icon, select it to enter the settings menu of your PS4. This is where you can make adjustments and configure various aspects of your console, including the Bluetooth settings.
It’s worth mentioning that the layout and interface of the settings menu may vary depending on the PS4 model and software version. However, the Bluetooth settings should be easily accessible in all versions.
If you are unsure of how to access the settings menu on your PS4, you can refer to the user manual or the PlayStation support website for detailed instructions specific to your console.
With the settings menu open, you are now ready to navigate to the Bluetooth settings section and continue with the process of connecting your wireless headphones to your PS4. Follow the next steps to find the appropriate menu and complete the pairing process.
Step 5: Navigate to the “Devices” section
After accessing the settings menu on your PS4, the next step is to navigate to the “Devices” section. This section contains various options related to device connectivity and settings, including Bluetooth devices.
Using your controller, locate and select the “Devices” option in the settings menu. The icon for this section typically resembles a controller or a hand holding a device.
Once you have entered the “Devices” section, you will find a list of available device-related settings. This includes settings for controllers, audio devices, and other peripherals.
Look for the option that pertains to audio devices or headphones. Depending on the PS4 software version, it might be labeled as “Audio Devices,” “Audio Settings,” or something similar.
Select the appropriate audio device option to proceed to the next step. This will take you to a menu where you can manage audio settings and connect your wireless headphones to your PS4.
If you’re having trouble locating the “Devices” section in the settings menu, you can refer to the user manual or visit the PlayStation support website for detailed instructions specific to your PS4 model.
With the “Devices” section now open, you are ready to move on to the next step and connect your wireless headphones to your PS4. Follow the subsequent steps to complete the pairing process and enjoy your gaming sessions without the hassle of wires.
Step 6: Select “Bluetooth Devices” from the menu
With the “Devices” section open in the settings menu of your PS4, the next step is to select the option for “Bluetooth Devices.” This menu allows you to manage and connect Bluetooth-enabled devices, such as your wireless headphones, to your PS4 console.
Using your controller, navigate through the options in the “Devices” section until you find “Bluetooth Devices.” This option is typically located near the audio settings or within the list of device-related settings.
Once you have located the “Bluetooth Devices” option, select it to enter the Bluetooth settings menu. Here, you will be able to view and manage all the Bluetooth devices that are currently connected or available to connect to your PS4.
At this point, it’s essential to ensure that your wireless headphones are in pairing mode, as mentioned in Step 3. Putting your headphones in pairing mode makes them discoverable by the PS4 and ready to establish a connection.
Once your wireless headphones are in pairing mode, select the option to “Scan for New Devices” or a similar command within the Bluetooth settings menu of your PS4. This prompts your console to search for available Bluetooth devices, including your wireless headphones.
Allow the PS4 some time to discover your wireless headphones. Depending on the signal strength and proximity, the headphones should appear in the list of available devices on the screen.
If your wireless headphones do not appear in the list after the scan, ensure that they are still in pairing mode and try the scan again. You can also try moving your headphones closer to the PS4 console for a better signal reception.
With the list of Bluetooth devices displayed, you are ready to proceed to the next step, where you will select your wireless headphones from the list and establish a connection with your PS4.
Step 7: Choose “Add a New Device”
After accessing the Bluetooth settings menu in your PS4, you will now need to choose the option to “Add a New Device.” This step allows you to select your wireless headphones from the list of available Bluetooth devices and initiate the connection process.
Using your controller, navigate through the list of Bluetooth devices that are displayed on the screen. Look for the option that corresponds to your wireless headphones, which should be identifiable by the brand name or model number.
Once you have located your wireless headphones in the list, select the option to “Add a New Device.” This prompts your PS4 to establish a connection with your headphones and initiate the pairing process.
It’s important to note that some wireless headphones may require you to enter a passcode or confirm the connection on both the headphones and the PS4 for successful pairing. In such cases, refer to the user manual or manufacturer’s instructions for the specific passcode or confirmation procedure.
During this step, it’s crucial to ensure that your wireless headphones remain in pairing mode and within range of the PS4 console. This optimizes the chances of a successful connection and avoids any signal interference.
After selecting the “Add a New Device” option and confirming the connection, the PS4 will attempt to establish a connection with your wireless headphones. If the pairing process is successful, you will receive a notification or prompt on the screen indicating that your headphones are now connected to the PS4.
Keep in mind that the connection process may take a few moments, depending on the specific model and features of your wireless headphones. Be patient and wait for the confirmation message before proceeding.
With your wireless headphones successfully added as a new device to your PS4, you are now ready to enjoy a wire-free audio experience during your gaming sessions or media playback.
Step 8: Wait for your wireless headphones to appear in the list
Once you have selected the option to “Add a New Device” in the Bluetooth settings menu of your PS4, the next step is to patiently wait for your wireless headphones to appear in the list of available devices on the screen.
After initiating the search for new devices, it may take a few moments for your wireless headphones to be detected by the PS4. The time it takes for your headphones to appear in the list can vary depending on the signal strength and proximity to the console.
During the waiting period, ensure that your wireless headphones remain in pairing mode and within range of the PS4. This helps to optimize the chances of a successful connection and improve signal reception.
If your headphones do not appear in the list within a reasonable time, you can try the following troubleshooting steps:
- Double-check that your wireless headphones are still in pairing mode. If they have timed out or exited pairing mode, reactivate it and repeat the search for new devices in the PS4’s Bluetooth settings menu.
- Move your wireless headphones closer to the PS4 console. Sometimes, distance can affect the strength of the Bluetooth signal, so reducing the distance between the two devices can improve the chances of detection.
- Ensure that there are no other electronic devices or obstructions interfering with the Bluetooth signal between the PS4 and your headphones. Such interference can disrupt or weaken the signal, making it more challenging for the PS4 to detect your headphones.
- Check if there are any firmware updates available for your wireless headphones. Updating the firmware can sometimes improve compatibility and performance with the PS4.
- If all else fails, consult the user manual or contact the manufacturer’s customer support for further assistance.
Once your wireless headphones appear in the list of available devices on the screen, you are ready to move on to the next step and select your headphones for pairing with your PS4.
Step 9: Select your wireless headphones from the list
After your wireless headphones have appeared in the list of available devices on your PS4, the next step is to select your headphones from the list. This allows you to establish a direct connection between your PS4 and the wireless headphones.
Using your controller, navigate through the list of available devices on the screen. Look for the option that corresponds to your wireless headphones, which should be identifiable by the brand name or model number.
Once you have located your wireless headphones in the list, select them by highlighting the option and pressing the appropriate button on your controller. In most cases, this will be the “X” button.
Depending on the specific model and features of your wireless headphones, you may be prompted to enter a passcode or confirm the connection on both your headphones and the PS4. Follow the on-screen instructions and enter the necessary information to complete the pairing process.
During this step, it’s essential to ensure that your wireless headphones remain in pairing mode and within range of the PS4 console. This ensures a reliable and stable connection between the two devices.
After selecting your wireless headphones from the list and confirming the connection, the PS4 will attempt to establish a direct connection with your headphones. If the pairing process is successful, you will receive a notification or prompt on the screen indicating that your headphones are now connected to the PS4.
Keep in mind that the connection process may take a few moments, depending on the specific model and features of your wireless headphones. Be patient and wait for the confirmation message before proceeding.
With your wireless headphones successfully selected and connected to your PS4, you are now ready to enjoy a wire-free audio experience during your gaming sessions or media playback.
Step 10: Follow any additional on-screen instructions
After successfully connecting your wireless headphones to your PS4, there may be additional on-screen instructions or prompts that you need to follow to ensure optimal functionality and customization.
These additional instructions could include options to customize audio settings, adjust volume levels, or select the audio output source for your wireless headphones. It’s important to pay attention to these instructions to fully utilize the features of your headphones and enhance your gaming or media experience.
Some common on-screen instructions you might encounter include:
- Choosing the audio output settings: Depending on your preferences, you may want to select whether the audio output should be exclusively through the wireless headphones or through both the headphones and the TV speakers simultaneously.
- Adjusting the volume levels: You can often fine-tune the volume levels of your wireless headphones directly from the PS4 settings menu. This allows you to achieve your desired listening levels without adjusting the volume on the headphones themselves.
- Enabling surround sound or other audio enhancements: If your wireless headphones support features like virtual surround sound or audio enhancements, the on-screen instructions may guide you on how to enable and configure them for an immersive audio experience.
It’s crucial to carefully follow these additional instructions to optimize the audio output and ensure the best possible gaming or media experience with your wireless headphones.
Remember that these instructions may vary depending on the specific model of your wireless headphones and the firmware of your PS4. If you have any difficulty or confusion, consult the user manual or contact the manufacturer’s customer support for further assistance.
With any additional on-screen instructions completed, you are now ready to enjoy a wire-free gaming or media experience with your wireless headphones connected to your PS4.
Conclusion
Connecting wireless headphones to your PS4 can greatly enhance your gaming experience by providing a wire-free and immersive audio experience. Throughout this guide, we have covered the step-by-step process of connecting your wireless headphones to your PS4.
Starting with checking the compatibility of your wireless headphones and ensuring they are fully charged, we moved on to putting the headphones in pairing mode and accessing the settings menu on your PS4. We then navigated to the “Devices” section, selected “Bluetooth Devices,” and chose “Add a New Device.”
After waiting for your wireless headphones to appear in the list, you selected them and followed any additional on-screen instructions to customize audio settings, adjust volume levels, or enable audio enhancements.
By following these steps, you can enjoy the freedom of wireless headphones and immerse yourself in the gaming world without the hassle of cables.
Keep in mind that the process may vary slightly depending on the specific model of your wireless headphones and the firmware of your PS4. It’s always a good idea to consult the user manual or contact the manufacturer’s customer support for further assistance if needed.
With your wireless headphones successfully connected to your PS4, sit back, put on your headphones, and enjoy your favorite games, movies, and music with enhanced audio quality and the convenience of wireless freedom.