Introduction
Connecting to an Allen Bradley PLC (Programmable Logic Controller) via Ethernet has become increasingly popular in industrial automation settings. Ethernet communication offers numerous advantages, such as faster data transfer, increased reliability, and greater flexibility in terms of connectivity options. This article aims to provide a comprehensive guide on how to connect to an Allen Bradley PLC via Ethernet, outlining the necessary steps and equipment required.
In today’s digital age, Ethernet has emerged as the standard protocol for communication in industrial automation systems. It allows for seamless integration of various devices, including PLCs, HMIs (Human Machine Interfaces), and computers, enabling real-time monitoring, control, and data exchange.
By connecting to an Allen Bradley PLC via Ethernet, operators and engineers can remotely access and monitor the PLC’s status, make program changes, and retrieve critical data. This level of connectivity not only enhances productivity but also improves troubleshooting capabilities, reducing downtime and increasing overall efficiency.
While connecting to an Allen Bradley PLC via Ethernet may seem daunting at first, with the right knowledge and equipment, the process can be straightforward. This article will guide you through the necessary steps, from configuring the Ethernet settings on the PLC to establishing a connection with your computer. It will also address common troubleshooting issues that may arise during the connection setup.
Whether you are a seasoned industrial automation professional or a novice in the field, this guide aims to equip you with the necessary knowledge and skills to connect to an Allen Bradley PLC using Ethernet communication. Let’s dive in and explore the benefits and steps involved in establishing a reliable and efficient Ethernet connection with your Allen Bradley PLC.
Benefits of Connecting to Allen Bradley PLC via Ethernet
Connecting to an Allen Bradley PLC via Ethernet offers a multitude of benefits, revolutionizing the way industrial automation systems operate. Let’s explore some of the key advantages:
1. Faster Data Transfer: Ethernet communication allows for high-speed data transfer between the PLC, HMIs, and other devices. This enables real-time monitoring, seamless control, and rapid data exchange for enhanced productivity and efficiency.
2. Increased Reliability: Ethernet networks are known for their robustness and reliability. They offer better resistance against electrical noise and interference, ensuring stable and consistent communication with the Allen Bradley PLC. This reduces the risk of data loss and system failures, maximizing uptime and minimizing costly downtime.
3. Greater Flexibility: Ethernet provides flexible connectivity options, allowing you to establish connections over large distances. You can connect to the Allen Bradley PLC from different locations within the facility or even remotely, providing convenience and accessibility for operators and engineers.
4. Remote Access and Monitoring: Ethernet connectivity enables remote access and monitoring of the Allen Bradley PLC. This means that operators and engineers can access the PLC’s status, make program modifications, and retrieve critical data from anywhere with an internet connection. Remote access enhances troubleshooting capabilities, reduces response time, and improves overall system efficiency.
5. Scalability and Expansion: Ethernet networks offer scalability, allowing for easy expansion of the automation system. Additional devices, such as HMIs, sensors, or actuators, can be seamlessly integrated into the network without major reconfiguration or disruptions. This scalability ensures that your automation system can grow and adapt to changing production needs.
6. Integration with IT Systems: Ethernet communication enables seamless integration with IT systems, such as MES (Manufacturing Execution Systems) or ERP (Enterprise Resource Planning) platforms. This facilitates data exchange between the control system and the enterprise-level systems, streamlining production processes, and providing valuable insights for decision-making.
7. Cost-Effective Solution: Ethernet-based communication is a cost-effective solution compared to other protocols or legacy communication methods. Ethernet hardware components are widely available and competitively priced. Moreover, the scalability and versatility of Ethernet networks make them a future-proof investment.
By leveraging Ethernet communication, connecting to an Allen Bradley PLC opens up a world of possibilities for industrial automation systems. From increased speed and reliability to remote access and scalability, the benefits are significant. Now let’s move on to the next section, where we will discuss the essential equipment required for establishing an Ethernet connection with your Allen Bradley PLC.
Overview of Ethernet Communication with Allen Bradley PLC
Ethernet communication is a widely-used protocol for connecting devices in industrial automation systems, and it offers seamless connectivity with Allen Bradley PLCs. In this section, we will provide an overview of how Ethernet communication works with Allen Bradley PLCs.
Allen Bradley PLCs support Ethernet/IP, an industrial protocol built on Ethernet standards. Ethernet/IP allows for real-time and non-real-time control and data exchange between devices. It utilizes the Common Industrial Protocol (CIP) to establish communication and exchange information between devices on the network.
To connect to an Allen Bradley PLC via Ethernet, you will need the following components:
- Allen Bradley PLC: Ensure that your Allen Bradley PLC model supports Ethernet/IP communication. This information can be found in the product documentation or specifications.
- Ethernet Module: Some Allen Bradley PLCs come with built-in Ethernet capabilities, while others require an additional Ethernet module. Check the specifications of your PLC to determine if an Ethernet module is required.
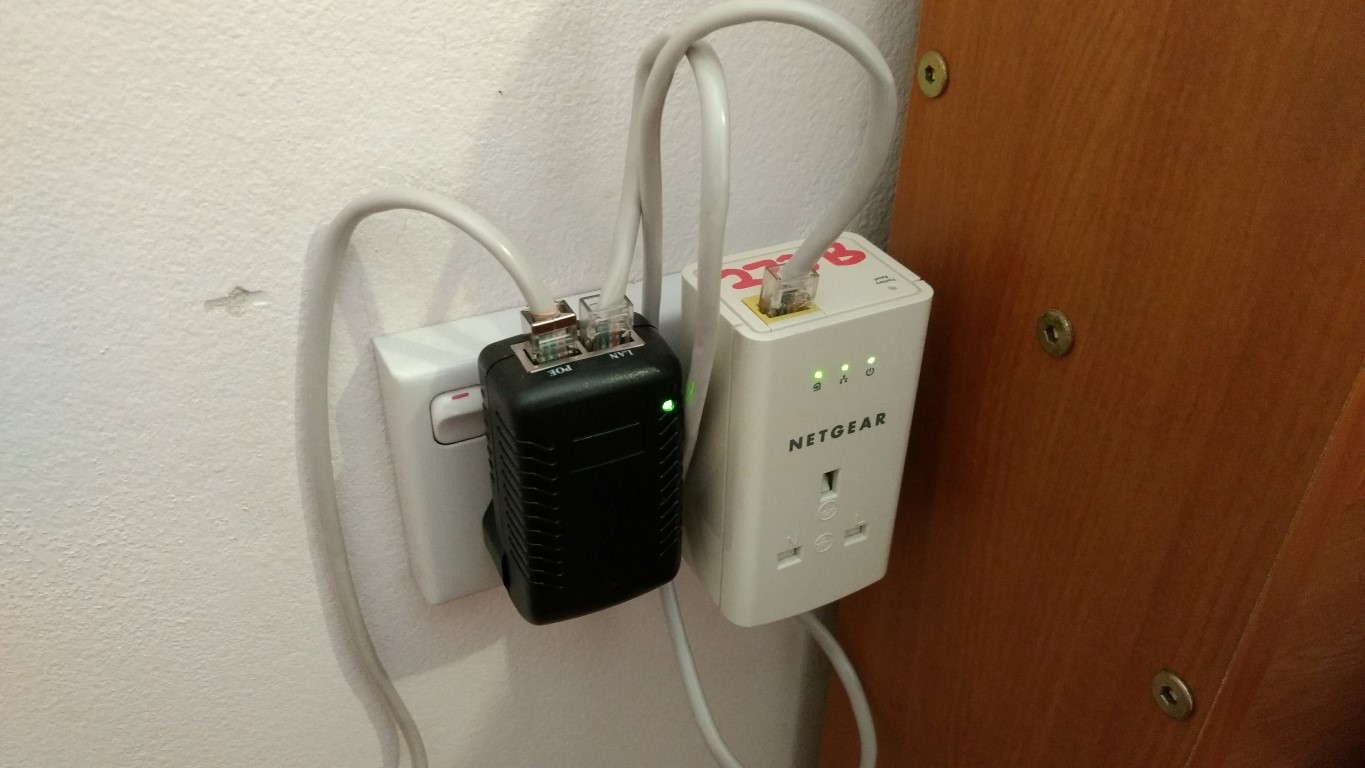
- Ethernet Cable: To establish a connection, you will need an Ethernet cable. Use a CAT5e or higher quality cable for reliable and high-speed communication.
- Computer or HMI: You will need a computer or an HMI to establish a connection with the Allen Bradley PLC. Ensure that it has an Ethernet port and the necessary software for communication.
Once you have gathered the necessary equipment, the next step is to configure the Ethernet settings on both the Allen Bradley PLC and your computer or HMI. This includes setting IP addresses, subnet masks, and gateway addresses to ensure proper communication between devices.
After configuring the Ethernet settings, you can establish a connection between your computer and the Allen Bradley PLC. This can be done using software such as RSLogix or Studio 5000, which are commonly used for programming Allen Bradley PLCs.
Once the connection is established, you can access and control the Allen Bradley PLC, monitor its status, download and upload programs, and retrieve critical data. Ethernet communication provides real-time data transfer, allowing for faster response times and enhanced productivity.
It is important to note that while Ethernet communication with Allen Bradley PLCs is highly reliable, it is crucial to ensure proper network security measures. This includes implementing firewalls, configuring access restrictions, and keeping the firmware of the Allen Bradley PLC and associated devices up to date.
Now that we have covered the basics of Ethernet communication with Allen Bradley PLCs, we can proceed to the next section, where we will discuss the process of gathering the necessary equipment for establishing a successful Ethernet connection.
Gathering Necessary Equipment
Before you can establish an Ethernet connection with your Allen Bradley PLC, it is important to ensure that you have all the necessary equipment. In this section, we will discuss the essential components you need to gather.
1. Allen Bradley PLC: The first and most crucial component is, of course, the Allen Bradley PLC itself. Make sure you have the appropriate model that supports Ethernet communication. Refer to the product documentation or specifications to verify its compatibility.
2. Ethernet Module: Depending on the specific model of your Allen Bradley PLC, you may need an Ethernet module. Not all PLCs come with built-in Ethernet capabilities, so check your PLC’s specifications to determine if an additional Ethernet module is required. If necessary, acquire the appropriate Ethernet module compatible with your Allen Bradley PLC.
3. Ethernet Cable: To establish the Ethernet connection, you will need a reliable Ethernet cable. It is recommended to use a CAT5e or higher quality cable for optimal performance. The length of the cable will depend on the distance between your computer or HMI and the Allen Bradley PLC. Ensure that the cable is long enough to reach without any strain or tension.
4. Computer or HMI: You will need a computer or Human Machine Interface (HMI) to interface with the Allen Bradley PLC. Ensure that your computer or HMI has an Ethernet port for connecting to the PLC. It should also have the necessary software installed to establish the connection and communicate with the PLC. Common software used for programming Allen Bradley PLCs include RSLogix and Studio 5000.
5. Power Supply: Depending on the specific model, your Allen Bradley PLC may require a separate power supply. Check the specifications of your PLC to determine if a power supply is needed. Ensure that the power supply voltage matches the requirements of your PLC.
6. Documentation and Manuals: It is essential to have the product documentation and manuals for your Allen Bradley PLC and Ethernet module. These documents provide valuable information on installation procedures, wiring diagrams, and configuration settings. Familiarize yourself with the documentation to ensure a smooth setup process.
7. Protective Gear: When working with electrical equipment, it is important to prioritize safety. Make sure to wear appropriate protective gear such as safety glasses and gloves. Disconnect power before making any physical connections or modifications to the equipment.
By gathering these necessary equipment and ensuring their compatibility, you will be one step closer to establishing a successful Ethernet connection with your Allen Bradley PLC. In the next section, we will cover the process of configuring the Ethernet settings on both the PLC and your computer or HMI.
Configuring the Ethernet Settings on the PLC
Before you can establish an Ethernet connection with your Allen Bradley PLC, you need to configure the Ethernet settings on the PLC itself. This section will guide you through the process of configuring the Ethernet settings on the PLC.
1. Access the PLC’s Configuration Menu: To configure the Ethernet settings on the Allen Bradley PLC, you will need to access its configuration menu. The process may vary slightly depending on the model of the PLC. Refer to the product documentation for specific instructions on how to access the configuration menu.
2. Assign an IP Address: In the configuration menu, you will need to assign an IP address to the PLC. This IP address will be used to communicate with the PLC over the Ethernet network. Make sure to choose an IP address that is within the same subnet as your computer or HMI. Consult the network administrator or IT department for guidance on IP address assignment if needed.
3. Set the Subnet Mask: The subnet mask determines which part of the IP address is used to identify the network and which part is used to identify the specific device. Set the subnet mask on the PLC to match the subnet mask of your computer or HMI.
4. Configure the Gateway Address: The gateway address is the IP address of the device that connects the local network (LAN) with other networks, such as the internet. Configure the gateway address on the PLC to match the gateway address of your computer or HMI. This allows the PLC to communicate with devices outside of the local network.
5. Configure Additional Network Settings: Depending on your specific requirements, you may need to configure additional network settings on the PLC. This may include DNS (Domain Name System) settings, DNS server addresses, or DHCP (Dynamic Host Configuration Protocol) settings. Consult the product documentation or network administrator for guidance on these settings.
6. Save and Apply the Configuration: Once you have configured all the necessary Ethernet settings, save the changes and apply the configuration. The PLC will restart or update its settings accordingly.
Note: It is crucial to ensure the security of your PLC and network. Change the default usernames, passwords, and other security settings to protect your PLC from unauthorized access. Consult the product documentation or network administrator for guidance on enhancing the security of your Allen Bradley PLC.
By following these steps to configure the Ethernet settings on your Allen Bradley PLC, you will be ready to establish a connection with your computer or HMI. In the next section, we will discuss how to configure the Ethernet settings on your computer or HMI to establish communication with the PLC.
Configuring the Ethernet Settings on the Computer
After configuring the Ethernet settings on the Allen Bradley PLC, the next step is to configure the Ethernet settings on your computer or Human Machine Interface (HMI). This section will guide you through the process of configuring the Ethernet settings on your computer.
1. Open the Network Settings: Access the network settings on your computer or HMI. The process may vary depending on the operating system you are using. Generally, you can navigate to the Control Panel or Network Settings section to find the network configuration options.
2. Locate the Ethernet Adapter: In the network settings, locate the Ethernet adapter that is connected to the Allen Bradley PLC. Select the appropriate Ethernet adapter if your computer or HMI has multiple network interfaces.
3. Assign an IP Address: Configure the IP address on the Ethernet adapter to match the IP address assigned to the Allen Bradley PLC. This allows your computer or HMI to communicate with the PLC over the Ethernet network. For example, if the PLC’s IP address is set to 192.168.1.100, configure your computer’s IP address as 192.168.1.XXX (where XXX is a unique value within the subnet).
4. Set the Subnet Mask: Set the subnet mask on your computer or HMI to match the subnet mask configured on the Allen Bradley PLC. This ensures that both devices are on the same subnet and can communicate with each other.
5. Configure Default Gateway: Enter the IP address of the Allen Bradley PLC as the default gateway on your computer or HMI. This allows your computer to route the traffic intended for the PLC through the Ethernet network.
6. Configure DNS Settings (if necessary): If you need to resolve domain names to IP addresses or connect to remote services using domain names, configure the DNS settings on your computer or HMI. Enter the IP addresses of the DNS servers provided by your network administrator or ISP (Internet Service Provider).
7. Apply the Settings: Once you have configured the Ethernet settings on your computer or HMI, apply the changes. The network interface may restart or update to apply the new settings.
Note: It is important to ensure proper security measures for your computer or HMI. Set up firewalls and update your antivirus software to protect your system from potential threats. Consult your network administrator or IT department for guidance on network security.
By configuring the Ethernet settings on your computer or HMI to match those of the Allen Bradley PLC, you are ready to establish a connection. In the next section, we will discuss the process of establishing a connection between the computer or HMI and the Allen Bradley PLC.
Establishing a Connection with the Allen Bradley PLC
Now that you have configured the Ethernet settings on both the Allen Bradley PLC and your computer or Human Machine Interface (HMI), it’s time to establish a connection between the devices. This section will guide you through the process of connecting to the Allen Bradley PLC.
1. Ensure the Physical Connection: Make sure the Ethernet cable is securely connected to both the Allen Bradley PLC and your computer or HMI. Check for any loose connections or cable damage. A stable physical connection is crucial for establishing a reliable Ethernet connection.
2. Launch the Programming Software: Open the programming software, such as RSLogix or Studio 5000, on your computer. These software tools are commonly used for programming and communication with Allen Bradley PLCs.
3. Create a New Project: In the programming software, create a new project or open an existing project that corresponds to the Allen Bradley PLC you are connecting to. Specify the correct PLC model and communication settings within the software.
4. Configure the Communication Driver: Configure the communication driver within the programming software to establish a connection with the Allen Bradley PLC. The specific steps may vary depending on the software you are using. Follow the software’s documentation or interface instructions to configure the driver settings accordingly.
5. Connect to the PLC: Once the communication driver is configured, initiate the connection process within the programming software. This will establish a connection between your computer or HMI and the Allen Bradley PLC. Depending on the software, this may involve clicking a “Connect” or “Online” button within the interface.
6. Monitor and Control the PLC: Once the connection is established, you can monitor and control the Allen Bradley PLC from your computer or HMI. This includes tasks such as downloading or uploading programs, modifying program logic, and accessing real-time data from the PLC.
7. Test the Connection: Test the connection to ensure that communication between your computer or HMI and the Allen Bradley PLC is functioning correctly. Send commands or retrieve data from the PLC to verify the connection’s stability and reliability.
Remember to save your project and regularly backup your PLC programs to prevent data loss in case of unexpected issues or system failures.
In the event that you encounter any connection issues or errors, refer to the documentation or troubleshooting guides provided by Allen Bradley or consult with technical support for further assistance.
With the connection established, you now have the ability to program, monitor, and control the Allen Bradley PLC remotely from your computer or HMI. In the next section, we will discuss common connection issues and provide troubleshooting tips to help you resolve them.
Troubleshooting Common Connection Issues
While connecting to an Allen Bradley PLC via Ethernet usually goes smoothly, there are instances where you may encounter connection issues. This section will outline some common connection issues and provide troubleshooting tips to help you resolve them.
1. Incorrect IP Address: Ensure that the IP address configured on both the Allen Bradley PLC and your computer or HMI are on the same subnet. If the IP addresses do not match, update the settings to ensure they are aligned.
2. Faulty Ethernet Cable: A faulty Ethernet cable can cause connection issues. Check the cable for any signs of damage or wear and replace it if necessary. Ensure that the cable is securely plugged into both the PLC and your computer or HMI.
3. Firewall or Antivirus Blocking the Connection: Firewalls or antivirus software may block communication between your computer or HMI and the Allen Bradley PLC. Temporarily disable or configure the necessary exceptions in your firewall or antivirus settings to allow communication.
4. Incompatible Communication Driver: Ensure that you have the correct communication driver configured in your programming software. Incorrect driver selection can result in connection failures. Check the documentation or support resources of the software to verify the correct driver configuration.
5. Power Cycle the Devices: Sometimes, power cycling both the Allen Bradley PLC and your computer or HMI can resolve connection issues. Turn off both devices, wait for a few moments, and then power them back on.
6. Check Network Configuration: Verify that the network settings, such as subnet mask and default gateway, are correctly configured on both the PLC and your computer or HMI. Misconfigured network settings can prevent successful communication.
7. Firmware or Software Updates: Ensure that the firmware of the Allen Bradley PLC and the programming software are up to date. Outdated firmware or software versions may contain bugs or compatibility issues that could hinder the connection. Check the manufacturer’s website for any available updates.
8. Consult Manufacturer Support: If you have tried the above troubleshooting steps and are still experiencing connection issues, reach out to the manufacturer’s technical support team. They can provide additional guidance and assistance based on the specific details of your equipment and situation.
By following these troubleshooting tips, you can resolve common connection issues and establish a stable and reliable connection to your Allen Bradley PLC. Remember to document any changes made during the troubleshooting process for future reference.
In the next section, we will summarize the key points discussed in this article and provide a concluding note.
Conclusion
Connecting to an Allen Bradley PLC via Ethernet can greatly enhance industrial automation systems, providing faster data transfer, increased reliability, and greater flexibility. In this comprehensive guide, we have covered the benefits of using Ethernet communication with Allen Bradley PLCs, the configuration of Ethernet settings on both the PLC and the computer or HMI, the establishment of a connection, and troubleshooting common connection issues.
By following the steps outlined in this guide, you can successfully establish a reliable Ethernet connection and leverage the capabilities of your Allen Bradley PLC. Remember to gather all the necessary equipment, configure the Ethernet settings correctly, and use the appropriate programming software to connect to the PLC.
It is important to pay attention to network security and regularly update the firmware and software of your Allen Bradley PLC and associated devices. This will help ensure a secure and stable connection.
If you encounter any issues during the connection setup or experience difficulties with the Ethernet communication, don’t hesitate to consult the product documentation, reach out to technical support, or seek assistance from the manufacturer. They can provide valuable insights and guidance tailored to your specific situation.
Connecting to an Allen Bradley PLC via Ethernet opens up a world of possibilities in industrial automation, allowing for real-time monitoring, seamless control, and enhanced productivity. Take advantage of the benefits of Ethernet communication to optimize your processes and improve overall efficiency.
We hope that this guide has provided you with a clear understanding of Ethernet communication with Allen Bradley PLCs and has equipped you with the knowledge and skills needed to establish a successful Ethernet connection. Implement these steps with confidence and enjoy the enhanced capabilities and flexibility that come with connecting to an Allen Bradley PLC via Ethernet.