Introduction
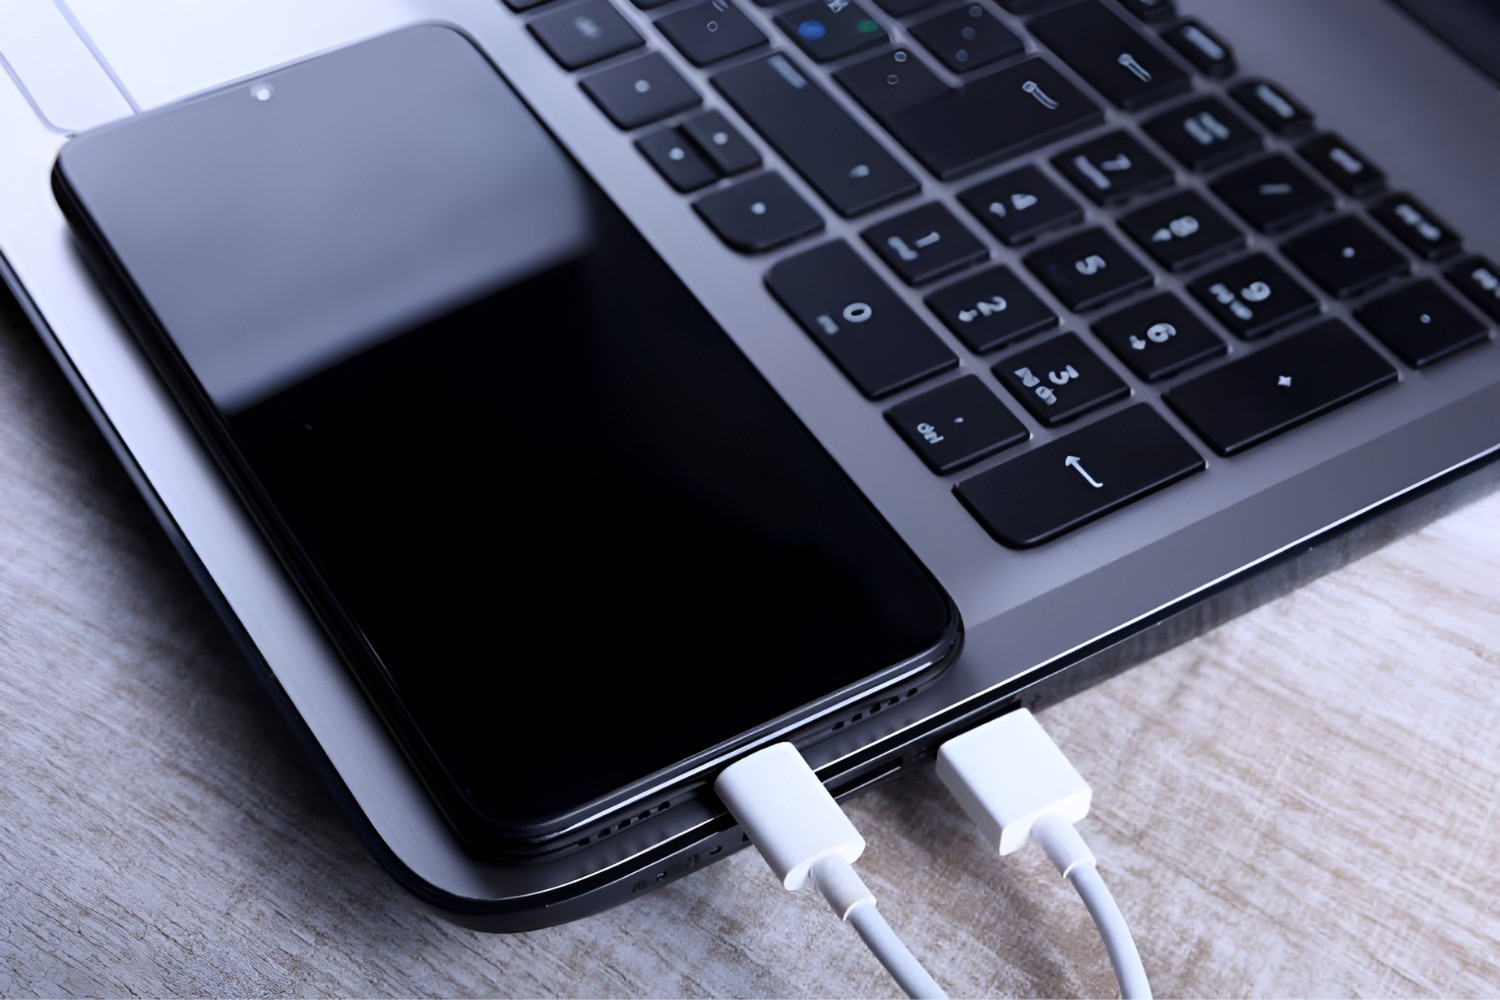
Welcome to the digital era where smartphones have become an integral part of our lives. They hold our cherished memories, important documents, and even our entertainment. But what happens when you want to access those files on a larger screen or transfer them to your PC? Connecting your smartphone to your PC via Wi-Fi is the solution you need.
Gone are the days of tangled cables and limited connectivity options. By leveraging the power of Wi-Fi, you can establish a wireless connection between your smartphone and PC, allowing for seamless file transfer, screen mirroring, and much more. So, whether you want to back up your photos, transfer music for a road trip, or simply enjoy a larger screen experience, connecting your smartphone to your PC via Wi-Fi opens up a world of possibilities.
In this article, we will guide you through the step-by-step process of connecting your smartphone to your PC via Wi-Fi. No technical expertise required – we will walk you through the entire process, making it easy and straightforward. So, grab your smartphone and let’s get started!
Step 1: Check your Wi-Fi settings
Before connecting your smartphone to your PC via Wi-Fi, it’s essential to ensure that your Wi-Fi settings are optimized. This step will help you avoid any potential connectivity issues and ensure a smooth connection.
Firstly, make sure that your Wi-Fi is turned on and that your smartphone is connected to a Wi-Fi network. Navigate to your smartphone’s settings and locate the Wi-Fi section. If Wi-Fi is turned off, toggle it on. Next, select a Wi-Fi network to connect to from the list of available networks. If you have a preferred Wi-Fi network, ensure that it is selected.
Once connected to a Wi-Fi network, check the signal strength. You can do this by looking at the Wi-Fi icon on your smartphone’s status bar. Ideally, the icon should be full or have at least three bars. A weak Wi-Fi signal may result in a slower and less stable connection.
Additionally, it’s a good idea to ensure that your Wi-Fi network is not experiencing any connectivity issues. If other devices on the same network are experiencing connectivity problems, it may be necessary to reset your router or contact your internet service provider for assistance.
Lastly, it’s always recommended to keep your smartphone’s operating system and Wi-Fi driver up to date. Software updates often include bug fixes and improvements that can enhance Wi-Fi connectivity. Check for any available updates by going to your smartphone’s settings and navigating to the software update section.
By verifying your Wi-Fi settings, you can ensure that your smartphone is ready to connect to your PC via Wi-Fi seamlessly. Once you have confirmed that your Wi-Fi settings are optimized, we can move on to the next step of the process.
Step 2: Connect your PC to the same Wi-Fi network
In order to establish a connection between your smartphone and PC via Wi-Fi, both devices need to be connected to the same Wi-Fi network. The Wi-Fi network acts as the bridge that enables data transfer between the two devices.
To connect your PC to the Wi-Fi network, start by locating the Wi-Fi icon on the taskbar of your PC’s desktop screen. It’s usually located in the bottom right corner. Click on the Wi-Fi icon to open the network options.
A list of available Wi-Fi networks will be displayed. Locate your Wi-Fi network from the list and click on it to connect. You may be prompted to enter the network password if it is a secured network. Enter the password and click on “Connect”.
Once your PC is connected to the Wi-Fi network, you should see the Wi-Fi icon on the taskbar change to indicate a successful connection. It may take a few moments for your PC to establish a stable connection to the network.
Now that your PC is connected to the same Wi-Fi network as your smartphone, it is ready to establish a connection with your smartphone. Proceed to the next step to enable Wi-Fi on your smartphone.
Step 3: Enable Wi-Fi on your smartphone
In order to connect your smartphone to your PC via Wi-Fi, you need to ensure that Wi-Fi is enabled on your smartphone. Enabling Wi-Fi allows your smartphone to detect and connect to available Wi-Fi networks, including the one that your PC is connected to.
The process of enabling Wi-Fi may vary slightly depending on the smartphone model and operating system. However, the general steps are as follows:
- Go to your smartphone’s settings.
- Locate the “Wi-Fi” or “Network & Internet” section.
- Toggle the switch to enable Wi-Fi. It may appear as a slider or a simple on/off button.
Once Wi-Fi is enabled, your smartphone will start scanning for available Wi-Fi networks. It may take a moment for the scan to complete, so be patient.
After the scan is complete, a list of available Wi-Fi networks will be displayed. Look for the Wi-Fi network that you connected your PC to in the previous step. The network name should match the one on your PC.
Tap on the Wi-Fi network name to connect your smartphone to the network. If the network is secured, you may be prompted to enter the network password. Enter the password and tap “Connect”.
Your smartphone will attempt to establish a connection to the Wi-Fi network. Once the connection is successful, you will see the Wi-Fi icon in the status bar of your smartphone. This indicates that your smartphone is now connected to the same Wi-Fi network as your PC.
With Wi-Fi enabled on your smartphone and connected to the same network as your PC, you are now ready to proceed to the next step and enable Wi-Fi sharing on your smartphone.
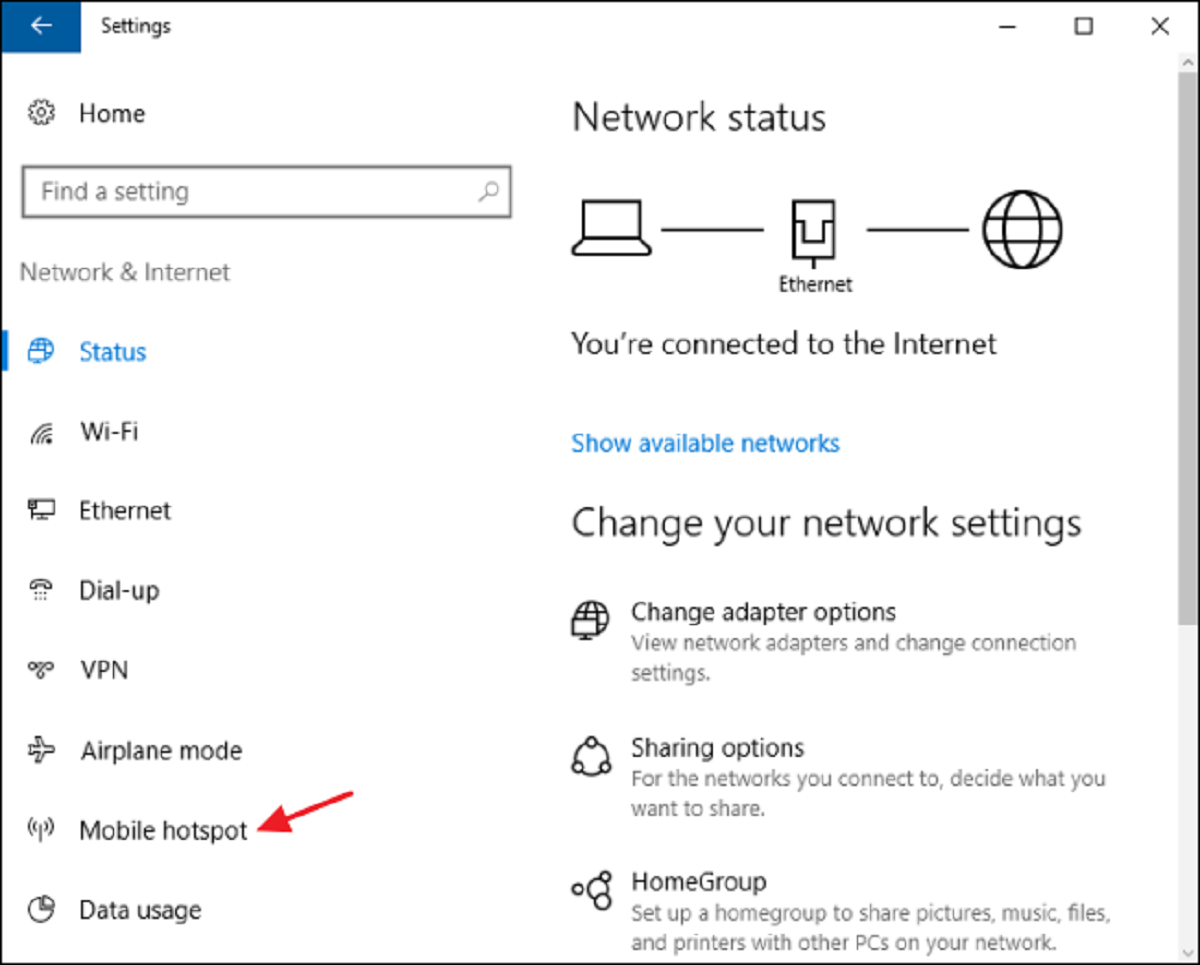
Step 4: Enable Wi-Fi sharing on your smartphone
Now that your smartphone is connected to the same Wi-Fi network as your PC, it’s time to enable Wi-Fi sharing on your smartphone. Enabling Wi-Fi sharing allows your smartphone to act as a hotspot, giving your PC access to its internet connection and enabling file transfer.
The process of enabling Wi-Fi sharing may vary depending on your smartphone’s model and operating system. However, the general steps are as follows:
- Go to your smartphone’s settings.
- Locate the “Wi-Fi & Internet” or “Network & Internet” section.
- Look for the “Hotspot & Tethering” or “Mobile Hotspot” option and tap on it.
- Toggle the switch to enable Wi-Fi sharing. It may appear as a slider or a simple on/off button.
Once Wi-Fi sharing is enabled, you can customize the hotspot settings by tapping on the “Hotspot Settings” or similar option. Here, you can change the hotspot name and set a password for security.
Keep in mind that enabling Wi-Fi sharing on your smartphone will consume battery power. If you plan to transfer a large number of files or use the internet extensively, it’s a good idea to connect your smartphone charger to ensure uninterrupted usage.
With Wi-Fi sharing enabled on your smartphone, your PC will be able to connect to the hotspot and access the internet connection. This connection is crucial for transferring files between your smartphone and PC wirelessly. We’re almost there! The next step involves finding your smartphone’s IP address.
Step 5: Find your smartphone’s IP address
In order to establish a direct connection between your PC and smartphone, you will need to know the IP address of your smartphone. The IP address acts as the unique identifier for your smartphone on the network, allowing your PC to locate and communicate with it.
Here’s how you can find your smartphone’s IP address:
- Open the Settings app on your smartphone.
- Navigate to the “Wi-Fi” or “Network & Internet” section.
- Tap on the Wi-Fi network to which your smartphone is connected.
- A window will open with detailed information about the Wi-Fi network. Look for the “IP address” field, which will display your smartphone’s IP address.
Take note of the IP address as you will need it for the next step.
It’s important to remember that IP addresses can change, especially if you connect to different networks or restart your smartphone. If you encounter issues connecting your PC to your smartphone, double-check that you have the correct IP address.
Now that you have your smartphone’s IP address, you are ready to proceed to the next step and connect your smartphone to your PC via Wi-Fi. Exciting times ahead!
Step 6: Connect your smartphone to your PC via Wi-Fi
Now that you have all the necessary information, it’s time to establish a direct Wi-Fi connection between your smartphone and PC. By connecting the two devices, you can access your smartphone’s files directly from your PC without the need for any additional cables.
Follow these steps to connect your smartphone to your PC via Wi-Fi:
- On your PC, open a web browser, such as Google Chrome or Mozilla Firefox.
- In the address bar, enter the IP address of your smartphone that you obtained in the previous step. Make sure to include the dots between the numbers (e.g., 192.168.1.100).
- Press Enter or Return to initiate the connection.
- Your web browser will attempt to establish a connection with your smartphone. Depending on your smartphone’s settings, you may be prompted to grant permission for the connection to proceed.
- If prompted, confirm the connection on your smartphone by tapping “Allow” or a similar option.
- Once the connection is established, your PC will be able to access your smartphone’s files and display them in the web browser.
At this point, you may be required to enter a username and password to access your smartphone’s files. This will depend on your smartphone’s settings, so refer to your smartphone’s documentation or user interface for the correct credentials.
Congratulations! You have successfully connected your smartphone to your PC via Wi-Fi. Now it’s time to explore your smartphone’s files on your PC in the next step.
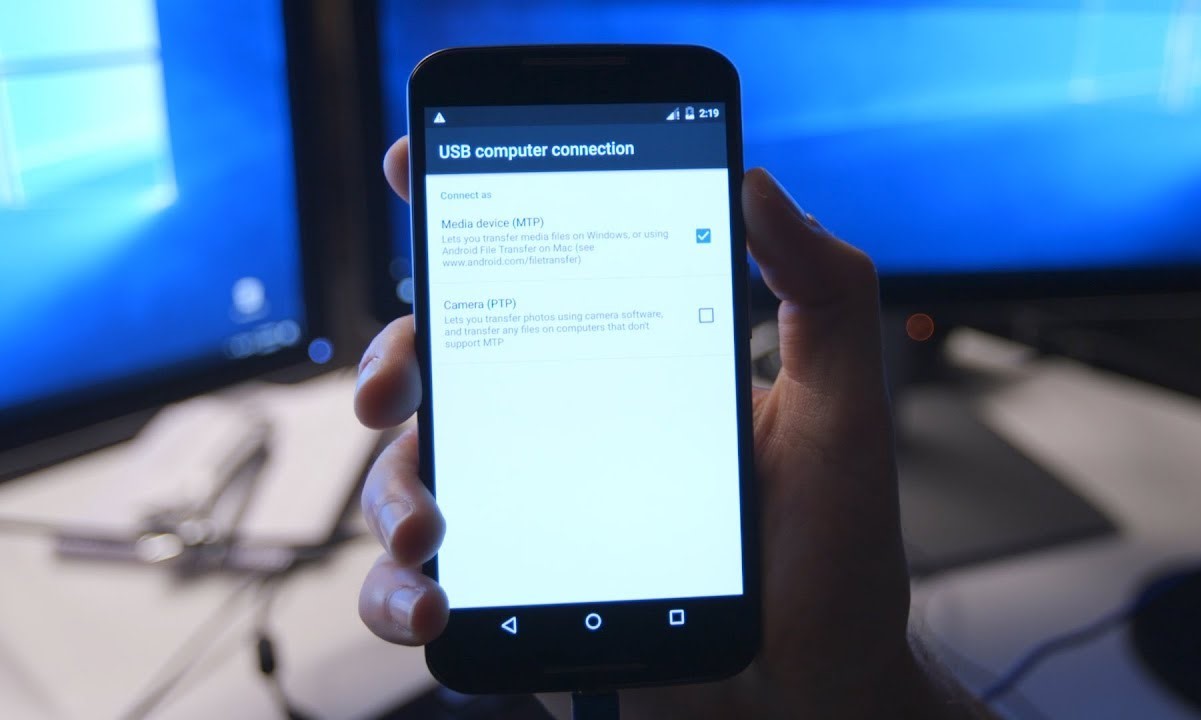
Step 7: Access your smartphone’s files on your PC
Now that your smartphone is connected to your PC via Wi-Fi, it’s time to access and explore your smartphone’s files directly from your PC. This allows for convenient file management and easy transfer of photos, videos, documents, and more.
Here’s how you can access your smartphone’s files on your PC:
- In the web browser on your PC, you should see a file explorer-like interface displaying the contents of your smartphone.
- Navigate through the folders and files to locate the specific items you want to access or transfer.
- To open a file, simply click on it. If your PC has the necessary software installed, it will open the file in the appropriate application.
- To copy or transfer a file from your smartphone to your PC, right-click on it and select the appropriate option, such as “Copy” or “Download”. Choose the destination folder on your PC where you want to save the file.
- Conversely, to transfer a file from your PC to your smartphone, locate the file on your PC and drag and drop it into the web browser interface. The file will be uploaded to your smartphone’s storage.
Remember to be mindful of available storage space on both your smartphone and PC. It’s a good practice to periodically clean up and organize your files to ensure optimal performance and efficient usage.
By accessing your smartphone’s files on your PC, you can easily manage, organize, and transfer your important files with just a few clicks. Enjoy the convenience of wireless file management!
Step 8: Transfer files between your smartphone and PC
Now that you have accessed your smartphone’s files on your PC, it’s time to transfer files between the two devices. Whether you want to back up important documents, transfer photos and videos, or simply organize your files, this step allows for seamless and efficient file transfer.
Follow these steps to transfer files between your smartphone and PC:
- In the file explorer-like interface on your PC, navigate to the location where the file you want to transfer is located.
- Click on the file to select it. If you want to transfer multiple files, hold down the Ctrl key on your keyboard and click on each file.
- Right-click on the selected file(s) and choose the “Copy” option.
- Navigate to the destination folder on your smartphone where you want to transfer the files. You can browse through the folders in the web browser interface.
- Right-click on an empty space in the destination folder and choose the “Paste” option. The files will begin to transfer from your PC to your smartphone.
- Alternatively, you can also drag and drop the selected files from your PC into the destination folder in the web browser interface.
- Wait for the file transfer to complete. The time it takes will depend on the size and number of files being transferred.
- Once the transfer is complete, you can access the transferred files on your smartphone, and they will be available for use or further organization.
It’s important to note that the file transfer speed may depend on the network strength and the size of the files being transferred. Larger files may take longer to transfer, so be patient during the process.
By following these steps, you can easily transfer files between your smartphone and PC, ensuring that your important data is backed up, organized, and easily accessible across devices.
Conclusion
Congratulations! You have successfully learned how to connect your smartphone to your PC via Wi-Fi. By following the step-by-step guide, you can now enjoy seamless file transfer and easy access to your smartphone’s files directly from your PC.
Connecting your smartphone to your PC via Wi-Fi eliminates the need for cables and offers greater convenience and flexibility. You can easily back up your important files, transfer media, and manage your documents with just a few clicks.
Remember to optimize your Wi-Fi settings on both your smartphone and PC to ensure a stable and reliable connection. Enable Wi-Fi sharing on your smartphone and connect both devices to the same Wi-Fi network. Discover your smartphone’s IP address and establish a direct connection between your smartphone and PC through a web browser.
Once connected, you can access, explore, and transfer files between your smartphone and PC effortlessly. Use the file explorer-like interface in the web browser to navigate through your smartphone’s folders and manage your files as needed. It’s as simple as dragging and dropping files between devices.
Make sure to keep your devices up to date with the latest software updates for enhanced performance and security. Regularly clean up and organize your files to optimize storage space on your smartphone and PC.
Enjoy the freedom and convenience of connecting your smartphone to your PC via Wi-Fi. Whether you’re sharing photos, transferring important documents, or simply managing your files, this wireless connection opens up a world of possibilities for seamless file management!