Introduction
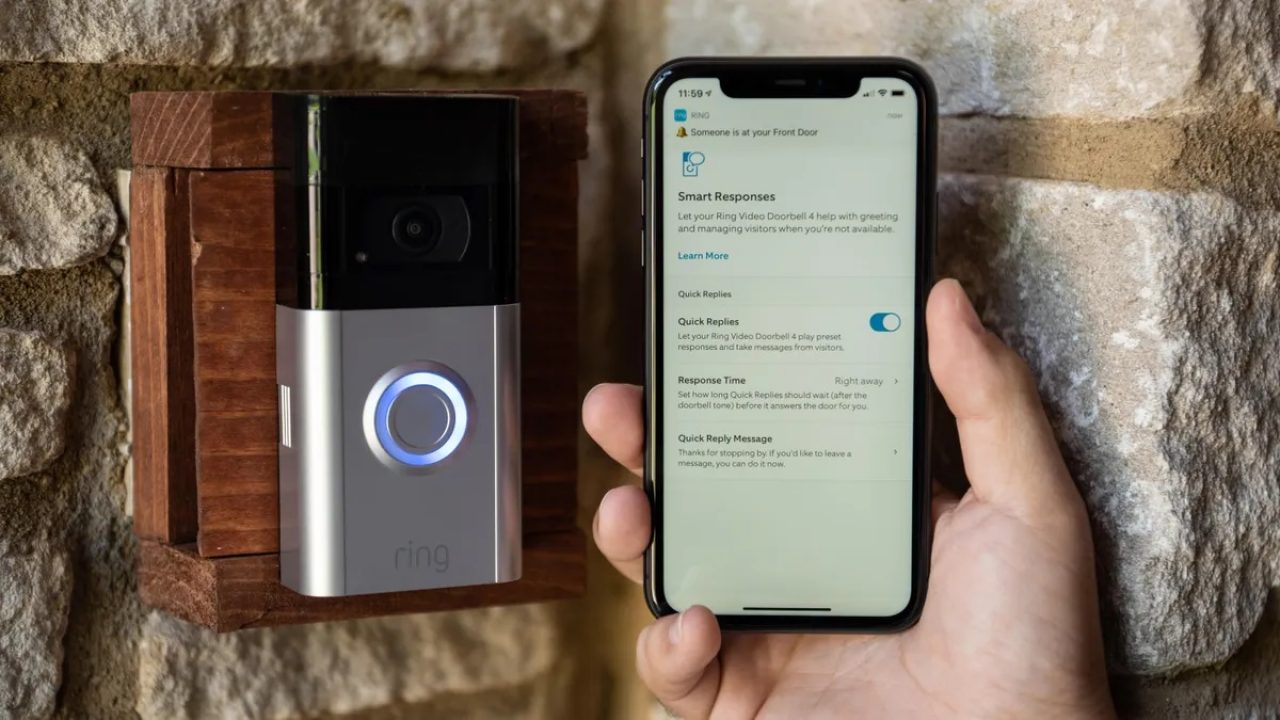
Welcome to our guide on how to connect your Ring camera to Wi-Fi. Ring cameras are a popular choice for home security, allowing you to monitor your property and receive notifications of any activity. To take full advantage of the features of your Ring camera, it’s essential to connect it to your Wi-Fi network. This will enable you to access live video feeds, receive alerts, and control your camera remotely through the Ring app.
Setting up your Ring camera and connecting it to Wi-Fi may seem intimidating, but don’t worry – we’ve got you covered. In this guide, we’ll take you through a step-by-step process to ensure a smooth and successful connection. We’ll cover everything from initial setup to configuring your camera settings. Soon, you’ll be able to monitor your property with ease and enjoy the peace of mind that comes with a connected security system.
Before we dive into the steps, there are a few things you’ll need to get started. First, make sure you have a stable internet connection and a Wi-Fi router within the range of your camera. You’ll also need a smartphone or tablet with the Ring app installed. If you haven’t already done so, you can download the app from the App Store or Google Play Store.
Now, let’s get started with setting up your Ring camera and connecting it to Wi-Fi. Follow the steps in the next sections, and before you know it, your camera will be up and running, enhancing the security of your home.
Step 1: Set up the Ring Camera
Before connecting your Ring camera to Wi-Fi, you’ll need to set it up properly. Here’s how:
1.1 Unbox the camera: Start by removing the camera from its packaging. Ensure that all the components, including the camera, power adapter, and any mounting accessories, are included.
1.2 Choose a location: Decide where you want to install your Ring camera. It should be placed in a prominent location with a clear view of the area you want to monitor. Keep in mind that the camera should be within the range of your Wi-Fi router.
1.3 Power up the camera: Plug in your Ring camera’s power adapter and connect it to a power source. Wait until the camera’s LED light turns on, indicating that it’s receiving power.
1.4 Install the battery (if applicable): If your Ring camera has a removable battery, insert it into the camera following the provided instructions. Skip this step if your camera is wired or has a built-in battery.
1.5 Sync the camera with the Ring app: Download and open the Ring app on your smartphone or tablet. Create a new Ring account or log in to your existing account. Follow the on-screen instructions to add a new device and select the camera model you’re setting up.
1.6 Scan the QR code: Use your smartphone or tablet’s camera to scan the QR code on the camera or packaging. This will help the app recognize the specific camera you’re setting up and ensure a seamless connection.
1.7 Follow the app prompts: The Ring app will guide you through the remaining steps of the setup process. This may include connecting your phone to the camera’s Wi-Fi network and configuring other camera settings. Follow the prompts and ensure that you provide accurate information when prompted.
1.8 Complete the setup: Once you’ve followed all the app prompts and configured the necessary settings, your Ring camera should be successfully set up. You can now proceed to connect it to your Wi-Fi network to enable remote access and additional features.
With your Ring camera properly set up and ready for connection, it’s time to move on to the next step: installing the Ring app.
Step 2: Install the Ring app
To connect your Ring camera to Wi-Fi and access its features, you’ll need to install the Ring app on your smartphone or tablet. Follow these steps to get the app up and running:
2.1 Open the App Store or Google Play Store: Depending on your device, open the App Store (for iPhones and iPads) or the Google Play Store (for Android devices).
2.2 Search for the Ring app: In the search bar, type “Ring” and look for the official Ring app developed by Ring.com. Make sure to choose the correct app and verify its authenticity by checking the app ratings and reviews.
2.3 Download and install the app: Tap the “Download” or “Install” button to start the download process. Once the app is downloaded, it will automatically install on your device. Note that the app may require certain permissions to function correctly, such as access to your device’s camera and microphone.
2.4 Open the Ring app: Once the installation is complete, locate the Ring app on your device’s home screen or app drawer. Tap on it to open the app.
2.5 Create a Ring account or log in: Upon launching the Ring app, you’ll be prompted to create a new account or log in to your existing account. If you already have a Ring account, enter your login credentials. Otherwise, follow the on-screen instructions to create a new account.
2.6 Allow app permissions: The Ring app may request additional permissions such as access to your location or notifications. You can choose to allow or deny these permissions based on your preferences.
2.7 Set up the Ring app: Follow the prompts in the app to complete the setup process. This may include enabling notifications, configuring security settings, and connecting any additional Ring devices you have.
2.8 Verify your account: You may be required to verify your Ring account through a verification email or SMS. Check your email or messages and follow the instructions provided to complete the verification process.
Once you’ve successfully installed and set up the Ring app, you’re ready to connect your Ring camera to your Wi-Fi network. Proceed to the next step for detailed instructions on how to complete this process.
Step 3: Connect the Ring Camera to Wi-Fi
Now that you have your Ring camera set up and the Ring app installed on your device, it’s time to connect your camera to your Wi-Fi network. Follow these steps:
3.1 Open the Ring app: Launch the Ring app on your smartphone or tablet by tapping on its icon.
3.2 Access the Device Settings: Locate and select your Ring camera from the app’s main screen. This will take you to the device settings page.
3.3 Choose “Wi-Fi Settings”: Look for the “Wi-Fi Settings” option within the device settings. Tap on it to access the Wi-Fi settings for your camera.
3.4 Connect to the camera’s Wi-Fi network: On the Wi-Fi settings page, you should see a list of available Wi-Fi networks. Look for the network name that matches your Ring camera and tap on it to connect. Note that the camera’s Wi-Fi network name usually starts with “Ring-” followed by a series of numbers or characters.
3.5 Enter your Wi-Fi password: After selecting your camera’s Wi-Fi network, you’ll be prompted to enter the password for your home Wi-Fi network. Input the correct password and tap “Connect” or “Join” to proceed.
3.6 Wait for the connection: Once you’ve entered the correct Wi-Fi password, give the camera a few moments to establish a connection to your home network. The camera’s LED light may flash or change color during this process.
3.7 Confirm the successful connection: If the camera successfully connects to your Wi-Fi network, you’ll see a confirmation message in the app. It may take a few moments for the camera to establish a secure connection with the Ring servers.
3.8 Return to the app’s main screen: After confirming the successful connection, return to the app’s main screen by tapping the “Back” or “Home” button. You should now see live video footage from your Ring camera, indicating that it’s connected to both Wi-Fi and the Ring app.
Congratulations! You’ve successfully connected your Ring camera to your Wi-Fi network. In the next step, we’ll cover how to configure your camera settings to customize the functionality and features according to your preferences.
Step 4: Configure Camera Settings
Now that your Ring camera is connected to Wi-Fi, it’s time to configure its settings to customize its functionality. Follow these steps to configure your camera settings:
4.1 Open the Ring app: Launch the Ring app on your smartphone or tablet. If you’re not already on the app’s main screen, navigate to it by tapping on the appropriate button.
4.2 Access the Device Settings: Locate and select your Ring camera from the app’s main screen. This will take you to the device settings page.
4.3 Explore the available settings: On the device settings page, you’ll find various options to customize your camera. Take some time to explore and familiarize yourself with these settings, as they may differ slightly depending on the model of your camera.
4.4 Adjust motion detection settings: One important aspect of configuring your camera is fine-tuning the motion detection settings. You can customize the sensitivity, range, and areas to be monitored by accessing the motion detection settings within the app. This will help reduce false alarms or ensure that no activity is missed.
4.5 Enable alerts and notifications: To receive alerts and notifications on your smartphone or tablet whenever activity is detected, make sure that this feature is enabled in the app settings. You can choose to receive push notifications, emails, or both, depending on your preferences.
4.6 Set up video recording and storage options: If your Ring camera supports video recording, you can configure the recording length and video storage settings. You may choose to store recordings on the cloud or on a compatible external storage device.
4.7 Customize additional settings: Depending on the model of your Ring camera, there may be additional settings you can customize. These can include audio settings, live view preferences, night vision settings, and more. Take your time to explore these options and adjust them according to your needs.
4.8 Save your settings: After making any changes to the camera settings, don’t forget to save your preferences by tapping on the appropriate button within the app. This will ensure that your settings are applied and saved for future use.
By configuring the camera settings, you can optimize the performance of your Ring camera and tailor it to meet your specific requirements. Take advantage of the flexibility offered by the app to customize the settings according to your preferences.
In the next step, we’ll guide you on how to test the connection and ensure that your Ring camera is functioning smoothly.
Step 5: Test the Connection
After setting up your Ring camera, connecting it to Wi-Fi, and configuring the camera settings, it’s important to test the connection to ensure that everything is working as intended. Follow these steps to test your Ring camera’s connection:
5.1 Open the Ring app: Launch the Ring app on your smartphone or tablet by tapping on its icon. This will take you to the app’s main screen.
5.2 Select your Ring camera: Locate and select your Ring camera from the list of devices on the app’s main screen. This will open the live view of your camera’s footage.
5.3 Check the live feed: Once the live view is displayed, closely monitor the video feed from your Ring camera. Ensure that the footage is clear, without any significant delays or buffering issues. This indicates that the camera is properly connected to both Wi-Fi and the Ring app.
5.4 Test camera functionality: Explore the app’s features to test the functionality of your Ring camera. For example, you can try activating the two-way audio feature to communicate through the camera, manually trigger motion detection, or test the night vision mode (if applicable).
5.5 Watch for notifications: While testing, keep an eye out for notifications on your smartphone or tablet. These can include alerts for detected motion, low battery notifications, or other camera-related updates. Ensure that the notifications are delivered promptly and accurately.
5.6 Check remote access: If you have set up remote access to your Ring camera, such as accessing it while you’re away from home, test this functionality as well. Make sure that you can successfully view the live feed and control the camera’s settings from a remote location.
5.7 Troubleshoot if necessary: If you encounter any issues during testing, refer to the troubleshooting guide provided by Ring. The guide can be accessed through the app or on the Ring website. Follow the recommended steps to resolve any connectivity or performance issues.
By thoroughly testing the connection and functionality of your Ring camera, you can ensure that it is working as intended and providing the security and peace of mind you desire. If everything is functioning smoothly, congratulations! Your Ring camera is ready to help protect your home.
Now that you’ve successfully completed the testing, you can confidently rely on your Ring camera to monitor your property, receive alerts, and keep your home secure. Remember to periodically check for software updates and revisit the camera settings as your needs may change over time.
Conclusion
Connecting your Ring camera to Wi-Fi is a crucial step in fully utilizing its features for home security. By following the steps outlined in this guide, you can successfully set up your Ring camera, install the Ring app, connect it to Wi-Fi, configure the camera settings, and test the connection. Once completed, you’ll have a reliable and effective tool for monitoring your property and enhancing your home’s security.
Throughout the process, it’s important to pay attention to details and ensure that each step is carefully executed. Take the time to properly set up the camera, choose an optimal location, and connect it securely to your Wi-Fi network. Familiarize yourself with the Ring app and its features, allowing you to tailor the camera settings to meet your specific requirements.
By connecting your Ring camera to Wi-Fi, you gain the ability to access live video feeds, receive timely alerts and notifications, and control your camera remotely through the Ring app. This flexibility and convenience provide peace of mind, knowing that you can monitor your home and respond to any activity, even when you’re away.
Remember to regularly check for software updates for both the Ring camera and the Ring app to ensure that you have the latest features and security enhancements. Additionally, familiarize yourself with the troubleshooting resources available through Ring’s support channels in case you encounter any connectivity or performance issues.
With your Ring camera successfully connected to Wi-Fi, you can rest assured that your home is under the watchful eye of a reliable security system. Enjoy the added peace of mind and convenience that comes with being able to monitor your property from anywhere, at any time.
So go ahead, follow the steps outlined in this guide, and connect your Ring camera to Wi-Fi. Take control of your home’s security and enjoy the benefits of having a connected security system at your fingertips.