Introduction
Connecting a DVD player to a Roku TV opens up a world of entertainment options, allowing you to enjoy your favorite movies and TV shows on a larger screen. While most DVD players and Roku TVs come with HDMI ports for easy connection, there might be instances where your DVD player doesn’t have an HDMI output. However, there’s no need to worry as there are alternative methods you can use to connect your DVD player to your Roku TV.
In this article, we will explore different methods that you can try to connect your DVD player to your Roku TV without an HDMI cable. These methods include using an RCA or component cable, a composite AV to HDMI converter, an S-Video cable with a VGA to HDMI converter, a DVD recorder, or a Blu-ray player with component video output. By following these methods, you can enjoy crisp and clear playback of your DVD collection on your Roku TV.
Keep in mind that the specific method you choose will depend on the available ports on your DVD player and Roku TV. Additionally, each method may require additional cables or converters to successfully establish the connection. So, let’s dive into the details of each method and find the best solution for your setup.
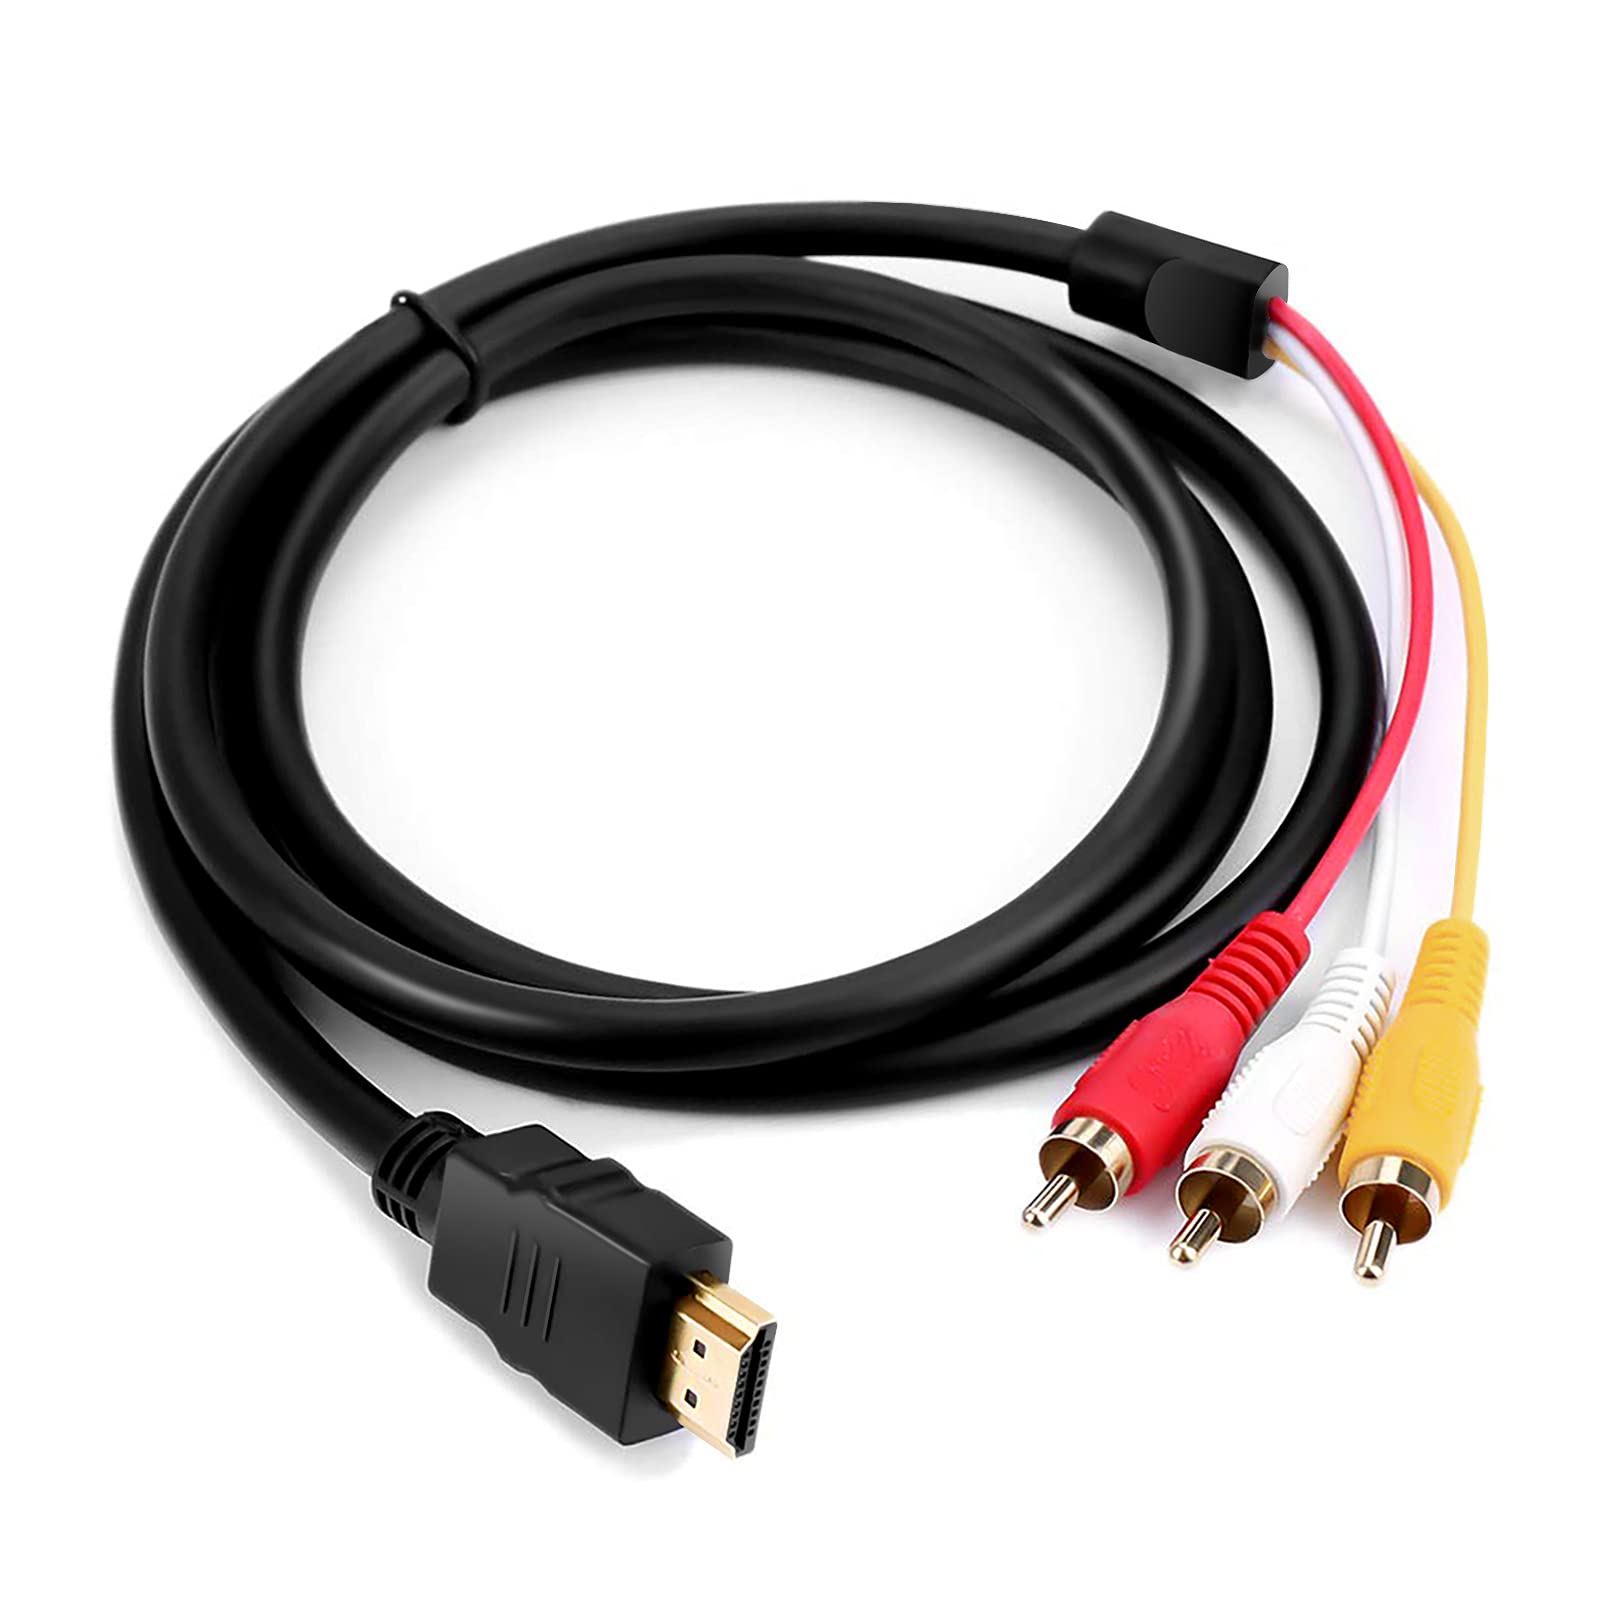
Method 1: Using an RCA or Component Cable
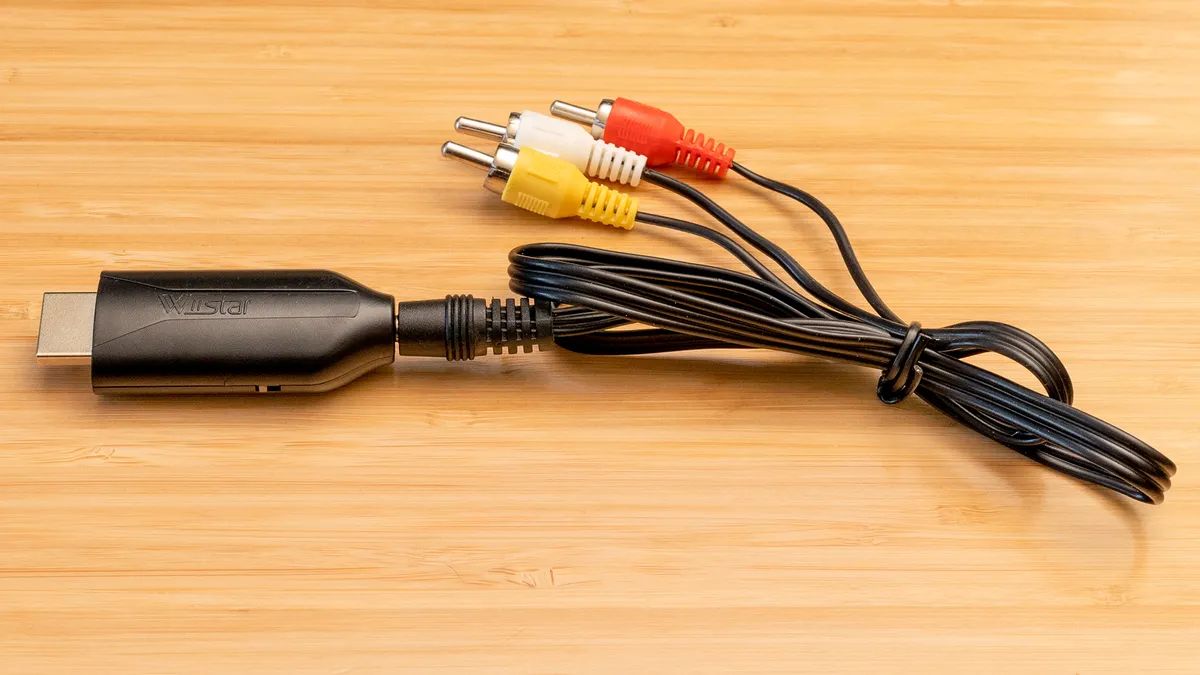
If your DVD player has RCA or component video outputs and your Roku TV has corresponding inputs, you can easily connect the two using an RCA or component cable. This method allows for standard definition (SD) video and stereo audio output.
To begin, make sure your DVD player and Roku TV are turned off. Then, locate the RCA or component video outputs on your DVD player. The RCA connectors will be color-coded with yellow for video and red and white for audio, while the component video outputs will have red, blue, and green connectors for video and red and white connectors for audio.
Next, find the RCA or component video inputs on your Roku TV. These inputs are usually located on the back or side panel and are also color-coded to match the corresponding cables. Insert the RCA or component cable into the respective outputs on the DVD player and inputs on the Roku TV.
Once the connections are secure, power on both the DVD player and the Roku TV. Use the Roku TV remote to navigate to the input source corresponding to the RCA or component video input. You should now see the DVD player’s menu or playback on your Roku TV screen.
It’s important to note that the RCA or component cables only transmit analog video and audio signals, so the picture quality may not be as sharp as HDMI. However, this method still allows you to enjoy DVD playback on your Roku TV without needing an HDMI connection.
Additionally, some DVD players may have progressive scan capability, which enhances the picture quality. If your DVD player supports progressive scan, make sure to enable it in the DVD player’s settings menu for a better viewing experience.
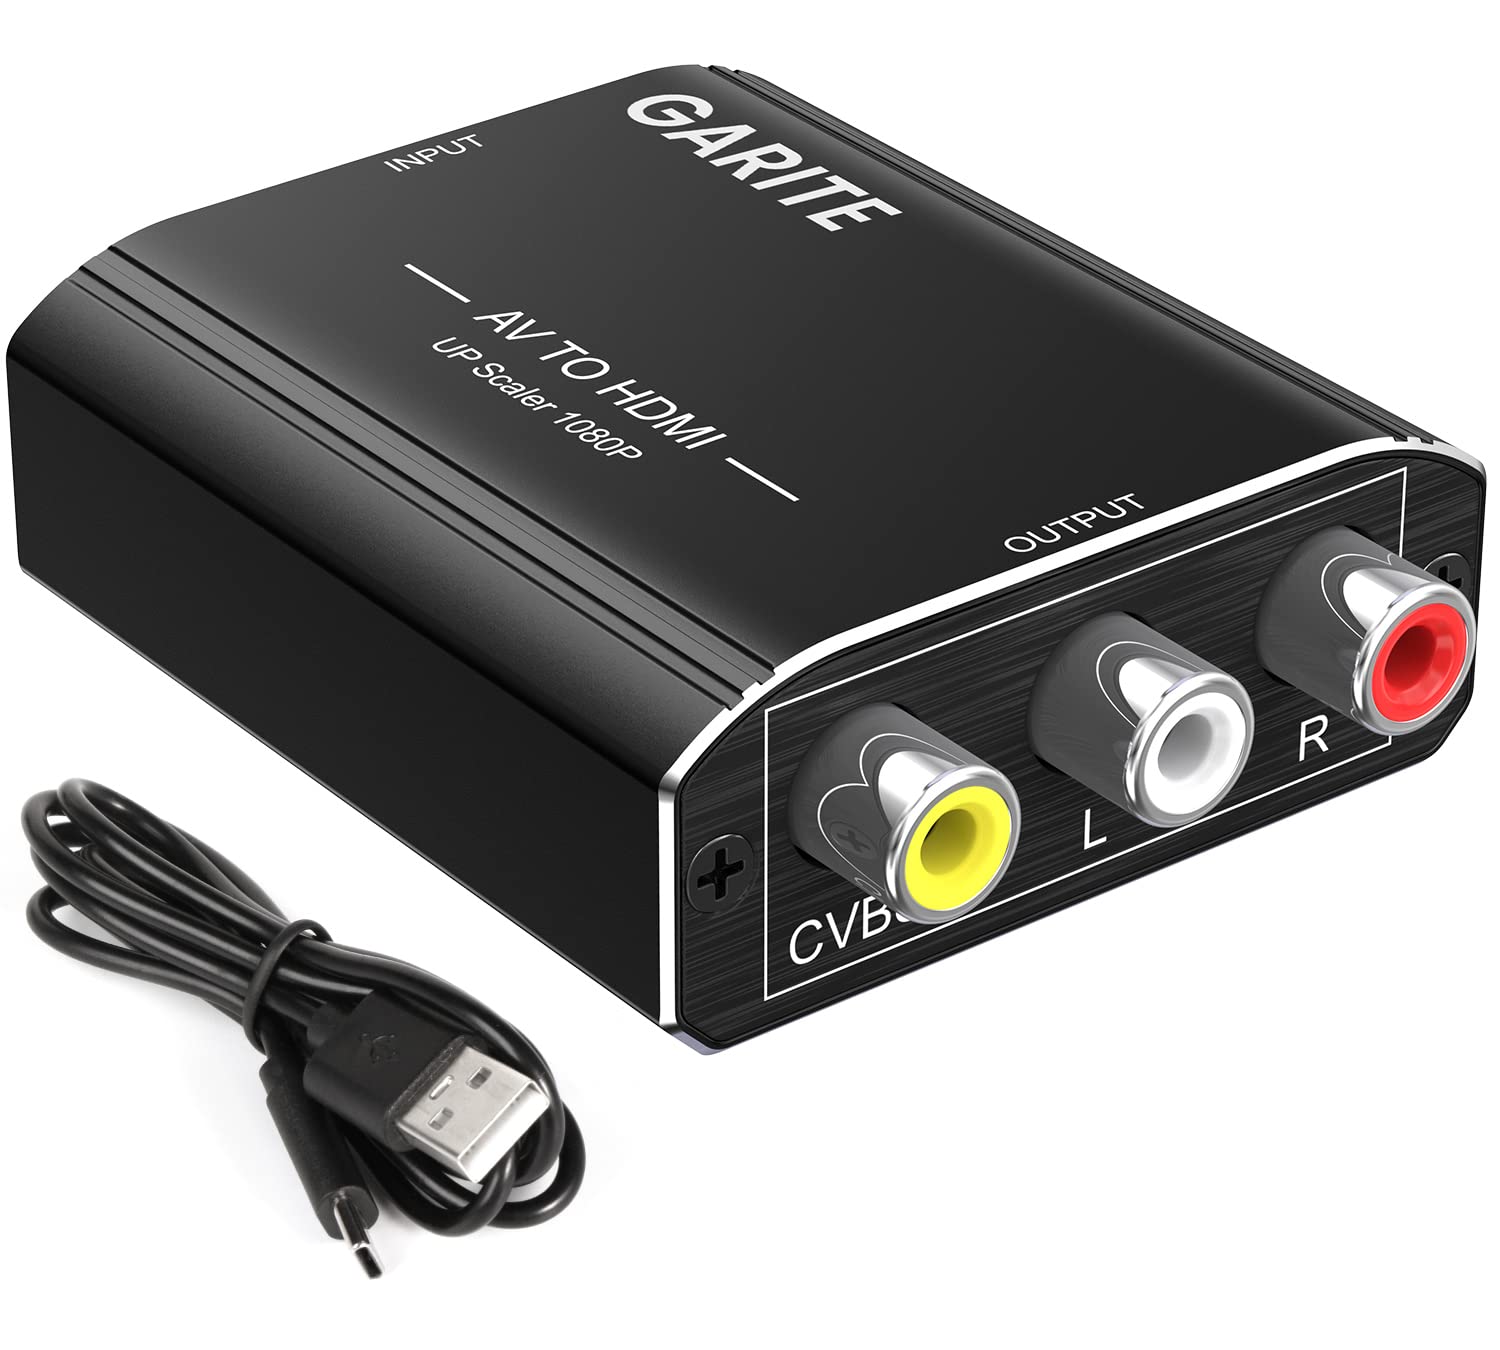
Method 2: Using a Composite AV to HDMI Converter
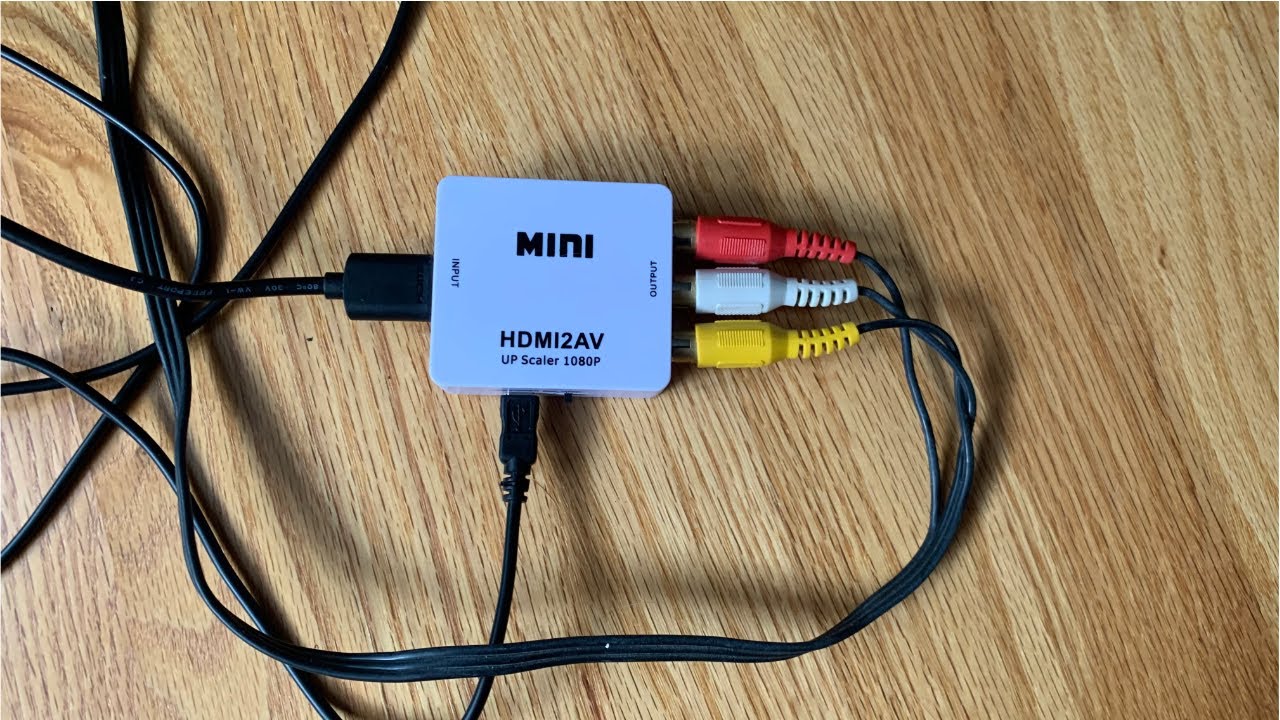
If your DVD player only has composite AV outputs (yellow, red, and white), and your Roku TV does not have corresponding input ports, you can still connect them using a composite AV to HDMI converter. This method allows for SD video and stereo audio conversion to an HDMI signal, ensuring compatibility with your Roku TV.
Start by turning off both the DVD player and the Roku TV. Locate the composite AV outputs on your DVD player, which are usually color-coded with yellow for video and red and white for audio. Then, connect the composite AV cables to their respective outputs on the DVD player.
Next, plug the other end of the composite AV cables into the input ports of the composite AV to HDMI converter. Ensure that you are connecting the correct colors to their corresponding inputs.
Afterward, using an HDMI cable, connect the output port of the converter to an available HDMI input port on your Roku TV. Make note of the HDMI input number used for this connection.
Once the connections are in place, power on both the DVD player and the Roku TV. Use the Roku TV remote to navigate to the HDMI input source that corresponds to the input number used for the converter. You should now see the DVD player’s menu or playback on your Roku TV screen.
The composite AV to HDMI converter will convert the analog video and audio signals from your DVD player into a digital HDMI signal that your Roku TV can understand. Keep in mind that this method may result in a slight degradation in picture and audio quality due to the conversion process.
It’s worth noting that not all composite AV to HDMI converters are created equal. Some may have better signal processing capabilities or additional features such as upscaling to improve image quality. Therefore, it’s recommended to do research and choose a converter that fits your needs and provides the best possible output.
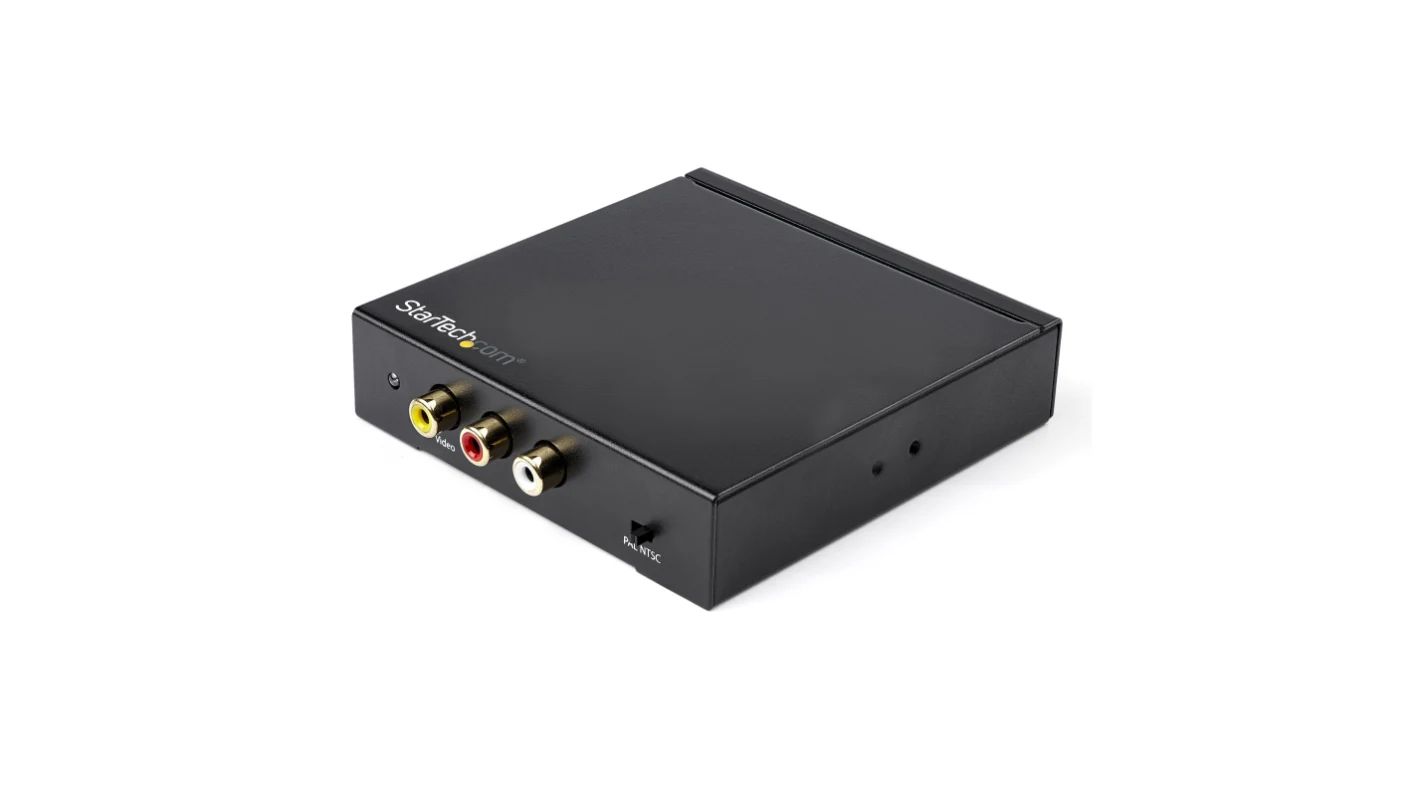
Method 3: Using a S-Video Cable and a VGA to HDMI Converter
If your DVD player has an S-Video output and your Roku TV does not have an S-Video input, you can still connect them using a combination of an S-Video cable and a VGA to HDMI converter. This method allows for better video quality than composite AV connections as S-Video separates the video signal into two components, resulting in a clearer picture.
To begin, turn off both the DVD player and the Roku TV. Locate the S-Video output port on your DVD player and connect one end of the S-Video cable to it. The S-Video connection should have a round multi-pin connector with tiny holes arranged in a circular pattern.
Next, find a VGA to HDMI converter that also supports S-Video input. Connect the other end of the S-Video cable to the S-Video input on the converter. Ensure the connection is secure.
Using a VGA cable, connect the VGA output port on the converter to the VGA input port on your Roku TV. Make sure to tighten the screws on each end to secure the connection.
After the physical connections are made, power on both the DVD player and the Roku TV. Use your Roku TV remote to navigate to the VGA input source corresponding to the connection you made. You should now see the DVD player’s menu or playback on your Roku TV screen.
The VGA to HDMI converter will convert the analog S-Video signal into a digital HDMI signal that your Roku TV can understand. However, it’s important to note that this method only transfers video signals, not audio. You will need to connect separate audio cables from the DVD player’s audio outputs (usually red and white) to the corresponding audio inputs on your Roku TV or an external audio device.
Keep in mind that the quality of the S-Video connection and the VGA to HDMI converter will determine the final video output. It’s recommended to choose a high-quality converter that supports S-Video and offers good signal processing capabilities to ensure optimal video quality.
Method 4: Using a DVD Recorder
If you have a DVD recorder with HDMI output and your Roku TV has HDMI input, you can use the DVD recorder as an intermediary device to connect your DVD player to the TV. This method allows you to leverage the DVD recorder’s capabilities to play DVDs and pass the digital signal to your Roku TV.
Before starting, ensure that your DVD player and Roku TV are turned off. Connect an HDMI cable from the HDMI output port on your DVD player to the HDMI input port on the DVD recorder.
Next, connect another HDMI cable from the HDMI output port on the DVD recorder to an available HDMI input port on your Roku TV.
Once the physical connections are in place, power on the DVD player, DVD recorder, and Roku TV. Use the Roku TV remote to select the HDMI input source that corresponds to the HDMI port connected to the DVD recorder. This will display the DVD recorder’s menu or playback on your Roku TV screen.
With this setup, you can use the DVD recorder to play your DVDs and utilize its features, such as recording, editing, or even transferring content to other external devices. The DVD recorder acts as a bridge between your DVD player and Roku TV, allowing you to enjoy DVD content without direct HDMI connectivity.
It’s worth noting that the quality of the video and audio will depend on the capabilities of your DVD recorder. Look for a DVD recorder that supports HDMI output and offers good signal processing to ensure optimal playback quality.
Also, keep in mind that this method introduces an additional device into your setup, which may require additional power and remote control management. Make sure to follow the DVD recorder’s instructions and adjust any necessary settings to ensure smooth operation and playback.
Method 5: Using a Blu-ray Player with Component Video Output
If you have a Blu-ray player with component video outputs (red, blue, and green) and your Roku TV has corresponding component video inputs, you can connect them using component video cables. This method allows for high-definition (HD) video playback on your Roku TV.
Start by turning off the Blu-ray player and Roku TV. Locate the component video outputs on your Blu-ray player. The component video connectors are typically color-coded with red, blue, and green for video, and red and white for audio.
Next, find the corresponding component video inputs on your Roku TV. These inputs are usually grouped together and also color-coded to match the cables. Insert the component video cables into the respective outputs on the Blu-ray player and inputs on the Roku TV.
Once the connections are secure, power on both the Blu-ray player and the Roku TV. Use the Roku TV remote to navigate to the input source corresponding to the component video input you used. You should now see the Blu-ray player’s menu or playback on your Roku TV screen in high-definition.
When using a Blu-ray player with component video output, you can take advantage of the high-quality video playback capabilities of Blu-ray discs. This method allows you to enjoy stunning high-definition visuals on your Roku TV, providing a cinematic experience in the comfort of your living room.
It’s important to note that component video cables only transmit video signals, not audio. Therefore, you will need to connect separate audio cables from the Blu-ray player’s audio outputs (red and white) to the corresponding audio inputs on your Roku TV or an external audio device to ensure complete audio playback.
Remember that component video cables can transmit HD video signals, but they do not support the latest standards like HDMI. While this method provides excellent video quality, it may not offer the same level of convenience or advanced features as an HDMI connection.
Lastly, keep in mind that some Blu-ray players may have additional features such as internet connectivity or streaming apps. Explore the capabilities of your Blu-ray player to further enhance your entertainment options on your Roku TV.
Conclusion
Connecting a DVD player to a Roku TV without HDMI is still possible using alternative methods. Whether you have an RCA or component video output, composite AV output, S-Video output, a DVD recorder, or a Blu-ray player with component video output, there are various ways to enjoy DVD playback on your Roku TV.
By following these methods and utilizing the appropriate cables or converters, you can establish a connection between your DVD player and Roku TV, allowing you to enjoy your favorite movies and TV shows on a larger screen. While some methods may offer higher video quality, such as the component or Blu-ray player option, others may provide a more basic and cost-effective solution, like using RCA or composite AV cables.
Keep in mind that the quality of the video and audio may vary depending on the method used and the capabilities of your devices. Additionally, it’s important to consider any additional features or limitations associated with each method, such as the need for separate audio cables or the availability of advanced features like internet connectivity or recording.
Before making a decision, take into account the specific ports and inputs available on your DVD player and Roku TV, as well as your desired video and audio quality. It is also recommended to consult the user manuals of your devices for detailed instructions and compatibility information.
Overall, with the versatility offered by these alternative methods, you can find a suitable solution to connect your DVD player to your Roku TV and enjoy an extended range of entertainment options. So, select the method that best fits your requirements, sit back, and get ready to immerse yourself in the world of DVD playback on your Roku TV.