Introduction
Connecting a PC to a television opens up a world of possibilities for entertainment and productivity. Whether you want to enjoy your favorite movies and TV shows on a bigger screen or give a presentation for work or school, connecting your PC to a television can significantly enhance your viewing experience. In this guide, we will walk you through the steps to connect your PC to a television using various connectivity options.
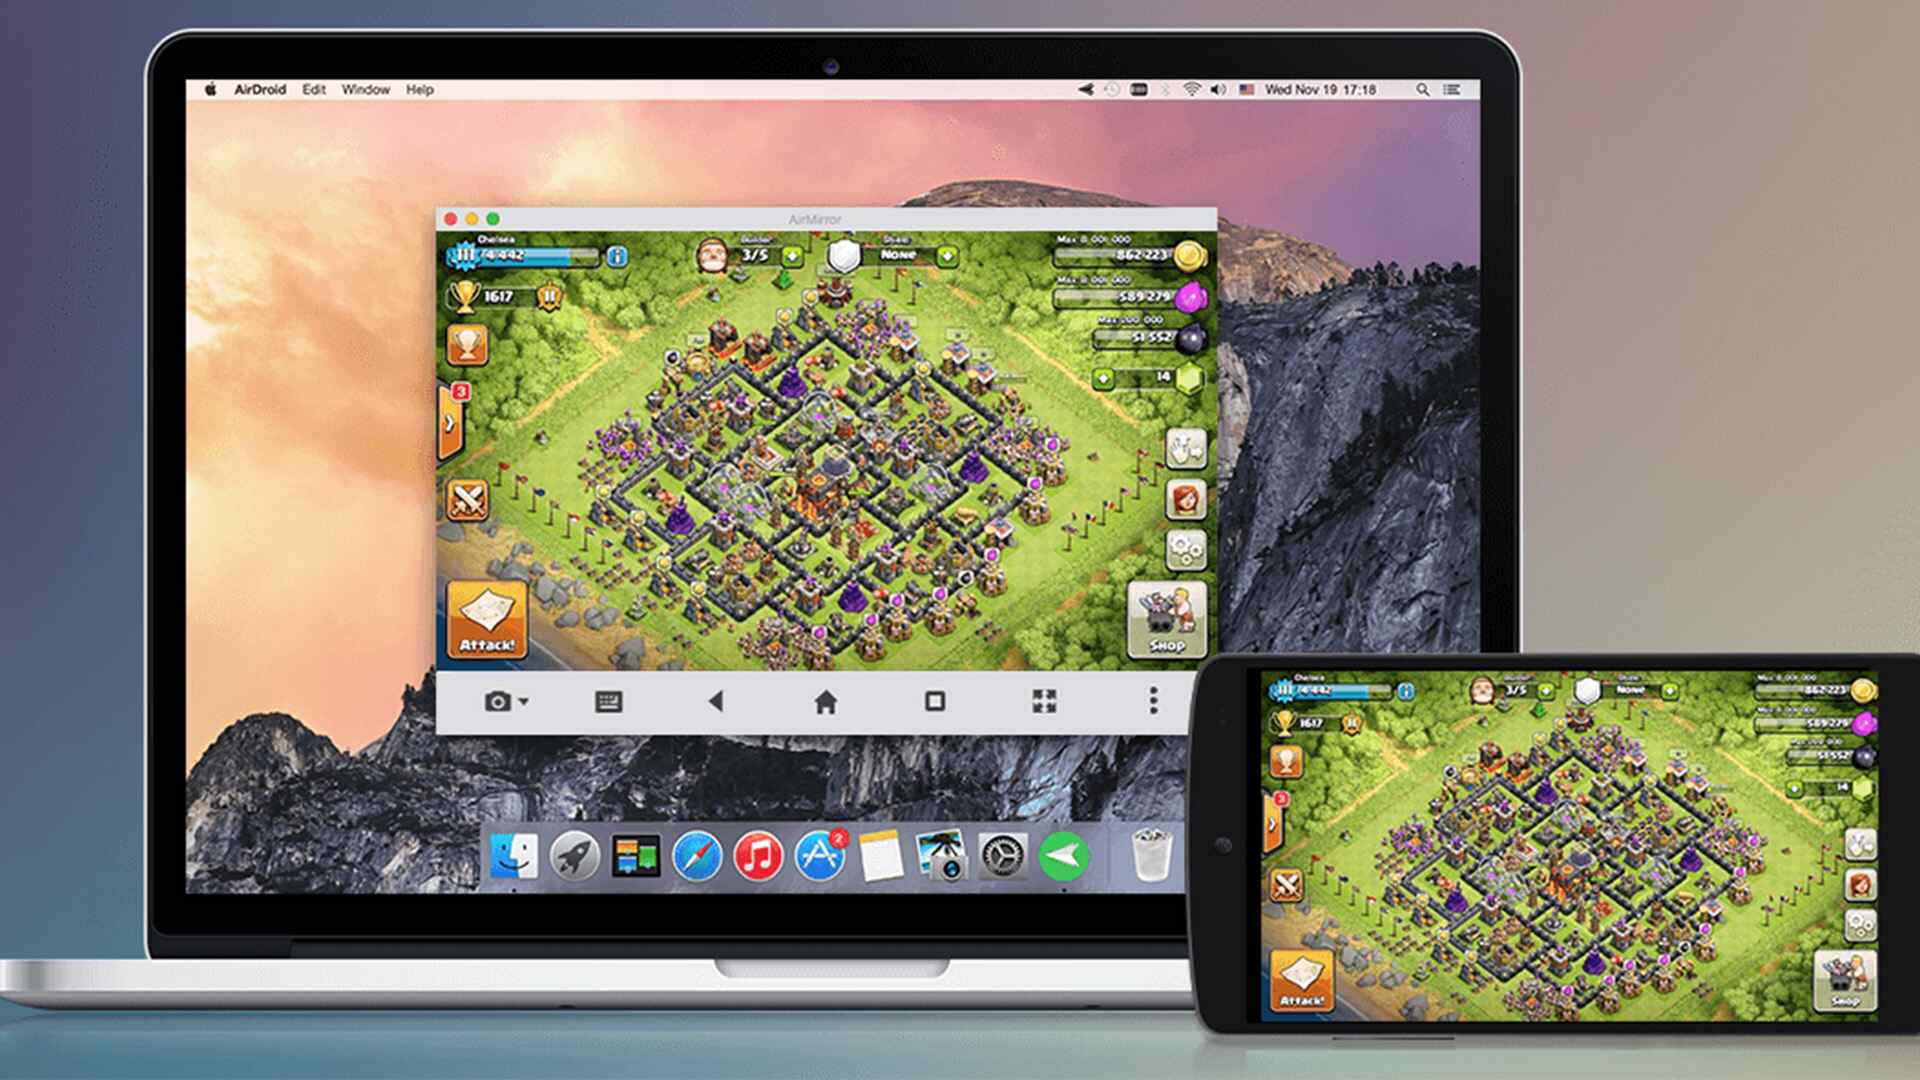
Before we dive into the nitty-gritty, it’s essential to determine the available connectivity options on both your PC and television. This will help you select the most suitable method for connecting the two devices seamlessly. The most common connectivity options include HDMI, VGA, DVI, and wireless connections such as Miracast or Chromecast.
Depending on the ports available on your PC and television, you may need to gather the necessary cables and adapters. HDMI cables are the most common and offer excellent audio and video quality. VGA and DVI cables are older standards but can still be used if your devices don’t have HDMI ports. Additionally, wireless connections provide a convenient way to connect your PC to the television.
Once you have the right cables and adapters, we will guide you through the step-by-step process of connecting your PC to the television using each of the available options. We’ll cover adjusting the display settings on your PC to ensure the best picture quality and resolution on the TV screen.
In case you encounter any issues during the connection process, we’ll provide troubleshooting tips to help you overcome common problems. By following our guide, you’ll be able to enjoy the benefits of having a connected PC and television setup in no time.
Now, let’s dive into the steps required to connect your PC to a television using different connectivity options.
Step 1: Determine the Available Connectivity Options
The first step towards connecting your PC to a television is to determine the available connectivity options on both devices. This will help you choose the most suitable method for establishing a connection.
Most modern PCs and televisions come equipped with various connectivity ports, including HDMI, VGA, DVI, and USB. It’s important to check the available ports on your PC and television to ensure compatibility.
If your PC has an HDMI port and your television also has an HDMI port, this is the most straightforward and convenient option. HDMI cables transmit both high-definition video and audio signals, making it the preferred choice for connecting your PC to a television.
If your PC or television doesn’t have an HDMI port, you can consider other options. VGA and DVI ports are common on older computers and televisions. VGA cables transmit video signals, but they don’t transmit audio, so you will need a separate audio cable. DVI cables can transmit both video and audio, but you may require an adapter to connect it to your television.
In addition to wired connections, several wireless options are available, such as Miracast and Chromecast. These wireless technologies allow you to stream content from your PC to the television without the need for cables. However, they require both your PC and television to support the specific wireless technology.
To determine the available connectivity options on your PC and television, identify the ports and refer to the user manuals or specifications. Once you know the available options, you can proceed to the next step and gather the necessary cables and adapters for the desired connection method.
Now that you have determined the available connectivity options, it’s time to move on to the next step: preparing the necessary cables and adapters.
Step 2: Prepare the Necessary Cables and Adapters
After determining the available connectivity options for connecting your PC to a television, the next step is to gather the necessary cables and adapters. This ensures that you have all the components required to establish a successful connection.
If you have chosen the HDMI connection method, you will need an HDMI cable. These cables are widely available and offer excellent quality for both video and audio transmission. Make sure to check the length of the cable to ensure it reaches between your PC and television comfortably.
In the case that your PC or television does not have an HDMI port, you will need to consider alternative options such as VGA or DVI connections. For VGA connections, you will need a VGA cable to transmit the video signal, and a separate audio cable if your television requires it. DVI connections may require a DVI-to-HDMI or DVI-to-VGA adapter depending on the ports available on your devices.
If you prefer a wireless connection, check if your PC and television support technologies like Miracast or Chromecast. In such cases, you won’t need cables or adapters, but make sure that both devices are compatible with the desired wireless technology.
When gathering your cables and adapters, it’s essential to ensure their quality. Poor quality cables and adapters can lead to signal degradation and affect the overall display quality. Opt for cables and adapters from reputable brands to ensure reliable performance.
By preparing the necessary cables and adapters according to the connectivity option you have chosen, you can proceed to the next step: connecting your PC to the television.
Step 3: Connect the PC to the Television via HDMI
One of the most common and straightforward methods to connect a PC to a television is through an HDMI (High-Definition Multimedia Interface) cable. HDMI cables transmit both high-quality audio and video signals, offering a seamless connection experience.
To connect your PC to the television via HDMI, follow these steps:
- Locate the HDMI port on your PC. It is usually located on the side or the back of the CPU. If you are using a laptop, the HDMI port might be on the side or back of the device.
- Identify the HDMI port on your television. It is typically located on the back or side panel.
- Take one end of the HDMI cable and insert it into the HDMI port on your PC.
- Connect the other end of the HDMI cable to the HDMI port on your television.
- Once the cable is securely connected, power on your PC and television.
- Using the television’s remote control, switch the input source to the HDMI port you connected the cable to. This will ensure that the television receives the signal from your PC.
- On your PC, you may need to adjust the display settings to extend or duplicate the screen onto the television. This can be done by right-clicking on the desktop, selecting “Display settings” or “Graphics properties,” and choosing the desired display mode.
After following these steps, you should now see your PC’s display mirrored or extended on the television screen. Ensure that both the PC and television are set to the appropriate resolution for the best picture quality.
With the HDMI connection method, you can enjoy high-definition videos, movies, presentations, and more on the larger screen of your television. However, if your PC or television does not have an HDMI port, don’t worry. There are other options available, which we will explore in the subsequent steps.
Step 4: Adjust the Display Settings on the PC
After successfully connecting your PC to the television via HDMI, the next step is to adjust the display settings on your PC to ensure the best picture quality and resolution on the TV screen.
Here’s how you can adjust the display settings on your PC:
- Right-click on the desktop and select “Display settings” or “Graphics properties” from the context menu. This will open the display settings window.
- In the display settings window, you will see a section labeled “Multiple displays” or “Display mode.” Here, you can choose how you want your PC to interact with the television. The options typically include:
- Extend these displays: This option allows you to extend your desktop onto the television, effectively creating a dual-screen setup. You can drag windows and applications between the PC and TV screens.
- Duplicate these displays: This option mirrors your PC’s screen onto the television, displaying the same content on both screens.
- Show only on 1 or 2: This option allows you to use either the PC’s screen or the television screen exclusively.
- Select the desired display mode based on your preference. If you want to use the television as a secondary display, choose the “Extend these displays” option.
- Once you have selected the desired display mode, you can further customize the display settings by adjusting the screen resolution, orientation, and other display-related options.
- Make sure to select the correct resolution for your television to ensure a sharp and clear picture. You can experiment with different resolutions to find the one that suits your needs.
- Click on the “Apply” button to save the changes. If the screen goes blank during this process, don’t worry. It is normal while the settings are being applied.
By adjusting the display settings on your PC, you can optimize the visuals and ensure that your PC and television work seamlessly together. If needed, you can always go back to the display settings and make further adjustments to meet your specific requirements.
In the next step, we’ll explore an alternative connection method using VGA or DVI cables for PCs or televisions that do not have an HDMI port.
Step 5: Connect the PC to the Television via VGA/DVI
If your PC or television does not have an HDMI port or you prefer an alternative connection method, you can use VGA (Video Graphics Array) or DVI (Digital Visual Interface) cables to establish a connection. While these options may not provide the same level of audio and video quality as HDMI, they can still deliver a satisfactory viewing experience.
To connect your PC to the television via VGA or DVI, follow these steps:
- Check if your PC has a VGA or DVI port. VGA ports are usually blue, while DVI ports can be white or black with a horizontal line of pins.
- Similarly, identify the VGA or DVI port on your television. These ports are typically labeled as VGA or DVI.
- Take one end of the VGA or DVI cable and insert it into the respective port on your PC.
- Connect the other end of the cable to the corresponding port on your television.
- Next, if you are using a VGA connection, you will need a separate audio cable to transmit the audio signal from your PC to the television. Connect one end of the audio cable to your PC’s audio output port and the other end to the audio input port on the television.
- Once the connections are secure, power on your PC and television.
- On your television’s remote control, switch the input source to VGA or DVI, depending on the connection you made.
- Now, on your PC, right-click on the desktop and select “Display settings” or “Graphics properties.”
- In the display settings window, select the appropriate display mode based on your preference, such as extending the displays or duplicating them. Adjust the screen resolution to match your television for optimal picture quality.
- Click on “Apply” to save the changes. If the screen goes blank temporarily, don’t worry; it’s normal during the settings adjustment.
By following these steps, you can successfully connect your PC to the television using VGA or DVI cables. Remember to adjust the display settings on your PC to customize the viewing experience and maximize the picture quality.
If both HDMI and VGA/DVI options are not available or suitable for your setup, consider exploring wireless connection methods, which we will discuss in the next step.
Step 6: Adjust the Display Settings on the PC
After successfully connecting your PC to the television via VGA or DVI cables, the next step is to adjust the display settings on your PC to ensure the best picture quality and resolution on the TV screen.
Follow these steps to adjust the display settings on your PC:
- Right-click on the desktop and select “Display settings” or “Graphics properties.”
- In the display settings window, you will see a section labeled “Multiple displays” or “Display mode.” Here, you can choose how you want your PC to interact with the television. The options typically include:
- Extend these displays: This option allows you to extend your desktop onto the television, effectively creating a dual-screen setup. You can drag windows and applications between the PC and TV screens.
- Duplicate these displays: This option mirrors your PC’s screen onto the television, displaying the same content on both screens.
- Show only on 1 or 2: This option allows you to use either the PC’s screen or the television screen exclusively.
- Select the desired display mode based on your preference. If you want to use the television as a secondary display, choose the “Extend these displays” option.
- Once you have selected the desired display mode, you can further customize the display settings by adjusting the screen resolution, orientation, and other display-related options.
- Make sure to select the correct resolution for your television to ensure a sharp and clear picture. You may need to experiment with different resolutions to find the one that suits your needs.
- Click on the “Apply” button to save the changes. If the screen goes blank during this process, don’t worry, as it is normal while the settings are being applied.
By adjusting the display settings on your PC, you can optimize the visuals and ensure that your PC and television work seamlessly together. Take the time to explore the various display options and resolutions to find the combination that provides the best viewing experience for your setup.
In the next step, we’ll explore another alternative for connecting your PC to the television wirelessly.
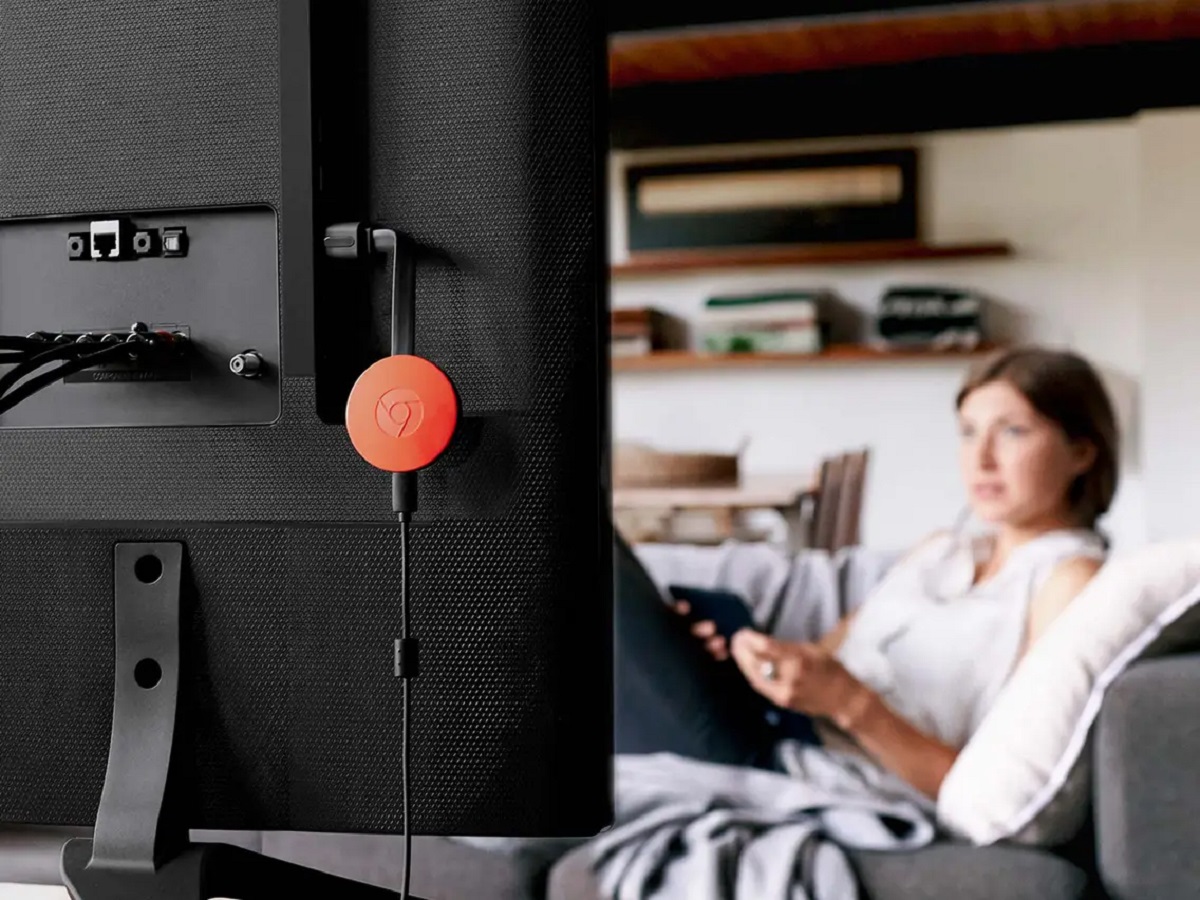
Step 7: Connect the PC to the Television Wirelessly
If you prefer a cable-free setup or if your PC and television do not have compatible ports for a wired connection, you can explore wireless options to connect your PC to the television. This step will guide you through the process of connecting your PC to the television wirelessly.
Wireless connectivity options, such as Miracast or Chromecast, allow you to mirror or stream content from your PC to the television using Wi-Fi signals.
To connect your PC to the television wirelessly, follow these steps:
- Ensure that both your PC and television support the same wireless technology, such as Miracast or Chromecast.
- On your PC, go to the settings or control panel and navigate to the wireless display settings.
- Enable the wireless display feature on your PC. The name and location of this setting may vary depending on your operating system.
- On your television, switch the input source to the appropriate setting that corresponds to the wireless display or casting feature. Refer to your television’s user manual for specific instructions.
- On your PC, search for available wireless display devices or select the television from the list of devices detected.
- Follow the on-screen prompts to establish the wireless connection between your PC and television.
- Once the connection is established, your PC’s screen will be mirrored or streamed to the television wirelessly.
It’s important to note that the specific steps and options may vary depending on the devices and wireless technology you are using. Make sure to refer to the user manual or online resources for detailed instructions tailored to your specific devices.
Wireless connections offer convenience and flexibility, allowing you to enjoy content from your PC on the larger screen of your television without the hassle of cables. However, it’s essential to ensure that both your PC and television support the same wireless technology for a successful connection.
In the next step, we’ll discuss troubleshooting common issues that you may encounter during the connection process.
Step 8: Adjust the Display Settings on the PC
After successfully connecting your PC to the television wirelessly, the next step is to adjust the display settings on your PC to ensure the best viewing experience on the TV screen.
Follow these steps to adjust the display settings on your PC:
- Right-click on the desktop and select “Display settings” or “Graphics properties.”
- In the display settings window, you will see a section labeled “Multiple displays” or “Display mode.” Here, you can choose how you want your PC to interact with the television. The options typically include:
- Extend these displays: This option allows you to extend your desktop onto the television, effectively creating a dual-screen setup. You can drag windows and applications between the PC and TV screens.
- Duplicate these displays: This option mirrors your PC’s screen onto the television, displaying the same content on both screens.
- Show only on 1 or 2: This option allows you to use either the PC’s screen or the television screen exclusively.
- Select the desired display mode based on your preference. If you want to use the television as a secondary display, choose the “Extend these displays” option.
- Once you have selected the desired display mode, you can further customize the display settings by adjusting the screen resolution, orientation, and other display-related options.
- Make sure to select the correct resolution for your television to ensure sharp and clear picture quality. Experiment with different resolutions to find the one that suits your needs best.
- Click on the “Apply” button to save the changes. If the screen goes blank temporarily, don’t worry; it’s normal while the settings are being applied.
By adjusting the display settings on your PC, you can optimize the visuals and ensure that your PC and television work flawlessly together wirelessly. Take the time to explore the various display options and resolutions to find the combination that provides the best viewing experience for your setup.
Now that your PC is successfully connected to the television wirelessly and the display settings are adjusted, you can enjoy the convenience of wirelessly streaming content from your PC to the larger screen of your television.
In the next step, we’ll provide troubleshooting tips to help you overcome common issues that may arise during the connection process.
Step 9: Troubleshooting Common Issues
While connecting your PC to a television is a relatively straightforward process, you may encounter some common issues along the way. In this step, we’ll provide troubleshooting tips to help you overcome these challenges and ensure a successful connection.
Here are some common issues you may face and their respective solutions:
No Signal or Black Screen
If you’re unable to see any signal or experience a black screen on your television after making the connection, try the following:
- Ensure that the cables are securely plugged into both your PC and television.
- Double-check that you’ve selected the correct input source on your television.
- Restart both your PC and television, and check if the connection is established upon reboot.
- If using HDMI, try connecting to a different HDMI port on your television.
- Verify that the HDMI, VGA, or DVI output option is enabled on your PC. Check your PC’s user manual or online resources for instructions specific to your device.
Poor Picture or Sound Quality
If you’re experiencing degraded picture or sound quality, try the following steps:
- Ensure that you are using high-quality cables and adapters. Poor-quality cables can result in signal degradation.
- If using VGA or DVI connections, check if your cables or adapters are faulty. Try using a different cable or adapter to see if it improves the quality.
- Adjust the display settings on your PC to match the resolution and refresh rate supported by your television.
- Verify that the audio settings are properly configured on your PC and television. Make sure that the right audio output source is selected.
Intermittent Connectivity or Disconnections
If your PC’s connection to the television is intermittent or keeps disconnecting, try the following:
- Ensure that both your PC and television are within the range of the wireless network if using a wireless connection. Check for any interference that may disrupt the signal.
- Restart your PC, television, and wireless router to refresh the network connections.
- Update the drivers for your PC’s wireless adapter. Visit the manufacturer’s website for the latest driver updates.
- If using a wireless casting device like Chromecast, ensure that it is up to date with the latest firmware.
If the above troubleshooting steps don’t resolve the issue, consult the user manuals or online resources specific to your PC and television models. Alternatively, you may reach out to the customer support of the respective manufacturers for further assistance.
By following these troubleshooting tips, you can overcome common issues that arise during the connection process and enjoy a seamless experience of using your PC with the television.
Congratulations! You have successfully connected your PC to the television and resolved any issues that may have occurred along the way. Now you can enjoy your favorite content on the big screen with enhanced visuals and sound.
Conclusion
Connecting your PC to a television opens up a world of entertainment and productivity possibilities. Whether you want to enjoy movies, videos, or presentations on a larger screen or create a dual-screen setup, knowing how to connect your PC to a television is a valuable skill. By following the steps outlined in this guide, you can establish a connection using various connectivity options.
In Step 1, you determined the available connectivity options on your PC and television, such as HDMI, VGA, DVI, or wireless connections. In Step 2, you prepared the necessary cables and adapters based on your chosen connection method. Steps 3 and 4 guided you through connecting your PC to the television via HDMI and adjusting the display settings on your PC for optimal viewing experience.
If HDMI was not available, Steps 5 and 6 provided instructions on connecting your PC to the television using VGA or DVI cables and adjusting the display settings accordingly. In Step 7, you learned how to connect your PC to the television wirelessly using Miracast or Chromecast. Step 8 involved adjusting the display settings on your PC to ensure the best visual experience.
Finally, in Step 9, you gained troubleshooting tips to address common issues that might arise during the connection process.
Now that you have successfully connected your PC to the television and resolved any challenges, you can enjoy a new level of convenience and immersion in your multimedia activities. Whether you want to stream movies, play games, give presentations, or multitask with an extended desktop, your connected PC and television setup will enhance your entertainment and productivity.
Remember to refer to the user manuals or online resources of your specific devices for detailed instructions tailored to your setup. Should you encounter any difficulties, don’t hesitate to reach out to customer support for further assistance.
Enjoy your newfound connection and the countless possibilities it brings!