Introduction
Welcome to our guide on how to connect a Bluetooth keyboard! As technology continues to advance, wireless devices have become increasingly popular, and Bluetooth keyboards offer a convenient and clutter-free alternative to traditional wired keyboards. Whether you’re using a computer, tablet, or smartphone, this step-by-step tutorial will walk you through the process of connecting a Bluetooth keyboard to your device.
Bluetooth technology enables devices to communicate wirelessly over short distances, eliminating the need for physical cables. With a Bluetooth keyboard, you can enjoy the benefits of mobility and flexibility, allowing you to type comfortably from a distance or even while lounging on the couch.
In this guide, we’ll cover the basic steps involved in connecting a Bluetooth keyboard to your device. We’ll also address common issues that you may encounter along the way and provide troubleshooting tips to help you overcome them.
We understand that technology can sometimes be intimidating, but rest assured that connecting a Bluetooth keyboard is a straightforward process. By following these simple instructions, you’ll be typing away on your wireless keyboard in no time.
Before we begin, it’s important to note that the exact steps may vary slightly depending on your specific device and operating system. However, the general process remains the same, and we’ll do our best to cover different scenarios.
So, if you’re ready to untether yourself from cables and embrace the freedom of a wireless keyboard, let’s get started with Step 1: Turn on the Bluetooth.
Step 1: Turn on the Bluetooth
The first step in connecting your Bluetooth keyboard is to ensure that the Bluetooth functionality on your device is turned on. Bluetooth is a wireless technology that allows devices to connect and communicate with each other.
To turn on Bluetooth on your device:
- Open the Settings menu on your device. This can usually be found by tapping the gear icon on the home screen or by swiping down from the top of the screen and selecting the settings gear.
- Look for the Bluetooth option within the Settings menu. It is often represented by a Bluetooth symbol or an option labeled “Bluetooth.”
- Toggle the Bluetooth switch to the “On” position. This will activate the Bluetooth functionality on your device.
After enabling Bluetooth, your device will start searching for nearby Bluetooth-enabled devices to connect with. However, before attempting to pair your keyboard, it’s important to put it into “discovery” or “pairing” mode, which we’ll cover in the next step.
Keeping Bluetooth turned on while not in use may drain your device’s battery faster, so it’s a good practice to turn it off when you’re finished using the keyboard or don’t need a wireless connection. This will help conserve battery life and improve overall performance.
Now that you’ve turned on Bluetooth, let’s move on to Step 2: Put the Keyboard in Discovery or Pairing Mode.
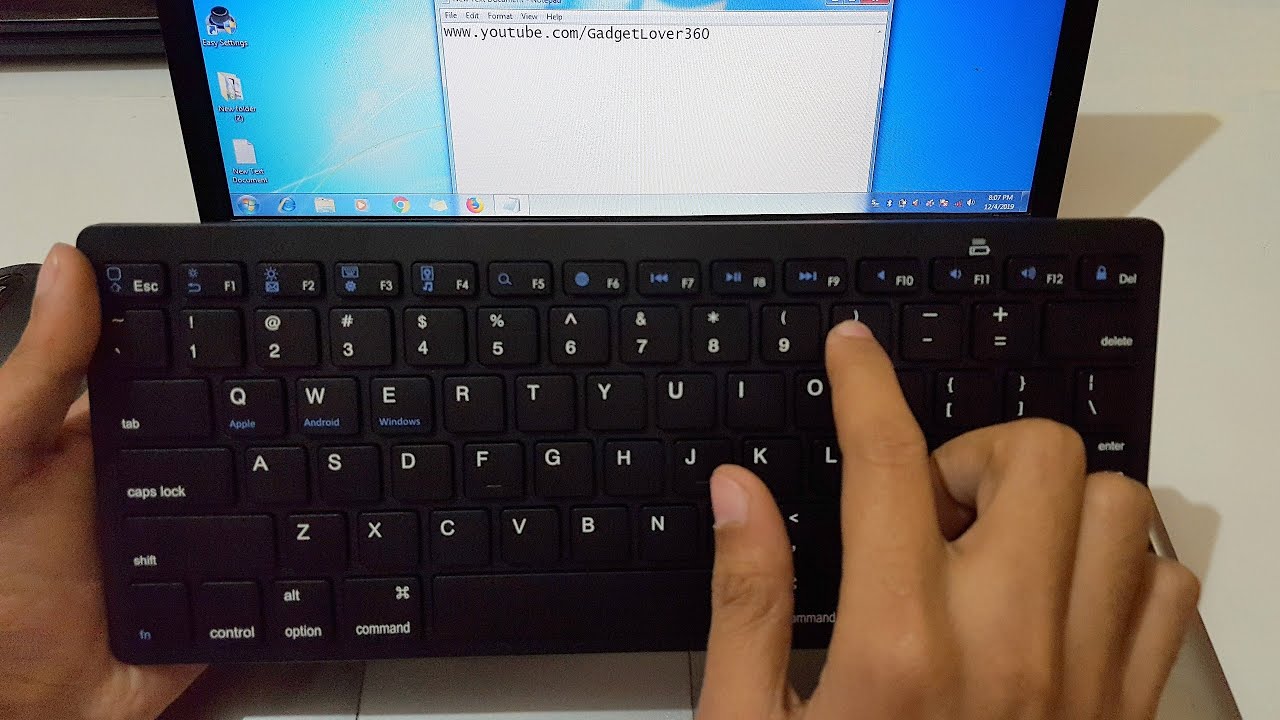
Step 2: Put the Keyboard in Discovery or Pairing Mode
Before you can connect your Bluetooth keyboard to your device, you need to put the keyboard in discovery or pairing mode. This enables the keyboard to broadcast its presence and allows your device to detect and establish a connection with it.
The process of putting a keyboard in discovery or pairing mode can vary depending on the manufacturer and model. Here are some general steps to follow:
- Check the user manual or manufacturer’s website: Look for specific instructions on how to put your keyboard into discovery or pairing mode. Manufacturers often provide detailed guides or support documents tailored to their products.
- Press and hold the pairing or connect button: Many Bluetooth keyboards have a dedicated button or switch that you need to press and hold to initiate the discovery or pairing mode. This button is often labeled with a Bluetooth symbol or a word like “Connect” or “Pair.”
- Observe the keyboard’s LED indicator: Some keyboards have LED lights that indicate the pairing mode. These lights may blink or change color to signify that the keyboard is ready to connect.
- Wait for the device to detect the keyboard: After activating the discovery or pairing mode, give your device a few moments to scan for available Bluetooth devices. Your keyboard should appear in the list of detected devices on your device’s screen. If not, try restarting the discovery mode on your keyboard or refreshing the Bluetooth settings on your device.
- Confirm the keyboard’s connection status: Once your device detects the keyboard, it will display the keyboard’s name or model on the screen. This indicates that the keyboard is ready to be connected.
Remember that the specific steps may differ depending on the keyboard model and manufacturer. Still, the general idea is to activate the discovery or pairing mode and wait for your device to recognize the keyboard.
With your Bluetooth keyboard in discovery or pairing mode, you’re now ready to move on to Step 3: Open Bluetooth Settings on Your Device.
Step 3: Open Bluetooth Settings on Your Device
Once you’ve put your Bluetooth keyboard in discovery or pairing mode, it’s time to navigate to the Bluetooth settings on your device. These settings allow you to manage and connect to various Bluetooth devices, including your keyboard.
To open the Bluetooth settings on your device, follow these steps:
- Go to the Settings menu on your device. This can usually be accessed by tapping the gear icon on your home screen or by swiping down from the top of the screen and selecting the settings gear.
- Look for the Bluetooth option within the Settings menu. It is often represented by a Bluetooth symbol or an option labeled “Bluetooth.”
- Tap on the Bluetooth option to open the Bluetooth settings.
Once you’re in the Bluetooth settings, you’ll see a list of available Bluetooth devices that your device has detected. This list may include previously paired devices as well as new devices in discovery mode.
It’s important to note that the appearance and organization of the Bluetooth settings may vary depending on your device’s operating system. However, the overall functionality remains the same.
Now that you’re in the Bluetooth settings on your device, you’re one step closer to connecting your Bluetooth keyboard. In the next step, we’ll guide you through scanning for available devices.
Step 4: Scan for Available Devices
After opening the Bluetooth settings on your device, the next step is to scan for available devices. This allows your device to search and identify Bluetooth-enabled devices within its range, including your Bluetooth keyboard.
Here’s how to scan for available devices:
- In the Bluetooth settings on your device, look for a button or option that allows you to scan for devices. This may be labeled as “Scan,” “Search,” or represented by a magnifying glass icon.
- Tap on the scan button or select the option to start the scanning process.
- Your device will now search for nearby Bluetooth devices, including your Bluetooth keyboard, and display them in a list on the screen.
The scanning process may take a few moments, so be patient while your device searches for available devices. Depending on your device’s operating system, you may also have the option to specify the type of device you’re searching for, such as a keyboard or accessory, which can help narrow down the search results.
Once the scan is complete, you should see a list of detected devices, including your Bluetooth keyboard. The keyboard’s name or model should appear in the list.
If your keyboard doesn’t appear in the list, make sure it is still in discovery or pairing mode. You may need to repeat Step 2: Put the Keyboard in Discovery or Pairing Mode to ensure the keyboard is ready to be detected by your device.
Now that you’ve successfully scanned for available devices, it’s time to select and connect to your Bluetooth keyboard. In the next step, we’ll walk you through the process of selecting the keyboard from the list.
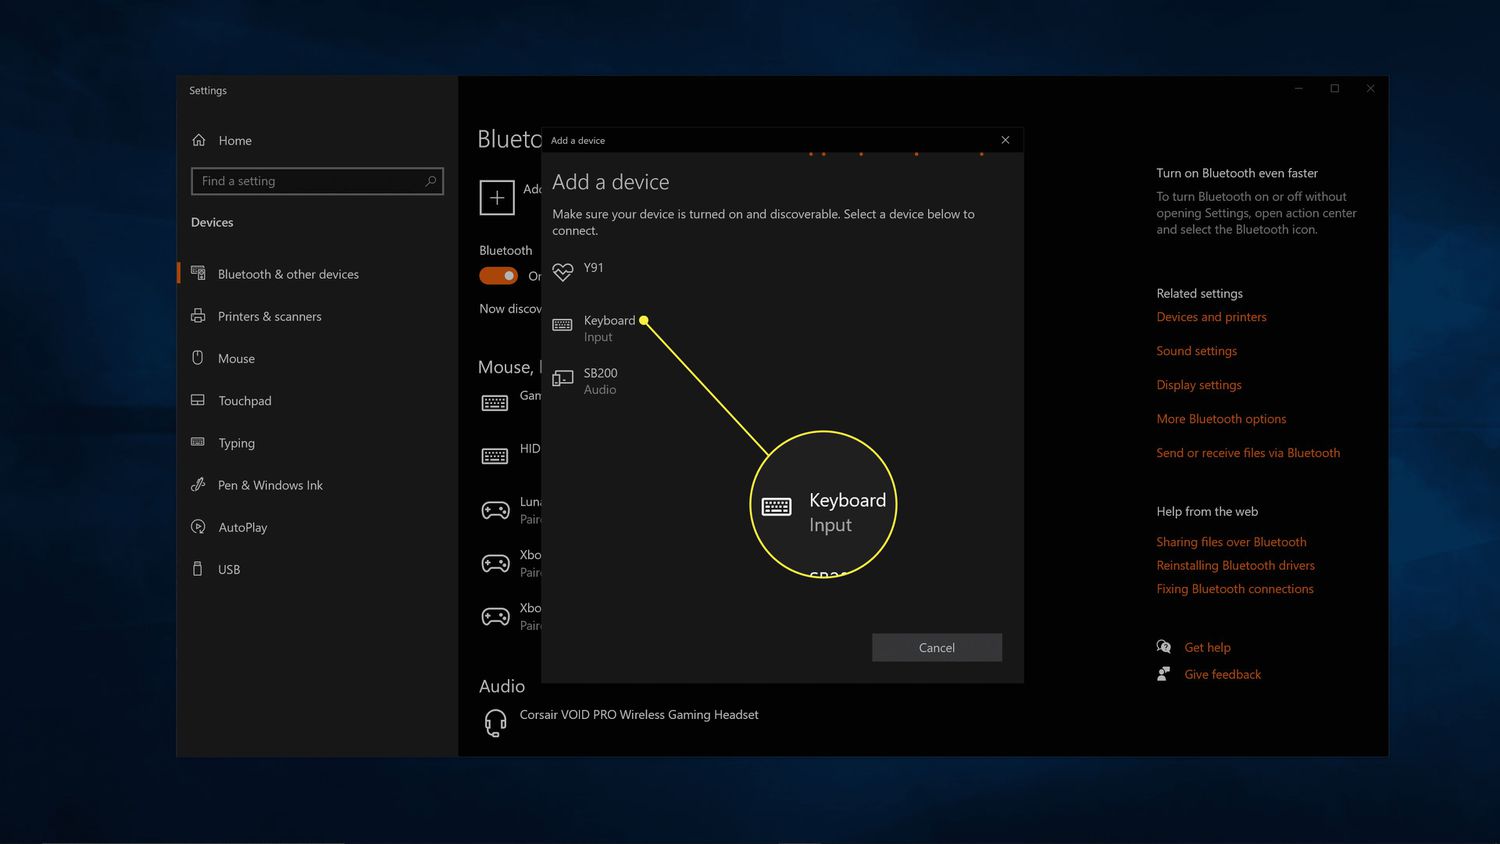
Step 5: Select the Bluetooth Keyboard
With the list of detected devices displayed in your Bluetooth settings, it’s time to select your Bluetooth keyboard from the list. This step enables your device to establish a connection with the keyboard and allows you to start using it wirelessly.
Here’s how to select the Bluetooth keyboard:
- In the list of available devices on your device’s Bluetooth settings, locate your Bluetooth keyboard. The name or model of the keyboard should be displayed.
- Tap on the name or model of your Bluetooth keyboard to select it. This action sends a connection request to the keyboard.
- After selecting the keyboard, your device will attempt to establish a connection with it. This may take a few seconds.
- If prompted, confirm the connection by following the on-screen instructions. Depending on your device’s operating system, you may need to enter a passkey or PIN to connect to your keyboard. The passkey or PIN is typically provided by the keyboard manufacturer and can be found in the keyboard’s user manual or documentation.
Once the connection is successfully established, your device will display a message confirming the connection with your Bluetooth keyboard. At this point, you should be able to start using your keyboard wirelessly.
If you encounter any issues while trying to connect to your Bluetooth keyboard, make sure that the keyboard is within range of your device and that it is still in pairing mode. You may need to repeat previous steps or consult the keyboard’s user manual for troubleshooting guidance specific to your keyboard model.
Now that you’ve successfully selected your Bluetooth keyboard, it’s time to move on to the next step and enter a passkey or PIN, if required. Step 6 awaits you!
Step 6: Enter a Passkey or PIN
When connecting certain Bluetooth keyboards, you may be required to enter a passkey or PIN to complete the pairing process. This passkey or PIN is a security measure designed to ensure that only authorized devices can connect to your keyboard.
Here’s what you need to do to enter a passkey or PIN:
- If prompted to enter a passkey or PIN, carefully read the instructions displayed on your device’s screen. The instructions should specify whether the passkey or PIN needs to be entered on the keyboard or the device.
- If the passkey or PIN needs to be entered on your Bluetooth keyboard, use the keyboard’s keys to type in the required numbers or characters. Pay attention to any specific formatting or sequence mentioned in the instructions.
- If the passkey or PIN needs to be entered on your device, use the on-screen keyboard or keypad to type in the necessary numbers or characters. Follow any formatting or sequence requirements outlined in the instructions.
- Once you’ve entered the passkey or PIN, select “OK” or “Enter” on your device’s screen to proceed.
It’s important to note that the passkey or PIN is typically provided by the keyboard manufacturer and can usually be found in the keyboard’s user manual or documentation. If you cannot locate the passkey or PIN, refer to the manufacturer’s website or contact their customer support for assistance.
Ensure that you enter the passkey or PIN accurately to avoid connection issues. Mistyping the passkey or PIN may result in a failed connection attempt. If you encounter any difficulties during this step, double-check the instructions, try again, and ensure you’re using the correct passkey or PIN.
Once you’ve successfully entered the passkey or PIN, your device will proceed to establish a secure connection with your Bluetooth keyboard.
With the passkey or PIN entered, you’re now ready to move on to the final step: confirming the connection between your device and Bluetooth keyboard. Step 7 is just around the corner!
Step 7: Confirm the Connection
After entering the passkey or PIN, the final step in connecting your Bluetooth keyboard is to confirm the connection between your device and the keyboard. This step ensures that all the necessary settings are in place and that the connection is successful.
Here’s how you can confirm the connection:
- Wait for your device to display a confirmation message or notification indicating that the connection with your Bluetooth keyboard has been established. The message may vary depending on your device’s operating system but should communicate a successful connection.
- Once you receive the confirmation, test the connection by typing on your Bluetooth keyboard. Open a text editor or any application where you can input text and start typing. If the text appears as expected, it means the connection is working correctly.
- If you experience any issues or the connection does not seem to be working, double-check that the keyboard is turned on and within range. If necessary, repeat the previous steps or consult the keyboard’s user manual for troubleshooting guidance specific to your keyboard model.
Once you’ve confirmed the connection and ensured that your keyboard is functioning correctly, you can start using your Bluetooth keyboard wirelessly with your device. Enjoy the convenience and freedom of typing without the constraints of cables!
Remember, if you encounter any difficulties during the connection process or while using your keyboard, consult the manufacturer’s documentation or support channels for further assistance. They can provide specific troubleshooting steps tailored to your keyboard model.
Congratulations! You’ve successfully connected your Bluetooth keyboard to your device. Now you can enjoy the ease and flexibility of typing without wires. Happy typing!
Troubleshooting Common Issues
While connecting a Bluetooth keyboard is generally a straightforward process, you may encounter some common issues along the way. Here are a few troubleshooting tips to help you overcome these issues:
- Ensure Bluetooth is turned on: Double-check that the Bluetooth functionality is enabled on your device. If it’s turned off, toggle it on and try connecting again.
- Restart the device: Sometimes a simple restart can resolve connectivity issues. Restart both your device and the Bluetooth keyboard and attempt the connection again.
- Check the battery level: If your Bluetooth keyboard has a low battery, it may struggle to establish a stable connection. Make sure the keyboard has sufficient battery charge or replace the batteries if necessary.
- Move closer to the device: If your keyboard isn’t connecting, it could be due to insufficient proximity to your device. Try moving closer to improve the Bluetooth signal strength.
- Clear existing pairings: If your keyboard has been previously paired with another device, make sure it is unpaired or disconnected from that device before attempting to connect it to a new device. Clearing any existing pairings can help avoid conflicts during the connection process.
- Update device firmware and keyboard drivers: Check for any available firmware updates for your device and ensure that the keyboard drivers are up to date. Outdated firmware or drivers can affect the connection and performance of the Bluetooth keyboard.
- Reset Bluetooth settings: If you’re experiencing persistent connectivity issues, you can try resetting the Bluetooth settings on your device. This will clear any existing Bluetooth configurations and allow you to start fresh with a clean connection attempt.
- Consult the user manual or support: If none of the above solutions work, refer to the user manual provided by the keyboard manufacturer for specific troubleshooting steps. Additionally, reach out to the manufacturer’s support for further assistance and guidance.
Remember that the troubleshooting steps may vary depending on your specific device and keyboard model. It’s always recommended to consult the user manual and the manufacturer’s support channels for accurate and tailored troubleshooting information.
By following these troubleshooting tips, you can overcome common issues and successfully connect your Bluetooth keyboard to your device.
Conclusion
Congratulations! You’ve reached the end of our guide on how to connect a Bluetooth keyboard. We hope that this step-by-step tutorial has helped you successfully establish a wireless connection between your device and your Bluetooth keyboard.
By turning on Bluetooth, putting the keyboard in discovery or pairing mode, opening the Bluetooth settings on your device, scanning for available devices, selecting the Bluetooth keyboard, entering a passkey or PIN, and confirming the connection, you can enjoy the convenience and flexibility of typing wirelessly.
Remember, if you encounter any issues during the connection process, consult the keyboard’s user manual or reach out to the manufacturer’s support for specific troubleshooting guidance tailored to your keyboard model.
Now, armed with your newly connected Bluetooth keyboard, you can enhance your productivity, type more comfortably, and enjoy the freedom of a clutter-free workspace.
Thank you for choosing our guide, and happy typing!