Introduction
Dealing with a poop-filled robot vacuum can be a messy and unpleasant task, but it’s a situation that many robot vacuum owners may encounter at some point. Although modern robot vacuums are designed to handle various types of debris, including pet hair and crumbs, they can sometimes struggle with the less desirable task of handling pet or human waste. When this happens, knowing how to properly clean poop out of a robot vacuum is essential to maintain its functionality and prevent any lingering odors.
While the thought of cleaning up poop from a robot vacuum may seem daunting, rest assured that with the right precautions and methods, the process can be relatively straightforward. This article will guide you through the necessary steps to effectively clean poop out of your robot vacuum, ensuring that it is hygienic and ready to get back to its cleaning duties.
Before we dive into the step-by-step cleaning process, it’s crucial to understand the potential hazards and precautions to take. Dealing with feces requires extra care to avoid exposure to harmful bacteria and odors. It’s recommended to wear gloves and protective clothing, and to work in a well-ventilated area. Additionally, make sure you have the necessary cleaning materials such as disinfectant wipes, a trash bag, and a cleaning tool like a small brush or toothpick. With these precautions in mind, let’s get started on cleaning that poop out of your robot vacuum!
Understanding the Problem
The first step in effectively cleaning poop out of your robot vacuum is to understand the nature of the problem. When a robot vacuum encounters poop, it can become stuck or smeared on various parts of the vacuum, from the brushes to the filter and even the interior components. This can not only impede the vacuum’s performance but also leave behind unpleasant odors and potential health hazards if not cleaned properly.
One important thing to note is that robot vacuums are not designed to handle large amounts of liquid or semi-solid waste. As a result, when they encounter poop, the vacuum may spread it around or push it deeper into the carpet or surfaces it’s cleaning. It’s essential to address the issue promptly to prevent further mess and ensure the vacuum’s proper functioning.
Another consideration is the type of surface the robot vacuum is cleaning. If the poop is on a hard surface like tile or hardwood floors, the cleaning process may be simpler compared to poop on a carpeted surface. Carpet fibers can trap and hold onto the poop, making it more challenging to remove completely.
Furthermore, different types of poop may require different cleaning approaches. For instance, pet waste may contain stuck-on hair or solidified matter that needs additional attention. Human waste, on the other hand, may have different consistencies and characteristics that require specific cleaning methods.
In understanding the problem, it’s crucial to assess the extent of the poop’s contact with the robot vacuum and its various components. This assessment will inform your cleaning strategy and help you determine which parts of the vacuum require more thorough cleaning and disinfection.
Now that we have a clear understanding of the problem, let’s move on to the necessary precautions to ensure a safe and effective poop cleaning process for your robot vacuum.
Necessary Precautions
Before you begin the process of cleaning poop out of your robot vacuum, it’s essential to take certain precautions to protect yourself and maintain a clean and hygienic environment.
First and foremost, be sure to wear disposable gloves throughout the cleaning process. This will prevent direct contact with the poop and minimize the risk of spreading bacteria or coming into contact with any harmful substances.
Additionally, choose a well-ventilated area for the cleaning process. Feces can emit unpleasant odors, so ensuring proper ventilation will help to dissipate any smells and maintain a fresh environment.
It’s also crucial to have the necessary cleaning materials readily available. This includes disinfectant wipes or cleaning solution, a small brush or toothpick, and a trash bag. Using a cleaning solution specifically designed to kill bacteria and eliminate odors will help ensure a thorough and hygienic cleaning process.
When disassembling the robot vacuum for cleaning, be gentle to avoid causing any damage or disrupting the internal components. Follow the manufacturer’s instructions on how to remove and clean the dirt bin, filter, and brushes. Taking this extra care will help to ensure that your robot vacuum continues to function optimally after the cleaning process.
Lastly, after cleaning the robot vacuum, remember to properly disinfect your hands and dispose of the gloves and any used cleaning materials. This step minimizes the risk of any contamination and helps to maintain a clean and safe environment.
By following these necessary precautions, you can approach the poop cleaning process confidently and with the assurance that you are taking the right steps to protect yourself and maintain a hygienic cleaning environment.
Step 1: Turn Off the Robot Vacuum
The first step in cleaning poop out of your robot vacuum is to turn it off completely. This is crucial to ensure your safety and prevent any accidental movement or activation of the vacuum during the cleaning process.
Locate the power button or switch on the robot vacuum and make sure it is fully turned off. Some models may have a specific “off” setting, while others may require you to press and hold the power button for a few seconds. Consult the user manual for your specific robot vacuum if you’re unsure how to turn it off.
Turning off the robot vacuum will also prevent any potential damage that could occur to the vacuum or its components during the cleaning process. It’s important to handle the vacuum with care, and turning it off ensures that it remains stationary during the cleaning process.
Once the robot vacuum is fully turned off, you can proceed to the next step of removing the dirt bin. This will allow you to access and clean the areas of the vacuum that have come into contact with the poop.
Remember, safety should always be a top priority when dealing with any cleaning task. By turning off the robot vacuum before starting the cleaning process, you can ensure a safe and controlled environment for effectively cleaning the poop out of your robot vacuum.
Step 2: Remove the Dirt Bin
After turning off the robot vacuum, the next step is to remove the dirt bin. The dirt bin is the part of the vacuum that collects the debris and, in this case, the poop. Removing the dirt bin will allow you to access and clean it thoroughly.
Locate the dirt bin on your robot vacuum. It is usually located at the back or bottom of the vacuum. Some models may have a release button or latch that you need to press or slide to remove the dirt bin. Refer to the user manual for specific instructions if needed.
Once you have identified the mechanism to remove the dirt bin, gently pull it out of the vacuum. Be cautious not to spill any contents if the bin is full. If necessary, empty any debris or other dirt from the bin into a trash bag or directly into a waste bin.
Inspect the inside of the dirt bin for any signs of poop. Depending on the design of your vacuum, the poop may be visibly present, or there may be traces or stains. Take note of any areas that require extra attention during the cleaning process.
Removing the dirt bin also gives you the opportunity to clean it separately. Wash the dirt bin with warm soapy water, or use a disinfectant wipe to thoroughly clean it. Pay extra attention to any areas where poop may have been in contact, ensuring that all residue is removed.
Once the dirt bin is clean and free from any traces of poop, you can move on to the next step of emptying the dirt bin contents into a trash bag.
By removing the dirt bin and cleaning it separately, you are effectively tackling the primary area where the poop has come into contact and ensuring a thorough cleaning process for your robot vacuum.
Step 3: Empty the Dirt Bin into a Trash Bag
Once you have removed the dirt bin from your robot vacuum and cleaned it, it’s time to empty the contents of the bin into a trash bag. This step ensures that any remaining debris, including the poop, is properly disposed of.
Find a suitable trash bag or waste bin to empty the contents into. It’s recommended to use a bag that can be securely sealed to prevent any odors or contamination from spreading.
Hold the dirt bin over the trash bag and carefully dump the contents into it. Be cautious and go slowly to avoid any spills or messes. If there are any stubborn debris or clumps of poop stuck inside the bin, you can use a cleaning tool like a toothpick or small brush to loosen and remove them before emptying the bin.
Once you have emptied the dirt bin into the trash bag, seal it tightly to prevent any odors or bacteria from spreading. If possible, consider double-bagging the waste for added precaution.
Dispose of the sealed trash bag according to your local waste guidelines. Some areas may require you to dispose of it in the regular household trash, while others may have specific instructions for the disposal of pet waste or hazardous materials. Follow the appropriate guidelines to ensure proper disposal.
After emptying the dirt bin and properly disposing of the waste, you can move on to the next step of removing and cleaning the filter.
By emptying the dirt bin into a trash bag, you are effectively removing the poop and any other debris from your robot vacuum, ensuring a clean and sanitary environment for future use.
Step 4: Remove the Filter
After emptying the dirt bin and disposing of the waste, the next step is to remove the filter from your robot vacuum. The filter helps to capture and trap dust, allergens, and other particles, including any remnants of poop that may have made their way into the vacuum.
Locate the filter compartment on your robot vacuum. This is usually located near the dirt bin or inside the vacuum’s body. Refer to the user manual for your specific model if you’re unsure where to find it.
Once you have located the filter compartment, open it to access the filter. The method of opening the compartment may vary depending on the vacuum, so follow the manufacturer’s instructions if needed.
Carefully remove the filter from its housing. Be gentle to avoid damaging the filter or other components of the vacuum. Take note of the filter’s condition to determine if it requires cleaning or replacement.
Inspect the filter for any visible signs of poop or debris. Depending on the type of filter, you may see stains or residue that needs to be cleaned. If the filter is excessively dirty or damaged, it may need to be replaced. Check the user manual or the manufacturer’s website for guidance on maintaining or replacing the filter.
If the filter is reusable, follow the manufacturer’s instructions to clean it. This may involve rinsing it under running water or using a mild soap solution. Gently scrub the filter to remove any dirt or residue. Allow the filter to dry completely before reinserting it into the vacuum.
If the filter is not reusable or showing signs of damage, it’s best to replace it with a new one. Many vacuum brands offer replacement filters that are easily accessible for purchase.
By removing the filter and assessing its condition, you can ensure that any traces of poop or debris are handled properly and maintain a clean and effective filtration system in your robot vacuum.
Step 5: Clean the Filter
Now that you have removed the filter from your robot vacuum, it’s time to clean it thoroughly. Cleaning the filter is essential for maintaining optimal performance and ensuring that any traces of poop or debris are properly removed.
Depending on the type of filter your robot vacuum uses, there are several methods you can employ to clean it.
If your vacuum’s filter is washable, rinse it under running water to remove any dirt, debris, or stains. Use a gentle stream of water to avoid damaging the filter. You can also use a mild dish soap and a soft brush to gently scrub the filter and remove any stubborn residue. Rinse the filter thoroughly to ensure all soapy residue is removed.
If your vacuum’s filter is not washable, use a soft brush or a vacuum brush attachment to remove any loose dirt or debris from the filter. Be gentle to avoid damaging the filter. Additionally, some filters can be tapped against a hard surface or gently shaken to dislodge dirt or dust.
Once the filter is clean, allow it to air dry completely. This may take a few hours, so be patient and ensure it is completely dry before reinserting it into the vacuum.
Remember, it’s important to follow the manufacturer’s instructions when cleaning the filter to prevent any damage and maintain its longevity.
Regularly cleaning or replacing the filter not only helps to eliminate any odor or bacteria from the poop but also ensures proper airflow and suction power in your robot vacuum.
After cleaning the filter, you can proceed to the next step of inspecting and cleaning the brushes.
Step 6: Inspect and Clean the Brushes
Once you have cleaned the filter, it’s time to inspect and clean the brushes of your robot vacuum. The brushes are responsible for sweeping up dirt, debris, and, in this case, any remaining traces of poop.
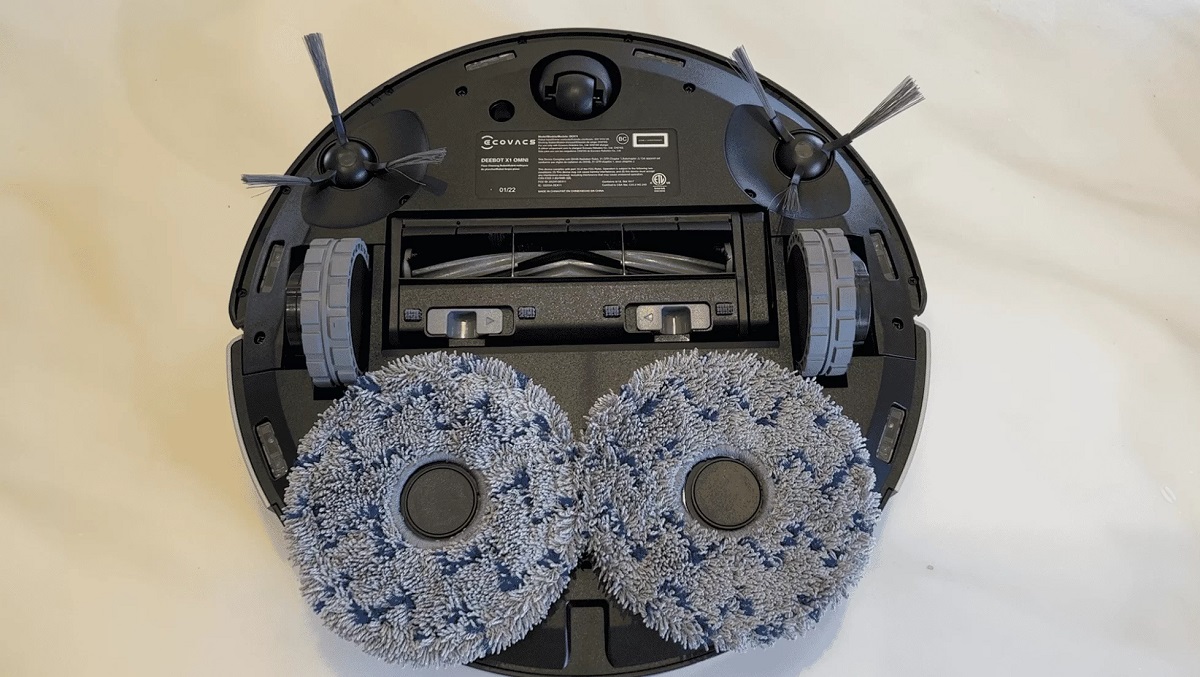
Start by locating the brush compartment or release mechanism on your robot vacuum. This is usually located on the underside of the vacuum. Consult the user manual if you’re unsure of its exact location.
Once you have gained access to the brushes, visually inspect them for any signs of poop, tangled hair, or other debris. Use a pair of tweezers or your gloved hands to gently remove any visible obstructions. Pay close attention to the bristles and brush ends, as these areas are more likely to have debris tangled in them.
If the brushes are removable, take them out and clean them separately. Some robot vacuums have brushes that can be easily detached for cleaning. Refer to the user manual for instructions on how to remove the brushes from your specific model.
Clean the brushes by gently rinsing them under running water or using a soft brush to remove any debris. Ensure that all traces of poop are thoroughly rinsed off. For brushes with longer bristles, you may need to use a comb to remove tangled hair or fibers.
Allow the brushes to air dry completely before reinserting them into the vacuum. This will prevent moisture buildup and potential damage to the vacuum’s internal components.
Once the brushes are clean and dry, carefully reattach them or reinstall them into the brush compartment. Ensure that the brushes are securely in place to maintain proper function.
Regularly inspecting and cleaning the brushes of your robot vacuum will help to prevent clogs, promote efficient cleaning, and eliminate any remaining traces of poop or debris.
With the brushes cleaned and back in place, we can move on to the next step of using a cleaning tool to remove any stuck poop from the vacuum.
Step 7: Use a Cleaning Tool to Remove Stuck Poop
After inspecting and cleaning the brushes, it’s time to tackle any stubborn or stuck-on poop that may still be present in your robot vacuum. Using a cleaning tool will help you effectively remove these remnants and ensure thorough cleanliness.
Select a suitable cleaning tool based on the design of your vacuum and the areas where the poop is stuck. Some common options include a small brush, toothpick, or even a cotton swab.
Carefully examine the interior components of the vacuum, such as the brush compartment, wheels, and other crevices, to locate any areas where poop may be stuck. Use the cleaning tool to gently scrape or brush away any remaining debris.
Be cautious not to apply excessive force or use sharp objects that could damage the vacuum. The goal is to dislodge and remove the stuck poop without causing any harm to the vacuum’s mechanisms.
If necessary, dampen a cloth or paper towel with water or a mild cleaning solution and use it to wipe away any residue or stains. Take care not to saturate the internal components with liquid.
Pay special attention to areas where poop may have become lodged, such as around the brush bristles or in the corners of the vacuum. Thoroughly clean these areas to ensure the removal of all poop particles.
Continue using the cleaning tool and wiping down the interior until all traces of poop have been eliminated. This step is essential for maintaining cleanliness and preventing any lingering odors or potential bacterial growth.
By using a cleaning tool to target and remove stuck-on poop, you can ensure that your robot vacuum is completely free from any remnants and ready to resume its cleaning duties.
Now that the stuck poop has been addressed, we can move on to the next step of cleaning the exterior of the vacuum.
Step 8: Wipe Down the Vacuum’s Exterior
With the interior components of your robot vacuum clean, it’s time to shift your focus to the exterior. Wiping down the vacuum’s exterior will help remove any dirt, grime, or residue that may have accumulated during the cleaning process and give it a fresh, clean appearance.
Start by using a soft, damp cloth or cleaning wipes to gently wipe down the surfaces of the vacuum. Be cautious not to use excessive moisture that could damage the electronics or other sensitive components.
Pay attention to areas prone to collecting dust or dirt, such as the sensors, buttons, or edges of the vacuum. Use a cotton swab or a small brush to access and clean these hard-to-reach spots.
If there are any stubborn stains or residue on the exterior, you can use a mild cleaning solution or soapy water to help remove them. Dampen a cloth with the solution and gently scrub the affected areas. Always ensure that the cloth is only damp and not soaking wet.
Take care to avoid getting any liquid into the openings or vents of the vacuum, as this could cause damage. If you encounter any particularly stubborn stains, consult the user manual or contact the manufacturer for guidance on the appropriate cleaning method.
After wiping down the exterior, use a dry cloth to remove any excess moisture and ensure that the vacuum is completely dry before turning it on or storing it.
By wiping down the vacuum’s exterior, you not only remove any remaining dirt or residue but also give it a refreshed and clean appearance. This step contributes to the overall cleanliness and maintenance of your robot vacuum.
Now that the vacuum’s exterior is clean, we can move on to the next step of reassembling the components.
Step 9: Reassemble the Components
Now that you have thoroughly cleaned the interior and exterior of your robot vacuum, it’s time to reassemble the components in preparation for its next use. Properly reassembling the components ensures that the vacuum functions optimally and extends its overall lifespan.
Start by inserting the clean and dry filter back into its designated compartment. Ensure that it fits securely and that any fasteners or latches are properly closed or locked.
Next, reattach the cleaned brushes back into the brush compartment. Make sure they are aligned correctly and firmly in place. Check for any loose or damaged bristles that may need replacement.
If you removed the dirt bin during the cleaning process, reinstall it back into the vacuum. Ensure that it fits snugly and securely, and that any locking mechanisms are properly engaged.
Take a moment to double-check that all the components are back in their proper positions and that nothing is loose or out of place. This will prevent any potential damage or malfunction during the vacuum’s operation.
If there are any additional accessories or attachments, such as boundary markers or side brushes, that you removed during cleaning, reattach them as well.
Once all the components are reassembled, double-check that everything is securely in place. This will give you peace of mind and confidence in the vacuum’s ability to function properly during its cleaning cycles.
Now that the components are reassembled, we can move on to the final step of proper disposal of the poop remnants.
Step 10: Dispose of the Poop Properly
After successfully cleaning the poop out of your robot vacuum and reassembling its components, it’s crucial to dispose of the poop remnants properly. Proper disposal ensures hygiene and prevents any potential spread of bacteria or unpleasant odors.
If you haven’t already done so, ensure that the dirt bin contents, including the poop, have been emptied into a sealed trash bag or waste bin. This will prevent any potential contact with the waste.
If you have used any disposable gloves during the cleaning process, it’s important to dispose of them as well. Seal them in a plastic bag before placing them in the trash to prevent any potential cross-contamination.
Take the filled trash bag or waste bin containing the poop remnants and dispose of it according to your local waste guidelines. Follow any specific instructions for disposing of pet waste or hazardous materials, if applicable.
Some areas may require you to place the bag in your regular household trash, while others may have designated disposal methods. It’s important to comply with these guidelines to ensure proper waste management.
By disposing of the poop remnants properly, you reduce the risk of any potential contamination or spread of bacteria. This step is crucial for maintaining a clean and hygienic environment for both you and your robot vacuum.
Congratulations! You have successfully completed all the necessary steps to clean poop out of your robot vacuum. With proper cleaning and maintenance, your vacuum will continue to be a valuable tool in keeping your floors clean and tidy.
Conclusion
Cleaning poop out of a robot vacuum may not be the most glamorous task, but with the right approach and precautions, it can be effectively accomplished. By following the step-by-step process outlined in this guide, you can ensure that your robot vacuum is free from poop residue, odor, and potential health hazards.
Understanding the nature of the problem and taking necessary precautions, such as wearing gloves and working in a well-ventilated area, is essential to protect yourself during the cleaning process.
The step-by-step process includes turning off the robot vacuum, removing and emptying the dirt bin, cleaning and inspecting the filter, and carefully cleaning the brushes. Using a cleaning tool to remove any stuck poop and wiping down the vacuum’s exterior helps to ensure thorough cleanliness.
Properly reassembling the vacuum’s components and disposing of the poop remnants in accordance with local waste guidelines are the final steps to complete the process.
Regular maintenance and cleaning of your robot vacuum, including routine filter cleaning or replacement and brush inspection, will help prevent future poop-related issues and ensure optimal performance.
Remember, always consult your robot vacuum’s user manual for specific instructions and recommendations from the manufacturer regarding cleaning and maintenance.
By following these steps and investing the time and effort in properly cleaning your robot vacuum, you can enjoy a cleaner and more hygienic home environment while also prolonging the lifespan of your valuable cleaning tool.