Introduction
Keeping your keyboard clean is essential to ensure its smooth operation and to maintain hygiene. While wiping the surface of the keyboard is a common practice, cleaning under the keys is often overlooked. However, over time, dirt, dust, food crumbs, and other particles can accumulate beneath the keys, leading to sticky or unresponsive keys, as well as potential health risks due to the growth of bacteria.
In this article, we will guide you through the process of cleaning under the keys of your keyboard, allowing you to restore its functionality and ensure a more pleasant typing experience. By following these steps, you can give your keyboard a thorough cleaning, removing any debris that may have accumulated over time.
Before we dive into the cleaning process, it’s important to note that the method used may vary slightly depending on the type of keyboard you have. Mechanical keyboards and laptops, for example, require different cleaning techniques. We will focus on the general steps that can be applied to most standard desktop keyboards.
Why Cleaning Under Keyboard Keys is Important
Cleaning under the keys of your keyboard is crucial for several reasons. Firstly, over time, dust, dirt, and debris can accumulate beneath the keys, leading to a build-up that affects the overall performance of your keyboard. This build-up can cause keys to become sticky or unresponsive, disrupting your typing experience and reducing your productivity.
Additionally, keyboards can be a breeding ground for bacteria and germs. Studies have shown that keyboards can harbor more bacteria than a toilet seat! Food particles, crumbs, and oils from your fingers provide a perfect environment for bacteria to thrive. Regularly cleaning under the keys helps to remove these contaminants, reducing the risk of illness and maintaining a healthier workspace.
Cleaning your keyboard not only improves its functionality and reduces the risk of germs, but it also helps in extending the lifespan of your keyboard. Dust and debris can cause damage to the internal components of your keyboard, leading to mechanical failures or malfunctioning keys. By keeping your keyboard clean and free from debris, you can ensure its longevity and save yourself from the hassle and cost of replacing it sooner than necessary.
Furthermore, a clean keyboard is visually appealing and contributes to a positive working environment. It’s much more pleasant to type on a keyboard that looks and feels clean, compared to one that is dirty and grimy. Keeping your keyboard clean demonstrates professionalism and attention to detail, which can enhance your overall work experience.
Overall, cleaning under the keys of your keyboard is essential for maintaining its performance, preventing the spread of bacteria, prolonging its lifespan, and creating a more pleasant work environment. Now that we understand the importance of this task, let’s move on to the tools you will need to get started.
Tools You Will Need
Before you begin cleaning under the keys of your keyboard, it’s important to gather the necessary tools to ensure an effective and safe cleaning process. Here are the tools you will need:
- Cotton swabs or cotton balls
- Isopropyl alcohol or keyboard cleaner
- A small brush (such as a clean, soft-bristled toothbrush)
- A keycap puller (optional, but can make the process easier)
- A microfiber cloth or lint-free cloth
Cotton swabs or cotton balls are useful for reaching tight spaces and cleaning small areas, especially around the edges of the keys. Isopropyl alcohol or a specialized keyboard cleaner is necessary for disinfecting and removing stubborn grime or stains.
A small brush, like a clean toothbrush, can be used to gently scrub the surface of the keys and dislodge any larger debris. Remember to use a brush with soft bristles to avoid scratching or damaging the keys.
If you have a keycap puller, it can make the process of removing the keys much easier. However, if you don’t have one, you can still clean under the keys using alternative methods, which we’ll cover in the following steps.
A microfiber cloth or lint-free cloth is essential for wiping down the keys and removing any excess moisture or cleaning solution. These types of cloths are gentle on the surface of the keys and are less likely to leave behind lint or residue.
Now that you have gathered the necessary tools, you’re ready to proceed with the step-by-step process of cleaning under the keys of your keyboard. Let’s get started!
Step 1: Power off your computer
Before you begin cleaning under the keys of your keyboard, it is crucial to power off your computer or laptop. This step ensures your safety and prevents any accidental key presses or actions while cleaning.
Shutting down your computer will also prevent any interference with the cleaning process and reduce the risk of damaging your keyboard or computer components. It is important to handle electronic devices with care and to follow proper precautions to avoid any potential harm.
If you are using a laptop, make sure to disconnect it from the power source as well. This is important, as accidental electrical connections during the cleaning process can be hazardous.
Once your computer is powered off and disconnected from its power source, you can proceed to the next step and begin cleaning the keys of your keyboard. Remember, safety should always be your top priority when working with electronic devices.
Now let’s move on to step 2, where we will learn how to remove the keys from your keyboard for a more thorough cleaning process.
Step 2: Remove the Keys
To effectively clean under the keys of your keyboard, it is recommended to remove the keys first. This step allows you to access the area underneath the keys and clean more thoroughly. However, please note that not all keyboards are designed to have removable keys. In such cases, you can still follow the alternate cleaning method mentioned later in this article.
If your keyboard has removable keys, follow these steps to remove them:
- Start by identifying the key or keys you wish to remove. Note that different keyboard layouts may have slight variations in key removal methods, so refer to manufacturer guidelines if available.
- Gently insert your fingernail or a flat, thin object, such as a plastic opening tool or a credit card, under the edge of the key you want to remove.
- Apply gentle upward pressure to lift the keycap. Avoid using excessive force to prevent damage to the key or the keyboard.
- The keycap should pop off easily. If it feels resistant, double-check to ensure there are no clips or locks holding it in place.
- Repeat this process for each key you wish to remove, being careful not to misplace or lose any of the keycaps.
Once you have removed all the desired keys, place them aside in a safe location, such as a clean cloth or a container. Make sure to keep them in the correct order, as this will make reattaching them easier later on.
If your keyboard has unique keys, such as the spacebar or larger keys, they may require a slightly different removal technique. Refer to the manufacturer’s instructions or search online for specific guidance on removing those keys.
With the keys removed, we are now ready to move on to the next step, which covers cleaning the keys themselves. Let’s proceed.
Step 3: Clean the Keys
Now that you have removed the keys from your keyboard, it’s time to clean them individually. This step ensures that you remove any dirt, grime, or residue that may have accumulated on the surface of the keys. Cleaning the keys will not only improve their appearance but also contribute to a more hygienic typing experience.
Follow these steps to clean the keys:
- Fill a small bowl or container with warm water and add a few drops of mild dish soap or a small amount of keyboard cleaner. Avoid using harsh or abrasive cleaners, as they can damage the key surface.
- Dip a clean microfiber cloth or cotton ball into the soapy water or keyboard cleaner solution.
- Gently wipe the surface of each key, applying slight pressure to remove any dirt or stains.
- For especially stubborn or sticky residues, you can use a soft-bristled toothbrush dipped in the cleaning solution to gently scrub the key. Be careful not to scrub too hard to avoid damaging the key.
- Once you have cleaned each key, rinse the cloth or cotton ball with clean water and wipe away any remaining soap or cleaner residue.
- Dry each key thoroughly with a clean microfiber cloth or allow them to air dry before proceeding to the next step.
Remember to clean both sides of each key, including the edges, to ensure a thorough cleaning. Pay special attention to any key labels or symbols, using a gentle touch to avoid fading or damaging them.
If you notice any particularly stubborn stains or marks that cannot be removed with gentle cleaning methods, you may consider purchasing replacement keycaps from the keyboard manufacturer or a reputable retailer.
With the keys now cleaned and dried, we’re ready to move on to the next step, which covers cleaning the area under the keys. Let’s continue.
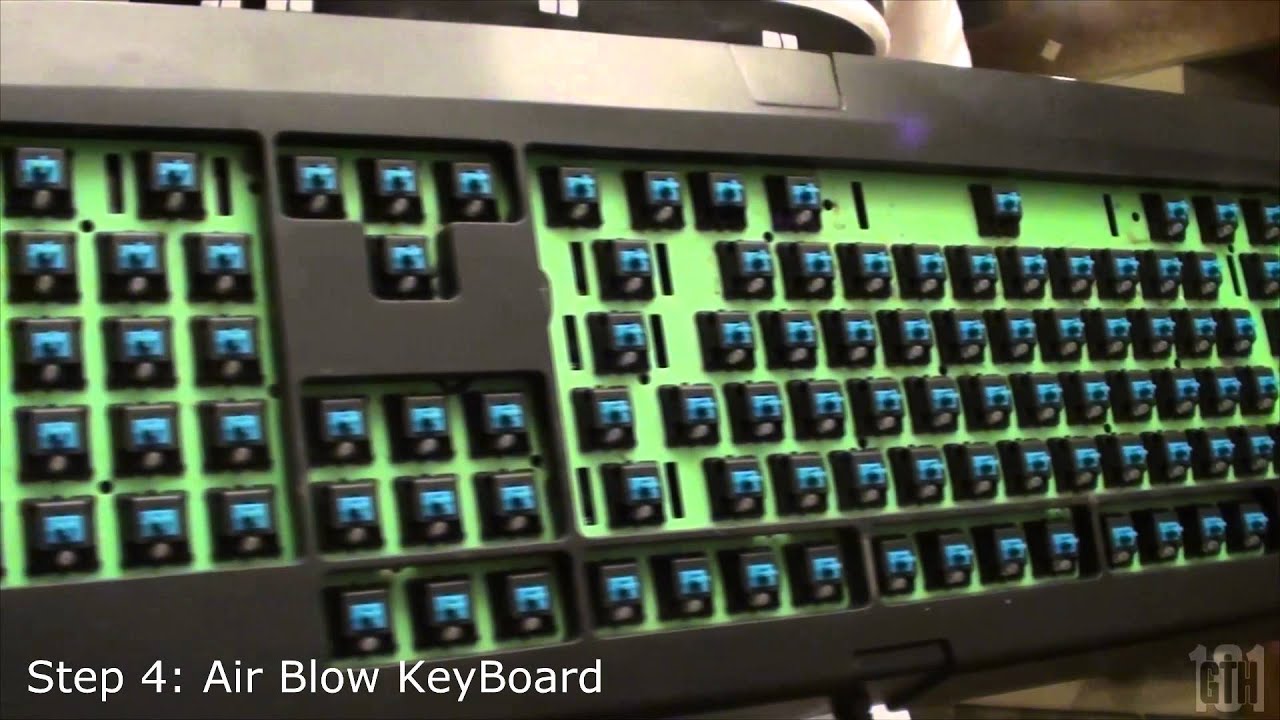
Step 4: Clean the Area Under the Keys
With the keys removed and cleaned, it’s time to focus on cleaning the area underneath the keys. This step is crucial as it helps remove any debris, dust, hair, or crumbs that may have accumulated over time, leading to sticky or unresponsive keys.
Follow these steps to clean the area under the keys:
- Take a can of compressed air and hold it upright.
- Direct short bursts of air between the keys, focusing on the areas where you removed the keycaps.
- This will help dislodge and remove any loose debris that may be trapped underneath the keys.
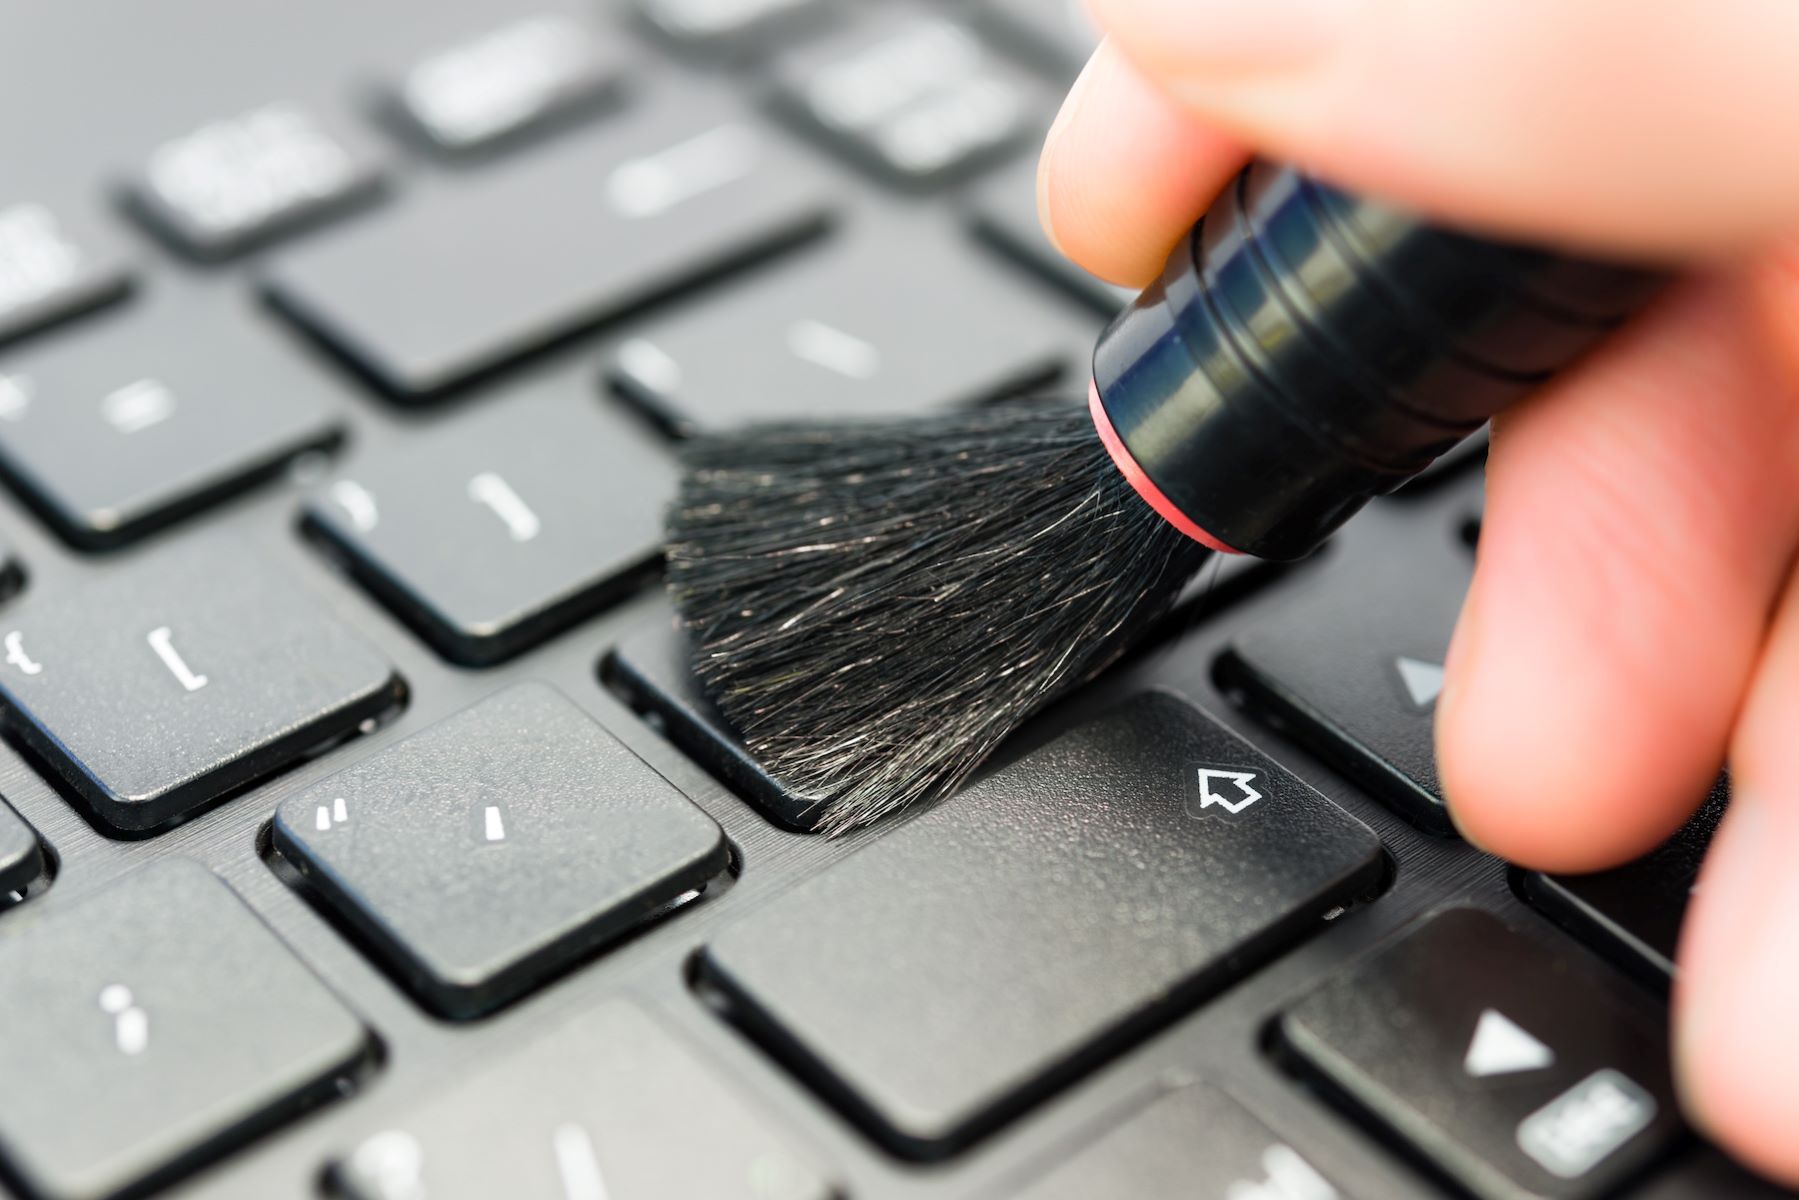
- Next, take a clean, soft-bristled toothbrush or a small brush designated for electronic cleaning.
- Gently brush along the edges and surfaces of the exposed keyboard, ensuring you reach into the nooks and crannies where dirt can accumulate.
- If necessary, you can lightly dampen the tip of the brush with isopropyl alcohol or a mixture of water and mild dish soap to aid in the cleaning process. However, make sure not to oversaturate the brush to prevent moisture from seeping into the keyboard.
- Continue brushing until you have removed any visible debris or dirt.
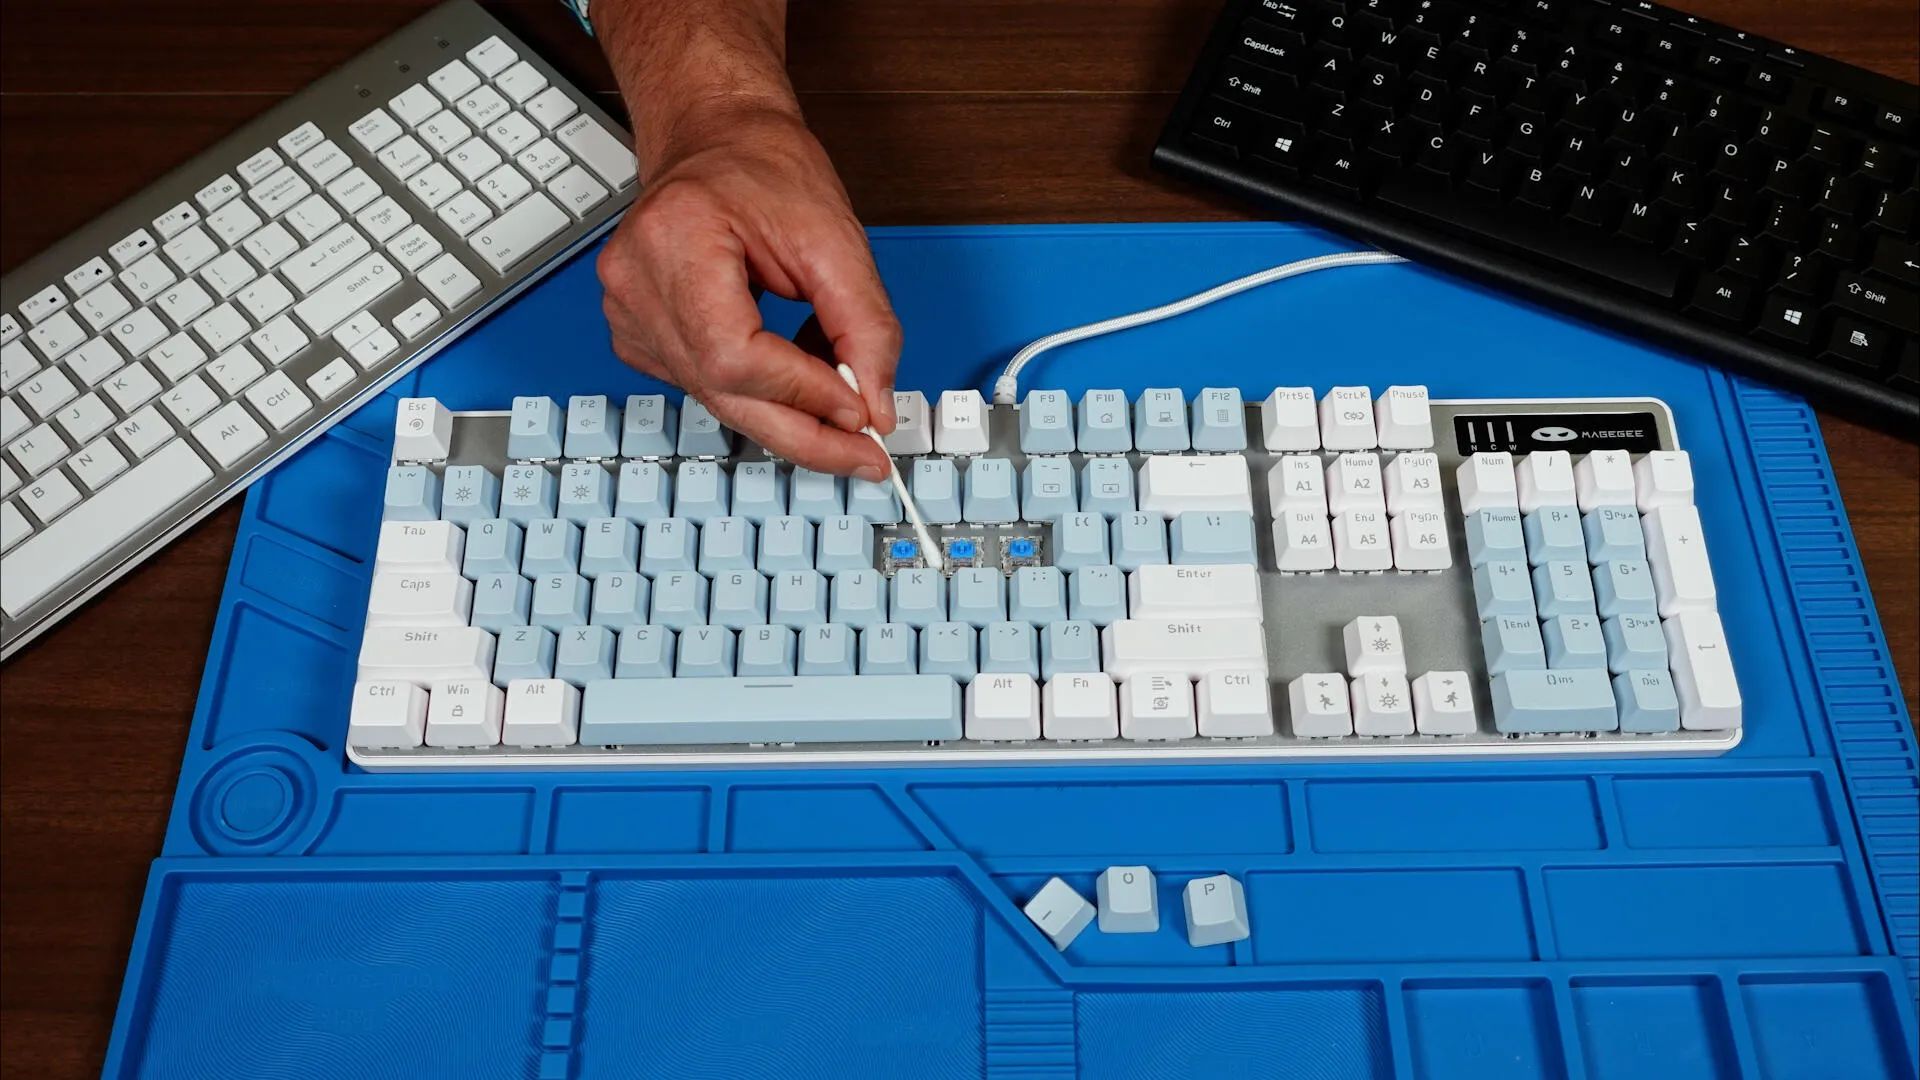
- Finally, use a clean microfiber cloth or cotton swabs lightly dampened with isopropyl alcohol to wipe down the surfaces between the keys.
- If there are any sticky spots or stubborn residue, apply gentle pressure with the cloth or swab to remove it.
- Allow the keyboard to dry completely before moving on to the next step.
Remember, when using compressed air, ensure that the can is held upright to prevent any propellant from escaping and causing damage to the keyboard or other components.
With the area under the keys now cleaned, we can proceed to the next step, which involves reattaching the keys to the keyboard. Let’s move on.
Step 5: Reattach the Keys
Now that you have completed the cleaning process, it’s time to reattach the keys to your keyboard. Reattaching the keys properly will ensure that they function correctly and provide a seamless typing experience.
Follow these steps to reattach the keys:
- Take the clean and dry keycaps that you set aside earlier.
- Align each keycap with its respective position on the keyboard.
- Place the keycap directly above its designated spot on the keyboard.
- Gently press down on the keycap until it snaps into place.
- Repeat this process for all the keys you removed.
Ensure that each keycap is properly aligned and securely attached to the keyboard. You should feel a noticeable click or snap as the keycap locks into place. If a keycap feels loose or wobbly, remove it and reattach it to ensure it is properly positioned.
If you encounter any difficulty in reattaching the keys or if a keycap is damaged or broken, you may need to contact the keyboard manufacturer for support or inquire about purchasing replacement keycaps.
Now that the keys are successfully reattached, it’s time to move on to the next important step, which is testing your keyboard to ensure proper functionality.
Step 6: Test Your Keyboard
After reattaching the keys, it’s essential to test your keyboard to ensure that all the keys are functioning correctly. Testing your keyboard will help you identify any keys that may still be sticky or unresponsive, allowing you to address the issue before resuming normal use of your keyboard.
Follow these steps to test your keyboard:
- Type a test message or open a text document on your computer.
- Starting from one end of the keyboard, press each key individually and observe if it registers on the screen.
- Pay attention to the responsiveness and smoothness of the key’s action.
- Check for any keys that stick, feel loose, or do not produce the expected character when pressed.
- If you encounter any issues, remove the problematic keycaps and repeat the cleaning process specifically for those keys.
- For laptops or non-removable key keyboards, you can use compressed air to blow out any trapped debris or gently clean the keys with a cotton swab dipped in isopropyl alcohol.
- Once you have tested all the keys and ensured their proper functioning, you can consider your keyboard successfully cleaned and ready for use.
If you continue to experience issues with certain keys even after cleaning and testing, it may be a sign of a more significant problem with your keyboard. In such cases, it is advisable to seek professional assistance or consider replacing the keyboard if it is no longer under warranty.
Congratulations! You have successfully cleaned and tested your keyboard. Now, let’s explore some tips for maintaining a clean keyboard to ensure its longevity and optimal performance.
Tips for Maintaining a Clean Keyboard
Maintaining a clean keyboard is essential for its longevity and optimal performance. By following these tips, you can keep your keyboard in good condition and enjoy a clean and hygienic typing experience:
- Regularly wipe down the surface of the keyboard with a clean, lint-free cloth or disinfectant wipes to remove any dust, dirt, or fingerprints.
- Avoid eating or drinking near your keyboard to prevent crumbs, spills, and liquid damage. If you must have a snack or drink, take extra caution and ensure that no debris or liquids come into contact with the keys.
- Consider using a keyboard cover or skin to protect the keys from spills and dust. These covers are available for various keyboard models and can be easily removed for cleaning.
- Trim your fingernails regularly to prevent dirt and debris from getting trapped beneath the keys.
- Take short breaks during long typing sessions to shake out any loose debris or use a can of compressed air to blow off any accumulated dust.
- Keep your workspace clean and tidy to minimize the amount of dirt and debris that can find its way into your keyboard.
- If you work in a particularly dusty environment, consider covering your keyboard with a cloth or purchasing a keyboard dust cover when not in use.
- Avoid using harsh or abrasive cleaning agents that can damage the key surfaces or remove the characters from the keycaps.
- Regularly clean your hands before using the keyboard to prevent transferring oils, dirt, and bacteria onto the keys.
- Follow any additional cleaning instructions recommended by the keyboard manufacturer to ensure the best care and maintenance for your specific keyboard model.
By incorporating these tips into your keyboard maintenance routine, you can prolong its lifespan, maintain its functionality, and enjoy a clean and pleasant typing experience for years to come.
Now that you have learned how to clean and maintain your keyboard, you are well-equipped to keep your keyboard in top shape. Remember to establish a regular cleaning schedule and take preventive measures to ensure a clean and hygienic workspace.
Conclusion
Cleaning under the keys of your keyboard is an essential task that should not be overlooked. By following the step-by-step process outlined in this article, you can effectively remove dirt, debris, and germs that may have accumulated beneath the keys over time.
Regularly cleaning your keyboard helps to maintain its functionality, prevent sticky or unresponsive keys, and promote a hygienic work environment. By removing dust, crumbs, and bacteria, you can reduce the risk of illnesses and create a more pleasant typing experience.
Remember to gather the necessary tools, power off your computer, remove the keys, clean both the keys and the area underneath, reattach the keys properly, and test your keyboard to ensure it is working correctly.
Additionally, implementing some tips for maintaining a clean keyboard will help prolong its lifespan and preserve its optimal performance. Regular wiping, practicing good hygiene, and preventing spills and debris accumulation are simple yet effective measures to keep your keyboard in excellent condition.
By keeping your keyboard consistently clean, you can enhance your typing experience, prevent unwanted issues, and ensure a healthier and more productive work environment.
Now that you have the knowledge and steps to clean your keyboard effectively, it’s time to put them into action. So go ahead, give your keyboard the cleaning it deserves, and enjoy a fresh and flawless typing experience!