Introduction
When it comes to using a laptop, the keyboard is one of the most frequently used components. Over time, the keys on your laptop’s keyboard may start to wear out or become sticky due to accumulated dirt and dust. In such cases, removing the keyboard keys and cleaning them can help restore their functionality and improve the overall typing experience.
While the idea of removing keyboard keys may sound daunting, it is actually a straightforward process that can be done at home with minimal tools and effort. In this guide, we will walk you through the step-by-step process of removing keyboard keys from a laptop.
Before we begin, please note that while this guide provides general instructions, the specific steps may vary depending on the laptop model and keyboard design. It is always advisable to refer to your laptop’s user manual or consult the manufacturer’s website for detailed instructions pertaining to your specific model.
Now that we have everything clarified, grab your toolkit and let’s get started on removing and cleaning those stubborn laptop keyboard keys!
Tools Required
Before diving into the process of removing keyboard keys from your laptop, it’s essential to gather the necessary tools. Here is a list of the tools you’ll need:
- Small Flathead Screwdriver: This tool will be used to gently pry off the keycaps.
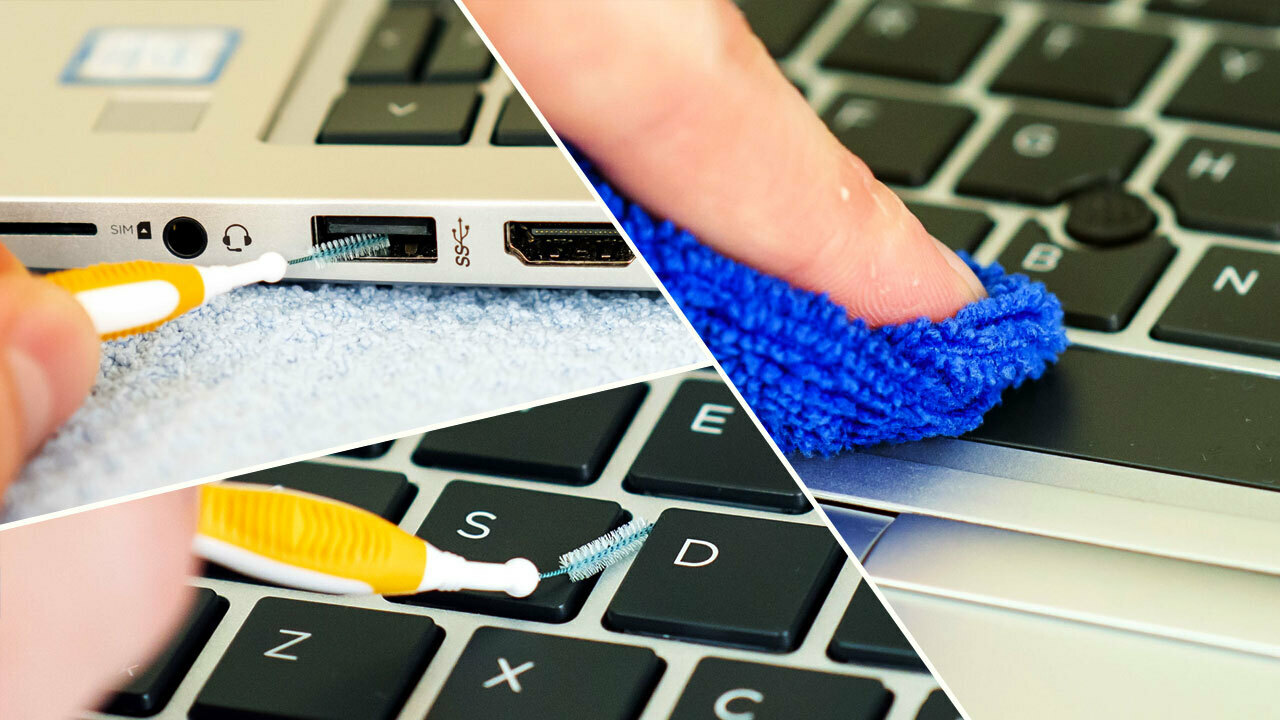
- Cotton Swabs or Soft Cloth: These are essential for cleaning the keycaps and the keyboard switches.
- Isopropyl Alcohol or Keyboard Cleaning Solution: This liquid will help in disinfecting and removing any grime or dirt from the keycaps and keyboard switches.
- Tweezers: Tweezers can be handy for removing any small particles or debris that may be stuck under the keycaps.
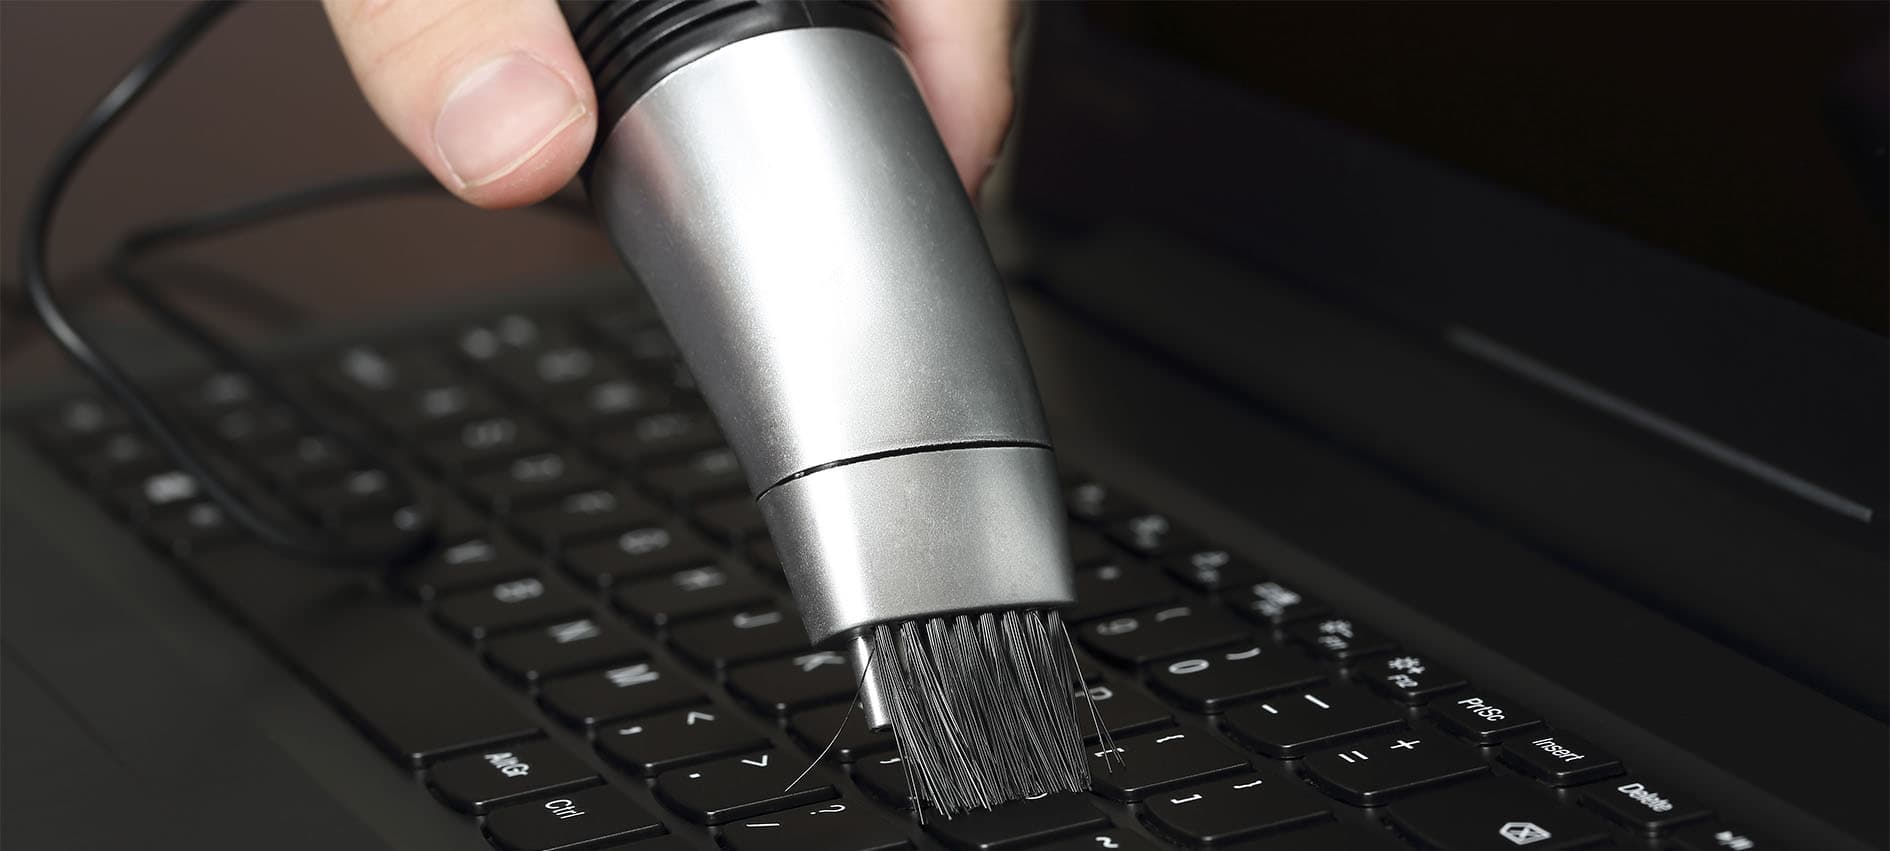
- Compressed Air Duster: This can be used to blow away dust and debris from the keyboard.
It’s important to ensure that the tools you use are clean and in good condition. Using a dirty or damaged tool may cause further damage to your laptop’s keyboard.
Additionally, maintain caution when using the screwdriver or any other tools to avoid scratching or damaging the laptop’s keys or surrounding areas. Work gently and patiently, applying just enough pressure to remove the keycaps without exerting excessive force.
Now that you have gathered all the necessary tools, you’re ready to proceed with the process of removing and cleaning the keyboard keys.
Step 1: Power off and Disconnect the Laptop
Before you start removing the keyboard keys, it’s important to ensure that your laptop is powered off and disconnected from any power source. This will prevent any accidental keystrokes or electrical shock while working on the keyboard.
Here are the steps to follow:
- Save any ongoing work and shut down your laptop properly. Disconnect the charger and remove any other external devices connected to the laptop.
- Flip the laptop over and locate the battery release latch, usually located near the bottom of the laptop. Slide or release the latch to remove the battery from the laptop. If your laptop has an internal battery that cannot be removed, simply ensure that it is turned off.
- If possible, discharge any residual power by holding down the power button for a few seconds.
By following these steps, you ensure the safety of both yourself and your laptop during the keyboard key removal process. With the laptop powered off and disconnected, you can proceed to the next steps with peace of mind.
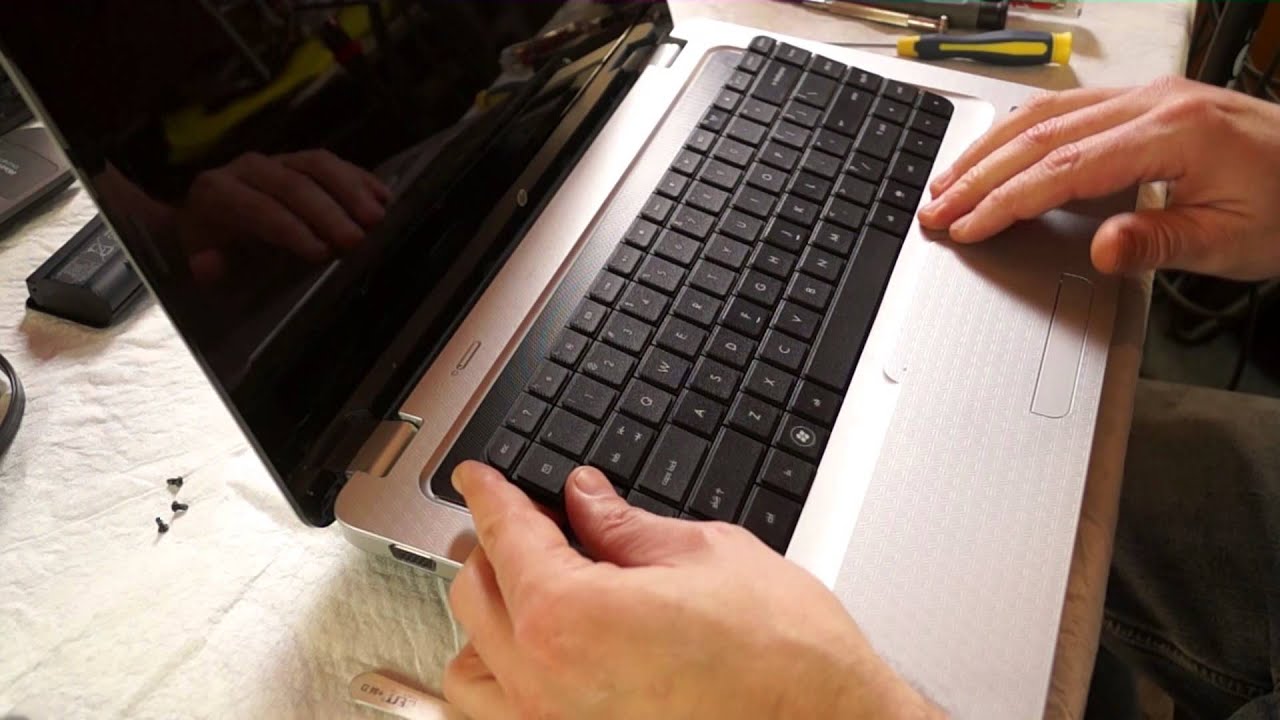
Step 2: Remove the Keycap
Now that your laptop is powered off and disconnected from any power source, it’s time to start removing the keyboard keys. The keycap is the top part of the key that you press when typing. Here’s how you can remove it:
- Position yourself in a well-lit area where you can comfortably work on the keyboard.
- Identify the keycap you want to remove. Choose a key that may be sticky, damaged, or requires cleaning.
- Using a small flathead screwdriver, gently insert it underneath one corner of the keycap. Be cautious not to apply excessive force or use a sharp object that may scratch the keyboard.
- Gently lift the screwdriver and the keycap should pop off. Repeat this process for any other keycaps you want to remove.
It’s important to keep track of each keycap and its original position to ensure proper reattachment later. You can take a photo or create a diagram to help you remember the layout.
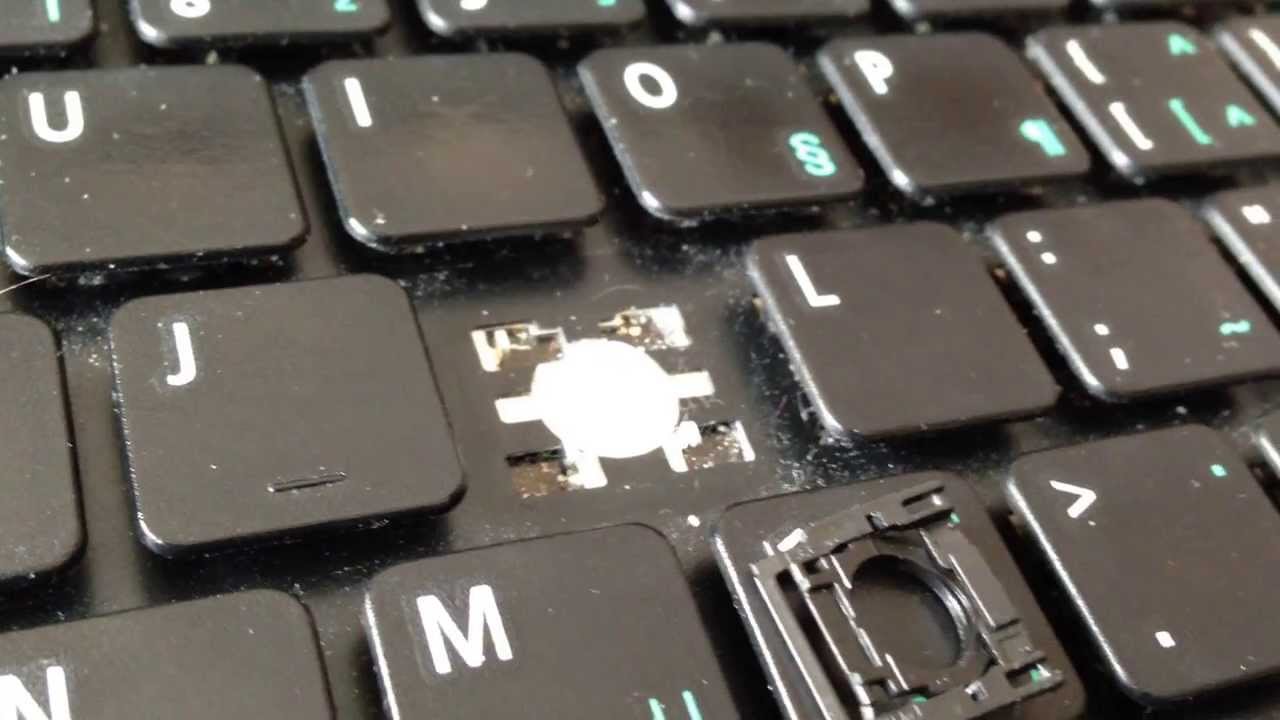
Some keycaps may have small plastic hinges or metal clips underneath them. If you encounter these types, be careful not to break or damage them during removal. Note the position and orientation of these hinges or clips for correct reassembly later.
By following these steps, you will be able to remove the keycaps of your laptop keyboard without causing any harm or damage. In the next step, we will learn how to clean the keycaps and the key switch to restore their functionality.
Step 3: Clean the Keycap and the Key Switch
After successfully removing the keycap, it’s time to give it a thorough cleaning, along with the key switch underneath. Dust, dirt, and debris can accumulate over time, causing keys to become sticky or unresponsive. Follow these steps to clean the keycap and the key switch:
- Prepare a cleaning solution by mixing isopropyl alcohol with water in a 1:1 ratio. Alternatively, you can use a specialized keyboard cleaning solution.
- Dampen a soft cloth or a cotton swab with the cleaning solution. Ensure that it is not dripping wet.
- Gently clean the removed keycap by wiping both the top and bottom surfaces, as well as the sides. Pay attention to any visible dirt or grime.
- For stubborn stains or sticky residue, you can gently scrub the keycap using a soft-bristled toothbrush or a clean toothpick. Be careful not to apply excessive force or damage the keycap.
- Next, clean the area underneath the keycap known as the key switch. Use a cotton swab lightly dampened with the cleaning solution to clean the key switch.
- Gently rub the cotton swab around the key switch, removing any dust or debris that may be present.
- Repeat this cleaning process for each keycap you have removed.
Allow the keycaps and the key switches to air dry completely before reattaching them. This will help ensure that there is no moisture left that could cause damage when the keys are reinstalled.
By cleaning the keycap and the key switch, you eliminate any dirt or grime that may be affecting the key’s functionality. In the next step, we will cover how to reattach the keycap to the keyboard.
Step 4: Reattach the Keycap
Once you have cleaned the keycap and the key switch, it’s time to reattach the keycap back to its original position on the laptop keyboard. Here’s how you can do it:
- Take the cleaned keycap and align it with the corresponding key switch on the keyboard. Ensure that the keycap is positioned correctly and sits evenly on the key switch.
- Press down firmly on the keycap until you hear a click or feel it snap back into place. Make sure all sides of the keycap are securely attached to the keyboard.
- Gently press down on the keycap and test its movement. Ensure that the keycap returns smoothly when pressed and doesn’t stick or wobble.
- If the keycap does not attach properly or feels loose, remove it again and reposition it until it fits snugly on the key switch.
- Repeat this process for each keycap you have previously removed and cleaned.
Take your time while reattaching the keycaps, ensuring accuracy and precision. Double-check that each keycap is aligned correctly to avoid any potential issues with typing or functionality.
If you had to remove any plastic hinges or metal clips during the keycap removal process, make sure to reattach them in their original positions. These hinges or clips help secure the keycap and provide stability during use.
Once all the keycaps are reattached, you are almost ready to test your cleaned and reassembled laptop keyboard. But before that, let’s move on to the final step.
Step 5: Test the Key to Ensure Proper Functioning
After reattaching all the keycaps, it’s essential to test each key to ensure its proper functioning. This step will help you identify if any keys are still sticky, unresponsive, or not functioning correctly. Follow these steps to test the keys:
- Power on your laptop and open a text editor or any application where you can type.
- Start pressing each key, one by one, and pay close attention to how they feel and respond to your keystrokes.
- Check if all the keys register accurately on the screen and if there are no delays or errors.
- If you notice any keys that are still sticky or unresponsive, repeat the cleaning process for those specific keys.
- If the issue persists even after cleaning, it may be necessary to seek professional assistance or consider replacing the keyboard.
By testing the keys, you ensure that the cleaning and reattaching process has been successful and that your laptop keyboard is fully functional again. It’s important to address any issues promptly to avoid further inconvenience or potential damage.
Now that you have completed all the steps and tested the keys, you can enjoy a clean and responsive keyboard on your laptop. Remember to maintain regular cleaning habits to prevent the recurrence of dirt and debris accumulation.
With this guide, you have learned how to remove, clean, and reattach laptop keyboard keys. By following these steps, you can improve the performance and longevity of your keyboard, enhancing your overall typing experience.
Conclusion
Removing and cleaning laptop keyboard keys can significantly improve their functionality and enhance your overall typing experience. By following the steps outlined in this guide, you can easily perform this maintenance task at home. However, it is crucial to exercise caution and refer to your laptop’s user manual for specific instructions.
During the process, remember to power off and disconnect your laptop to ensure safety. Gather the necessary tools, such as a small flathead screwdriver, cotton swabs or a soft cloth, isopropyl alcohol or keyboard cleaning solution, tweezers, and a compressed air duster.
Step-by-step, remove the keycap using gentle pressure, clean it, and the key switch with a cleaning solution and a soft cloth or cotton swab. Allow sufficient time for drying. Be careful not to damage any plastic hinges or clips that secure the keycap.
Then, reattach the keycap to the key switch, ensuring a secure fit and proper alignment. Test each key’s functionality by typing in a text editor or application. If any keys remain sticky or unresponsive, repeat the cleaning process or seek professional assistance if needed.
Regularly cleaning and maintaining your laptop keyboard will prolong its lifespan and ensure smooth and effortless typing. Remember to practice proper keyboard hygiene by avoiding eating or drinking near your laptop and keeping your hands clean while using the keyboard.
Now that you possess the knowledge and skills to remove, clean, and reattach laptop keyboard keys, you can confidently tackle this maintenance task whenever needed. Enjoy a clean and fully functional keyboard, allowing you to type with ease and efficiency.