Introduction
Welcome to our comprehensive guide on how to check if an LED TV mainboard is good. The mainboard, also known as the motherboard or logic board, is a crucial component that controls the functions and operations of an LED television. It houses essential circuitry, including the processor, memory, and input/output ports.
Having a faulty mainboard can result in various issues, such as no power, distorted or no video/audio, and connectivity problems. It is vital to ensure that your LED TV’s mainboard is in optimal condition to enjoy a seamless viewing experience.
In this guide, we will provide you with a step-by-step approach to inspect and test the mainboard of your LED TV. From visual inspections to checking the power supply and testing for damaged capacitors, we will cover all the essential aspects of assessing whether your mainboard is functioning correctly.
Additionally, we will discuss how to test the HDMI ports, check for firmware updates, and troubleshoot common issues that may arise with the mainboard. Following these techniques will enable you to determine the health of your LED TV mainboard and take appropriate action, whether it requires repair or replacement.
To conduct these tests, you will need a few tools, including a screwdriver, multimeter, and a basic understanding of electronics. Don’t worry if you’re not an expert in electronics; we will explain each procedure in a beginner-friendly manner, making it easy for anyone to follow along.
Are you ready to dive into the world of LED TV mainboard testing? Let’s get started on this exciting journey of ensuring your LED TV mainboard is in top-notch condition!
Overview of LED TV Mainboard
The LED TV mainboard, also referred to as the motherboard or logic board, is the central hub of an LED television. It is responsible for controlling and coordinating all the functions and operations of the TV. Think of it as the brain that ensures everything works seamlessly.
The mainboard contains various components, including the processor, memory modules, input/output ports, and other circuitry. These components work together to process and display the video and audio signals, manage the power supply, and enable connectivity options such as HDMI and USB ports.
One of the key components on the mainboard is the processor, which acts as the control center. It processes the incoming signals, decodes them, and sends them to the appropriate sections of the TV for display and sound reproduction. The memory modules help the processor store and retrieve data quickly, enhancing the overall performance of the TV.
The input/output ports on the mainboard allow you to connect external devices such as gaming consoles, Blu-ray players, or soundbars. These ports include HDMI, USB, component, composite, and audio jacks. They enable the transfer of audio and video signals between the TV and other devices, expanding the entertainment possibilities.
Additionally, the mainboard manages the power supply to ensure the TV receives the required voltage and current. It regulates the flow of electricity and protects the TV from power surges or fluctuations. This component is essential for the TV’s safe and efficient operation.
Understanding the mainboard’s components and their functions is crucial when assessing its health. Any issues with the mainboard can lead to various problems, such as no power, distorted or no video/audio output, or connectivity issues. By familiarizing yourself with the mainboard’s overview, you will be better equipped to troubleshoot and diagnose potential issues.
Signs of a Good LED TV Mainboard
When it comes to assessing the health of an LED TV mainboard, there are several signs that indicate it is in good condition. By knowing what to look for, you can determine whether your mainboard is functioning optimally. Here are some signs of a good LED TV mainboard:
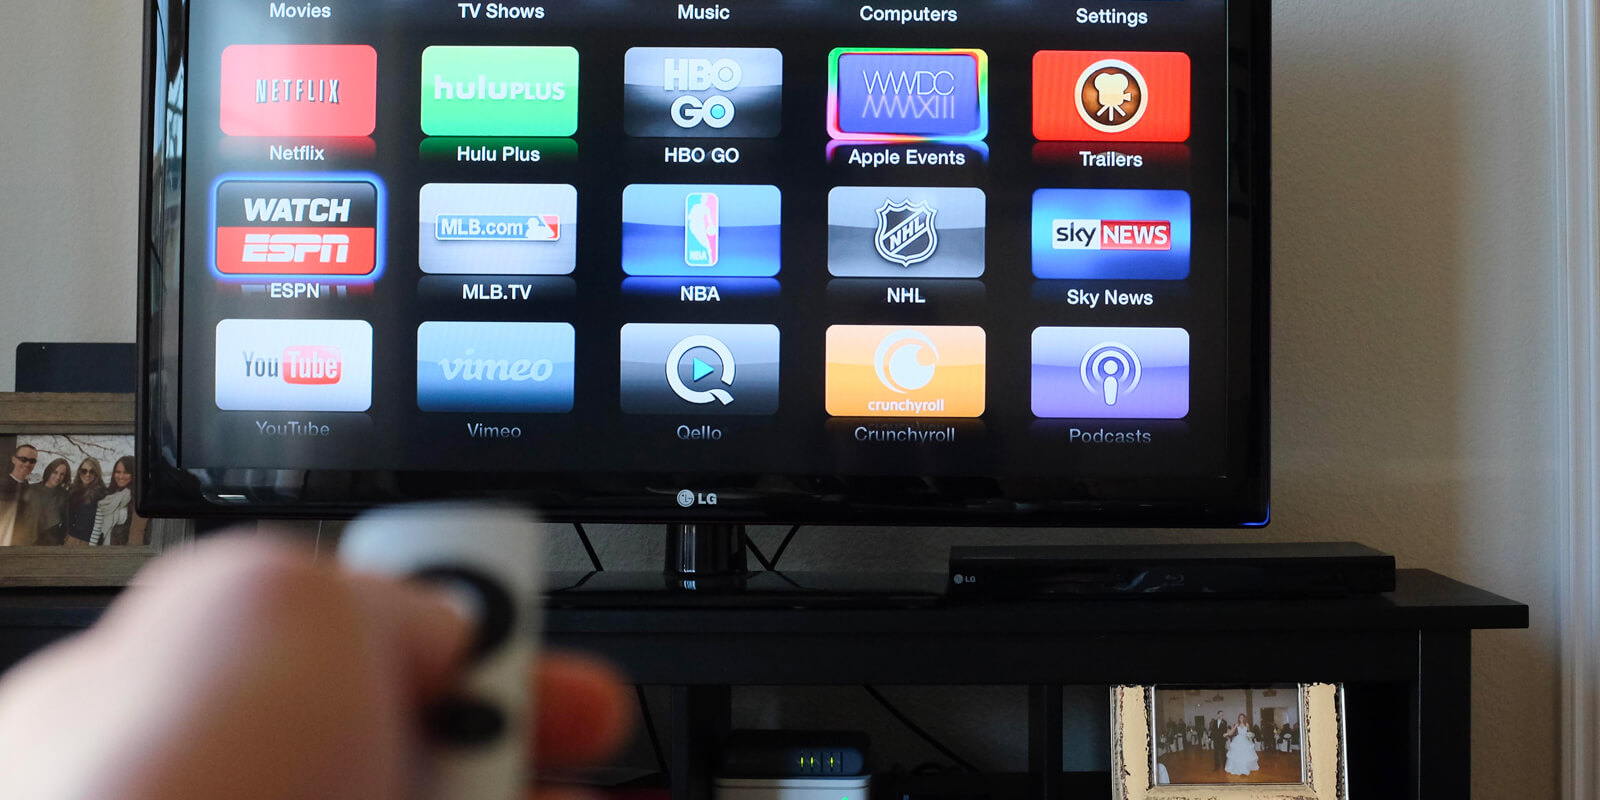
1. Power On: One of the obvious signs of a good mainboard is when the TV powers on smoothly without any issues. When you press the power button, the TV should turn on promptly, displaying the manufacturer’s logo or the home screen.
2. Video and Audio Output: A good mainboard ensures that the TV produces clear and crisp video quality. The images should be sharp, with vibrant colors and no distortion. Similarly, the audio should be clear, without any static or disruptions. Check different sources and inputs to verify the consistent quality.
3. Connectivity Functionality: If the mainboard is working properly, all the input/output ports, such as HDMI, USB, and audio jacks, should function correctly. You should be able to connect external devices and experience smooth communication between the TV and these devices.
4. Responsive User Interface: The user interface of the TV should respond promptly when navigating through menus and settings. If there is a delay or lag between pressing a button and the response on-screen, it may indicate a mainboard issue.
5. Firmware Updates: A good mainboard allows for firmware updates. Regular firmware updates provided by the manufacturer help improve the TV’s performance, fix bugs, and add new features. If your mainboard supports firmware updates and you can successfully install them, it indicates a healthy mainboard.
6. No Overheating: The mainboard should not overheat excessively during normal operation. If the TV becomes excessively hot or shuts down due to overheating, it could be a sign of a faulty mainboard. Proper ventilation and cooling mechanisms should keep the mainboard at a reasonable temperature.
7. Stable Functioning: A good mainboard ensures that the TV operates stably without sudden shutdowns, freezes, or crashes. If the TV consistently functions without any unexpected interruptions, it indicates that the mainboard is in good condition.
Keep in mind that while these signs generally indicate a good mainboard, it is always recommended to perform further testing and inspections to ensure its overall health.
Tools needed for testing LED TV Mainboard
Before you begin testing the LED TV mainboard, it is important to gather the necessary tools. These tools will help you perform various inspections and tests to determine the condition of the mainboard. Here are the essential tools you’ll need:
1. Screwdriver set: A set of screwdrivers with different sizes and types is necessary to remove the screws holding the TV’s back cover or mainboard in place. Make sure to use the appropriate screwdriver to avoid damaging the screws or the TV itself.
2. Multimeter: A digital multimeter is a versatile tool used to measure voltage, current, and resistance. It will help you perform electrical tests on the mainboard, such as checking the power supply and identifying faulty components.
3. Anti-static wrist strap: An anti-static wrist strap is crucial for protecting the sensitive electronic components of the mainboard from electrostatic discharge (ESD). This strap helps to prevent the buildup and discharge of static electricity that can damage the mainboard.
4. ESD mat: An ESD mat provides a safe work surface that dissipates static electricity, further protecting the mainboard from ESD. It is important to place the mainboard on an ESD mat during testing to minimize the risk of damage.
5. Testing cables: You may need various testing cables, such as HDMI, to connect external devices and verify the functionality of the input/output ports on the mainboard.
6. Diagnostic software: Some manufacturers provide diagnostic software specifically designed for their TVs. This software can help diagnose and identify potential issues with the mainboard. Check the manufacturer’s website for any software tools they offer.
7. Documentation: Having the TV’s user manual or service manual can be helpful during the testing process. It provides valuable information about the mainboard’s layout, connectors, and troubleshooting steps.
Remember to take necessary safety precautions while working with electronic equipment. Ensure that the TV is unplugged from the power source and discharge any residual energy by pressing the power button for a few seconds before starting the testing procedure.
By having these tools at your disposal, you will be well-prepared to conduct a thorough and accurate assessment of the LED TV mainboard’s condition.
How to visually inspect the Mainboard
Performing a visual inspection of the LED TV mainboard is the first step in assessing its condition. A thorough visual inspection can help identify any visible issues or signs of damage. Follow these steps to visually inspect the mainboard:
1. Power off and unplug the TV: Before starting any inspection, ensure that the TV is powered off and unplugged from the electrical outlet. This step is crucial for your safety and to prevent any damage to the TV or mainboard.
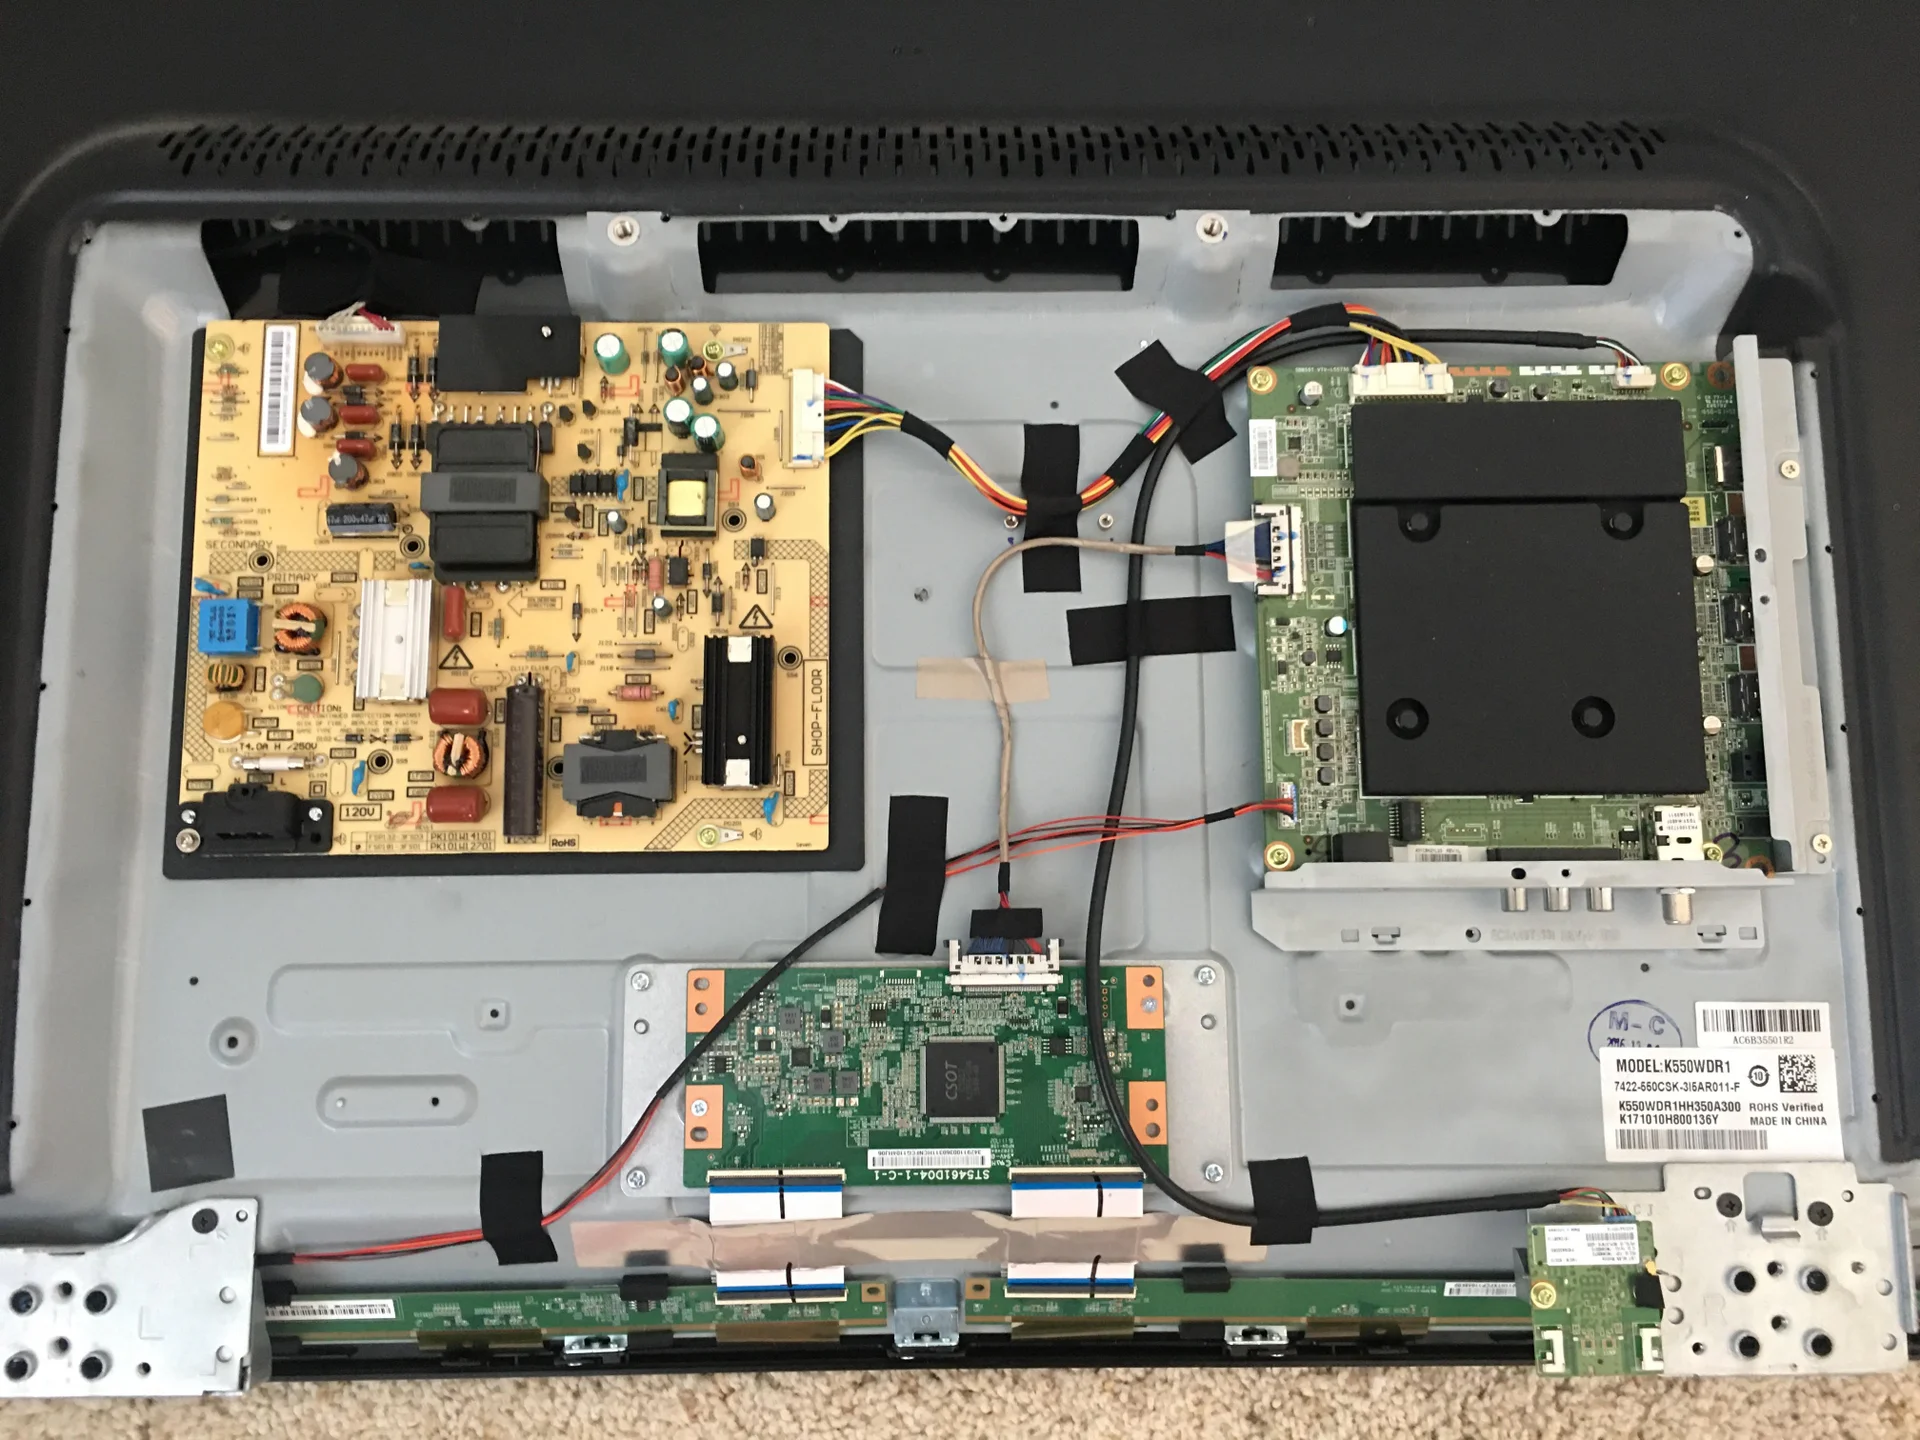
2. Remove the TV back cover: Use the appropriate screwdriver to carefully remove the screws that secure the TV’s back cover. Place the screws in a safe container so you don’t lose them. Gently lift and remove the back cover to expose the mainboard.
3. Observe the overall condition: Take a moment to observe the mainboard’s overall condition. Look for any obvious signs of physical damage, such as burns, melted components, or corrosion. Pay attention to any burnt or discolored areas, as these may indicate past or ongoing issues.
4. Check for bulging or leaking capacitors: Capacitors are cylindrical components on the mainboard. Inspect them closely, looking for any bulging or leaking. Bulging or swollen capacitors are a common sign of a faulty mainboard. If you notice any, it may require further testing or replacement.
5. Inspect for loose or damaged connectors: Carefully examine all the connectors on the mainboard. Check for any loose or damaged connectors, such as pins that are bent, broken, or missing. Loose or damaged connectors can cause connectivity issues or poor signal transmission.
6. Look for signs of overheating: Examine the mainboard for any signs of overheating, such as discoloration, burn marks, or a strong smell of burnt electronics. Overheating can be an indication of a faulty mainboard or inadequate cooling mechanisms.
7. Check for dust or debris: Take note of any dust or debris that may have accumulated on the mainboard. Excessive dust can hinder the performance of the components and disrupt the airflow, leading to overheating or other issues. If necessary, use compressed air or a soft brush to gently clean the mainboard.
8. Verify component labeling: Take a close look at the labels and markings on the mainboard. Ensure that all components are properly labeled and positioned. Check for any signs of tampering or aftermarket modifications that could indicate potential issues.
By visually inspecting the mainboard, you can identify any visible problems or anomalies that may affect its performance. If you notice any significant issues during the inspection, it is recommended to seek professional assistance or further diagnostic testing.
How to check the power supply on LED TV Mainboard
The power supply of an LED TV mainboard is responsible for providing the necessary voltage and current to the various components. A malfunctioning power supply can cause issues such as no power, intermittent shutdowns, or unstable operation. To check the power supply of the LED TV mainboard, follow these steps:
1. Power off and unplug the TV: Start by turning off the TV and unplugging it from the power source. This step ensures your safety and prevents any accidental damage to the TV or mainboard.
2. Discharge any residual energy: Press and hold the TV’s power button for a few seconds to discharge any residual energy. This step helps eliminate the risk of electrical shocks while working on the mainboard.
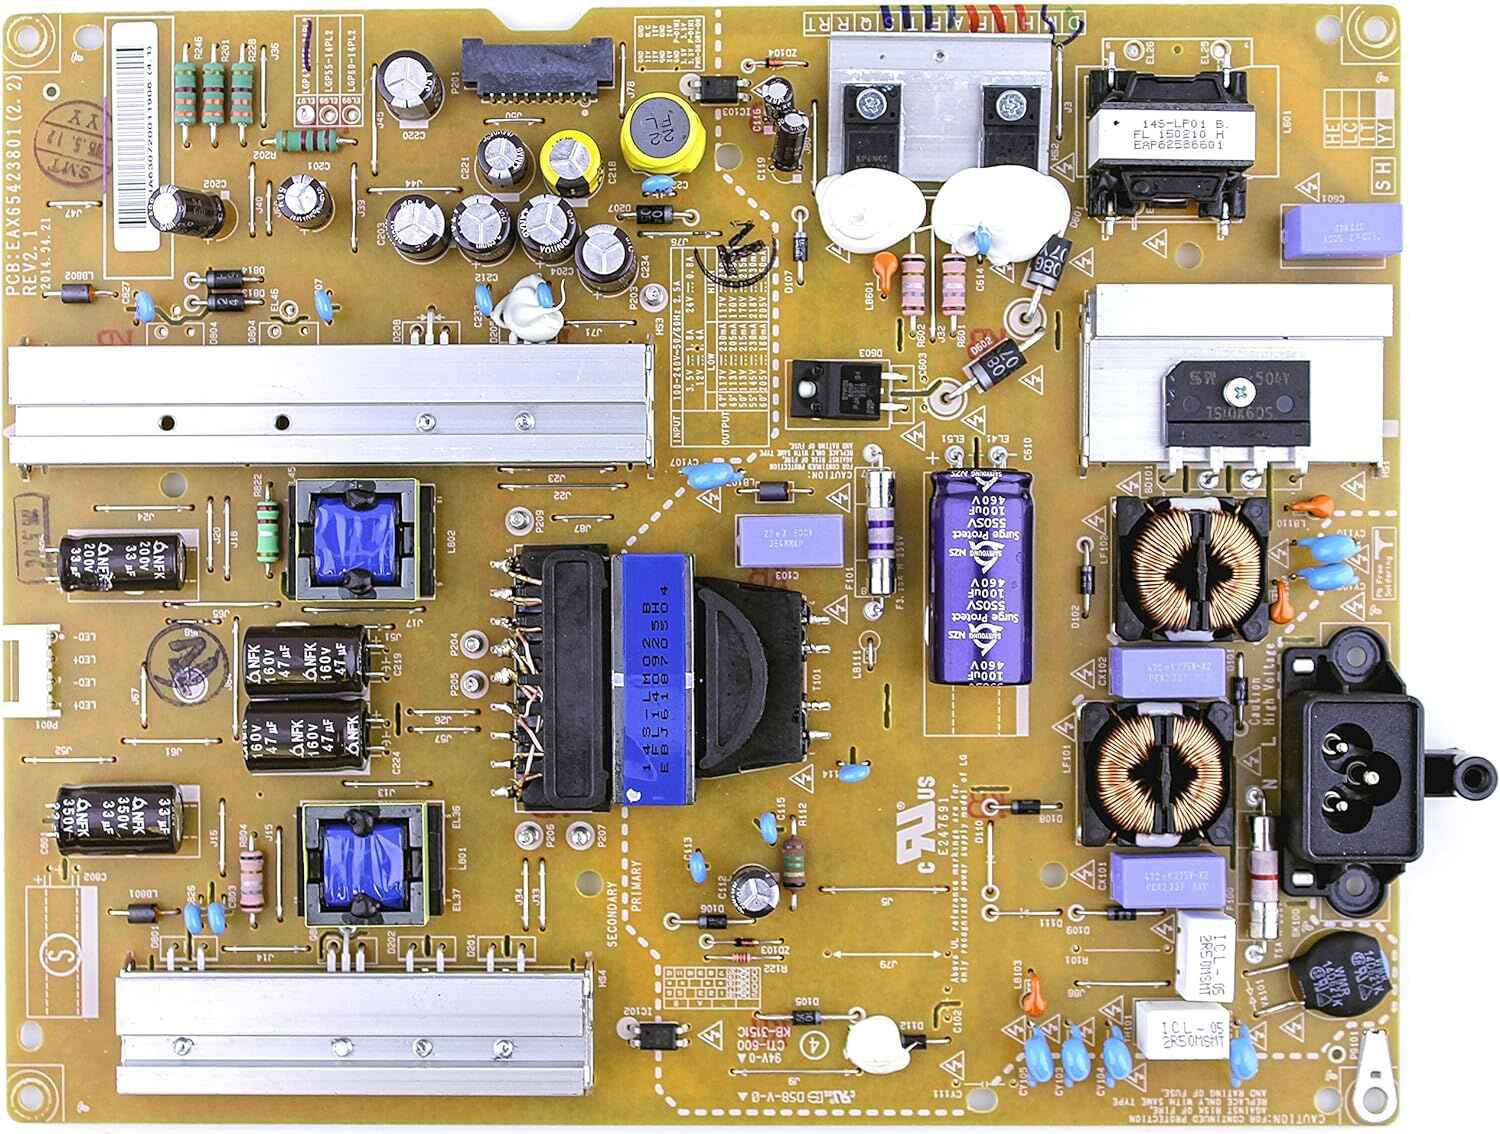
3. Locate the power supply board: Identify the power supply board of the mainboard. It is usually a separate board connected to the mainboard and receives power from the AC input.
4. Visual inspection: Perform a visual inspection of the power supply board. Look for any visible signs of damage, such as burnt components, bulging capacitors, or scorched areas. If you notice any issues, it may indicate a faulty power supply that needs further investigation.
5. Testing with multimeter: Set your digital multimeter to measure voltage (DC). Locate the connector or terminals on the power supply board that provide power to the mainboard. Consult the TV’s service manual or user manual to identify the specific voltage levels required for the mainboard.
6. Power on the TV: Plug in the power cord and turn on the TV. While the TV is turned on, place the multimeter’s red probe on the positive terminal of the power supply connector and the black probe on the negative terminal. The multimeter should display the voltage level corresponding to the power supply output.
7. Check voltage levels: Compare the measured voltage levels with the specifications provided in the TV’s manual. If the measured voltage deviates significantly from the expected levels, it could indicate a faulty power supply. In such cases, it is recommended to seek professional assistance or replace the power supply board.
8. Power off and reassemble: Once you have completed the power supply test, power off the TV, unplug it from the power source, and reassemble the TV’s back cover using the appropriate screws.
By checking the power supply on the LED TV mainboard, you can identify any abnormalities or issues that may affect the overall functionality of the TV. It is important to exercise caution while working with electronics and, if necessary, seek professional assistance for complex repairs or replacements.
How to test for damaged capacitors on LED TV Mainboard
Capacitors are essential components on the LED TV mainboard that store and regulate electrical energy. When capacitors become damaged or faulty, they can cause various issues such as power problems, audio/video distortion, or even complete failure of the TV. To test for damaged capacitors on the LED TV mainboard, follow these steps:
1. Power off and unplug the TV: Ensure that the TV is powered off and unplugged from the electrical outlet. This step is important to prevent any electrical hazards and ensure your safety throughout the testing process.
2. Open the TV and locate the mainboard: Use the appropriate screwdriver to remove the screws holding the TV’s back cover. Once the cover is removed, locate the mainboard, which is the large circuit board at the center of the TV.
3. Identify the capacitors: Capacitors on the mainboard are typically cylindrical in shape and vary in size. Take note of their locations and look for any visible signs of damage such as bulging, leaking, or electrolyte residue on the top or bottom of the capacitors. Damaged capacitors are often easy to spot due to their abnormal physical appearance.
4. Discharge residual energy: Use a screwdriver with an insulated handle or a dedicated discharge tool to safely discharge any residual energy stored in the capacitors. This step is crucial to avoid electrical shock when handling the capacitors.
5. Test with a multimeter: Set your multimeter to measure capacitance (capacitance testing mode). Carefully remove the damaged capacitors from the mainboard, making sure to note their position and polarity. Connect the multimeter’s probes to the corresponding capacitor leads, observing the correct polarity. The multimeter should display the capacitance value.
6. Compare measured capacitance: Compare the measured capacitance value with the capacitor’s rated capacitance, which is typically indicated on its body or in the manufacturer’s specifications. If the measured capacitance significantly deviates from the rated value or shows as zero (“0” or “OL” on the multimeter display), it indicates a damaged or faulty capacitor that requires replacement.
7. Repeat for other capacitors: Test each capacitor individually following the same process. Keep in mind that some capacitors may be located on separate boards or in different sections of the mainboard. Thoroughly inspect and test each capacitor for any signs of damage.
8. Replace damaged capacitors: If you identify any damaged capacitors, remove them from the mainboard and replace them with appropriate replacements of the same capacitance value, voltage rating, and polarity. Ensure the new capacitors are soldered correctly onto the mainboard.
Testing for damaged capacitors on the LED TV mainboard is crucial for maintaining the TV’s performance and preventing further damage. If you are unsure or uncomfortable performing these tests yourself, it is recommended to seek professional assistance from a qualified technician.
Testing the HDMI ports on LED TV Mainboard
HDMI ports on an LED TV mainboard allow you to connect external devices such as gaming consoles, media players, and laptops to enjoy high-definition audio and video. It is important to ensure that the HDMI ports are functioning correctly to have a seamless viewing experience. Here’s how you can test the HDMI ports on an LED TV mainboard:
1. Prepare the testing devices: Gather a known working HDMI cable and a device that you know outputs audio and video through HDMI, such as a Blu-ray player or a game console.
2. Power off and unplug the TV: Before connecting any devices, power off the TV and unplug it from the power source. This precaution ensures your safety during the testing process.
3. Connect the HDMI cable: Take the HDMI cable and connect one end to the HDMI output port of the testing device and the other end to one of the HDMI input ports on the LED TV mainboard. Ensure that both ends are securely inserted into the ports.
4. Power on the TV and testing device: Turn on the TV and the testing device. Wait for both devices to fully power up and establish a connection.
5. Select the appropriate HDMI input: Use the TV’s remote control or on-screen menu to select the HDMI input channel that corresponds to the HDMI port you connected the testing device to. Most TVs have multiple HDMI input options, so choose the correct one.
6. Check for audio and video output: Once the appropriate HDMI input is selected, verify if the audio and video signals are being transmitted successfully from the testing device to the TV. Ensure that you have the correct input selected on the testing device as well.
7. Test with multiple HDMI ports: Repeat the process for each HDMI port on the LED TV mainboard. Connect the testing device to different HDMI ports and check if the audio and video signals are detected and displayed correctly.
8. Inspect for any issues: While testing, keep an eye out for any issues such as distorted video, no video output, no audio, or any interference. These issues could indicate a problem with the HDMI port or cable.
By testing the HDMI ports on the LED TV mainboard, you can ensure that the ports are functioning properly and capable of transmitting high-quality audio and video signals. If any port fails to work or exhibits issues, it may require further inspection, cleaning, or professional assistance for repair or replacement.
Checking for firmware updates on LED TV Mainboard
Firmware updates are vital for maintaining the optimal performance of the LED TV mainboard. They provide bug fixes, improved functionality, and compatibility with the latest technologies. Checking for and installing firmware updates is a straightforward process. Here’s how you can do it:
1. Identify the TV’s model and manufacturer: Note down the exact model number of your LED TV and its manufacturer. This information is usually located on a sticker at the back of the TV or in the TV’s user manual. Knowing the correct model and manufacturer is essential for finding the appropriate firmware updates.
2. Visit the manufacturer’s website: Go to the official website of the TV manufacturer. Most manufacturers provide support sections on their websites where you can find firmware updates for specific TV models. Look for a “Support” or “Downloads” section.
3. Locate the firmware updates: Within the support section, search for firmware updates specific to your TV model. The firmware updates are usually listed with their version numbers and release dates. Download the latest firmware update for your TV model.
4. Read the release notes: Before installing the firmware update, it is recommended to read the release notes provided by the manufacturer. The release notes contain important information about the changes, improvements, and fixes included in the update.
5. Prepare a USB flash drive: Format a USB flash drive to Fat32 or exFAT file system, and ensure it is empty. Copy the downloaded firmware update file to the root directory of the USB flash drive. Safely eject the USB flash drive from your computer.
6. Power off and unplug the TV: Before proceeding with the firmware update, turn off the TV and unplug it from the power source. This step ensures a safe and uninterrupted update process.
7. Insert the USB flash drive into the TV: Plug the USB flash drive into one of the USB ports on the TV. Refer to your TV’s user manual to determine the recommended USB port for firmware updates.
8. Install the firmware update: Power on the TV and follow the on-screen prompts to install the firmware update. The TV will detect the firmware update on the USB flash drive and guide you through the installation process. Be patient and ensure that the TV remains powered on during the update.
9. Wait for the update to complete: The firmware update process may take several minutes. Do not turn off or unplug the TV during this time. Once the update is complete, the TV will restart automatically.
10. Verify the firmware version: After the TV restarts, go to the TV’s settings menu, typically under “System” or “About,” and verify that the firmware version matches the latest update you installed.
Regularly checking for and installing firmware updates on your LED TV mainboard can help optimize its performance and ensure compatibility with the latest features and technologies. Remember to follow the manufacturer’s instructions carefully during the firmware update process.
Troubleshooting common issues with LED TV Mainboard
LED TV mainboards can experience various issues that affect the TV’s performance and functionality. Troubleshooting these common issues can help identify the underlying problem and potentially resolve it. Here are some common issues you may encounter with an LED TV mainboard and steps to troubleshoot them:
1. No power: If the TV does not power on at all, ensure that it is properly plugged into a working power outlet. Check the power cord and connection to the mainboard. If the power supply is functioning correctly, but the TV still does not power on, it may indicate a faulty mainboard that requires professional repair.
2. No video or audio: If the TV powers on, but there is no video or audio output, ensure that the input source is selected correctly and that the cables are securely plugged into the appropriate ports. Test different input sources and cables to rule out any issues with the external devices. If the problem persists, it could indicate a fault with the mainboard’s video or audio processing components.
3. Distorted or flickering video: If the video output on the TV appears distorted, flickering, or showing visual artifacts, first check the HDMI or other video cables for loose connections or damage. Try connecting the device to a different HDMI port on the TV. If the issue persists, it could indicate a problem with the mainboard’s video processing components or the connected device’s output.
4. No HDMI signal: If there is no HDMI signal detected when connecting external devices, ensure that the HDMI cable is properly connected to both the TV and the device. Try using a different HDMI cable or port. If this does not resolve the issue, it may indicate a faulty HDMI port or HDMI controller on the mainboard.
5. Remote control or buttons not responsive: If the TV does not respond to commands from the remote control or physical buttons, check the batteries in the remote control and replace them if necessary. Ensure that there are no obstructions between the remote control and the TV’s infrared receiver. If both the remote control and physical buttons are unresponsive, there may be a problem with the mainboard’s control circuitry.
6. Random reboots or freeze-ups: If the TV randomly reboots or freezes during operation, ensure that the firmware is up to date. Check for any available firmware updates and install them as per the manufacturer’s instructions. If the issue persists, it may indicate a problem with the mainboard’s memory, processor, or power supply circuitry.
7. Intermittent connectivity issues: If the TV experiences intermittent connectivity issues with external devices or internet connectivity, check the cables and connections. Ensure that the firmware is up to date to leverage any fixes provided by the manufacturer. If the issue continues, there may be a problem with the mainboard’s communication ports or network controller.
For any of these issues, it is advisable to consult the TV’s user manual or contact the manufacturer’s support for specific troubleshooting steps or to arrange for professional repair service. Understanding the common issues and their troubleshooting steps can help you narrow down the problem and make informed decisions about repair or replacement.
Conclusion
Testing and assessing the mainboard of an LED TV is crucial for maintaining optimal performance and addressing any potential issues. By following the steps outlined in this guide, you can visually inspect the mainboard, check the power supply, test for damaged capacitors, examine the HDMI ports, and update the firmware. Additionally, troubleshooting common mainboard issues can help identify and resolve problems that may arise.
Remember to always prioritize safety when working with electronic devices. Power off and unplug the TV before conducting any inspections or tests. Follow proper procedures for discharging energy and handle components with care to prevent damage or injury.
Regular maintenance and testing of the mainboard can prolong the lifespan of your LED TV and ensure an optimal viewing experience. If you encounter any issues that you are not comfortable or qualified to handle, it is recommended to seek professional assistance from authorized repair centers or technicians.
By understanding the mainboard’s components, performing visual inspections, checking for power supply issues, testing capacitors and HDMI ports, and staying updated with firmware releases, you can effectively diagnose and address problems with the LED TV mainboard.
Stay informed about the latest advancements in LED TV technology and refer to the manufacturer’s documentation for specific instructions related to your TV model. With proper testing and troubleshooting techniques, you can maintain your LED TV’s mainboard in optimal condition for a remarkable viewing experience.