Introduction
Welcome to this guide on how to change Redragon keyboard colors. If you own a Redragon keyboard and you’re looking to add a touch of personalization to it, then you’re in the right place. Redragon keyboards offer a wide range of customizable lighting options that allow you to create a unique and visually appealing setup.
Having a keyboard that matches your style can enhance your overall gaming experience, make your workspace more inviting, or simply add a fun element to your computer setup. Whether you prefer a vibrant and colorful display or a more subtle and refined look, Redragon keyboards have got you covered.
In this guide, we will take you through a step-by-step process of changing the colors on your Redragon keyboard. From installing the necessary software to customizing lighting effects and key assignments, you’ll soon have the perfect keyboard to match your preferences.
Before we dive into the step-by-step instructions, it’s important to note that the specific steps may vary slightly depending on the model of your Redragon keyboard. However, the general principles covered in this guide should apply to most Redragon keyboards.
So, without further ado, let’s get started on transforming the look of your Redragon keyboard and making it truly yours!
Step 1: Equipment and Software Required
Before you begin changing the colors on your Redragon keyboard, there are a few things you’ll need to have in order to ensure a smooth process. Here’s a list of the equipment and software you’ll need:
- A Redragon keyboard: This guide is specifically tailored to Redragon keyboards, so make sure you have one in order to follow along.
- A computer: You will need a computer to download and install the necessary software for customizing your Redragon keyboard’s colors.
- Dedicated software: Redragon provides software specifically designed for their keyboards. You’ll need to download and install this software before proceeding. You can find the software on the Redragon website or included in the package of your keyboard.
- An available USB port: Ensure that you have an available USB port on your computer to connect your Redragon keyboard.
Once you have gathered all the necessary equipment and software, you’re ready to move on to the next steps of the process. Make sure to double-check that you have everything ready before proceeding to avoid any delays or interruptions throughout the customization process.
In the next step, we will guide you through the process of installing the Redragon software onto your computer, so stay tuned!
Step 2: Installing Redragon Software
Now that you have gathered all the necessary equipment, it’s time to install the Redragon software onto your computer. The Redragon software allows you to access and customize the various lighting options of your keyboard.
To begin, follow these steps:
- Visit the Redragon website: Open your preferred web browser and navigate to the official Redragon website.
- Find the software download section: Look for the software download section on the website. It is usually located in the support or downloads area.
- Select your keyboard model: Find your specific keyboard model from the list of available options and click on it.
- Download the software: Once you have selected your keyboard model, click on the download button to start the software download. Follow any on-screen instructions if prompted.
- Install the software: After the download is complete, locate the downloaded file on your computer and double-click to launch the installation process. Follow the installation wizard to install the Redragon software onto your computer.
- Finish the installation: Once the installation is complete, you may be prompted to restart your computer. If so, go ahead and restart to ensure that the software is properly installed.
Once you have successfully installed the Redragon software, you’re one step closer to customizing the colors of your keyboard. In the next step, we will guide you through the process of connecting your Redragon keyboard to your computer. Stay with us!
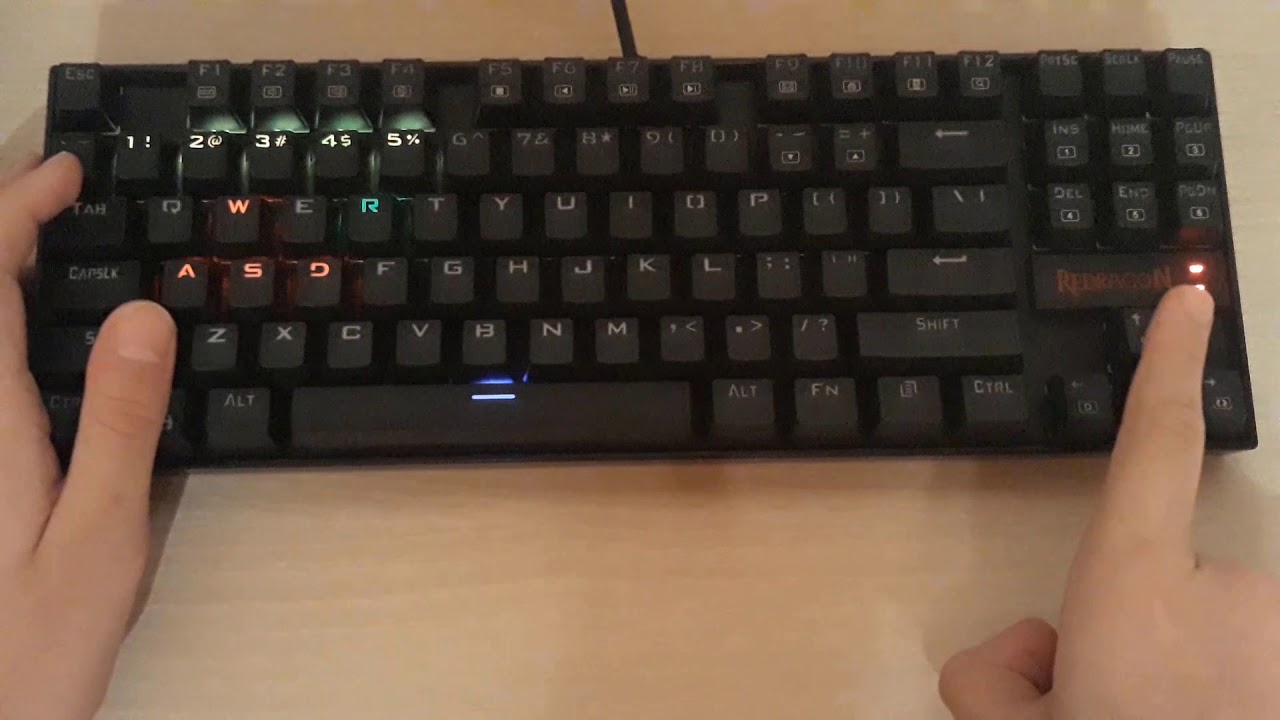
Step 3: Connecting the Keyboard
Now that you have installed the Redragon software on your computer, it’s time to connect your Redragon keyboard. Follow these steps to ensure a proper connection:
- Locate an available USB port: Look for an available USB port on your computer. This is where you will connect your Redragon keyboard.
- Plug in the keyboard: Take the USB cable that came with your Redragon keyboard and plug it into the USB port on your computer. Make sure the connection is secure.
- Wait for the computer to recognize the keyboard: After you have connected the keyboard, wait for a few moments as your computer recognizes and installs the necessary drivers for the keyboard.
- Ensure the keyboard is powered on: Make sure that your Redragon keyboard is powered on. Look for any indicator lights or check the keyboard manual for instructions on how to turn it on.
- Check the software connection: Open the Redragon software on your computer and verify that it recognizes the connected keyboard. You should see the keyboard model displayed in the software interface.
If the Redragon software successfully recognizes your connected keyboard, you’re all set to proceed to the next steps of customizing the colors. However, if the software does not recognize the keyboard, double-check the connection, restart your computer, and try again.
Now that your Redragon keyboard is connected and properly recognized by the software, it’s time to explore the various customization options available to you. In the next step, we will guide you through accessing the Redragon software and getting started with the color customization process. Let’s dive in!
Step 4: Accessing the Redragon Software
With your Redragon keyboard connected to your computer, it’s time to access the Redragon software and start customizing the colors. Follow these steps to access the software:
- Locate the Redragon software on your computer: Look for the Redragon software icon either on your desktop or in the start menu. Double-click on the icon to launch the software.
- If you can’t find the software: In case you are unable to locate the software, double-check that it has been properly installed. If the software is installed but not visible, try searching for “Redragon” in the start menu search bar.
- Open the software: Once you have located and launched the Redragon software, the interface should open up and display various options for customization.
- Explore the software interface: Take a moment to familiarize yourself with the different tabs and options available in the software. You will find options to change the lighting effects, colors, and other settings related to your Redragon keyboard.
Once you have successfully accessed the Redragon software and familiarized yourself with the interface, you’re ready to proceed to the next step of setting up custom lighting effects for your keyboard. Stay with us for more exciting customization options!
Step 5: Setting up Custom Lighting
Now that you have accessed the Redragon software, it’s time to unleash your creativity and set up custom lighting effects for your keyboard. Follow these steps to customize the lighting:
- Select the lighting option: In the Redragon software, navigate to the “Lighting” or “RGB” tab to access the lighting settings for your keyboard.
- Choose a lighting effect: Explore the different lighting effects available in the software. You may find options such as static, breathing, wave, or even custom effects. Select the lighting effect that best suits your preferences.
- Adjust the color scheme: Once you have chosen a lighting effect, you can further customize it by adjusting the color scheme. Depending on the software, you may have the option to choose from a wide range of colors or create your own custom color palette.
- Experiment with brightness and speed: Play around with the brightness and speed settings to fine-tune the lighting effect. Some software allows you to adjust the intensity of the colors or the speed at which the lighting effect transitions.
- Preview and apply the changes: Take advantage of the preview option in the software to see how your customized lighting effect will look on your keyboard. Once you are satisfied with the changes, click “Apply” or “Save” to make them take effect on your Redragon keyboard.
Feel free to experiment with different lighting effects, color combinations, and settings until you achieve the desired look for your keyboard. Customizing the lighting not only adds a personal touch but can also enhance your gaming or working environment.
In the next step, we will delve into adjusting color profiles for even more customization options. So, let’s continue on this exciting journey of transforming your Redragon keyboard!
Step 6: Adjusting Color Profiles
After setting up custom lighting effects in the previous step, it’s time to take your customization to the next level by adjusting color profiles. Color profiles allow you to create and switch between different lighting configurations. Follow these steps to adjust color profiles:
- Access the color profile settings: In the Redragon software, locate the “Color Profiles” or “Profiles” tab.
- Create a new color profile: Click on the option to create a new color profile. Give it a name that reflects the style or theme you want to achieve.
- Customize the lighting and effects: Within the new color profile, you can customize the lighting effects, colors, and other settings, just like in the previous step. Take this opportunity to create a unique combination that suits your preferences.
- Save the color profile: Once you are satisfied with the changes, save the color profile to apply your custom lighting configuration. Some software may allow you to assign a key combination or shortcut to quickly switch between color profiles.
- Create additional color profiles: Repeat the process to create multiple color profiles. This way, you can switch between different lighting setups depending on your mood, game, or workspace.
By adjusting color profiles, you can easily switch between different lighting configurations without having to redo the customization every time. This provides you with greater flexibility and allows you to match your keyboard lighting to various activities or settings.
In the next step, we will explore how to customize key assignments on your Redragon keyboard. Stay tuned!
Step 7: Customizing Key Assignments
Customizing key assignments on your Redragon keyboard can greatly enhance your productivity and gaming experience. In this step, we will guide you through the process of customizing key assignments using the Redragon software. Follow these steps:
- Access the key assignment settings: In the Redragon software, navigate to the “Key Assignments” or “Key Mapping” tab.
- Select a key to customize: Choose a specific key on your keyboard that you want to customize. It can be a function key, a letter key, or any other key that you want to assign an alternate function to.
- Choose an action or function: Once you have selected a key to customize, you can choose from a list of predefined actions or functions available in the software. These can range from media controls and macros to application shortcuts or key combinations.
- Assign the function to the key: Map the selected action or function to the chosen key by following the instructions provided in the software. This may involve pressing the desired key combination or selecting the action from a dropdown menu.
- Repeat for additional key assignments: Customize other keys on your Redragon keyboard using the same process. You can assign different functions to different keys based on your needs and preferences.
- Save and apply the changes: Once you have finished customizing the key assignments, save the changes in the software. The key assignments will take effect immediately on your Redragon keyboard.
Customizing key assignments can provide you with quick access to commonly used functions, shortcuts, or macros, saving you time and effort during gameplay or while working on your computer. Take advantage of this feature to streamline your workflow or enhance your gaming performance.
In the next step, we will guide you on how to save and apply all the changes you have made to your Redragon keyboard. Stay with us to complete your customization journey!
Step 8: Saving and Applying Changes
After customizing the various settings of your Redragon keyboard, it’s important to save and apply the changes to ensure that your preferences are retained. Follow these steps to save and apply your customizations:
- Review your customizations: Take a moment to review all the changes you have made to the lighting effects, color profiles, and key assignments on your Redragon keyboard.
- Ensure everything is as desired: Double-check that the lighting effects are displaying correctly, the color profiles are switching smoothly, and the key assignments are functioning as intended.
- Save the settings: Look for the “Save” or “Apply” button within the Redragon software. Click on it to save all the customizations you have made.
- Confirm the changes: After saving the settings, you may receive a confirmation message indicating that the changes have been successfully applied to your Redragon keyboard.
- Test the functionality: Test the functionality of your customized settings by typing, playing games, or performing other tasks that involve the keyboard. Make sure everything is working as expected.
By saving and applying your changes, you ensure that your customized settings remain in place even after you disconnect and reconnect your Redragon keyboard or restart your computer. It’s important to follow this step to avoid having to repeat the customization process every time.
Congratulations! You have successfully customized the colors, lighting effects, and key assignments on your Redragon keyboard. Now, you can enjoy a personalized and optimized keyboard experience tailored to your preferences.
In the final step, we will provide some troubleshooting tips to assist you in case you encounter any issues along the way. Let’s dive in!
Step 9: Troubleshooting Tips
While customizing your Redragon keyboard, you may encounter some challenges or issues. Don’t worry! In this step, we will provide you with some troubleshooting tips to help overcome common problems:
- Unplug and reconnect: If you notice that your customizations are not being applied or the keyboard is not responding, try unplugging and reconnecting the USB cable to ensure a secure connection.
- Restart the software: Sometimes, the Redragon software may encounter glitches or become unresponsive. In such cases, close the software and restart it to see if the issue is resolved.
- Update the software and drivers: Check for software or driver updates for both your Redragon keyboard and the Redragon software. Keeping them up to date ensures compatibility and can resolve any known issues.
- Check for conflicts with other software: Verify that there are no conflicts with other software or applications running on your computer. Close any unnecessary programs that may interfere with the functioning of the Redragon software.
- Check for firmware updates: Some Redragon keyboards have firmware that can be updated. Check the Redragon website or the keyboard’s manual to see if there are any available firmware updates. Updating the firmware can address certain issues.
- Consult the user manual: If you’re still experiencing difficulties, refer to the user manual that came with your Redragon keyboard. It may provide specific troubleshooting steps and solutions for common problems.
- Contact customer support: If all else fails, reach out to Redragon customer support for further assistance. They will be able to provide you with more specific guidance based on your keyboard model and the issue you are facing.
Remember, troubleshooting can vary depending on the specific model of your Redragon keyboard and the software version you are using. These tips should serve as a general guideline to help you resolve common issues.
With these troubleshooting tips in mind, you should be able to overcome any obstacles and fully enjoy the customized experience of your Redragon keyboard.
Congratulations once again on customizing your Redragon keyboard to your liking! Enjoy gaming, typing, or working with a keyboard that reflects your unique style and preferences.
Conclusion
Congratulations on completing the process of changing the colors on your Redragon keyboard! By following the step-by-step guide, you have successfully customized the lighting effects, color profiles, and key assignments to match your preferences and enhance your overall keyboard experience.
With the Redragon software and your creative input, you have transformed your keyboard into a personalized and visually appealing piece of equipment. Your customized lighting effects will add a touch of style to your gaming setup or workspace, making it uniquely yours.
Remember, the Redragon software provides you with a wide range of options to create different color profiles, allowing you to easily switch between various lighting configurations depending on your mood or activity. Additionally, by customizing key assignments, you can streamline your workflow or enhance your gaming performance by having quick access to desired functions.
If you encountered any issues along the way, the troubleshooting tips provided in the guide should help you overcome them. Don’t hesitate to reach out to Redragon customer support for further assistance if needed.
We hope this guide has been helpful in guiding you through the process of changing the colors on your Redragon keyboard. Enjoy your customized keyboard and make the most out of your gaming sessions or work tasks with a keyboard that matches your style and preferences!