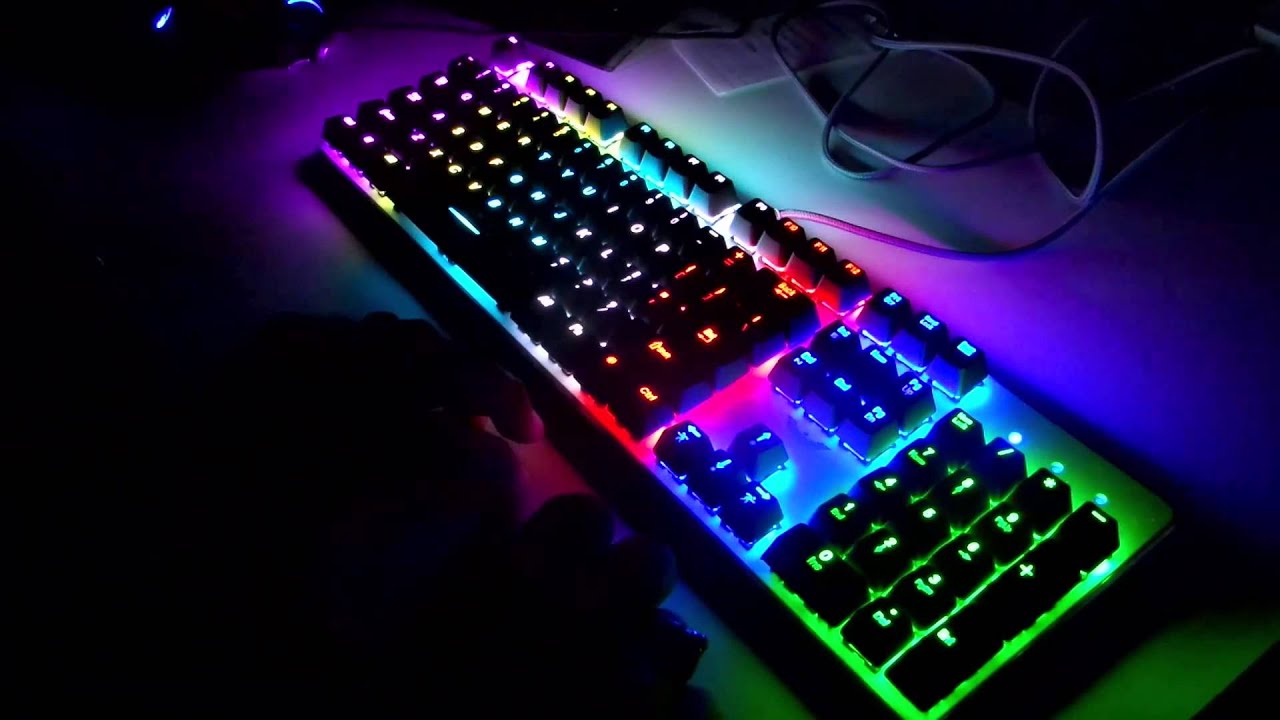
Introduction
Changing keys on a keyboard can be a great way to customize your typing experience. Whether you want to replace a worn-out key or personalize your keyboard with a different set of keycaps, this guide will walk you through the process step by step.
With just a few simple tools and a bit of patience, you can easily remove and replace keys on your keyboard. This can be particularly useful if you use your keyboard frequently for work, gaming, or other tasks that require precision and comfort.
In this article, we will provide a comprehensive guide on how to change keys on a keyboard. We will cover the necessary tools you will need, as well as a detailed walkthrough for each step of the process. By the end, you will have the knowledge and confidence to successfully change keys on your keyboard.
Before we dive into the steps, it is important to note that not all keyboards are designed to have removable keycaps. Some keyboards, especially those with membrane or laptop-style keyboards, may have keys that are not easily replaceable. It’s always a good idea to check your keyboard’s manual or do some research to ensure that your keyboard can be modified before attempting any changes.
Now, without further ado, let’s dive into the tools you will need to get started with changing keys on your keyboard.
Tools Needed
Before you begin the process of changing keys on your keyboard, make sure you have the following tools on hand:
- Keycap puller: This tool is designed to safely remove keycaps without damaging the keyboard. It typically has a set of prongs or loops that you can use to grip the sides of the keycap and pull it upward.
- Cotton swabs or cleaning cloth: It’s always a good idea to clean the keycap and the area beneath it before reattaching it. Cotton swabs or a cleaning cloth can help remove any dust, dirt, or debris.
- Isopropyl alcohol or mild cleaner: If the keycap or the keyboard itself is dirty or sticky, you may need to use a cleaning solution. Isopropyl alcohol or a mild cleaner can help dissolve grime and sanitize the surface.
- Tweezers (optional): In case you encounter difficulty aligning or pressing the keycap, a pair of tweezers can be a handy tool to use. They offer more precision and control when handling small components.
Having these tools ready before you start will ensure a smooth and hassle-free process. Now that you have gathered the necessary tools, let’s move on to the step-by-step instructions for changing keys on your keyboard.
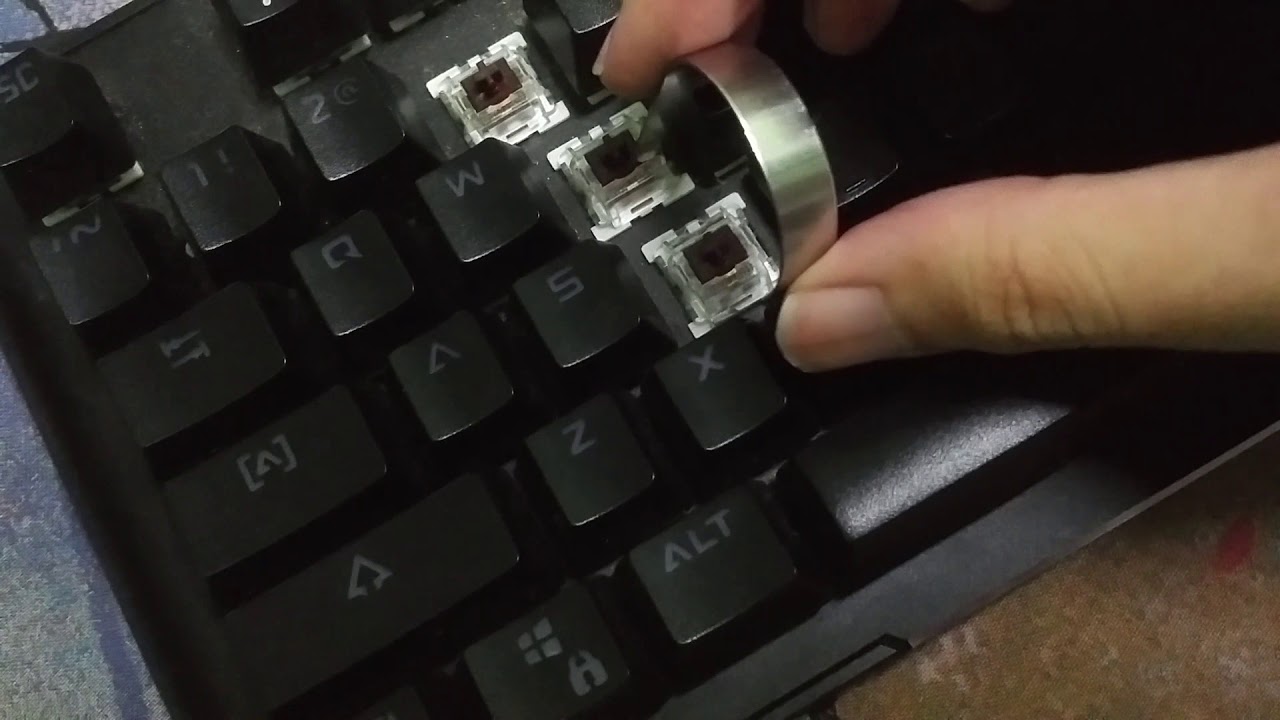
Step 1: Remove the Keycap
The first step in changing keys on your keyboard is to remove the existing keycap. Follow these instructions:
- Locate the key that you want to change and position your keyboard in a well-lit area.
- Take your keycap puller and gently position the prongs or loops around the edges of the keycap.
- Apply slight upward pressure on the keycap puller to lift the keycap off the key switch. You may need to wiggle it gently from side to side to free it completely.
- Once the keycap is loose, remove it from the key switch and set it aside. Be careful not to lose or damage any parts.
It’s important to exercise caution while removing the keycap to avoid any damage to the key switch or surrounding components. Take your time and be gentle as you lift the keycap from its housing.
Remember that some keyboards may have different mechanisms for keycap removal. In some cases, you may need to use a small flat-head screwdriver or follow specific instructions provided by the manufacturer. Always refer to the keyboard’s manual or do some research beforehand to ensure you are using the correct method for your specific keyboard model.
With the keycap successfully removed, you are ready to move on to the next step, which involves cleaning the keycap and the keyboard itself. Let’s proceed to step 2.
Step 2: Clean the Keycap and Keyboard
After removing the keycap, it’s important to clean both the keycap and the keyboard itself to ensure a dust- and dirt-free surface. Follow these steps:
- Take a cotton swab or a cleaning cloth and dampen it slightly with isopropyl alcohol or a mild cleaner.
- Gently wipe the surface of the keycap, removing any dust, dirt, or residue. Pay attention to the edges and crevices to ensure a thorough cleaning.
- Repeat the process for all the keycaps you plan to change, taking care not to oversaturate the cloth or swab.
- Next, clean the area on the keyboard where the keycap was seated. Use the cotton swab or cleaning cloth to remove any debris or grime.
- Allow the keycap and the keyboard to dry completely before proceeding to the next step.
It’s important to note that different cleaners may be suitable for different types of keycaps and keyboards. Be sure to check the manufacturer’s recommendations or do some research regarding the compatibility of the cleaning solution with your specific keyboard.
By cleaning both the keycap and the keyboard, you ensure that the new keycap will attach securely and function properly. With a clean surface, you’re ready to move on to step 3, which involves aligning the keycap correctly.
Step 3: Align the Keycap Correctly
Now that you have a clean keycap and keyboard, it’s time to align the keycap properly before attaching it. Follow these instructions:
- Take a close look at the key switch and identify the orientation of the switch stem beneath it. Pay attention to any notches, tabs, or other indicators that guide the alignment.
- Position the keycap above the switch, ensuring that it aligns correctly with the stem. The keycap should fit snugly without any tilting or misalignment.
- Double-check the positioning of the keycap and make any necessary adjustments to ensure a proper fit.
It’s important to align the keycap correctly to avoid any issues with stability or functionality. Taking the time to ensure proper alignment will result in a keycap that fits securely and functions as intended.
If you’re having difficulty aligning the keycap with the switch, tweezers can be a useful tool to assist in the alignment process. The tweezers will provide more control and precision, allowing you to position the keycap accurately.
With the keycap aligned correctly, you’re ready to move on to the next step: pressing the keycap in place. Let’s proceed to step 4.
Step 4: Press the Keycap in Place
With the keycap aligned correctly, it’s time to secure it in place by pressing it down onto the switch. Follow these steps:
- Ensure that the keycap is positioned directly above the switch stem.
- Apply even pressure with your fingers or the palm of your hand to press the keycap firmly onto the switch.
- You should feel and hear a satisfying click or snap as the keycap locks into place.
- Gently wiggle the keycap back and forth to verify that it is securely attached.
It’s important to press the keycap evenly and steadily to avoid any damage to the switch or surrounding components. Avoid using excessive force or pressing at an angle, as this can cause the keycap to become misaligned or damaged.
If you encounter difficulty while pressing the keycap, double-check the alignment and try again. Sometimes a slight adjustment in positioning can make a significant difference in successfully attaching the keycap.
With the keycap firmly in place, you’re almost done! The final step is to ensure that the key is functioning properly. Let’s move on to step 5.
Step 5: Test the Key to Ensure Proper Functionality
After successfully attaching the keycap, it’s crucial to test the key to verify its proper functionality. Follow these steps:
- Open a text document or any application where you can input text.
- Press the key multiple times to ensure that it registers each keystroke accurately.
- If the key does not function or registers inconsistently, remove the keycap and repeat the process, making sure to align and attach it correctly.
- Repeat the testing process for all the keycaps you have changed to ensure that each one is functioning properly.
Testing the key is essential to ensure that the switch beneath the keycap is working correctly. If you encounter any issues, such as keys not registering or registering incorrectly, it may indicate a problem with the keycap alignment or the switch itself.
If you continue to experience difficulties with a specific key, it may be necessary to consult a professional or contact the manufacturer for further assistance.
With all keycaps tested and functioning properly, you have successfully changed the keys on your keyboard! Take a moment to admire your personalized keyboard and revel in the improved typing experience.
Remember, changing keys on a keyboard is a reversible process, allowing you to experiment with different keycap styles or revert back to the original keys if desired.
Now that you know how to change keys on a keyboard, you can confidently customize your keyboard to suit your preferences and style. Happy typing!
Conclusion
Changing keys on your keyboard is a rewarding process that allows you to personalize your typing experience. By following the step-by-step instructions outlined in this guide, you can easily remove and replace keycaps to create a keyboard that suits your preferences and style.
Throughout the process, it’s crucial to gather the necessary tools, such as a keycap puller and cleaning materials, to ensure a smooth and successful outcome. Take your time when removing keycaps, cleaning them, aligning them properly, and pressing them back into place, as precision and attention to detail are key.
Remember, not all keyboards are designed to have removable keycaps, so it’s essential to check your keyboard’s manual or do research beforehand to confirm its compatibility with keycap changes. It’s also important to exercise caution to avoid any damage to the key switches or surrounding components.
By following these steps, you can transform your keyboard into a unique and customized tool that enhances your typing experience. From professional settings to gaming setups, changing keys on your keyboard offers a versatile way to make your workspace your own.
So, go ahead and explore different keycap styles, colors, and materials to find the perfect combination that reflects your personality and elevates your typing experience. Enjoy the satisfaction that comes with a keyboard that is not only functional, but also uniquely yours.
Now that you have the knowledge and confidence to change keys on a keyboard, it’s time to unleash your creativity and make your keyboard truly stand out.