Introduction
Welcome to the world of CPU fan curves! When it comes to optimizing your computer’s performance and managing its temperature, understanding and customizing the CPU fan curve is essential. In this article, we will explore what a CPU fan curve is, why you should consider changing it, and provide a step-by-step guide on how to do so.
The CPU fan curve refers to the relationship between the temperature of your CPU and the speed at which your computer’s cooling fan operates. By default, the fan curve is set by the manufacturer, aiming to strike a balance between cooling efficiency and noise level. However, every computer system is unique, and the default settings might not always be the most optimal for your specific needs.
So, why should you consider changing the CPU fan curve? Well, the answer is simple – customization. By adjusting the fan curve, you can have more control over how your computer cools itself, striking a balance between noise level and temperature. Increasing fan speed will result in better cooling performance, but it comes at the cost of increased noise. On the other hand, reducing fan speed will make your computer quieter, but it may lead to higher temperatures and potential performance throttling.
Whether you are an avid gamer pushing your system to its limits or a content creator working on resource-intensive tasks, customizing the fan curve can provide significant benefits. Not only can it improve cooling efficiency and maintain stable performance, but it can also prolong the lifespan of your CPU by preventing overheating.
In the following sections, we will guide you through the step-by-step process of changing the CPU fan curve. We will cover important aspects such as checking your BIOS version, accessing BIOS settings, locating the fan settings, adjusting the fan curve, and saving your changes. So, let’s delve into the details and embark on this journey of customization and optimization!
What Is CPU Fan Curve?
Before we dive into the process of changing the CPU fan curve, let’s first understand what it means. The CPU fan curve, also known as fan speed curve or fan profile, refers to the relationship between the temperature of your CPU and the rotational speed of the cooling fan.
This curve determines how the cooling fan responds to changes in CPU temperature. At lower temperatures, the fan operates at a lower speed, resulting in quieter operation. As the temperature rises, the fan speed increases to ensure adequate cooling and prevent the CPU from overheating.
By default, the CPU fan curve is usually set by the manufacturer to provide a balance between cooling efficiency and noise production. However, these default settings might not be the most optimal for your computer system. Depending on your specific needs and preferences, you might want to customize the fan curve to achieve better cooling performance or reduce noise levels.
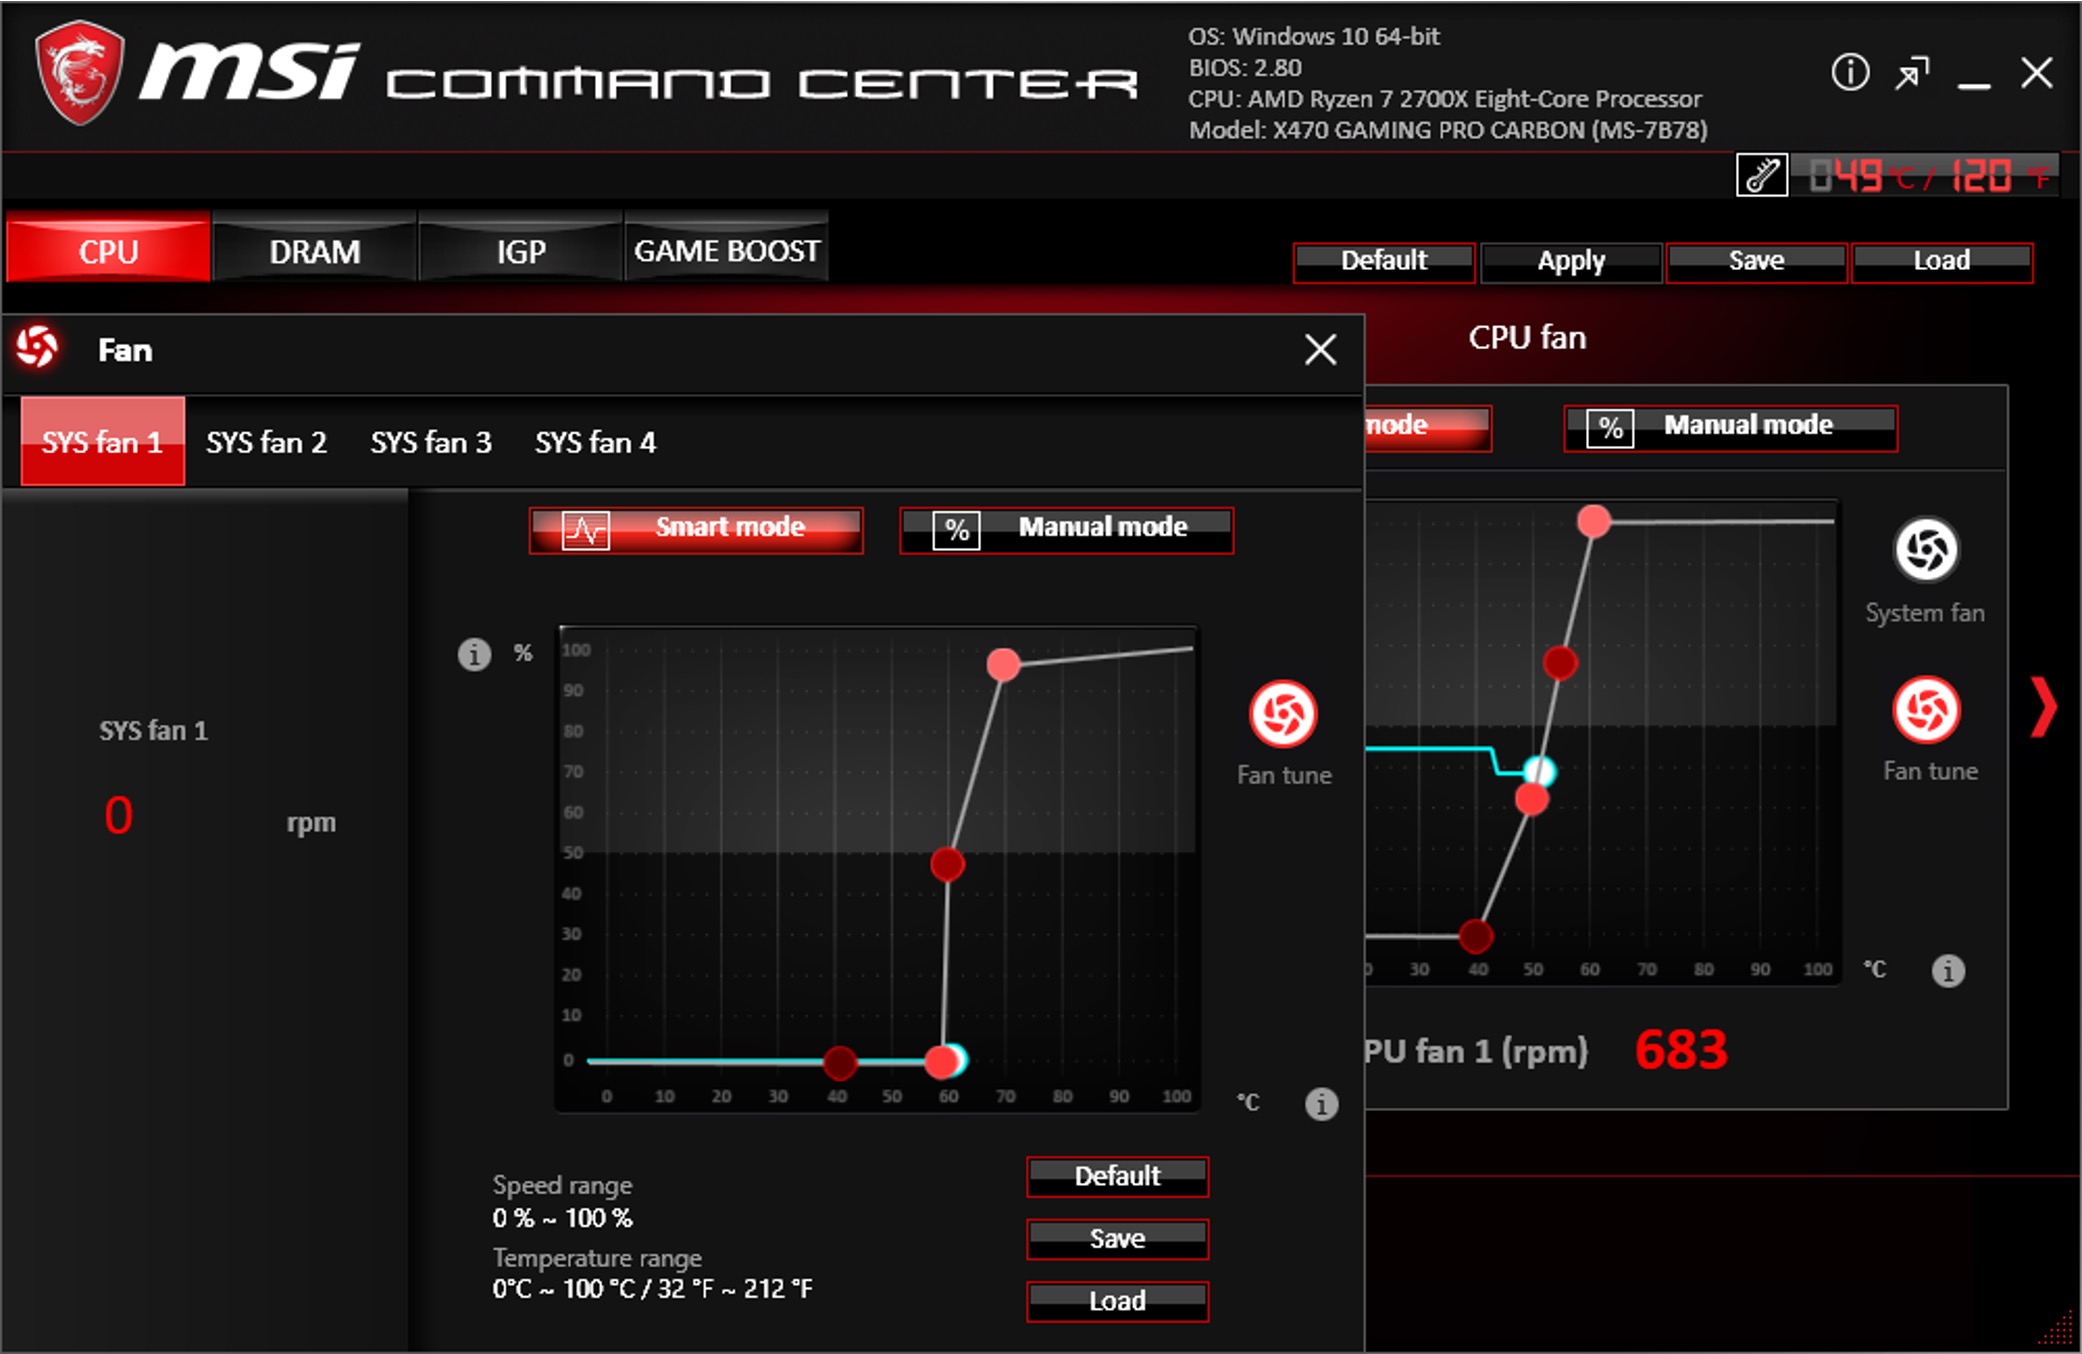
The CPU fan curve typically consists of multiple points, each representing a temperature threshold and the corresponding fan speed. For example, at lower temperatures, the fan speed might be set to a minimum percentage, such as 30%. As the temperature surpasses a certain threshold, the fan speed gradually increases in a linear or non-linear fashion.
Customizing the fan curve allows you to fine-tune the cooling performance of your CPU. Depending on the capabilities of your motherboard’s BIOS (Basic Input/Output System), you can adjust the fan curve to be more aggressive, resulting in higher fan speeds at lower temperatures. Conversely, you can make the fan curve less aggressive to prioritize quieter operation at the expense of slightly higher temperatures.
Understanding the CPU fan curve is crucial for maintaining the optimal operating temperature of your CPU. It enables you to strike the right balance between cooling efficiency, system noise, and performance.
Now that you have an understanding of what the CPU fan curve is, let’s proceed to the next section, where we will explore the reasons why you should consider changing it.
Why Change CPU Fan Curve?
You might be wondering why you should bother changing the CPU fan curve when the default settings are already in place. Well, here are a few compelling reasons why customizing the fan curve can be beneficial:
1. Improved Cooling Performance: By adjusting the fan curve, you can increase the fan speed at lower temperatures, leading to better cooling performance. This can help maintain lower CPU temperatures, reducing the risk of overheating and potential performance throttling.
2. Noise Reduction: Many stock CPU fan curves aim for a balance between cooling performance and noise level. However, if you prioritize a quieter computing experience, customizing the fan curve allows you to reduce fan speed at lower temperatures, resulting in reduced noise output.
3. Performance Optimization: When your CPU runs at lower temperatures, it can operate at its full potential for longer periods. By optimizing the fan curve, you can prevent temperature-induced performance degradation and ensure your CPU consistently delivers optimal performance.
4. Longer CPU Lifespan: Overheating can negatively impact the lifespan of your CPU. By customizing the fan curve to maintain lower temperatures, you can mitigate the risk of long-term damage and extend the longevity of your processor.
5. Personalized Preference: Each computer system is unique, and what works for one user may not work for another. Customizing the fan curve allows you to tailor the cooling performance and noise levels to your personal preferences and specific needs.
It is important to note that changing the CPU fan curve requires careful consideration. While increasing the fan speed can improve cooling, it also results in increased noise output. Conversely, reducing the fan speed can make your system quieter but may lead to higher temperatures. Finding the right balance between cooling performance and noise is crucial.
Now that you are aware of the potential benefits of changing the CPU fan curve, it’s time to dive into the step-by-step guide on how to adjust it. In the next section, we will walk you through the necessary steps to access and customize the fan curve settings in your computer’s BIOS.
Step 1: Check Your BIOS Version
Before you begin adjusting the CPU fan curve, it is essential to check your computer’s BIOS version. The BIOS, or Basic Input/Output System, is the firmware that controls the hardware and settings of your computer. Different BIOS versions may have varying options and interfaces for adjusting the fan curve.
To check your BIOS version, follow these steps:
1. Restart your computer: Save any ongoing work and restart your computer.
2. Access the BIOS: During the boot process, you need to press a specific key to access the BIOS settings. The key varies depending on the computer’s manufacturer. Common keys include F2, Del, or Esc. Look for a message displayed on the screen during startup that indicates the key to press to enter BIOS.
3. Navigate to the BIOS information: Once you are in the BIOS settings, navigate to the System Information or BIOS Information section. Different BIOS versions have different layouts, so look for an option that provides details about your system’s firmware.
4. Find the BIOS version: Look for the section that displays the BIOS version. The version number is usually listed next to “BIOS Version” or a similar title. Take note of the version number for reference.
5. Exit the BIOS: After noting down the BIOS version, exit the BIOS settings. You can usually do this by selecting the “Exit” menu option and choosing to save and exit.
Now that you have checked your BIOS version, you are ready to proceed to the next step. In the following section, we will guide you through accessing the BIOS settings and navigating to the fan curve adjustment options.
Remember, each BIOS version may have different interfaces and options. It is important to consult your motherboard’s documentation or check the manufacturer’s website for specific instructions relating to your BIOS version.
Step 2: Accessing BIOS
To adjust the CPU fan curve, you will need to access your computer’s BIOS (Basic Input/Output System) settings. The BIOS provides low-level control over the hardware components and settings of your computer, including the fan curves.
Here are the steps to access the BIOS:
1. Restart your computer: Save any ongoing work and restart your computer.
2. Determine the BIOS key: Pay attention to the startup screen or manufacturer’s logo that appears when your computer boots up. There is usually a message displaying the key to press to enter the BIOS. Common keys include F2, Del, Esc, F10, or F12. Make a note of the key before proceeding.
3. Press the BIOS key: As soon as you see the message or logo, press the designated key repeatedly. Timing can be crucial, so start pressing the key as soon as possible and continue until the BIOS setup utility appears.
4. Enter the BIOS setup utility: The BIOS setup utility may differ depending on your computer’s manufacturer and BIOS version. It typically has a text-based or graphical interface with various menus and options.
If you are unsure about navigating the BIOS, refer to the documentation that came with your computer or motherboard, or visit the manufacturer’s website for specific instructions.
Remember, be cautious when navigating the BIOS settings, as any incorrect changes can potentially harm your system’s performance or stability. If you are unsure about a particular setting, it is best to leave it at its default value or seek guidance online.
Once you have successfully accessed the BIOS settings, you can proceed to the next step: locating the fan settings. In the following section, we will guide you through finding the appropriate options to adjust the CPU fan curve.
Step 3: Locating the Fan Settings
After accessing the BIOS settings, the next step is to locate the fan settings. The exact location and naming of these settings can vary depending on your computer’s manufacturer and BIOS version. However, most BIOS interfaces have sections dedicated to hardware configuration or power management, where you can find the fan settings.
Here are some general guidelines to help you locate the fan settings:
1. Explore the BIOS menus: Navigate through the various menus in the BIOS to find the section related to hardware configuration or power management. Look for terms such as “Hardware,” “Fan Control,” “Fan Configuration,” or “Power.”
2. Look for “Fan” or “Cooling” options: Once you have entered the appropriate section, search for options related to fan control or cooling. These settings may be labeled as “Fan Speed Control,” “PWM Mode,” “Fan Curve,” or something similar.
3. Consider submenus: Some BIOS interfaces may have submenus dedicated to fan settings. Look for submenu titles like “System Fan,” “CPU Fan,” or “Chassis Fan.”
4. Check for presets or profiles: Some BIOS versions offer preconfigured fan profiles or presets that you can choose from. These presets affect the fan curve and determine how the fan speed adjusts with temperature changes. If presets are available, they can be a convenient option for those who don’t want to manually adjust the fan curve.
5. Consult the documentation: If you are unable to locate the fan settings, refer to the motherboard’s documentation or check the manufacturer’s website for specific instructions relating to your BIOS version.
Remember, the exact location and terminology of fan settings can differ between BIOS versions and motherboard models. Exploring the menus and options in your BIOS will allow you to find the appropriate settings for adjusting the fan curve.
Once you have identified the fan settings, you are ready to proceed to the next step: adjusting the fan curve. In the following section, we will guide you through the process of customizing the fan curve settings to suit your needs.
Step 4: Adjusting the Fan Curve
Now that you have located the fan settings in your BIOS, it’s time to adjust the fan curve to your liking. By customizing the fan curve, you can control the fan’s speed based on the CPU temperature, optimizing cooling and noise levels. Here’s a step-by-step guide to help you through the process:
1. Select the desired fan: If you have multiple fans connected to your motherboard, select the CPU fan or the fan you wish to adjust. Keep in mind that some BIOS interfaces have separate sections for different fans.
2. Choose the fan control mode: Most BIOS settings offer different fan control modes, such as PWM (Pulse Width Modulation) or DC (Direct Current). PWM mode allows the motherboard to control the fan speed more precisely, while DC mode adjusts the voltage supplied to the fan. Select the mode that matches your fan’s capabilities.
3. Adjust the fan curve: Look for options related to fan curve or fan speed control. Depending on your BIOS, you may have the ability to set specific fan speed percentages at varying temperature thresholds. You can typically add, remove, or modify these points on the graph to create the desired fan curve shape.
4. Find a balance: Consider your priorities when setting the fan curve. Do you prioritize lower temperatures or a quieter system? Adjust the fan curve accordingly, increasing the fan speed for better cooling or reducing it for a quieter operation. Keep in mind that extreme settings might lead to higher noise levels or increased temperatures.
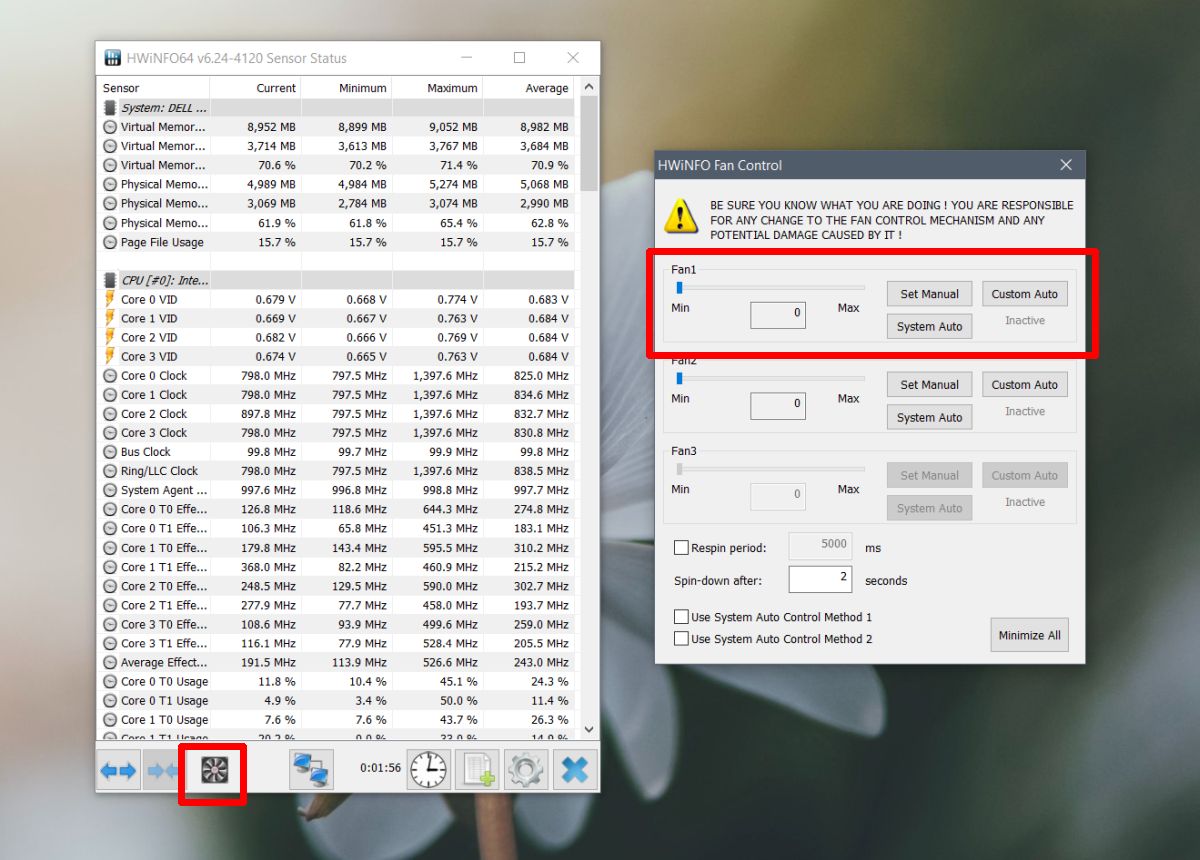
5. Test and fine-tune: Once you have made changes to the fan curve, save the settings and exit the BIOS. Allow your system to boot up, then closely monitor the CPU temperature and fan speed using software utilities or BIOS monitoring tools. Adjust the fan curve further if needed to achieve the desired cooling performance and noise levels.
Remember, every computer system is unique, and the optimal fan curve settings may vary. It’s recommended to keep an eye on your CPU temperatures after making adjustments and ensure they remain within safe limits.
Now that you have adjusted the fan curve to your preferences and needs, it’s time to save the changes and exit the BIOS. Proceed to the next step for the final step in the process.
Step 5: Save and Exit BIOS
After adjusting the fan curve settings to your preference, it’s important to save your changes and exit the BIOS. Here’s how you can complete this final step:
1. Save your changes: In the BIOS interface, look for an option typically located at the bottom of the screen that allows you to save your changes. The option may be labeled as “Save Settings,” “Save Changes,” or something similar.
2. Confirm changes: After selecting the option to save your changes, the BIOS will prompt you to confirm. Make sure to read any on-screen instructions carefully and press the confirmation key as indicated. This key is often F10 or Y (for Yes).
3. Exit the BIOS: Once your changes have been saved, navigate to the “Exit” menu or option. Select “Exit Setup” or a similar choice to exit the BIOS. Again, confirm the exit if prompted.
4. Reboot your computer: Your computer will restart to apply the changes you made to the fan curve. Allow your system to completely boot up, and observe how the adjusted fan curve affects the CPU temperature and fan speed.
5. Monitor and fine-tune: After restarting, closely monitor the CPU temperature and fan speed using software utilities or BIOS monitoring tools. Make any necessary adjustments to the fan curve if you notice temperature or noise levels that are not meeting your expectations.
Congratulations! You have successfully adjusted the fan curve settings in your BIOS. By customizing the fan curve, you have gained better control over your system’s cooling performance and noise levels.
Remember, it’s essential to strike a balance between cooling efficiency and noise output when configuring the fan curve. Fine-tuning your settings may be necessary to achieve the optimal balance for your specific needs and preferences.
With your newly adjusted fan curve, you can enjoy a more optimized and customized computing experience. Take some time to monitor and evaluate the performance of your system in various tasks and applications to ensure that the fan curve settings are providing the desired results.
Now that you have completed all the steps to change the CPU fan curve, you can enjoy improved cooling, reduced noise, and potentially extended CPU lifespan. Happy computing!
Conclusion
In conclusion, customizing the CPU fan curve can greatly enhance your computer’s performance, cooling efficiency, and noise levels. By taking control of the fan speed based on the CPU temperature, you can optimize the cooling performance while maintaining a quieter system. Adjusting the fan curve allows you to strike the right balance between cooling, noise, and overall system stability.
Throughout this article, we discussed the importance of understanding the CPU fan curve and why you should consider changing it. We explored the step-by-step process of adjusting the fan curve, starting from checking the BIOS version to locating the fan settings, and finally adjusting and fine-tuning the fan curve to meet your specific needs.
By following these steps, you can personalize your computer’s cooling performance according to your preferences and requirements. Whether you are a gaming enthusiast pushing your CPU to the limits or a content creator focusing on resource-intensive tasks, customizing the fan curve can make a significant difference in temperature management and system stability.
However, it is crucial to monitor your CPU temperatures and ensure they remain within safe limits after adjusting the fan curve. Extreme fan curve settings may result in higher temperatures or increased noise levels, so finding the right balance is important.
Remember, every computer system is unique, and your optimal fan curve settings may vary. Adjustments and fine-tuning might be necessary to achieve the desired cooling performance and noise levels. Be mindful of the changes you make and evaluate the impact on your system’s overall performance.
With a custom fan curve in place, you can enjoy an optimized computing experience with improved cooling, reduced noise, and potentially extended CPU lifespan. So, take the time to explore your BIOS settings, experiment with the fan curve, and find the settings that work best for you.
We hope this guide has provided you with the knowledge and confidence to change the CPU fan curve. Embrace the flexibility and control that this customization offers, and enjoy a cooler, quieter, and more efficient computing experience.


