Introduction
Welcome to our guide on how to change the brightness on an LG OLED TV. LG OLED TVs are renowned for their stunning picture quality and vibrant colors. However, each viewing environment is unique, and you may find that the default brightness settings don’t always suit your preferences or the lighting conditions in your room. Being able to adjust the brightness can significantly enhance your viewing experience and ensure optimal picture quality.
In this article, we will walk you through the process of changing the brightness settings on your LG OLED TV. We’ll explain how to navigate the interface, access the quick settings menu, and adjust brightness levels according to your preferences. Additionally, we’ll explore the different picture mode settings available and how they can impact the overall brightness of your TV. We’ll also provide tips on calibrating the brightness for different viewing environments, changing OLED light settings, enabling energy-saving mode, and resetting the brightness to default settings.
Whether you want to dim the screen for late-night movie sessions or increase the brightness for a sunny living room, this guide will help you easily take control of the brightness settings on your LG OLED TV. Let’s dive in and discover how to achieve the perfect picture quality that suits your preferences!
Understanding the LG OLED TV Interface
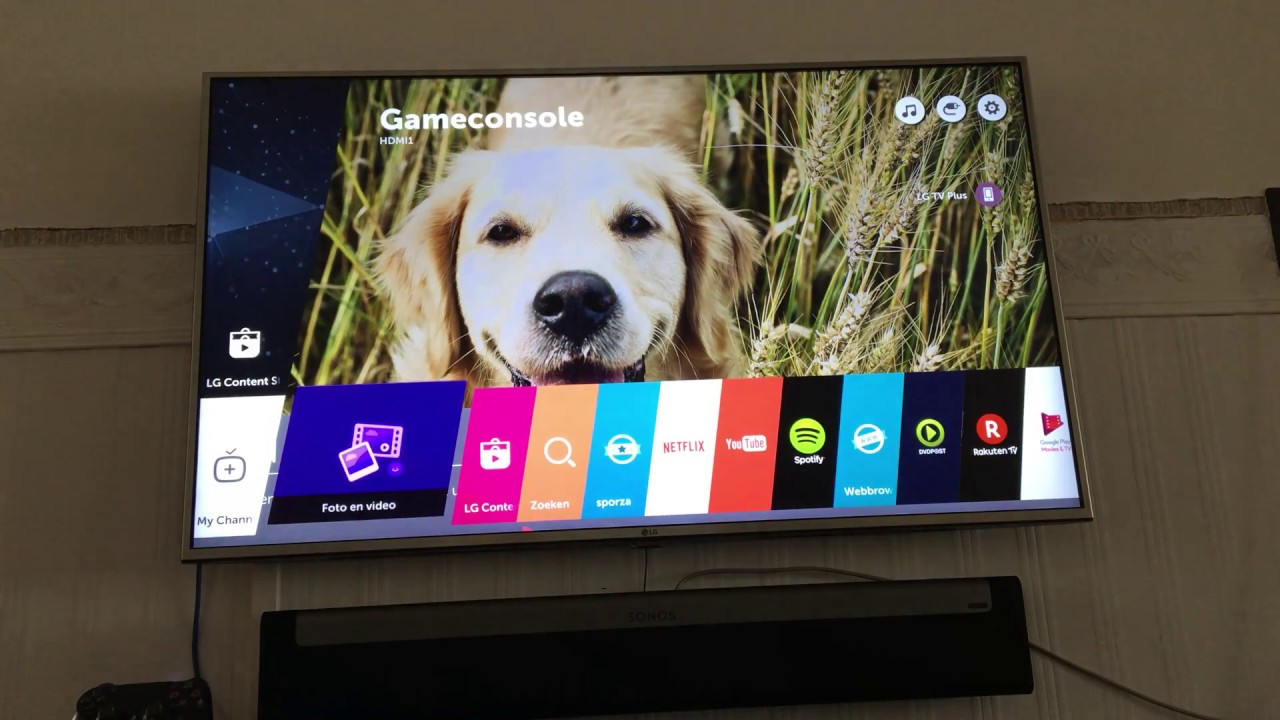
Before we delve into adjusting the brightness settings, it’s essential to familiarize ourselves with the LG OLED TV interface. The interface is user-friendly and designed to provide easy access to various settings. By understanding the interface, you’ll be able to navigate through the menu effortlessly.
The LG OLED TV interface typically consists of a home screen that displays various apps and menus. The home screen is where you can access the picture settings and adjust the brightness levels. To navigate through the interface, you can use the LG TV remote control that comes with your TV. The remote control offers convenient and straightforward navigation options.
When you turn on your LG OLED TV, you’ll be greeted with the home screen. From here, you can use the arrow keys on your remote control to navigate to the picture settings. These settings allow you to adjust various aspects of the picture, including brightness, contrast, color, and more. Look for the dedicated “Picture” or “Settings” button on your remote control to access these options.
Once you access the picture settings, you’ll have a range of customization options available. Aside from brightness, you can also adjust other picture-related settings such as contrast, backlight, sharpness, and color temperature. The process may vary slightly depending on the model of your LG OLED TV, but the general principles remain the same.
Some LG OLED TVs may also feature a dedicated quick settings menu. This menu provides a shortcut to key settings, including brightness, allowing you to make adjustments without navigating through multiple menus. The quick settings menu can usually be accessed by pressing the “Settings” or “Menu” button on your remote control and selecting the “Quick Settings” option.
Now that you have a basic understanding of the LG OLED TV interface, let’s explore how to adjust the brightness levels to suit your preferences and viewing environment. By making simple adjustments, you can enhance the visual experience and enjoy optimal picture quality.
Using the Remote Control
The remote control is an essential tool for navigating through the LG OLED TV interface and making changes to the picture settings, including brightness. Understanding how to use the remote control will enable you to easily make the desired adjustments.
Most LG OLED TVs come with a standard remote control that includes dedicated buttons for accessing the picture settings. These buttons are usually labeled with icons or text indicating their function. Look for buttons such as “Settings,” “Menu,” or ones with a picture-related icon.
To adjust the brightness using the remote control, start by pressing the “Settings” or “Menu” button. This will open the picture settings menu on your TV screen. Once in the menu, use the arrow keys on the remote control to navigate through the different settings options.
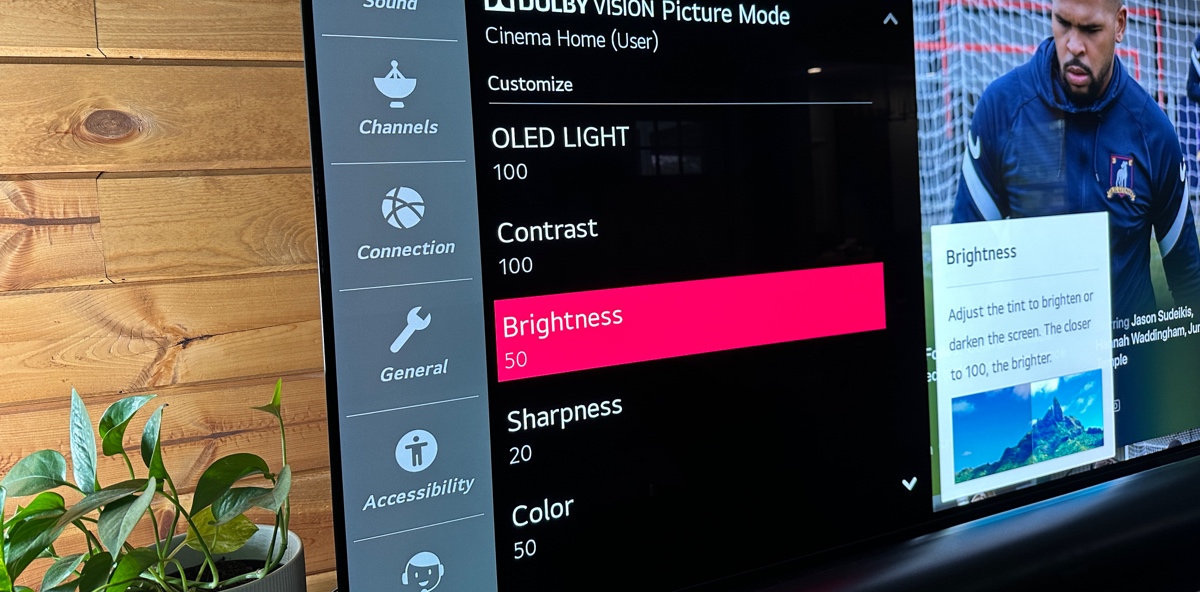
As you scroll through the settings options, locate the “Brightness” or “Backlight” setting. Depending on the model of your LG OLED TV, it might be listed under a different name, such as “OLED Light,” but it serves the same purpose. Use the arrow keys to select the brightness setting.
Once you have selected the brightness setting, you can adjust it by using the up and down arrow keys on the remote control. Increase the brightness by pressing the up arrow, or decrease it by pressing the down arrow. The changes you make will be reflected on the TV screen, allowing you to see the impact of the adjustment in real-time.
Continue adjusting the brightness until you reach a level that suits your preferences or the lighting conditions in your room. Take into account that brighter settings might be more suitable for well-lit environments, while lower settings tend to be more comfortable for darker rooms or nighttime viewing.
Once you have set the desired brightness, you can exit the picture settings menu by pressing the “Exit” or “Back” button on the remote control. The TV will save your adjustments, allowing you to enjoy your favorite content with the optimal brightness settings.
Now that you know how to use the remote control to adjust the brightness, let’s explore another method of accessing the brightness settings through the quick settings menu.
Accessing the Quick Settings Menu
The quick settings menu on your LG OLED TV provides a convenient way to access key settings, including brightness, without having to navigate through multiple menus. This allows for quick adjustments on the fly, ensuring you can easily modify the brightness levels to suit your needs.
To access the quick settings menu, start by picking up your LG TV remote control. Look for the “Settings” or “Menu” button, usually located near the center or bottom of the remote. Press the corresponding button to bring up the main settings menu.
Once you’re in the main settings menu, you’ll see a list of options on the screen. Look for the “Quick Settings” or “Shortcut” option and select it using the arrow keys on your remote control. This will take you to the quick settings menu.
The quick settings menu typically consists of a grid or list of options that you can navigate using the arrow keys. Look for the brightness setting, usually represented by a light bulb or sun icon. Once you’ve located the brightness setting, select it using the arrow keys and press the “Enter” or “OK” button to access the brightness adjustment options.
In the brightness adjustment options, you’ll have the ability to increase or decrease the brightness levels. This may be done by using the arrow keys on your remote control or by entering a numerical value, depending on the TV model. Make the necessary adjustments to the brightness until you achieve the desired level.
As you change the brightness, the screen will adjust in real-time, allowing you to see the impact of your adjustments. This helps you fine-tune the brightness to suit your preferences or the specific lighting conditions in your room.
Once you’ve set the desired brightness level, you can exit the quick settings menu by pressing the “Exit” or “Back” button on your remote control. The TV will save your settings, ensuring that your chosen brightness level is maintained for future viewing.
By accessing the quick settings menu, you can easily adjust the brightness of your LG OLED TV without having to navigate through several menus. This allows for quick and convenient adjustments, ensuring an optimal viewing experience with the right brightness levels.
Next, we’ll explore different methods for adjusting the brightness levels using the picture mode settings on your LG OLED TV.
Adjusting Brightness Levels
Once you’ve accessed the picture settings menu on your LG OLED TV, you can begin adjusting the brightness levels to your liking. By making these adjustments, you can optimize the picture quality and ensure a comfortable viewing experience. Here’s how you can adjust the brightness on your LG OLED TV:
1. Use the arrow keys on your remote control to navigate to the “Brightness” or “Backlight” setting in the picture settings menu. This setting is typically located under the “Picture” or “Settings” section.
2. Once you’ve selected the brightness setting, you can adjust it by using the up and down arrow keys on your remote control. Increase the brightness by pressing the up arrow, or decrease it by pressing the down arrow. As you make the adjustments, the changes will be immediately visible on the TV screen.
3. Take into consideration the lighting conditions in your room and your personal preferences. If you’re in a well-lit room, you may want to increase the brightness to enhance the picture clarity. Conversely, if you’re in a darker room or watching TV at night, you may prefer to decrease the brightness for a more comfortable viewing experience.
4. Experiment with different brightness levels to find the setting that best suits your needs. Keep in mind that excessively high brightness levels can lead to eye strain, while very low levels can affect the visibility of certain details in the picture.
5. Additionally, consider other picture settings that can impact the brightness. For example, adjusting the contrast, backlight, or picture mode can also affect the overall brightness of the TV. Explore these settings alongside the brightness adjustment to achieve the perfect balance of brightness, contrast, and picture quality.
6. Remember that brightness preferences can vary depending on the content you’re watching. For example, you may prefer a brighter setting for movies but a lower brightness for gaming or late-night TV sessions. Feel free to make adjustments as needed to suit your specific viewing requirements.
7. Once you’ve reached the desired brightness level, exit the picture settings menu by pressing the “Exit” or “Back” button on your remote control. The TV will save your adjustments, so you won’t need to readjust the brightness every time you turn on your LG OLED TV.
By following these steps, you can easily adjust the brightness levels on your LG OLED TV to create an optimal viewing experience that matches your preferences and the lighting conditions in your room.
Next, let’s explore how picture mode settings can further enhance the brightness and overall picture quality.
Using Picture Mode Settings
LG OLED TVs offer various picture mode settings that allow you to customize the brightness and other aspects of the picture quality. These modes are preconfigured settings designed to optimize the picture quality based on different content and viewing conditions. By choosing the appropriate picture mode, you can enhance the brightness and overall visual experience. Here’s how to use picture mode settings on your LG OLED TV:
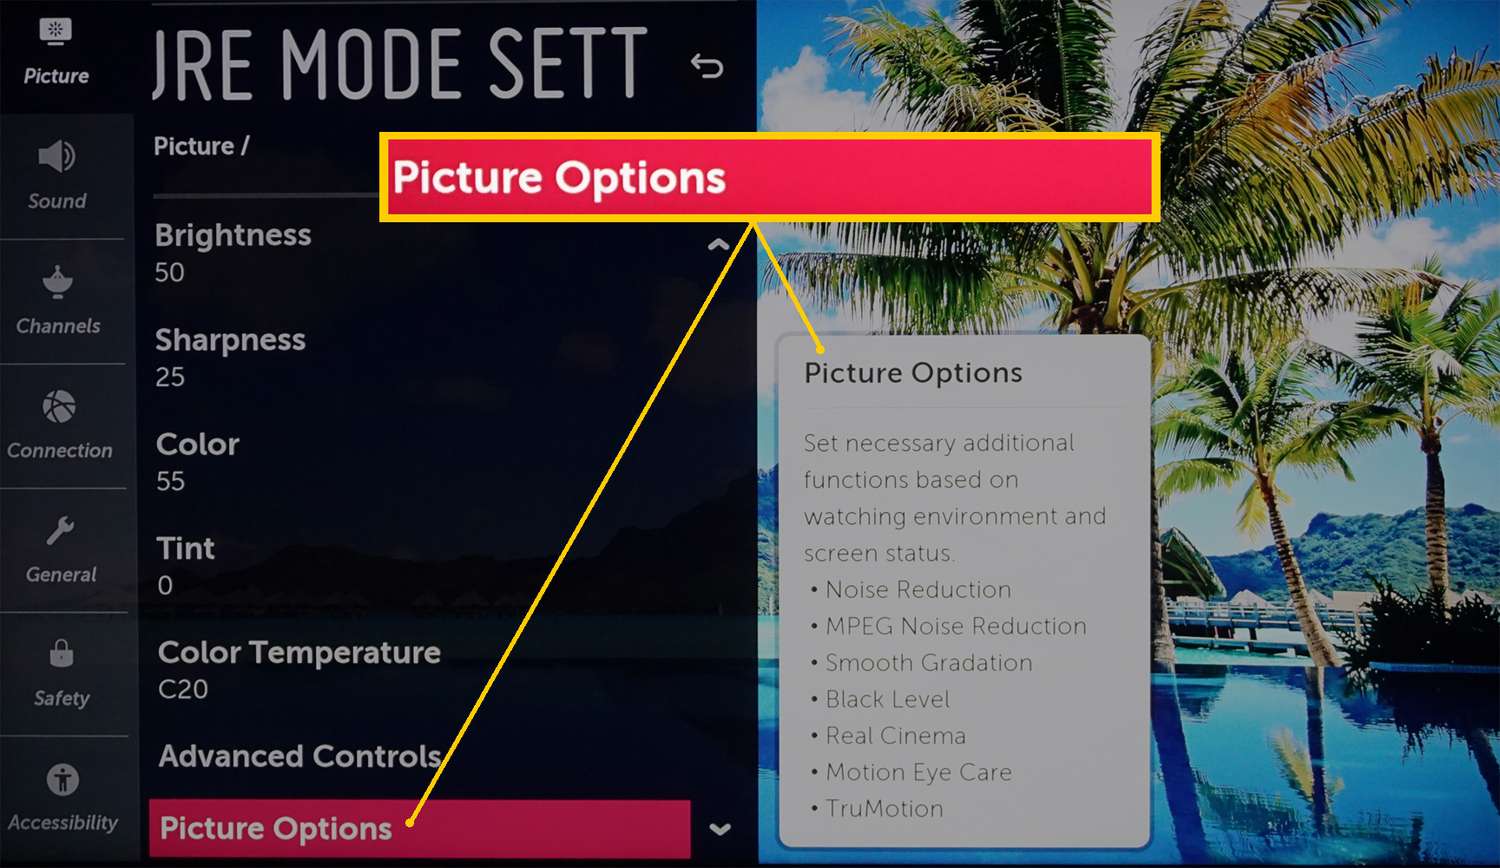
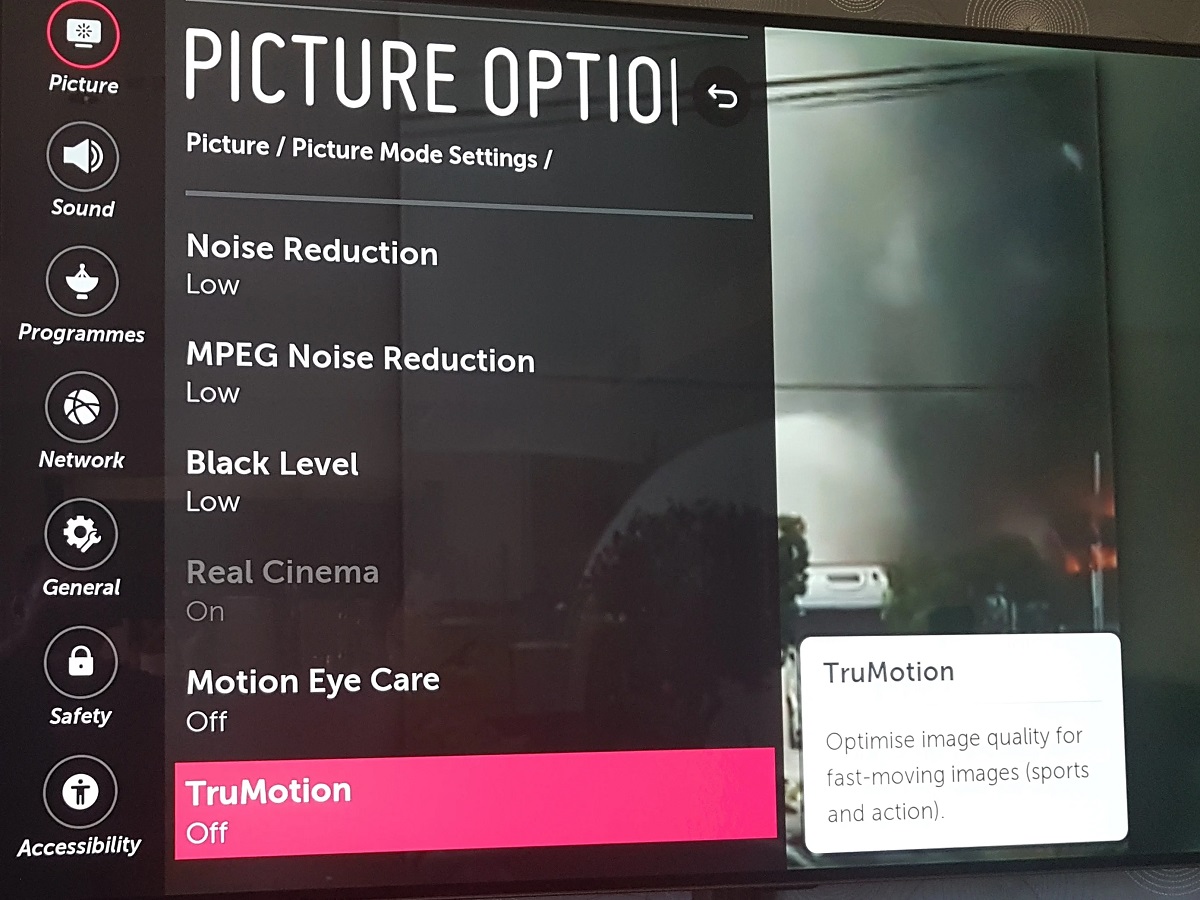
1. Access the picture settings menu on your LG OLED TV using the remote control. Look for the “Settings” or “Menu” button and navigate to the picture settings section.
2. Within the picture settings menu, locate the “Picture Mode” option. This setting allows you to choose from a range of preconfigured picture modes, such as Standard, Cinema, Game, Vivid, or Sports.
3. The Standard mode is the default setting and provides a balanced picture quality suitable for most viewing scenarios. However, you can experiment with different picture modes to find the one that best suits your preferences and the content you’re watching.
4. Each picture mode has its own characteristics and presets for brightness, contrast, color saturation, and other picture settings. For example, the Cinema mode might have a more subdued brightness level, while the Vivid mode might enhance the brightness and color intensity.
5. To explore different picture modes, use the arrow keys on your remote control to navigate through the options. The picture on the TV screen will adjust accordingly, providing a preview of how each mode affects the brightness and overall picture quality.
6. As you switch between picture modes, observe the changes in brightness and assess which mode provides the best visual experience for your specific content and viewing environment.
7. Keep in mind that some picture modes may have preset brightness settings. However, you can still manually adjust the brightness within each mode using the previously mentioned steps.
8. Once you’ve selected the desired picture mode and made any additional brightness adjustments, exit the picture settings menu by pressing the “Exit” or “Back” button on your remote control. The TV will save your chosen picture mode and brightness settings for future use.
By utilizing the picture mode settings on your LG OLED TV, you can tailor the brightness and other picture settings to match different types of content and viewing conditions. This versatility allows you to enjoy an optimized viewing experience with the perfect balance of brightness, contrast, and color reproduction.
Next, let’s explore how to calibrate the brightness to achieve optimal viewing in various environments.
Calibrating Brightness for Different Environments
Calibrating the brightness of your LG OLED TV for different viewing environments is crucial to ensure a comfortable and visually appealing experience. The optimal brightness setting can vary depending on factors such as ambient lighting, room size, and personal preferences. Here are some tips on how to calibrate the brightness for different environments:
1. Daytime Viewing: If you’re watching TV during the day in a well-lit room, you may want to increase the brightness to combat the ambient light. Higher brightness levels will help enhance the visibility of details and maintain picture quality in the presence of external light sources.
2. Nighttime Viewing: When watching TV in a dark room or during nighttime, reducing the brightness can help create a more pleasant viewing experience. Lower brightness levels prevent eye strain and minimize distractions, allowing you to focus on the on-screen content without any harsh glare.
3. Room Size: Consider the size of your viewing room when calibrating the brightness. In larger rooms, you may need to increase the brightness slightly to maintain a vibrant image that appears vivid and clear even from a distance. Conversely, in smaller rooms, a lower brightness setting may be sufficient to avoid an overly bright or harsh viewing experience.
4. Personal Preferences: Experiment with different brightness levels to find the setting that aligns with your personal preferences. Some individuals may prefer a brighter image with more vibrant colors, while others may lean towards a slightly dimmer and more relaxed viewing experience. Adjust the brightness to suit your visual comfort and enjoyment.
5. Guided Calibration Tools: Many LG OLED TVs offer advanced calibration tools, such as built-in test patterns or calibration wizards, to help fine-tune the picture settings, including brightness. These tools can assist in achieving precise brightness levels by providing on-screen guidance and reference points. Refer to your TV’s user manual or online resources for instructions on how to access and use these calibration tools.
6. Professional Calibration: For the most accurate calibration, consider hiring a professional calibrator who can analyze your specific viewing environment and configure the brightness, along with other picture settings, using specialized equipment. This option is ideal for users who require utmost precision and a calibrated viewing experience.
Remember to regularly reassess and adjust your brightness settings as lighting conditions change throughout the day or in different seasons. By calibrating the brightness to suit your specific environment and preferences, you can enjoy your LG OLED TV’s stunning picture quality to the fullest.
Next, let’s explore another way to control the brightness on your LG OLED TV by adjusting the OLED light settings.
Changing OLED Light Settings
LG OLED TVs utilize OLED (Organic Light Emitting Diode) technology, which provides exceptional contrast and deep black levels. Adjusting the OLED light settings allows you to control the brightness of the individual pixels on the screen, further enhancing your viewing experience. Here’s how you can change the OLED light settings on your LG OLED TV:
1. Access the picture settings menu on your LG OLED TV using the remote control. Navigate to the “Picture” or “Settings” section, where you’ll find the OLED light settings.
2. Look for a setting called “OLED Light” or “Brightness” and select it using the arrow keys on your remote control. This setting controls the overall brightness of the OLED display.
3. Adjust the OLED light setting by using the up and down arrow keys on your remote control. Increasing the OLED light setting will make the screen brighter, and decreasing it will make it dimmer.
4. As you make adjustments to the OLED light setting, keep an eye on the changes on the TV screen. You’ll notice that increasing the OLED light brings out more details in darker areas of the image, while decreasing it deepens the black levels and enhances contrast.
5. It’s important to strike a balance with the OLED light setting to avoid washing out the image or losing details in dark scenes. Experiment with different levels to find the setting that provides the optimal balance of brightness, contrast, and detail for your viewing preferences.
6. Remember that the OLED light setting can interact with the overall brightness setting and picture mode settings. Make sure to find a cohesive balance between these settings to achieve the best picture quality.
7. Once you’ve achieved the desired OLED light setting, exit the picture settings menu by pressing the “Exit” or “Back” button on your remote control. The TV will save your OLED light setting, ensuring that it remains consistent for future viewing.
By adjusting the OLED light settings on your LG OLED TV, you can fine-tune the brightness and contrast levels to optimize the image quality. This level of control allows you to create a visually stunning and immersive viewing experience.
Next, let’s explore how to enable the energy-saving mode on your LG OLED TV to further control the brightness and conserve energy.
Enabling Energy Saving Mode
LG OLED TVs offer an energy-saving mode that allows you to reduce power consumption and conserve energy while watching TV. Enabling this mode can also affect the overall brightness of your TV. Here’s how you can enable energy-saving mode on your LG OLED TV:
1. Access the main settings menu on your LG OLED TV using the remote control. Look for the “Settings” or “Menu” button and navigate to the energy-saving settings section, which is typically located under the “General” or “Power” settings.
2. Within the energy-saving settings, you’ll find different levels or options for energy-saving mode. These options may vary depending on your TV model, but usually include levels such as “Off”, “Minimum”, “Medium”, and “Maximum”. Each level represents a different level of power-saving and brightness reduction.
3. Select the desired energy-saving level using the arrow keys on your remote control. Keep in mind that increasing the energy-saving level will result in a decrease in brightness and power consumption.
4. To understand the impact of each energy-saving level, observe the changes in the brightness of the TV screen as you switch between different levels. Find the level that provides a good balance between energy-saving and maintaining a satisfactory brightness level for your viewing comfort.
5. Enabling energy-saving mode can be particularly beneficial if you’re watching TV for extended periods or if you’re conscious about reducing your power consumption. It can help lower electricity bills and contribute to environmental sustainability.
6. It’s important to note that enabling energy-saving mode may slightly affect the overall picture quality, particularly in terms of brightness and contrast. However, with careful adjustment, you can find a suitable balance that still provides an enjoyable viewing experience.
7. Once you’ve selected the energy-saving level, exit the energy-saving settings menu by pressing the “Exit” or “Back” button on your remote control. The TV will save your energy-saving mode settings for future use.
Enabling the energy-saving mode on your LG OLED TV allows you to reduce power consumption while watching TV, helping you save energy and lower your electricity costs. With the ability to adjust the energy-saving level, you can find the right balance between energy efficiency and maintaining satisfactory picture brightness.
Next, let’s explore how to reset the brightness back to the default settings on your LG OLED TV.
Resetting Brightness to Default Settings
If you’ve made changes to the brightness settings on your LG OLED TV and want to revert to the original default settings, you can easily reset the brightness setting in a few simple steps. Here’s how you can reset the brightness to the default settings on your LG OLED TV:
1. Access the picture settings menu on your LG OLED TV using the remote control. Navigate to the “Picture” or “Settings” section, where you’ll find the brightness setting.
2. Within the picture settings menu, locate the “Brightness” or “Backlight” setting and select it using the arrow keys on your remote control.
3. Once you’ve selected the brightness setting, look for an option to reset or restore the default settings. This option is typically labeled as “Reset to Default” or “Default Setting”.
4. Select the reset option using the arrow keys on your remote control and press the “Enter” or “OK” button. This will reset the brightness setting back to the original default value.
5. After resetting the brightness settings, you can exit the picture settings menu by pressing the “Exit” or “Back” button on your remote control. Your LG OLED TV will now be using the default brightness settings.
Resetting the brightness to the default settings can be useful if you’ve made adjustments that you’re not satisfied with or if you want to start fresh and reevaluate your preferred brightness level.
Remember that resetting the brightness will only affect the specific brightness setting you’ve adjusted. It won’t impact other picture settings such as contrast, color, or backlight.
By knowing how to reset the brightness settings on your LG OLED TV, you have the flexibility to experiment and make adjustments while having the option to easily revert to the original default settings at any time.
Now that you have a better understanding of how to adjust, customize, and reset the brightness settings on your LG OLED TV, you can enjoy a personalized viewing experience with optimal picture quality.
If you have any further questions or seeking additional assistance, please refer to the user manual or contact the LG customer support for further guidance.
Conclusion
Adjusting the brightness on your LG OLED TV is essential for enhancing your viewing experience and ensuring optimal picture quality. By understanding the LG OLED TV interface, using the remote control, accessing the quick settings menu, and utilizing the various picture mode settings, you have the flexibility to customize the brightness to your preference in different viewing environments.
Calibrating the brightness for different environments allows you to create a comfortable and visually appealing experience. Remember to consider factors such as ambient lighting, room size, and personal preferences when adjusting the brightness levels on your LG OLED TV. Additionally, you can further refine the brightness by utilizing the OLED light settings to control the brightness of individual pixels on the screen.
Enabling the energy-saving mode is not only beneficial for reducing power consumption but also provides an additional way to manage the brightness and contribute to environmental sustainability. And if you ever need to start fresh or go back to the original settings, resetting the brightness to the default settings is a simple process.
With these tools and techniques, you can achieve an optimal balance of brightness, contrast, and picture quality tailored to your viewing preferences and the specific viewing environment.
We hope this guide has been helpful in assisting you in changing the brightness settings on your LG OLED TV. By taking advantage of the available options and customization features, you can enjoy a truly immersive and visually stunning viewing experience.
If you have any further questions or require additional assistance, please consult the user manual provided with your LG OLED TV or reach out to LG customer support for further guidance.