Introduction
Having a reliable and long-lasting battery is crucial for the smooth operation of your Samsung Ultrabook. Over time, the battery in your Ultrabook may start to lose its capacity, leading to shorter battery life and frequent recharges. Fortunately, replacing the battery on your Samsung Ultrabook is a relatively straightforward process that can be done at home with just a few simple tools.
In this guide, we will walk you through the step-by-step process of changing the battery on your Samsung Ultrabook. Whether you are experiencing performance issues with your current battery or simply looking to upgrade to a higher capacity one, this guide will provide you with all the information you need to successfully replace the battery.
Before we dive into the process, it’s important to note that different Samsung Ultrabook models may have slightly different battery replacement procedures. Therefore, we recommend referring to the user manual or visiting the official Samsung support website to ensure you have the most accurate instructions for your specific Ultrabook model.
Now, let’s get started and learn how to change the battery on your Samsung Ultrabook!
Step 1: Gather the Necessary Tools
Before you begin the battery replacement process, it’s important to gather all the necessary tools to ensure a smooth and efficient procedure. Here are the tools you will need:
- A small Phillips screwdriver
- A plastic prying tool or a thin plastic card
- A new replacement battery specifically designed for your Samsung Ultrabook model
- An anti-static wrist strap (optional, but recommended to prevent static electricity damage)
Make sure you have these tools readily available before proceeding to the next steps. It’s important to use a Phillips screwdriver that fits the screws on your Ultrabook to avoid any potential damage.
If you don’t have an anti-static wrist strap, you can ground yourself by touching a metal object, such as a doorknob, before handling any internal components of your Ultrabook. This helps to discharge any static electricity that could potentially harm the sensitive electronic components.
By gathering all the necessary tools beforehand, you can ensure a smooth and efficient battery replacement process without any interruptions.
Step 2: Prepare the Ultrabook
Before diving into the battery replacement process, it’s crucial to prepare your Samsung Ultrabook to ensure maximum safety and efficiency. Follow these steps to properly prepare your Ultrabook:
- Power off your Ultrabook and disconnect it from any external power sources, such as the charger or docking station. This ensures that there is no power running through the device during the battery replacement process.
- Place your Ultrabook on a clean and static-free surface. It’s best to work in a well-lit area with enough space to comfortably maneuver your Ultrabook.
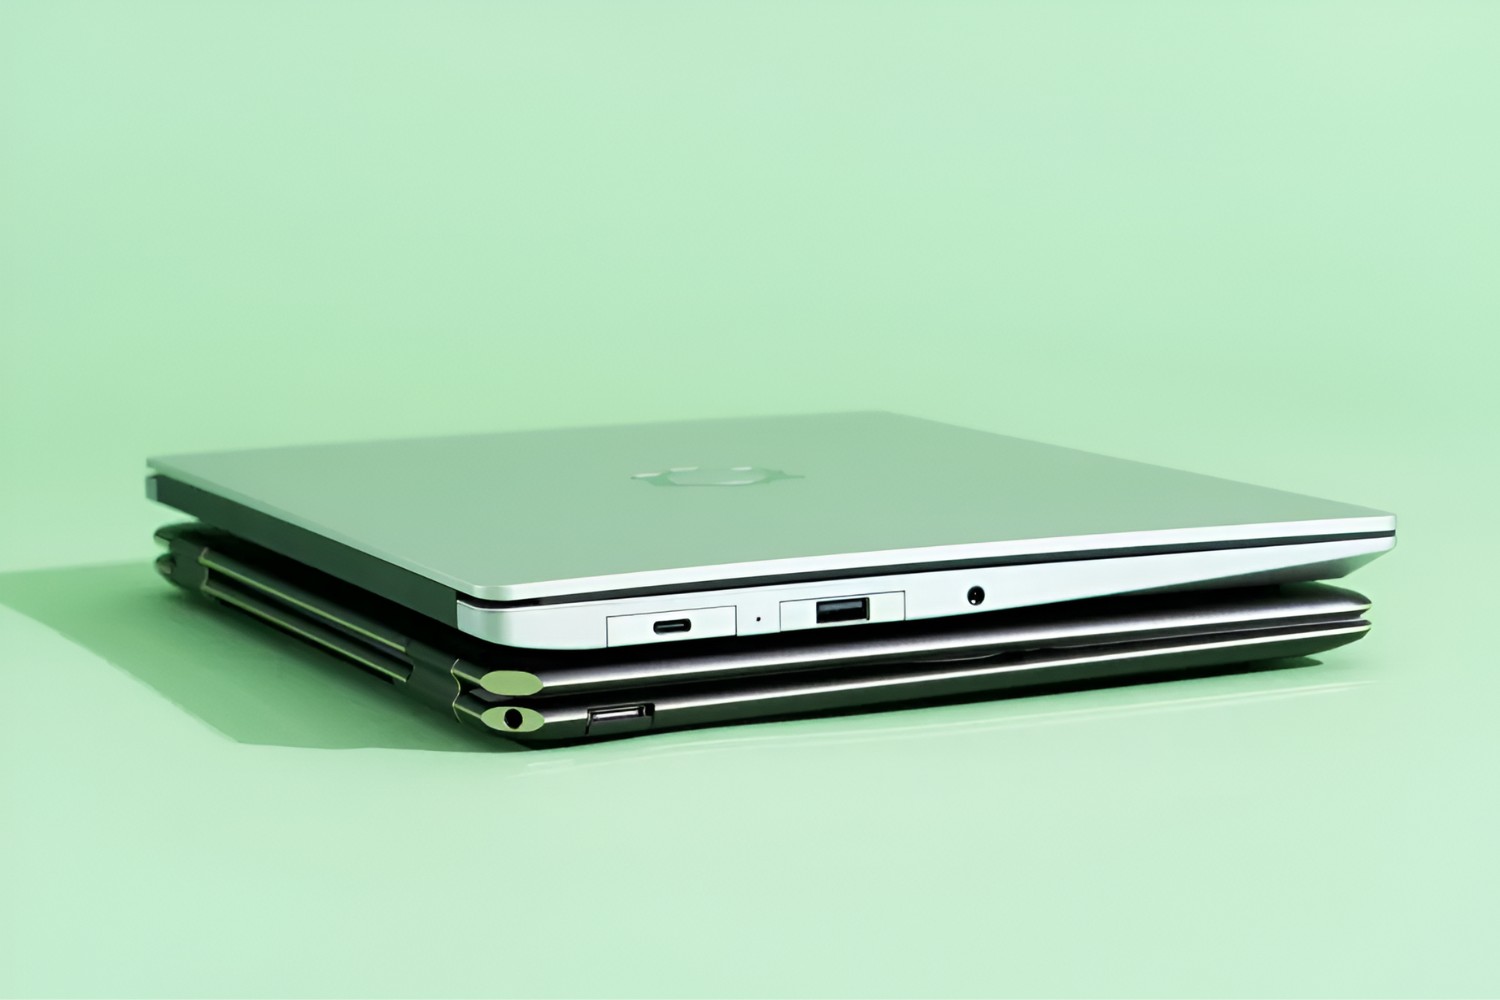
- Take a moment to familiarize yourself with the external features of your Ultrabook. Identify the location of the power button, USB ports, and any other external connectors. This will help you avoid accidentally damaging these components during the battery replacement process.
- If you haven’t already done so, discharge any static electricity from your body by touching a grounded object or wearing an anti-static wrist strap.
Preparing your Ultrabook before starting the battery replacement process ensures safety and minimizes the risk of any accidental damage. Take your time to follow these steps carefully to set the stage for a successful battery replacement.
Step 3: Remove the Bottom Cover
With the necessary tools gathered and your Ultrabook prepared, it’s time to remove the bottom cover to access the internal components of your Samsung Ultrabook. Follow these steps:
- Lay your Ultrabook upside down on a soft and clean surface to protect the display and prevent any scratches.
- Locate the screws securing the bottom cover. These screws are usually marked with small icons or labeled with letters or numbers.
- Using a small Phillips screwdriver, carefully unscrew all the screws that secure the bottom cover. Keep track of the screws and consider using a small container or a magnetic mat to prevent them from getting lost.
- Once all the screws have been removed, gently pry the bottom cover using a plastic prying tool or a thin plastic card. Start from one corner and gradually work your way around the edges, applying even pressure until the cover starts to lift.
- Continue prying and lifting the bottom cover until it completely separates from the Ultrabook’s chassis. Be cautious during this step to avoid damaging any internal components.
It’s important to note that some Ultrabook models may have different methods of securing the bottom cover, such as additional screws or clips. Refer to the user manual or official Samsung support website for specific instructions tailored to your Ultrabook model.
With the bottom cover successfully removed, you now have access to the internal components of your Samsung Ultrabook, including the battery.
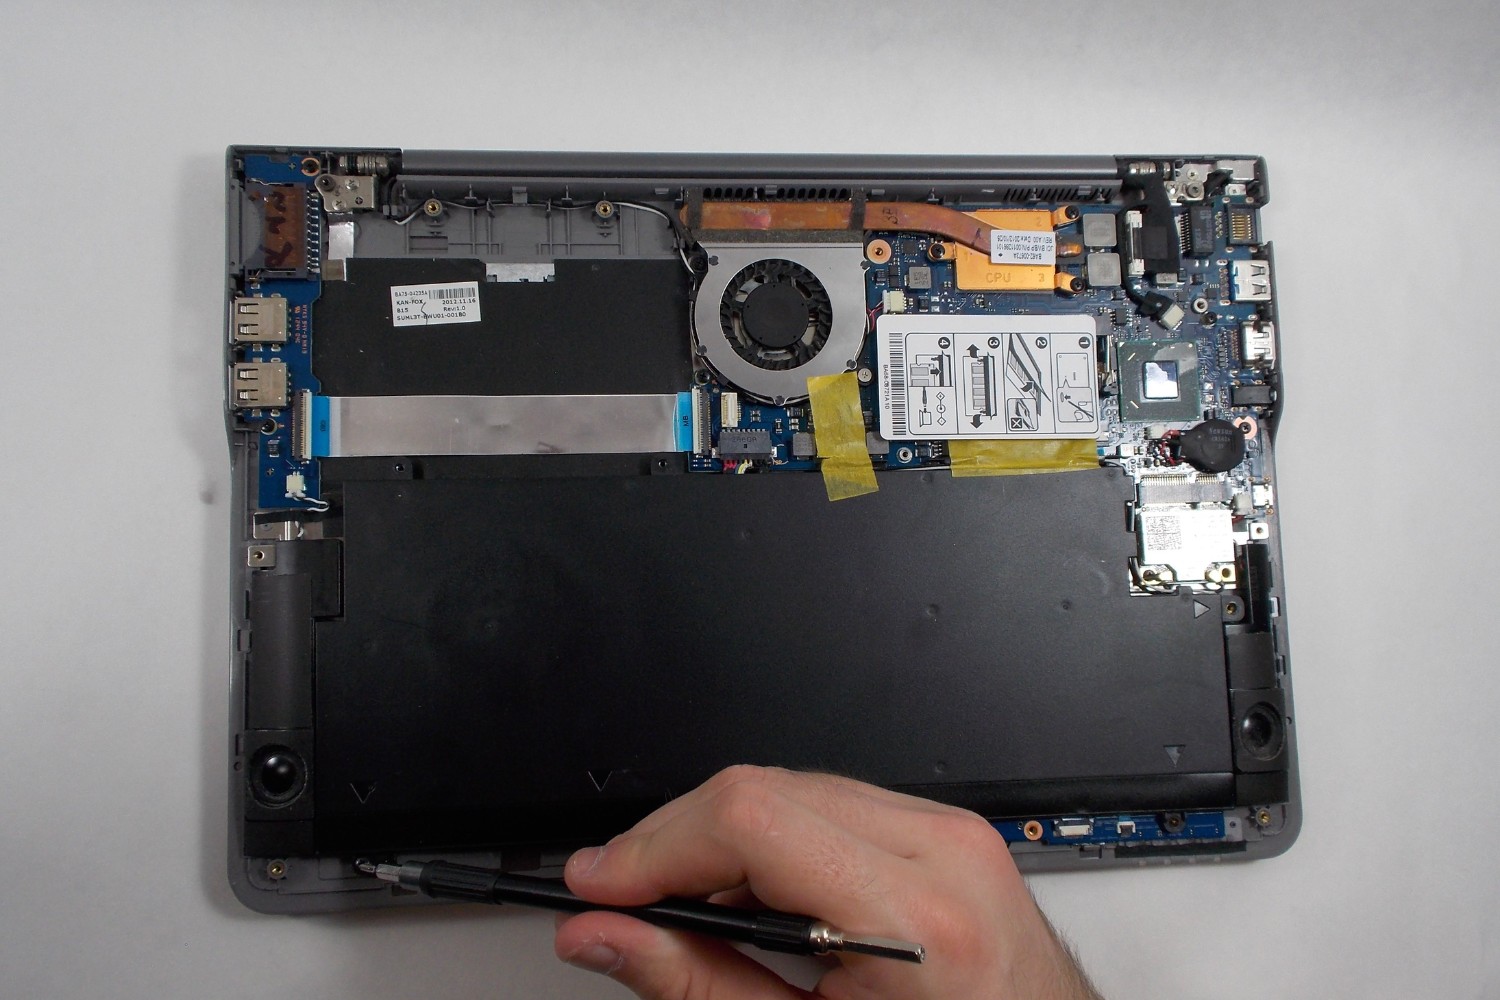
Step 4: Locate the Battery
After removing the bottom cover, the next step is to locate the battery within your Samsung Ultrabook. Here’s how to find it:
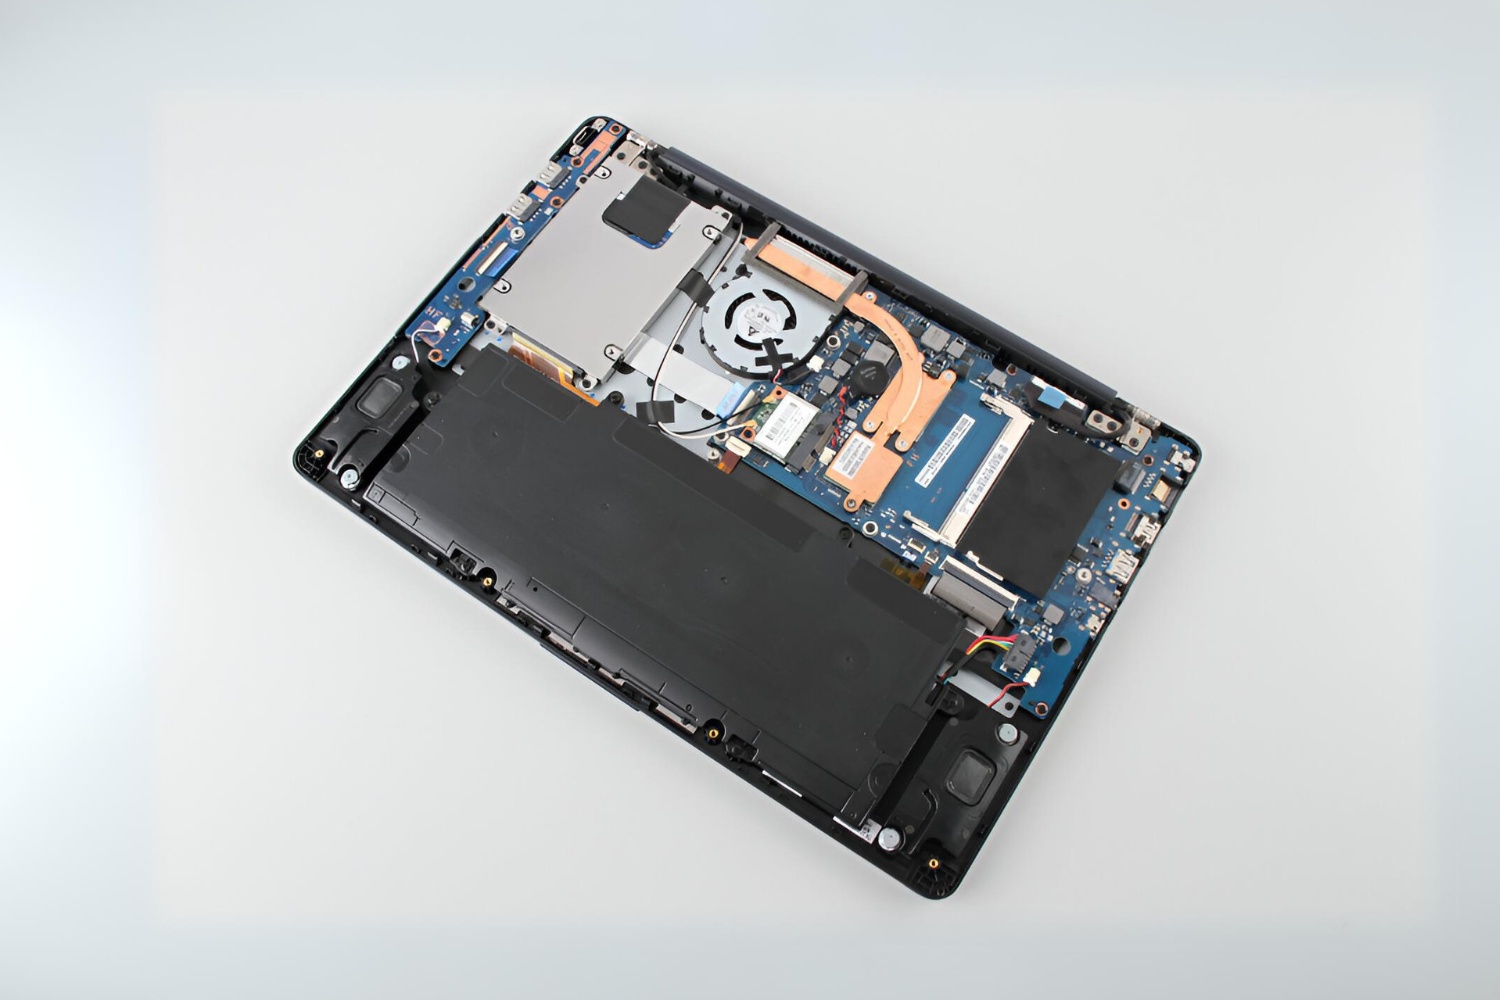
- Take a moment to familiarize yourself with the internal layout of your Ultrabook. Observe the different components and their placements to locate the battery.
- In most Ultrabook models, the battery is commonly positioned near the center or towards one side of the chassis.
- Look for a rectangular-shaped component with wires connected to the motherboard. This is the battery pack.
- Depending on the Ultrabook model, the battery may be secured in place with adhesive or held down by screws. Take note of how the battery is attached for the later steps.
Keep in mind that the location and appearance of the battery may vary slightly depending on your specific Samsung Ultrabook model. If you’re having trouble finding the battery, refer to the user manual or the official Samsung support website for detailed diagrams or instructions tailored to your Ultrabook.
By successfully locating the battery, you’re now one step closer to replacing it with a new one and improving the overall battery life and performance of your Samsung Ultrabook.
Step 5: Disconnect the Battery Connector
Before removing the old battery from your Samsung Ultrabook, it’s essential to disconnect the battery connector to prevent any electrical current from flowing through the device. Here’s how to disconnect the battery connector:
- Locate the battery connector, which is a small plastic connector attached to the motherboard with wires leading to the battery.
- Gently lift the connector tab using your fingernail or a plastic prying tool. This will release the lock mechanism and allow you to disconnect the connector more easily.
- Once the tab is lifted, carefully pull the battery connector away from its socket. Apply gentle and even pressure to avoid damaging the connector or the socket.
- Make sure the battery connector is completely detached and no longer connected to the motherboard.
Disconnecting the battery connector is a crucial step in the battery replacement process, as it ensures the complete isolation of the battery from the rest of the device’s circuitry. This prevents any potential electrical short circuits and keeps you safe during the rest of the procedure.
Remember to handle the battery connector with care and avoid pulling on the wires. Delicate handling ensures that you can easily reconnect the new battery in the subsequent steps without any complications.
Step 6: Remove the Old Battery
Now that the battery connector is disconnected, you can proceed to remove the old battery from your Samsung Ultrabook. Follow these steps carefully:
- Locate any securing mechanisms that may be holding the battery in place. These can include adhesive strips, screws, or brackets.
- If there are adhesive strips, gently pull them to release the battery from the Ultrabook’s chassis. Take care not to damage the battery or any other internal components.
- If there are screws or brackets, use the appropriate tools to remove them. Keep track of the screws and ensure they are placed in a safe spot to avoid losing them.
- With the securing mechanisms removed, carefully lift the old battery out of its position. Take note of its orientation and any other components it may be connected to.
- Place the old battery aside, ensuring it is in a safe location away from any liquids or heat sources until you can properly dispose of it.
It’s vital to handle the old battery with care, as it may still retain a charge or pose a risk if not properly disposed of. Follow local regulations and guidelines for the safe disposal of lithium-ion batteries.
Now that the old battery has been removed, you’re ready to move on to the next step of installing the new battery in your Samsung Ultrabook.
Step 7: Install the New Battery
With the old battery removed, it’s time to install the new battery in your Samsung Ultrabook. Follow these steps carefully to ensure proper installation:
- Take the new replacement battery that is specifically designed for your Samsung Ultrabook model. Ensure it matches the specifications and dimensions of the old battery.
- Align the new battery with the slot where the old battery was positioned. Make sure it is oriented correctly and the connectors are facing the right direction.
- Slowly lower the new battery into place, taking care not to force it or apply excessive pressure. It should fit snugly and align with any screw holes or securing mechanisms.
- If there were adhesive strips on the old battery, remove the protective covering on the new battery’s adhesive strips and press it firmly down onto the Ultrabook’s chassis.
- If there were screws or brackets holding the old battery, use the appropriate tools to attach them to the new battery in the same positions.
Ensure that the new battery is securely installed and properly aligned with the surrounding components. Take a moment to double-check that all connections are secure and there are no loose parts.
It’s worth mentioning that different Samsung Ultrabook models may have variations in the battery installation process. Therefore, it’s important to consult the user manual or official Samsung support website for precise instructions tailored to your specific Ultrabook model.
With the new battery successfully installed, your Samsung Ultrabook is one step closer to enjoying improved battery life and performance.
Step 8: Reconnect the Battery Connector
After installing the new battery in your Samsung Ultrabook, the next step is to reconnect the battery connector to restore power to the device. Follow these steps carefully:
- Locate the battery connector on the motherboard where the old battery was connected.
- Gently align the battery connector with its socket, ensuring proper orientation.
- Apply gentle and even pressure to reconnect the battery connector to its socket. You should feel a slight click or resistance as it locks into place.
- Double-check that the battery connector is securely connected and there are no loose wires.
It’s essential to ensure that the battery connector is properly and firmly connected to prevent any power interruptions or loose connections. A loose connection can lead to unstable battery performance or even cause damage to the Ultrabook’s circuitry.
Take a moment to inspect the surrounding components and make sure everything is in place before proceeding to the next step.
By reconnecting the battery connector, you are re-establishing the power connection to your Samsung Ultrabook and preparing it for the final steps of the battery replacement process.
Step 9: Replace the Bottom Cover
With the new battery securely connected, it’s time to replace the bottom cover of your Samsung Ultrabook. Follow these steps to complete the battery replacement process:
- Take the bottom cover that you removed earlier and ensure it is clean and free from any dust or debris.
- Align the bottom cover with the chassis of the Ultrabook, making sure that all the necessary ports and openings are properly aligned.
- Gently press down on the edges of the bottom cover, applying even pressure to ensure a snug fit.
- If there were screws that secured the bottom cover, use the Phillips screwdriver to reinsert and tighten them in their respective positions. Make sure not to overtighten the screws.
When replacing the bottom cover, pay attention to any clips or latches that may exist and ensure they are aligned and securely fastened. This will help prevent any rattling or loose parts once the bottom cover is in place.
Double-check that all screws are tightened appropriately and that the bottom cover sits flush with the Ultrabook’s chassis.
By replacing the bottom cover, you are protecting the internal components of your Samsung Ultrabook and completing the physical aspect of the battery replacement process.
Step 10: Test the New Battery
After completing the battery replacement process and reassembling your Samsung Ultrabook, it’s important to test the new battery to ensure it is functioning properly. Follow these steps to perform a quick test:
- Connect your Ultrabook to a power source using the charger or AC adapter.
- Allow the battery to charge fully, ensuring that the charging indicator light turns on and the battery icon in the operating system shows the charging status.
- Once the battery is fully charged, disconnect the power source and run your Ultrabook solely on battery power.
- Observe the battery life and performance. Check if the battery percentage decreases at an acceptable rate and if the Ultrabook runs smoothly without any sudden shuts downs or performance issues.
- Use your Ultrabook for an extended period, performing regular tasks and activities, to further evaluate the battery life and overall performance.
If you notice any abnormalities or significant issues with the new battery, such as rapid draining, overheating, or unexpected system behavior, it is recommended to contact Samsung support or the place of purchase for further assistance.
Keep in mind that it may take a few charge cycles for the new battery to reach its maximum capacity and for the operating system to calibrate its monitoring accurately.
By thoroughly testing the new battery, you can ensure its functionality and determine if the battery replacement process was successful.
Conclusion
Congratulations! You have successfully learned how to change the battery on your Samsung Ultrabook. By following the step-by-step process outlined in this guide, you can extend the lifespan of your Ultrabook and enjoy improved battery life and performance.
Remember, always refer to the user manual or official Samsung support website for detailed instructions specific to your Ultrabook model. Different models may have slight variations in the battery replacement process.
Changing the battery on your Samsung Ultrabook is a relatively straightforward procedure, but it does require careful handling and attention to detail. Make sure to gather the necessary tools, prepare the Ultrabook, and follow each step with precision.
After successfully installing the new battery, ensure that the bottom cover is securely fastened and perform a thorough test to confirm the functionality and performance of the new battery.
In the end, replacing the battery in your Samsung Ultrabook can greatly enhance your productivity and overall user experience. You can now enjoy longer battery life, improved performance, and reduced reliance on external power sources.
Thank you for following this guide, and we hope it has been helpful in your battery replacement journey. Happy computing!