Introduction
Keeping your Thinkpad Ultrabook i7 in top condition is essential for its performance and longevity. One often overlooked aspect of maintenance is cleaning the keys on your keyboard. Over time, dust, dirt, and debris can accumulate under the keys, affecting their responsiveness and overall functionality. Regularly cleaning the keys not only improves typing experience but also prolongs the life of your keyboard.
In this article, we will guide you through the process of removing the keys on your Thinkpad Ultrabook i7 to give them a thorough cleaning. We will provide step-by-step instructions, along with helpful tips, to ensure that you can safely and effectively remove and clean the keys without causing any damage to your Ultrabook.
Before we dive into the process, it’s important to gather the necessary tools. This will ensure that you have everything you need for a successful cleaning session. Let’s take a look at the tools you will need:
Tools You Will Need
Before you begin cleaning the keys on your Thinkpad Ultrabook i7, gather the following tools:
- Microfiber cloth or lint-free cloth
- Cotton swabs
- Isopropyl alcohol or keyboard cleaner spray
- Compressed air canister
- Small flat-head screwdriver
Having these tools on hand will give you the necessary equipment to effectively remove and clean the keys on your Thinkpad Ultrabook i7. The microfiber cloth or lint-free cloth will be used to wipe away dust and debris, while cotton swabs soaked in isopropyl alcohol or keyboard cleaner spray will help clean the keycaps. The compressed air canister will be useful for blowing away any stubborn particles stuck between the keys. Lastly, the small flat-head screwdriver will assist in safely removing the keys without causing any damage.
Ensure that these tools are easily accessible and in good condition before proceeding with the cleaning process. Having them readily available will make the task much easier and efficient, giving you the best results in cleaning your Thinkpad Ultrabook i7 keys.
Step 1: Preparation
Before you start removing and cleaning the keys on your Thinkpad Ultrabook i7, it’s important to take a few preparatory steps to ensure a smooth process:
- Power down your Thinkpad Ultrabook i7: Make sure to shut down your laptop properly before proceeding with any maintenance. This will prevent any accidental keystrokes or disruptions during the cleaning process.
- Gather your tools: As mentioned in the previous section, gather all the necessary tools, including a microfiber cloth, cotton swabs, isopropyl alcohol or keyboard cleaner spray, compressed air canister, and a small flat-head screwdriver. Having these tools within reach will save you time and effort.
- Create a clean and well-lit workspace: Find a quiet and well-lit area where you can work comfortably. Prepare a clean, flat surface to place your Thinkpad Ultrabook i7 on. This will help prevent any accidental damage or loss of small components.
- Remove any external attachments: Disconnect any external attachments like USB drives or headphones that may be connected to your Thinkpad Ultrabook i7. This will ensure that you have enough space to work freely and avoid any obstructions.
By following these steps, you will set the stage for a successful cleaning process. Taking the time to prepare adequately will minimize any potential risks and make it easier to navigate through the subsequent steps of removing and cleaning the keys on your Thinkpad Ultrabook i7.
Step 2: Removing the Top Lid
Now that you have prepared your workspace, it’s time to start removing the top lid of your Thinkpad Ultrabook i7. Follow these steps:
- Locate the top lid release latch: On most Thinkpad models, the top lid release latch is located on the side or front of the keyboard. It is usually marked with an icon that resembles a rectangle with a line on one side.
- Slide the release latch: Slide the release latch towards the designated unlock position. This action will loosen the top lid, allowing you to lift it up slightly.
- Gently lift the top lid: With the release latch in the unlock position, use your fingertips to gently lift the top lid upwards. Be cautious and use even pressure to prevent any unnecessary strain on the hinges or other components.
- Support the top lid: As you lift the top lid, support it with your other hand to prevent it from snapping back or falling abruptly. Hold it at a comfortable angle that provides easy access to the keyboard.
Remember to handle the top lid with care. Avoid using excessive force or bending it beyond its natural range of motion. In case you encounter any resistance while lifting the lid, double-check if the release latch is fully in the unlock position.
Removing the top lid will expose the keyboard and allow you to access the keys for cleaning. Proceed to the next step to learn how to remove the individual keys on your Thinkpad Ultrabook i7.
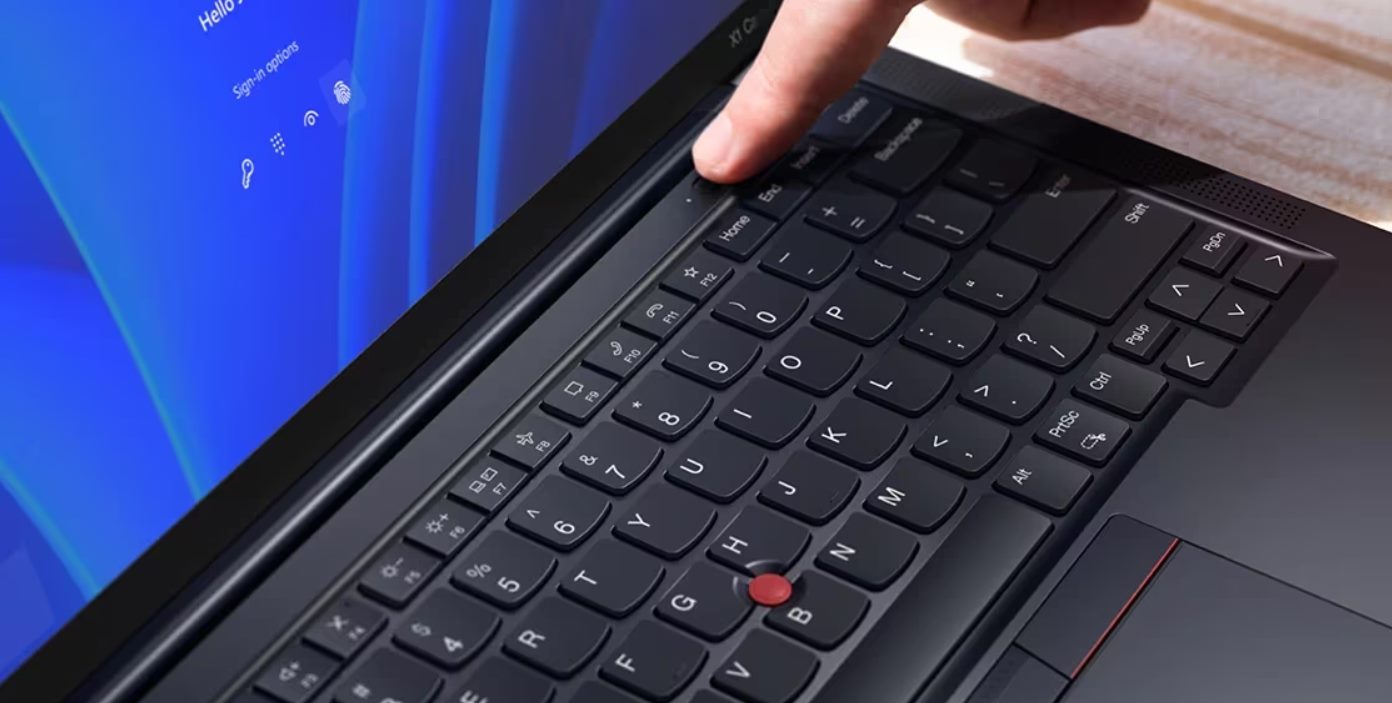
Step 3: Removing the Keys
With the top lid of your Thinkpad Ultrabook i7 lifted, you can now begin removing the individual keys for thorough cleaning. Follow these steps:
- Identify the key you want to remove: Look closely at the keyboard to locate the key or keys you wish to clean. It’s helpful to take note of their position to easily reassemble them later.
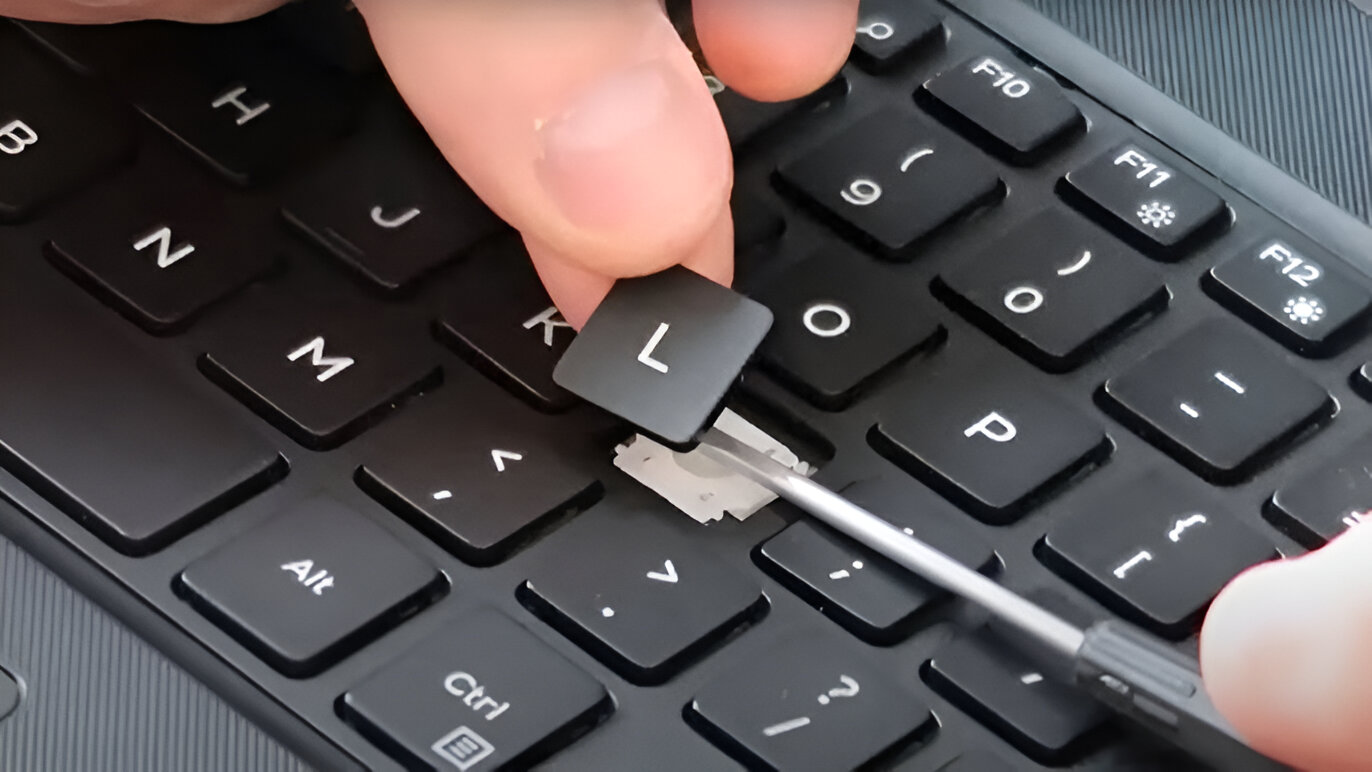
- Use a small flat-head screwdriver: Take the small flat-head screwdriver from your toolkit and insert it carefully under one side of the keycap you want to remove. Gently lift the keycap upwards until it pops off.
- Remove the keycap completely: Once the keycap is partially lifted, use your fingers to carefully pull it off the rest of the way. Take it off slowly, ensuring not to damage the delicate mechanisms underneath.
- Repeat the process for other keys (if necessary): If you plan on cleaning multiple keys, repeat steps 2 and 3 for each key you want to remove.
It’s important to be gentle and patient while removing the keys. Applying too much force or rushing the process can lead to damage to the keycaps or the keyboard itself.
Keep the removed keycaps in a safe place, such as a small container or tray, to ensure they don’t get lost or damaged during the cleaning process. With the keys successfully removed, you can move on to the next step and learn how to clean them.
Step 4: Cleaning the Keys
Now that you have removed the keys from your Thinkpad Ultrabook i7, it’s time to give them a thorough cleaning. Follow these steps to ensure effective cleaning:
- Prepare the cleaning solution: Dampen a microfiber cloth or lint-free cloth with isopropyl alcohol or keyboard cleaner spray. Make sure the cloth is not soaking wet, as excess liquid can seep into the key mechanisms.
- Clean the keycaps: Gently wipe each keycap with the dampened cloth to remove any dirt, oil, or grime. Pay special attention to the areas between the keys where debris tends to accumulate. For stubborn stains or sticky residue, use a cotton swab dipped in the cleaning solution to spot-clean the affected area.
- Allow the keycaps to air dry: After cleaning, place the keycaps on a clean surface and allow them to air dry completely. This will prevent any potential damage from residual moisture.
- Clean the keyboard surface: While the keycaps are drying, use a compressed air canister to blow away any loose debris or particles from the keyboard surface. Hold the canister at a slight distance to avoid the force of the air damaging any internal components.
- Recheck for any missed spots: Examine the key switches and the exposed keyboard area for any remaining dirt or buildup. Use a cotton swab lightly dampened with the cleaning solution to target those areas and remove any leftover grime.
Remember to be gentle while cleaning the keys and the keyboard surface. Avoid using excessive pressure or liquid, as this can cause damage to the delicate mechanisms underneath.
Once the keycaps and keyboard are completely dry and free from dirt, you can proceed to the next step to reassemble the keys on your Thinkpad Ultrabook i7.
Step 5: Cleaning the Keyboard
Now that you have cleaned the individual keycaps, it’s time to focus on cleaning the keyboard surface itself. Follow these steps to effectively clean your Thinkpad Ultrabook i7 keyboard:
- Apply compressed air: Start by using a compressed air canister to blow away any loose debris or particles that may have accumulated between the keys. Direct the air between the gaps of the keys, moving from left to right and top to bottom, to ensure thorough cleaning.
- Use a clean cloth: Dampen a microfiber cloth or lint-free cloth with isopropyl alcohol or keyboard cleaner spray. Gently wipe the keyboard surface, including the areas around the keys and the rest of the exposed area. Pay attention to any spots or fingerprints that may require extra cleaning.
- Spot-clean with cotton swabs: Dip a cotton swab in the cleaning solution and use it to target any stubborn stains or hard-to-reach areas between the keys. Move the swab gently in a circular motion to lift and remove the dirt or grime.
- Dry the keyboard: After cleaning, allow the keyboard surface to air dry completely to avoid any potential damage caused by moisture. Ensure that no excess liquid remains on or between the keys.
- Recheck for missed spots: Take a final look at the keyboard surface to see if any missed spots or residue are still present. If necessary, repeat the cleaning process using the damp cloth or cotton swabs until the surface is thoroughly clean.
Remember to handle the keyboard with care and avoid excessive force or liquid during the cleaning process. This will help maintain the longevity and functionality of your Thinkpad Ultrabook i7 keyboard.
Once you have ensured that the keyboard is clean and dry, you can move on to the next step to reassemble the keys and bring your Thinkpad Ultrabook i7 back to its full functionality.
Step 6: Reassembling the Keys
With the keys and keyboard surface thoroughly cleaned, it’s time to reassemble the keys on your Thinkpad Ultrabook i7. Follow these steps to ensure proper reassembly:
- Retrieve the keycaps: Locate the keycaps that you removed earlier and ensure they are completely dry. If necessary, gently dry them with a clean cloth.
- Align the keycap: Take a keycap and align it with the corresponding key switch on the keyboard. Make sure the keycap is properly oriented, with the letters or symbols facing up.
- Press down on the keycap: Use your fingertips to press down firmly but gently on the keycap. Apply even pressure to ensure that the keycap snaps back into place on the key switch.
- Repeat for each keycap: Continue this process for each keycap you removed, aligning and pressing them back into their respective positions on the keyboard.
Be careful not to apply excessive force or twist the keycaps while reassembling them. This can cause damage to the key switches or the keycap itself.
Double-check each key after reassembly to ensure that it sits evenly and securely on the keyboard surface. Press each key to ensure proper functionality and responsiveness before moving on to the final step of reattaching the top lid of your Thinkpad Ultrabook i7.
Step 7: Reattaching the Top Lid
After successfully reassembling the keys on your Thinkpad Ultrabook i7, it’s time to reattach the top lid. Follow these steps to complete the cleaning process:
- Align the top lid: Hold the top lid at a comfortable angle and align it with the base of your Thinkpad Ultrabook i7. Ensure that the hinges on the top lid line up with the corresponding slots on the base.
- Lower the top lid: Slowly lower the top lid onto the base, making sure that it is aligned evenly. Gently press down to engage the top lid with the base, allowing it to settle into place.
- Engage the top lid release latch: Once the top lid is in position, slide the top lid release latch back towards the lock position. This will secure the top lid and prevent it from accidentally opening while using your Thinkpad Ultrabook i7.
- Verify the top lid attachment: Give the top lid a gentle jiggle to ensure that it is securely attached to the base. Check that it opens and closes smoothly without any resistance or misalignment.
Take a moment to examine the overall appearance and functionality of your Thinkpad Ultrabook i7 after reattaching the top lid. Ensure that all keys are aligned correctly and that the lid sits flush with the base. Test a few keys to verify their responsiveness before resuming regular use.
Congratulations! You have successfully cleaned the keys and keyboard of your Thinkpad Ultrabook i7. By performing regular maintenance, you can enjoy a clean and smoothly functioning keyboard for an extended period.
Remember, regular cleaning and maintenance are key to maintaining the performance and longevity of your Thinkpad Ultrabook i7. It’s recommended to clean your keyboard at least once every few months or whenever you notice a buildup of dirt or debris.
Conclusion
Cleaning the keys on your Thinkpad Ultrabook i7 is a crucial step in maintaining its performance and prolonging its lifespan. Regularly removing dust, dirt, and debris from the keys and keyboard surface ensures a smooth typing experience and prevents potential issues caused by buildup over time.
In this article, we provided a step-by-step guide on how to clean the keys of your Thinkpad Ultrabook i7. We discussed the importance of gathering the necessary tools before beginning the cleaning process, such as microfiber cloth, cotton swabs, isopropyl alcohol or keyboard cleaner spray, compressed air canister, and a small flat-head screwdriver. Preparation is key to a successful cleaning session.
We walked you through the process of removing the top lid, carefully taking off each keycap, and cleaning them individually. We also outlined the steps to clean the keyboard surface using compressed air, a damp cloth, and cotton swabs. Proper reassembly of the keys and reattachment of the top lid were highlighted to ensure everything is securely in place.
Remember to handle the keys and the Ultrabook with care throughout the cleaning process, avoiding excessive force or liquid.
By following our instructions, you can maintain a clean and top-performing Thinkpad Ultrabook i7, improving your typing experience and increasing its longevity.
Make it a habit to clean your keyboard regularly to prevent the accumulation of dirt and debris. In doing so, you’ll enjoy a smoother typing experience and protect your investment in your Thinkpad Ultrabook i7.