Why Cancel Amazon Music on Alexa App?
While Amazon Music on Alexa App offers a vast library of music and convenient features, there may come a time when you decide to cancel your subscription. There are various reasons why you might want to cancel Amazon Music on the Alexa App, and here are a few common scenarios:
- Switching to a different music streaming service: You might have found another music streaming service that better suits your preferences or offers a wider range of music genres.
- Cost-saving measures: If you are looking to trim your expenses, canceling your Amazon Music subscription can be a simple way to save some money each month.
- Exploring alternative options: Perhaps you want to explore other music streaming platforms to discover new music or take advantage of unique features offered by different services.
- Change in music listening habits: Your music listening habits may have changed over time, and you might find that you no longer utilize the features and benefits that Amazon Music on the Alexa App offers.
- Temporary break: If you are taking a break from music streaming altogether or need a break from paid subscriptions, canceling Amazon Music on the Alexa App can be a temporary solution.
Whatever your reason may be, canceling Amazon Music on the Alexa App is a straightforward process. By following a few simple steps, you can easily terminate your subscription and move on to explore other music streaming options.
Step 1: Open the Alexa App
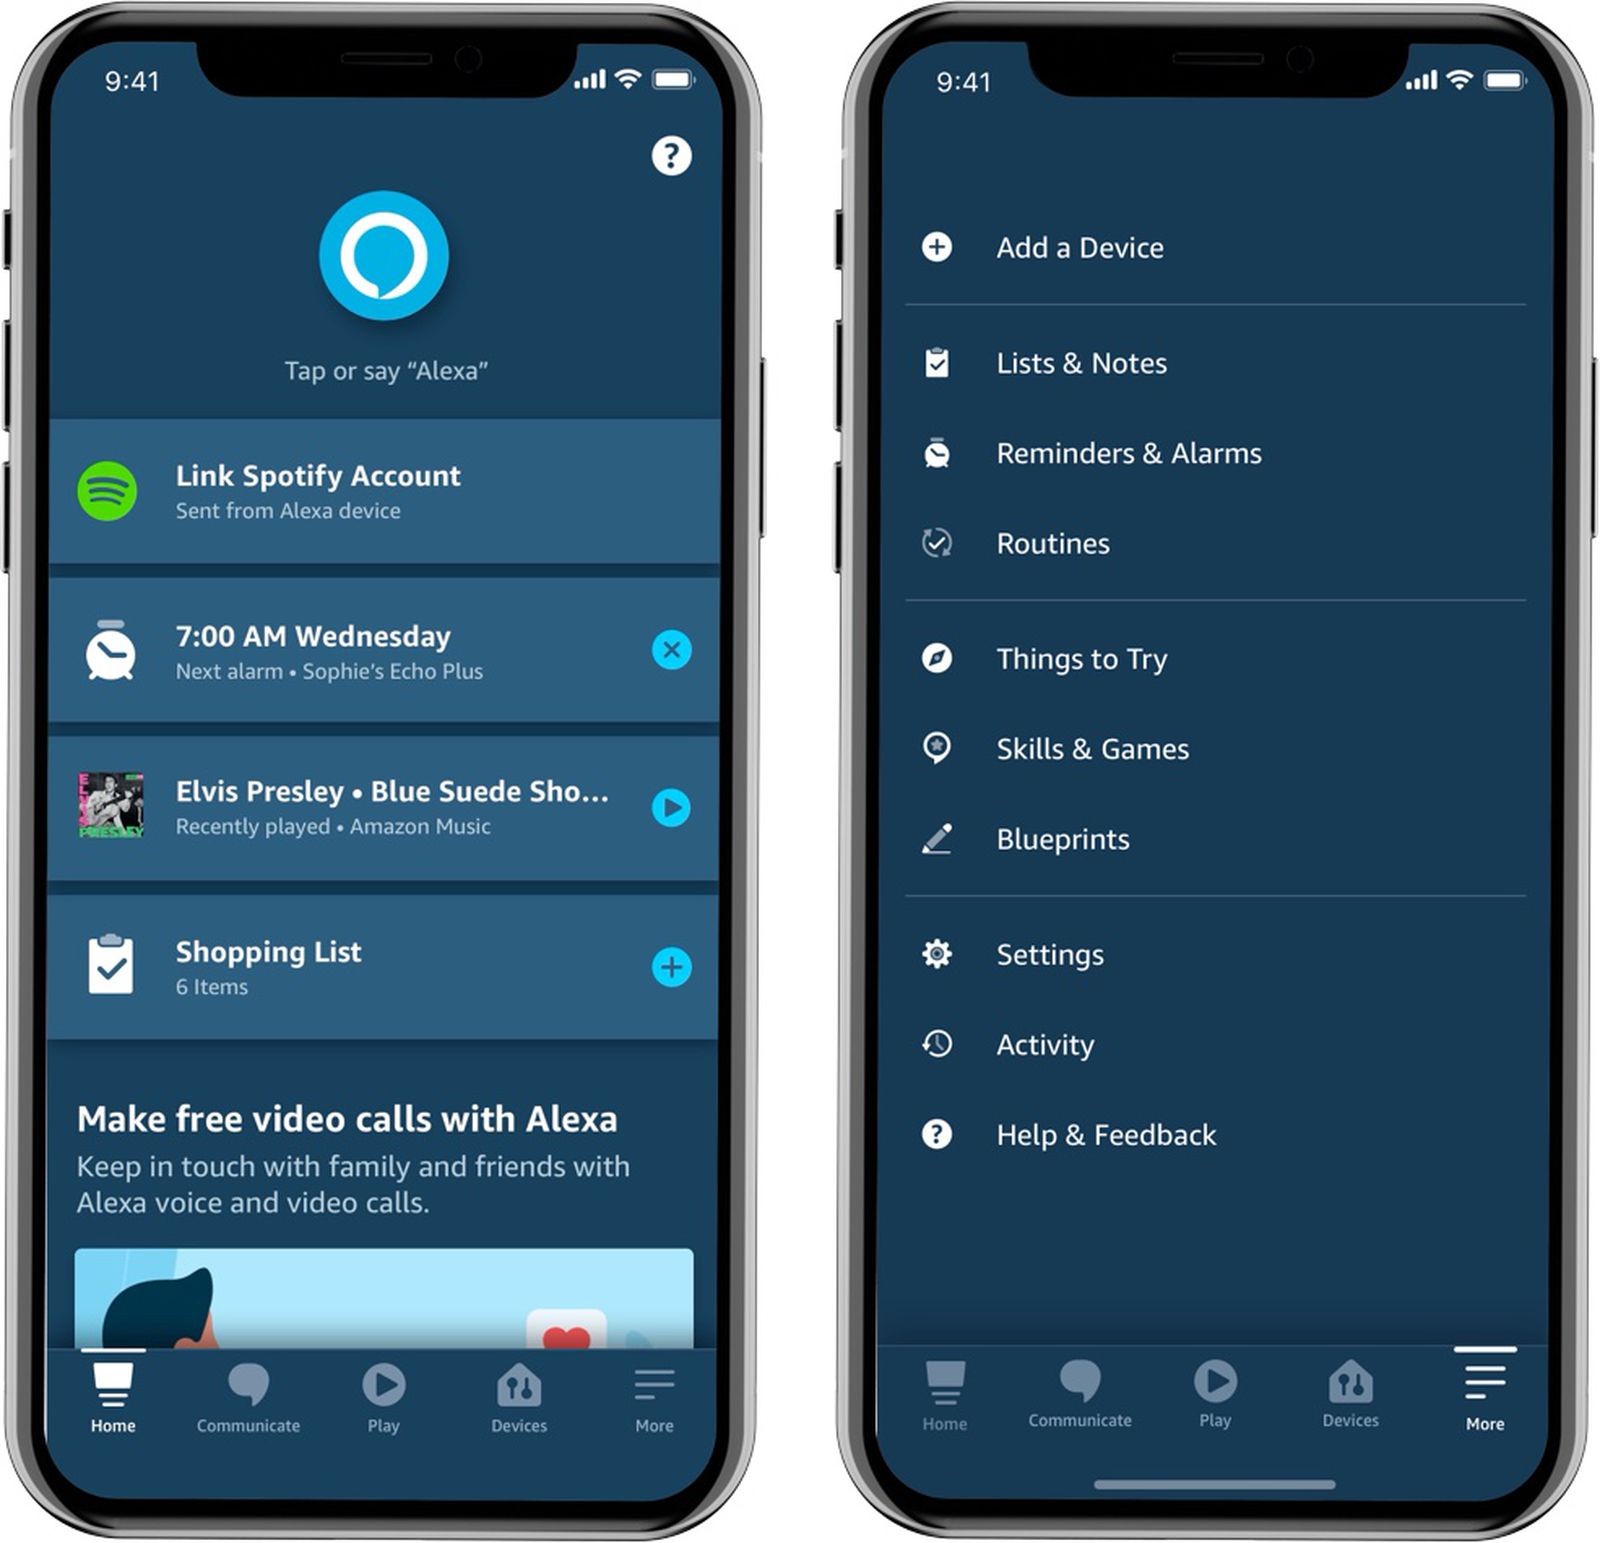
The first step to cancel your Amazon Music subscription on the Alexa App is to open the Alexa app on your mobile device. The Alexa app allows you to manage various settings and integrations of your Alexa-enabled devices, including music and podcast subscriptions.
To open the Alexa app, follow these simple steps:
- Locate the Alexa app icon on your device’s home screen. The icon typically features a white outline of a speech bubble on a blue background.
- Tap on the Alexa app icon to launch the application. Once opened, you will be greeted by the Alexa app’s home screen.
- If you have not signed in to your Amazon account, you will be prompted to do so. Enter your Amazon account credentials to proceed.
- Once signed in, you will be directed to the Alexa app’s main interface. Here, you can explore and manage various settings and features.
By successfully opening the Alexa app, you have taken the initial step towards canceling your Amazon Music subscription. Now, it’s time to proceed to the next step in the cancellation process.
Step 2: Go to Settings
After opening the Alexa app, the next step to cancel your Amazon Music subscription is to navigate to the settings section. In the settings menu, you will find various options to customize and manage your Alexa-enabled devices, including your music and podcast subscriptions.
- On the Alexa app’s home screen, look for the “Settings” option. It is usually represented by a gear or cogwheel icon, typically located in the bottom right corner of the screen.
- Tap on the “Settings” option to access the settings menu. This will bring up a new screen with a list of different settings categories.
- Scroll through the settings categories and locate the “Music & Podcasts” option. Tap on it to proceed.
- Within the “Music & Podcasts” section, you will find various settings related to music and podcast streaming services, including your Amazon Music subscription.
By successfully navigating to the settings section and finding the “Music & Podcasts” option, you are one step closer to canceling your Amazon Music subscription on the Alexa app. Now, let’s move on to the next step.
Step 3: Select Music & Podcasts
Once you have accessed the settings menu in the Alexa app, it’s time to select the “Music & Podcasts” option. This section allows you to manage all your music and podcast subscriptions, including your Amazon Music subscription.
- Within the settings menu, scroll down until you find the “Music & Podcasts” option. It is usually listed among the different categories of settings.
- Tap on the “Music & Podcasts” option to enter the dedicated section.
- Upon entering the “Music & Podcasts” section, you will see a variety of settings and options related to music and podcast streaming services.
- Look for the section specifically mentioning your Amazon Music subscription. It might be labeled as “Amazon Music,” “Music Subscriptions,” or something similar.
By selecting the “Music & Podcasts” section, you have accessed the area where you can manage your Amazon Music subscription. Now, let’s move on to the next step to cancel your subscription.
Step 4: Choose your Amazon Music subscription
Once you’re in the “Music & Podcasts” section of the Alexa app, the next step is to locate and select your Amazon Music subscription. This step allows you to access the specific details and options related to your subscription, including the option to cancel.
- Within the “Music & Podcasts” section, look for the section that displays your Amazon Music subscription details.
- Tap on the Amazon Music subscription option to access the subscription settings.
- Upon entering the Amazon Music subscription settings, you will see various details regarding your subscription, such as the subscription type (individual or family plan), billing information, and renewal date.
- Take a moment to review the information and familiarize yourself with the options available for your Amazon Music subscription.
By choosing your Amazon Music subscription within the “Music & Podcasts” section, you have accessed the specific settings and details of your subscription. Now, let’s move on to the next step to cancel your subscription if that’s what you desire.
Step 5: Cancel your subscription
After selecting your Amazon Music subscription within the Alexa app, you are now ready to cancel your subscription. Follow these steps to proceed with the cancellation:
- Within the Amazon Music subscription settings, look for the option to cancel your subscription. It is usually labeled as “Cancel Subscription,” “End Membership,” or something similar.
- Tap on the cancel option to initiate the cancellation process.
- At this point, the app may prompt you with additional information or offers to reconsider the cancellation. Read through the details if you wish, but if you’re sure about canceling, proceed with the cancellation.
- Follow any additional on-screen instructions to confirm the cancellation of your Amazon Music subscription. This may involve verifying your identity or providing a reason for cancellation.
After completing these steps, your Amazon Music subscription will be successfully canceled. Keep in mind that your access to the service and any downloaded or saved music may be affected immediately upon cancellation. Make sure to transition to an alternative music streaming service if needed.
It’s important to note that if you have an Amazon Music subscription through another platform (such as Prime Music), the cancellation process might differ. In such cases, you may need to cancel your subscription through the respective platform’s account settings.
Now that you have canceled your subscription successfully, let’s move on to the next step to confirm your cancellation.
Step 6: Confirm your cancellation
After initiating the cancellation process for your Amazon Music subscription, it is important to confirm that your subscription has been successfully canceled. Following these steps will ensure that your cancellation is confirmed:
- After submitting your cancellation request, the Alexa app will display a confirmation message indicating that your subscription has been canceled.
- Read through the confirmation message carefully to ensure that all the details are correct, including the effective date of the cancellation.
- Take a screenshot or note down the cancellation confirmation for your records. This can serve as proof of cancellation if any issues arise in the future.
- Double-check your billing statement or payment method to ensure that no further charges related to your Amazon Music subscription are being made.
- If you receive any further communication from Amazon Music regarding your cancellation, review the message to ensure that it aligns with your cancellation request.
By following these steps to confirm your cancellation, you can have peace of mind knowing that your Amazon Music subscription has been successfully terminated. Now, it’s time to embrace your decision and move forward to explore other music streaming options.
Step 7: Enjoy your cancellation!
Congratulations! You have successfully canceled your Amazon Music subscription on the Alexa app. Now, it’s time to embrace the freedom that comes with your cancellation and explore new music streaming possibilities. Here are a few suggestions to make the most of your newly found musical freedom:
- Discover new platforms: Explore other music streaming platforms and apps to find a new favorite. There are numerous options available, each with its own unique features and music catalogs.
- Create personalized playlists: Build your own playlists on different platforms, curating a collection of songs that resonate with your current musical taste and mood.
- Try different genres: Use this opportunity to broaden your musical horizons by delving into genres you haven’t explored before. You might discover hidden musical gems and expand your appreciation for diverse styles.
- Utilize free services: Take advantage of free music streaming services that offer ad-supported or limited-feature options. This allows you to continue enjoying music without any extra costs.
- Support independent artists: Explore platforms that focus on independent artists and support their music. Discovering new talent can be a rewarding experience while contributing to the growth of artists within the music industry.
Remember, canceling your Amazon Music subscription opens up a world of possibilities and gives you the freedom to tailor your music listening experience to your preferences. Enjoy the flexibility and explore new avenues of musical discovery.
Whether you’re seeking new artists, exploring different genres, or simply enjoying the variety of options available to you, embrace the journey and savor the music. Music has the power to uplift, inspire, and captivate, and now you have the chance to embark on an exciting musical adventure.
So, go ahead and enjoy your cancellation! Discover new songs, artists, and playlists, and revel in the joy of music streaming on your own terms.


